


在pg群里看到了这次 每日一练的活动,正好我也在学习数据库。在一起的工作中虽然使用过数据库,但是也仅限于简单使用。会一点简单的SQL语言而已。
在这次的活动中也算是基本上了解了opengauss的结构使用的方法,以后学习的方向。
在这次活动后我开始制作自己的学习笔记表格。
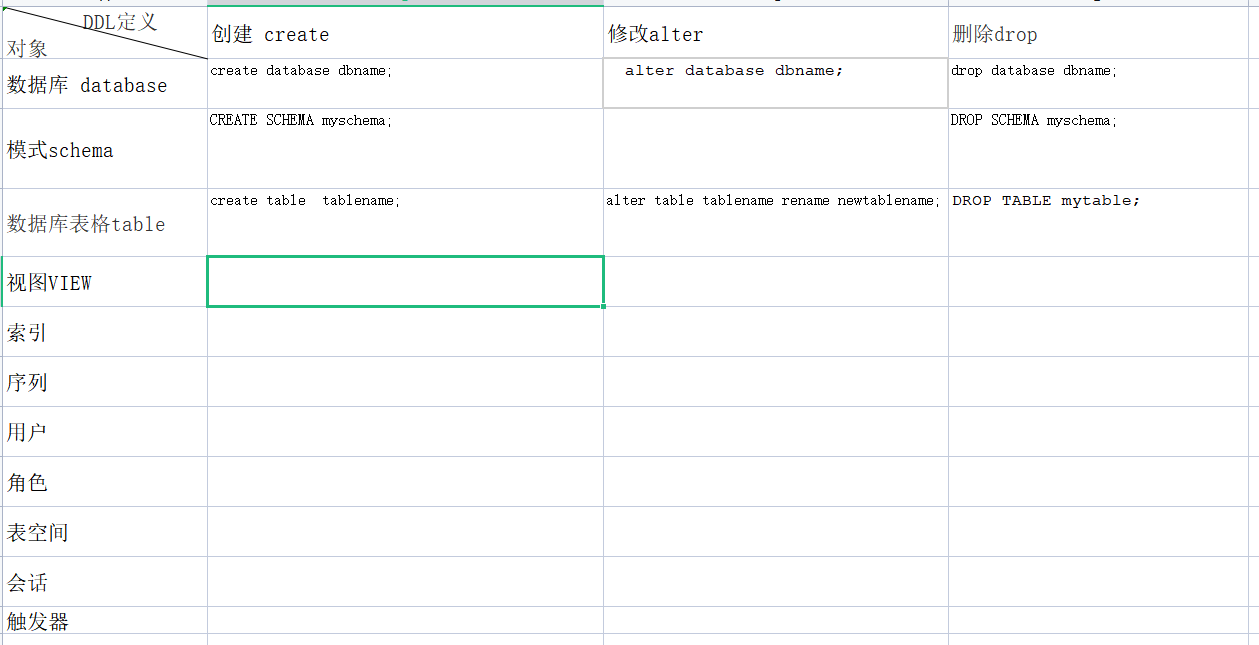
以前的使用中基本上也就对表格 视图 函数有一定的了解。
这次系统的学习之后对模式 schema 序列,用户,角色,都有了一个全新的认识。作为一个数据库应用程序的开发者来说这种深层次的概念是可以很好的解决开发中的实际问题的。
下一步就是根据openGauss视频课详细的去学习对应的技术。
在学习中也有几点不是很理想,第一是实训平台操作不方便,不如自己安装一个数据库。 第二openGauss安装也不是很方便,这方面如果要更多人使用应该简化。
这两点也反应我的一个不足那就是对Linux使用的不足,以后也要加强自己在这方面的学习。
这个过程中使用centos7 安装了openGauss极简版本
步骤如下:
一,虚拟机安装centos7
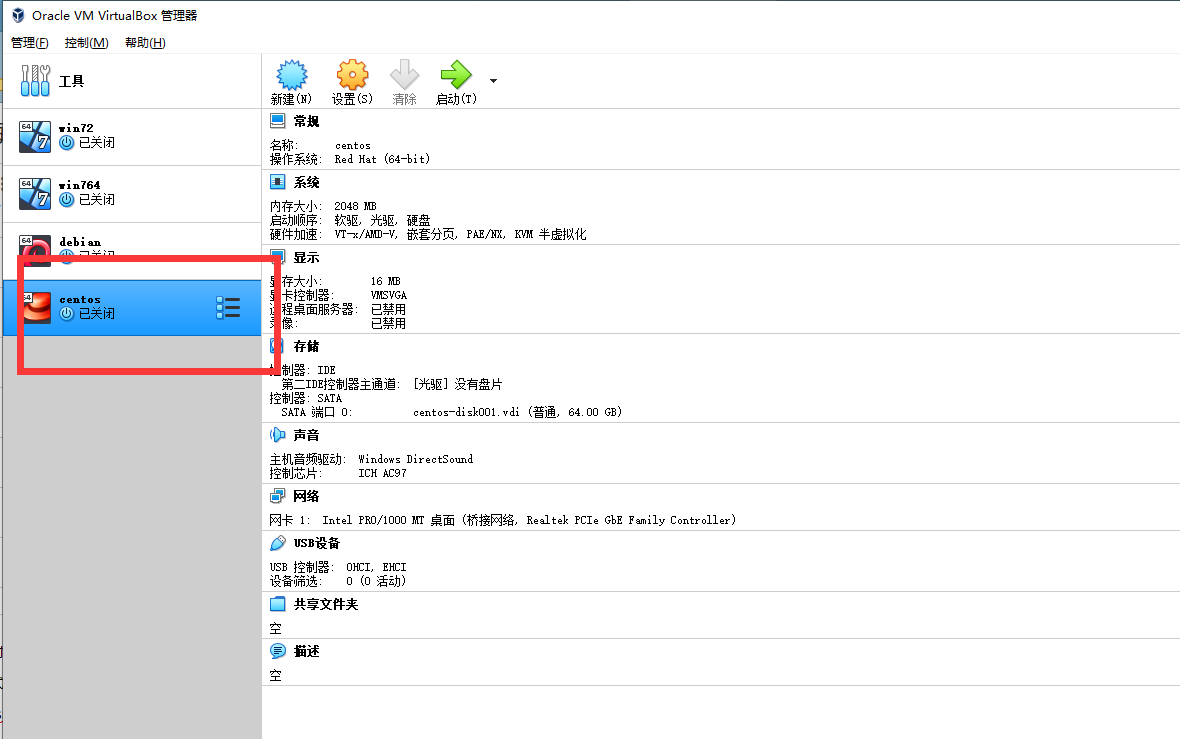
这里使用Oracle VM VirtualBox虚拟机开源免费不用破解
安装完毕后启动虚拟机设置ip地址。开启ssl使用SecureCRTPortable终端连接centos
然后参考官方安装文档安装相应软件。
相关软件:
安装netstat,由于centos7默认不带这个命令需要单独安装
yum install net-tools -y
安装bzip2 因为官方的安装包是openGauss-x.x.x-openEuler-64bit.tar.bz2 不安装这个软件直接解压命令报错
yum -y install bzip2 -y
修改内核的配置因为在你安装install命令的时候会出现如下报错
On systemwide basis, the maximum number of SEMMNI is not correct. the current SEMMNI value is: 128. Please check it.
解决:在/etc/sysctl.conf中加入语句kernel.sem = 250 32000 100 999,然后执行sysctl -p
安装wget 命令用于下载openGauss的软件包
wget https://opengauss.obs.cn-south-1.myhuaweicloud.com/2.1.0/x86/openGauss-2.1.0-CentOS-64bit.tar.bz2
关闭防火墙和selinux
## 关闭防火墙
systemctl status firewalld
systemctl disable firewalld.service
systemctl stop firewalld.service

## 关闭SELinux
sed -i '/SELINUX=/d' etc/selinux/config
echo "SELINUX=disabled" >> /etc/selinux/config
cat etc/selinux/config|grep -v ^#|grep -v '^$'
输入这个命令selinux直接关闭不用重启
setenforce 0
2 安装环境准备:
groupadd -g 1001 dbgrp
useradd -u 2001 -g dbgrp omm
mkdir -p /opt/software/openGauss
chown -R omm:dbgrp opt
切换omm用户安装
[root@db1 ~]# su - omm

[omm@db1 ~]$ cd /opt/software/openGauss/

[omm@db1 openGauss]$ tar -jxf openGauss-2.1.0-CentOS-64bit.tar.bz2 -C /opt/software/openGauss/
安装:
[omm@bogon ~]$ cd /opt/software/openGauss/simpleInstall/
[omm@bogon simpleInstall]$ ls
finance.sql  install.sh  README.md  school.sql
[omm@bogon simpleInstall]$ sh install.sh -w gauss#123
- -w:初始化数据库密码(gs_initdb指定),安全需要必须设置。

-p:指定的openGauss端口号,如不指定,默认为5432。

-h|–help:打印使用说明。

安装后,该数据库部署结点的名称为sgnode(gs_initdb指定)。

执行时,如果出现报错“the maximum number of SEMMNI is not correct, the current SEMMNI is xxx. Please check it.”,请使用有root权限的用户执行如下命令 。
安装成功会出现如下界面:

启动成功:
[omm@bogon ~]$  gs_ctl start -D $GAUSSHOME/data/single_node -Z single_node
[2021-12-14 15:32:45.083][11887][][gs_ctl]: gs_ctl started,datadir is /opt/software/openGauss/data/single_node
[2021-12-14 15:32:45.089][11887][][gs_ctl]:  another server might be running; Please use the restart command
[omm@bogon ~]$ gsql -d postgres -p  -r
failed to connect Unknown:-r.
[omm@bogon ~]$ gsql -d postgres -p
gsql:选项需要一个参数 -- p
Try "gsql --help" for more information.
[omm@bogon ~]$ gsql -d postgres -p 5432 -r
gsql ((openGauss 2.1.0 build 590b0f8e) compiled at 2021-09-30 14:29:04 commit 0 last mr  )
Non-SSL connection (SSL connection is recommended when requiring high-security)
Type "help" for help.
这时启动成功
但是发现一个问题,重启后服务不能自动启动。
这里我每次只能使用
gs_ctl start -D $GAUSSHOME/data/single_node -Z single_node这个是本人做好的centos+openGauss的镜像「openGauss」https://www.aliyundrive.com/s/cdmG622UNeg
打开「阿里云盘」APP 可以下载。
启动服务,然后编辑配置文件
1. 设置远程访问认证机制
/opengauss/data/pg_hba.conf
# TYPE  DATABASE    USER        CIDR-ADDRESS          METHOD
# IPv4 local connections:
host    all         all         127.0.0.1/32          md5

#增加一项
host    all             all             0.0.0.0/0            md5
# IPv6 local connections:
#host    all         all         ::1/128               md5
2. 改监听地址
需改/opengauss/data/postgresql.conf
文件listen_address = *
使用DBeaver 可以连接。

写在最后,虽然21天时间比较短,但是养成一个使用学习的习惯还是收货满满的。期待下一次的提升。
