



“ 介绍MyBatis通用Mapper的使用。”
上篇介绍完SpringBoot集成MyBatis,并简单的讲了MyBatis的注解式开发(SpringBoot(一)集成MyBatis)。
注解式开发可以为一些简单的CURD操作免去创建xml的麻烦。但如果我连注解都不想写,这就要用到今天讲的通用Mapper了(Spring data jpa也可以实现这个功能,但那个涉及到Hibernate我就不展开了)。
01
—
引入通用Mapper
首先先放上通用Mapper的github地址
https://github.com/abel533/Mapper
https://github.com/abel533/Mapper/tree/master/spring-boot-starter
一、Maven引入通用Mapper
<dependency><groupId>tk.mybatis</groupId><artifactId>mapper-spring-boot-starter</artifactId><version>2.1.3</version></dependency>
二、更改Appliaction类上的@MapperScan的包
// 原版的包名是import org.mybatis.spring.annotation.MapperScan;// 我们改为使用Mapper4的包import tk.mybatis.spring.annotation.MapperScan;
三、创建一个DAO的公共接口类
public interface MyBaseMapper<T> extends MySqlMapper<T>, Mapper<T> {}
该类继承了MySqlMapper<T>, Mapper<T>,这其中就包含了很多通用Mapper封装号的通用方法。
注意:该接口不能被@MapperScan扫描到,不然会启动报错。
四、原有的DAO接口继承该接口
@Repositorypublic interface DemoDao extends MyBaseMapper<User> {@Select({"select * from user where user_id = #{userId}"})User selectUser(@Param("userId") String userId);@Update({"update user set name = #{name} where user_id = #{userId}"})int updateUser(@Param("userId")String userId,@Param("name")String name);@Insert({"insert into user(age,name) values(#{age},#{name})"})int insertUser(@Param("age")Integer age,@Param("name")String name);@Delete({"delete from user where user_id = #{userId}"})int deletUser(@Param("userId")String userId);}
原有的方法和注解都可以保留,不受影响。
02
—
通用Mapper的使用
在使用前先讲几个要注意的地方
一、自定义DAO接口继承公共DAO接口的时候需要指定一个泛型
public interface DemoDao extends MyBaseMapper<User> {
这个泛型规定了这个接口的方法入参和返回对象的映射实体。
二、被指定的泛型对象也有要注意的地方
1.所有属性不能用基本类型,int要用Integer。
2.类名要和表明对应,属性名要和列名对应。UserInfo对应user_info表,这里也适用于map-underscore-to-camel-case: true配置项。
如果类名\表名、属性名\列名对不上可以使用@Table、@Column手动指定。
@Table(name = "user_info")public class User {@Id@Column(name = "user_id")private Integer id;
3.表中的主键要在实体类中使用@Id指定,如上。
这些注意的地方都解决了,我们就可以开始使用了。
首先,和一般使用一样注入一个DAO
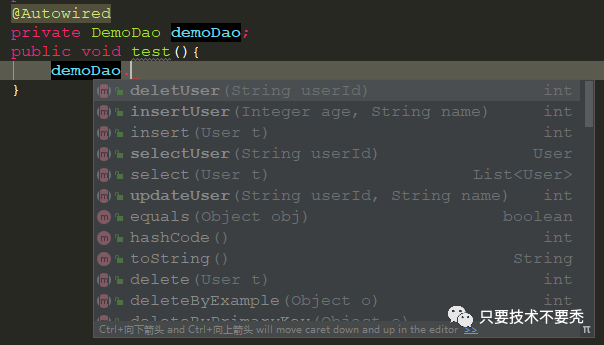
我们发现除了我们原本写的几个方法外,多了很多方法。下面我就来介绍几个常用的方法。
1.select操作
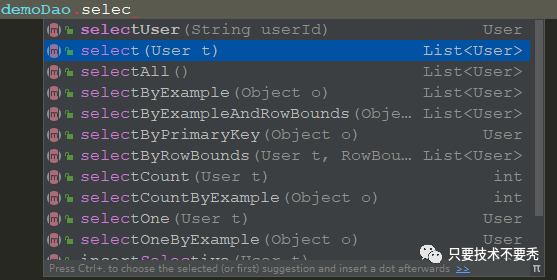
首先介绍select(User t)方法,这个方法是通过传入的对象的非空字段作为条件查询,返回所有匹配结果。
User user = new User();user.setUserName("秃子");List<User> users = demoDao.select(user);// 这段代码等同于select * from user_info where user_name = '秃子'
代码可读性瞬间就提升了,而且这样简单的select操作,再也不用写sql了。
selectOne:也是同样的道理,只是查一个。
selectByPrimaryKey:通过主键查询
那复杂条件怎么查询呢?我们使用selectByExample(Object o)
// 首先,创建一个Example对象,传入实体类classExample example = new Example(User.class);// 创建一个Criteria对象,用于存查询条件Example.Criteria criteria = example.createCriteria();// andEqualTo(A,B)等同于条件 and A=B,A是实体对象的属性名,B是值criteria.andEqualTo("userName","秃子");// andBetween(A,B,C)等同于条件 and A between B and Ccriteria.andBetween("age",20,25);List<User> users = demoDao.selectByExample(example);// 这个方法等同于select * from user_info where user_name = '秃子' and age bewteen 20 and 25
criteria还有很多的方法,通过名字就能理解是什么意思,能写出大多数的条件查询了。大家可以通过查看sql的日志打印看看,最终的sql是不是想要的。
2.update操作
讲完select操作我们讲update操作
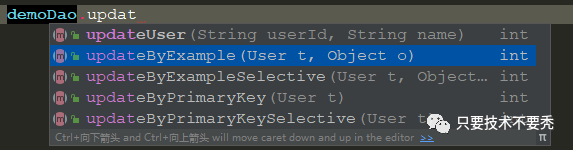
update除了我们自己的,还有四个方法。
通过名字我们很容易理解两个是通过Example条件update,两个是通过主键update。Selective结尾的方法和另一个区别在于,Selective结尾的方法只更新非空字段。
Example example = new Example(User.class);Example.Criteria criteria = example.createCriteria();criteria.andEqualTo("userName","秃子");criteria.andBetween("age",20,25);User user = new User();user.setUserName("帅哥");// 第一个参数是要更新的数据 第二个是条件demoDao.updateByExampleSelective(user,example);// 等同于update user_info set user_name = '帅哥' where user_name = '秃子' and age bewteen 20 and 25
注意:强烈建议不要使用不是Selective结尾的方法。updateByExample会把所有符合条件的字段都更新。上个例子如果换成使用updateByExample方法,那么除了user_name会被更新成帅哥外,其他所有字段都会被更新成null这就是很可怕的一件事了。但如果我就是想把某一个字段更新成null怎么办,那么只有手写sql了。但这种场景应该不多,毕竟null在mysql里也是占空间的,设计的时候没必要用null当作一个值。
3.delete操作
delete操作就很简单了
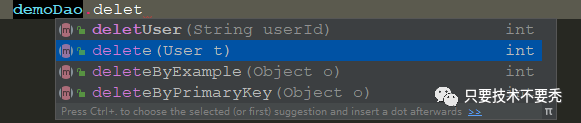
通过上面的例子举一反三就好,不多讲。
4.insert操作
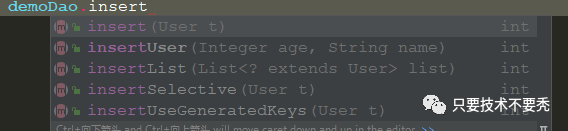
insert也很简单,这里讲一点。如果主键是自增主键,实体类中该字段为null就好。有时候我们insert一个数据后想知道他的主键怎么办?
可以在id属性上加上@GeneratedValue(strategy = GenerationType.IDENTITY)
@Id@GeneratedValue(strategy = GenerationType.IDENTITY)@Column(name = "user_id")private String id;
那么insert返回的int就是主键的值了。
03
—
结语
通用Mapper介绍完了,用的好相信能大大减少日常开发的工作量,提高可读性。有问题可以后台留言哦,谢谢!
新手上路,有不正确的地方请各位大佬及时指正。
祝大佬变强,但不变秃。
