


https://luciferliu.blog.csdn.net/article/details/122393279
命令目录
第三天:Linux 高级命令
学习目标
Linux 高级命令,版本CentOS 7.9
实操演示
1.配置本地YUM源,并安装zip软件
1.本地光驱挂载ISO安装包
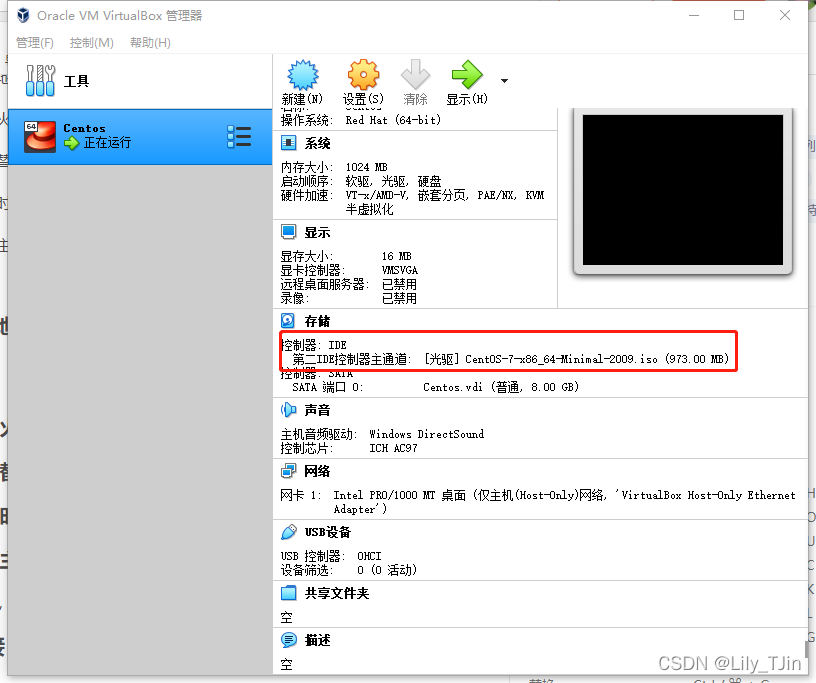
挂载ISO文件到/mnt
[root@Centos7-111 ~]# mount /dev/cdrom /mnt
mount: /dev/sr0 is write-protected, mounting read-only
也可以通过配置/etc/fstab文件,开机时Linux自动识别并挂载ISO文件,/etc/fstab文件添加一行配置即可。
# vi /etc/fstab
/dev/cdrom /mnt         iso9660 loop,defaults   0 0
可以通过df -h 命令查看,出现/dev/sr0 就对了。
[root@Oracle11g yum.repos.d]# df -h
Filesystem             Size  Used Avail Use% Mounted on
devtmpfs               2.0G     0  2.0G   0% /dev
tmpfs                  2.0G     0  2.0G   0% /dev/shm
tmpfs                  2.0G  9.2M  2.0G   1% /run
tmpfs                  2.0G     0  2.0G   0% /sys/fs/cgroup
/dev/mapper/rhel-root   46G  6.8G   39G  15% /
/dev/sda1             1014M  202M  813M  20% /boot
tmpfs                  396M   12K  396M   1% /run/user/42
tmpfs                  396M     0  396M   0% /run/user/0
/dev/sr0               4.3G  4.3G     0 100% /mnt
手动设置yum源文件
[root@Centos7-111 ~]# mkdir /etc/yum.repos.d/bak
[root@Centos7-111 ~]# mv /etc/yum.repos.d/* /etc/yum.repos.d/bak
mv: cannot move ‘/etc/yum.repos.d/bak’ to a subdirectory of itself, ‘/etc/yum.repos.d/bak/bak’
[root@Centos7-111 ~]# {
echo "[local]"
echo "name=local"
echo "baseurl=file:///mnt"
echo "enabled=1"
echo "gpgcheck=0"
} >/etc/yum.repos.d/local.repo
[root@Centos7-111 ~]# cd /etc/yum.repos.d/
[root@Centos7-111 yum.repos.d]# cat local.repo
[local]
name=local
baseurl=file:///mnt
enabled=1
gpgcheck=0
查看本地镜像源
[root@Centos7-111 yum.repos.d]# yum repolist all
Loaded plugins: fastestmirror
Determining fastest mirrors
local                                              | 3.6 kB     00:00
(1/2): local/group_gz                                | 3.5 kB   00:00
(2/2): local/primary_db                              | 832 kB   00:00
repo id                         repo name                     status
local                           local                         enabled: 447
repolist: 447
安装zip包
[root@Centos7-111 yum.repos.d]#
[root@Centos7-111 yum.repos.d]# yum install -y zip
Loaded plugins: fastestmirror
Loading mirror speeds from cached hostfile
Resolving Dependencies
--> Running transaction check
---> Package zip.x86_64 0:3.0-11.el7 will be installed
--> Finished Dependency Resolution

Dependencies Resolved

==========================================================================
 Package      Arch            Version                Repository      Size
==========================================================================
Installing:
 zip          x86_64          3.0-11.el7             local          260 k

Transaction Summary
==========================================================================
Install  1 Package

Total download size: 260 k
Installed size: 796 k
Downloading packages:
Running transaction check
Running transaction test
Transaction test succeeded
Running transaction
  Installing : zip-3.0-11.el7.x86_64                                  1/1
  Verifying  : zip-3.0-11.el7.x86_64                                  1/1

Installed:
  zip.x86_64 0:3.0-11.el7

Complete!
安装成功
2. 配置防火墙
查询防火墙开启端口和状态
[root@Centos7-111 ~]# firewall-cmd --list-port

[root@Centos7-111 ~]# systemctl status firewalld
● firewalld.service - firewalld - dynamic firewall daemon
   Loaded: loaded (/usr/lib/systemd/system/firewalld.service; enabled; vendor preset: enabled)
   Active: active (running) since Sat 2022-01-22 14:43:35 CST; 3h 53min ago
     Docs: man:firewalld(1)
 Main PID: 661 (firewalld)
   CGroup: /system.slice/firewalld.service
           └─661 /usr/bin/python2 -Es /usr/sbin/firewalld --nofork --no...

Jan 22 14:43:34 Centos7-111 systemd[1]: Starting firewalld - dynamic f....
Jan 22 14:43:35 Centos7-111 systemd[1]: Started firewalld - dynamic fi....
Jan 22 14:43:35 Centos7-111 firewalld[661]: WARNING: AllowZoneDrifting ...
Hint: Some lines were ellipsized, use -l to show in full.
···
配置80端口,然后重启防火墙后,查询80端口已设置
···
[root@Centos7-111 ~]# firewall-cmd --zone=public --add-port=80/tcp --permanent
success
[root@Centos7-111 ~]# firewall-cmd --list-port

[root@Centos7-111 ~]# firewall-cmd --reload
success
[root@Centos7-111 ~]# firewall-cmd --list-port
80/tcp
[root@Centos7-111 ~]# firewall-cmd --query-port=80/tcp
yes
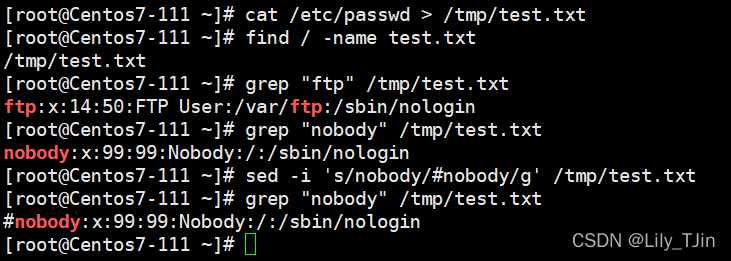
3. 查找和替换文件
生成一个test.txt,然后查找 ftp 的内容
[root@Centos7-111 ~]# cat /etc/passwd > /tmp/test.txt
[root@Centos7-111 ~]# find / -name test.txt
/tmp/test.txt
[root@Centos7-111 ~]# grep "ftp" /tmp/test.txt
ftp:x:14:50:FTP User:/var/ftp:/sbin/nologin
[root@Centos7-111 ~]#
替换内容,将一行加上备注 #
[root@Centos7-111 ~]# grep "nobody" /tmp/test.txt
nobody:x:99:99:Nobody:/:/sbin/nologin
[root@Centos7-111 ~]# sed -i 's/nobody/#nobody/g' /tmp/test.txt
[root@Centos7-111 ~]# grep "nobody" /tmp/test.txt
#nobody:x:99:99:Nobody:/:/sbin/nologin
4. 配置定时任务
[root@Centos7-111 ~]# crontab -l
no crontab for root
[root@Centos7-111 ~]# crontab -e
no crontab for root - using an empty one
crontab: installing new crontab
[root@Centos7-111 ~]# crontab -l
35      *       *         *     *     ls
[root@Centos7-111 ~]# date
Sat Jan 22 19:29:53 CST 2022
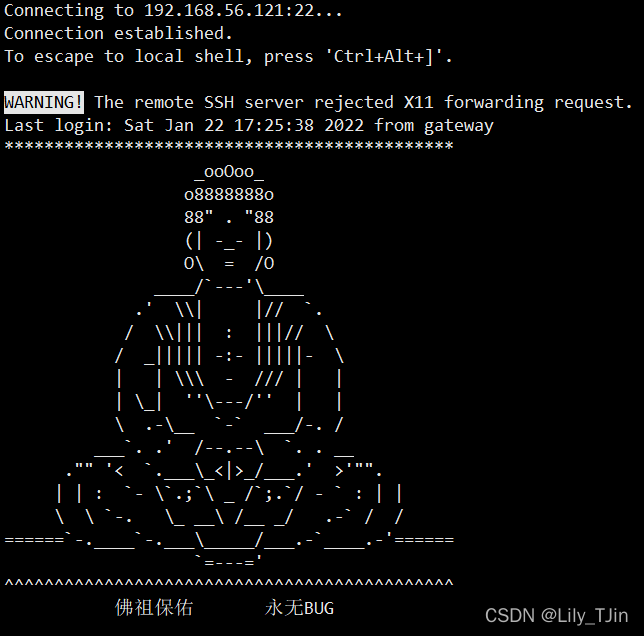
5. 配置佛主保佑
编辑 /etc/motd
···
[root@Centos7-111 ~]# vi /etc/motd
               _ooOoo_
              o8888888o
              88" . "88
              (| -_- |)
              O\  =  /O
           ____/`---'\____
         .'  \\|     |//  `.
        /  \\|||  :  |||//  \
       /  _||||| -:- |||||-  \
       |   | \\\  -  /// |   |
       | \_|  ''\---/''  |   |
       \  .-\__  `-`  ___/-. /
     ___`. .'  /--.--\  `. . __
  ."" '<  `.___\_<|>_/___.'  >'"".
 | | :  `- \`.;`\ _ /`;.`/ - ` : | |
 \  \ `-.   \_ __\ /__ _/   .-` /  /
======-.____-._/__.-____.-'=======—=’
^^^^^^^^^^^^^^^^^^^^^^^^^^^^^^^^^^^^^^^^^^^^^
佛祖保佑 永无BUG
···
再次连接到服务器,真的显示佛祖保佑了
相关链接
[1] 第三天:Linux 高级命令
最后修改时间:2022-02-02 08:49:56
「喜欢这篇文章,您的关注和赞赏是给作者最好的鼓励」
关注作者
【版权声明】本文为墨天轮用户原创内容,转载时必须标注文章的来源(墨天轮),文章链接,文章作者等基本信息,否则作者和墨天轮有权追究责任。如果您发现墨天轮中有涉嫌抄袭或者侵权的内容,欢迎发送邮件至:contact@modb.pro进行举报,并提供相关证据,一经查实,墨天轮将立刻删除相关内容。
