验证码是常见的反爬机制之一,基于字符的验证码现在有ddddocr可以方便地识别,但滑块类型仍得通过图像识别实现。本文介绍了拼图类滑块验证码的定位的一种思路
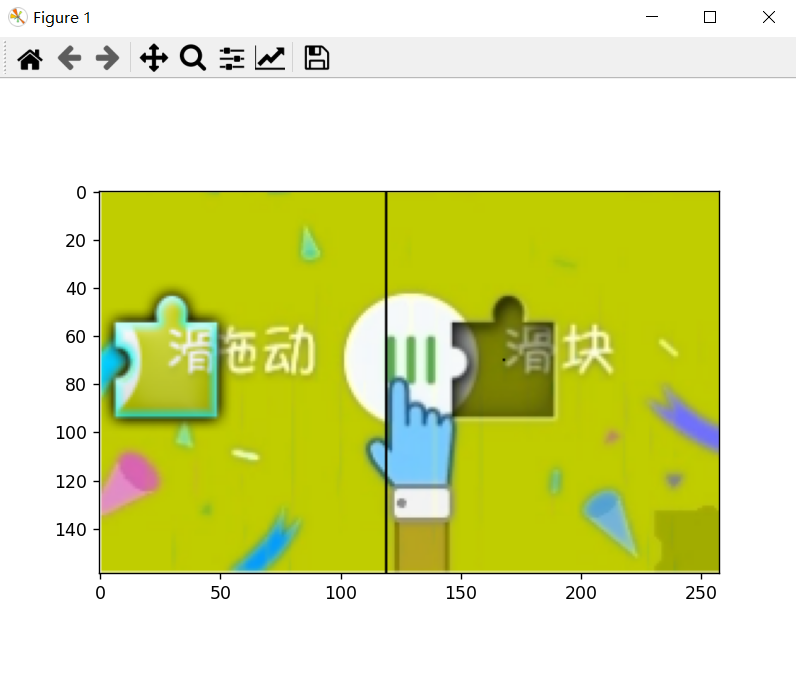
抓取得到的图片:


考虑基于CNN的目标检测模型
准确率高但内存开销大、效率低,大材小用
考虑使用模板匹配 >> 参考外链 https://www.jianshu.com/p/04a675ab3566
cv2.matchTemplate需要提供模板图片(前景图),在该案例中不易获取
 1import numpy as np
 2from cv2 import cv2
 3from matplotlib import pyplot as plt
 4plt.imshow(
 5    cv2.morphologyEx(
 6        cv2.threshold(
 7            cv2.cvtColor(
 8                cv2.imread("1.png"), cv2.COLOR_BGR2GRAY
 9            ), 130, 255, cv2.THRESH_BINARY
10        )[1], cv2.MORPH_CLOSE, np.ones((10,2), np.uint8)
11    )
12)
13plt.show()
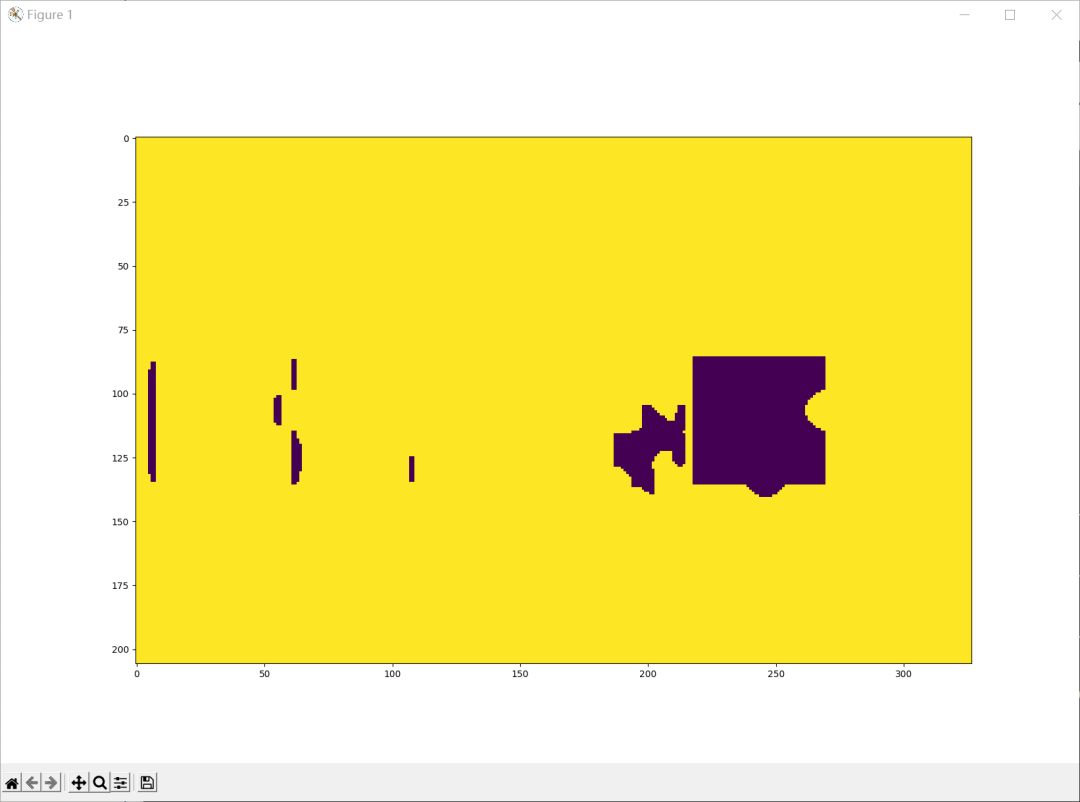
翻车示例1
考虑暴力匹配:遍历所有的bbox,计算每个矩形的“像矩形的程度”,取最值对应的bbox即为所求
可以用亮度衡量相似度
但这个算法的复杂度是O(n^4)
显然,如果已知矩形的大小,时间复杂度降为O(n^2),而同一个验证系统的拼图块的大小确实是固定的
用以一点为中心的矩形窗口的亮度均值代表其与目标矩形的相似度
调用cv2.blur执行方框模糊,需要传入卷积核的大小,因此我们需要估计目标矩形的大致大小
理想情况:卷积核大小 = 目标矩形大小 只有目标矩形的重心的亮度平均值最低 误差分析:卷积核大小 < 目标矩形大小 满足卷积窗口与目标矩形内切的点都是最小值点 误差分析:卷积核大小 > 目标矩形大小 满足目标举行与卷积窗口内切的点都是最小值点 解决方案:取最小值点们的重心(算术平均值)
 1import numba as nb  # to generate complied code
 2
 3@nb.njit(cache=True, nogil=True)
 4def find_center(img:np.ndarray):
 5    y, x = img.shape
 6    val = np.min(img)
 7    ys = []
 8    xs = []
 9    for i in range(y):
10        for j in range(x):
11            if img[i,j] == val:
12                ys.append(i)
13                xs.append(j)
14    return sum(xs)/len(xs), sum(ys)/len(ys)
15
16ks = 50  # kernel size ≈ width of target rectangle
17
18x, y = find_center(
19    cv2.blur(img, (ks, ks))[ks:-ks, ks:-ks]
20)
21
22pos = (round(y)+ks, round(x)+ks)  # the inner center

从实际结果来看,由于拼图存在缺口,并不是完美的矩形,中心点并不能保证在目标矩形的正中央 考虑通过渐进的方式找到四个角 这里介绍我急中生智想到的仿生学思路(以找左上角为例) 原理:目标矩形的四个顶点都是直角,整个目标矩形的亮度比周围低,是一个“盆地” 思路:从中心往左上角移动,直到“走出盆地”,此时得到真实的宽度和高度 如何判定盆地? 方法一:用与中心点构成的对角线确定的矩形内亮度的均值与阈值作比较 由于阈值肯定得高于目标矩形的亮度均值,测量值容易较真实值偏大 方法二:计算横纵方向上的导数,若其绝对值高于阈值则认为是“峭壁” 阴影区域内可能存在一些导数较大的边缘,容易误判导致测量值比真实值偏小 (这个方法本质上就是边缘提取,这就是正确的思路,但由于需要仔细调整阈值,当时又赶时间所以就被放弃了) 方法三:用当前行/列的均值判定是否已走出盆地 由于阈值是固定的而非相对的,要求预处理尽可能降低阴影部分的亮度 事实证明可行
  1@nb.njit(cache=True, nogil=True)
  2def find_vertices(img:np.ndarray, x, y):
  3    _ = 160  # the threshold of the mean luminance
  4
  5    # find left top
  6    yy = y - 5  # we assert that the height is longer than 5
  7    xx = x - 5  # we assert that the width is longer than 5 too
  8    while True:
  9        flag = False  # flag of whether the left edge has been reached
 10        tmp:int = 0  # the sum. to avoid float calculation
 11        for i in range(yy, y):
 12            tmp += img[yy, xx]  # sum up the vertical row
 13        if tmp >= (y-yy) * _:  # just across the left edge
 14            flag = True
 15        else:
 16            xx -= 1  # step left a row
 17        tmp = 0
 18        for i in range(xx, x):
 19            tmp += img[yy, xx]  # sum up the horizontal line
 20        if tmp >= (x-xx) * _:  # just across the top edge
 21            if flag is True:
 22                break  # left and top edges have been crossed
 23        else:
 24            yy -= 1  # step up a line
 25    left_top = (yy+1, xx+1)  # left-top corner found
 26
 27    # find left bottom
 28    yy = y + 5
 29    xx = x - 5
 30    while True:
 31        flag = False
 32        tmp = 0
 33        for i in range(y, yy):
 34            tmp += img[yy, xx]
 35        if tmp >= (yy-y) * _:
 36            flag = True
 37        else:
 38            xx -= 1
 39        tmp = 0
 40        for i in range(xx, x):
 41            tmp += img[yy, xx]
 42        if tmp >= (x-xx) * _:
 43            if flag is True:
 44                break
 45        else:
 46            yy += 1
 47    left_bottom = (yy-1, xx+1)
 48    # print(yy-y)  # for debug only
 49
 50    # find right bottom
 51    yy = y + 5
 52    xx = x + 5
 53    while True:
 54        flag = False
 55        tmp = 0
 56        for i in range(y, yy):
 57            tmp += img[yy, xx]
 58        if tmp >= (yy-y) * _:
 59            flag = True
 60        else:
 61            xx += 1
 62        tmp = 0
 63        for i in range(x, xx):
 64            tmp += img[yy, xx]
 65        if tmp >= (xx-x) * _:
 66            if flag is True:
 67                break
 68        else:
 69            yy += 1
 70    right_bottom = (yy-1, xx-1)
 71
 72    # find right top
 73    yy = y - 5
 74    xx = x + 5
 75    while True:
 76        flag = False
 77        tmp = 0
 78        for i in range(yy,y):
 79            tmp += img[yy, xx]
 80        if tmp >= (y-yy) * _:
 81            flag = True
 82        else:
 83            xx += 1
 84        tmp = 0
 85        for i in range(x, xx):
 86            tmp += img[yy, xx]
 87        if tmp >= (xx-x) * _:
 88            if flag is True:
 89                break
 90        else:
 91            yy -= 1
 92    right_top = (yy+1, xx-1)
 93
 94    """改良:事实上四个点经常偏内(即没到边缘就认为是边缘而停止了),因此取最靠外的点构成四条边"""
 95    top = min(left_top[0], right_top[0])
 96    bottom = max(left_bottom[0], right_bottom[0])
 97    left = min(left_top[1], left_bottom[1])
 98    right = max(right_top[1], right_bottom[1])
 99
100    return left, right, top, bottom
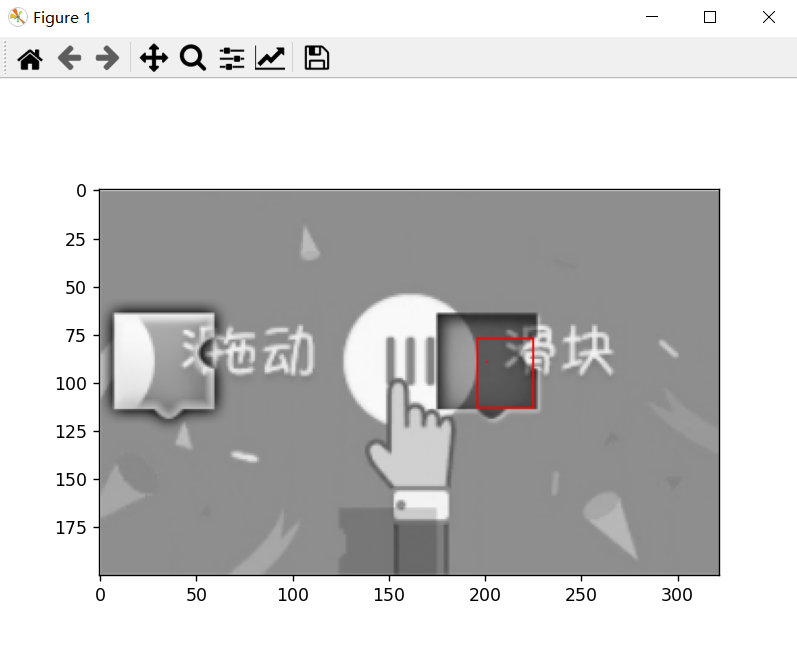
预处理的小改动:
没有采用二值化的方法,而是更温和地增加了对比度
1@nb.njit(cache=True, nogil=True)
2def rise_contrast(img:np.ndarray, pivot=127, factor=8):
3 """inplace rising contrast of img"""
4 y, x = img.shape
5 for i in range(y):
6     for j in range(x):
7         img[i,j] = min(max(0, img[i,j] + (img[i,j] - pivot)*factor), 255)
benchmark
提高识别率
现象:中心都识别在矩形框内,但四个顶点经常偏内
原因:find_vertices()没有达到预期的效果
尝试调整阈值,但效果不理想,为了提高鲁棒性,决定放弃find_vertices函数,改用OpenCV的边缘提取算法实现
1def find_edge(img):
2    return cv2.Canny(img, 200, 255)
可见canny()得到的是一张干净的二值化的图片,接下来只需要找到左边缘的坐标即可
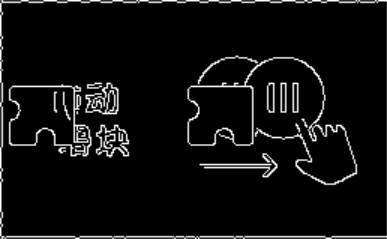
canny得到的边缘
由中点和边缘识别的结果推出边缘的坐标
事实上,滑动滑块只需要直到左边缘的坐标即可,因此以下不再实现整个bbox的识别,只识别左边缘
 1@nb.njit(cache=True, nogil=True)
 2def find_leftmost(img:np.ndarray, inner_point):
 3    y, x = inner_point
 4    forward = 35
 5    vertical_range = 15
 6
 7    to_compare = np.zeros(forward, np.uint16)
 8
 9    for i in range(forward):
10        for j in range(-vertical_range, vertical_range):
11            to_compare[i] += img[y+j, x-i]
12
13    _ = np.max(to_compare)
14    for i in range(forward):
15        if to_compare[i] >= _ * 0.75:
16            return x - i
整体思想与之前的find_vertices类似,只不过检测的是一个竖线段的亮度平均值(表示当前竖线是边缘的程度)
其实这种方法也远没做到自适应,但确实完美解决了问题
benchmark
经测试,1000张测试图片的处理需要约0.8s
同时,无论是opencv的函数还是numba编译的函数运行时都释放了GIL,所以在实际应用场景(战胜反爬机制)上并不会影响高并发的性能
效果图展示