Hummingbird介绍
Hummingbird是一个用于将传统ML模型编译为深度学习矩阵计算的库。
使用深度学习框架来加速ML模型; 在深度学习框架内运行所有环节;
使用Hummingbird将经过训练的传统 ML 模型转换为PyTorch、TorchScript、ONNX和TVM)。
Hummingbird支持多种ML模型和特征化器。这些模型包括scikit-learn决策树和随机森林,以及LightGBM和XGBoost分类器/回归器。
Hummingbird原理
Hummingbird将原始算法运算转换为适合矢量化和GPU执行的形式。下图解释了Hummingbird将决策树转换为涉及 GEMM(通用矩阵乘法)的张量的策略之一,其中我们使用矩阵乘法实现树的遍历。

在此示例中,决策树有四个决策节点(橙色)和五个叶节点(蓝色)。这棵树将一个包含五个元素的特征向量作为输入。
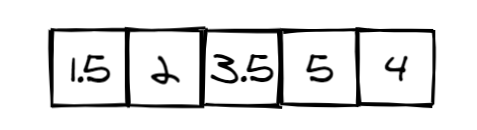
步骤1: input tensor
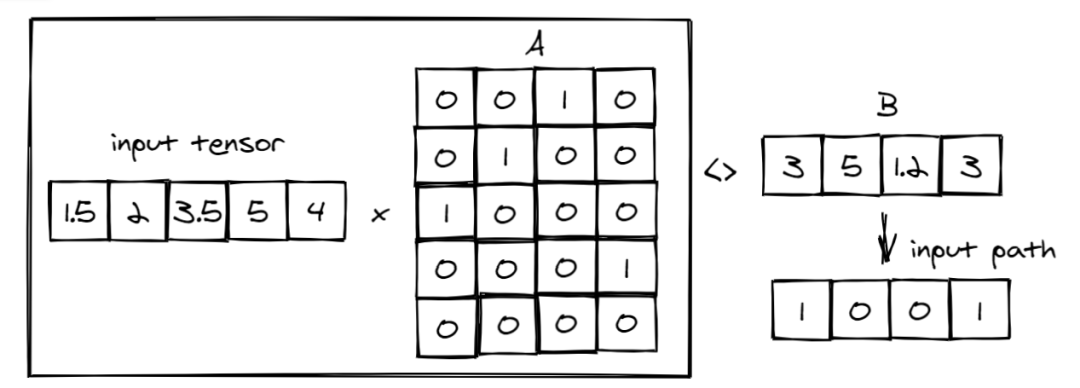
将捕获输入特征和内部节点之间关系的与张量相乘A
(从上面的决策树模型计算)。
然后将其与B
设置为每个内部节点(橙色)的值的张量进行比较,以创建input path
表示从输入到节点的路径的张量。在这种情况下,树模型有4个条件,输入向量为5,因此,张量的形状A
为5x4,张量B
为1x4。
步骤2: 将input path
与C
相乘,捕获内部节点是否是该内部节点的父节点。
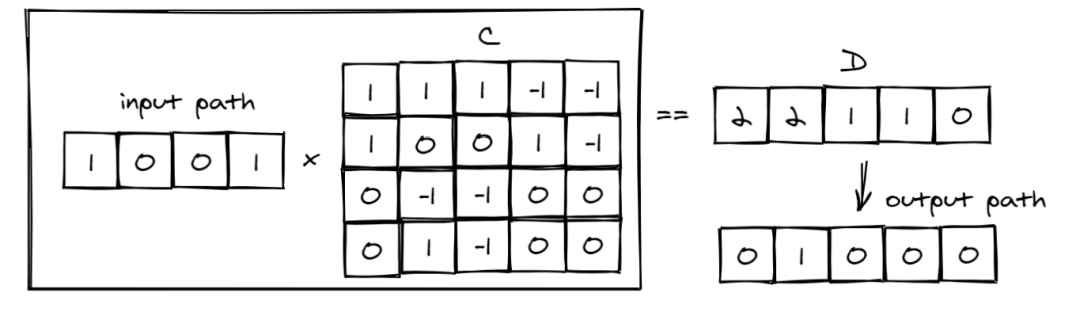
如果是,则它是在左子树还是右子树中,然后统计父节点在从叶节点到树根的路径中的左孩子的计数,以创建表示从节点到输出的路径的tenor输出路径。
在这种情况下,这个树模型有4个条件的 5 个输出,因此张量的形状C
是4x5,张量D
是 1x5。
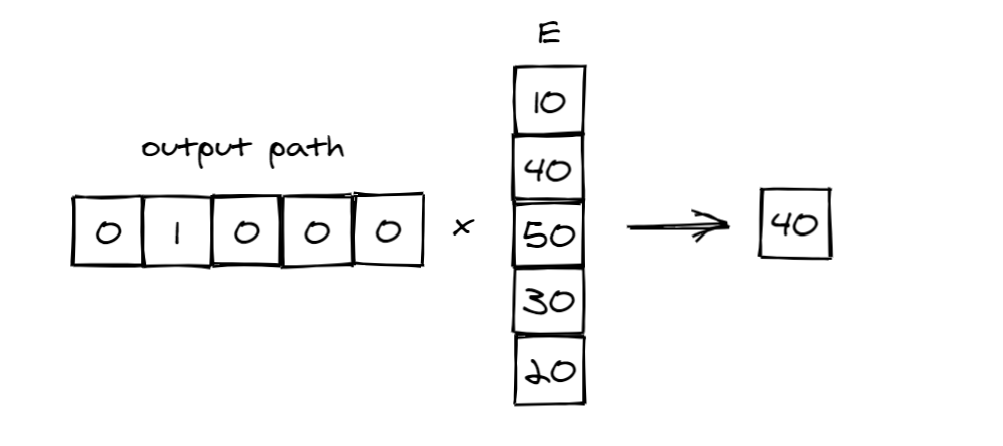
步骤3: 将output path
与E
相乘得到最终预测。在这种情况下,树模型有 5 个输出,因此张量的形状E是 5x1。
Hummingbird安装
需要PyTorch >= 1.6.0,建议Python>=3.7
基础安装:
pip install hummingbird-ml
基础安装 + 所有依赖库:
pip install hummingbird-ml[extra]
Hummingbird案例
RandomForest
import numpy as np
from sklearn.ensemble import RandomForestClassifier
from hummingbird.ml import convert, load

# Create some random data for binary classification
num_classes = 2
X = np.random.rand(100000, 28)
y = np.random.randint(num_classes, size=100000)

# Create and train a model (scikit-learn RandomForestClassifier in this case)
skl_model = RandomForestClassifier(n_estimators=10, max_depth=10)
skl_model.fit(X, y)

# Use Hummingbird to convert the model to PyTorch
model = convert(skl_model, 'pytorch')

# Run predictions on CPU
model.predict(X)

# Run predictions on GPU
model.to('cuda')
model.predict(X)

# Save the model
model.save('hb_model')

# Load the model back
model = load('hb_model')
XGBoost
import numpy as np
from sklearn.ensemble import RandomForestClassifier
from hummingbird.ml import convert, load

# Create some random data for binary classification
num_classes = 2
X = np.random.rand(100000, 28)
y = np.random.randint(num_classes, size=100000)

import xgboost as xgb
model = xgb.XGBClassifier(n_estimators=20, max_depth=3)
model.fit(X, y)

# Use Hummingbird to convert the model to PyTorch
model = convert(model, 'pytorch')

# Run predictions on CPU
model.predict(X)

# Run predictions on GPU
model.to('cuda')
model.predict(X)

# Save the model
model.save('hb_model')

# Load the model back
model = load('hb_model')
LightGBM
import numpy as np
from sklearn.ensemble import RandomForestClassifier
from hummingbird.ml import convert, load

# Create some random data for binary classification
num_classes = 2
X = np.random.rand(100000, 28)
y = np.random.randint(num_classes, size=100000)

import lightgbm as lgb
model = lgb.LGBMClassifier(n_estimators=20, max_depth=3, verbose=-1)
model.fit(X, y)

# Use Hummingbird to convert the model to PyTorch
model = convert(model, 'pytorch')

# Run predictions on CPU
model.predict(X)

# Run predictions on GPU
model.to('cuda')
model.predict(X)

# Save the model
model.save('hb_model')

# Load the model back
model = load('hb_model')
使用体验
1. Hummingbird主要是用Pytorch使用树模型,方便模型部署。
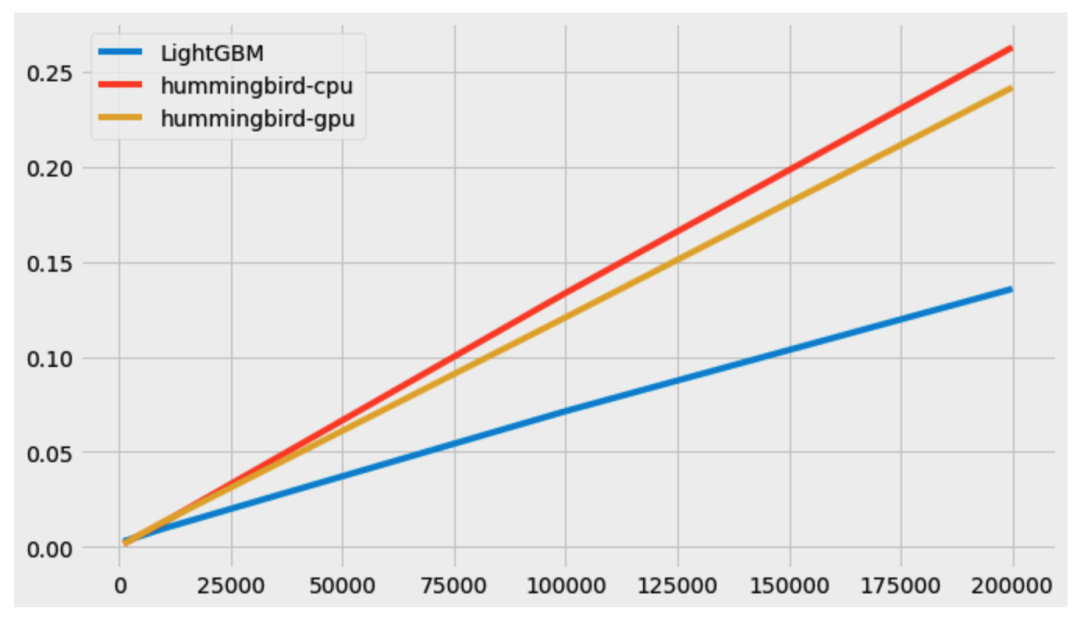
2. Hummingbird在速度上并没有原始的库快,比treelie更慢。
添加👇微信