


基础环境
下载地址:
https://github.com/prometheus/prometheus/releases/download/v2.22.2/prometheus-2.22.2.linux-amd64.tar.gz
下载地址:
https://github.com/prometheus/alertmanager/releases/download/v0.23.0/alertmanager-0.23.0.linux-amd64.tar.gz
下载地址:
https://github.com/timonwong/prometheus-webhook-dingtalk/releases/download/v1.4.0/prometheus-webhook-dingtalk-1.4.0.linux-amd64.tar.gz
1.新增用户和用户组
➜ groupadd prometheus➜ useradd -g prometheus -M -s /sbin/nologin prometheus
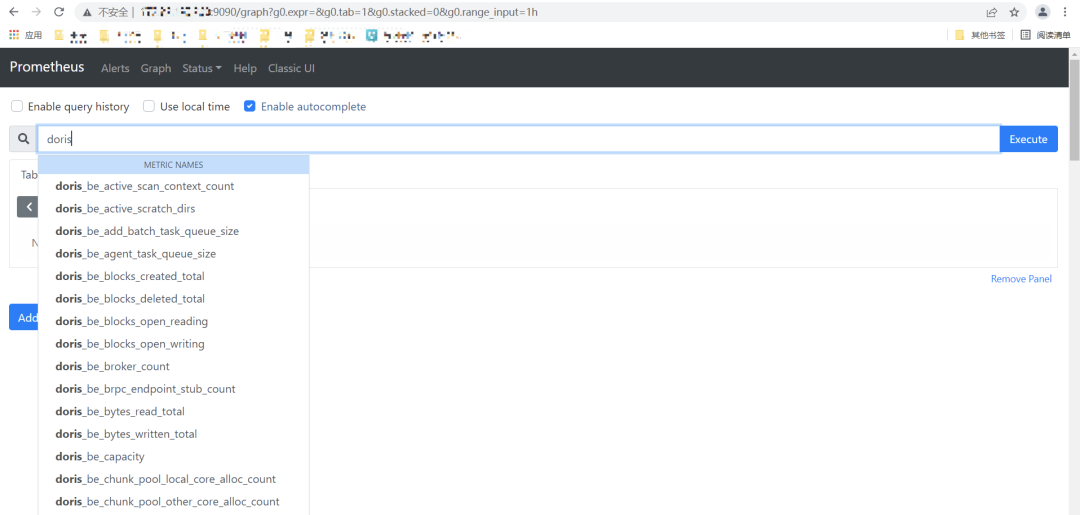
2.安装配置 Prometheus Server
3.安装 AlertManager 模块
3.1 下载安装包
➜ wget https://github.com/prometheus/alertmanager/releases/download/v0.23.0/alertmanager-0.23.0.linux-amd64.tar.gz
➜ tar xf alertmanager-0.23.0.linux-amd64.tar.gz -C /soft➜ cd /soft➜ mv alertmanager-0.23.0.linux-amd64 alertmanager➜ cd alertmanager➜ mkdir data #系统文件持久化路径➜ chown -R prometheus.prometheus /soft/alertmanager
3.2 配置 alertmanager.yml 文件
route:group_by: ['alertname']group_wait: 1sgroup_interval: 1mrepeat_interval: 4hreceiver: 'webhook2'receivers:- name: 'webhook2'webhook_configs:- &dingtalk_configsend_resolved: trueurl: http://localhost:8060/dingtalk/webhook2/send#An inhibition rule mutes an alert (target) matching a set of matchers when an alert (source) exists that matches another set of matchers. Both target and source alerts must have the same label values for the label names in the equal list.inhibit_rules:- source_match:severity: 'critical'target_match:severity: 'warning'equal: ['alertname', 'dev', 'instance']
group_wait :设置等待时间,如果在等待时间内当前 Group 接收到了新的告警,这些告警将会合并为一个通知向 Receiver 发送。
group_interval :用于定义相同的 Group 之间发送告警通知的时间间隔。
repeat_interval:用于表示当一个规则成功被发送,重复发送报警的第二次间隔时间。
3.3 检查配置文件配置
很重要,关乎程序能否正常启动。当出现如下图片时,说明 alertmanager.yml 文件配置正常。
➜ cd /soft/alertmanager➜ ./amtool check-config ./alertmanager.yml

➜ vim /usr/lib/systemd/system/alertmanager.service
[Unit]Description=alertmanagerDocumentation=https://prometheus.io/After=network.target[Service]User=prometheusGroup=prometheusExecStart=/soft/alertmanager/alertmanager --config.file=/soft/alertmanager/alertmanager.yml --storage.path=/soft/alertmanager/dataRestart=on-failure[Install]WantedBy=multi-user.target
systemctl daemon-reloadsystemctl enable alertmanager.servicesystemctl start alertmanager.servicesystemctl status alertmanager.service #查看服务状态systemctl restart alertmanager.service #重启服务使用

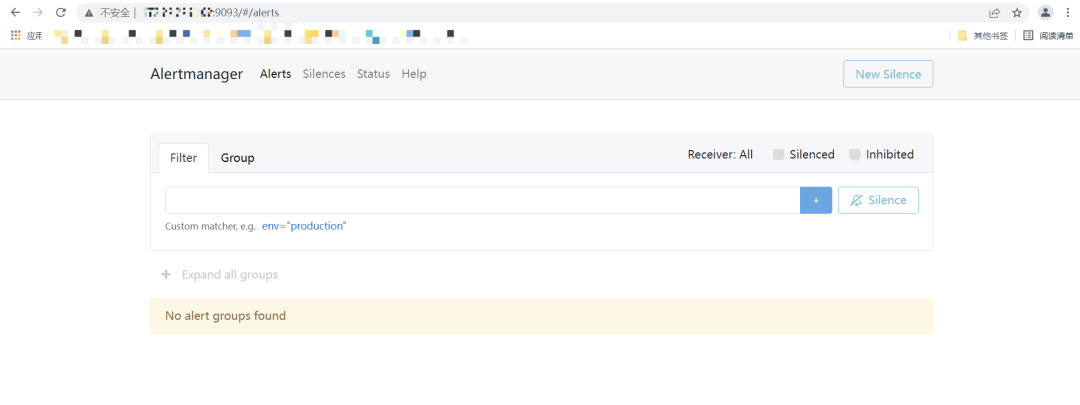
服务启动后,可以在http://localhost:9093查看ui界面
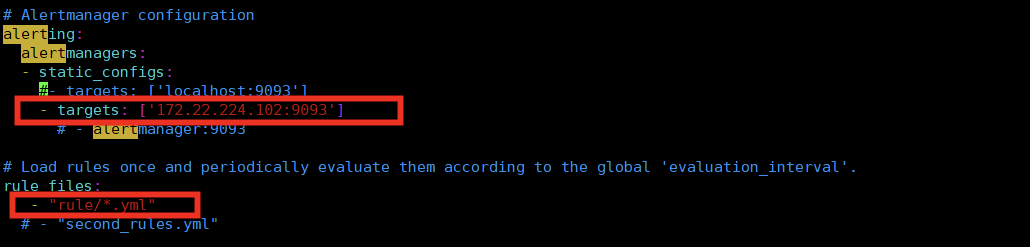
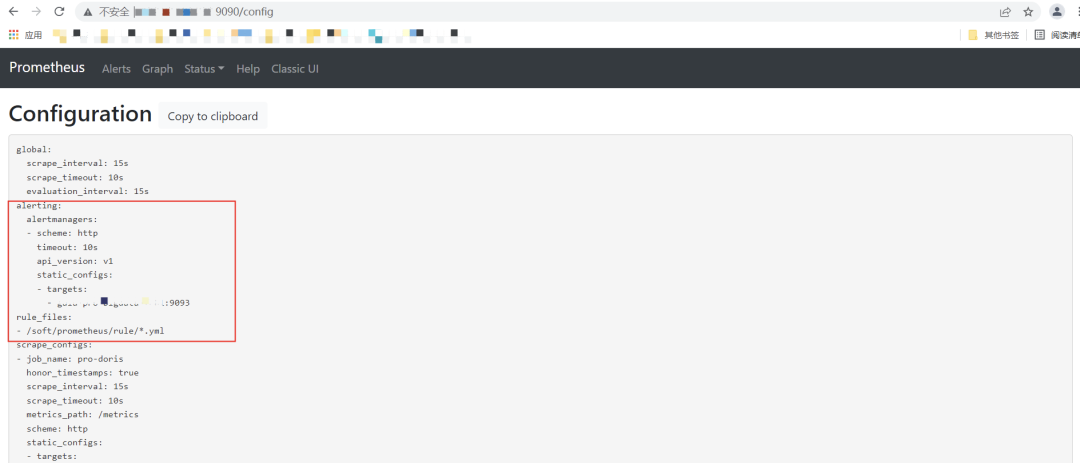
vim prometheus.yml
alerting:alertmanagers:- static_configs:- targets: ['localhost:9093'] #根据实际alertmanager服务地址配置。rule_files:- "rule/*.yml" #自定义规则存储目录,可以通过*.yml来通配该目录下所有规则。
3.8 重新加载 Prometheus 配置文件,查看 alerting 配置是否生效
➜ ./promtool check config prometheus.yml➜ systemctl reload prometheus.service
4.安装 prometheus-webhook-dingtalk 插件
4.1 下载插件
➜ wget https://github.com/timonwong/prometheus-webhook-dingtalk/releases/download/v1.4.0/prometheus-webhook-dingtalk-1.4.0.linux-amd64.tar.gz
➜ tar -xf prometheus-webhook-dingtalk-1.4.0.linux-amd64.tar.gz -C /soft➜ mv prometheus-webhook-dingtalk-1.4.0.linux-amd64 prometheus-webhook-dingtalk
➜ cp config.example.yml config.yml➜ vim config.yml
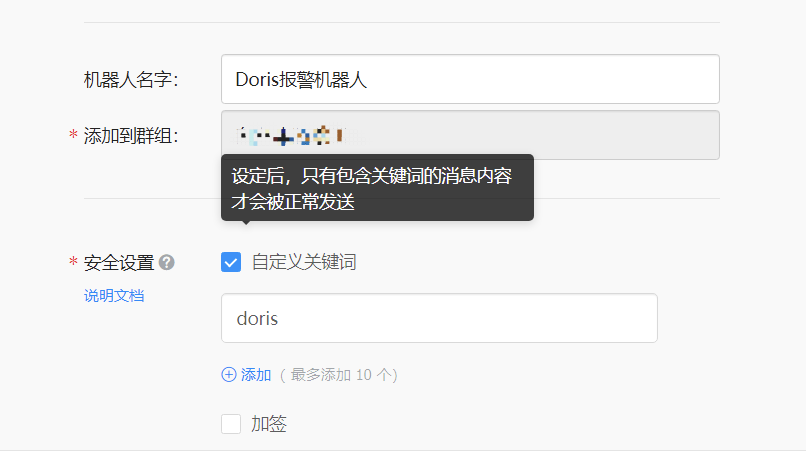
## Request timeout# timeout: 5s## Customizable templates path 自定义模板位置templates:- /soft/alertmanager/alarm_template/webhook.tmpl## You can also override default template using `default_message`## The following example to use the 'legacy' template from v0.3.0# default_message:# title: '{{ template "legacy.title" . }}'# text: '{{ template "legacy.content" . }}'## Targets, previously was known as "profiles"targets:webhook1: #加签的钉钉,需要同时配置加签机器人的密钥信息url: https://oapi.dingtalk.com/robot/send?access_token=xxxxxxxxxxxx# secret for signaturesecret: SEC000000000000000000000webhook2: #不加签钉钉url: https://oapi.dingtalk.com/robot/send?access_token=cf9c2fd69723661108b7fd7******webhook_legacy:url: https://oapi.dingtalk.com/robot/send?access_token=xxxxxxxxxxxx# Customize template contentmessage:# Use legacy templatetitle: '{{ template "legacy.title" . }}'text: '{{ template "legacy.content" . }}'webhook_mention_all: #@所有人钉钉url: https://oapi.dingtalk.com/robot/send?access_token=xxxxxxxxxxxxmention:all: truewebhook_mention_users: #@指定用户钉钉url: https://oapi.dingtalk.com/robot/send?access_token=cf9c2fd69723661108b7fd7****mention:mobiles: ['152****30', '134****74']
4.4 创建 webhook-dingtalk 系统服务启动文件
vim /usr/lib/systemd/system/webhook-dingtalk.service
[Unit]Description=prometheus-webhook-dingtalkDocumentation=https://github.com/timonwong/prometheus-webhook-dingtalkAfter=network.target[Service]User=prometheusGroup=prometheusExecStart=/soft/prometheus-webhook-dingtalk/prometheus-webhook-dingtalk --config.file=/soft/prometheus-webhook-dingtalk/config.ymlRestart=on-failure[Install]WantedBy=multi-user.target
systemctl daemon-reloadsystemctl enable webhook-dingtalk.servicesystemctl start webhook-dingtalk.servicesystemctl status webhook-dingtalk.servicesystemctl restart webhook-dingtalk.service
4.6 查看 webhook-dingtalk 服务状态

5.配置报警规则
➜ vim doris_instance.yml
groups:- name: doris_instance_downrules:- alert: Doris Backends Downexpr: up {group="be", job="pro-doris"} == 0for: 20slabels:user: dorisseverity: errorannotations:summary: "doris Instance {{ $labels.instance }} down"description: "doris {{ $labels.instance }} of job {{ $labels.job }} has been down for more than 20s."- alert: Doris Frontends Downexpr: up {group="fe", job="pro-doris"} == 0for: 20slabels:user: dorisseverity: errorannotations:summary: "doris Instance {{ $labels.instance }} down"description: "doris {{ $labels.instance }} of job {{ $labels.job }} has been down for more than 20s."
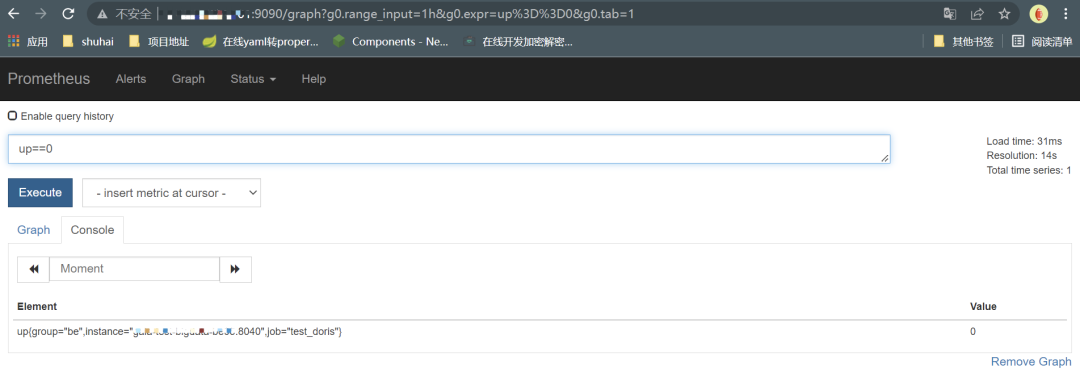
➜ cd /soft/prometheus➜ ./promtool check config prometheus.yml
➜ systemctl reload prometheus.service
6.测试
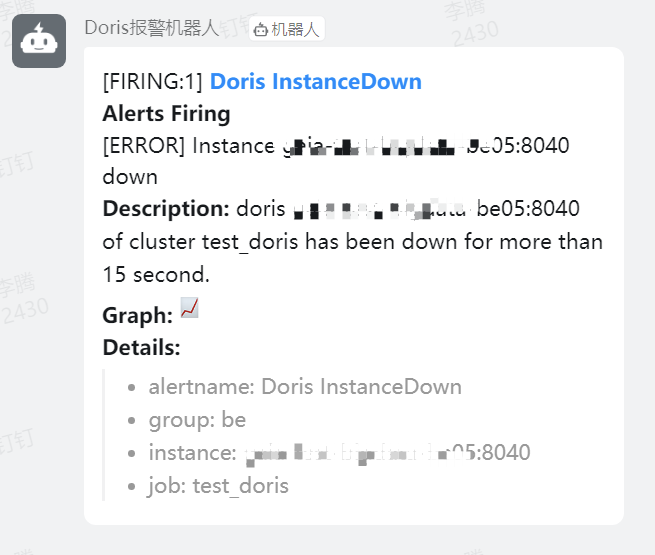
当 Doris 集群中的 instance 出现 down 机后,钉钉群里新建的机器人会发出报警信息。
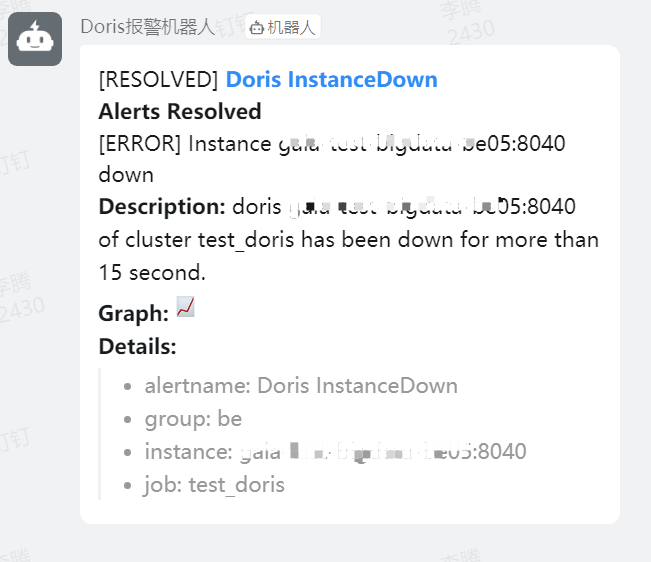
当在 alertmanager.yml 文件中配置了 send_resolved = true,异常解除同样会发送钉钉警告信息,否则则不发送。
至此,Prometheus 监控 Doris 异常信息并发送报警至钉钉流程结束。
—— End ——
欢迎关注:

Apache Doris(incubating)官方公众号
社区人物志|王博:每一位你,都是前进道路上的一团星光。 社区人物志|张家锋:一个人可能走得更快,但一群人会走得更远 活动回顾|Apache Doris 向量化技术实现与后续规划 从NoSQL到Lakehouse,Apache Doris的13年技术演进之路
相关链接:
Apache Doris官方网站:
http://doris.incubator.apache.org
Apache Doris Github:
https://github.com/apache/incubator-doris
Apache Doris 开发者邮件组:
dev@doris.apache.org

