


-----正文-----

本章介绍通过DM8、Django、Python搭建网站的示例说明。
环境说明
数据库版本:DM8
开发软件:Django3.1.7、Python3.7.9
相关关键字:网站搭建
一、准备工作
1.安装好DM8数据库;
过程略。可参考往期干货:干货分享|DM8命令行方式安装创建数据库
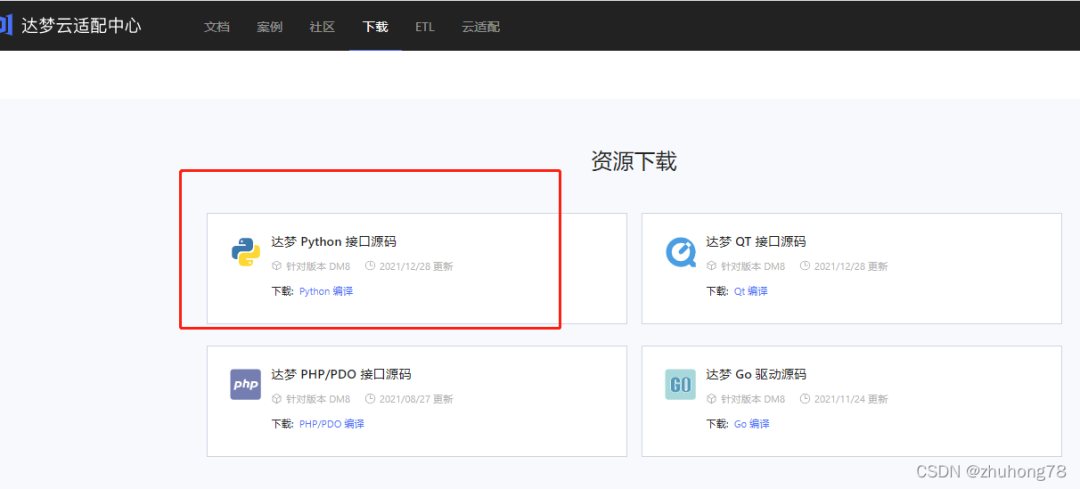
2.下载DM8相关驱动包;
下载地址:https://eco.dameng.com/download/
3.安装Django3.1.7版本;
安装过程略。
验证:

4.python环境:版本3.7.9;
安装过程略。
验证:

二、驱动安装
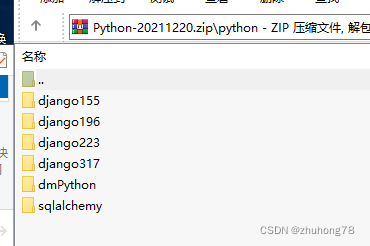
上传解压Python-20211220.zip。
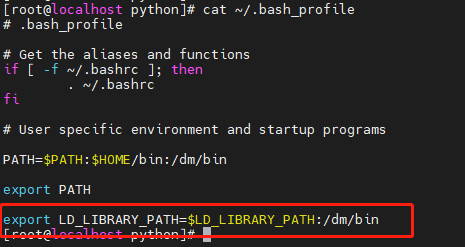
1.安装dmPython驱动
配置环境变量,加入DM8的bin目录:
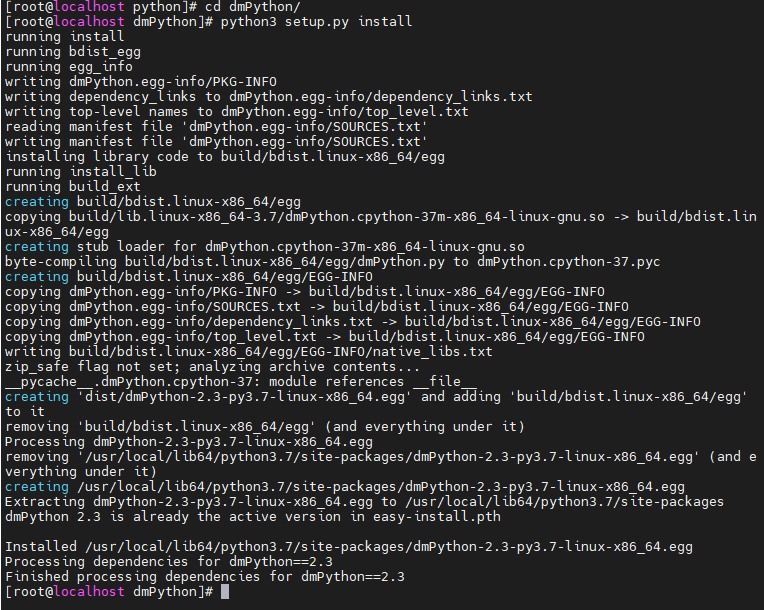
[root@localhost python]# cd dmPython/[root@localhost dmPython]# python3 setup.py installrunning install
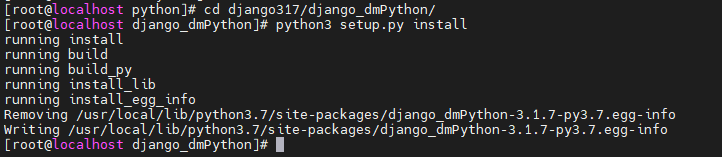
2.安装django驱动
[root@localhost python]# cd django317/django_dmPython/[root@localhost django_dmPython]# python3 setup.py install
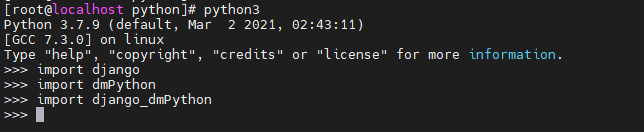
3.检查安装情况
[root@localhost django_dmPython]# python3Python 3.7.9 (default, Mar 2 2021, 02:43:11)[GCC 7.3.0] on linuxType "help", "copyright", "credits" or "license" for more information.>>> import re>>> import django>>> import dmPython>>> import django_dmPython>>>
三、Django配置
1.创建项目
[root@localhost test]# django-admin startproject dmtest

2.创建应用
[root@localhost test]# cd dmtest/[root@localhost dmtest]# python3 manage.py startapp syscheck

3.修改settings.py文件
[root@localhost dmtest]# vim dmtest/settings.py
访问主机部分:
ALLOWED_HOSTS = ['*']
应用安装部分:
INSTALLED_APPS = ['django.contrib.admin','django.contrib.auth','django.contrib.contenttypes','django.contrib.sessions','django.contrib.messages','django.contrib.staticfiles','syscheck',]
数据库连接部分:
DATABASES = {undefined'default': {undefined'ENGINE': 'django_dmPython','NAME': 'dmsystest','USER': 'dmsystest','PASSWORD': 'dameng123','HOST': '192.168.163.137','PORT': '5237','OPTINOS': {'local_code': 1, 'connection_timeout': 5},}}
语言显示部分:
LANGUAGE_CODE = 'zh-Hans'
4.创建数据库对应关系
[root@localhost dmtest]# vim syscheck/models.pyfrom django.db import modelsclass info1(models.Model):ip_addr = models.CharField(max_length=50, null=True)sys_name = models.CharField(max_length=50, null=True)sys_version = models.CharField(max_length=50, null=True)cpu_type = models.CharField(max_length=50, null=True)cpu_cores = models.CharField(max_length=50, null=True)cpu_sockets = models.CharField(max_length=50, null=True)net_info1 = models.CharField(max_length=50, null=True)net_info2 = models.CharField(max_length=50, null=True)# Create your models here.
5.修改views.py文件,显示html模板
[root@localhost dmtest]# vim syscheck/views.pyfrom django.shortcuts import renderfrom syscheck.models import info1import datetime# Create your views here.def localinfo(request):time1=datetime.datetime.now()infos=info1.objects.all()return render(request,"test1.html",locals())
6.创建html模板
[root@localhost dmtest]# mkdir -p syscheck/templates[root@localhost dmtest]# vim syscheck/templates/test1.html{% load static %}<html><head><meta charset="UTF-8"><title>Upload Successfully</title></head><body style="background-size:100% 133.5%;" ><p style="color:WhiteSmoke">系统信息</p><p style="color:WhiteSmoke">服务器时间:{undefined{ time1 }}</p><br>{% for i in infos %}<p style="color:seagreen;">{undefined{i.ip_addr}}</p><p style="color:MediumSlateBlue;">系统名称: {undefined{i.sys_name}}</p><p style="color:MediumSlateBlue;">系统版本: {undefined{i.sys_version}}</p><br><br>{% endfor %}</body></html>
7.修改urls文件
[root@localhost dmtest]# vim dmtest/urls.pyfrom django.contrib import adminfrom django.urls import pathfrom syscheck import viewsurlpatterns = [path('admin/', admin.site.urls),path('sysinfo/',views.localinfo),]
8.添加静态图片背景
[root@localhost dmtest]# mkdir static
拷贝2.jpg文件至static目录下;
修改settings.py文件 ;
STATIC_URL = '/static/'STATICFILES_DIRS = [os.path.join(BASE_DIR, "static"),]
9.同步数据
[root@localhost dmtest]# python3 manage.py makemigrations[root@localhost dmtest]# python3 manage.py migrate

四.使用python处理文本文件,往DM8数据库插入数据
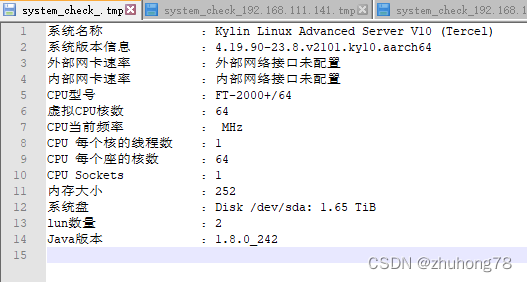
文本如图:
python程序:
[root@link02 project]# vim syscheck.pyimport reimport dmPython#定义空列表list_local_sysinfo=[]#读取文件,将每行的值存入列表with open(r'/opt/web/produce/python/system_check_.tmp', 'r', encoding='UTF-8') as f:for line in f:m=re.search(':.*\n|:.*\n',line)#print(m)if (m != None):(m1,m2) = re.search(':.*\n|:.*\n',line).span()m3=line[m1+1:m2-1]#print(m3)list_local_sysinfo.append(m3)#print(list_local_sysinfo)#从列表中给变量赋值,方便知道往数据库里存入的数据是什么sys_name = list_local_sysinfo[0]sys_version = list_local_sysinfo[1]net_exter = list_local_sysinfo[2]net_inter = list_local_sysinfo[3]cpu_type = list_local_sysinfo[4]cpu_cores = list_local_sysinfo[5]cpu_frequency = list_local_sysinfo[6]cpu_threads_percore = list_local_sysinfo[7]cpu_cores_persocket = list_local_sysinfo[8]cpu_sockets = list_local_sysinfo[9]memory = list_local_sysinfo[10]sys_disk = list_local_sysinfo[11]nums_lun = list_local_sysinfo[12]java_version = list_local_sysinfo[13]'''print(sys_name,'\n',sys_version,'\n',net_exter ,'\n',net_inter ,'\n',cpu_type ,'\n',cpu_cores ,'\n',cpu_frequency ,'\n',cpu_threads_percore ,'\n',cpu_cores_persocket ,'\n',cpu_sockets ,'\n',memory ,'\n',sys_disk ,'\n',nums_lun ,'\n',java_version ,'\n')'''#调用dmPython接口,插入数据try:conn = dmPython.connect(user='dmsystest', password='dameng123', server='192.168.163.137', port=5237)cursor = conn.cursor()try:#清空表,初始化测试环境cursor.execute ('delete from t_syscheck')except (dmPython.Error, Exception) as err:nulltry:#插入数据cursor.execute ("insert into t_syscheck values('192.168.163.136',?,?,?,?,?,?,?,?,?,?,?,?,?,?)",sys_name,sys_version,net_exter,net_inter,cpu_type,cpu_cores,cpu_frequency,cpu_threads_percore,cpu_cores_persocket,cpu_sockets,memory,sys_disk,nums_lun,java_version)print('python: insert success!')except (dmPython.Error, Exception) as err:print(err)cursor.close()conn.close()except (dmPython.Error, Exception) as err:print(err)
五.运行网站
[root@localhost dmtest]# python3 manage.py runserver 192.168.163.138:8000Watching for file changes with StatReloaderPerforming system checks...System check identified no issues (0 silenced).January 27, 2022 - 17:08:59Django version 3.1.7, using settings 'dmtest.settings'Starting development server at http://192.168.163.138:8000/Quit the server with CONTROL-C.
访问:http://192.168.163.138:8000/sysinfo/
>>> THE END <<<
相关推荐
干货 | dmPython连接数据库将查出的sql转化为excel表格

文章转载自达梦E学,如果涉嫌侵权,请发送邮件至:contact@modb.pro进行举报,并提供相关证据,一经查实,墨天轮将立刻删除相关内容。
