前言
据了解Prometheus作为监控系统,这个系统早已经比较火了,而钉钉在很多公司作为内部通讯软件取代了Slack,prometheus-webhook-dingtalk部署上之后,结合钉钉自定义机器人可以算是告警加推送接收的完成。
获取钉钉机器人
如何获取钉钉机器人, 参考文档: https://jingyan.baidu.com/article/d3b74d640c50cc1f77e6092d.html
配置好后可以简单测试钉钉告警机器人:
#linux命令
curl 'https://oapi.dingtalk.com/robot/send?access_token=xxxxxxxxxx' \
  -H 'Content-Type: application/json' \
  -d '{"msgtype": "text",
    "text": {
       "content": "雨纷纷,旧故里草木深"
    }
   }'
钉钉机器人返回结果

注意事项:“https://oapi.dingtalk.com/robot/send?access_token=xxxxxxxxxxxx”:为钉钉自定义机器人配置好后的 Webhook 地址,请保管好此 Webhook 地址,不要公布在外部网站上,泄露有安全风险。
prometheus-webhook-dingtalk部署使用
#linux二进制部署
wget https://github.com/timonwong/prometheus-webhook-dingtalk/releases/download/v0.3.0/prometheus-webhook-dingtalk-0.3.0.linux-amd64.tar.gz
tar -xvf prometheus-webhook-dingtalk-0.3.0.linux-amd64.tar.gz
cd prometheus-webhook-dingtalk-0.3.0.linux-amd64/
prometheus-webhook-dingtalk使用
prometheus-webhook-dingtalk的所有配置通过命令行参数完成,工具使用特别简单,不需要配置文件
usage: prometheus-webhook-dingtalk --ding.profile=DING.PROFILE [<flags>]

Flags:
  -h, --help              Show context-sensitive help (also try --help-long and --help-man).
      --web.listen-address=":8060"
                          The address to listen on for web interface.
      --ding.profile=DING.PROFILE ...
                          Custom DingTalk profile (can be given multiple times, <profile>=<dingtalk-url>).
      --ding.timeout=5s   Timeout for invoking DingTalk webhook.
      --template.file=""  Customized template file (see template/default.tmpl for example)
      --log.level=info    Only log messages with the given severity or above. One of: [debug, info, warn, error]
      --version           Show application version.
关于这里的 --ding.profile 参数:配置比较复杂,因为可以支持同时往多个钉钉自定义机器人发送报警消息,所以 --ding.profile 在命令行中指定多次,如下:
#启动方法
nohup ./prometheus-webhook-dingtalk --ding.profile="webhook1=https://oapi.dingtalk.com/robot/send?access_token=xxxxxxxxxxxx" --ding.profile="webhook2=https://oapi.dingtalk.com/robot/send?access_token=yyyyyyyyyyyy" 2>&1 &
#启动使用的端口默认8060
Alertmanager配置启动
Alertmanager也注意配置两个webhook1,webhook2的钉钉自定义机器人发送告警消息,加入相应的 receivers(注意下面的 name和url)即可:
cat alertmanager.yml
global:
  resolve_timeout: 5m
route:
  receiver: webhook1
  group_wait: 30s
  group_interval: 5m
  repeat_interval: 5m
  group_by: [alertname]
  routes:
  - receiver: webhook1
    group_wait: 10s
    match_re:             #匹配的alertname才由此receiver发送
      alertname: 'Memory Usage|CPU Usage'

  - receiver: webhook2
    group_wait: 10s
    match_re:             #匹配的alertname才由此receiver发送
      alertname: 'Server Status|Disk Usage'

receivers:
- name: webhook1
  webhook_configs:
  - url: http://192.168.134.131:8060/dingtalk/webhook1/send
    send_resolved: true

- name: webhook2
  webhook_configs:
  - url: http://192.168.134.131:8060/dingtalk/webhook2/send
    send_resolved: true

inhibit_rules:
  - source_match:
      severity: 'critical'
    target_match:
      severity: 'warning'
    equal: ['alertname', 'dev', 'instance']
启动Alertmanager
#Linux命令
nohup ./alertmanager --config.file="/software/alertmanager-0.23.0.linux-amd64/alertmanager.yml" 2>&1 &
ss -alntup | grep -i 9093      #确认9093端口是否启动,此时命令应该有输出。
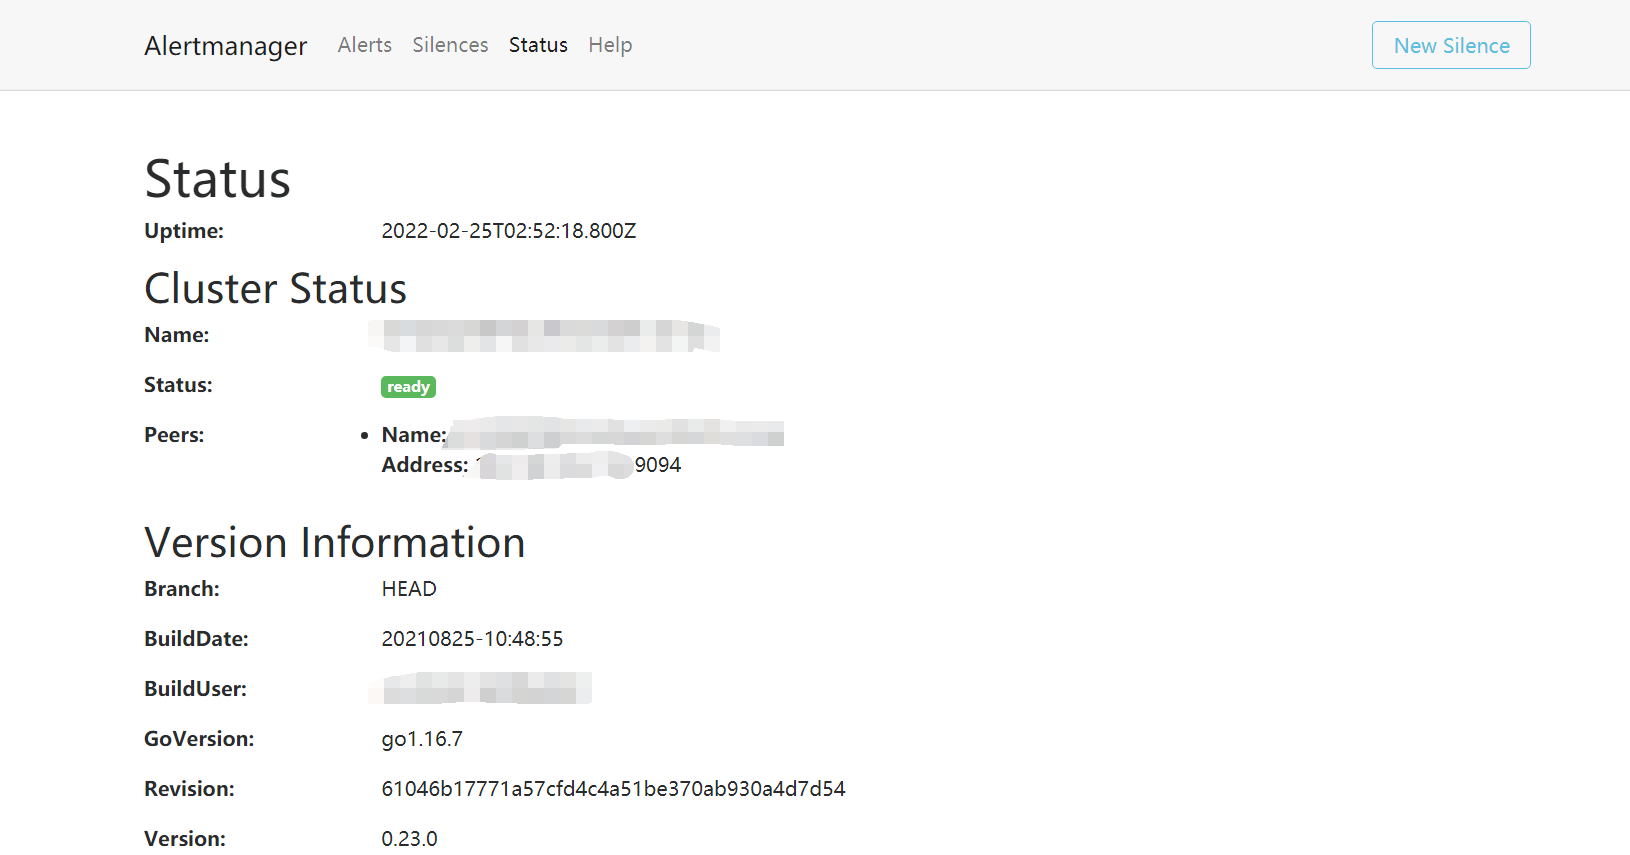
Alertmanager启动默认端口为9093,启动后访问http://ip:9093/查看alertmanager是否启动成功,如下:
Prometheus配置启动
如何配置Prometheus配置文件和告警规则,可通过参考文档https://www.modb.pro/db/334564的“prometheus配置及告警规则配置”章节
prometheus关联alertmanager
prometheus.yml中的alerting标签下配置上alertmanager的地址即可,配置如下:
# Alertmanager configuration
alerting:
  alertmanagers:
  - static_configs:
    - targets: ['192.168.134.131:9093']
prometheus启动
#Linux命令
nohup ./prometheus --config.file=/software/prometheus-2.33.3.linux-amd64/etc/prometheus.yml 2>&1 &
ss -alntup | grep -i 9090      #确认9090端口是否启动,此时命令应该有输出。
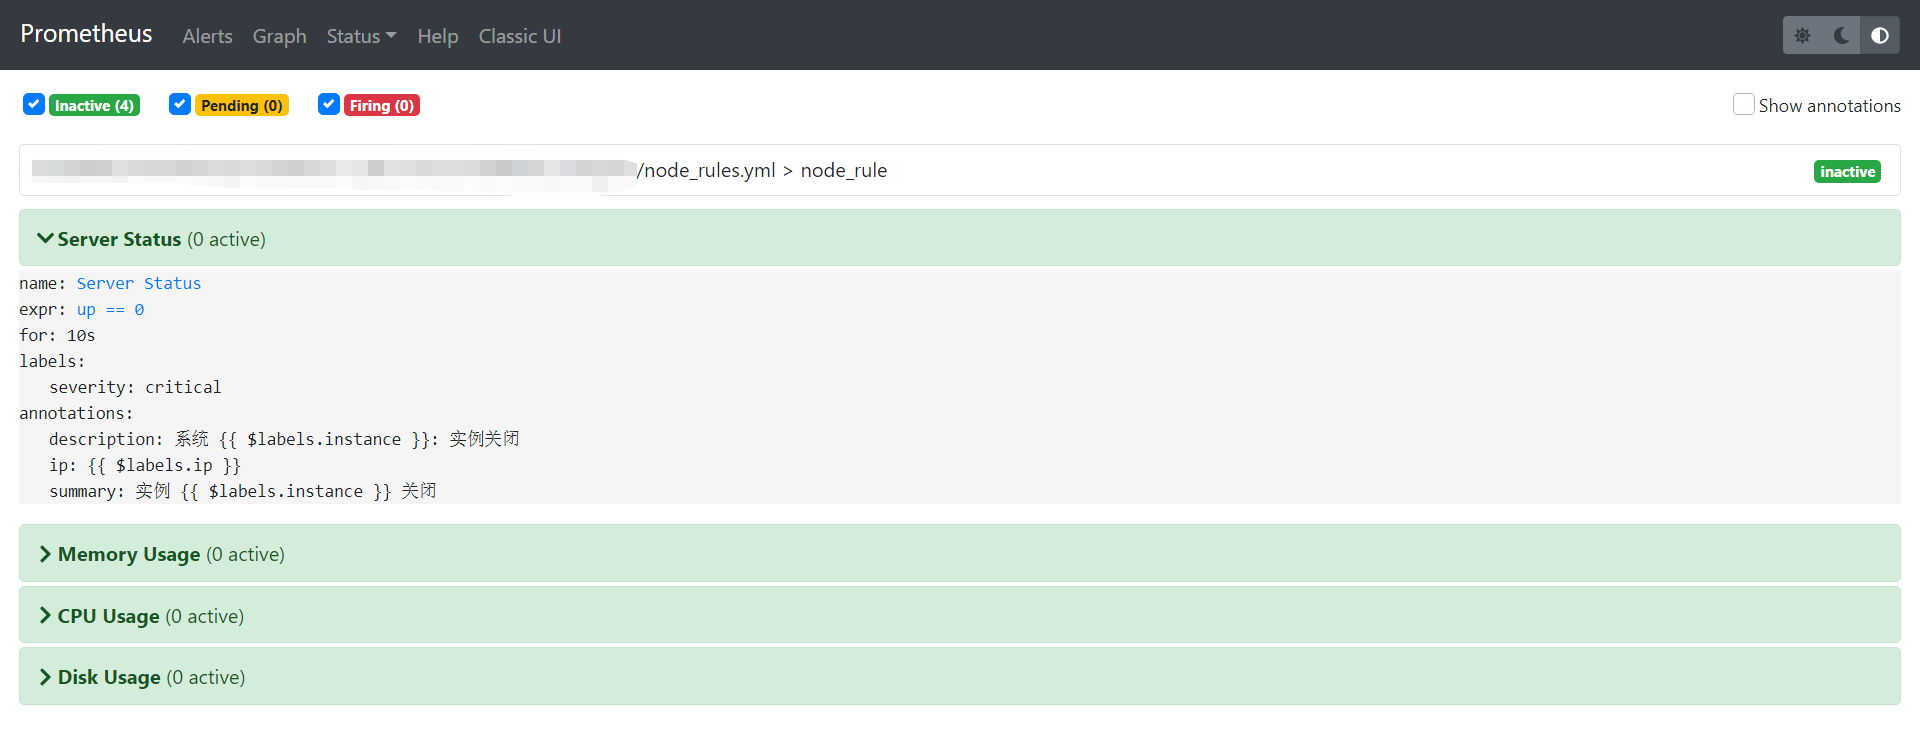
启动后访问http://ip:9090/查看prometheus是否启动成功,点击alerts就能看到配置的报警信息了,如下:
测试钉钉接收
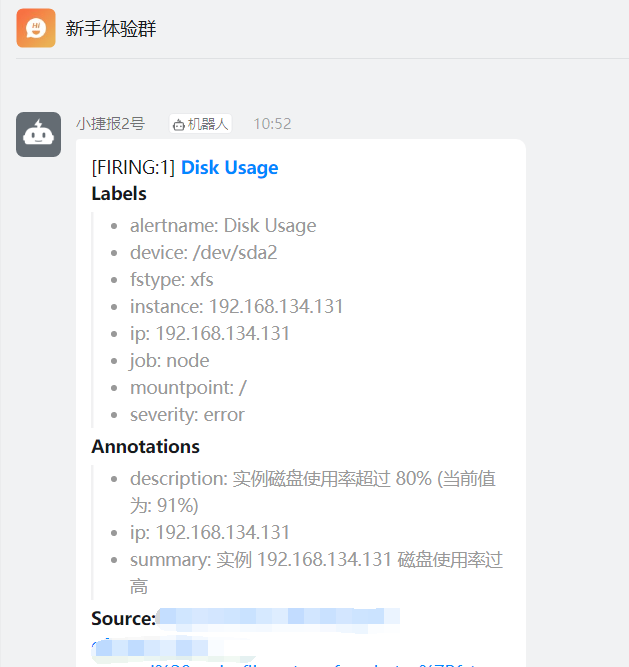
磁盘测试
说明:使用dd命令创建一个大文件,文件一定要占用盘存储空间的80%以上,磁盘告警由webhook2发出。
dd if=/dev/zero of=/test bs=1024M count=12
钉钉接收消息截图
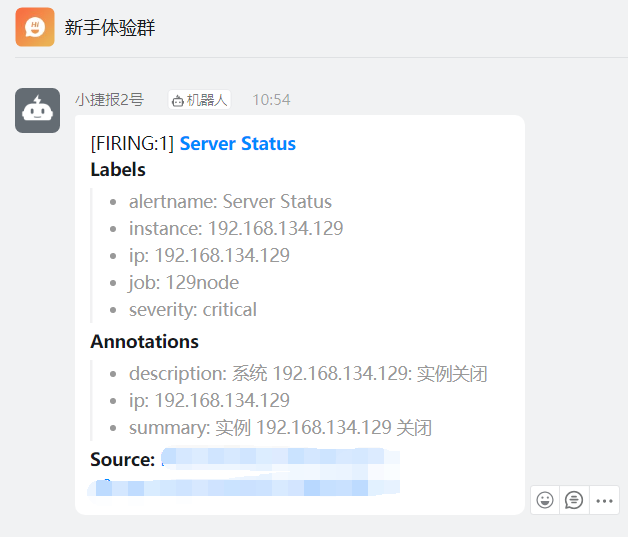
主机down测试
说明:直接对一个监控节点进行关机操作,主机状态告警由webhook2发出。
halt -p
钉钉接收消息截图
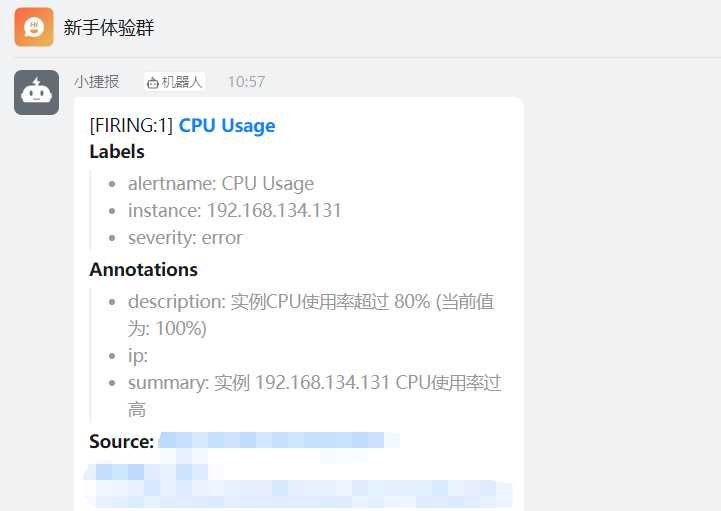
CPU测试
说明:下载stress软件,如果你Linux系统总的CPU线程有1个,那么设置测试的CPU一定要超过这个值。一般设置为2-3倍。CPU告警由webhook1发出。
stress --cpu 3 --timeout 6000
钉钉接收消息截图
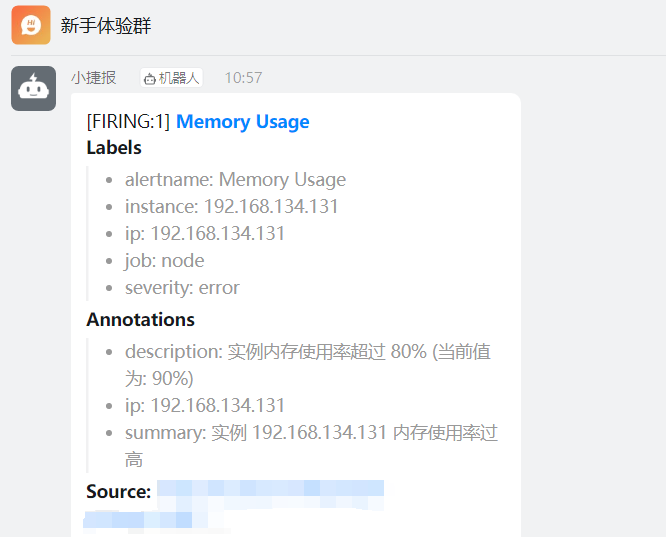
内存测试
说明:下载memtester软件,根据你实际的内存量设置合适的内存测试值,如你的主机有10G,那么按照设置告警的规则为80%才告警,你可以设置测试内存为9G。测试单位有B K M G自选。CPU告警由webhook1发出。
./memtester 700M
钉钉接收消息截图