


项目开发中有需要用到扫码识别的功能,这个功能在很多项目中都应该会使用到,于是找到了 Zxing-Embedded 的鸿蒙版,相信有安卓开发经验的同学都知道这个 Zxing-Embedded 框架,下面就开始使用。
ZXing Embedded 简介及使用方法
https://gitee.com/baijuncheng-open-source/zxing-embedded
安装方法如下:
方案一:本地源集成,用户可自定义修改
①复制 zxing_embedded 文件夹到 project 目录。
include ':entry', ':zxing-ohos-embedded'
③例如,我们需要修改 build.Gradle 文件的入口模块下添加依赖项:
dependencies {
    implementation fileTree(dir: 'libs', include: ['*.jar'])
    testCompile'junit:junit:4.12'
    implementation project('zxing-embeded')
}
方案二:线上 HAR 包集成(这种方便,不能修改 jar 包代码)
在本地项目的 build.gradled 的 dependencies 下添加:
implementation 'com.gitee.baijuncheng-open-source:Zxing-Embedded:1.0.0’
基本使用
创建 scanner.xml 文件,如下:
<?xml version="1.0" encoding="utf-8"?>
<DirectionalLayout
    xmlns:ohos="http://schemas.huawei.com/res/ohos"
    xmlns:ech="http://schemas.huawei.com/res/ohos-auto"
    ohos:height="match_parent"
    ohos:width="match_parent"
    ohos:orientation="vertical">

    <com.google.zxing.journeyapps.barcodescanner.DecoratedBarcodeView
        ohos:id="$+id:zxing_barcode_scanne"
        ohos:height="match_parent"
        ohos:width="match_parent"
        ech:zxing_scanner_layout="$layout:custom_barcode_scanner"/>

</DirectionalLayout>
提醒:导入任何自定义文件或者第三方库的时候必须加。
xmlns:ech="http://schemas.huawei.com/res/ohos-auto"
DecoratedBarcodeViewdde 的属性简介:

创建 cusstom_barcode_scammer.xml 文件:
//BarcodeView提供相机预览功能和图片解码功能
<com.google.zxing.journeyapps.barcodescanner.BarcodeView
    ohos:width="match_parent"
    ohos:height="match_parent"
    ohos:id="$+id:zxing_barcode_surface"
    app:zxing_framing_rect_width="250vp"
    app:zxing_framing_rect_height="50vp"/>``

//在BarcodeView视图之上,提供取景框,外部透明背景,扫描激光线
<com.google.zxing.journeyapps.barcodescanner.ViewfinderView
    ohos:width="match_parent"
    ohos:height="match_parent"
    ohos:id="$+id:zxing_viewfinder_view"
    app:zxing_possible_result_points="$color:zxing_custom_possible_result_points"
    app:zxing_result_view="$color:zxing_custom_result_view"
    app:zxing_viewfinder_laser="$color:zxing_custom_viewfinder_laser"
    app:zxing_viewfinder_laser_visibility="false"
    app:zxing_viewfinder_mask="$color:zxing_custom_viewfinder_mask"/>
创建 scannerAbility 文件:
public class ScannerAbility extends BaseAbility implements DecoratedBarcodeView.TorchListener, Observable, Component.ClickedListener {
      //
    private CaptureManager capture;
    private DecoratedBarcodeView barcodeScannerView;
    //闪光灯的
    private DirectionalLayout switchFlashlightLayout;
    private ViewfinderView viewfinderView;
    private BarcodeView barcodeView;

    @Override
    protected void onStart(Intent intent) {
        super.onStart(intent);
        //初始化视图
        super.setUIContent(ResourceTable.Layout_ability_scanner);
        initView();
    }

        //初始化视图变量
    private void initView(){
        barcodeScannerView = (DecoratedBarcodeView) findComponentById(ResourceTable.Id_zxing_barcode_scanne);
        barcodeScannerView.setTorchListener(this);
        barcodeView = (BarcodeView) findComponentById(ResourceTable.Id_zxing_barcode_surface);
        /*设置扫描框的宽高*/
        barcodeView.setFramingRectSize(new Size(1000,1000));
        switchFlashlightLayout= (DirectionalLayout) findComponentById(ResourceTable.Id_open_Flashlight);
        switchFlashlightLayout.setClickedListener(this);
        Image back = (Image)findComponentById(ResourceTable.Id_back_icon);
        back.setClickedListener(this);
        viewfinderView = (ViewfinderView) findComponentById(ResourceTable.Id_zxing_viewfinder_view);
        capture = new CaptureManager(this, barcodeScannerView);
        capture.initializeFromIntent(getIntent(), null);
        capture.setShowMissingCameraPermissionDialog(false);

      //设置
        changeMaskColor(null);
        changeLaserVisibility(false);
        BusHelper.getINSTANCE().register("CameraPreviewStarted", this);
    }

      //改变背景颜色
    public void changeMaskColor(Component view) {
        int color = Color.argb(80, 0,0,0);
        viewfinderView.setMaskColor(color);
    }

    public void changeLaserVisibility(boolean visible) {
        viewfinderView.setLaserVisibility(visible);
    }


      //下面控制capture
    @Override
    protected void onActive() {
        super.onActive();
        capture.onResume();
    }

    @Override
    protected void onInactive() {
        super.onInactive();
        capture.onPause();
    }

    @Override
    public void onSaveAbilityState(PacMap outState) {
        super.onSaveAbilityState(outState);
        capture.onSaveInstanceState(outState);
    }

    @Override
    public void onRestoreAbilityState(PacMap inState) {
        super.onRestoreAbilityState(inState);
        capture.initializeFromIntent(getIntent(), inState);
        capture.setShowMissingCameraPermissionDialog(false);
        capture.decode();
    }

    @Override
    protected void onStop() {
        super.onStop();
        BusHelper.getINSTANCE().unRegister(this);
        capture.onDestroy();
    }


    @Override
    public void onRequestPermissionsFromUserResult(int requestCode, String[] permissions, int[] grantResults) {
        super.onRequestPermissionsFromUserResult(requestCode, permissions, grantResults);
        capture.onRequestPermissionsResult(requestCode, permissions, grantResults);
    }

    //解码
    @Override
    public void onSubscribe(Object object) {
        if (capture != null)
            capture.decode();
    }
}
我这里用到 RxBus.getDefault().send 方法传递消息,是由于项目用了 fraction 来承载。
//扫描结果的回调
@Override
protected void onAbilityResult(int requestCode, int resultCode, Intent data) {
    if (requestCode != CUSTOMIZED_REQUEST_CODE && requestCode != REQUEST_CODE) {
        // This is important, otherwise the result will not be passed to the fragment
        super.onAbilityResult(requestCode, resultCode, data);
        return;
    }
    switch (requestCode) {
        case REQUEST_CODE: {
            IntentResult result = IntentIntegrator.parseAbilityResult(requestCode, resultCode, data);
            if (result != null) {
                String toast;
                if (result.getContents() == null) {
                    toast = "Cancelled from fragment";
                } else {
                    toast = "Scanned from fragment: " + result.getContents();
                    // At this point we may or may not have a reference to the activity
                    HashMap parame = new HashMap();
                    parame.put(Constants.EVENT_IN_SCANNER_RESULT,result.getContents());
                    RxBus.getDefault().send(parame, Constants.EVENT_IN_SCANNER_RESULT);
                }
            }
            return;
        }
        default:
            break;
    }
}
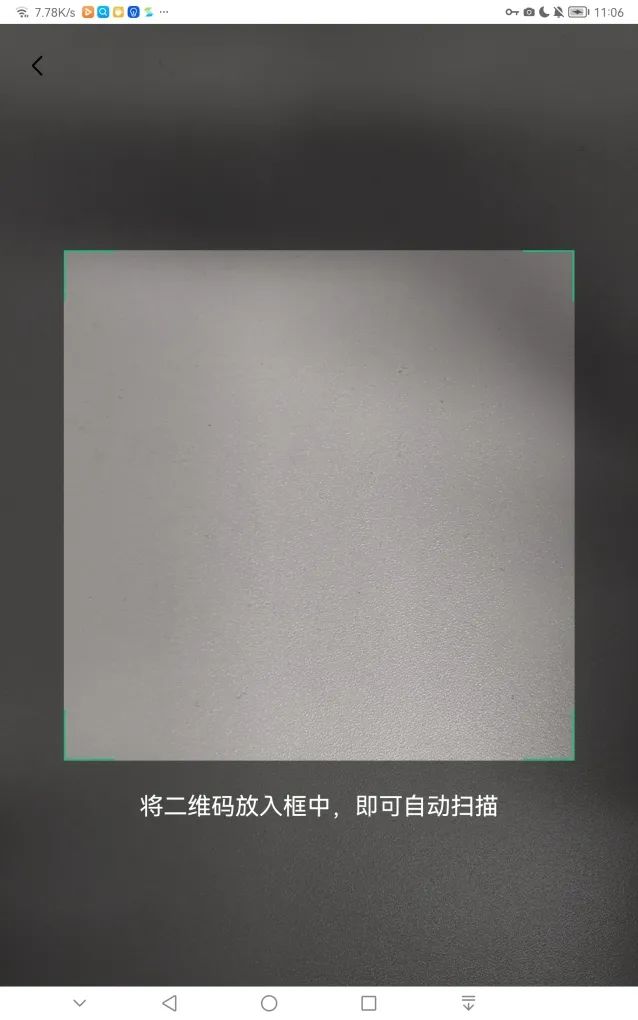
效果下图:

自定义扫描界面
因为 R.layout.zxing_barcode_scanner 是源码中的布局文件,无法直接修改,所以还要重写一份布局文件给 DecoratedBarcodeView 加载,代码如下:
public class CustomViewfinderView extends ViewfinderView {

    /**
     * 重绘时间间隔
     */
    public static final long CUSTOME_ANIMATION_DELAY = 16;


    /* ******************************************    边角线相关属性    ************************************************/

    /**
     * "边角线长度/扫描边框长度"的占比 (比例越大,线越长)
     */
    public float mLineRate = 0.1F;

    /**
     * 边角线厚度 (建议使用dp)
     */
    public float mLineDepth =   4;

    /**
     * 边角线颜色
     */
    public Color mLineColor =  new Color(Color.getIntColor("#1EBB81"));


    public CustomViewfinderView(Context context, AttrSet attrSet) {
        super(context, attrSet);
    }


    @Override
    public void onDraw(Component component, Canvas canvas) {
        super.onDraw(component, canvas);
      //刷新扫描框的尺寸
        refreshSizes();
        if (framingRect == null || cameraPreview.getPreviewFramingRect() == null) {
            return;
        }
                //获取扫描框的位置
        Rect frame = framingRect;
        Rect previewFrame = cameraPreview.getPreviewFramingRect();

        int width = canvas.getLocalClipBounds().getWidth();
        int height = canvas.getLocalClipBounds().getHeight();


        //绘制4个角
        paint.setColor(mLineColor); // 定义画笔的颜色即4个角的颜色
      //画左上角
        canvas.drawRect(frame.left, frame.top, frame.left + frame.getWidth() * mLineRate, frame.top + mLineDepth, paint);
        canvas.drawRect(frame.left, frame.top, frame.left + mLineDepth, frame.top + frame.getHeight() * mLineRate, paint);

        //画右上角
        canvas.drawRect(frame.right - frame.getWidth() * mLineRate, frame.top, frame.right, frame.top + mLineDepth, paint);
        canvas.drawRect(frame.right - mLineDepth, frame.top, frame.right, frame.top + frame.getHeight() * mLineRate, paint);

            //画左下角
        canvas.drawRect(frame.left, frame.bottom - mLineDepth, frame.left + frame.getWidth() * mLineRate, frame.bottom, paint);
        canvas.drawRect(frame.left, frame.bottom - frame.getHeight() * mLineRate, frame.left + mLineDepth, frame.bottom, paint);

            //画右下角
        canvas.drawRect(frame.right - frame.getWidth() * mLineRate, frame.bottom - mLineDepth, frame.right, frame.bottom, paint);
        canvas.drawRect(frame.right - mLineDepth, frame.bottom - frame.getHeight() * mLineRate, frame.right, frame.bottom, paint);


        // 绘制外部(即框架矩形外)变暗
        Color color = new Color(resultBitmap != null ? resultColor : maskColor);
        paint.setColor(color);
        canvas.drawRect(0, 0, width, frame.top, paint);
        canvas.drawRect(0, frame.top, frame.left, frame.bottom + 1, paint);
        canvas.drawRect(frame.right + 1, frame.top, width, frame.bottom + 1, paint);
        canvas.drawRect(0, frame.bottom + 1, width, height, paint);
        }
    }
}
onDraw 方法中的大部分代码 Copy 自 ViewfinderView,笔者添加部分逻辑:是边角线的绘制。
代码的核心是在 onDraw 方法的第 5 行代码:Rect frame = framingRect;
接下来,我们用 CustomViewfinderView 替换掉 ViewfinderView(如下所示):
<com.google.zxing.journeyapps.barcodescanner.BarcodeView
    ohos:width="match_parent"
    ohos:height="match_parent"
    ohos:id="$+id:zxing_barcode_surface"
    app:zxing_framing_rect_width="250vp"
    app:zxing_framing_rect_height="50vp"/>

//自定义的view
<com.sgcc.evs.phone.view.CustomViewfinderView
    ohos:width="match_parent"
    ohos:height="match_parent"
    ohos:id="$+id:zxing_viewfinder_view"
    app:zxing_possible_result_points="$color:zxing_custom_possible_result_points"
    app:zxing_result_view="$color:zxing_custom_result_view"
    app:zxing_viewfinder_laser="$color:zxing_custom_viewfinder_laser"
    app:zxing_viewfinder_laser_visibility="false"
    app:zxing_viewfinder_mask="$color:zxing_custom_viewfinder_mask"/>
最后,运行结果如下(如图所示):
总结
代码SHOW出你的爱

👇扫码报名今晚的鸿蒙直播课👇


求分享
求点赞
求在看
文章转载自鸿蒙技术社区,如果涉嫌侵权,请发送邮件至:contact@modb.pro进行举报,并提供相关证据,一经查实,墨天轮将立刻删除相关内容。
