


碰一碰简单来说就是,使用 NFC 拉起配网 FA,入网之后,使用控制 FA 进行设备控制。

总结下来开发碰一碰能力需要 3 部分:
设备端:安装碰一碰固件程序。
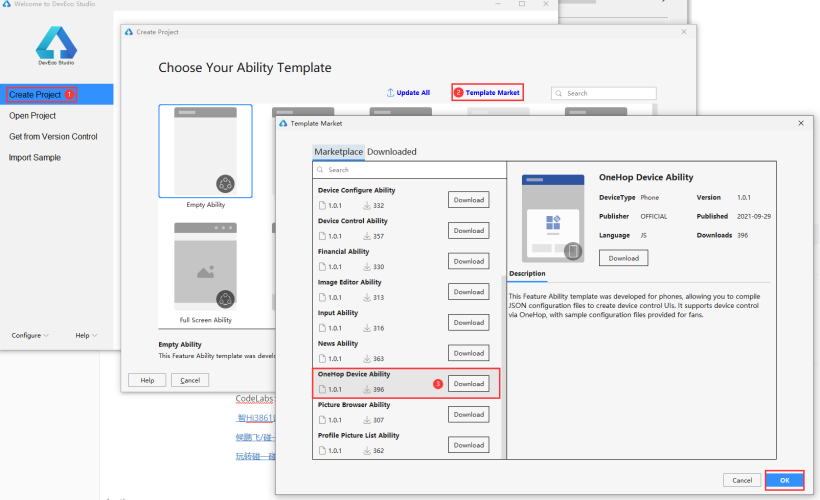
手机端:可以使用原子化服务配网模板、控制模板。
NFC 标签:存放设备端信息。用原子化服务的包名→生成 Product ID,用于拉起 FA。
接下来参考官方 demo 和 OneHop 模板来体验下碰一碰的流程。
设备端
①源码下载
repo init -u https://gitee.com/openharmony/manifest.git -b refs/tags/OpenHarmony_release_v1.1.0 --no-repo-verify
repo sync -c
关于 Ubuntu 编译环境搭建可以参考软通动力大佬的帖子,写的特别详细:
https://harmonyos.51cto.com/posts/9453
首先要完成官方镜像的拉取和编译,成功之后在尝试安装 OneHop 设备端代码,设备端代码获取链接:
https://gitee.com/openharmony-sig/knowledge_demo_smart_home/tree/master/dev/team_x/demo_winder
②源码修改
修改文件:
device/hisilicon/hispark_pegasus/hi3861_adapter/hals/communication/wifi_lite/wifiservice/source/wifi_device.c
代码如下:
static void HiWifiWpaEventCb(const hi_wifi_event *hisiEvent)
{
    if (hisiEvent == NULL) {
        return;
    }
    /*注释此处
    if (LockWifiEventLock() != WIFI_SUCCESS) {
        return;
    }
    */
    for (int i = 0; i < WIFI_MAX_EVENT_SIZE; i++) {
        if (g_wifiEvents[i] == NULL) {
            continue;
        }
        DispatchEvent(hisiEvent, g_wifiEvents[i]);
    }
    /*注释此处
    if (UnlockWifiEventLock() != WIFI_SUCCESS) {
        return;
    }
    */
}
打开下面文件,注意取消前面的#号:
device/hisilicon/hispark_pegasus/sdk_liteos/build/config/usr_config.mk
- # CONFIG_I2C_SUPPORT is not set
+ CONFIG_I2C_SUPPORT=y
为了方便调试需要关闭 test 子系统,在 vendor\hisilicon\hispark_pegasus\config.json 文件中,删除下面代码,注意逗号。
,
      {
       "subsystem": "test",
       "components": [
         { "component": "xts_acts", "features":[] },
         { "component": "xts_tools", "features":[] }
        ]
      }
最后将 app 添加到编译框架,在 applications/sample/wifi-iot/app/BUILD.gn 文件,将 features 字段中的 startup 修改为 winder,并添加 winder 模块的索引 deps。
 import("//build/lite/config/component/lite_component.gni")

   lite_component("app") {
   #将startup修改为winder
   features = [
       "winder",
   ]
   #添加winder模块的索引deps
   deps = [ "//applications/sample/wifi-iot/app/hals:hi3861_hals" ]
 }
③构建编译
1.1.0 的构建使用的是 hb 命令,方式如下:
hb set                # 设置编译路径
.                    # 选择当前路径
# hisilicon            # 选择编译的目标类型
    > wifiiot_hispark_pegasus
      ipcamera_hispark_aries
      ipcamera_hispark_taurus

hb build -b debug    # 执行编译
烧录推荐使用 HiBurn,简单高效,一张图就明白了。


最后烧录完成提示:
Execution Successful
手机端
①编辑模板
手机端就简单了,安装 DevEco Studio 3.0 Beta1 及以上版本,然后 IDE 自带 OneHop 的模板。
https://developer.harmonyos.com/cn/develop/deveco-studio#download_beta
②获取证书
源码不怎么需要修改,但是在真机上运行程序,需要在线获取签名证书。基本流程就是在 AppGallery Connect 注册项目和应用,然后用 IDE 软件自动获取。
https://developer.huawei.com/consumer/cn/service/josp/agc/index.html#/myProject
这部分出问题参考官方文档吧,文档很详细:
https://developer.harmonyos.com/cn/docs/documentation/doc-guides/ide_debug_device-0000001053822404#section837891802519
再就是为了方便调试可以先关闭免安装功能(在 src/main/config.json 中,将"installationFree"设置为 false)这样桌面会生成应用图标,无需 NFC 贴纸,打开图标一样可以实现设备配网、控制。
"installationFree": false
③测试 APP
如果这样配网完成还是不能自动拉起控制 FA,那么检查下 default/pages/netconfig/netconfig.js,检查下这个函数参数是否正确。
let target = {
    bundleName: 'com.liangzili.myonehop.hmservice',
    abilityName: 'com.liangzili.myonehop.ControlMainAbility',
    deviceType: 1,
    data: {

        session_id: getApp(this).ConfigParams.deviceInfo.sessionId,
        product_id: getApp(this).Product.productId,
        product_name: getApp(this).Product.productName
    }
}
FeatureAbility.startAbility(target);
NFC 标签
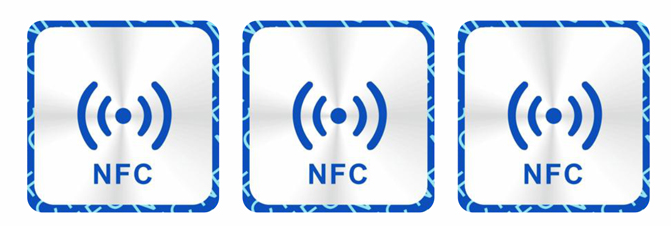
①制作贴纸
首先当然是需要购买一些 NFC 贴纸,我使用的是下图这一种。
②设置意图
所以需要登录华为开发者门户设置下,当检测到设置的 Product ID 是要执行的操作。
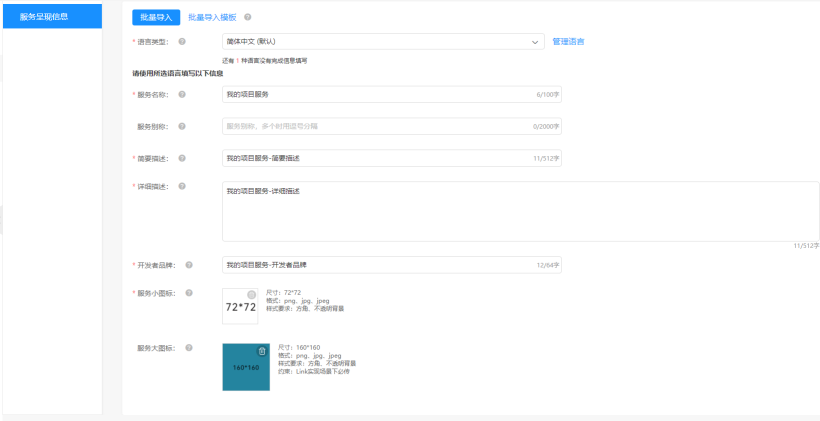
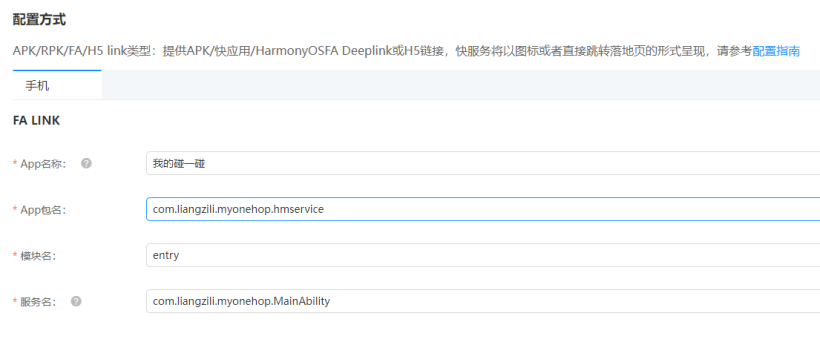
“App 包名”填写为 config.json 文件中的 bundleName 字段取值。
“模块名”填写为入口原子化服务(即设备配网模块)config.json 文件中的 moduleName 字段取值。
“服务名”填写为入口原子化服务(即设备配网模块)config.json 文件中的 mainAbility 字段取值。
总结
👇扫码报名下周三的鸿蒙直播课👇


求分享
求点赞
求在看
