


本项目就是基于 ArkUI 中的声明式编程开发,语言 ETS(Extended Type Script),代码都在 ets 文件中编写,这个文件用于描述 UI 布局、样式、事件交互和页面逻辑。

官方文档地址如下:
https://developer.harmonyos.com/cn/docs/documentation/doc-guides/ui-ts-overview-0000001192705715
https://developer.harmonyos.com/cn/docs/documentation/doc-references/ts-framework-directory-0000001111581264
之前一篇【HarmonyOS ArkUI 之仿微信朋友圈图片预览】仿微信朋友圈实现列表展示,九宫格小图图片展示,点击图片进行图片预览,图片左右滑动切换。
本文介绍仿照微信选择图片、多选图片、点击浏览大图,删除选择的图片,因为用的 ets 语言开发,为了方便演示,图片数据没有获取手机本地图片,使用内置资源。
效果演示如下:

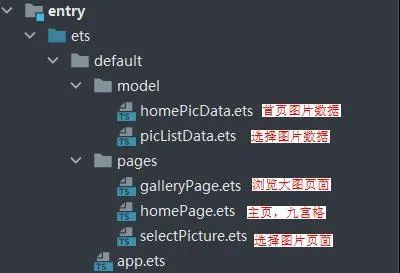
项目类说明:
主要知识点
①九宫格列表和选择图片列表
https://developer.harmonyos.com/cn/docs/documentation/doc-references/ts-container-grid-0000001158261259
②浏览大图切换页面
https://developer.harmonyos.com/cn/docs/documentation/doc-references/ts-container-swiper-0000001111421434
③循环渲染迭代数组(目前第二个参数中 itemGenerator: (item: any, index?: number) => void index 不能使用)
https://developer.harmonyos.com/cn/docs/documentation/doc-references/ts-rending-control-syntax-foreach-0000001149978669
④基础的组件
https://developer.harmonyos.com/cn/docs/documentation/doc-references/ts-basic-components-image-0000001111581276
https://developer.harmonyos.com/cn/docs/documentation/doc-references/ts-basic-components-text-0000001111581280
https://developer.harmonyos.com/cn/docs/documentation/doc-references/ts-basic-components-button-0000001158141265
代码解析
①图片列表
主要是网格容器 Grid 组件和渲染组件 ForEach,注释也很清楚,让你更快掌握知识点。
@Entry
@Component
struct Test {
  @State private listPicture: Array<Resource> = [
    $r("app.media.ic_picture1"), $r("app.media.ic_picture2"), $r("app.media.ic_picture3"),
    $r("app.media.ic_picture4"), $r("app.media.ic_picture5"), $r("app.media.ic_picture6"),
    $r("app.media.ic_picture7"), $r("app.media.ic_picture8"), $r("app.media.ic_picture9"),
    $r("app.media.ic_picture10"), $r("app.media.ic_picture11"), $r("app.media.ic_picture12")
  ]

  build() {
    Column() {
      // 网格图片列表
      Grid() {
        ForEach(this.listPicture, item => {
          GridItem() {
            // 图片
            Image(item)
              .width('100%')
              .height(90)
              .objectFit(ImageFit.Cover) // 缩放类型
          }
        }, item => item.toString()) // ForEach第三个参数需要设置,否则模拟器不显示
      }.columnsTemplate('1fr 1fr 1fr 1fr') // 4等分列
      .columnsGap(2) // 列间距
      .rowsGap(2) // 行间距
    }
    .width('100%')
    .height('100%')
  }
}
②点击选择框
处理选中和未选中效果,主要点击当前项时,根据选中状态进行替换列表中的对象,设置按钮的文字和启用状态,框架会自动更新界面。

项目中部分代码:
......
  /**
   * 点击是否选中
   */
  clickIsSelected(item:PictureData) {
    // 点击未选中 且 选中数大于总数,则返回
    if (!item.isSelected && this.listSelectPicture.length >= this.total) {
      return
    }

    //全部列表:替换元素、更新选中状态
    let newItem = {
      id: item.id,
      picResource: item.picResource,
      isSelected: !item.isSelected
    }
    this.listAllPicture.splice(item.id, 1, newItem)

    //选中的列表:选中就添加,未选中删除
    if (newItem.isSelected) {
      this.listSelectPicture.push(item.picResource)
    } else {
      let index = this.listSelectPicture.indexOf(item.picResource)
      this.listSelectPicture.splice(index, 1)
    }

    // 根据选中的数量,显示按钮状态和文字
    this.isEnabledComplete = this.listSelectPicture.length != 0
    if(this.listSelectPicture.length == 0){
      this.completeText = '完成';
    }else{
      this.completeText = `完成(${this.listSelectPicture.length}/${this.total})`;
    }
  }
......
③显示选中的图片
需要注意的点:根据选择的图片总数,显示或隐藏添加按钮。


项目中部分代码:
......
  /**
   * 在build函数之前执行
   */
  private aboutToAppear() {
    // 首次进入显示添加按钮
    let showAddData = new HomePictureData(-1, $r('app.media.ic_add'), true)
    this.listPicture.push(showAddData)
  }

  /**
   * 页面显示触发
   */
  private onPageShow() {
    try {
      let list: Array<Resource> = router.getParams().listSelectPicture
      // 存入图片
      for (let listKey of list) {
        this.listSelectPicture.push(listKey)
      }
      // 清空旧数据
      this.listPicture = []
      // 添加新的数据,存入id
      for (var i = 0;i < this.listSelectPicture.length; i++) {
        let resource = this.listSelectPicture[i]
        this.listPicture.push(new HomePictureData(i, resource, false))
      }
      // 判断是否小于总数,设置最后一位显示加号
      if (this.listSelectPicture.length < this.total) {
        let showAddData = new HomePictureData(-1, $r('app.media.ic_add'), true)
        this.listPicture.push(showAddData)
      }
    } catch (err) {
      console.log(`router错误 code: ${err.code}, msg: ${err.msg}`)
    }
  }
......
④浏览大图
主要使用滑动容器组件 Swiper,根据上个页面传的操作值:是否删除、显示删除按钮。


简单示例:
@Entry
@Component
struct Test {
  @State private listPicture: Array<Resource> = [
    $r("app.media.ic_picture1"), $r("app.media.ic_picture2"), $r("app.media.ic_picture3"),
    $r("app.media.ic_picture4"), $r("app.media.ic_picture5"), $r("app.media.ic_picture6"),
    $r("app.media.ic_picture7"), $r("app.media.ic_picture8"), $r("app.media.ic_picture9"),
    $r("app.media.ic_picture10"), $r("app.media.ic_picture11"), $r("app.media.ic_picture12")
  ]
  @State imageIndex:number = 0

  build() {
    Column() {
      // 切换页面
      Swiper() {
        ForEach(this.listPicture, item => {

          // 图片
          Image(item)
            .width('100%')
            .height('100%')
            .objectFit(ImageFit.Cover) //缩放类型

        }, item => item.toString())
      }
      .width('100%')
      .height('100%')
      .index(this.imageIndex)// 设置当前索引
      .indicator(false)// 不显示指示器
      .loop(false) // 关闭循环
      .onChange((index: number) => {// 索引变化监听
        // 更新索引值
        this.imageIndex = index
      })
    }
    .width('100%')
    .height('100%')
  }
}
项目地址如下(需要登录才能看到演示图):
https://gitee.com/liangdidi/PictureSelectionDemo.git

求分享
求点赞
求在看
文章转载自鸿蒙技术社区,如果涉嫌侵权,请发送邮件至:contact@modb.pro进行举报,并提供相关证据,一经查实,墨天轮将立刻删除相关内容。
