


一、MGR规划
1.1、 硬件配置
主机名 | OS版本 | CPU | MEMORY | HDDsize |
mysql1 | Centos7.8 | 4 core | 8G | 100GB |
mysql2 | Centos7.8 | 4 core | 8G | 100GB |
mysql3 | Centos7.8 | 4 core | 8G | 100GB |
1.2、IP规划
主机名 | publicIP | privateIP | 复制用户 | 角色 |
mysql1 | 172.19.200.171 | 192.168.56.171 | repl | 主 |
mysql2 | 172.19.200.172 | 192.168.56.172 | repl | 从 |
mysql3 | 172.19.200.173 | 192.168.56.173 | repl | 从 |
1.3、MYSQL规划
主机名 | 版本 | 软体路径 | DB数据路径 | my.cnf |
mysql1 | 8.0.26 | /u02/app/mysql | /u02/app/data3306 | /u02/app/my3306.cnf |
mysql2 | 8.0.26 | /u02/app/mysql | /u02/app/data3306 | /u02/app/my3306.cnf |
mysql3 | 8.0.26 | /u02/app/mysql | /u02/app/data3306 | /u02/app/my3306.cnf |
1.4、系统安装
CentOS 7.8 安装省略。。。
1.5、系统配置
cat etc/hosts
##public
172.19.200.171 mysql1
172.19.200.172 mysql2
172.19.200.173 mysql3
##private
192.168.56.171 mysql1-priv
192.168.56.172 mysql2-priv
192.168.56.173 mysql3-priv
1.6、系统参数设定
参数设定请参考
https://mp.weixin.qq.com/s/kySX_2MSiEX3Tk0-5YRkFg
二、Mysql8.0.26安装
Mysql安装请参考
https://dev.mysql.com/doc/refman/8.0/en/binary-installation.html
https://mp.weixin.qq.com/s/PeM0aauUHLPZavl6t88H6w
三、配置MGR
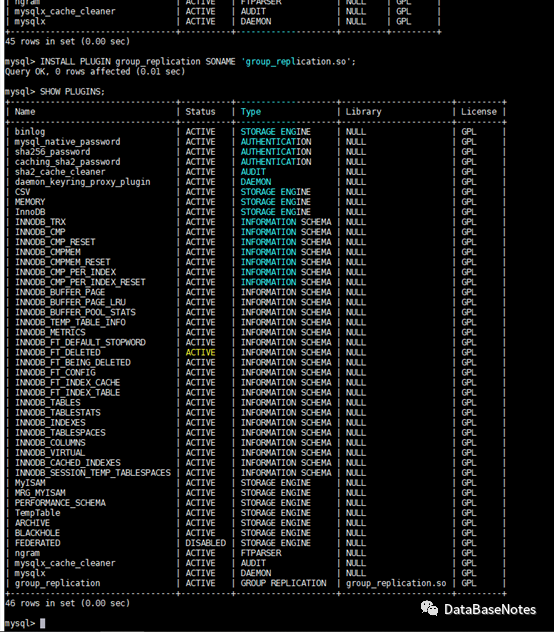
3.1、安装mgr插件
INSTALL PLUGIN group_replication SONAME 'group_replication.so';
SHOW PLUGINS;
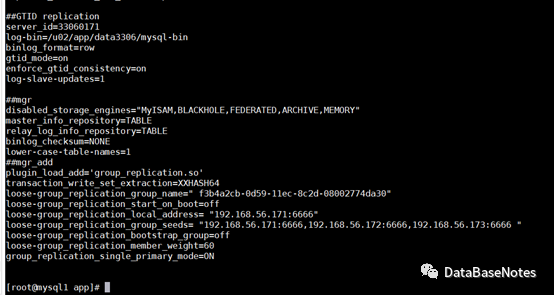
3.2、编辑mgr相关参数
vi my3306.cnf
----add 以下内容(我这里用port6666作为MGR内部端口)
##GTID replication
server_id=33060171
log-bin=/u02/app/data3306/mysql-bin
binlog_format=row
gtid_mode=on
enforce_gtid_consistency=on
log-slave-updates=1
##mgr
disabled_storage_engines="MyISAM,BLACKHOLE,FEDERATED,ARCHIVE,MEMORY"
master_info_repository=TABLE
relay_log_info_repository=TABLE
binlog_checksum=NONE
lower-case-table-names=1
##mgr_add
plugin_load_add='group_replication.so'
transaction_write_set_extraction=XXHASH64
loose-group_replication_group_name=" f3b4a2cb-0d59-11ec-8c2d-08002774da30"
loose-group_replication_start_on_boot=off
loose-group_replication_local_address="192.168.56.171:6666"
loose-group_replication_group_seeds= "192.168.56.171:6666,192.168.56.172:6666,192.168.56.173:6666"
loose-group_replication_bootstrap_group=off
loose-group_replication_member_weight=60
group_replication_single_primary_mode=ON
3.3、重启DB
mysqladmin -uroot -p -S/u02/app/data3306/mysql.sock shutdown
mysqld_safe --defaults-file=/u02/app/my3306.cnf &
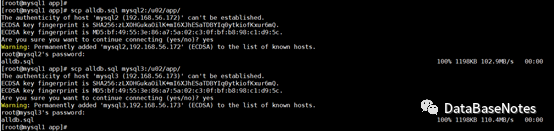
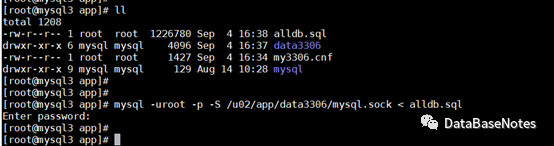
3.4、主库备份,从库恢复
Master:(mysql1)
mysqldump -uroot -p -S/u02/app/data3306/mysql.sock --all-databases --triggers --routines --events> alldb.sql

scp alldb.sql mysql2:/u02/app/
scp alldb.sql mysql3:/u02/app/
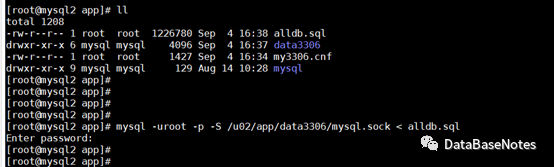
slave:(mysq2/mysql3)
mysql -uroot -p -S/u02/app/data3306/mysql.sock < alldb.sql
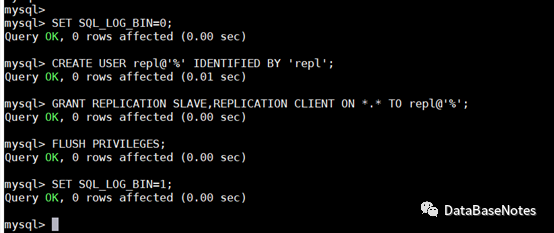
3.5、主库创建帐号并授权
SET SQL_LOG_BIN=0;
CREATE USER repl@'%' IDENTIFIED BY 'repl';
GRANT REPLICATION SLAVE,REPLICATION CLIENT ON *.* TO repl@'%';
FLUSH PRIVILEGES;
SET SQL_LOG_BIN=1;
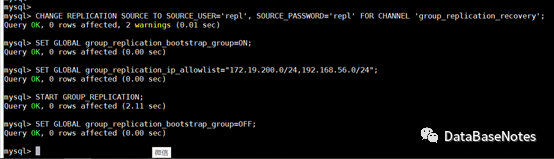
3.6、主库引导组复制
CHANGE REPLICATION SOURCE TO SOURCE_USER='repl', SOURCE_PASSWORD='repl' FOR CHANNEL 'group_replication_recovery';
SET GLOBAL group_replication_bootstrap_group=ON;
SET GLOBAL group_replication_ip_allowlist="172.19.200.0/24,192.168.56.0/24";
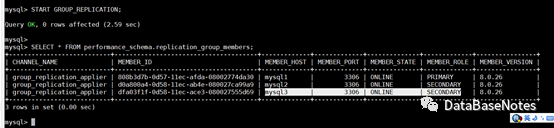
START GROUP_REPLICATION;
SET GLOBALgroup_replication_bootstrap_group=OFF;
3.7、查看MGR组信息
SELECT * FROMperformance_schema.replication_group_members;

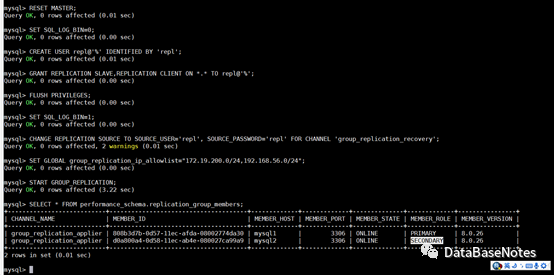
3.8、加入第二个成员slave节点
RESET MASTER;
SET SQL_LOG_BIN=0;
CREATE USERrepl@'%' IDENTIFIED BY 'repl';
GRANT REPLICATION SLAVE,REPLICATION CLIENT ON *.* TO repl@'%';
FLUSH PRIVILEGES;
SET SQL_LOG_BIN=1;
CHANGE REPLICATION SOURCE TO SOURCE_USER='repl', SOURCE_PASSWORD='repl' FOR CHANNEL 'group_replication_recovery';
SET GLOBAL group_replication_ip_allowlist="172.19.200.0/24,192.168.56.0/24";
START GROUP_REPLICATION;
--查看mgr组信息
SELECT * FROM performance_schema.replication_group_members;
3.9、加入第3个成员slave节点
同样按照第8步骤,加入第三个节点。
--查看mgr组信息
SELECT * FROM performance_schema.replication_group_members;
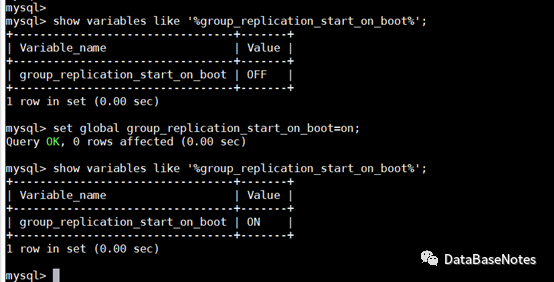
3.10、MGR自启动设置
show variables like '%group_replication_start_on_boot%';
set global group_replication_start_on_boot=on;
备注:建议同步修改my3306.cnf文件
vi my3306.cnf
loose-group_replication_start_on_boot=off --> ON;
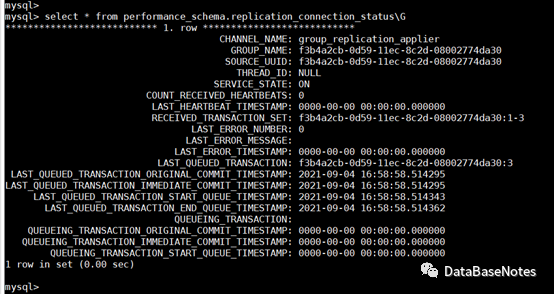
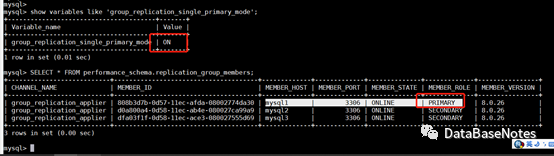
3.11、检查同步状态
--查看sql如下:
SELECT * FROM performance_schema.replication_group_members;
SELECT * FROM performance_schema.replication_group_members;
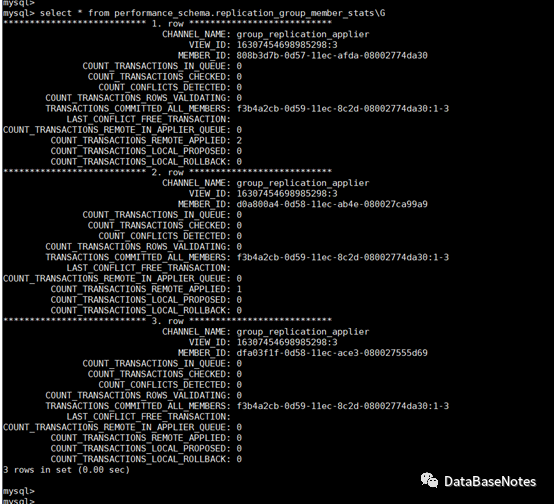
select * from performance_schema.replication_group_member_stats;
select * from performance_schema.replication_connection_status;
3.12、参考文档
https://dev.mysql.com/doc/refman/8.0/en/group-replication-deploying-in-single-primary-mode.html
18.2.1.1 Deploying Instances for Group Replication
18.2.1.2 Configuring an Instance for Group Replication
18.2.1.3 User Credentials For Distributed Recovery
18.2.1.4 Launching Group Replication
18.2.1.5 Bootstrapping the Group
18.2.1.6 Adding Instances to the Group
四、验证数据同步
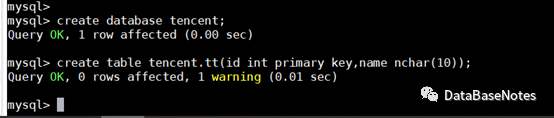
4.1、主库测试DDL操作
create database tencent;
create table tencent.tt(id int primary key,name nchar(10));
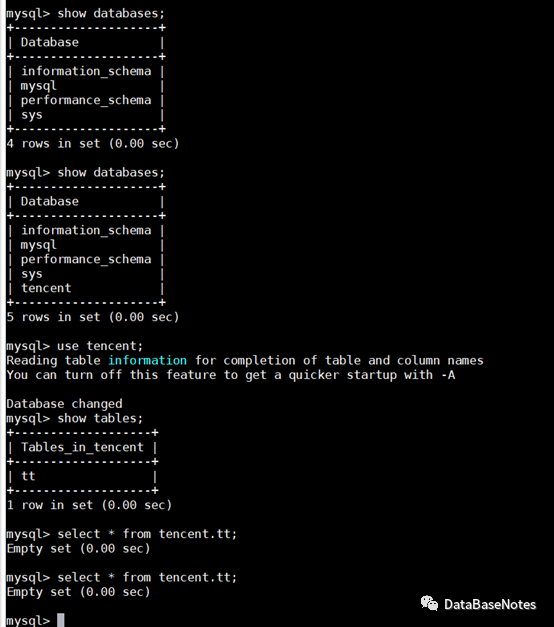
4.2. 从库查看db和table是否同步
show databases;
use tencent;
show tables;
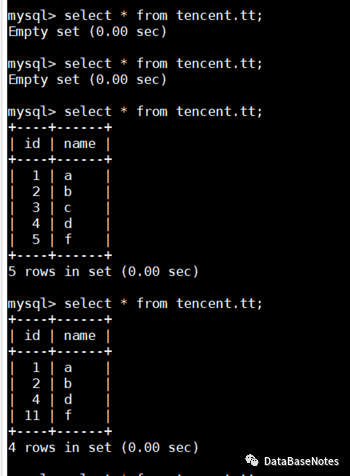
select * from tencent.tt;
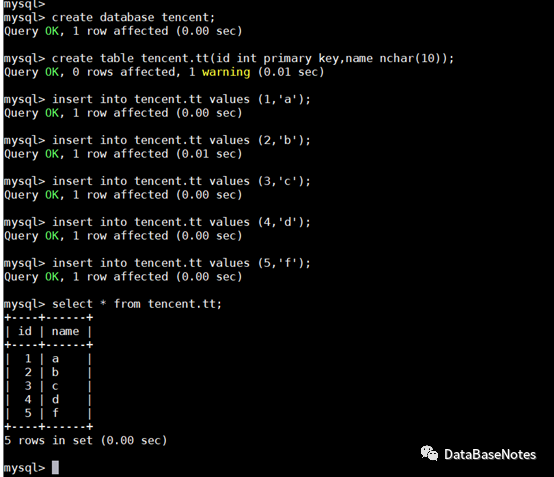
4.3、主库测试DML操作
insert into tencent.tt values (1,'a');
insert into tencent.tt values (2,'b');
insert into tencent.tt values (3,'c');
insert into tencent.tt values (4,'d');
insert into tencent.tt values (5,'f');
select * from tencent.tt;
delete from tt where id=3;
update tt setid=11 where id=5;
select * from tencent.tt;

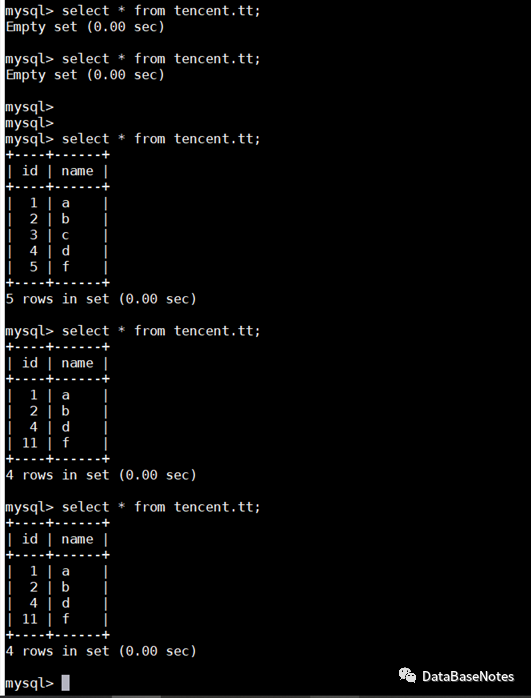
4.4、从库查看数据是否同步
select * from tencent.tt;
select * from tencent.tt;
五、单主/多主模式切换
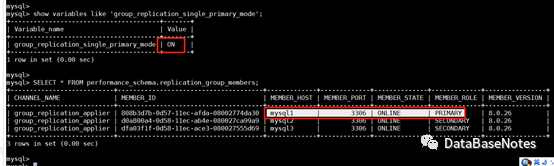
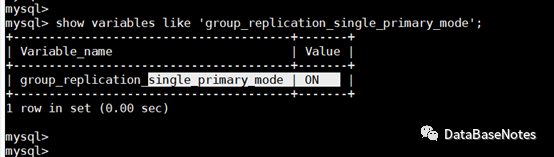
5.1、查看mgr模式
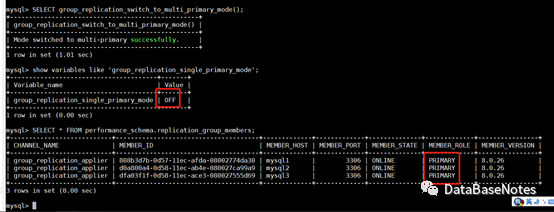
show variables like 'group_replication_single_primary_mode';
默认搭建为单主模式
5.2、由单主模式切换为多主模式
SELECT group_replication_switch_to_multi_primary_mode();
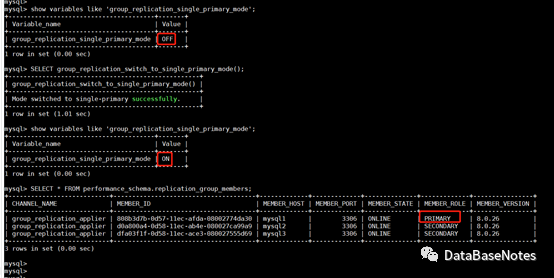
5.3、由多主模式切换为单主模式
SELECT group_replication_switch_to_single_primary_mode();
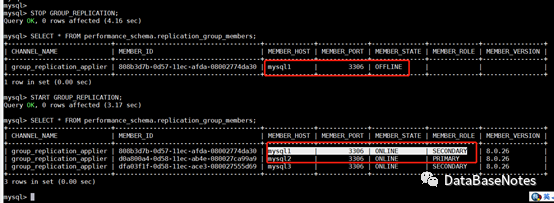
5.4、模拟宕机切换
在节点1 上重启replicaion
STOP GROUP_REPLICATION;
START GROUP_REPLICATION;
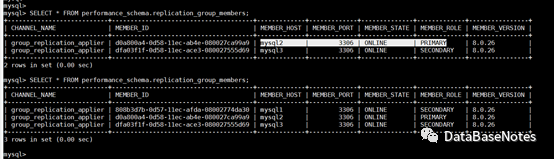
SELECT * FROM performance_schema.replication_group_members;
节点2/3上查看
六、至此,MGR搭建测试实验结束。
MGR还有很多功能尚未验证和研究,期待大家一起讨论研究哦。。。
加油!!!
