



前言
我们使用 Stack
组件的时候,通常会使用 Positioned
组件来做子组件相对 Stack
的定位,Positioned
通过 top
,bottom
,height
三选二确定垂直方向的位置和尺寸,使用 left
,right
和 width
三选二确定水平方向的位置和尺寸。对应的,我们可以使用 AnimatedPositioned
组件来实现子组件在 Stack
中的移动、尺寸变化等其他效果。本篇我们用这个组件构建两个球追逐的动画效果,以便全面了解这个组件的使用。
效果解析
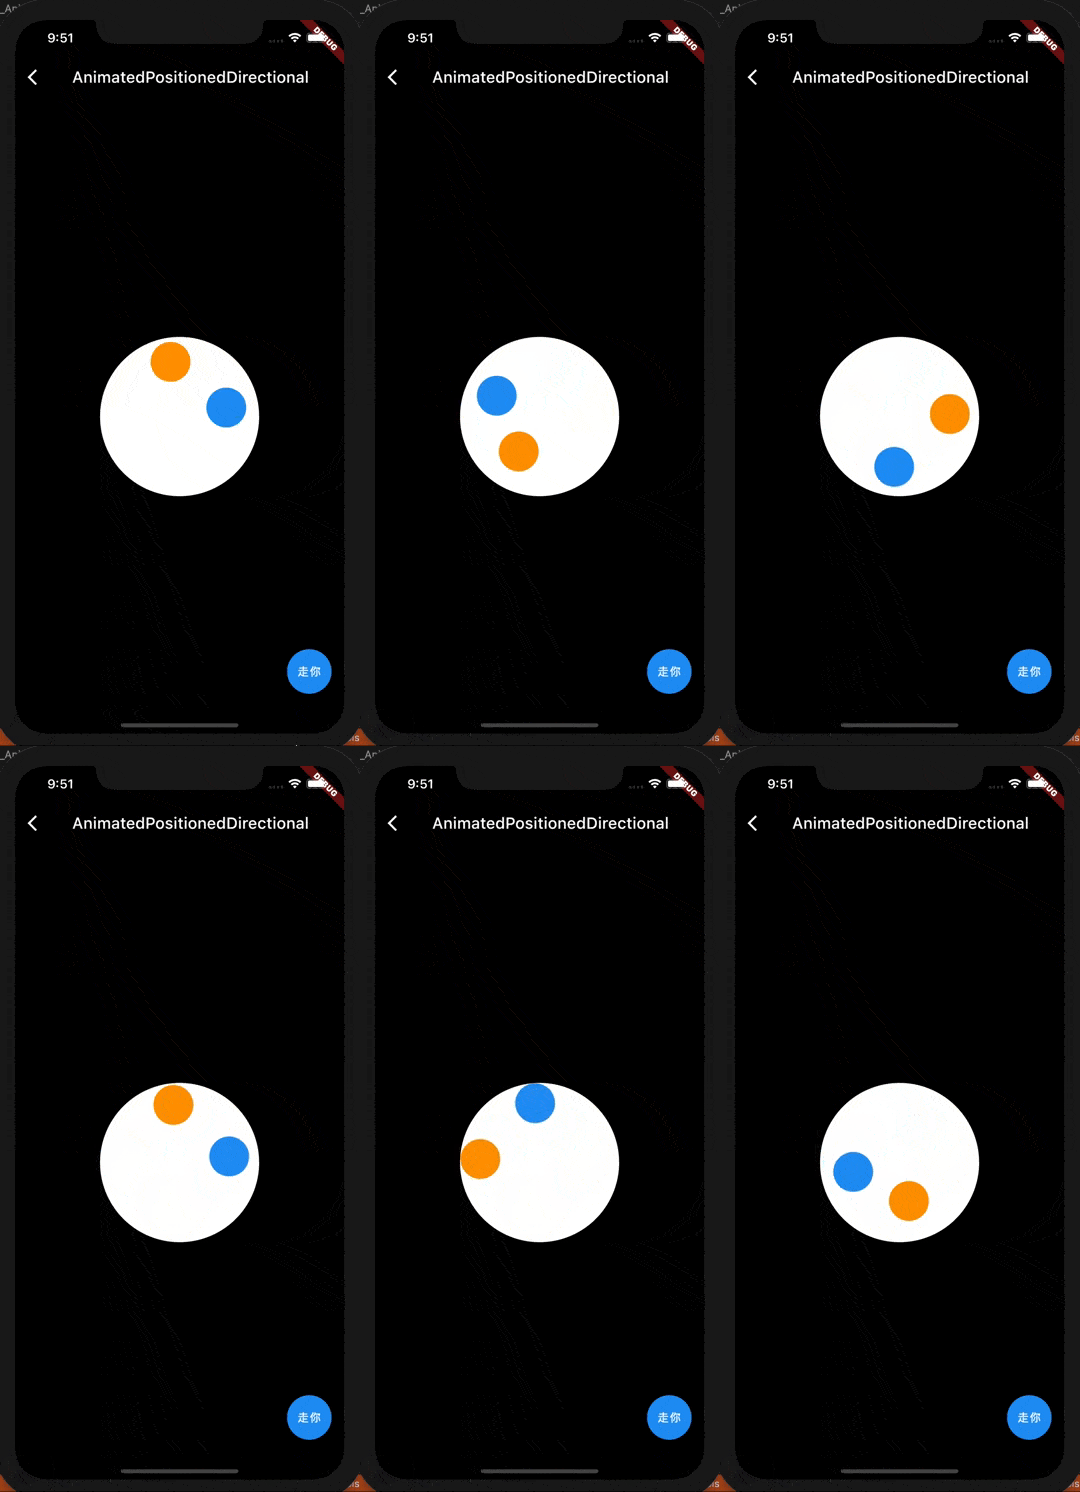
从动图可以看到,蓝色球和橙色球会一先一后沿着白色大圆的左、下、右、上顶点移动,同时在启动切换的时候会有弹入效果。具体实现的逻辑如下:
沿着大圆4个点移动效果,我们可以控制球的起始位置就可以搞定了。 弹入效果则可以使用 bounceIn
曲线实现。对一先一后的追逐效果,可以设置一个有序的位置数组,一个球的位置是另一个球的下一个位置,可以通过使用不同的下标从位置数组取取位置实现。 重复动效的实现:重复动效使用 AnimatedPositioned
的onEnd
触发,每次结束时调用setState
将控制位置的下标加1,就可以实现动画循环的效果了。
代码实现
代码实现如下:
class _AnimatedPositionedDemoState extends State<AnimatedPositionedDemo> { final roundSize = 200.0; var ballSize = 50.0; late List<Offset> animatedOffsets; int index = 0; @override void initState() { animatedOffsets = [ Offset(0.0, (roundSize - ballSize) / 2), Offset((roundSize - ballSize) / 2, roundSize - ballSize), Offset(roundSize - ballSize, (roundSize - ballSize) / 2), Offset((roundSize - ballSize) / 2, 0.0), ]; super.initState(); } @override Widget build(BuildContext context) { return Scaffold( appBar: AppBar( title: Text('AnimatedPositioned'), brightness: Brightness.dark, backgroundColor: Colors.black, ), backgroundColor: Colors.black, body: Center( child: Stack(children: [ ClipOval( child: Container( width: roundSize, height: roundSize, color: Colors.white, ), ), AnimatedPositioned( top: animatedOffsets[index].dy, height: ballSize, left: animatedOffsets[index].dx, width: ballSize, child: ClipOval( child: Container( color: Colors.blue, ), ), duration: Duration(seconds: 2), curve: Curves.bounceIn, onEnd: () { setState(() { index = (index + 1) % animatedOffsets.length; }); }, ), AnimatedPositioned( top: animatedOffsets[(index + 1) % animatedOffsets.length].dy, height: ballSize, left: animatedOffsets[(index + 1) % animatedOffsets.length].dx, width: ballSize, child: ClipOval( child: Container( color: Colors.orange, ), ), duration: Duration(seconds: 2), curve: Curves.bounceIn, ), ]), ), floatingActionButton: FloatingActionButton( child: Text( '走你', style: TextStyle( color: Colors.white, ), textAlign: TextAlign.center, ), onPressed: () { setState(() { index = (index + 1) % 4; }); }, ), ); }}
其中关键部分是:
AnimatedPositioned( top: animatedOffsets[index].dy, height: ballSize, left: animatedOffsets[index].dx, width: ballSize, child: ClipOval( child: Container( color: Colors.blue, ), ), duration: Duration(seconds: 2), curve: Curves.bounceIn, onEnd: () { setState(() { index = (index + 1) % animatedOffsets.length; }); },),
我们通过 left
和 top
控制了球的起始位置,然后在 onEnd
的时候调用了 setState
更新位置下标来切换球的位置到相邻的下一个顶点。
变化的玩法
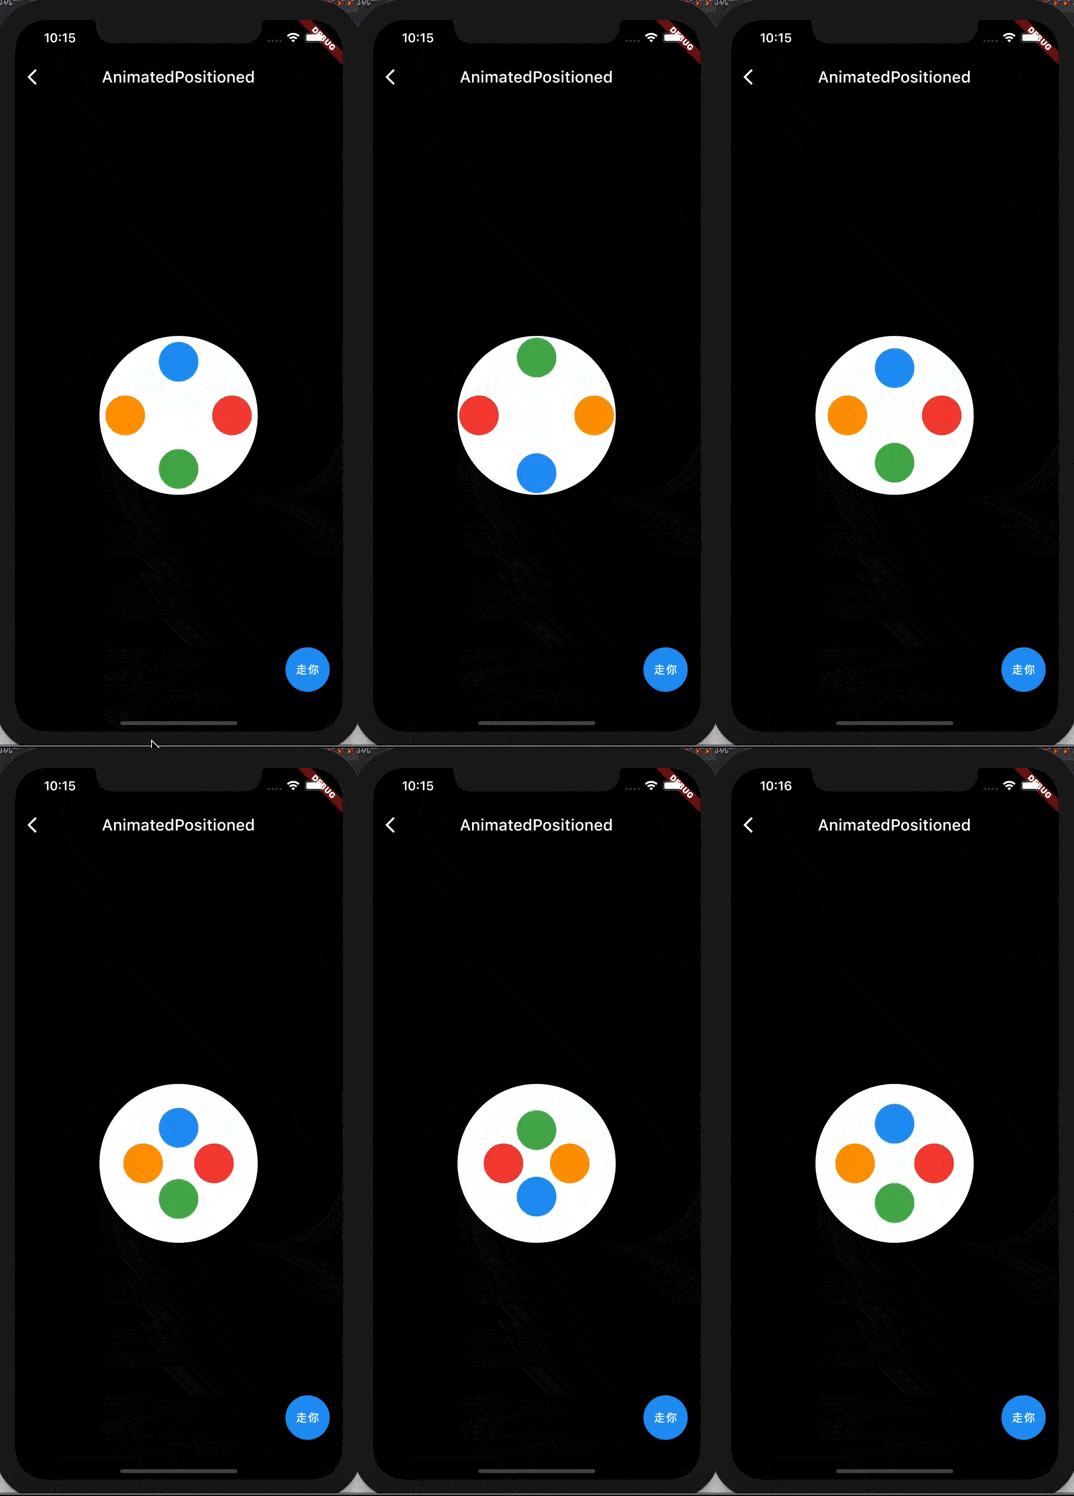
实际上我们可以增加球,调整球移动点位的跨度或位置,实现一些其他有趣的动画。比如下面是4个球,每次2个顶点的跨度(下标每次+2),就会有4个球分别穿到对面的感觉。这个动画的源码已经上传至:动画相关源码:https://gitee.com/island-coder/flutter-beginner/tree/master/animation。
 。
。
总结
本篇介绍了利用 AnimatedPositioned
实现追逐球动画的效果,通过改变位置、尺寸或颜色都可以做一些有趣的动画来。有兴趣的 Flutter
爱好者也可以做一些其他尝试,搞一些有趣的动画玩玩,这样在 loading
的时候,如果加载是时间长,至少不会让等待的过程那么无聊。
文章转载自岛上码农,如果涉嫌侵权,请发送邮件至:contact@modb.pro进行举报,并提供相关证据,一经查实,墨天轮将立刻删除相关内容。
