



在《Tekton系列之实践篇-由Jenkins改成Tekton》中,我们可以将Jenkinsfile改成Tekton Pipeline,但是Tekton有一个很大的问题是不能很好的划分权限,特别是在Dashboard上根本就做权限控制,那如果在实际中使用的话权限不明会带来很多问题,比如谁删了什么,谁执行了什么都不知道。
如果你公司有自动化运维平台,可以接入Tekton,如果没有就需要在Github上找是否有相关的Dashboard或者平台,可惜我什么都没有.....
目前我使用的Kubesphere来管理K8s集群以及流水线,所以我就在想怎么使用kubesphere管理。不过截止目前版本,Kubesphere的流水线引擎还是Jenkins,除非二开,不然没办法直接继承Tekton,期待Kubesphere把Tekton也加入(https://github.com/kubesphere/community/blob/master/sig-advocacy-and-outreach/summer-ospp/kubeSphere-tekton-integration_zh-CN.md)。
那应该怎么做呢?我想到一个很牛逼(SB)的办法,如下: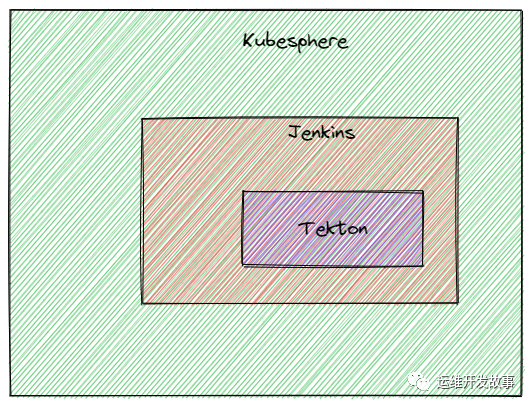
看懂了么?
其实就是继续使用Jenkins做Kubesphere的流水线引擎,然后将Jenkins和Tekton进行打通,这样是不是间接使用了Tekton?这是不是一个很牛逼(SB)的idea?
但是悲剧来了,Jenkins的Tekton插件要求Jenkins最低的版本是2.263,而Kubesphere的Jenkins版本是2.49,而且升级非常麻烦,麻烦到官方都不建议升级的地步。所以这里只能退而求其次,使用Jenkins来进行实验了。
部署Jenkins
Jenkins的部署方式有很多,这里采用Helm的方式来部署,简单快捷。
首先需要安装Helm命令,见文档(https://helm.sh/docs/intro/install/)。
接着安装Jenkins,如下:
helm repo add jenkinsci https://charts.jenkins.iohelm repo update# 我习惯把CHART下载到本地,方便管理helm pull jenkinsci/jenkins# 这里有一步解压的过程,然后进入Jenkins目录进行部署# 部署kubectl create ns devopshelm install jenkins -n devops .
部署完成后即可进行登录了。
访问地址要么使用NodePort,要么使用ingress,这里没有展示配置过程。
安装Jenkins插件
为了实现上面的需求,我找到一个Jenkins插件可以用来管理Tekton,插件名叫tekton-client-plugin tekton-client-plugin(https://github.com/jenkinsci/tekton-client-plugin)。
tekton-client-plugin用来打通Jenkins和Tekton,功能也不复杂,可以到文档(https://plugins.jenkins.io/tekton-client/#documentation)进行学习。
如果Jenkins版本大于2.263,可以直接在插件中心下载,如下: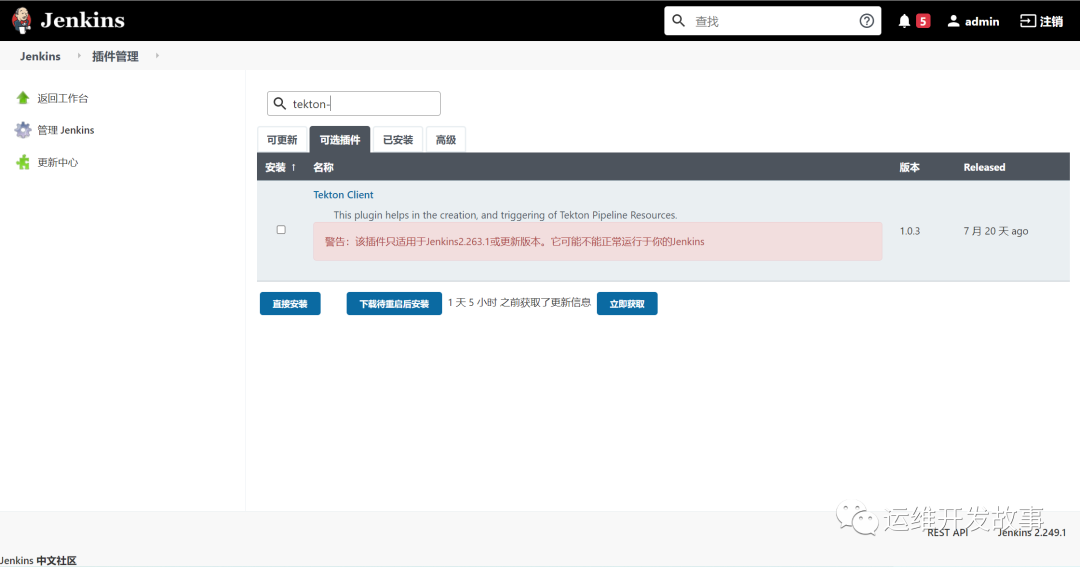
配置权限
这里是权限是Jenkins操作Tekton的权限,如下:
kind: RoleapiVersion: rbac.authorization.k8s.io/v1metadata: name: tekton-role namespace: tekton-devops-pipelinerules: - apiGroups: - "" resources: - pods - pods/log verbs: - get - list - watch - apiGroups: - tekton.dev resources: - tasks - taskruns - pipelines - pipelineruns verbs: - create - delete - deletecollection - get - list - patch - update - watch---apiVersion: rbac.authorization.k8s.io/v1kind: RoleBindingmetadata: name: tekton-role-binding namespace: tekton-devops-pipelineroleRef: apiGroup: rbac.authorization.k8s.io kind: Role name: tekton-rolesubjects: - kind: ServiceAccount name: jenkins namespace: devops
注意授权的serviceaccount和namespace。
编写Jenkinsfile
要使用的Jenkinsfile其实很简单。但是由于我们是多分支发布,所以Jenkinsfile如下:
pipeline { agent any parameters { choice(description: '选择分支', name: 'BRANCH_NAME', choices: ['dev', 'test', 'uat', 'pre', 'prod']) } stages { stage('deploy to dev'){ when{ expression { return "$BRANCH_NAME".contains('dev') } } steps{ tektonCreateRaw input: 'deploy/dev/pipeline.yaml', inputType: 'FILE', namespace: 'tekton-devops-pipeline' } } stage('deploy to test'){ when{ expression { return "$BRANCH_NAME".contains('test') } } steps{ tektonCreateRaw input: 'deploy/test/pipeline.yaml', inputType: 'FILE', namespace: 'tekton-devops-pipeline' } } stage('deploy to uat'){ when{ expression { return "$BRANCH_NAME".contains('uat') } } steps{ tektonCreateRaw input: 'deploy/uat/pipeline.yaml', inputType: 'FILE', namespace: 'tekton-devops-pipeline' } } stage('deploy to pre'){ when{ expression { return "$BRANCH_NAME".contains('pre') } } steps{ tektonCreateRaw input: 'deploy/pre/pipeline.yaml', inputType: 'FILE', namespace: 'tekton-devops-pipeline' } } stage('deploy to prod'){ when{ expression { return "$BRANCH_NAME".contains('prod') } } steps{ tektonCreateRaw input: 'deploy/prod/pipeline.yaml', inputType: 'FILE', namespace: 'tekton-devops-pipeline' } } }}
Tekton的PipelineRun按目录分级,如下(这里只是为了方便,其实可以只用一个PipelineRun):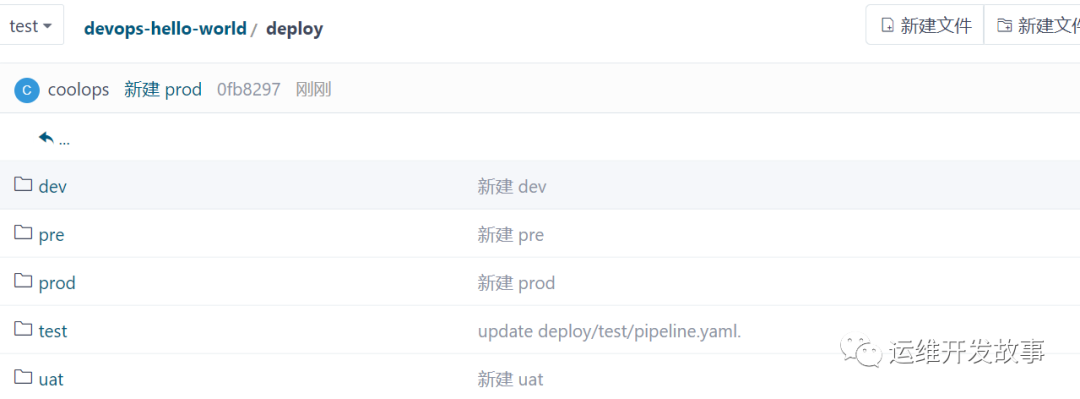
弄完过后,就可以创建流水线了,如下创建一个hello-world-test的流水线。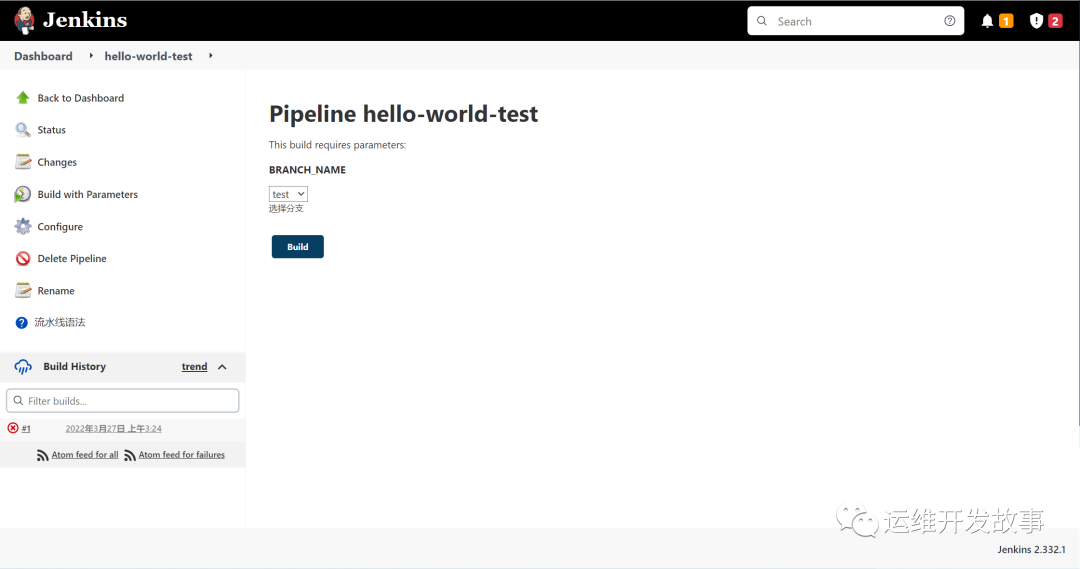
然后选择对应的分支进行部署。可以看到触发了Tekton的PipelineRun,如下: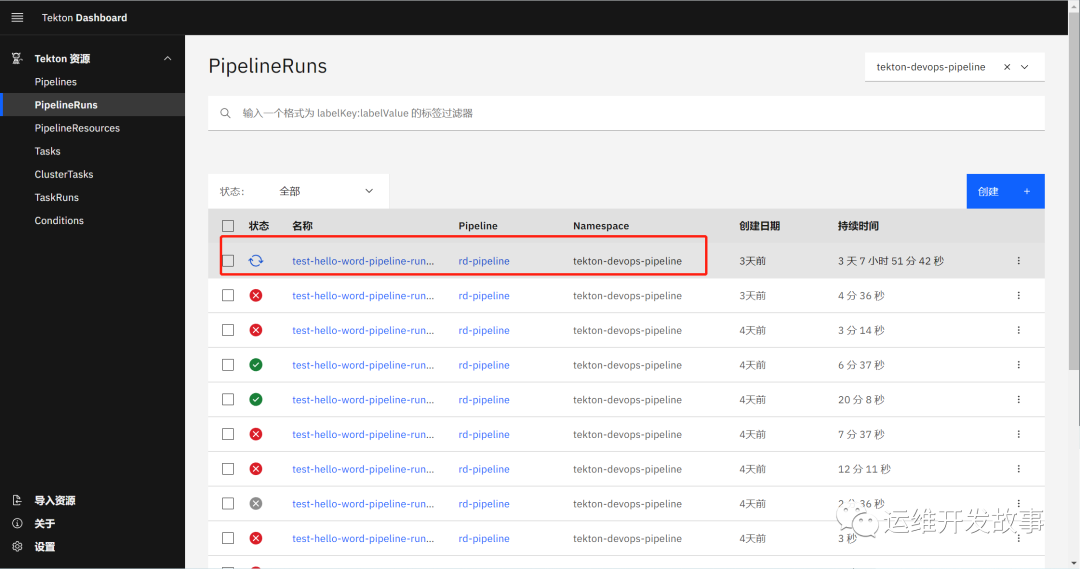
不过Jenkins这边还有如下问题:
[Checks API] No suitable checks publisher found.Failed: nulljava.lang.NullPointerException at org.waveywaves.jenkins.plugins.tekton.client.build.create.CreateRaw.createPipelineRun(CreateRaw.java:278) at org.waveywaves.jenkins.plugins.tekton.client.build.create.CreateRaw.createWithResourceSpecificClient(CreateRaw.java:168) at org.waveywaves.jenkins.plugins.tekton.client.build.create.CreateRaw.runCreate(CreateRaw.java:429) at org.waveywaves.jenkins.plugins.tekton.client.build.create.CreateRaw.perform(CreateRaw.java:393) at org.jenkinsci.plugins.workflow.steps.CoreStep$Execution.run(CoreStep.java:101) at org.jenkinsci.plugins.workflow.steps.CoreStep$Execution.run(CoreStep.java:71) at org.jenkinsci.plugins.workflow.steps.SynchronousNonBlockingStepExecution.lambda$start$0(SynchronousNonBlockingStepExecution.java:47) at java.base/java.util.concurrent.Executors$RunnableAdapter.call(Executors.java:515) at java.base/java.util.concurrent.FutureTask.run(FutureTask.java:264) at java.base/java.util.concurrent.ThreadPoolExecutor.runWorker(ThreadPoolExecutor.java:1128) at java.base/java.util.concurrent.ThreadPoolExecutor$Worker.run(ThreadPoolExecutor.java:628) at java.base/java.lang.Thread.run(Thread.java:829)[Checks API] No suitable checks publisher found.
虽然报这个错,但是Tekton PipelineRun触发没问题,具体原因还待排查,这就非常尴尬了。看到下面这一串串的红色,心凉了一半(Tekton实际是可以允许成功)。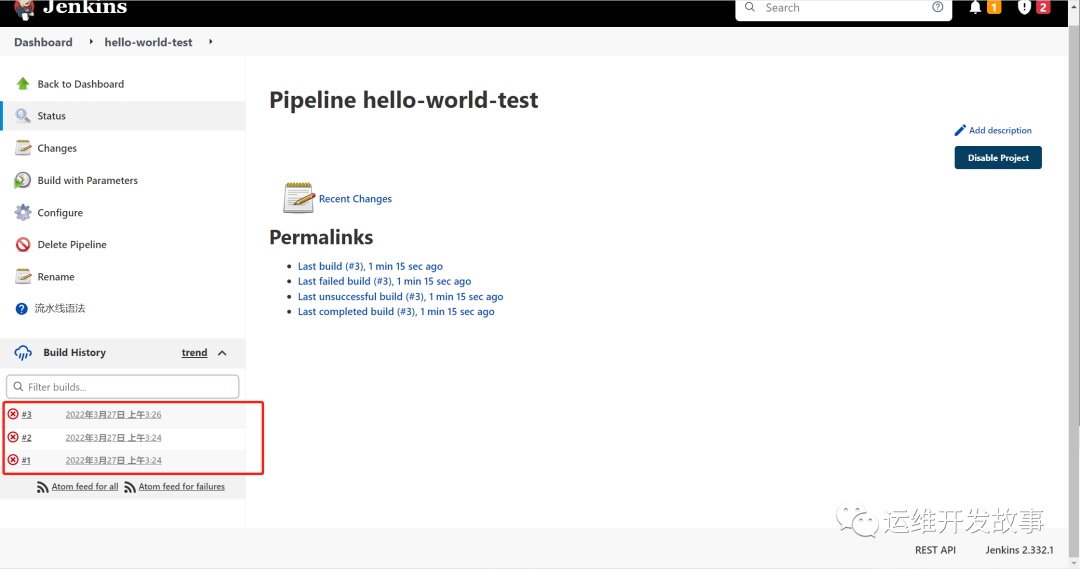
最后
其实这篇实践不算完成,Jenkins的问题还没有解决,在网上查了半天资料也没什么效果,很多说是Jenkins Check-API 插件的原因,但是没有去测试。
不过,从理论上用Jenkins来管理Tekton是可行的,而且对于Jenkins重度用户来说,也算是比较不错的事情。当然我更想使用类似于Kubesphere这类来管理,期待Kubesphere把Tekton集成进去。
如果我的文章对你有所帮助,还请帮忙点赞、在看、转发一下,你的支持会激励我输出更高质量的文章,非常感谢!
你还可以把我的公众号设为「星标」,这样当公众号文章更新时,你会在第一时间收到推送消息,避免错过我的文章更新。
我是 乔克,《运维开发故事》公众号团队中的一员,一线运维农民工,云原生实践者,这里不仅有硬核的技术干货,还有我们对技术的思考和感悟,欢迎关注我们的公众号,期待和你一起成长!
