


基于TPC-H测试OceanBase社区版3.1.3数据库负载性能OLAP
此内容为参加“OceanBase 性能挑战季开启 | 第三期技术征文大赛等你来战 !“欢迎大家踊跃参与,活动详情:https://www.modb.pro/db/388053
作者:马顺华
从事运维管理工作多年,目前就职于六棱镜(杭州)科技有限公司,熟悉运维自动化、OceanBase部署运维、MySQL 运维以及各种云平台技术和产品。并已获得OceanBase认证OBCA、OBCP证书。
本文档基于TPC-H测试OceanBase社区版3.1.3的OLAP负载性能,您可以按照本文介绍自行测试对比,快速了解数据库系统的性能。


背景 tpch是TPC(Transaction Processing Performance Council)组织提供的工具包。用于进行OLAP测试,以评估商业分析中决策支持系统(DSS)的性能。它包含了一整套面向商业的ad-hoc查询和并发数据修改,强调测试的是数据库、平台和I/O性能,关注查询能力。TPC-H是业界常用的一套基准,由TPC委员会制定发布,用于评测数据库的分析型查询能力。TPC-H查询包含8张数据表、22条复杂的SQL查询,大多数查询包含若干表Join、子查询和Group by聚合等。本文的TPC-H的实现基于TPC-H的基准测试,并不能与已发布的TPC-H基准测试结果相比较,本文中的测试来源于网络,并不符合TPC-H基准测试的所有要求。
机器信息
机器类型 主机配置 备注 OS Centos 7.4 中控机 /OBD CPU:8C 内存:16G 目标机器 /OBserver CPU:8C 内存:32G 系统盘 / dev/vda 50G LVS分区、文件系统:EXT4 数据盘 /data dev/vdb 100G GPT分区、文件系统:xfs 事务日志盘 /redo dev/vdc 100G GPT分区、文件系统:xfs
| 机器类型 | 主机配置 | 备注 |
|---|---|---|
| OS | Centos 7.4 | |
| 中控机 /OBD | CPU:8C | 内存:16G |
| 目标机器 /OBserver | CPU:8C | 内存:32G |
| 系统盘 / | dev/vda 50G | LVS分区、文件系统:EXT4 |
| 数据盘 /data | dev/vdb 100G | GPT分区、文件系统:xfs |
| 事务日志盘 /redo | dev/vdc 100G | GPT分区、文件系统:xfs |
机器角色划分
角色 机器IP 备注 OBD 112.127.2.131 中控机 OBserver 112.127.2.120 {2881,2882}, {3881,3882} zone1 112.127.2.121 {2881,2882}, {3881,3882} zone2 112.127.2.122 {2881,2882}, {3881,3882} zone3 OBproxy 112.127.2.120 {2883,2884} 反向代理 112.127.2.121 {2883,2884} 反向代理 112.127.2.122 {2883,2884} 反向代理 OBAgent 112.127.2.120 监控采集框架 默认端口 8088、8089 112.127.2.121 监控采集框架 默认端口 8088、8089 112.127.2.122 监控采集框架 默认端口 8088、8089 OBclient 112.127.2.131 OB命令行客户端 tpch tool 112.127.2.120 tpch tool客户端
| 角色 | 机器IP | 备注 |
|---|---|---|
| OBD | 112.127.2.131 | 中控机 |
| OBserver | 112.127.2.120 | {2881,2882}, {3881,3882} zone1 |
| 112.127.2.121 | {2881,2882}, {3881,3882} zone2 | |
| 112.127.2.122 | {2881,2882}, {3881,3882} zone3 | |
| OBproxy | 112.127.2.120 | {2883,2884} 反向代理 |
| 112.127.2.121 | {2883,2884} 反向代理 | |
| 112.127.2.122 | {2883,2884} 反向代理 | |
| OBAgent | 112.127.2.120 | 监控采集框架 默认端口 8088、8089 |
| 112.127.2.121 | 监控采集框架 默认端口 8088、8089 | |
| 112.127.2.122 | 监控采集框架 默认端口 8088、8089 | |
| OBclient | 112.127.2.131 | OB命令行客户端 |
| tpch tool | 112.127.2.120 | tpch tool客户端 |
安装环境部署版本
软件名 版本 安装方式 备注 JDK 1.8.0 yum安装 建议使用 1.8u131 及以上版本 make 3.82 yum install make gcc 4.8.5 yum install gcc Python Python 2.7.5 系统自带 prettytable pip install prettytable obclient 2.0.0-2.el7.x86_64 yum安装 OBserver客户端工具 oceanbase-ce 3.1.3.el7.x86_64 yum安装 OBserver集群 JDBC mysql-connector-java-5.1.47 mysql 5.7.16 yum安装 数据库 tpch tool 3.0.0 uzip安装
| 软件名 | 版本 | 安装方式 | 备注 |
|---|---|---|---|
| JDK | 1.8.0 | yum安装 | 建议使用 1.8u131 及以上版本 |
| make | 3.82 | yum install make | |
| gcc | 4.8.5 | yum install gcc | |
| Python | Python 2.7.5 | 系统自带 | |
| prettytable | pip install prettytable | ||
| obclient | 2.0.0-2.el7.x86_64 | yum安装 | OBserver客户端工具 |
| oceanbase-ce | 3.1.3.el7.x86_64 | yum安装 | OBserver集群 |
| JDBC | mysql-connector-java-5.1.47 | ||
| mysql | 5.7.16 | yum安装 | 数据库 |
| tpch tool | 3.0.0 | uzip安装 |
一、部署集群
1、使用 OBD 部署 集群
本次使用OceanBase社区版 3.1.3 数据库集群。OceanBase 集群规模为 1:1:1(详细部署请参考之前文章)
[admin@CAIP131 ~]$ obd cluster deploy obce_demo -c obce-demo.yaml
Update OceanBase-community-stable-el7 ok
Update OceanBase-development-kit-el7 ok
Download oceanbase-ce-3.1.3-10100032022041510.el7.x86_64.rpm (47.10 M): 100% [####################################] Time: 0:00:19   2.54 MB/s
Package oceanbase-ce-3.1.3 is available.
Download obproxy-3.2.0-1.el7.x86_64.rpm (7.80 M): 100% [##########################################################] Time: 0:00:03   2.61 MB/s
Package obproxy-3.2.0 is available.
install oceanbase-ce-3.1.3 for local ok
install obproxy-3.2.0 for local ok
+-------------------------------------------------------------------------------------------+
|                                          Packages                                         |
+--------------+---------+-----------------------+------------------------------------------+
| Repository   | Version | Release               | Md5                                      |
+--------------+---------+-----------------------+------------------------------------------+
| oceanbase-ce | 3.1.3   | 10100032022041510.el7 | e96a23de85ba1d53862b9955926194a01d19d0d0 |
| obproxy      | 3.2.0   | 1.el7                 | 8d5c6978f988935dc3da1dbec208914668dcf3b2 |
+--------------+---------+-----------------------+------------------------------------------+
Repository integrity check ok
Parameter check ok
Open ssh connection ok
Remote oceanbase-ce-3.1.3-e96a23de85ba1d53862b9955926194a01d19d0d0 repository install ok
Remote oceanbase-ce-3.1.3-e96a23de85ba1d53862b9955926194a01d19d0d0 repository lib check ok
Remote obproxy-3.2.0-8d5c6978f988935dc3da1dbec208914668dcf3b2 repository install ok
Remote obproxy-3.2.0-8d5c6978f988935dc3da1dbec208914668dcf3b2 repository lib check ok
Cluster status check ok
Initializes observer work home ok
Initializes obproxy work home ok
obce_demo deployed

检查集群部署状态(deployed)
[admin@CAIP131 ~]$ obd cluster list
+------------------------------------------------------------------+
|                           Cluster List                           |
+-----------+------------------------------------+-----------------+
| Name      | Configuration Path                 | Status (Cached) |
+-----------+------------------------------------+-----------------+
| obce_demo | /home/admin/.obd/cluster/obce_demo | deployed        |
+-----------+------------------------------------+-----------------+
[admin@CAIP131 ~]$


2、启动和初始化集群boostrap
上文中 deploy 操作只安装了软件和准备初始化目录,还需使用 obd cluster start 命令启动集群节点并初始化集群。
[admin@CAIP131 ~]$ obd cluster start obce_demo
Get local repositories and plugins ok
Open ssh connection ok
Load cluster param plugin ok
Check before start observer ok
Check before start obproxy ok
Start observer ok
observer program health check ok
Connect to observer ok
Initialize cluster
Cluster bootstrap ok
Wait for observer init ok
+------------------------------------------------+
|                    observer                    |
+--------------+---------+------+-------+--------+
| ip           | version | port | zone  | status |
+--------------+---------+------+-------+--------+
| 112.127.2.122 | 3.1.3   | 2881 | zone1 | active |
| 112.127.2.122 | 3.1.3   | 2881 | zone2 | active |
| 112.127.2.122 | 3.1.3   | 2881 | zone3 | active |
+--------------+---------+------+-------+--------+

Start obproxy ok
obproxy program health check ok
Connect to obproxy ok
Initialize cluster
+------------------------------------------------+
|                    obproxy                     |
+--------------+------+-----------------+--------+
| ip           | port | prometheus_port | status |
+--------------+------+-----------------+--------+
| 112.127.2.122 | 2883 | 2884            | active |
| 112.127.2.122 | 2883 | 2884            | active |
| 112.127.2.122 | 2883 | 2884            | active |
+--------------+------+-----------------+--------+
obce_demo running


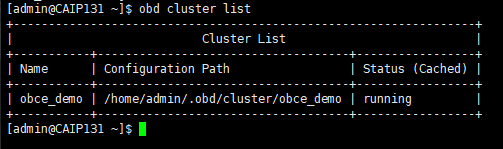
查看部署后的运行状态(running)
[admin@CAIP131 ~]$ obd cluster list
+------------------------------------------------------------------+
|                           Cluster List                           |
+-----------+------------------------------------+-----------------+
| Name      | Configuration Path                 | Status (Cached) |
+-----------+------------------------------------+-----------------+
| obce_demo | /home/admin/.obd/cluster/obce_demo | running         |
+-----------+------------------------------------+-----------------+

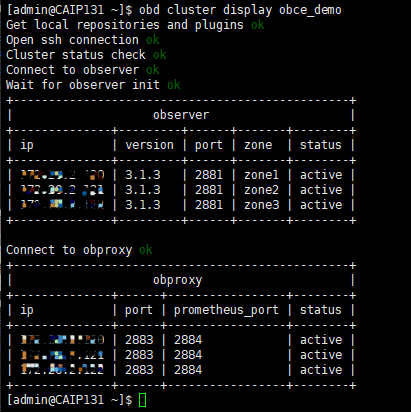
查看部署后的运行状态(active)
[admin@CAIP131 ~]$ obd cluster display obce_demo
Get local repositories and plugins ok
Open ssh connection ok
Cluster status check ok
Connect to observer ok
Wait for observer init ok
+------------------------------------------------+
|                    observer                    |
+--------------+---------+------+-------+--------+
| ip           | version | port | zone  | status |
+--------------+---------+------+-------+--------+
| 112.127.2.122 | 3.1.3   | 2881 | zone1 | active |
| 112.127.2.122 | 3.1.3   | 2881 | zone2 | active |
| 112.127.2.122 | 3.1.3   | 2881 | zone3 | active |
+--------------+---------+------+-------+--------+

Connect to obproxy ok
+------------------------------------------------+
|                    obproxy                     |
+--------------+------+-----------------+--------+
| ip           | port | prometheus_port | status |
+--------------+------+-----------------+--------+
| 112.127.2.122 | 2883 | 2884            | active |
| 112.127.2.122 | 2883 | 2884            | active |
| 112.127.2.122 | 2883 | 2884            | active |
+--------------+------+-----------------+--------+

3、连接验证:(sys租户)
[admin@CAIP131 ~]$ obclient -h112.127.2.122 -uroot@sys#obce_demo -p -P2883 -A -c oceanbase
Enter password:
Welcome to the OceanBase.  Commands end with ; or \g.
Your MySQL connection id is 7
Server version: 5.6.25 OceanBase 3.1.3 (r10100032022041510-a09d3134c10665f03fd56d7f8bdd413b2b771977) (Built Apr 15 2022 02:16:22)

Copyright (c) 2000, 2018, Oracle, MariaDB Corporation Ab and others.

Type 'help;' or '\h' for help. Type '\c' to clear the current input statement.


查看所有节点是否正常:
MySQL [oceanbase]> select svr_ip,status,with_rootserver,usec_to_time(start_service_time),usec_to_time(stop_time) from __all_server;
+--------------+--------+-----------------+----------------------------------+----------------------------+
| svr_ip       | status | with_rootserver | usec_to_time(start_service_time) | usec_to_time(stop_time)    |
+--------------+--------+-----------------+----------------------------------+----------------------------+
| 112.127.2.122 | active |               1 | 2022-04-19 15:04:27.928806       | 1970-01-01 08:00:00.000000 |
| 112.127.2.122 | active |               0 | 2022-04-19 15:04:29.968798       | 1970-01-01 08:00:00.000000 |
| 112.127.2.122 | active |               0 | 2022-04-19 15:04:38.224182       | 1970-01-01 08:00:00.000000 |
+--------------+--------+-----------------+----------------------------------+----------------------------+
3 rows in set (0.002 sec)


1)、status 表示节点状态。
inactive,表示节点已经掉线或者进程退出了。节点掉线常见原因是节点时钟偏差过大、网络延时过大、clog空间盘满(use大于等于95%)。如果进程刚刚启动,则是进程在跟 rootserver 通信沟通。正常情况下启动几秒就能变 active,异常宕机后的再启动可能需要几十秒变 acitve,最长不超过2分钟。
2)、start_service_time
表示节点开始提供服务时间。如果是默认值 1970-1-1 ,则表示进程还在应用clog、刷新schema等。通常如果要应用的clog不多的时候,这个几秒钟就好了。如果是此前内存中大量数据还没有合并落盘就宕机了,这个恢复时间就长一些,可能会要十几分钟。
3)、stop_service_time
表示停止服务时间。如果是默认值 1970-1-1 ,表示没有停止服务。如果时间大于默认值(在当前时间附近),表示手动发起过 stop server 或 stop zone 命令。则需要手动发起 start server 或者 start zone 命令恢复服务。
4)、只有这三个列都正常了,节点才是正常的,集群才是正常的。
4、创建资源池及租户:
1)、查询系统资源总计资源 (sys租户)
[admin@CAIP131 ~]$ obclient -h1112.127.2.122 -uroot@sys#obce_demo -p -P2883 -A -c oceanbase
Enter password:
Welcome to the OceanBase.  Commands end with ; or \g.
Your MySQL connection id is 9
Server version: 5.6.25 OceanBase 3.1.3 (r10100032022041510-a09d3134c10665f03fd56d7f8bdd413b2b771977) (Built Apr 15 2022 02:16:22)

Copyright (c) 2000, 2018, Oracle, MariaDB Corporation Ab and others.

Type 'help;' or '\h' for help. Type '\c' to clear the current input statement.
MySQL [oceanbase]> SELECT svr_ip,svr_port, cpu_total, mem_total/1024/1024/1024, disk_total/1024/1024/1024, zone FROM __all_virtual_server_stat;
+--------------+----------+-----------+--------------------------+---------------------------+-------+
| svr_ip       | svr_port | cpu_total | mem_total/1024/1024/1024 | disk_total/1024/1024/1024 | zone  |
+--------------+----------+-----------+--------------------------+---------------------------+-------+
| 112.127.2.122 |     2882 |        14 |          16.000000000000 |           50.000000000000 | zone1 |
| 112.127.2.122 |     2882 |        14 |          16.000000000000 |           50.000000000000 | zone2 |
| 112.127.2.122 |     2882 |        14 |          16.000000000000 |           50.000000000000 | zone3 |
+--------------+----------+-----------+--------------------------+---------------------------+-------+
3 rows in set (0.029 sec)


2)查询租户已分配资源:
MySQL [oceanbase]> SELECT sum(c.max_cpu), sum(c.max_memory)/1024/1024/1024 FROM __all_resource_pool as a, __all_unit_config AS c WHERE a.unit_config_id=c.unit_config_id;+----------------+----------------------------------+
| sum(c.max_cpu) | sum(c.max_memory)/1024/1024/1024 |
+----------------+----------------------------------+
|              5 |                   4.799999999813 |
+----------------+----------------------------------+
1 row in set (0.016 sec)

MySQL [oceanbase]> SELECT * FROM oceanbase.__all_unit_config;
+----------------------------+----------------------------+----------------+-----------------+---------+---------+------------+------------+----------+----------+---------------+---------------------+
| gmt_create                 | gmt_modified               | unit_config_id | name            | max_cpu | min_cpu | max_memory | min_memory | max_iops | min_iops | max_disk_size | max_session_num     |
+----------------------------+----------------------------+----------------+-----------------+---------+---------+------------+------------+----------+----------+---------------+---------------------+
| 2022-04-19 16:16:20.980444 | 2022-04-19 16:16:20.980444 |              1 | sys_unit_config |       5 |     2.5 | 5153960755 | 4294967296 |    10000 |     5000 |   53687091200 | 9223372036854775807 |
+----------------------------+----------------------------+----------------+-----------------+---------+---------+------------+------------+----------+----------+---------------+---------------------+
1 row in set (0.005 sec)


3)、创建资源单元(unitS1 ):
MySQL [oceanbase]> CREATE RESOURCE UNIT unitS1 max_cpu = 4, max_memory = '6G', min_memory = '6G', max_iops = 100000, min_iops = 100000, max_session_num = 30000, max_disk_size = '20G';
Query OK, 0 rows affected (0.007 sec)


4)查看新创建的资源单元(unitS1 )
MySQL [oceanbase]> SELECT unit_config_id,name,max_cpu,min_cpu,max_memory,min_memory,max_disk_size FROM __all_unit_config;
+----------------+-----------------+---------+---------+------------+------------+---------------+
| unit_config_id | name            | max_cpu | min_cpu | max_memory | min_memory | max_disk_size |
+----------------+-----------------+---------+---------+------------+------------+---------------+
|              1 | sys_unit_config |       5 |     2.5 | 5153960755 | 4294967296 |   53687091200 |
|           1001 | unitS1          |       4 |       4 | 6442450944 | 6442450944 |   21474836480 |
+----------------+-----------------+---------+---------+------------+------------+---------------+
2 rows in set (0.002 sec)


5)、创建资源池(poolS1):
MySQL [oceanbase]> CREATE RESOURCE POOL poolS1 UNIT = 'unitS1', UNIT_NUM = 1;
Query OK, 0 rows affected (0.028 sec)


6)查看资源池(poolS1)
MySQL [oceanbase]> SELECT * FROM oceanbase.__all_resource_pool;
+----------------------------+----------------------------+------------------+----------+------------+----------------+-------------------+-----------+--------------+--------------------+
| gmt_create                 | gmt_modified               | resource_pool_id | name     | unit_count | unit_config_id | zone_list         | tenant_id | replica_type | is_tenant_sys_pool |
+----------------------------+----------------------------+------------------+----------+------------+----------------+-------------------+-----------+--------------+--------------------+
| 2022-04-19 16:16:20.983213 | 2022-04-19 16:16:20.991808 |                1 | sys_pool |          1 |              1 | zone1;zone2;zone3 |         1 |            0 |                  0 |
| 2022-04-19 16:29:16.127638 | 2022-04-19 16:29:16.127638 |             1001 | poolS1   |          1 |           1001 | zone1;zone2;zone3 |        -1 |            0 |                  0 |
+----------------------------+----------------------------+------------------+----------+------------+----------------+-------------------+-----------+--------------+--------------------+
2 rows in set (0.002 sec)


7)创建租户(tenantdemo):
MySQL [oceanbase]> create tenant tenantdemo resource_pool_list=('poolS1'), charset=utf8mb4, replica_num=3, zone_list('zone1', 'zone2', 'zone3'), primary_zone=RANDOM, locality='F@zone1,F@zone2,F@zone3' set variables ob_compatibility_mode='mysql', ob_tcp_invited_nodes='%';
Query OK, 0 rows affected (1.296 sec)


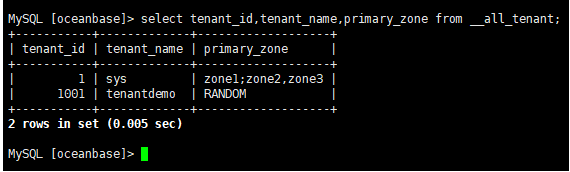
将租户的 primary_zone 设置为 RANDOM。
8)查看创建成功的租户:
MySQL [oceanbase]> select tenant_id,tenant_name,primary_zone from __all_tenant;

9)登录新创建的 tenantdemo 租户(默认租户密码为空):
[admin@CAIP131 ~]$ obclient -h112.127.2.122 -uroot@tenantdemo#obce_demo -P2883 -c -A oceanbase


10)设置租户 tenantdemo 的root密码
MySQL [oceanbase]> alter user root identified by '#####';
Query OK, 0 rows affected (0.030 sec)


二、对OceanBase进行环境调优
请在系统租户下进行环境调优。
1、OceanBase 数据库调优。
在系统租户下执行 obclient -h$host_ip -P$host_port -uroot@sys -A 命令。
[root@CAIP120 load]# obclient -h112.127.2.122 -uroot@sys#obce_demo -p -P2883 -A -c oceanbase
Enter password:
Welcome to the OceanBase.  Commands end with ; or \g.
Your MySQL connection id is 20169
Server version: 5.6.25 OceanBase 3.1.3 (r10100032022041510-a09d3134c10665f03fd56d7f8bdd413b2b771977) (Built Apr 15 2022 02:16:22)

Copyright (c) 2000, 2018, Oracle, MariaDB Corporation Ab and others.

Type 'help;' or '\h' for help. Type '\c' to clear the current input statement.


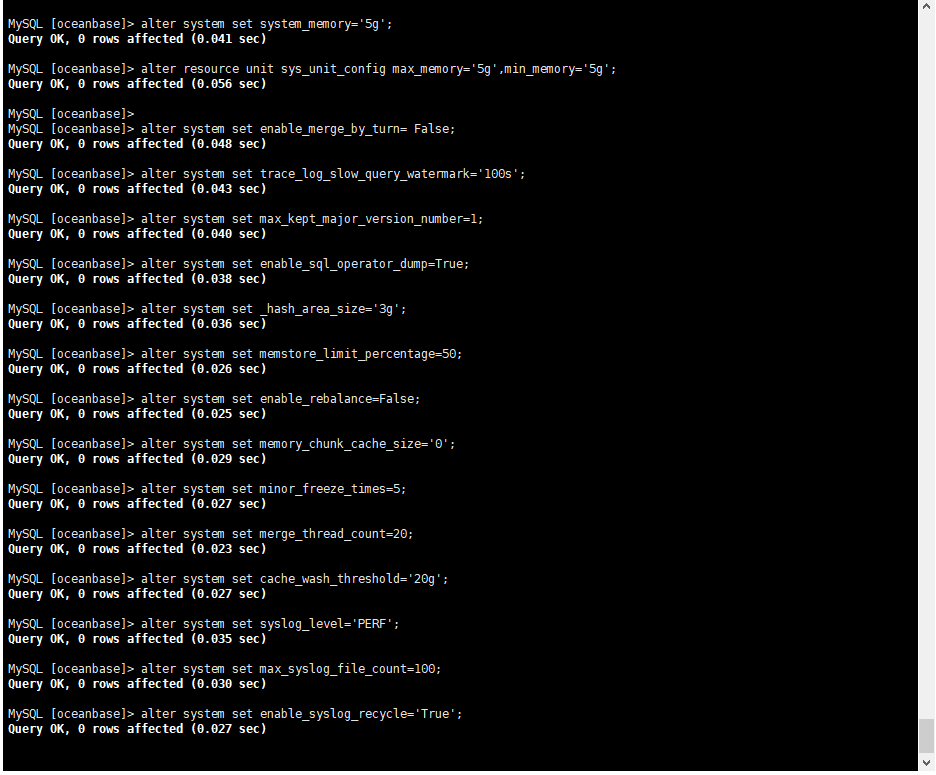
#调整 sys 租户占用的内存,以提供测试租户更多资源,需根据实际环境动态调整
alter system set system_memory='5g';
alter resource unit sys_unit_config max_memory='5g',min_memory='5g';
#调优参数
alter system set enable_merge_by_turn= False;
alter system set trace_log_slow_query_watermark='100s';
alter system set max_kept_major_version_number=1;
alter system set enable_sql_operator_dump=True;
alter system set _hash_area_size='3g';
alter system set memstore_limit_percentage=50;
alter system set enable_rebalance=False;
alter system set memory_chunk_cache_size='0';
alter system set minor_freeze_times=5;
alter system set merge_thread_count=20;
alter system set cache_wash_threshold='20g';
##调整日志级别及保存个数
alter system set syslog_level='PERF';
alter system set max_syslog_file_count=100;
alter system set enable_syslog_recycle='True';

2、设置租户调优。
在测试用户下执行 obclient -h$host_ip -P$host_port -u$user@$tenant -p$password -A 命令。
[root@CAIP120 load]# obclient -h112.127.2.122 -uroot@tenantdemo#obce_demo -P2883 -p -c -A oceanbase
Enter password:
Welcome to the OceanBase.  Commands end with ; or \g.
Your MySQL connection id is 20170
Server version: 5.6.25 OceanBase 3.1.3 (r10100032022041510-a09d3134c10665f03fd56d7f8bdd413b2b771977) (Built Apr 15 2022 02:16:22)

Copyright (c) 2000, 2018, Oracle, MariaDB Corporation Ab and others.

Type 'help;' or '\h' for help. Type '\c' to clear the current input statement.


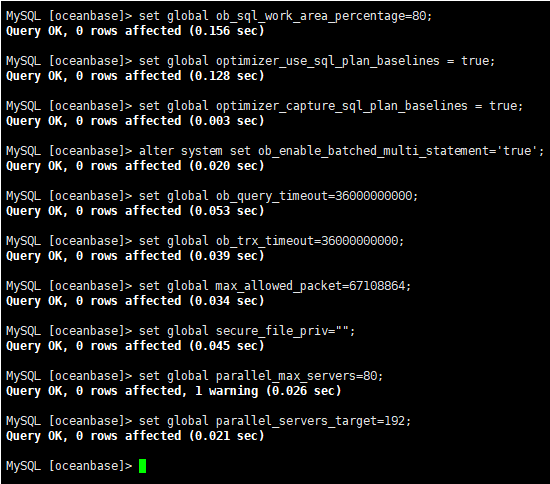
#设置全局参数
set global ob_sql_work_area_percentage=80;
set global optimizer_use_sql_plan_baselines = true;
set global optimizer_capture_sql_plan_baselines = true;
alter system set ob_enable_batched_multi_statement='true';
##租户下设置,防止事务超时
set global ob_query_timeout=36000000000;
set global ob_trx_timeout=36000000000;
set global max_allowed_packet=67108864;
set global secure_file_priv="";
/*
parallel_max_servers 推荐设置为测试租户分配的 resource unit cpu 数的 10 倍
如测试租户使用的 unit 配置为:create resource unit $unit_name max_cpu 26
那么该值设置为 260
parallel_server_target 推荐设置为 parallel_max_servers * 机器数*0.8
那么该值为 260*3*0.8=624
*/
set global parallel_max_servers=80;
set global parallel_servers_target=192;

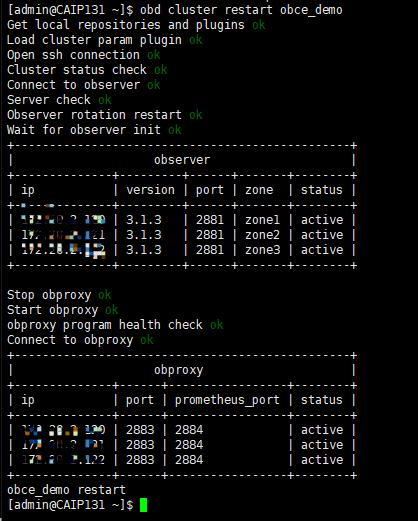
3、重启集群
调优参数设置完毕请重启集群:
[admin@CAIP131 ~]$ obd cluster restart obce_demo

三、TPC-H测试工具测试OceanBase
TPC-H是业界常用的一套基准,由TPC委员会制定发布,用于评测数据库的分析型查询能力。TPC-H查询包含8张数据表、22条复杂的SQL查询,大多数查询包含若干表Join、子查询和Group by聚合等。
1、安装TPC-H
1)在服务器上安装TPC-H
本文使用的TPC-H版本为TPC-H_Tools_v3.0.0。
-


-
TPC-H下载地址(TPC-H需要完成注册后才可以下载):
-
http://tpc.org/tpc_documents_current_versions/download_programs
-

-
下载的地址需要通过代理访问。下载的时候需要通过邮箱进行注册,每注册一次,只能进行一次下载。下载地址会通过邮件的形式发送到邮箱。
-


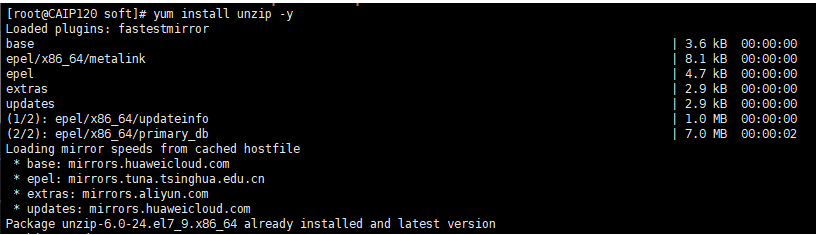
2)下载unzip
[root@CAIP120 soft]# yum install unzip -y

3)解压下载好的安装包
[root@CAIP120 soft]# unzip -q 6eb6268c-803f-4b0e-bc6b-e2e55929a5f6-tpc-h-tool.zip
[root@CAIP120 soft]# ls
6eb6268c-803f-4b0e-bc6b-e2e55929a5f6-tpc-h-tool.zip  TPC-H_Tools_v3.0.0  tpc-h_v3.0.0.docx  tpc-h_v3.0.0.pdf


4)切换到dbgen目录
[root@CAIP120 TPC-H_Tools_v3.0.0]# cd dbgen/
[root@CAIP120 dbgen]# ls
answers     build.c          dists.dss  dsstypes.h      permute.h      queries    rnd.h         tests     tpch.v
bcd2.c      check_answers    driver.c   HISTORY         PORTING.NOTES  README     rng64.c       text.c    update
bcd2.h      column_split.sh  dss.ddl    load_stub.c     print.c        reference  rng64.h       tpcd.h    varian
bm_utils.c  config.h         dss.h      makefile.suite  qgen.c         release.h  shared.h      tpch.dsw  varsub
BUGS        dbgen.dsp        dss.ri     permute.c       qgen.vcproj    rnd.c      speed_seed.c  tpch.sln


5)安装gcc
[root@CAIP120 dbgen]# yum install gcc-c++ #已安装gcc可跳过此处


6)复制makefile
复制makefile文件,备份makefile.suite,重命名为:makefile,也可以不备份直接重命名。
makefile文件主要是用来进行make编译的
[root@CAIP120 dbgen]# cp makefile.suite makefile
[root@CAIP120 dbgen]# ls
answers     check_answers    dss.ddl      makefile        qgen.c       rnd.c         tests        update_release.sh
bcd2.c      column_split.sh  dss.h        makefile.suite  qgen.vcproj  rnd.h         text.c       variants
bcd2.h      config.h         dss.ri       permute.c       queries      rng64.c       tpcd.h       varsub.c
bm_utils.c  dbgen.dsp        dsstypes.h   permute.h       README       rng64.h       tpch.dsw
BUGS        dists.dss        HISTORY      PORTING.NOTES   reference    shared.h      tpch.sln
build.c     driver.c         load_stub.c  print.c         release.h    speed_seed.c  tpch.vcproj


7)修改makefile配置
修改makefile文件文件中的CC、DATABASE、MACHINE、WORKLOAD等参数定义。
打开makefile文件。修改makefile配置。
[root@CAIP120 dbgen]# vim makefile


修改CC、DATABASE、MACHINE、WORKLOAD参数的定义。
  ################
  ## CHANGE NAME OF ANSI COMPILER HERE
  ################
  CC      = gcc    #设定c语言编译器为gcc
  # Current values for DATABASE are: INFORMIX, DB2, ORACLE,
  #                                  SQLSERVER, SYBASE, TDAT (Teradata)
  # Current values for MACHINE are:  ATT, DOS, HP, IBM, ICL, MVS,
  #                                  SGI, SUN, U2200, VMS, LINUX, WIN32
  # Current values for WORKLOAD are:  TPCH
  DATABASE= MYSQL    #数据库格式为mysql
  MACHINE = LINUX    #系统环境为linux
  WORKLOAD = TPCH    #工作加载为tpch
原文件
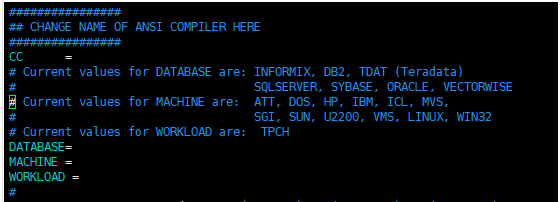

修改后


8)修改tpcd.h文件,并添加新的宏定义。
-
打开
tpcd.h文件。[root@CAIP120 dbgen]# vim tpcd.h

-
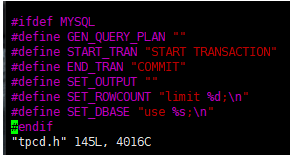
添加如下宏定义。在文件尾部另起一行插入。因为设定的数据库格式为mysql,所以需要进行此步骤
#ifdef MYSQL
#define GEN_QUERY_PLAN ""
#define START_TRAN "START TRANSACTION"
#define END_TRAN "COMMIT"
#define SET_OUTPUT ""
#define SET_ROWCOUNT "limit %d;\n"
#define SET_DBASE "use %s;\n"
#endif
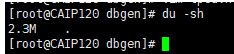
9)查看文件大小
-
 [root@CAIP120 dbgen]# du -sh
 2.3M
2、对文件进行编译make。
[root@CAIP120 dbgen]# make
gcc  -g -DDBNAME=\"dss\" -DLINUX -DMYSQL -DTPCH -DRNG_TEST -D_FILE_OFFSET_BITS=64    -c -o build.o build.c
gcc  -g -DDBNAME=\"dss\" -DLINUX -DMYSQL -DTPCH -DRNG_TEST -D_FILE_OFFSET_BITS=64    -c -o driver.o driver.c
gcc  -g -DDBNAME=\"dss\" -DLINUX -DMYSQL -DTPCH -DRNG_TEST -D_FILE_OFFSET_BITS=64    -c -o bm_utils.o bm_utils.c
gcc  -g -DDBNAME=\"dss\" -DLINUX -DMYSQL -DTPCH -DRNG_TEST -D_FILE_OFFSET_BITS=64    -c -o rnd.o rnd.c
gcc  -g -DDBNAME=\"dss\" -DLINUX -DMYSQL -DTPCH -DRNG_TEST -D_FILE_OFFSET_BITS=64    -c -o print.o print.c
gcc  -g -DDBNAME=\"dss\" -DLINUX -DMYSQL -DTPCH -DRNG_TEST -D_FILE_OFFSET_BITS=64    -c -o load_stub.o load_stub.c
gcc  -g -DDBNAME=\"dss\" -DLINUX -DMYSQL -DTPCH -DRNG_TEST -D_FILE_OFFSET_BITS=64    -c -o bcd2.o bcd2.c
gcc  -g -DDBNAME=\"dss\" -DLINUX -DMYSQL -DTPCH -DRNG_TEST -D_FILE_OFFSET_BITS=64    -c -o speed_seed.o speed_seed.c
gcc  -g -DDBNAME=\"dss\" -DLINUX -DMYSQL -DTPCH -DRNG_TEST -D_FILE_OFFSET_BITS=64    -c -o text.o text.c
gcc  -g -DDBNAME=\"dss\" -DLINUX -DMYSQL -DTPCH -DRNG_TEST -D_FILE_OFFSET_BITS=64    -c -o permute.o permute.c
gcc  -g -DDBNAME=\"dss\" -DLINUX -DMYSQL -DTPCH -DRNG_TEST -D_FILE_OFFSET_BITS=64    -c -o rng64.o rng64.c
gcc  -g -DDBNAME=\"dss\" -DLINUX -DMYSQL -DTPCH -DRNG_TEST -D_FILE_OFFSET_BITS=64  -O -o dbgen build.o driver.o bm_utils.o rnd.o print.o load_stub.o bcd2.o speed_seed.o text.o permute.o rng64.o -lm
gcc  -g -DDBNAME=\"dss\" -DLINUX -DMYSQL -DTPCH -DRNG_TEST -D_FILE_OFFSET_BITS=64    -c -o qgen.o qgen.c
gcc  -g -DDBNAME=\"dss\" -DLINUX -DMYSQL -DTPCH -DRNG_TEST -D_FILE_OFFSET_BITS=64    -c -o varsub.o varsub.c
gcc  -g -DDBNAME=\"dss\" -DLINUX -DMYSQL -DTPCH -DRNG_TEST -D_FILE_OFFSET_BITS=64  -O -o qgen build.o bm_utils.o qgen.o rnd.o varsub.o text.o bcd2.o permute.o speed_seed.o rng64.o -lm
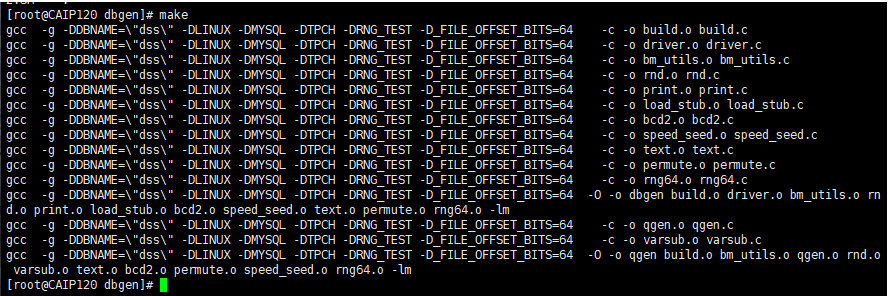

编译完成后该目录下会生成两个可执行文件:


dbgen:数据生成工具。在使用InfiniDB官方测试脚本进行测试时,需要用该工具生成tpch相关表数据。qgen:SQL生成工具。生成初始化测试查询,由于不同的seed生成的查询不同,为了结果的可重复性,请使用附件提供的22个查询。
3、使用TPC-H生成测试数据。
如果之前生成过数据,可以通过make clean清理。
[root@CAIP120 dbgen]# time ./dbgen -s 10
TPC-H Population Generator (Version 3.0.0)
Copyright Transaction Processing Performance Council 1994 - 2010

real	2m34.992s
user	2m25.795s
sys	0m7.723s
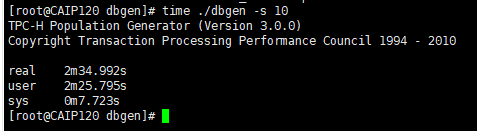

dbgen参数-s的作用是指定生成测试数据的仓库数。-s 10表示生成10G的数据
[root@CAIP120 dbgen]# ls *.tbl
customer.tbl  lineitem.tbl  nation.tbl  orders.tbl  partsupp.tbl  part.tbl  region.tbl  supplier.tbl


执行完生成数据命令后,可以在dbgen目录看到8个*.tbl文件,就是你生成好的数据文件
4、数据对比
生成测试数据前目录大小
[root@CAIP120 dbgen]# du -sh
2.3M


新建测试目录
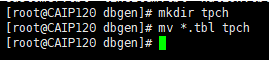
[root@CAIP120 dbgen]# mkdir tpch
[root@CAIP120 dbgen]# mv *.tbl tpch

生成测试数据后目录大小:-s 10表示生成10G的数据(仅做测试,只简单测试10G数据)
[root@CAIP120 dbgen]# du -sh
11G


5、使用TPC-H生成查询。
1)将qgen与dists.dss复制到queries目录下。
[root@CAIP120 dbgen]# cp qgen queries
[root@CAIP120 dbgen]# cp dists.dss queries


2)在 queries 目录下创建 test.sh 脚本生成查询 SQL。
[root@CAIP120 queries]# vim test.sh


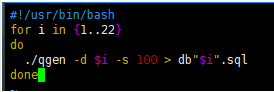
3)使用以下脚本生成查询。执行完生成数据命令后,可以在queries目录中看到查询负载sql
#!/usr/bin/bash
for i in {1..22}
do
  ./qgen -d $i -s 100 > db"$i".sql
done

4)授权并执行 test.sh 脚本。
[root@CAIP120 queries]# chmod +x  test.sh
[root@CAIP120 queries]# ./test.sh


5)查询 SQL 进行调整。
[root@CAIP120 queries]# dos2unix *
dos2unix: converting file 10.sql to Unix format ...
dos2unix: converting file 11.sql to Unix format ...
dos2unix: converting file 12.sql to Unix format ...
dos2unix: converting file 13.sql to Unix format ...
dos2unix: converting file 14.sql to Unix format ...
dos2unix: converting file 15.sql to Unix format ...
dos2unix: converting file 16.sql to Unix format ...
dos2unix: converting file 17.sql to Unix format ...
dos2unix: converting file 18.sql to Unix format ...
dos2unix: converting file 19.sql to Unix format ...
dos2unix: converting file 1.sql to Unix format ...
dos2unix: converting file 20.sql to Unix format ...
dos2unix: converting file 21.sql to Unix format ...
dos2unix: converting file 22.sql to Unix format ...
dos2unix: converting file 2.sql to Unix format ...
dos2unix: converting file 3.sql to Unix format ...
dos2unix: converting file 4.sql to Unix format ...
dos2unix: converting file 5.sql to Unix format ...
dos2unix: converting file 6.sql to Unix format ...
dos2unix: converting file 7.sql to Unix format ...
dos2unix: converting file 8.sql to Unix format ...
dos2unix: converting file 9.sql to Unix format ...
dos2unix: converting file db10.sql to Unix format ...
dos2unix: converting file db11.sql to Unix format ...
dos2unix: converting file db12.sql to Unix format ...
dos2unix: converting file db13.sql to Unix format ...
dos2unix: converting file db14.sql to Unix format ...
dos2unix: converting file db15.sql to Unix format ...
dos2unix: converting file db16.sql to Unix format ...
dos2unix: converting file db17.sql to Unix format ...
dos2unix: converting file db18.sql to Unix format ...
dos2unix: converting file db19.sql to Unix format ...
dos2unix: converting file db1.sql to Unix format ...
dos2unix: converting file db20.sql to Unix format ...
dos2unix: converting file db21.sql to Unix format ...
dos2unix: converting file db22.sql to Unix format ...
dos2unix: converting file db2.sql to Unix format ...
dos2unix: converting file db3.sql to Unix format ...
dos2unix: converting file db4.sql to Unix format ...
dos2unix: converting file db5.sql to Unix format ...
dos2unix: converting file db6.sql to Unix format ...
dos2unix: converting file db7.sql to Unix format ...
dos2unix: converting file db8.sql to Unix format ...
dos2unix: converting file db9.sql to Unix format ...
dos2unix: converting file dists.dss to Unix format ...
dos2unix: Binary symbol found at line 1
dos2unix: Skipping binary file qgen
dos2unix: converting file test.sh to Unix format ...


去掉生成文件中的 limit -xx(OB不支持limit 负数的语法) , 去掉 day 后的 (3), 加上parallel(96) 并发,以 db1 为例, SQL 如下:
[root@CAIP120 queries]# vim db1.sql
原sql

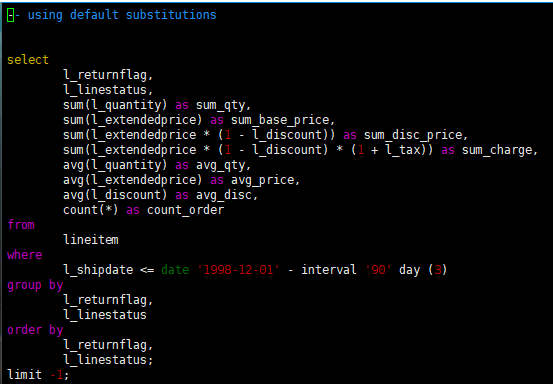
修改sql


6、新建表
创建表结构文件 create_tpch_mysql_table_part.ddl。
共需新建8个表,part、region、nation、customer、supplier、orders、partsupp、lineitem。
[root@CAIP120 dbgen]# vim create_tpch_mysql_table_part.ddl


create tablegroup if not exists tpch_tg_10g_lineitem_order_group binding true partition by key 1 partitions 192;
create tablegroup if not exists tpch_tg_10g_partsupp_part binding true partition by key 1 partitions 192;

drop database if exists $db_name;
create database $db_name;
use $db_name;

    create table lineitem (
    l_orderkey bigint not null,
    l_partkey bigint not null,
    l_suppkey bigint not null,
    l_linenumber bigint not null,
    l_quantity bigint not null,
    l_extendedprice bigint not null,
    l_discount bigint not null,
    l_tax bigint not null,
    l_returnflag char(1) default null,
    l_linestatus char(1) default null,
    l_shipdate date not null,
    l_commitdate date default null,
    l_receiptdate date default null,
    l_shipinstruct char(25) default null,
    l_shipmode char(10) default null,
    l_comment varchar(44) default null,
    primary key(l_orderkey, l_linenumber))
    tablegroup = tpch_tg_100g_lineitem_order_group
    partition by key (l_orderkey) partitions 192;
    create index I_L_ORDERKEY on lineitem(l_orderkey) local;
    create index I_L_SHIPDATE on lineitem(l_shipdate) local;

    create table orders (
    o_orderkey bigint not null,
    o_custkey bigint not null,
    o_orderstatus char(1) default null,
    o_totalprice bigint default null,
    o_orderdate date not null,
    o_orderpriority char(15) default null,
    o_clerk char(15) default null,
    o_shippriority bigint default null,
    o_comment varchar(79) default null,
    primary key (o_orderkey))
    tablegroup = tpch_tg_100g_lineitem_order_group
    partition by key(o_orderkey) partitions 192;
    create index I_O_ORDERDATE on orders(o_orderdate) local;


    create table partsupp (
    ps_partkey bigint not null,
    ps_suppkey bigint not null,
    ps_availqty bigint default null,
    ps_supplycost bigint default null,
    ps_comment varchar(199) default null,
    primary key (ps_partkey, ps_suppkey))
    tablegroup tpch_tg_100g_partsupp_part
    partition by key(ps_partkey) partitions 192;


    create table part (
  p_partkey bigint not null,
  p_name varchar(55) default null,
  p_mfgr char(25) default null,
  p_brand char(10) default null,
  p_type varchar(25) default null,
  p_size bigint default null,
  p_container char(10) default null,
  p_retailprice bigint default null,
  p_comment varchar(23) default null,
  primary key (p_partkey))
  tablegroup tpch_tg_100g_partsupp_part
  partition by key(p_partkey) partitions 192;


    create table customer (
  c_custkey bigint not null,
  c_name varchar(25) default null,
  c_address varchar(40) default null,
  c_nationkey bigint default null,
  c_phone char(15) default null,
  c_acctbal bigint default null,
  c_mktsegment char(10) default null,
  c_comment varchar(117) default null,
  primary key (c_custkey))
  partition by key(c_custkey) partitions 192;

  create table supplier (
  s_suppkey bigint not null,
  s_name char(25) default null,
  s_address varchar(40) default null,
  s_nationkey bigint default null,
  s_phone char(15) default null,
  s_acctbal bigint default null,
  s_comment varchar(101) default null,
  primary key (s_suppkey)
) partition by key(s_suppkey) partitions 192;


    create table nation (
  n_nationkey bigint not null,
  n_name char(25) default null,
  n_regionkey bigint default null,
  n_comment varchar(152) default null,
  primary key (n_nationkey));

    create table region (
  r_regionkey bigint not null,
  r_name char(25) default null,
  r_comment varchar(152) default null,
  primary key (r_regionkey));


查看表
[root@CAIP120 queries]# obclient -h112.127.2.120 -uroot@tenantdemo#obce_demo -P2883 -p -c -A oceanbase
Enter password:
Welcome to the OceanBase.  Commands end with ; or \g.
Your MySQL connection id is 11
Server version: 5.6.25 OceanBase 3.1.3 (r10100032022041510-a09d3134c10665f03fd56d7f8bdd413b2b771977) (Built Apr 15 2022 02:16:22)

Copyright (c) 2000, 2018, Oracle, MariaDB Corporation Ab and others.

Type 'help;' or '\h' for help. Type '\c' to clear the current input statement.

MySQL [oceanbase]> show databases;
+--------------------+
| Database           |
+--------------------+
| oceanbase          |
| information_schema |
| mysql              |
| test               |
| tpcc               |
| tpch               |
+--------------------+
6 rows in set (0.028 sec)

MySQL [oceanbase]> use tpch;
Database changed
MySQL [tpch]> show tables;
+----------------+
| Tables_in_tpch |
+----------------+
| customer       |
| lineitem       |
| nation         |
| orders         |
| part           |
| partsupp       |
| region         |
| supplier       |
+----------------+
8 rows in set (0.025 sec)

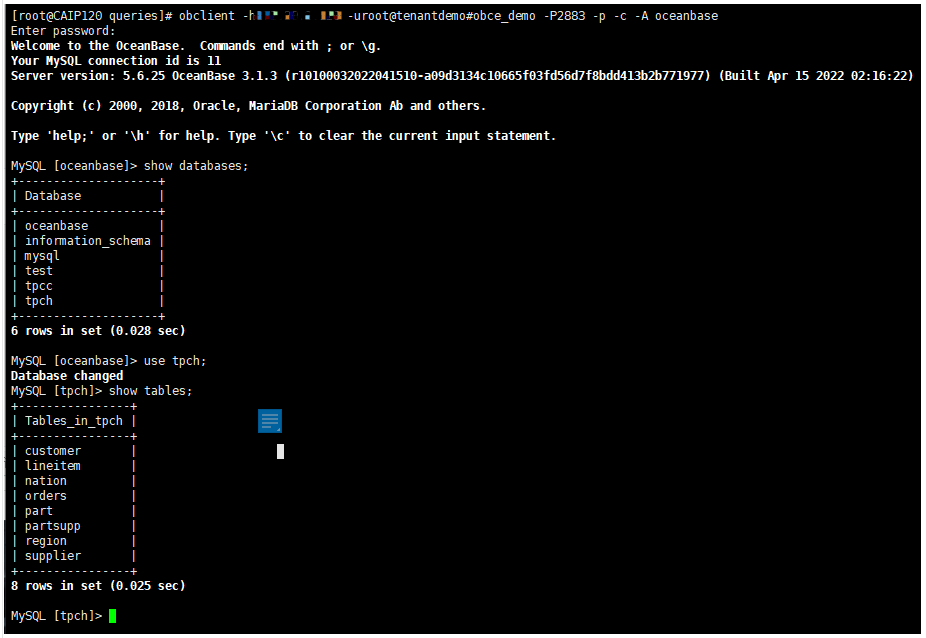
切换到tpch数据库下,show tables;可以看到8张表
7、加载数据
您可以根据上述步骤生成的数据和 SQL 自行编写脚本。加载数据示例操作如下:
1)创建加载脚本目录。
[root@CAIP120 dbgen]# mkdir load
[root@CAIP120 dbgen]# pwd
/soft/TPC-H_Tools_v3.0.0/dbgen
[root@CAIP120 dbgen]# cd load
[root@CAIP120 load]# cp /soft/TPC-H_Tools_v3.0.0/dbgen/dss.ri /soft/TPC-H_Tools_v3.0.0/dbgen/dss.ddl ./


2)创建 load.py 脚本。
[root@CAIP120 load]# vim load.py


#/usr/bin/evn python
#-*- encoding:utf-8 -*-
import os
import sys
import time
import commands
hostname='$host_ip'  #注意!!请填写某个 observer,如 observer A 所在服务器的 IP 地址
port='$host_port'               #observer A 的端口号
tenant='$tenant_name'              #租户名
user='$user'               #用户名
password='$password'           #密码
data_path='$path'         #注意!!请填写 observer A 所在服务器下 tbl 所在目录
db_name='$db_name'             #数据库名
#创建表
cmd_str='obclient -h%s -P%s -u%s@%s -p%s < create_tpch_mysql_table_part.ddl'%(hostname,port,user,tenant,password)
result = commands.getstatusoutput(cmd_str)
print result
cmd_str='obclient -h%s -P%s -u%s@%s -p%s  -D%s -e "show tables;" '%(hostname,port,user,tenant,password,db_name)
result = commands.getstatusoutput(cmd_str)
print result
cmd_str=""" obclient -h%s -P%s -u%s@%s -p%s -c  -D%s -e "load data /*+ parallel(80) */ infile '%s/customer.tbl' into table customer fields terminated by '|';" """ %(hostname,port,user,tenant,password,db_name,data_path)
result = commands.getstatusoutput(cmd_str)
print result
cmd_str=""" obclient -h%s -P%s -u%s@%s -p%s -c  -D%s -e "load data /*+ parallel(80) */ infile '%s/lineitem.tbl' into table lineitem fields terminated by '|';" """ %(hostname,port,user,tenant,password,db_name,data_path)
result = commands.getstatusoutput(cmd_str)
print result
cmd_str=""" obclient -h%s -P%s -u%s@%s -p%s -c -D%s -e "load data /*+ parallel(80) */ infile '%s/nation.tbl' into table nation fields terminated by '|';" """ %(hostname,port,user,tenant,password,db_name,data_path)
result = commands.getstatusoutput(cmd_str)
print result
cmd_str=""" obclient -h%s -P%s -u%s@%s -p%s -c  -D%s -e "load data /*+ parallel(80) */ infile '%s/orders.tbl' into table orders fields terminated by '|';" """ %(hostname,port,user,tenant,password,db_name,data_path)
result = commands.getstatusoutput(cmd_str)
print result
cmd_str=""" obclient -h%s -P%s -u%s@%s -p%s   -D%s -e "load data /*+ parallel(80) */ infile '%s/partsupp.tbl' into table partsupp fields terminated by '|';" """ %(hostname,port,user,tenant,password,db_name,data_path)
result = commands.getstatusoutput(cmd_str)
print result
cmd_str=""" obclient -h%s -P%s -u%s@%s -p%s -c  -D%s -e "load data /*+ parallel(80) */ infile '%s/part.tbl' into table part fields terminated by '|';" """ %(hostname,port,user,tenant,password,db_name,data_path)
result = commands.getstatusoutput(cmd_str)
print result
cmd_str=""" obclient -h%s -P%s -u%s@%s -p%s -c  -D%s -e "load data /*+ parallel(80) */ infile '%s/region.tbl' into table region fields terminated by '|';" """ %(hostname,port,user,tenant,password,db_name,data_path)
result = commands.getstatusoutput(cmd_str)
print result
cmd_str=""" obclient -h%s -P%s -u%s@%s -p%s -c  -D%s -e "load data /*+ parallel(80) */ infile '%s/supplier.tbl' into table supplier fields terminated by '|';" """ %(hostname,port,user,tenant,password,db_name,data_path)
result = commands.getstatusoutput(cmd_str)
print result


3)加载数据。
注意加载数据需要安装 obclient 客户端。
$python as c_count
(0,'')
(0, 'obclient: [Warning] Using a password on the command line interface can be insecure.\nTABLE_NAME\nT1\nLINEITEM\nORDERS\nPARTSUPP\nPART\nCUSTOMER\nSUPPLIER\nNATION\nREGION')
(0, 'obclient: [Warning] Using a password on the command line interface can be insecure.')
(0, 'obclient: [Warning] Using a password on the command line interface can be insecure.')
(0, 'obclient: [Warning] Using a password on the command line interface can be insecure.')
(0, 'obclient: [Warning] Using a password on the command line interface can be insecure.')
(0, 'obclient: [Warning] Using a password on the command line interface can be insecure.')
(0, 'obclient: [Warning] Using a password on the command line interface can be insecure.')
(0, 'obclient: [Warning] Using a password on the command line interface can be insecure.')
加载数据
[root@CAIP120 load]# python load.py


8、执行合并
Major 合并将当前大版本的 SSTable 和 MemTable 与前一个大版本的全量静态数据进行合并,使存储层统计信息更准确,生成的执行计划更稳定。执行合并需要使用 sys 租户登录。
[root@CAIP120 dbgen]# obclient -h172.20.2.120 -uroot@sys#obce_demo -p -P2883 -A -c oceanbase
Enter password:
Welcome to the OceanBase.  Commands end with ; or \g.
Your MySQL connection id is 8
Server version: 5.6.25 OceanBase 3.1.3 (r10100032022041510-a09d3134c10665f03fd56d7f8bdd413b2b771977) (Built Apr 15 2022 02:16:22)

Copyright (c) 2000, 2018, Oracle, MariaDB Corporation Ab and others.

Type 'help;' or '\h' for help. Type '\c' to clear the current input statement.


MySQL [(none)]> use oceanbase
Database changed
MySQL [oceanbase]> alter system major freeze;
Query OK, 0 rows affected


查看合并是否完成
MySQL [oceanbase]> select name,value from oceanbase.__all_zone where name='frozen_version' or name='last_merged_version';
+---------------------+-------+
| name                | value |
+---------------------+-------+
| frozen_version      |    27 |
| last_merged_version |    27 |
| last_merged_version |    27 |
| last_merged_version |    27 |
| last_merged_version |    27 |
+---------------------+-------+
5 rows in set (0.003 sec)


frozen_version 和所有 zone 的 last_merged_version 的值相等即表示合并完成。
9、执行TPC-H测试
使用TPC-H进行性能测试,需要有很多工作配合才能获得较高性能,如建立索引,表数据的合理分布(使用表空间和聚簇技术)等。
这里从查询优化技术的角度,对TPC-H的22条查询语句和主流数据库执行每条语句对应的查询执行计划进行分析,目的在于了解各个主流数据库的查询优化技术,以TPC-H实例进一步掌握查询优化技术,对比主流数据库的实现情况对查询优化技术融会贯通。
您可以根据上述步骤生成的数据和 SQL 自行编写脚本。执行测试示例22条(SQL语句)分析操作如下:
1)在 queries 目录下编写测试脚本 tpch.sh。
#!/bin/bash
TPCH_TEST="obclient -h 172.20.2.120 -P 2881 -uroot@tenantdemo  -D tpch  -pPwd@20220419# -c"
#warmup预热
for i in {1..22}
do
    db1="source db${i}.sql"
    echo $db1| $TPCH_TEST >db${i}.log  || ret=1
done
#正式执行
for i in {1..22}
do
    starttime=`date +%s%N`
    echo `date  '+[%Y-%m-%d %H:%M:%S]'` "BEGIN Q${i}"
    db1="source db${i}.sql"
    echo $db1| $TPCH_TEST >db${i}.log  || ret=1
    stoptime=`date +%s%N`
    costtime=`echo $stoptime $starttime | awk '{printf "%0.2f\n", ($1 - $2) / 1000000000}'`
    echo `date  '+[%Y-%m-%d %H:%M:%S]'` "END,COST ${costtime}s"
done


2)再次执行测试脚本测试
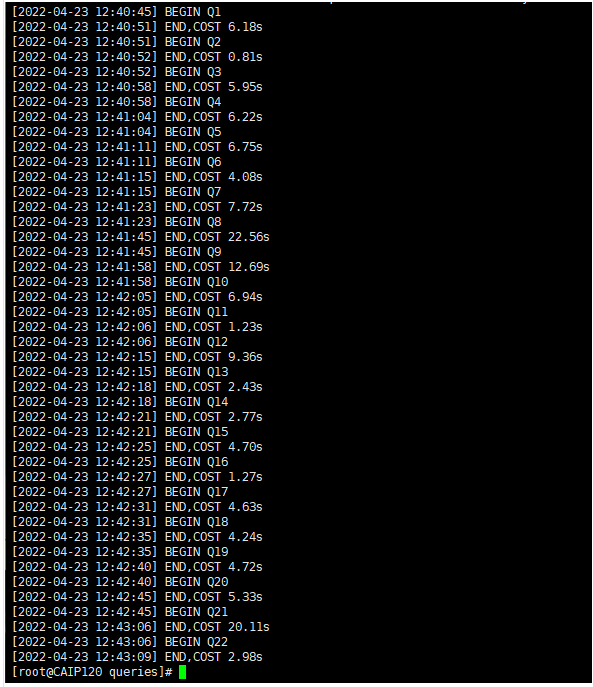
 测试结果对比
| Query ID | 网络3节点 OB V3.1.0查询响应时间(单位:秒) | 本机3节点 OB V3.1.3查询响应时间(单位:秒) |
|---|---|---|
| 1 | 14.04 | 6.18 |
| 2 | 1.12 | 0.81 |
| 3 | 13.57 | 5.95 |
| 4 | 2.51 | 6.22 |
| 5 | 12.31 | 6.75 |
| 6 | 7.33 | 4.08 |
| 7 | 10.38 | 7.72 |
| 8 | 11.42 | 22.56 |
| 9 | 30.99 | 12.69 |
| 10 | 6.84 | 6.94 |
| 11 | 1.22 | 1.23 |
| 12 | 8.64 | 9.36 |
| 13 | 7.59 | 2.43 |
| 14 | 1.51 | 2.77 |
| 15 | 3.01 | 4.7 |
| 16 | 2.66 | 1.27 |
| 17 | 8.60 | 4.63 |
| 18 | 7.88 | 4.24 |
| 19 | 9.36 | 4.72 |
| 20 | 10.95 | 5.33 |
| 21 | 12.27 | 20.11 |
| 22 | 4.05 | 2.98 |
| total | 188.25 | 143.67 |
四、OBD 一键测试
官方脚本
sudo yum install -y yum-utils
sudo yum-config-manager --add-repo https://mirrors.aliyun.com/oceanbase/OceanBase.repo
sudo yum install obtpch
sudo ln -s /usr/tpc-h-tools/tpc-h-tools/ /usr/local/
obd test tpch obperf  --tenant=tpch_mysql -s 100 --remote-tbl-dir=/tmp/tpch100
1、安装yum-utils
[admin@CAIP131 ~]$ sudo yum install -y yum-utils
[sudo] password for admin:
base                                                                                                      | 3.6 kB  00:00:00
epel/x86_64/metalink                                                                                      |  10 kB  00:00:00
epel                                                                                                      | 4.7 kB  00:00:00
extras                                                                                                    | 2.9 kB  00:00:00
oceanbase.community.stable                                                                                | 3.0 kB  00:00:00
oceanbase.development-kit                                                                                 | 3.0 kB  00:00:00
updates                                                                                                   | 2.9 kB  00:00:00
(1/2): epel/x86_64/updateinfo                                                                             | 1.0 MB  00:00:00
epel/x86_64/primary_db         FAILED
http://epel.mirror.angkasa.id/pub/epel/7/x86_64/repodata/e3b1189957a202fdb60540c6f8f95da600c1a7a73e2e6f084efa7d7bf56de48d-primary.sqlite.bz2: [Errno 12] Timeout on http://epel.mirror.angkasa.id/pub/epel/7/x86_64/repodata/e3b1189957a202fdb60540c6f8f95da600c1a7a73e2e6f084efa7d7bf56de48d-primary.sqlite.bz2: (28, 'Connection timed out after 30000 milliseconds')
Trying other mirror.
(2/2): epel/x86_64/primary_db                                                                             | 7.0 MB  00:00:02
Package yum-utils-1.1.31-54.el7_8.noarch already installed and latest version


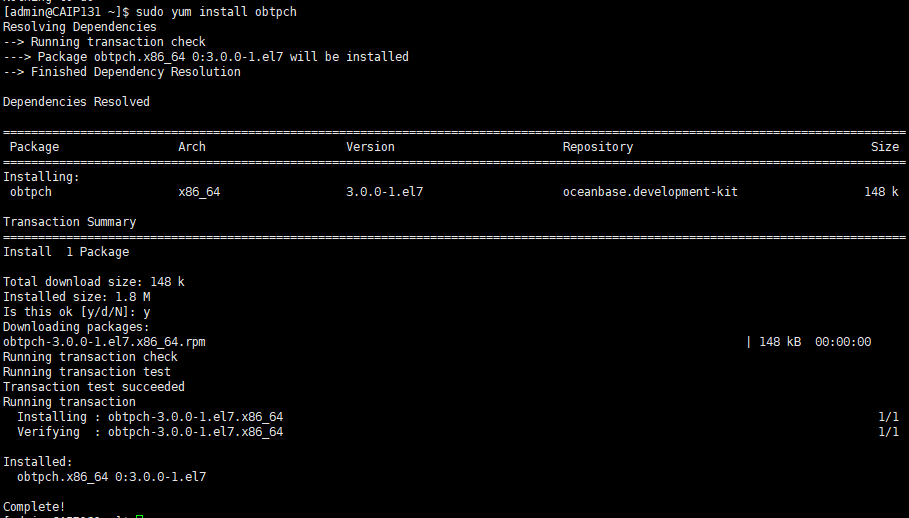
2、安装obd版本的obtpch
[admin@CAIP131 ~]$ sudo yum install obtpch
Resolving Dependencies
--> Running transaction check
---> Package obtpch.x86_64 0:3.0.0-1.el7 will be installed
--> Finished Dependency Resolution
Dependencies Resolved
=================================================================================================================================
 Package                 Arch                    Version                        Repository                                  Size
=================================================================================================================================
Installing:
 obtpch                  x86_64                  3.0.0-1.el7                    oceanbase.development-kit                  148 k
Transaction Summary
=================================================================================================================================
Install  1 Package
Total download size: 148 k
Installed size: 1.8 M
Is this ok [y/d/N]: y
Downloading packages:
obtpch-3.0.0-1.el7.x86_64.rpm                                                                             | 148 kB  00:00:00
Running transaction check
Running transaction test
Transaction test succeeded
Running transaction
  Installing : obtpch-3.0.0-1.el7.x86_64                                                                                     1/1
  Verifying  : obtpch-3.0.0-1.el7.x86_64                                                                                     1/1
Installed:
  obtpch.x86_64 0:3.0.0-1.el7
Complete!

3、添加tpc-h目录链接
[admin@CAIP131 ~]$ sudo ln -s /usr/tpc-h-tools/tpc-h-tools/ /usr/local/

 4、obd一键测试
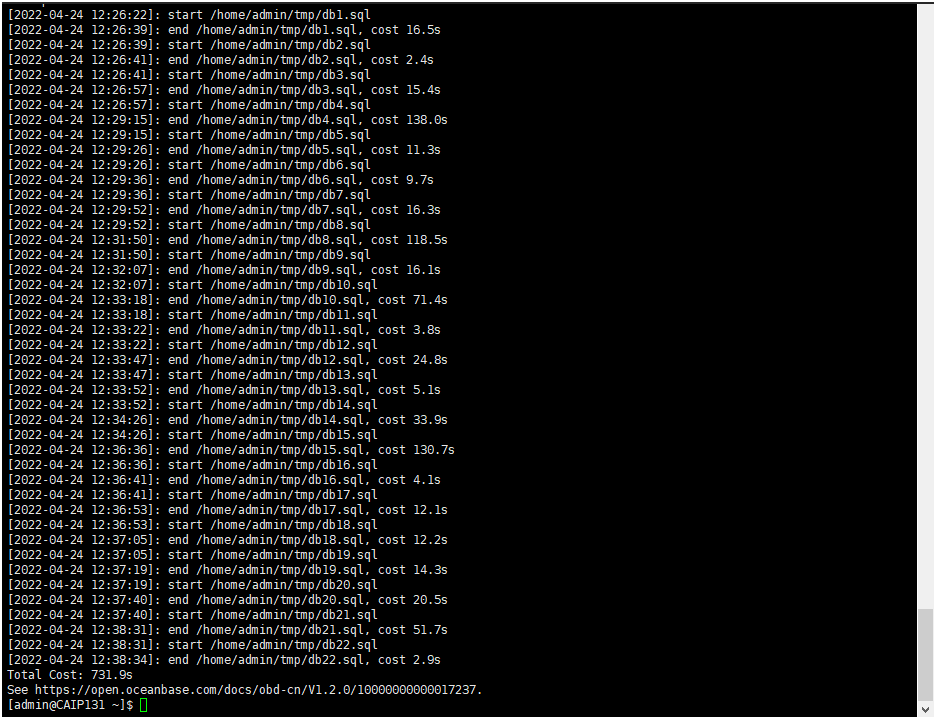
[admin@CAIP131 ~]$ obd test tpch obce_demo --tenant=tenantdemo --user=root --password=Pwd@20220419# -s 10 --remote-tbl-dir=/tmp/tpch10
Get local repositories and plugins ok
Open ssh connection ok
Cluster status check ok
Connect observer(z1(172.20.2.120):2881) ok
Send tbl to remote (z1(172.20.2.120)) ok
Format DDL ok
Create table ok
Load data ok
Merge ok
Format SQL ok
Warmup ok
[2022-04-24 12:26:22]: start /home/admin/tmp/db1.sql
[2022-04-24 12:26:39]: end /home/admin/tmp/db1.sql, cost 16.5s
[2022-04-24 12:26:39]: start /home/admin/tmp/db2.sql
[2022-04-24 12:26:41]: end /home/admin/tmp/db2.sql, cost 2.4s
[2022-04-24 12:26:41]: start /home/admin/tmp/db3.sql
[2022-04-24 12:26:57]: end /home/admin/tmp/db3.sql, cost 15.4s
[2022-04-24 12:26:57]: start /home/admin/tmp/db4.sql
[2022-04-24 12:29:15]: end /home/admin/tmp/db4.sql, cost 138.0s
[2022-04-24 12:29:15]: start /home/admin/tmp/db5.sql
[2022-04-24 12:29:26]: end /home/admin/tmp/db5.sql, cost 11.3s
[2022-04-24 12:29:26]: start /home/admin/tmp/db6.sql
[2022-04-24 12:29:36]: end /home/admin/tmp/db6.sql, cost 9.7s
[2022-04-24 12:29:36]: start /home/admin/tmp/db7.sql
[2022-04-24 12:29:52]: end /home/admin/tmp/db7.sql, cost 16.3s
[2022-04-24 12:29:52]: start /home/admin/tmp/db8.sql
[2022-04-24 12:31:50]: end /home/admin/tmp/db8.sql, cost 118.5s
[2022-04-24 12:31:50]: start /home/admin/tmp/db9.sql
[2022-04-24 12:32:07]: end /home/admin/tmp/db9.sql, cost 16.1s
[2022-04-24 12:32:07]: start /home/admin/tmp/db10.sql
[2022-04-24 12:33:18]: end /home/admin/tmp/db10.sql, cost 71.4s
[2022-04-24 12:33:18]: start /home/admin/tmp/db11.sql
[2022-04-24 12:33:22]: end /home/admin/tmp/db11.sql, cost 3.8s
[2022-04-24 12:33:22]: start /home/admin/tmp/db12.sql
[2022-04-24 12:33:47]: end /home/admin/tmp/db12.sql, cost 24.8s
[2022-04-24 12:33:47]: start /home/admin/tmp/db13.sql
[2022-04-24 12:33:52]: end /home/admin/tmp/db13.sql, cost 5.1s
[2022-04-24 12:33:52]: start /home/admin/tmp/db14.sql
[2022-04-24 12:34:26]: end /home/admin/tmp/db14.sql, cost 33.9s
[2022-04-24 12:34:26]: start /home/admin/tmp/db15.sql
[2022-04-24 12:36:36]: end /home/admin/tmp/db15.sql, cost 130.7s
[2022-04-24 12:36:36]: start /home/admin/tmp/db16.sql
[2022-04-24 12:36:41]: end /home/admin/tmp/db16.sql, cost 4.1s
[2022-04-24 12:36:41]: start /home/admin/tmp/db17.sql
[2022-04-24 12:36:53]: end /home/admin/tmp/db17.sql, cost 12.1s
[2022-04-24 12:36:53]: start /home/admin/tmp/db18.sql
[2022-04-24 12:37:05]: end /home/admin/tmp/db18.sql, cost 12.2s
[2022-04-24 12:37:05]: start /home/admin/tmp/db19.sql
[2022-04-24 12:37:19]: end /home/admin/tmp/db19.sql, cost 14.3s
[2022-04-24 12:37:19]: start /home/admin/tmp/db20.sql
[2022-04-24 12:37:40]: end /home/admin/tmp/db20.sql, cost 20.5s
[2022-04-24 12:37:40]: start /home/admin/tmp/db21.sql
[2022-04-24 12:38:31]: end /home/admin/tmp/db21.sql, cost 51.7s
[2022-04-24 12:38:31]: start /home/admin/tmp/db22.sql
[2022-04-24 12:38:34]: end /home/admin/tmp/db22.sql, cost 2.9s
Total Cost: 731.9s
See https://open.oceanbase.com/docs/obd-cn/V1.2.0/10000000000017237.


注意
-
obd 运行 tpch,详细参数介绍请参考 obd test 文档。
-
在本例中,大幅参数使用的是默认参数,在用户场景下,可以根据自己的具体情况做一些参数上的调整。例如,在本例中使用的集群名为
obperf,租户名是tpch_mysql。 -
使用 OBD 进行一键测试时,集群的部署必须是由 OBD 进行安装和部署,否则无法获取集群的信息,将导致无法根据集群的配置进行性能调优。
-
测试的压测机器当前需要连网才能下载 obtpch,下个版本可以支持离线下载 obtpch。
-
如果系统租户的密码通过终端登陆并修改,非默认空值,需要通过 obd cluster edit-config 将密码设置到配置文件,配置项是
# root_password: # root user password -
运行
obd test tpch后,系统会详细列出运行步骤和输出,数据量越大耗时越久。 -
远程目录具备足够的容量能存储 tpch 的数据,建议单独一块盘存储加载测试数据。
-
obd test tpch命令会自动完成所有操作,无需其他额外任何操作,包含测试数据的生成、传送、OceanBase 参数优化、加载和测试。当中间环节出错时,您可参考 obd test 文档 进行重试。例如:跳过数据的生成和传送,直接进行加载和测试。
tpc-h-tools和obtpch测试结果对比
| Query ID | 本机3节点 OB V3.1.3查询响应时间(单位:秒) | 本机单节点 OBD V3.1.3一键测试查询响应时间(单位:秒) |
|---|---|---|
| 1 | 6.18 | 16.5 |
| 2 | 0.81 | 2.4 |
| 3 | 5.95 | 15.4 |
| 4 | 6.22 | 138.0 |
| 5 | 6.75 | 11.3 |
| 6 | 4.08 | 9.7 |
| 7 | 7.72 | 16.3 |
| 8 | 22.56 | 118.5 |
| 9 | 12.69 | 16.1 |
| 10 | 6.94 | 71.4 |
| 11 | 1.23 | 3.8 |
| 12 | 9.36 | 24.8 |
| 13 | 2.43 | 5.1 |
| 14 | 2.77 | 33.9 |
| 15 | 4.7 | 130.7 |
| 16 | 1.27 | 4.1 |
| 17 | 4.63 | 12.1 |
| 18 | 4.24 | 12.2 |
| 19 | 4.72 | 14.3 |
| 20 | 5.33 | 20.5 |
| 21 | 20.11 | 51.7 |
| 22 | 2.98 | 2.9 |
| total | 143.67 | 731.9 |
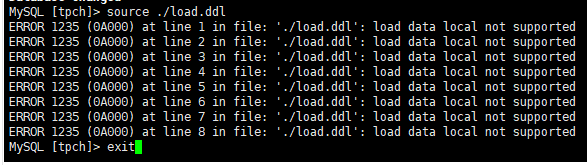
可能遇到的问题:
问题1:
-
导入数据失败。报错信息如下:
ERROR 1017 (HY000) at line 1: File not existtbl 文件必须放在所连接的 OceanBase 数据库所在机器的某个目录下,因为加载数据必须本地导入。
MySQL [tpch]> source ./load.ddl
ERROR 1235 (0A000) at line 1 in file: ‘./load.ddl’: load data local not supported
ERROR 1235 (0A000) at line 2 in file: ‘./load.ddl’: load data local not supported
ERROR 1235 (0A000) at line 3 in file: ‘./load.ddl’: load data local not supported
ERROR 1235 (0A000) at line 4 in file: ‘./load.ddl’: load data local not supported
ERROR 1235 (0A000) at line 5 in file: ‘./load.ddl’: load data local not supported
ERROR 1235 (0A000) at line 6 in file: ‘./load.ddl’: load data local not supported
ERROR 1235 (0A000) at line 7 in file: ‘./load.ddl’: load data local not supported
ERROR 1235 (0A000) at line 8 in file: ‘./load.ddl’: load data local not supported
MySQL [tpch]> exit

-
导入数据报错。报错信息如下:
ERROR 1227 (42501) at line 1: Access denied需要授予用户访问权限。运行以下命令,授予权限:
grant file on *.* to tpch_100g_part;
问题2:
查询 SQL 报错未安装dos2unix
[root@CAIP120 queries]# dos2unix *
-bash: dos2unix: command not found


解决安装dos2unix
[root@CAIP120 queries]# yum install -y dos2unix


问题3:
加载数据报错tbl文件路径未设置正确
[root@CAIP120 load]# python load.py
(256, 'ERROR 5151 (42P01) at line 8: tablegroup not exist')
(256, "ERROR 1049 (42000): Unknown database 'show tables;'")
(256, 'ERROR 5108 (42000): Invalid argument for length()')
(256, 'ERROR 5108 (42000): Invalid argument for length()')
(256, 'ERROR 5108 (42000): Invalid argument for length()')
(256, 'ERROR 5108 (42000): Invalid argument for length()')
(256, 'ERROR 5108 (42000): Invalid argument for length()')
(256, "ERROR 1049 (42000): Unknown database 'load data /*+ parallel(80) */ infile '/soft/tpc-h_tools_v3.0.0/dbgen/load/part.tbl' into table part fields terminated by '|';'")
(256, 'ERROR 5108 (42000): Invalid argument for length()')
(256, 'ERROR 5108 (42000): Invalid argument for length()')


修改后
data_path='/soft/TPC-H_Tools_v3.0.0/dbgen/load'

data_path=/soft/TPC-H_Tools_v3.0.0/dbgen/tpch
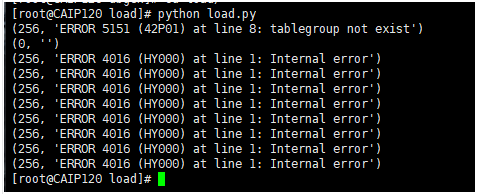
问题4:
[root@CAIP120 load]# python load.py
(256, 'ERROR 5151 (42P01) at line 8: tablegroup not exist')
(0, '')
(256, 'ERROR 4016 (HY000) at line 1: Internal error')
(256, 'ERROR 4016 (HY000) at line 1: Internal error')
(256, 'ERROR 4016 (HY000) at line 1: Internal error')
(256, 'ERROR 4016 (HY000) at line 1: Internal error')
(256, 'ERROR 4016 (HY000) at line 1: Internal error')
(256, 'ERROR 4016 (HY000) at line 1: Internal error')
(256, 'ERROR 4016 (HY000) at line 1: Internal error')
(256, 'ERROR 4016 (HY000) at line 1: Internal error')

问题5:
执行测试脚本报错
[root@CAIP120 queries]# bash tpch.sh
ERROR 1064 (42000) at line 4 in file: 'db13.sql': You have an error in your SQL syntax; check the manual that corresponds to your OceanBase version for the right syntax to use near '(o_orderkey) as c_count
      customer left outer join orders on
        c_custk' at line 7


报错说明提示db13 语句有语法错误,需要修改如下才能正常执行:
select  /*+    parallel(96) */
  c_count,
  count(*) as custdist
from
  (
    select
      c_custkey,
      count(o_orderkey) as c_count   #修改点from
      customer left outer join orders on
        c_custkey = o_custkey
        and o_comment not like '%special%packages%'group by
      c_custkey
  ) c_orders
group by
  c_count
order by
  custdist desc,
  c_count desc;
BenchmarkSQL跑TPC-C和TPC-H Tool跑TPC-H测试场景和方法来源网络,实际测试中可能会遇到一些问题。分析这些问题也可以了解OceanBase的特点。我也是初学者,还在不断探索中,希望学习到更多的Oceanbase技能。 在座的都是青年才俊,有句话是这样说,我要向大家学习。欢迎大家在文章评论区反馈留言和我交流学习。
