


注:黑色为原版部分,红色为疑问与完善内容部分(红色完善与新加的部分请老师确认是否正确,望老师多多指点)
目录
准备阶段
偶数机(management server)----管理机
奇数机(database server)---------数据库机
Xmanager Enterprise 5----------图形化操作工具
奇数机与偶数机 账号:root 密码:oracle
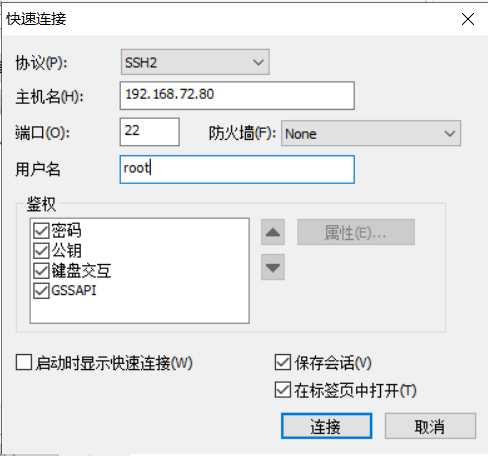
远程连接工具:SecureCRT
虚拟机:VMware Workstation Pro
创建sudo的oracle用户(考试root权限被锁只能用sudo 请老师确认是否正确)

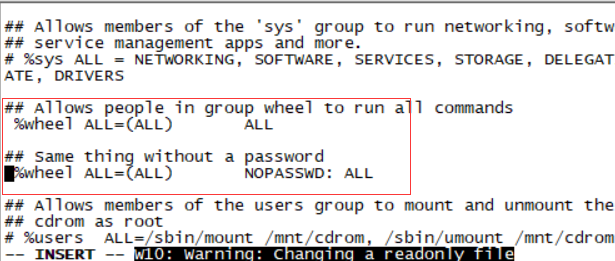
去掉%wheel前的#
vi /etc/group
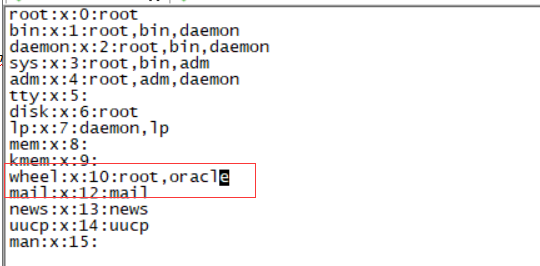
wheel 加上oracle用户 这样sudo就不需要密码了
配置网络(练习中设静态Ip,为了方便SecureCRT远程连接 后续都是在SecureCRT操作)
先检查奇数机的ip

编辑网络配置命令:vi /etc/sysconfig/network-scripts/ifcfg-eth0
老师给的11g环境
奇数机 初始网络配置
DEVICE=eth0 网卡设备名,eth0表示第一张网卡
BOOTPROTO=dhcp 是否自动获取IP(none,static,dhcp),static:静态ip,dhcp:动态ip,none:无(无指定)
ONBOOT=yes 是否随网络服务启动当前网卡生效(在centOS6以上的版本ONBOOT是默认关闭的)
HWADDR=00:0c:29:d4:df:ac MAC地址
偶数机 初始网络配置
DEVICE=eth0 网卡设备名,eth0表示第一张网卡
BOOTPROTO=none 是否自动获取IP(none,static,dhcp),static:静态ip,dhcp:动态ip,none:无(无指定)
ONBOOT=yes 是否随网络服务启动当前网卡生效(在centOS6以上的版本ONBOOT是默认关闭的)
HWADDR=00:50:56:21:4a:10 MAC地址
IPADDR=192.168.92.90 IP地址
NETMASK=255.255.255.0 子网掩码
GATEWAY=192.168.92.1 网关
TYPE=Ethernet 网络类型 这里是以太网
USERCTL=no 是否允许非root用户控制此网卡,这里为不允许
IPV6INIT=no IPV6是否启用,这里设置为不启用
PEERDNS=yes 是否允许DHCP获得的DNS覆盖本地的DNS
/etc/hosts (负责IP地址与域名快速解析的文件)初始配置
127.0.0.1 localhost.localdomain localhost
::1 localhost6.localdomain6 localhost6
192.168.92.80 odd.oracle.com odd
192.168.92.90 even.oracle.com even
(第一部份:网络IP地址;
第二部份:主机名或域名;
第三部份:主机名别名;)
为了方便SecureCRT远程连接,根据奇数机动态获取的ip 奇数机与偶数机都进行静态ip修改设置
奇数机部分:(注:ip根据ifconfig获取的动态ip来配置)
DEVICE=eth0
BOOTPROTO=static
ONBOOT=yes
HWADDR=00:0c:29:d4:df:ac
IPADDR=192.168.72.80
NETMASK=255.255.255.0
GATEWAY=192.168.72.1
TYPE=Ethernet
USERCTL=no
IPV6INIT=no
PEERDNS=yes
偶数机部分:(ip根据ifconfig获取的动态ip来配置)
DEVICE=eth0
BOOTPROTO=none
ONBOOT=yes
HWADDR=00:50:56:21:4a:10
IPADDR=192.168.72.90
NETMASK=255.255.255.0
GATEWAY=192.168.72.1
TYPE=Ethernet
USERCTL=no
IPV6INIT=no
PEERDNS=yes
奇数机与偶数机修改/etc/hosts
# Do not remove the following line, or various programs
# that require network functionality will fail.
127.0.0.1 localhost.localdomain localhost
::1 localhost6.localdomain6 localhost6
192.168.72.80 odd.oracle.com odd
192.168.72.90 even.oracle.com even
全部修改好后奇数机与偶数机重启网络:service network restart
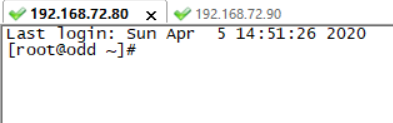
设置好后检查SecureCRT远程连接是否成功

Part 1
Description
In this skillset, you create a new database and modify the existing PROD1 and RPOD2 database. Activities include configuring the network environment, create and configuring tablespace, creating database backups, and improving access to the network file directories. It is important to configure your database environment, so that you can perform complete recovery from any failure, and that your databases are maintained for 100% availability. At the end of this skillset, you should have operational databases in open mode.
Objectives
- Determine and set storage parameters for additional tablespaces and database segments.
- Configure the database environment to support optimal data access performance.
- Protect the database from loss of data due to any kind of failure.
- Create and manage database configuration files.
- Create and manage network configuration files.
- Configure the database instance to support shared server connections.
- Configure the network environment to allow connections to multiple databases.
- Improve access to network file directories.
End State
At the end of this skillset, your database PROD1, PROD2, PROD3, PROD4 and EMREP must be accessible to the proctor. No credit will be given for this skillset if the databases are not open for access.
- Do not change any of the default passwords for the databases or the OS.
- The sample schemas HR,SH,BI,and OE in the PROD1 database can be accessed with the passwords hr,sh,bi,and oe respectively.
- You do not have root access on your systems. You can use sudo to execute any scripts.
- Directories
- All the scripts are located in the /home/oracle/scripts directory.
- Use the /home/oracle/files location to create any external files that are required to perform a skillset task.
- Do not delete or change the directory structure and files unless specified. Unspecified deletions or changes to the directory structure and files can disable scoring.
- General
- You can configure and use GUI tools such as Enterprise Manager Database Control, if required and as applicable.
- Enterprise Manager Grid Control can be configured and used only from Skillset6.
- Data files should not exceed 2 GB in size.
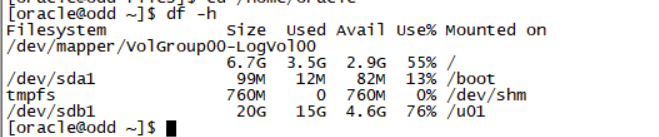
- At the end of the skillset before the proctor starts the scoring, ensure you have a minimum of 15% free space for /(i.e. root) filesystem on the Database Server (i.e. odd PC).Use the command df -h at the command prompt to check the free space.
翻译:
说明
在此技能集中,您将创建一个新数据库并修改PROD1和RPOD2数据库。活动包括配置网络环境、创建和配置表空间、创建数据库备份以及改进对网络文件目录的访问。配置数据库环境非常重要,这样您就可以从任何故障中执行完全恢复,并且您的数据库可以保持100%的可用性。在这个技能集的末尾,您应该让操作数据库处于打开模式。
目标
确定并设置附加表空间和数据库段的存储参数。
配置数据库环境以支持最佳的数据访问性能。
保护数据库免受任何类型的故障造成的数据丢失。
创建和管理数据库配置文件。
创建和管理网络配置文件。
配置数据库实例以支持共享服务器连接。
配置网络环境以允许连接到多个数据库。
改进对网络文件目录的访问。
结束状态
在本技能集的末尾,proctor必须可以访问数据库PROD1、PROD2、PROD3、PROD4和EMREP。如果数据库未打开以供访问,则不会为此技能集授予任何学分。
1.不要更改数据库或操作系统的任何默认密码。
2.PROD1数据库中的示例模式HR、SH、BI和OE可以分别使用密码HR、SH、BI和OE进行访问。
3.您的系统上没有根访问权限。可以使用sudo执行任何脚本。
目录
1.所有脚本都位于/home/oracle/scripts目录中。
2.使用/home/oracle/files位置创建执行技能集任务所需的任何外部文件。
3.除非指定,否则不要删除或更改目录结构和文件。目录结构和文件的未指定删除或更改可能会禁用评分。
·概述
1.如果需要和适用,您可以配置和使用图形用户界面工具,如Enterprise Manager数据库控制。
2.只能从Skillset6配置和使用Enterprise Manager网格控件。
3.数据文件大小不应超过2 GB。
4.在proctor开始评分之前,在技能集的末尾,确保数据库服务器(即odd PC)上的/(即根)文件系统至少有15%的可用空间。在命令提示符下使用命令df-h检查可用空间。
Section 1: Create a Database
1. Create an 11gR2 database, PROD3, on the Management Server by using the command line and run the necessary scripts to complete the PROD3 database creation. Use the following specifications.
i. The database name is PROD3.
The instance name is PROD3.
Ensure that the value for the ORACLE_SID environmental variable is set in uppercase---for example, ORACLE_SID=PROD3.
The password for SYS and SYSTEM is oracle.
There is a sample parameter file named initPROD3.ora in the /home/oracle/scripts directory that can be copied to the appropriate directory and modified as required.
ii. Run the necessary scripts.
iii. The SYSTEM tablespace should be locally managed.
iv. Create and use the directory structure /u01/app/oracle/oradata/PROD3/ to store the database files.
翻译:
第1节:创建数据库
一。使用命令行在管理服务器上创建11gR2数据库PROD3,并运行完成PROD3数据库创建所需的脚本。使用以下规格。
数据库名是PROD3。
实例名为PROD3。
请确保ORACLE SID环境变量的值设置为大写,例如,ORACLE SID=PROD3。
SYS和SYSTEM的密码是oracle。
在/home/oracle/scripts目录中有一个名为initPROD3.ora的示例参数文件,可以将其复制到相应的目录中,并根据需要进行修改。
二。运行必要的脚本。
系统表空间应在本地管理。
iv.创建并使用目录结构/u01/app/oracle/oradata/PROD3/来存储数据库文件。
操作部分:
在偶数机操作
Su - oracle(变更为oracle身份)
建立audit dump目录:
mkdir -p /u01/app/oracle/admin/PROD3/adump(这个是审计目录,数据库spfile里执行后必须有这个目录,否则数据库起不来)
mkdir -p /u01/app/oracle/oradata/PROD3
vi /etc/oratab
PROD3:/u01/app/oracle/product/11.2.0/dbhome_1:Y
配置ORACLE_HOME环境变量
Export ORACLE_HOME=/u01/app/oracle/product/11.2.0/dbhome_1

自己的解决方案 配置PATH环境变量(字符串变量)
Export PATH=$ORACLE_HOME/bin:$PATH(请老师确认是否正确)

建立password file:
orapwd file=/u01/app/oracle/product/11.2.0/dbhome_1/dbs/orapwPROD3 force=y password=oracle ignorecase=n
是否可以写成
orapwd file=$ORACLE_HOME/dbs/orapwPROD3 force=y password=oracle ignorecase=n
编辑初始化参数文件:
vi /u01/app/oracle/product/11.2.0/dbhome_1/dbs/initPROD3.ora
是否可以写成
Vi $ORACLE_HOME/dbs/initPROD3.ora
db_block_size=8192
db_domain="us.oracle.com"
db_name="PROD3"
instance_name=PROD3
control_files=("/u01/app/oracle/oradata/PROD3/control01.ctl","/u01/app/oracle/oradata/PROD3/control02.ctl")
compatible=11.2.0.0.0
undo_tablespace=UNDOTBS1
deferred_segment_creation=false
是否可以简化编辑初始化参数文件
db_block_size=8192
db_domain="us.oracle.com"
db_name="PROD3"
instance_name=PROD3
db_create_file_dest='/u01/app/oracle/oradata'
control_files=('/u01/app/oracle/oradata/PROD3/control01.ctl','/u01/app/oracle/oradata/PROD3/control02.ctl')
sga_target=500m
注:
control_files=('/u01/app/oracle/oradata/PROD3/control01.ctl','/u01/app/oracle/oradata/PROD3/control02.ctl')
控制文件路径老师用的是双引号 但实际操作建库的时候会报控制文件错误,改单引号就正确了 请老师确认是否正确
启动实例到nomount状态:
export ORACLE_SID=PROD3
sqlplus / as sysdba
startup nomount
CREATE DATABASE PROD3
MAXINSTANCES 8
MAXLOGHISTORY 1
MAXLOGFILES 16
MAXLOGMEMBERS 5
MAXDATAFILES 100
DATAFILE '/u01/app/oracle/oradata/PROD3/system01.dbf' SIZE 300M REUSE AUTOEXTEND ON NEXT 10240K MAXSIZE 2G
EXTENT MANAGEMENT LOCAL
SYSAUX DATAFILE '/u01/app/oracle/oradata/PROD3/sysaux01.dbf' SIZE 250M REUSE AUTOEXTEND ON NEXT 10240K MAXSIZE 2G
DEFAULT TEMPORARY TABLESPACE TEMP TEMPFILE '/u01/app/oracle/oradata/PROD3/temp01.dbf' SIZE 100M REUSE AUTOEXTEND ON NEXT 640K MAXSIZE 2G
UNDO TABLESPACE UNDOTBS1 DATAFILE '/u01/app/oracle/oradata/PROD3/undotbs01.dbf' SIZE 100M REUSE AUTOEXTEND ON NEXT 5120K MAXSIZE 2G
CHARACTER SET US7ASCII
NATIONAL CHARACTER SET AL16UTF16
LOGFILE
GROUP 1 ('/u01/app/oracle/oradata/PROD3/redo01.log') SIZE 100M,
GROUP 2 ('/u01/app/oracle/oradata/PROD3/redo02.log') SIZE 100M,
GROUP 3 ('/u01/app/oracle/oradata/PROD3/redo03.log') SIZE 100M
USER SYS IDENTIFIED BY oracle USER SYSTEM IDENTIFIED BY oracle;
执行相关的脚本:
sqlplus / as sysdba
@/u01/app/oracle/product/11.2.0/dbhome_1/rdbms/admin/catalog.sql;
@/u01/app/oracle/product/11.2.0/dbhome_1/rdbms/admin/catproc.sql;
可选:
@/u01/app/oracle/product/11.2.0/dbhome_1/rdbms/admin/catblock.sql;
@/u01/app/oracle/product/11.2.0/dbhome_1/rdbms/admin/catoctk.sql;
@/u01/app/oracle/product/11.2.0/dbhome_1/rdbms/admin/owminst.plb;
connect SYSTEM/oracle
@/u01/app/oracle/product/11.2.0/dbhome_1/sqlplus/admin/pupbld.sql;
connect SYSTEM/oracle
@/u01/app/oracle/product/11.2.0/dbhome_1/sqlplus/admin/help/hlpbld.sql helpus.sql;
重编译失效对象:
execute utl_recomp.recomp_serial();
create spfile from pfile;
shutdown immediate;
startup;
建库流程没有按老师的文档练用了另外一种方式 比较好操作请老师确认
. Oraenv
PROD3回车切到PROD3数据库
Sqlplus / as sysdba
SQL> !echo $ORACLE_HOME
/u01/app/oracle/product/11.2.0/dbhome_1
startup nomount pfile='/u01/app/oracle/product/11.2.0/dbhome_1/dbs/initPROD3.ora';
create database PROD3 character set al32utf8 extent management local;
@?/rdbms/admin/catalog.sql
@?/rdbms/admin/catproc.sql
Alter user sys identified by oracle;
Alter user system identified by oracle;
重编译失效对象:
execute utl_recomp.recomp_serial();
Conn system/oracle
@?/sqlplus/admin/pupbld.sql
Conn / as sysdba
create spfile from pfile='/u01/app/oracle/product/11.2.0/dbhome_1/dbs/initPROD3.ora';
shutdown immediate;
startup;
Section 2: Create and Configure a Tablespace
1. Create a temporary tablespace group named TEMP_GRP to support batch processing, the creation of large indexes, and analysis of tables on the PROD1 database:
The group should contain the temporary tablespaces TEMP1 and TEMP2.
Make TEMP_GRP the default temporary tablespace for all new users.
奇数机:
PROD1与PROD2先备份(备份与老师文档不一致 请老师确认是否正确)
Su - oracle
export ORACLE_HOME=/u01/app/oracle/product/11.2.0/dbhome_1
export PATH=$ORACLE_HOME/bin:$PATH
Mkdir -p/home/oracle/files/arch1
Mkdir -p/home/oracle/files/arch2
Mkdir -p/home/oracle/files/bak
(备份的数据库路径都放在/home/oracle/files下主要是考虑到放到/home/oracle下容易造成磁盘空间不足)
. Oraenv
PROD1
Sqlplus / as sysdba
startup mount;
alter system set log_archive_dest_1='location=/home/oracle/files/arch1';
alter database archivelog;
alter database open;
Exit;
. oraenv
PROD2
Sqlplus / as sysdba
startup mount;
alter system set log_archive_dest_1='location=/home/oracle/files/arch2';
alter database archivelog;
alter database open;
Exit;
cd /home/oracle/files
Vi rman.sh(全备脚本)
rman target / << EOF
run {
backup database format '/home/oracle/files/bak/%d_%U.full';
sql 'alter system archive log current';
backup archivelog all format '/home/oracle/files/bak/%d_%U.arc';
backup current controlfile format '/home/oracle/files/bak/%d_%U.ctl';
}
EOF
Chmod +x rman.sh
. Oraenv PROD1 PROD2切换执行刚刚新建的rman.sh脚本 使用方法cd /home/oracle/files后 ./rman.sh
创建PROD1 EM
. Oraenv
PROD1
Sqlplus / as sysdba
Startup;
alter user dbsnmp identified by oracle account unlock; 解锁dbsnmp用户
Exit;
Lsnrctl start;(创建em前先打开监听器,不然会报错)

错误提示没有打开监听
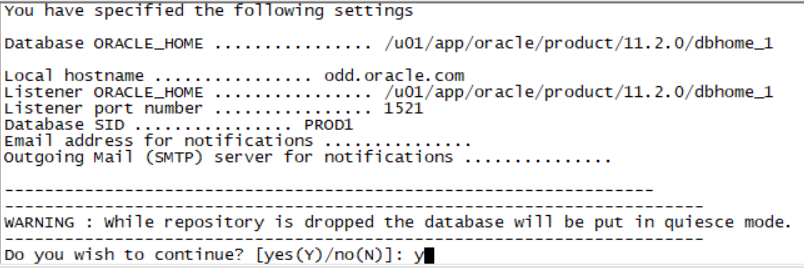
emca -config dbcontrol db -repos recreate;
Password for sys user,password for dbsnmp user,password for system user 三个用户老师给的环境密码都是oracle 都填写oracle

等待3-5分钟(电脑差就挺慢了)
emctl status dbconsole

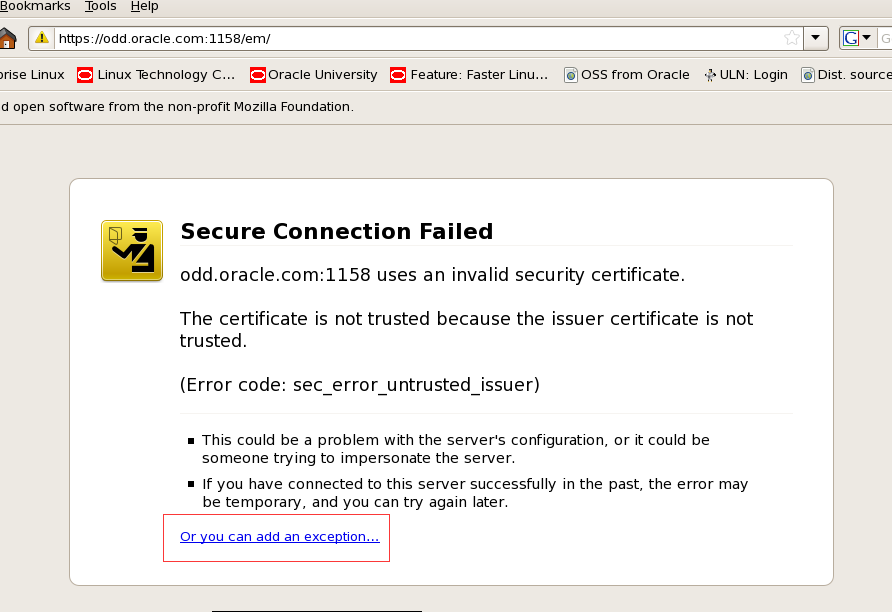
复制黏贴红框ip地址到火狐浏览器打开
点击红框处
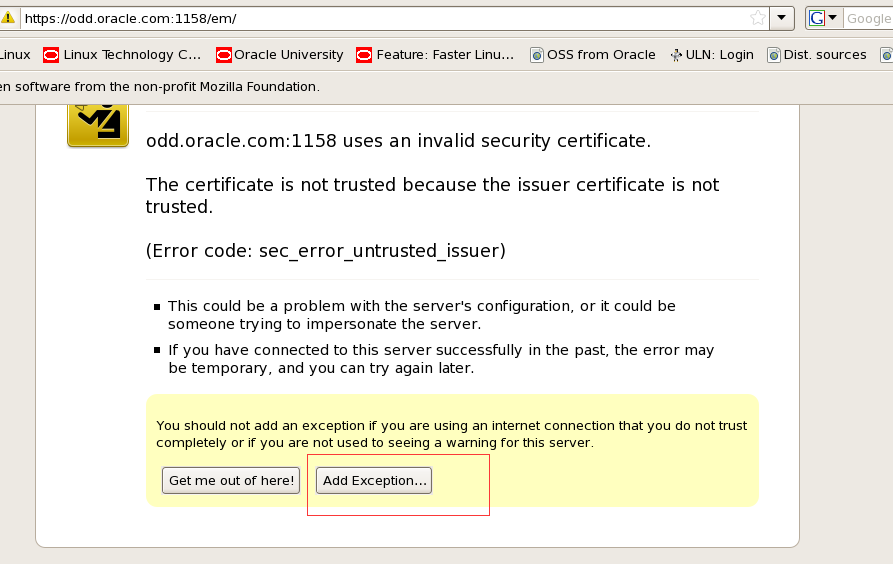

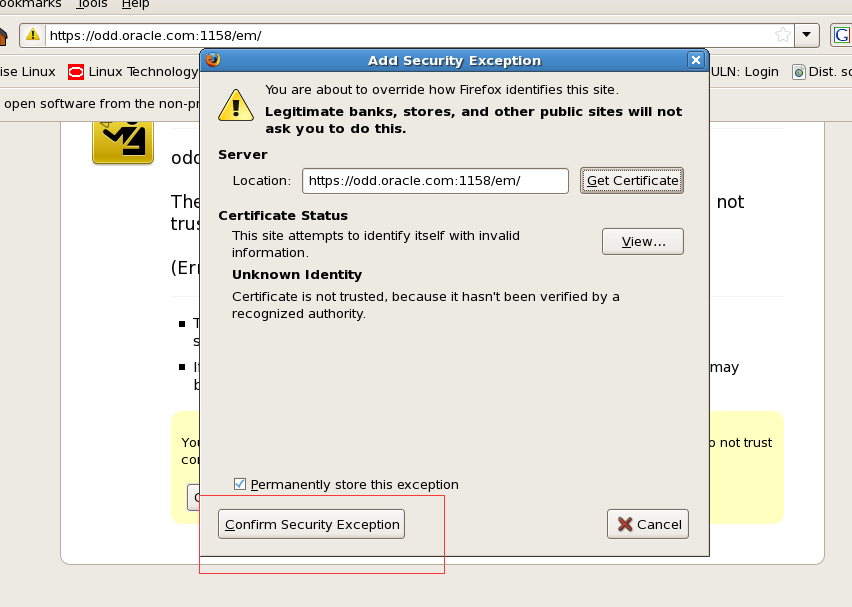
选中后confirm security exception变可点击 点击进登录页
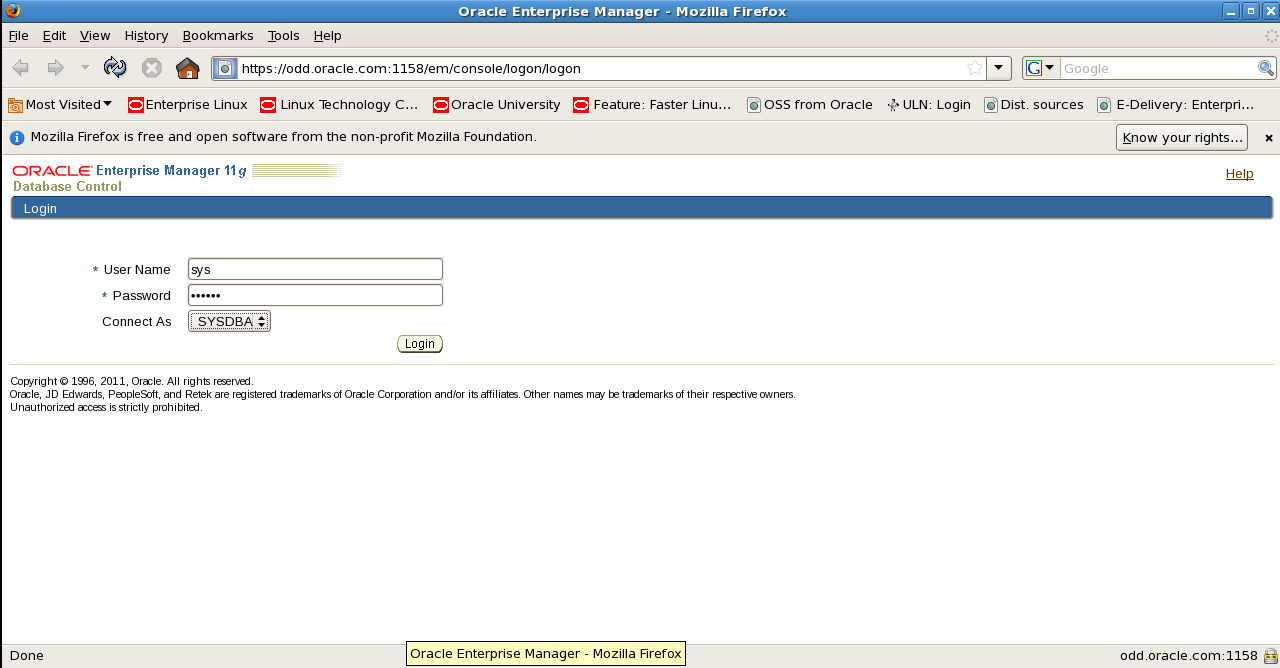
老师给的环境账号:sys 密码:oracle connect as选择sysdba 登录
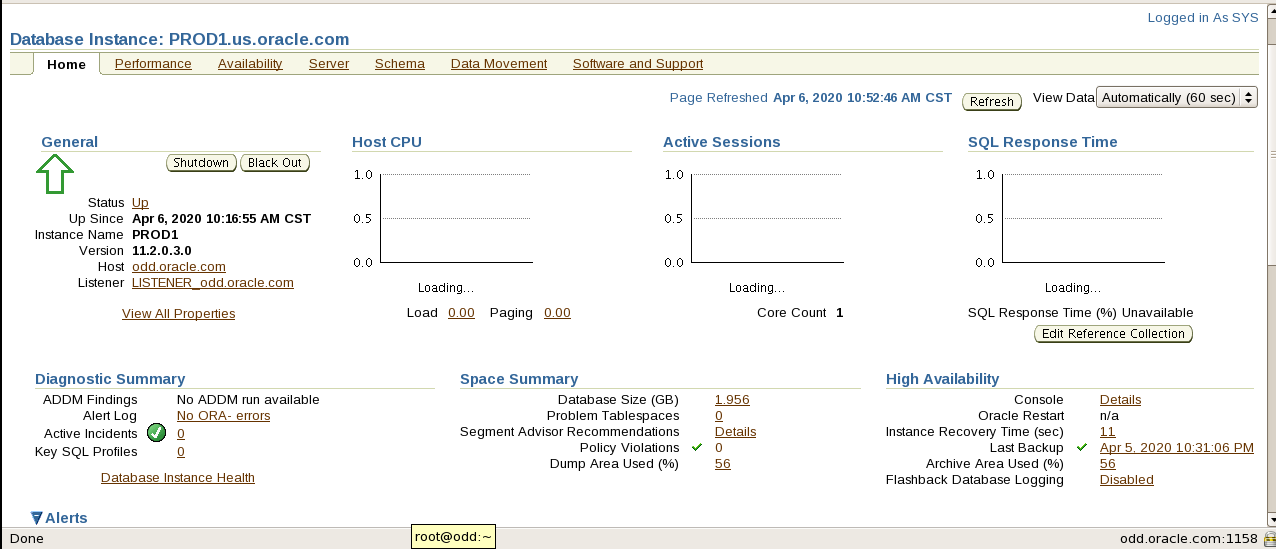
看到该页面显示就表示创建em成功
sqlplus sys/oracle@prod1 as sysdba
还未配置监听使用(. oraenv PROD1 sqlplus / as sysdba)
翻译:
第2节:创建和配置表空间
一。创建名为TEMP_GRP的临时表空间组,以支持批处理、创建大型索引和分析PROD1数据库上的表:
该组应包含临时表空间TEMP1和TEMP2。
使TEMP_GRP成为所有新用户的默认临时表空间。
create temporary tablespace temp1
tempfile '/u01/app/oracle/oradata/PROD1/temp1.dbf' size 64M autoextend on maxsize 2G
extent management local uniform size 1M
tablespace group TEMP_GRP;
create temporary tablespace temp2
tempfile '/u01/app/oracle/oradata/PROD1/temp2.dbf' size 64M autoextend on maxsize 2G
extent management local uniform size 1M
tablespace group TEMP_GRP;
alter database default temporary tablespace TEMP_GRP;
2. Create a permanent tablespace to store sample test data. Use the following specifications on the PROD1 database.
Tablespace name: TEST
Initial data file size: 400 MB with the file expected to grow to 4TB
Initial extent size: 1 MB
Next extent size: 1 MB
翻译:2。创建一个永久表空间来存储样本测试数据。在PROD1数据库上使用以下规范。
表空间名称:TEST
初始数据文件大小:400 MB,预计文件将增长到4TB
初始数据块大小:1 MB
下一个数据块大小:1 MB
create bigfile tablespace test
datafile '/u01/app/oracle/oradata/PROD1/test01.dbf' size 400M autoextend on maxsize 4T
extent management local uniform size 1M;
3. Create a permanent tablespace to store indexes. Use the following specifications on the PROD1 database:
Tablespace name: INDX
File size: 40 MB
翻译:三个。创建永久表空间以存储索引。在PROD1数据库上使用以下规范:
表空间名称:INDX
文件大小:40 MB
create tablespace indx
datafile '/u01/app/oracle/oradata/PROD1/indx01.dbf' size 40M autoextend on maxsize 2G;
4. Create a permanent tablespace to store data collected from various Oracle tools. Use the following specifications on the PROD1 database:
Tablespace name:TOOLS
File size: 10 MB
翻译:四。创建一个永久表空间来存储从各种Oracle工具收集的数据。在PROD1数据库上使用以下规范:
表空间名称:工具
文件大小:10 MB
create tablespace tools
datafile '/u01/app/oracle/oradata/PROD1/tools01.dbf' size 10M autoextend on maxsize 2G;
5. Create a permanent tablespace for storing segments associated with online transaction processing (OLTP) for accounts with high insert rates. Because of the potential high volume of concurrent inserts, every effort should be taken to reduce contention for each of the tables that is stored in this tablespace. Use the following specifications on the PROD1 database:
Tablespace name: OLTP
File size: 48 MB
Initial extent size: 2 MB
Next extent size: 2 MB
翻译:五。为具有高插入率的帐户创建一个永久表空间,用于存储与联机事务处理(OLTP)相关联的段。由于并发插入量可能很大,因此应该尽一切努力减少存储在这个表空间中的每个表的争用。在PROD1数据库上使用以下规范:
表空间名称:OLTP
文件大小:48 MB
初始数据块大小:2 MB
下一个数据块大小:2 MB
create tablespace oltp
datafile '/u01/app/oracle/oradata/PROD1/oltp01.dbf' size 48M autoextend on maxsize 2G
extent management local uniform size 2M
segment space management auto;
Section 3: Set Up Undo Management
1. Set up automatic undo management in the PROD1 database to support the following requirements:
Avoid the ORA-01555 "Snapshot too old" error for queries running up to 90 minutes on an average.
The number of concurrent OLTP users will be approximately 120 during normal business hours.
The number of concurrent batch processes that will run in the evenings and weekends will be approximately 12 through 15.
翻译:第3节:设置撤消管理
一。在PROD1数据库中设置自动撤消管理,以支持以下要求:
对于平均运行90分钟的查询,请避免出现ORA-01555“快照太旧”错误。
在正常工作时间内,竞争的OLTP用户数量大约为120个。
在晚上和周末运行的竞争性批处理过程的数量大约为12到15个。
alter system set undo_retention=5400;
(下面2个我是根据题目来看的 少了2个设置,请老师确认是否正确)
alter system set processes=120 scope=spfile;
alter system set job_queue_processes=15;
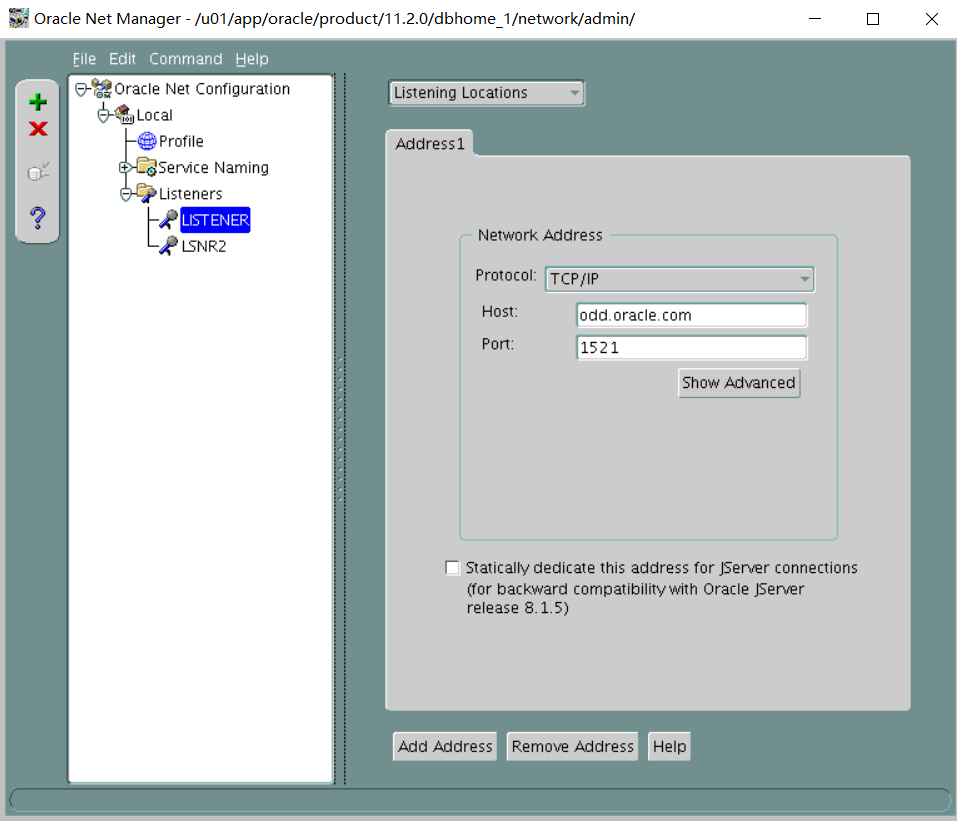
Section 4: Server-Side and Client-Side Network Configuration
1. Perform the following the client-side network configuration tasks on the Database Server. Provide connect descriptors for your database by using local naming and easy connect methods where necessary.
i. The PROD1 alias should connect to the PROD1 instance by using the default listener, and always use a dedicated server connection.
翻译:第4节:服务器端和客户端网络配置
一。在数据库服务器上执行以下客户端网络配置任务。必要时,使用本地命名和简单连接方法为数据库提供连接描述符。
i.PROD1别名应使用默认侦听器连接到PROD1实例,并始终使用专用服务器连接。
lsnrctl start
vi tnsnames.ora
PROD1=
(DESCRIPTION=
(ADDRESS_LIST=
(ADDRESS=(PROTOCOL=tcp)(HOST=odd.oracle.com)(PORT=1521))
)
(CONNECT_DATA=
(SERVICE_NAME=PROD1.us.oracle.com)
(server=dedicated)
)
)
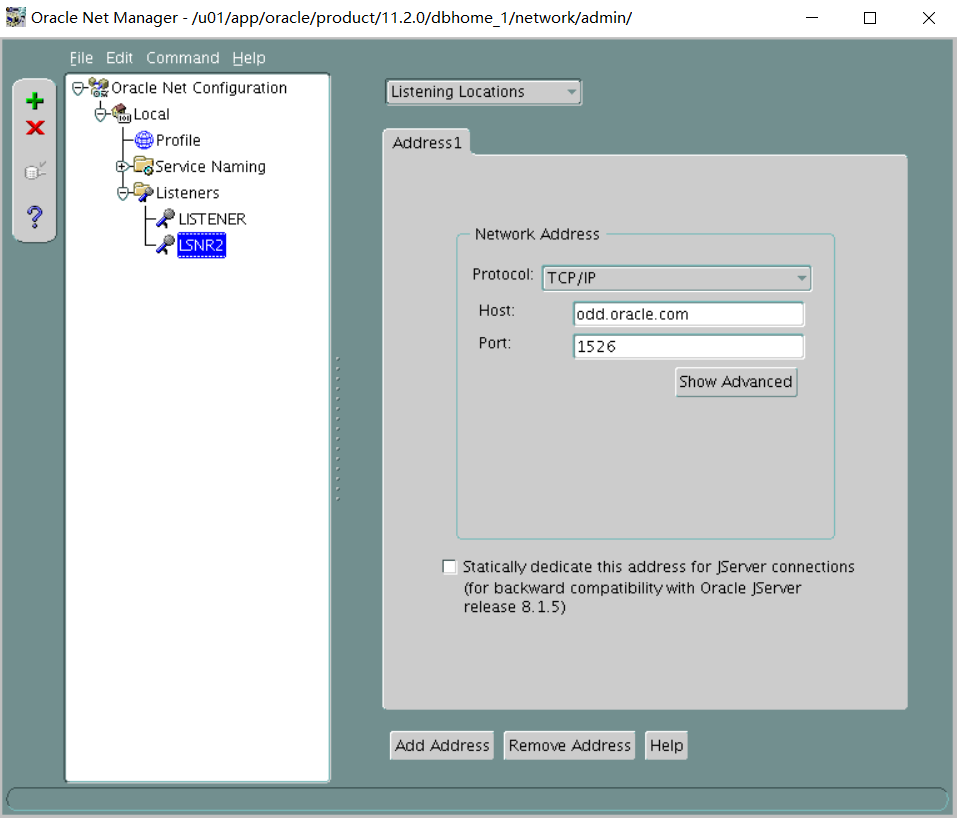
ii. The PROD_S alias should connect to the PROD1 instance.
i. Create an additional listener LSNR2 by using port 1526.
翻译:PROD_S的别名应连接到PROD1实例。
i、 使用端口1526创建其他LSNR2列表。
vi listener.ora
LSNR2=
(DESCRIPTION=
(ADDRESS_LIST=
(ADDRESS=(PROTOCOL=tcp)(HOST=odd.oracle.com)(PORT=1526))
)
)
lsnrctl start listener2
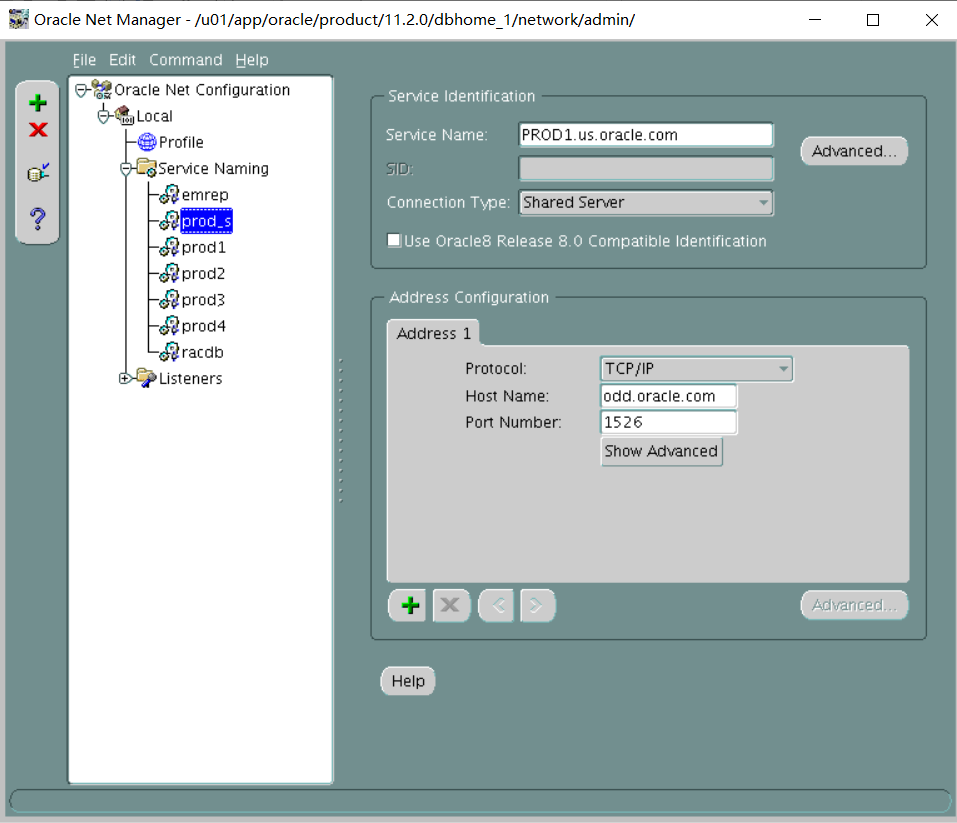
ii. Use LSNR2 and shared server connection for PROD_S.
翻译:二。对产品使用LSNR2和共享服务器连接。
vi tnsnames.ora
PROD1_S=
(DESCRIPTION=
(ADDRESS_LIST=
(ADDRESS=(PROTOCOL=tcp)(HOST=odd.oracle.com)(PORT=1526))
)
(CONNECT_DATA=
(SERVICE_NAME=PROD1.us.oracle.com)
(server=shared)
)
)
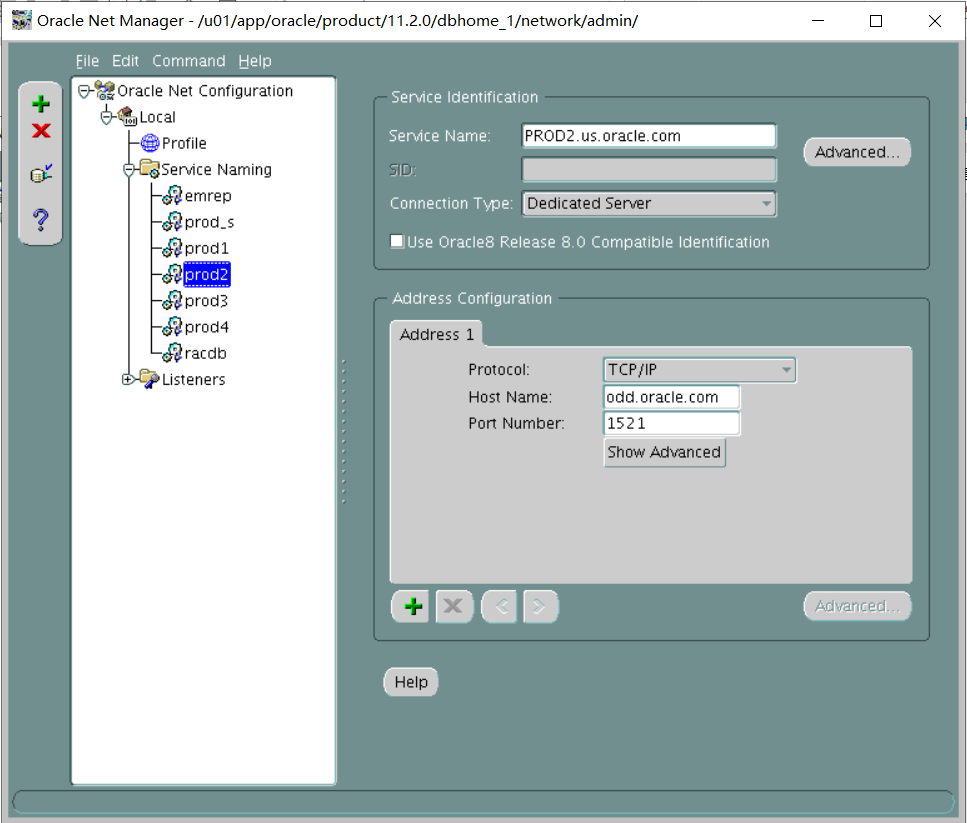
iii. The PROD2 alias should connect to the PROD2 instance by using the default listener LISTENER, TCP/IP port 1521, and always use a dedicated server connection.
翻译:iii.PROD2别名应使用默认侦听器侦听器TCP/IP端口1521连接到PROD2实例,并始终使用专用服务器连接。
PROD2=
(DESCRIPTION=
(ADDRESS_LIST=
(ADDRESS=(PROTOCOL=tcp)(HOST=odd.oracle.com)(PORT=1521))
)
(CONNECT_DATA=
(SERVICE_NAME=PROD2.us.oracle.com)
(server=dedicated)
)
)
iv. The PROD3 alias should connect to the PROD3 instance by using the default listener LISTENER, TCP/IP port 1521, and always use a dedicated server connection.
翻译:iv.PROD3别名应使用默认侦听器侦听器TCP/IP端口1521连接到PROD3实例,并始终使用专用服务器连接。
PROD3=
(DESCRIPTION=
(ADDRESS_LIST=
(ADDRESS=(PROTOCOL=tcp)(HOST=even.oracle.com)(PORT=1521))
)
(CONNECT_DATA=
(SERVICE_NAME=PROD3.us.oracle.com)
(server=dedicated)
)
)
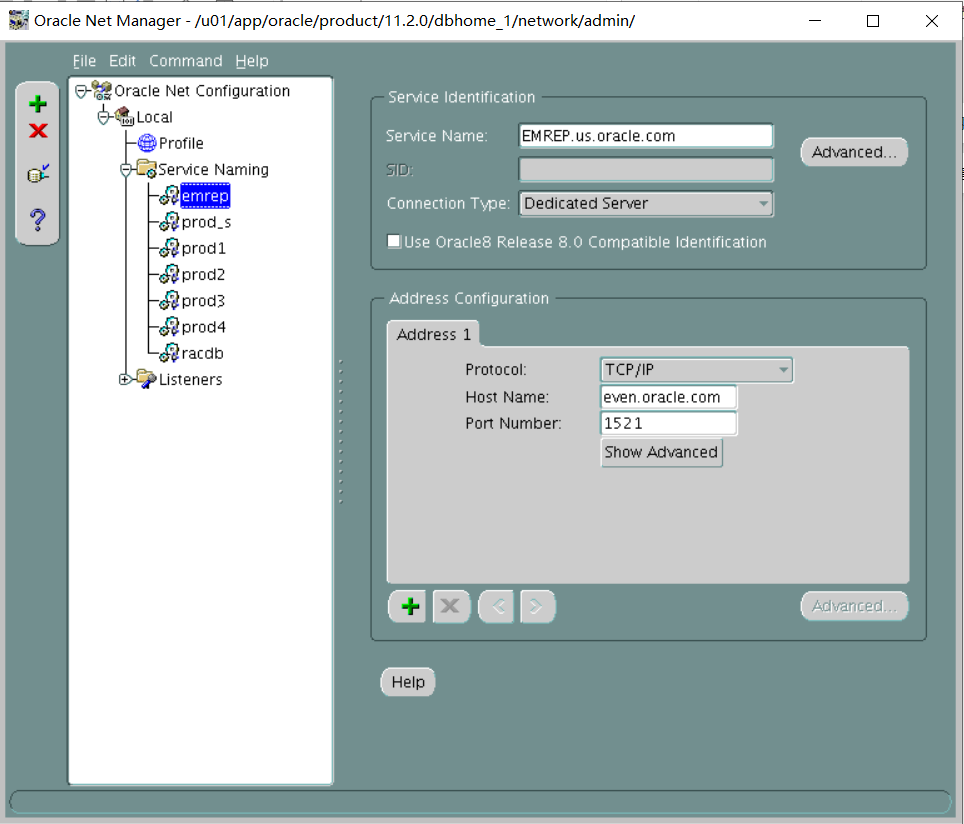
v. The EMREP alias should connect to the EMREP instance by using the default listener LISTENER, TCP/IP port 1521, and always use a dedicated server connection.
翻译:v、 EMREP别名应使用默认侦听器侦听器TCP/IP端口1521连接到EMREP实例,并始终使用专用服务器连接。
EMREP=
(DESCRIPTION=
(ADDRESS_LIST=
(ADDRESS=(PROTOCOL=tcp)(HOST=even.oracle.com)(PORT=1521))
)
(CONNECT_DATA=
(SERVICE_NAME=EMREP.us.oracle.com)
(server=dedicated)
)
)
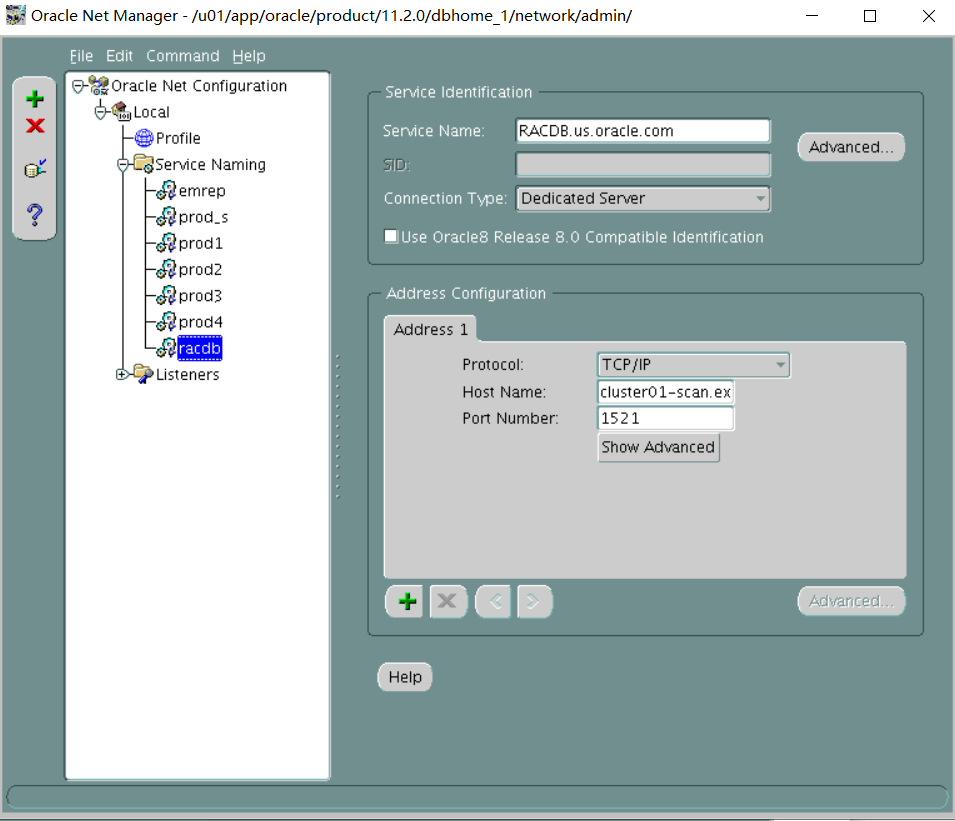
vi. The RACDB alias should connect to the RACDB service (created later) with a dedicated server connection.
The RACDB service will be running on your RAC cluster.
Given below are the details to create an alias:
Scan Name: cluster01-scan.example.com
Service Name: RACDB
翻译:六.The Racdb,alias should connect to the Rackb Service(created later)with a dedicated server connection.
The Racdb Service will be running on your rac cluster.
Given below are the details to create an alias:
Scan name:Cluster01-scan.example.com
服务名称:Racdb
RACDB=
(DESCRIPTION=
(ADDRESS_LIST=
(ADDRESS=(PROTOCOL=tcp)(HOST=cluster01-scan.example.com)(PORT=1521))
)
(CONNECT_DATA=
(SERVICE_NAME=RACDB.us.oracle.com)
(server=dedicated)
)
)
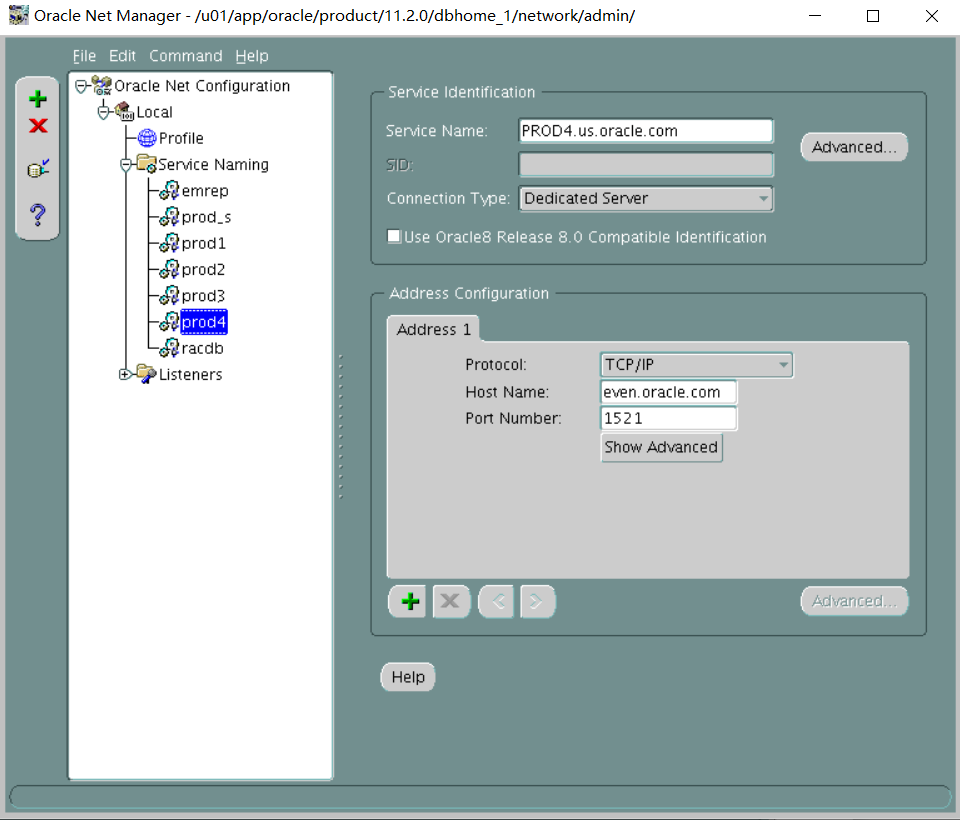
vii. The PROD4 alias should connect to the PROD4 instance by using the default listener LISTENER, TCP/IP port 1521, and always use a dedicated service connection.
翻译:七。PROD4别名应使用默认侦听器侦听器TCP/IP端口1521连接到PROD4实例,并始终使用专用服务连接。
PROD4=
(DESCRIPTION=
(ADDRESS_LIST=
(ADDRESS=(PROTOCOL=tcp)(HOST=even.oracle.com)(PORT=1521))
)
(CONNECT_DATA=
(SERVICE_NAME=PROD4.us.oracle.com)
(server=dedicated)
)
)
(练习时我用的监听图形化请老师确认是否正确)
奇数机:
Exit;(退出PROD1数据库操作)
Cd $ORACLE_HOME/bin
Export DISPLAY=192.168.72.1:0.0 (使用的是静态ip配的网关)
Netmgr 打开监听图形化


测试远程连接数据库 RACDB不用测 PROD_S放在后面远程测试连接(考试时必须要保证远程能正常连数据库不然就是没分)
测试前打开所有的监听
奇数机:lsnrctl start lsnrctl start LSNR2 偶数机:lsnrctl start 启动数据库 奇数机:PROD1 PROD2 偶数机:PROD3 PROD4 EMREP
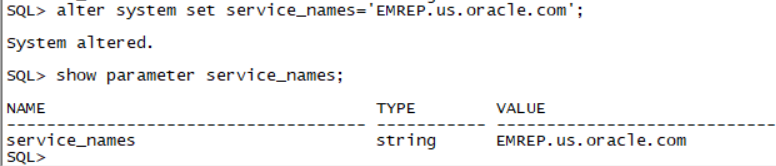
测试远程代码Sqlplus system/oracle@prod1 sqlplus system/oracle@prod2 sqlplus system/oracle@prod3 sqlplus system/oracle@prod4 sqlplus system/oracle@emrep(老师给的环境emrep service_name并不是文档写的EMREP.us.oracle.com 而是EMREP)
如图:
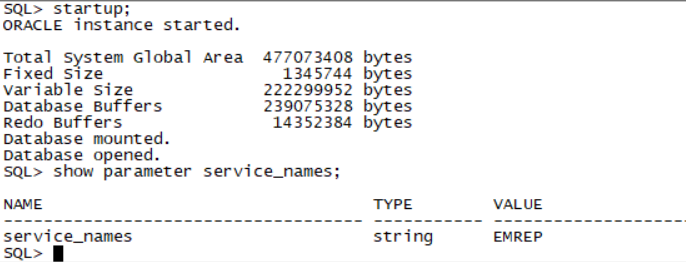
由于service_names不对 监听器配置的是EMREP.us.oracle.com无法远程连接到emrep 需要进行service_names修改
如图:
Section 5: Configure the Database
1. Investigate the parameter file of the PROD1 database for reasonable sizes for each parameter listed. Add parameters as you deem necessary to support an optimal database environment in addition, modify or add the parameter to specify the following directories that the database should use for PL/SQL I/O to the file system:/home/oracle,/home/oracle/temp,and/home/oracle/scripts and ensure that this is persistent across all PROD1 database instance startups.
翻译:第5节:配置数据库
一。调查PROD1数据库的参数文件,了解所列每个参数的合理大小。添加您认为支持最佳数据库环境所必需的参数。此外,修改或添加该参数,以指定数据库应用于文件系统的PL/SQL I/O的以下目录:home/oracle、/home/oracle/temp和/home/oracle/scripts,并确保这在所有PROD1数据库实例中都是持久的创业公司。
alter system set utl_file_dir='/home/oracle','/home/oracle/temp','/home/oracle/scripts' scope=spfile;
Section 6: Configure the Shared Server
1. Configure the PROD1 database to support up to 300 sessions, reserving 100 for dedicated connections.
翻译:第6节:配置共享服务器
一。将PROD1数据库配置为最多支持300个会话,为专用连接保留100个会话。
alter system set sessions=300 scope=spfile;
alter system set shared_server_sessions=200 scope=spfile;
alter system set circuits=200 scope=spfile;
shutdown immediate;
startup
2. Configure the PROD1 database to support:
i. Default of three TCP dispatchers
ii. Maximum of 10 dispatchers
翻译:2.配置PROD1数据库以支持:
- 三个TCP调度程序的默认值
- Ii.最多10个调度员
alter system set dispatchers='(protocol=tcp)(dispatchers=3)';
alter system set max_dispatchers=10;
3. Configure the PROD1 database to support:
i. A minimum of 10 shared server processes
ii. A maximum of 30 shared server processes
翻译:3.配置PROD1数据库以支持:
I.至少10个共享服务器进程
Ii.最多30个共享服务器进程
alter system set shared_servers=10;
alter system set max_shared_servers=30;
做到这里可以设置prod_s的连接了
alter system set local_listener='prod_s','prod1';
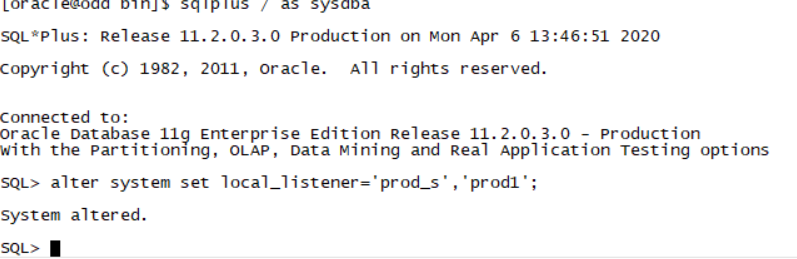
一定要启动lsnrctl start LSNR2 LSNR2监听
远程连接prod_s sqlplus system/oracle@prod_s
Section 7: Database Backup and Availability
1. Triplex the control file on the PROD1 database to minimize recovery time in case of disk drive failure.
翻译:第7节:数据库备份和可用性
一。将PROD1数据库上的控制文件分成三份,以便在磁盘驱动器出现故障时将恢复时间降至最低。
alter system set control_files='/u01/app/oracle/oradata/PROD1/control01.ctl','/u01/app/oracle/oradata/PROD1/control02.ctl','/u01/app/oracle/oradata/PROD1/control03.ctl' scope=spfile;
shutdown immediate;
Exit;
host cp /u01/app/oracle/oradata/PROD1/control01.ctl /u01/app/oracle/oradata/PROD1/control03.ctl
此处应该是cp /u01/app/oracle/oradata/PROD1/control01.ctl /u01/app/oracle/oradata/PROD1/control03.ctl
Sqlplus / as sysdba(由于prod数据库关闭了所以不能远程连了)
startup
2. Back up the PROD1 and PROD2 database to prepare for complete recovery under all circumstances.
翻译:2。备份PROD1和PROD2数据库,以备在任何情况下进行完全恢复。
shutdown immediate;
startup mount;
alter database archivelog;
alter database open;
alter system set db_recovery_file_dest_size=5G;
alter system set db_recovery_file_dest='/home/oracle/files';
Exit;
rman target /
CONFIGURE CONTROLFILE AUTOBACKUP on;
backup as compressed backupset database plus archivelog;
(PROD1和PROD2都要进行备份 操作与上面一样 请老师确认是否正确)
Section 8: Collect Schema Statistics
1. Collect actual statistics for the HR schema in the PROD1 database as necessary, for use with cost-based optimization.
翻译:第8节:收集架构统计信息
一。必要时,收集PROD1数据库中人力资源模式的当前统计数据,以便与基于成本的优化一起使用。
exec dbms_stats.gather_schema_stats('HR');
Section 9: Configure the Parameter File
1. There are multiple Oracle databases running on the Database Server.
Configure the PROD1 database such that diagnostic information about critical error events is stored in an easily accessible location, namely ORACLE_HOME.
翻译:第9节:配置参数文件
一。数据库服务器上运行多个Oracle数据库。
配置PROD1数据库搜索,将有关严重错误事件的诊断信息存储在一个易于访问的位置,即ORACLE HOME。
SQL> !echo $ORACLE_HOME
/u01/app/oracle/product/11.2.0/dbhome_1
alter system set diagnostic_dest='/u01/app/oracle/product/11.2.0/dbhome_1';
Section 10: Improve Access to Network File Directories
1. Configure and improve access to the network file directories.
i. You need to improve access to the network file directories.
Configure the PROD1 database to avoid using the operating system Kernel NFS client.
The mount point details are as follows:
Mount point available on the Database Server: /u02/oradata/prod1
Shared location on the Management Server: /vol/oradata
翻译:第10节:改进对网络文件目录的访问
一。配置并改进对网络文件目录的访问。
i、 您需要改进对网络文件目录的访问。
配置PROD1数据库以避免使用操作系统内核NFS客户端。
安装点详细信息如下:
数据库服务器上可用的装入点:u02/oradata/prod1
管理服务器上的共享位置:/vol/oradata
在管理机上执行:
mkdir -p /vol/oradata
chmod -R 777 /vol/oradata
(这一步只能在root用户权限操作 但考试root用户被锁住 只能用sudo 请老师确认是否正确)
[oracle@even ~]$ sudo chmod -R 777 /vol/oradata
service nfs start
export PATH="$PATH:/sbin" (将service的路径写入PATH)
[oracle@even etc]$ sudo service nfs start
vi /etc/exports
把以下内容添加进去:
/vol/oradata 192.168.92.80(rw,sync)
exportfs -a
exportfs –v
/vol/oradata 192.168.72.80(rw,sync) (因为之前设置了静态ip 192.168.72.80)这里面的ip地址也跟着变了 或者也可以用/vol/oradata * (rw,sync)解决ip问题
exportfs -a
exportfs -v
sudo service nfs stop
Sudo service nfs start
(练习过程中在编辑/etc/exports之前启动nfs服务 奇数机挂载会报错,当/etc/exports编辑完成后启动nfs服务,奇数机挂载就正确,请老师确认是否正确)
在数据库机上执行:
mkdir -p /u02/oradata/prod1
mount -t nfs 192.168.92.90:/vol/oradata /u02/oradata/prod1
sudo mount -t nfs 192.168.72.90:/vol/oradata /u02/oradata/prod1
cd $ORACLE_HOME/dbs
vi oranfstab
--add followings:
server: ocmnfs
path: 192.168.92.90
export:/vol/oradata mount:/u02/oradata/prod1
server: ocmnfs
path: 192.168.72.90 (由于修改了静态ip)
export:/vol/oradata mount:/u02/oradata/prod1
cd $ORACLE_HOME/rdbms/lib
make -f ins_rdbms.mk dnfs_on
重启PROD1数据库
. Oraenv
PROD1
shutdown immediate
startup
ii. Create a permanent tablespace by using the following specifications:
Tablespace name: SHARED_DATA
Data file size: 10 MB
The tablespace must use the mounted network file system (NFS) for the data file.
翻译:ii.使用以下规范创建永久表空间:
表空间名称:SHARED
数据文件大小:10 MB
表空间必须对数据文件使用挂载的网络文件系统(NFS)。
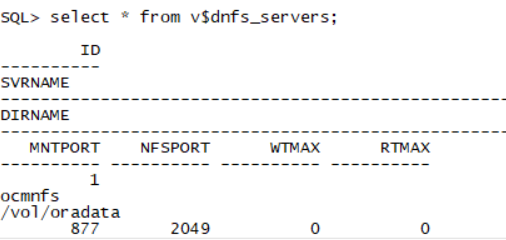
create tablespace shared_data datafile '/u02/oradata/prod1/shared_data.dbf' size 10M;
select * from v$dnfs_servers;
Section 11: Apply a Patch
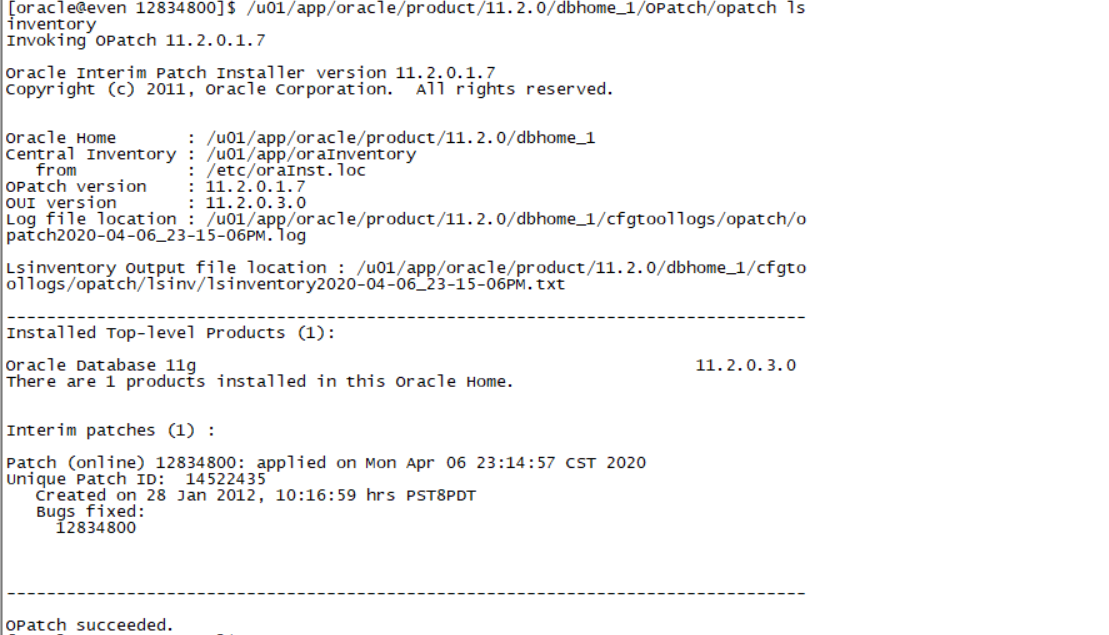
1. Apply the patch 12834800 to the PROD4 database without shutting down the database. Use the p12834800_112030_LINUX.zip file that is in the /home/oracle folder.
翻译:第11节:修补
一。在不关闭数据库的情况下,将补丁12834800应用到PROD4数据库。使用/home/oracle文件夹中的p12834800_112030_LINUX.zip文件。
偶数机操作:
unzip p12834800_112030_LINUX.zip
查看README.txt里的(2.2) Installing in Online Mode部分。
cd 12834800
打补丁前一定要提前启prod4库 不启prod4库打补丁会报错
/u01/app/oracle/product/11.2.0/dbhome_1/OPatch/opatch apply online -connectString PROD4:sys:oracle:
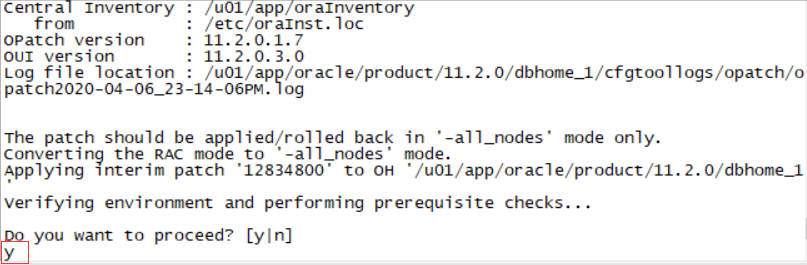
选择Y 是的
/u01/app/oracle/product/11.2.0/dbhome_1/OPatch/opatch lsinventory
Section 12: Create an ASM Instance and Configure Grid Infrastructure
1. Start Grid infrastructure on the Management Server and register the following database in the Oracle Local Registry (OLR).
i. PROD4
ii. EMREP
翻译:第12节:创建一个ASM实例并配置网格基础设施
一。在管理服务器上启动网格基础结构,并在Oracle本地注册表(OLR)中注册以下数据库。
I.PROD4
Ii.EMREP
偶数机操作:
/u01/app/11.2.0/grid/bin/crsctl status res -t
如果报错:CRS-4000: Command Status failed, or completed with errors,则需要启动ohasd
/u01/app/11.2.0/grid/bin/crsctl start ohasd
/u01/app/11.2.0/grid/bin/crsctl start res ora.cssd
/u01/app/11.2.0/grid/bin/srvctl add database -d PROD4 -o /u01/app/oracle/product/11.2.0/dbhome_1 -p /u01/app/oracle/product/11.2.0/dbhome_1/dbs/spfilePROD4.ora
/u01/app/11.2.0/grid/bin/srvctl add database -d EMREP -o /u01/app/oracle/product/11.2.0/dbhome_1 -p /u01/app/oracle/product/11.2.0/dbhome_1/dbs/spfileEMREP.ora
2. Create an ASM instance and add two disk groups: DATA and FRA
i. Use normal redundancy for DATA and external redundancy for FRA.
ii. Use the ASM disks 1 to 4 for DATA and ASM disks 5 to 8 for FRA.
翻译:2创建一个ASM实例并添加两个磁盘组:DATA和FRA
i 数据使用常规冗余,FRA使用外部冗余。
Ii.数据使用ASM磁盘1到4,FRA使用ASM磁盘5到8。
进入grid home的dbs目录下,编辑init+ASM.ora,
export ORACLE_HOME=/u01/app/11.2.0/gridinit+ASM.ora
Cd $ORACLE_HOME/dbs
Vi init+ASM.ora
instance_type=ASM
Export ORACLE_SID=+ASM
sqlplus / as sysasm
startup nomount
create diskgroup data normal redundancy disk
'ORCL:ASMDISK1',
'ORCL:ASMDISK2',
'ORCL:ASMDISK3',
'ORCL:ASMDISK4'
attribute
'compatible.asm'='11.2',
'compatible.rdbms'='11.2';
create diskgroup fra external redundancy disk
'ORCL:ASMDISK5',
'ORCL:ASMDISK6',
'ORCL:ASMDISK7',
'ORCL:ASMDISK8'
attribute
'compatible.asm'='11.2',
'compatible.rdbms'='11.2';
3. Register the following with Grid infrastructure:
i. ASM and the disk groups
ii. The listener
翻译:三。向网格基础设施注册以下内容:
I.ASM和磁盘组
Ii.监听
Exit;
/u01/app/11.2.0/grid/bin/srvctl add listener -l listener -s -o /u01/app/oracle/product/11.2.0/dbhome_1
/u01/app/11.2.0/grid/bin/srvctl add asm -l listener -p /u01/app/11.2.0/grid/dbs/init+ASM.ora -d 'ORCL:*'
sqlplus / as sysasm
alter system set asm_diskgroups=data,fra;
shutdown immediate;
Exit;
/u01/app/11.2.0/grid/bin/srvctl start asm
export ORACLE_SID=+ASM
Sqlplus / as sysasm
alter diskgroup data mount;
alter diskgroup fra mount;
最后检查是否正确利用图形化
Exit;
Cd $ORACLE_HOME/bin
Export DISPLAY=192.168.72.1:0.0
./asmca
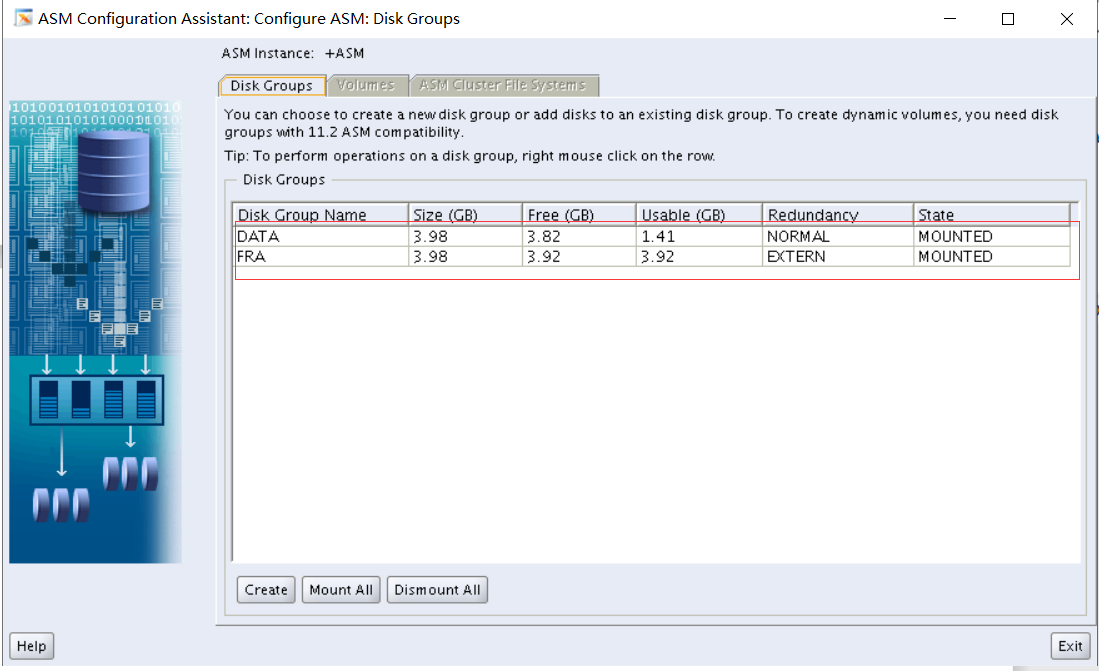
磁盘组状态全部mounted就表示正确
Part 2
Description
In this skillset, you configure an RMAN recovery catalog. You perform complete backups, restoration and recovery. You also configure Flashback Database to use it to perform a flashback operation.
Objectives
- Configure recovery catalog.
- Configure RMAN.
- Perform a full database backup.
- Configure and monitor Flashback Database.
End State
The PROD1, PROD2 and PROD4 databases must be open and accessible. No credit will be given for the skillset if the databases are not open for access.
翻译:第二部分
说明
在此技能集中,您可以配置RMAN恢复目录。执行完整的备份、还原和恢复。您还可以将闪回数据库配置为使用它执行闪回操作。
目标
配置恢复目录。
配置RMAN。
执行完整的数据库备份。
配置和监控闪回数据库。
结束状态
PROD1、PROD2和PROD4数据库必须是开放和可访问的。如果数据库未打开以供访问,则不会授予技能集任何学分。
先远程连接sqlplus system/oracle@prod1 sqlplus system/oracle@prod2 sqlplus system/oracle@prod4 查看是否连接正常
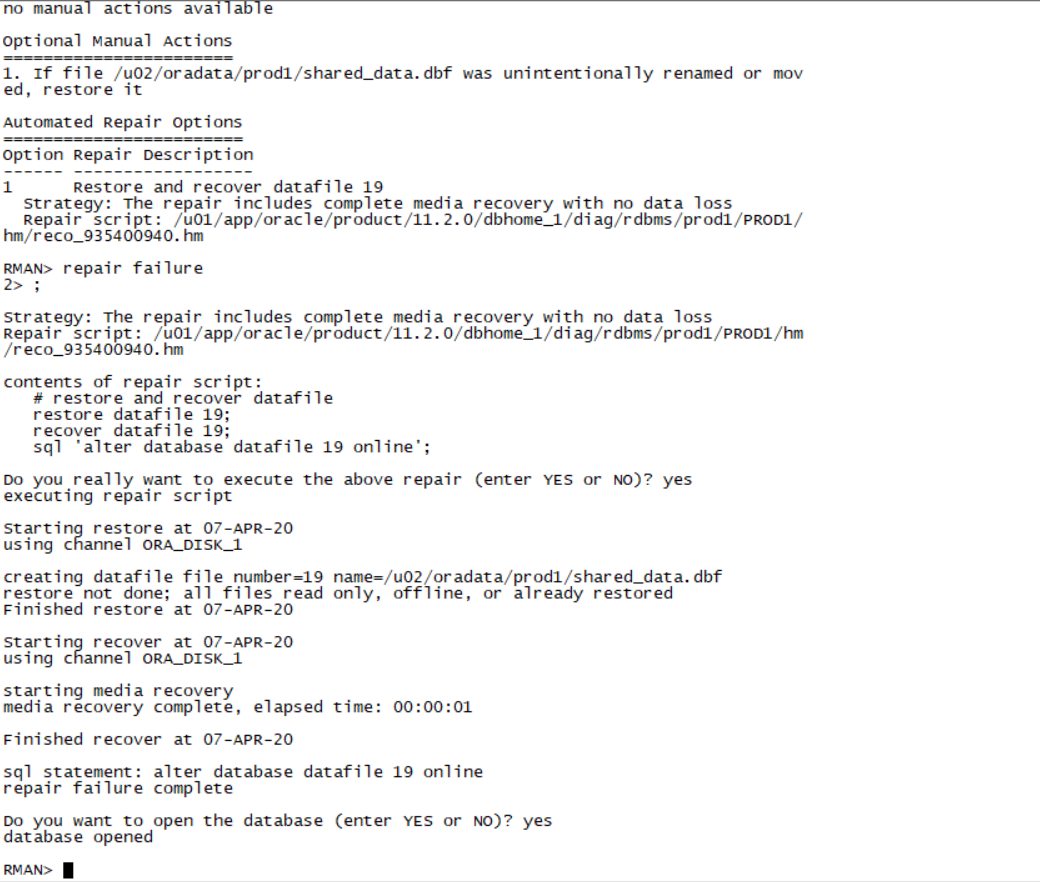
如果启PROD1出现错误
如图:
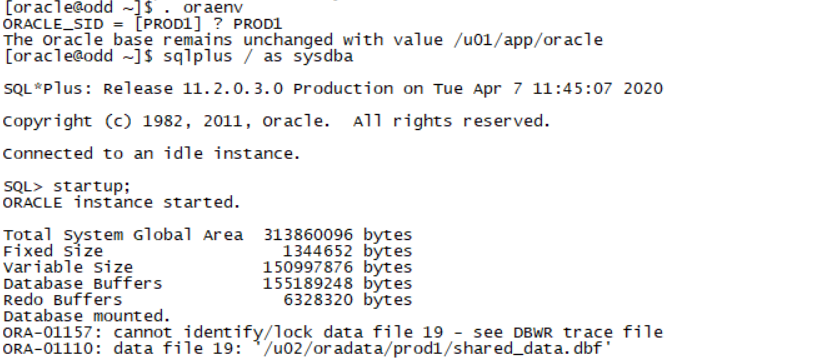
可以从第一场备份的PROD1进行数据恢复
Exit;
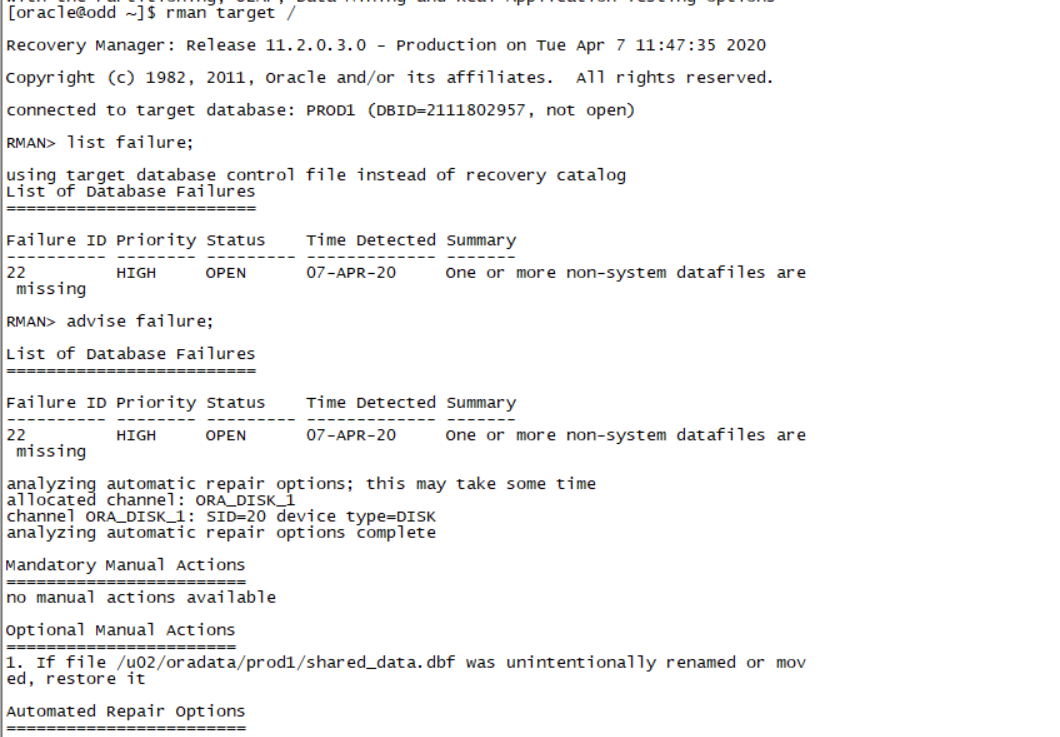
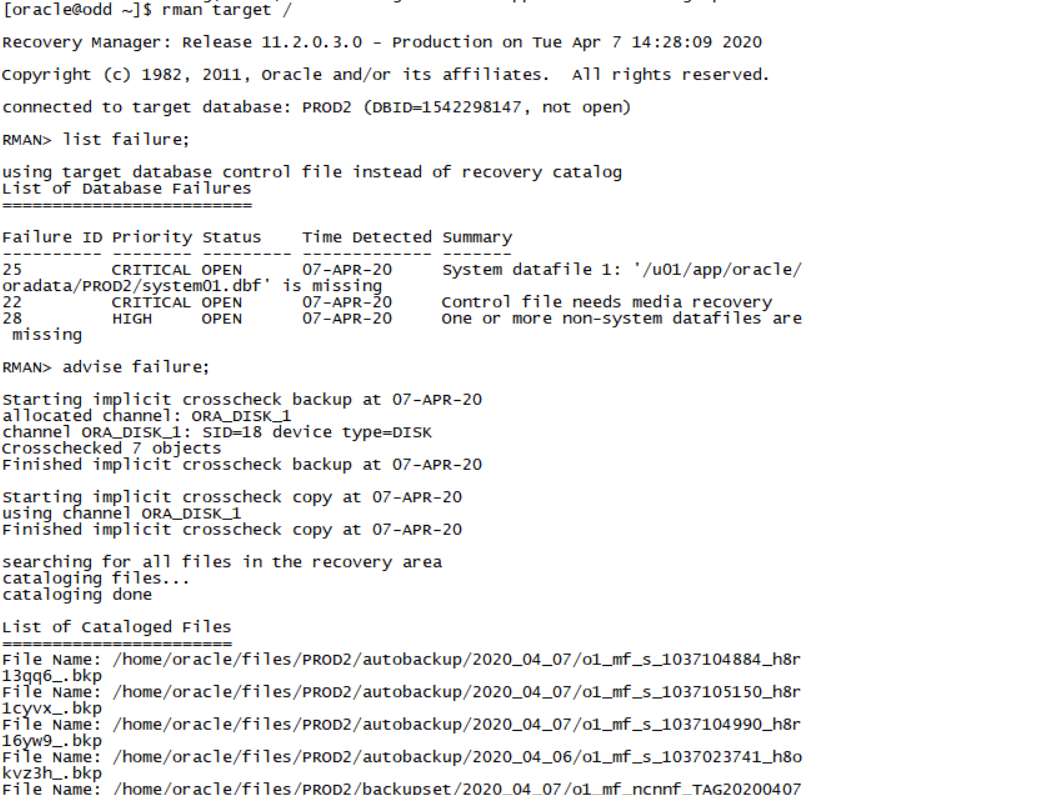
Rman target /
List failure;
Advise failure;
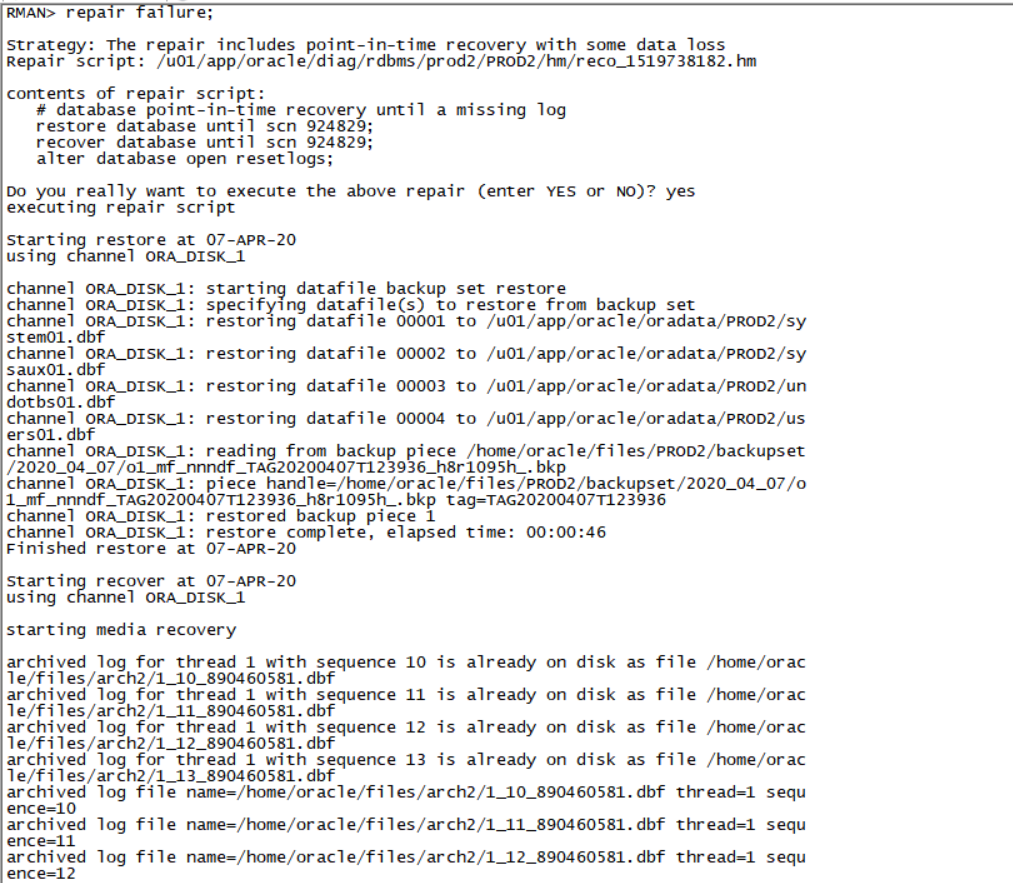
Repair failure;(三板斧)
如图:
Section 1: Configure the Recovery Catalog
Connect to the recovery catalog created on the PROD4 database. The recovery catalog owner is rc_admin and the password is RC_ADMIN.
翻译:第1节:配置恢复目录
连接到在PROD4数据库上创建的恢复目录。恢复目录所有者是rc_admin,密码是rc_admin。
偶数机:
export ORACLE_SID=PROD4
sqlplus / as sysdba
create user rc_admin identified by RC_ADMIN;
grant connect, recovery_catalog_owner to rc_admin;
alter user rc_admin quota unlimited on users;
Exit;
rman catalog rc_admin/RC_ADMIN
create catalog;
1. Make sure that the recovery catalog is compatible with the Oracle Database 11g RMAN client on the Database Server machine.
用高版本的RMAN去连接低版本的catalog
奇数机操作:
rman target sys/oracle@prod1 catalog rc_admin/RC_ADMIN@prod4
upgrade catalog;
upgrade catalog;
Exit;
升级完毕catalog以后,再连一次catalog确定没有告警信息:
rman target sys/oracle@prod1 catalog rc_admin/RC_ADMIN@prod4
2. Register the PROD1 and PROD2 database with the recovery catalog.
rman target sys/oracle@prod1 catalog rc_admin/RC_ADMIN@prod4
register database;
rman target sys/oracle@prod2 catalog rc_admin/RC_ADMIN@prod4
register database;
Section 2: Backups
Create backups of the PROD1 and PROD2 databases. All backups should be listed in the recovery catalog.
1. Create a backup for the PROD2 database that can be used for recovery under any circumstances. Ensure that you have a complete set of files from which to recover if a media failure occurs.
翻译:第2节:备份
创建PROD1和PROD2数据库的备份。所有备份都应列在恢复目录中。
- 为PROD2数据库创建备份,以便在任何情况下都能用于恢复。确保您有一套完整的文件,如果发生媒体故障,可以从中恢复。
rman target sys/oracle@prod2 catalog rc_admin/RC_ADMIN@prod4(使用catalog方式进行备份)
CONFIGURE CONTROLFILE AUTOBACKUP ON;
backup database;
sql 'alter system switch logfile';
backup archivelog all;
#backup current controlfile;
backup current controlfile;(不需要前面的#号)
记录备份过程中产生的输出信息
2. Create a long-term backup of the PROD1 database for archival purposes. Use tag Q107.
翻译:2。为存档目的创建PROD1数据库的长期备份。使用标签Q107。
Exit;
mkdir -p /home/oracle/files/PROD1/backupforever
rman target sys/oracle@prod1 catalog rc_admin/RC_ADMIN@prod4
backup database tag Q107 keep forever format '/home/oracle/files/PROD2/backupforever/%U';;
backup database tag Q107 keep forever format '/home/oracle/files/PROD1/backupforever/%U';
3. The backup process of the EXAMPLE data file in the PROD1 database takes a long time. Perform the necessary configuration to speed up the backup process and reduce the size of the backup files. The size for each backup file should not be greater than 30 MB.
翻译:3.PROD1数据库中示例数据文件的备份过程需要很长时间。执行必要的配置以加快备份过程并减小备份文件的大小。每个备份文件的大小不应大于30 MB。
CONFIGURE DEVICE TYPE DISK PARALLELISM 4 BACKUP TYPE TO BACKUPSET;
backup as compressed backupset tablespace example section size 30M;
4. Reduce the overheads of fast incremental backups to a minimum on the PROD1 database.
翻译:4.将PROD1数据库上快速增量备份的开销降至最低。
Exit;
Sqlplus sys/oracle@prod1 as sysdba
ALTER DATABASE ENABLE BLOCK CHANGE TRACKING USING FILE '/home/oracle/files/change_tracking.file';
Section 3: Configure Flashback
1. Enable Flashback Database for the PROD1 database.
i. Configure a fast recovery area of 4 GB.
ii. The fast recovery area should be in the /home/oracle/flash directory on the Database Server.
翻译:第三节配置闪回
1.为PROD1数据库启用闪回数据库。
I.配置4 GB的快速恢复区域。
Ii.快速恢复区域应该在数据库服务器上的目录中。
alter system set db_recovery_file_dest_size=4G;
alter system set db_recovery_file_dest='/home/oracle/flash';
alter database flashback on;
2. In the PROD1 database, in the HR schema, the DEPARTMENT_ID column is the primary key of the DEPARTMENTS table. Perform necessary configurations to support transaction blackout in all possible dependencies.
i. Log in as HR and run the script 2_3_2.sql to perform series of insert and then update transactions.
ii. Reinstate the value in the DEPARTMENTS table with the original values before the update transactions.
翻译:2.在PROD1数据库的HR模式中,DEPARTMENT_ID列是DEPARTMENTS表的主键。执行必要的配置以支持所有可能的依赖项中的事务中断。
i.以HR身份登录,运行脚本2_3_2.sql执行一系列插入和更新事务。
Ii.使用更新事务之前的原始值恢复DEPARTMENTS表中的值。
先确保数据库是归档模式。
Archive log list;(检查数据库是否是归档模式)
alter database add supplemental log data;
alter database add supplemental log data (primary key) columns;
connect hr/hr@prod1
@/home/oracle/scripts/2_3_2.sql
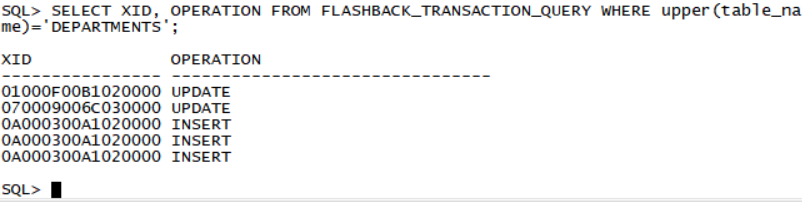
先找出departments上发生的事务ID:
connect sys/oracle@prod1 as sysdba
Sqlplus sys/oracle@prod1 as sysdba
SELECT XID, OPERATION FROM FLASHBACK_TRANSACTION_QUERY WHERE upper(table_name)='DEPARTMENTS';
XID OPERATION
---------------- --------------------------------
03000A00BE020000 UPDATE
02000A00A4020000 UPDATE
0100020013020000 INSERT
0100020013020000 INSERT
0100020013020000 INSERT
主要是2个update的XID(练习中这个XID是一个随机数,根据查询结果来)
DECLARE
V_XID SYS.XID_ARRAY;
BEGIN
V_XID := SYS.XID_ARRAY('03000A00BE020000','02000A00A4020000');
DBMS_FLASHBACK.TRANSACTION_BACKOUT(2, V_XID);
END;
/
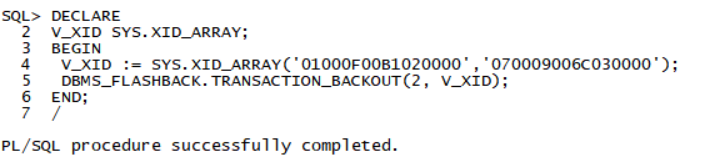
DECLARE
V_XID SYS.XID_ARRAY;
BEGIN
V_XID := SYS.XID_ARRAY('01000F00B1020000','070009006C030000');(后面两个是update里面的xid根据上方查询得到的随机xid的值)
DBMS_FLASHBACK.TRANSACTION_BACKOUT(2, V_XID);
END;
/
如果出错,则先把department_id in (290,300,310)的三条记录删除,然后执行
delete from hr.departments where department_id in (290,300,310);
alter database drop supplemental log data (primary key) columns;
alter database drop supplemental log data;
alter database add supplemental log data;
alter database add supplemental log data (primary key) columns;
connect hr/hr@prod1
@/home/oracle/scripts/2_3_2.sql
Sqlplus sys/oracle@prod1 as sysdba
SELECT XID, OPERATION FROM FLASHBACK_TRANSACTION_QUERY WHERE upper(table_name)='DEPARTMENTS';
DECLARE
V_XID SYS.XID_ARRAY;
BEGIN
V_XID := SYS.XID_ARRAY('xx,'xx);(后面两个是update里面的xid根据上方查询得到的随机xid的值)
DBMS_FLASHBACK.TRANSACTION_BACKOUT(2, V_XID);
END;
/
多做几次日志切换,至少4次。然后重新添加supplemental log,并执行2_3_2.sql。
Part 3
Description
In this skillset, you demonstrate the skills required to administer an Oracle database that is used for a Data Warehouse. You diagnose why a materialized view is not fast refreshing and troubleshoot this. You configure the database to accept new tablespaces with data files from different operating systems and configure the environment to support secure files and parallel execution.
Objectives
- Create a database link.
- Create a fast refreshable materialized view.
- Create a plug-in tablespace by using the transportable tablespace feature.
- Optimize star queries.
- Configure parallel execution.
End State
The PROD1, PROD2, and PROD4 databases must be open and accessible. No credit will be given for the skillset if the databases are not open for access.
翻译:第三部分
说明
在此技能集中,您将演示管理用于数据仓库的Oracle数据库所需的技能。您可以诊断为什么物化视图不能快速刷新并对此进行故障排除。将数据库配置为接受包含来自不同操作系统的数据文件的新表空间,并将环境配置为支持安全文件和并行执行。
目标
创建数据库链接。
创建一个快速刷新的物化视图。
使用可传输表空间功能创建插件表空间。
优化星级查询。
配置并行执行。
结束状态
PROD1、PROD2和PROD4数据库必须是开放和可访问的。如果数据库未打开以供访问,则不会授予技能集任何学分。
Section 1: Create a Database Link
1. Create a database link called PROD_LINK to permit all users in the PROD2 database to access the PROD1 database. All PROD2 database users should be able to connect to PROD1 using the link and connect as the SYSTEM user on the PROD1 database.
翻译:第1节:创建数据库链接
一。创建名为PROD_link的数据库链接,以允许PROD2数据库中的所有用户访问PROD1数据库。所有PROD2数据库用户都应该能够使用该链接连接到PROD1,并作为PROD1数据库上的系统用户进行连接。
第三场是小破坏 一般是删除数据文件看情况而定 运气好可以直接切到PROD2库 rman target / list failure advise failure repair failure(三板斧解决)
Prod2 会被破坏,需要先恢复prod2
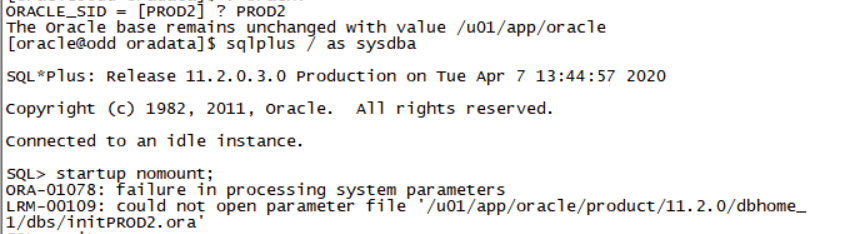
vi initPROD2.ora
db_name=PROD2
[oracle@odd dbs]$ echo $ORACLE_SID
PROD2
SQL> startup nomount;
[oracle@odd dbs]$ rman target /
RMAN> restore spfile from '/home/oracle/files/PROD2/autobackup/2019_06_29/o1_mf_s_1012214447_gkfmxhbo_.bkp';
注意这里红色的部分表示控制文件的自动备份,该自动备份是在前面创建备份的时候,而生成的。前面在备份的时候,所有的输出都需要记录到一个自己的日志里,便于在这里找到控制文件的自动备份位于哪个文件里。
Spfile恢复以后,把原来的pfile删除,并用恢复出来的spfile启动实例到nomount状态
[oracle@odd dbs]$ rm -rf initPROD2.ora
SQL> startup nomount;
[oracle@odd dbs]$ rman target /
RMAN> restore controlfile from '/home/oracle/files/PROD2/autobackup/2019_06_29/o1_mf_s_1012214447_gkfmxhbo_.bkp';
RMAN> alter database mount;
查看一下联机日志文件的序列号,如下序列号为10的日志文件的归档状态为NO,说明该日志文件没有归档,所以set until sequence 10
SQL> select group#,sequence#,status,archived from v$log;
GROUP# SEQUENCE# STATUS ARC
---------- ---------- ---------------- ---
1 10 CURRENT NO
2 8 ACTIVE YES
RMAN> run{
5> }
RMAN> alter database open resetlogs;
我直接模拟重大破坏 我是直接把PROD2库整个删了
我没有根据老师的文档来 我用我自己的恢复方式 请老师确认是否正确
PROD2整个库删了以后
Vi /etc/oratab
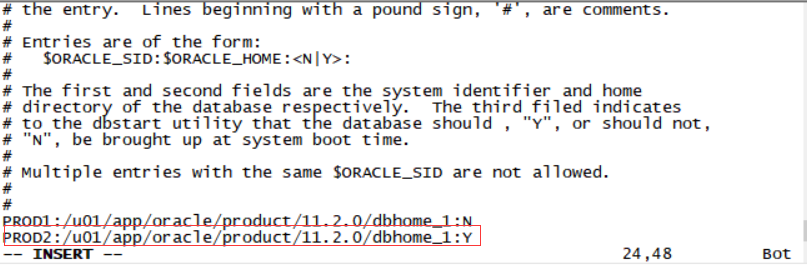
加上PROD2:/u01/app/oracle/product/11.2.0/dbhome_1:Y
查看cd /u01/app/oracle/oradata 如果里面没有PROD2文件夹 新建一个PROD2文件夹
mkdir /u01/app/oracle/oradata/PROD2

. Oraenv
PROD2
Sqlplus / as sysdba
Startup nomount;
根据提示在$ORACLE_HOME/dbs路径下创建initPROD2.ora(询问了一下同学最大的破坏就是数据库全删只保留一个pfile应该是这个文件请老师确认一下)
mkdir $ORACLE_HOME/dbs/initPROD2.ora
db_block_size=8192
db_domain="us.oracle.com"
db_name="PROD2"
instance_name=PROD2
db_create_file_dest='/u01/app/oracle/oradata'
control_files=('/u01/app/oracle/oradata/PROD2/control01.ctl','/u01/app/oracle/oradata/PROD2/control02.ctl')
sga_target=500m
. Oraenv
PROD2
Sqlplus / as sysdba
Startup nomount;
Exit;
cd /home/oracle/files/PROD2/autobackup 查左侧第一个时间
如图:

/2019_06_29/o1_mf_s_1012214447_gkfmxhbo_.bkp';
cd 2020_04_06看到下面的备份文件
Rman target /
RMAN>restore spfile from '/home/oracle/files/PROD2/autobackup/2020_04_06/o1_mf_s_1037023741_h8okvz3h_.bkp';(还原spfile)
RMAN>restore controlfile from '/home/oracle/files/PROD2/autobackup/2020_04_06/o1_mf_s_1037023741_h8okvz3h_.bkp';(还原控制文件)
Exit;
Sqlplus / as sysdba(进PROD2)
Shutdown immediate;
Startup;
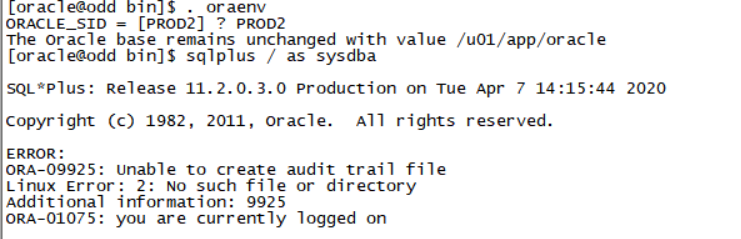
查看日志cat /u01/app/oracle/diag/rdbms/prod2/PROD2/trace/alert_PROD2.log

无法打开/u01/app/oracle/admin/PROD2/adump/..查看是否有该文件夹
查看发现cd /u01/app/oracle/admin 没有PROD2 要新建/u01/app/oracle/admin/PROD2/adump
mkdir -p /u01/app/oracle/admin/PROD2/adump
mkdir -p /u01/app/oracle/admin/PROD2/dump
mkdir -p /u01/app/oracle/admin/PROD2/pfile
. Oraenv
PROD2
Sqlplus / as sysdba
Startup mount;
Exit;
Rman target /
List failure;
Advise failure;
Repair failure;(三板斧)
. Oraenv
PROD2
Sqlplus / as sysdba
create public database link PROD_LINK connect to system identified by oracle using 'PROD1';
Section 2: Fast Refreshable Materialized Views
1. Ensure that the PROD_MV materialized view in the SH schema in the PROD1 database is fast refreshed, and allows rewrites.
翻译:第2节:快速刷新的物化视图
- 确保PROD1数据库中SH模式中的PROD_MV物化视图快速刷新,并允许重写。
Sqlplus sys/oracle@prod1 as sysdba
SQL> set long 9999999
Conn sh/sh@prod1
SQL> select query from user_mviews where mview_name='PROD_MV';
QUERY
--------------------------------------------------------------------------------
SELECT time_id, prod_subcategory,SUM(unit_cost) AS sum_units
FROM costs c, products p
WHERE c.prod_id = p.prod_id
GROUP BY time_id, prod_subcategory
Conn sys/oracle@prod1 as sysdba
grant advisor to sh;
connect sh/sh@prod1
declare
ls_sql varchar2(3000);
ls_taskname varchar2(1000);
begin
ls_taskname := 'MYTASK';
ls_sql := q'[create materialized view PROD_MV refresh fast as SELECT time_id, prod_subcategory, SUM(unit_cost) AS sum_units FROM costs c, products p WHERE c.prod_id = p.prod_id GROUP BY time_id, prod_subcategory]';
DBMS_ADVISOR.TUNE_MVIEW (
task_name=>ls_taskname,
mv_create_stmt=>ls_sql);
end;
/
set long 999999
select STATEMENT from DBA_TUNE_MVIEW where task_name='MYTASK' order by ACTION_ID;
在查询的结果里面依次执行
CREATE MATERIALIZED VIEW LOG ON "SH"."COSTS" WITH ROWID, SEQUENCE ("PROD_ID","TIME_ID","UNIT_COST") INCLUDING NEW VALUES;
CREATE MATERIALIZED VIEW LOG ON "SH"."PRODUCTS" WITH ROWID, SEQUENCE ("PROD_ID","PROD_SUBCATEGORY") INCLUDING NEW VALUES;
drop Materialized view SH.PROD_MV;
CREATE MATERIALIZED VIEW SH.PROD_MV
REFRESH FAST WITH ROWID
ENABLE QUERY REWRITE
AS
SELECT SH.PRODUCTS.PROD_SUBCATEGORY C1, SH.COSTS.TIME_ID C2, SUM("SH"."COSTS"."UNIT_COST") M1, COUNT("SH"."COSTS"."UNIT_COST") M2, COUNT(*) M3
FROM SH.PRODUCTS, SH.COSTS
WHERE SH.COSTS.PROD_ID = SH.PRODUCTS.PROD_ID
GROUP BY SH.PRODUCTS.PROD_SUBCATEGORY, SH.COSTS.TIME_ID;
Section 3: Optimize Star Queries
1. Make the required changes to the 3_3_1.sql script in the /home/oracle/scripts folder to ensure that the query executes as a star transformation query and make sure that transformations are also possible for any other query in any other schema in PROD1 database when that schema is suitably configured.
Note: Star transformations must be fully configured to permit the use of temporary tables.
翻译:第3节:优化星形查询
一。对/home/oracle/scripts文件夹中的3_3_1.sql脚本进行所需的更改,以确保查询作为星型转换查询执行,并确保在适当配置架构时,PROD1数据库中任何其他架构中的任何其他查询也可以进行转换。
注意:必须完全配置星型转换以允许使用临时表。
Exit;
cd /home/oracle/scripts
cat 3_3_1.sql
SELECT ch.channel_class, c.cust_city, t.calendar_quarter_desc,
SUM(s.amount_sold) sales_amount
FROM sh.sales s, sh.times t, sh.customers c, sh.channels ch
WHERE s.time_id = t.time_id
AND s.cust_id = c.cust_id
AND s.channel_id = ch.channel_id
AND c.cust_state_province = 'CA'
AND ch.channel_desc in ('Internet','Catalog')
AND t.calendar_quarter_desc IN ('1999-Q1','1999-Q2')
GROUP BY ch.channel_class, c.cust_city, t.calendar_quarter_desc
/
星型转换的前提条件:
sqlplus sys/oracle@prod1 as sysdba
connect / as sysdba
alter system set star_transformation_enabled=true;
connect sh/sh
select constraint_name,constraint_type,status,validated from user_constraints where table_name='SALES';
CONSTRAINT_NAME C STATUS VALIDATED
------------------------------ - -------- -------------
SALES_PRODUCT_FK R ENABLED NOT VALIDATED
SALES_TIME_FK R ENABLED NOT VALIDATED
SALES_CHANNEL_FK R ENABLED NOT VALIDATED
SALES_PROMO_FK R ENABLED NOT VALIDATED
SYS_C0011009 C ENABLED VALIDATED
SYS_C0011010 C ENABLED VALIDATED
SYS_C0011011 C ENABLED VALIDATED
SYS_C0011012 C ENABLED VALIDATED
SYS_C0011013 C ENABLED VALIDATED
SYS_C0011014 C ENABLED VALIDATED
SYS_C0011015 C ENABLED VALIDATED
CONSTRAINT_NAME C STATUS VALIDATED
------------------------------ - -------- -------------
SALES_CUSTOMER_FK R ENABLED NOT VALIDATED
12 rows selected.
SQL>
把time_id和cust_id上的外键设置为validate状态:
alter table sales enable validate constraint SALES_TIME_FK;
alter table sales enable validate constraint SALES_CUSTOMER_FK;
alter table sales enable validate constraint SALES_CHANNEL_FK;
检查times表和customers表的主键的状态:
SQL> select constraint_name,constraint_type,status,validated from user_constraints where table_name='TIMES' and constraint_type='P';
CONSTRAINT_NAME C STATUS VALIDATED
------------------------------ - -------- -------------
TIMES_PK P ENABLED NOT VALIDATED
alter table times enable validate constraint TIMES_PK;
select constraint_name,constraint_type,status,validated from user_constraints where table_name='CUSTOMERS' and constraint_type='P';
CONSTRAINT_NAME C STATUS VALIDATED
------------------------------ - -------- -------------
CUSTOMERS_PK P ENABLED NOT VALIDATED
alter table customers enable validate constraint CUSTOMERS_PK;
select constraint_name,constraint_type,status,validated from user_constraints where table_name='CHANNELS' and constraint_type='P';
CONSTRAINT_NAME C STATUS VALIDATED
------------------------------ - -------- -------------
CHANNELS_PK P ENABLED NOT VALIDATED
alter table channels enable validate constraint CHANNELS_PK;
SQL> select index_name from user_ind_columns where table_name='SALES' and column_name='TIME_ID';
INDEX_NAME
------------------------------
SALES_TIME_BIX
SQL> select index_name from user_ind_columns where table_name='SALES' and column_name='CUST_ID';
INDEX_NAME
------------------------------
SALES_CUST_BIX
select index_name from user_ind_columns where table_name='SALES' and column_name='CHANNEL_ID';
INDEX_NAME
------------------------------
SALES_CHANNEL_BIX
删除bitmap索引(考试不会用到)
Drop index sh.SALES_TIME_BIX;
Drop index sh.SALES_CUST_BIX;
Drop index sh.SALES_CHANNEL_BIX;
如果没有建bitmap索引 可以用下面的方式建bitmap索引
create bitmap index cust_id_ind on sh.sales(cust_id) local;
create bitmap index time_id_ind on sh.sales(time_id) local;
create bitmap index channel_id_ind on sh.sales(channel_id) local;
exec dbms_stats.gather_table_stats('SH','SALES',cascade=>true);
exec dbms_stats.gather_table_stats('SH','TIMES',cascade=>true);
exec dbms_stats.gather_table_stats('SH','CUSTOMERS',cascade=>true);
exec dbms_stats.gather_table_stats('SH','CHANNELS',cascade=>true);
set autotrace traceonly exp;
@/home/oracle/scripts/3_3_1.sql
Section 4: Create a Plug-in Tablespace and External Tables
1. Create a plug-in tablespace, TRPDATA, by using the transportable tablespace feature in the PROD1 database.
i. The data file to be transported, TRPDATA_6, is created on a big endian platform, that is, Solaris 64-bit.
ii. Use the TRPDATA_6 data file and the trans3_2.dmp dump file located in the /home/oracle/scripts directory.
iii. The exported user is SST. The tablespace objects should belong to the SST user.
翻译:第4节:创建插件表空间和外部表
一。使用PROD1数据库中的transportable tablespace特性创建一个插件表空间TRPDATA。
i.要传输的数据文件TRPDATA_6是在一个大端平台(即Solaris 64位)上创建的。
二。使用TRPDATA_6数据文件和位于/home/oracle/scripts目录中的trans3_2.dmp转储文件。
三、出口用户为SST。表空间对象应该属于SST用户。
获得具体的platform的名称:
Conn sys/oracle@prod1 as sysdba
select PLATFORM_NAME,ENDIAN_FORMAT from v$transportable_platform order by 2,1;
Exit;
. Oraenv
PROD1
Rman target /
RMAN> convert datafile '/home/oracle/scripts/TRPDATA_6' from platform 'Solaris[tm] OE (64-bit)' format '/u01/app/oracle/oradata/PROD1/TRPDATA_6.dbf';
Exit;
Sqlplus sys/oracle@prod1 as sysdba;
create directory scriptdir as '/home/oracle/scripts';
grant read,write,execute on directory scriptdir to public;
create user sst identified by oracle;
grant dba to sst;
Exit;
cd /home/oracle/files
vi prod1_imp.par
userid=system/oracle@prod1
directory=scriptdir
dumpfile=trans3_2.dmp
TRANSPORT_DATAFILES=('/u01/app/oracle/oradata/PROD1/TRPDATA_6.dbf')
job_name=impjob
impdp parfile=prod1_imp.par
Sqlplus sys/oracle@prod1 as sysdba
alter tablespace TRPDATA read write;
- In the scripts directory, you will find prod_master.dat.gz and prod_master.ctl. Using the information found the prod_master.ctl file, create an Oracle Loader external table in the SH schema that must run a preprocessor to manipulate data.
翻译:2。在scripts目录中,可以找到prod_master.dat.gz和prod_master.ctl。使用prod_master.ctl文件中找到的信息,在SH架构中创建一个Oracle Loader外部表,该表必须运行预处理器才能操作数据。
Exit;
Cd /home/oracle/scripts
cp prod_master.ctl prod_master.ctl.backup
vi prod_master.ctl
把preprocessor注释掉。(preprocessor '/home/oracle/scripts/uncompress.sh')也可以删掉
Cat prod_master.ctl
先按照prod_master.ctl里的表结构创建sh.prod_master。然后等后面生成外部表的语法以后,再删除。
Sqlplus sys/oracle@prod1 as sysdba
connect sh/sh@prod1
create table prod_master(product_id number,
product_name varchar2(50),
code varchar2(20),
reorder_threshold number,
cost number(10,2),
price number(10,2),
primary_source varchar2(50),
secondary_source varchar2(50),
obsoleted date);
Exit;
chmod a+x uncompress.sh
sqlldr sh/sh@prod1 control=prod_master.ctl external_table=GENERATE_ONLY log=prod_master.log
vi prod_master.log并找到create table部分,把其中的表名改成prod_master,并添加preprocessor,最后执行下面的语句:
prod_master.log改成和下面执行的语句即可
Drop table sh.prod_master;(先删除之前的再执行下面的sql语句)
CREATE TABLE sh.prod_master
(
"PRODUCT_ID" NUMBER,
"PRODUCT_NAME" VARCHAR2(50),
"CODE" VARCHAR2(20),
"REORDER_THRESHOLD" NUMBER,
"COST" NUMBER(10,2),
"PRICE" NUMBER(10,2),
"PRIMARY_SOURCE" VARCHAR2(50),
"SECONDARY_SOURCE" VARCHAR2(50),
"OBSOLETED" DATE
)
ORGANIZATION external
(
TYPE oracle_loader
DEFAULT DIRECTORY scriptdir
ACCESS PARAMETERS
(
RECORDS DELIMITED BY NEWLINE CHARACTERSET US7ASCII
PREPROCESSOR scriptdir:'uncompress.sh'
BADFILE 'SCRIPTDIR':'prod_master.dat.bad'
LOGFILE 'prod_master.log_xt'
FIELDS TERMINATED BY "," LDRTRIM
MISSING FIELD VALUES ARE NULL
REJECT ROWS WITH ALL NULL FIELDS
(
"PRODUCT_ID" CHAR(255)
TERMINATED BY ",",
"PRODUCT_NAME" CHAR(50)
TERMINATED BY ",",
"CODE" CHAR(20)
TERMINATED BY ",",
"REORDER_THRESHOLD" CHAR(255)
TERMINATED BY ",",
"COST" CHAR(255)
TERMINATED BY ",",
"PRICE" CHAR(255)
TERMINATED BY ",",
"PRIMARY_SOURCE" CHAR(50)
TERMINATED BY ",",
"SECONDARY_SOURCE" CHAR(50)
TERMINATED BY ",",
"OBSOLETED" CHAR(12)
TERMINATED BY ","
DATE_FORMAT DATE MASK 'DD-MON-YYYY'
)
)
location
(
'prod_master.dat.gz'
)
)REJECT LIMIT UNLIMITED;
select * from prod_master;
Section 5: Configure Parallel Execution
1. Configure parallel execution in the PROD1 database. Use a plan table that persists across logins. As the SYS user, implement the following:
i. Parallel execution is to be done automatically by Oracle only when statements execute for more than 5 seconds.
翻译:第5节:配置并行执行
1.在PROD1数据库中配置并行执行。使用跨登录持续存在的计划表。作为SYS用户,执行以下操作:
i.只有当语句执行超过5秒时,Oracle才会自动执行并行操作。
conn sys/oracle@prod1 as sysdba
alter system set parallel_min_time_threshold=5;
ii. Ensure that the maximum degree of parallelism for a statement is determined automatically while running the statement.
翻译:ii.确保在运行语句时自动确定语句的最大并行度。
alter system set parallel_degree_policy=auto;
iii. Allow up to 100 parallel execution slaves with 10% of the slaves defined as permanent.
翻译:iii.允许多达100个并行执行从机,其中10%的从机被定义为永久的。
alter system set parallel_max_servers=100;
alter system set parallel_min_servers=10;
iv. If a statement that requires more than 5 seconds cannot execute in parallel, it should not execute at all.
翻译: iv. 如果一个需要超过5秒的语句不能并行执行,那么它根本不应该执行。
alter system set parallel_servers_target=100; ????(这个答案是否正确请老师确认)
v. Set the SH.SALES table to have a default degree of parallelism of 8. Check after each remaining task to ensure that this degree of parallelism set for the SH.SALES table is persistent till the end of this skillset.
翻译:v、 将SH.SALES表的默认并行度设置为8。在完成每个剩余的任务后进行检查,以确保SH.SALES表的这种并行度集在该技能集结束之前是持久的。
alter table sh.sales parallel 8;
vi. Examine the 3_5_1_6.sql script located in the /home/oracle/scripts folder. Execute the script after making necessary changes to ensure:
1. The execution plan for the UPDATE statement shows parallel execution
2. The execution plan is stored in SH.PLAN_TABLE
翻译:vi.检查位于/home/oracle/scripts文件夹中的3u 5u 1u 6.sql脚本。在进行必要的更改后执行脚本,以确保:
1.UPDATE语句的执行计划显示并行执行
2。执行计划存储在SH.plan_表中
创建plan_table:
@/u01/app/oracle/product/11.2.0/dbhome_1/rdbms/admin/utlxplan.sql
@?/rdbms/admin/utlxplan.sql
alter session enable parallel dml;
Conn sh/sh@prod1
@/home/oracle/scripts/3_5_1_6.sql
Part 4
Description
In this skillset, you are required to modify a database to allow creation of tablespaces with different block size. You create partitioned objects and configure your environment to secure data.
Objectives
- Create an additional buffer cache.
- Optimize space usage for the LOB data.
- Create an encrypted tablespace.
- Manage schema data.
- Create partitioned tables.
- Set up Fine-Grained Auditing.
- Configure the database to retrieve all previous versions of the table rows.
End State
The PROD1, PROD2, and PROD4 databases must be open and accessible. No credit will be given for the skillset if the databases are not open for access.
翻译:第四部分
说明
在此技能集中,需要修改数据库以允许创建具有不同块大小的表空间。创建分区对象并配置环境以保护数据。
目标
创建额外的缓冲缓存。
优化LOB数据的空间使用。
创建加密表空间。
管理模式数据。
创建分区表。
建立细粒度审计。
配置数据库以检索所有以前版本的表行。
结束状态
PROD1、PROD2和PROD4数据库必须是开放和可访问的。如果数据库未打开以供访问,则不会授予技能集任何学分。
Section 1: Create an Additional Buffer Cache and Table
1. Create an additional buffer cache in SGA of the PROD1 database for use with 16 KB blocks. Ensure that the 16 KB buffer cache is always available in SGA.
翻译:第1节:创建额外的缓冲缓存和表
- 在PROD1数据库的SGA中创建一个附加的缓冲区缓存,用于16kb块。确保16 KB缓冲缓存在SGA中始终可用。
Sqlplus sys/oracle@prod1 as sysdba
alter system set db_16k_cache_size=10M;
2. Create a partitioned table called NEW_ORDERS under SH schema
ORDER_ID NUMBER (12) Primary key,
Total_Amount Number(10)
If the column of
Order_ID < 1000 store in Tablespace Users,
and
Order_ID < 2000 store in Tablespace Example.
翻译:2。在SH schema下创建名为NEW_ORDERS的分区表
订单号(12)主键,
总金额(10)
如果
Order_ID<1000存储在表空间用户中,
以及
Order_ID<2000存储在表空间示例中。
connect sh/sh@prod1
create table NEW_ORDERS(
ORDER_ID NUMBER (12) Primary key,
Total_Amount Number(10))
partition by range(order_id)
(
partition p1 values less than (1000) tablespace users,
partition p2 values less than (2000) tablespace example
);
3. As HR user, Create table MIXED_DATA with column DEPARTMENT_NAME
VARCHAR2(10), Then drop it.
Create table MIXED_DATA again, with column DEPARTMENT_ID
VARCHAR2(10), Then drop it.
翻译:三。作为HR用户,使用列DEPARTMENT\u NAME创建表MIXED\u DATA
VARCHAR2(10),然后删除它。
再次创建表MIXED_DATA,列DEPARTMENT_ID
VARCHAR2(10),然后删除它。
connect hr/hr@prod1
create table MIXED_DATA (DEPARTMENT_NAME VARCHAR2(20));
create table MIXED_DATA (DEPARTMENT_NAME VARCHAR2(10));(按照题意varchar2是10)
drop table MIXED_DATA;
create table MIXED_DATA (DEPARTMENT_ID VARCHAR2(10));
drop table MIXED_DATA;
Section 2: Optimize Space Usage for the LOB Data and Encrypted Tablespace
1. Create a table in the PROD1 database to optimize space usage for multiple rows that can have the same LOB data and also compress the LOB data.
i. As the OE user, create the CUSTOMER_PROFILES table in the SF_DATA tablespace with the following columns:
CUST_ID NUMBER,
FIRSTZ_NAME VARCHAR2(20),
LAST_NAME VARCHAR2(30),
PROFILE_INFO BLOB
ii. Create a directory structure /home/oracle/scripts/cust_files, and then create a directory object, CUST_FILES, which points to /home/oracle/scripts/cust_files.
iii. Load data into the table by using the procedure in the 4_2_2.sql script located in the /home/oracle/scripts directory.
iv. Enable compression for the PROFILE_INFO column and also save space by avoiding multiple copies of the same LOB data.
翻译:一。在PROD1数据库中创建一个表,以优化具有相同LOB数据的多行的空间使用并压缩LOB数据。
i.作为OE用户,在sfu数据表空间中创建具有以下列的CUSTOMER_PROFILES表:
客户身份证号码,
名字VARCHAR2(20),
姓VARCHAR2(30),
配置文件信息块
ii。创建一个目录结构/home/oracle/scripts/cust_files,然后创建一个目录对象cust_files,它指向/home/oracle/scripts/cust_files。
iii.使用位于/home/oracle/scripts目录中的4u2.sql脚本中的过程将数据加载到表中。
iv.启用配置文件信息列的压缩,并通过避免同一LOB数据的多个副本来节省空间。
Conn sys/orcacle@prod1 as sysdba
alter system set db_securefile=permitted;
create table oe.CUSTOMER_PROFILES(
CUST_ID NUMBER,
FIRSTZ_NAME VARCHAR2(20),
LAST_NAME VARCHAR2(30),
PROFILE_INFO BLOB)
tablespace sf_data
lob(PROFILE_INFO) store as securefile
(tablespace sf_data
deduplicate
compress);
Exit;
mkdir -p /home/oracle/scripts/cust_files
cp /home/oracle/scripts/cust1.txt /home/oracle/scripts/cust_files
Sqlplus sys/oracle@prod1 as sysdba
create directory CUST_FILES as '/home/oracle/scripts/cust_files';
grant read,write on directory CUST_FILES to public;
@/home/oracle/scripts/4_2_2.sql
exec oe.loadLOBFromBFILE_proc;
2. Create an encrypted tablespace.
i. Log in to the PROD3 database as SYS.
[You can use Database Creation Assistant (DBCA) to create the PROD3 database on the Management Server if it is not already created in Skillset 1].
Run the 4_2_22.sql script.
Create an encrypted tablespace with the following specifications:
Tablespace name: ENCT_DATA
File size: 50 MB
翻译:2。创建加密的表空间。
i.以SYS身份登录PROD3数据库。
[如果PROD3数据库尚未在技能集1中创建,则可以使用数据库创建助手(DBCA)在管理服务器上创建该数据库]。
运行4_2_22.sql脚本。
使用以下规范创建加密表空间:
表空间名称:ENCT_DATA
文件大小:50 MB
奇数机:
export ORACLE_SID=PROD3
sqlplus /nolog
只能在奇数机远程连PROD3不然脚本会报错(根据题意是sys身份登录PROD3数据库)
Sqlplus sys/oracle@prod3 as sysdba
@/home/oracle/scripts/4_2_22.sql
ii. Use the ENCT_DATA tablespace to implement security measures to encrypt the data in the CUSTOMERS and PROMOTIONS tables in the SH schema.
翻译:ii.使用ENCT_数据表空间来实现安全措施,以加密SH模式中CUSTOMERS和PROMOTIONS表中的数据。
偶数机:
Exit;
Cd $ORACLE_HOME/network/admin
vi sqlnet.ora
WALLET_LOCATION=
(SOURCE=(METHOD=file)(METHOD_DATA=(DIRECTORY=/home/oracle/files)))
mkdir -p /home/oracle/files
Sqlplus sys/oracle@prod3 as sysdba
ALTER SYSTEM SET ENCRYPTION KEY IDENTIFIED BY "oracle123";
create tablespace ENCT_DATA
datafile '/u01/app/oracle/oradata/PROD3/ENCT_DATA01.dbf' size 50M
ENCRYPTION
DEFAULT STORAGE (ENCRYPT);
alter table sh.customers move tablespace ENCT_DATA;
alter table sh.promotions move tablespace ENCT_DATA;
Section 3: Manage Schema Data
1. Create a new tablespace and a new table in the HR schema in the PROD1 database with the following specifications:
i. Tablespace LOB_DATA with a 16 KB chunk size, and initial and next extents each with a size of 2 MB.
Table name: MAGAZINE_ARTICLES
Tablespace: USERS
Column names:
AUTHOR VARCHAR2(30)
ARTICLE_NAME VARCHAR2(50)
ARTICLE_DATE DATE
ARTICLE_DATA CLOB
The data in this table is not accessed frequently. Disable storage in row.
翻译:第3节:管理架构数据
1。使用以下规范在PROD1数据库的HR模式中创建新表空间和新表:
i.表空间LOB_数据块大小为16kb,初始和下一个数据块大小均为2mb。
表名:杂志文章
表空间:用户
列名:
作者VARCHAR2(30)
文章名称VARCHAR2(50)
条款日期
第四条数据CLOB
此表中的数据不经常访问。禁用行中的存储。
奇数机:
export ORACLE_SID=PROD1
sqlplus / as sysdba
create tablespace LOB_DATA
datafile '/u01/app/oracle/oradata/PROD1/LOB_DATA01.dbf' size 10M
extent management local uniform size 2M
blocksize 16K;
connect hr/hr@prod1
create table hr.MAGAZINE_ARTICLES(
AUTHOR VARCHAR2(30),
ARTICLE_NAME VARCHAR2(50),
ARTICLE_DATE DATE,
ARTICLE_DATA CLOB)
SEGMENT CREATION IMMEDIATE
tablespace users
lob(ARTICLE_DATA) store as artical_lob
(tablespace LOB_DATA
chunk 16384
disable storage in row
nocache
);
ii. Use datapump import to populate the HR.MAGAZINE_ARTICLES table with data from the exp_mag.dmp file located in the /home/oracle/scripts folder.
翻译:ii.使用datapump import用/home/oracle/scripts文件夹中的exp_mag.dmp文件中的数据填充HR.MAGAZINE_ARTICLES表。
Exit;
impdp hr/hr@prod1 directory=scriptdir dumpfile=exp_mag.dmp tables='MAGAZINE_ARTICLES' content=data_only
Section 4: Create Partitioned Tables
1. Create a partitioned table called NEW_ORDER_ITEMS in the PROD1 database by using the range-parititioned NEW_ORDERS table.The NEW_ORDER_ITEMS partitioned table should avoid storing unnecessary columns. Use the PART_TBS1 and PART_TBS2 tablespaces, and the range-partitioned NEW_ORDERS table that exists in the SH schema of the PROD1 database.
i. Use the following column specifications for creating the NEW_ORDER_ITEMS table:
ORDER_ID NUMBER(12) NOT NULL
PRODUCT_ID NUMBER NOT NULL
QUANTITY NUMBER NOT NULL
SALES_AMOUNT NUMBER NOT NULL
翻译:第4节:创建分区表
一。在PROD1数据库中使用范围划分的NEW_ORDERS表创建一个名为NEW_ORDER_ITEMS的分区表。NEW_ORDER_ITEMS分区表应避免存储不必要的列。使用PART_TBS1和PART_TBS2表空间,以及PROD1数据库的SH模式中存在的range partitioned NEW_ORDERS表。
i.使用以下列规范创建新的_ORDER_ITEMS表:
订单号(12)不为空
产品编号不为空
数量编号不为空
销售金额编号不为空
Sqlplus sys/oracle@prod1 as sysdba
connect sh/sh@prod1
create table NEW_ORDER_ITEMS
(ORDER_ID NUMBER(12) NOT NULL,
PRODUCT_ID NUMBER NOT NULL,
QUANTITY NUMBER NOT NULL,
SALES_AMOUNT NUMBER NOT NULL,
CONSTRAINT fk_new_orders FOREIGN KEY(order_id) REFERENCES new_orders(order_id))
PARTITION BY REFERENCE (fk_new_orders)
(
partition p1 tablespace PART_TBS1,
partition p2 tablespace PART_TBS2
);
ii. Populate the NEW_ORDERS and NEW_ORDER_ITEMS tables by executing the 4_4_12.sql script located in the /home/oracle/scripts directory.
翻译:ii.通过执行位于/home/oracle/scripts目录中的4_4_12.sql脚本,填充新的_ORDERS和新的_ORDER_ITEMS表。
alter table new_orders add c1 varchar2(10);
alter table new_orders add c2 varchar2(10);
alter table new_orders modify total_amount date;
@/home/oracle/scripts/4_4_12.sql
2. Create a partitioned table that automatically stores rows for nonexistent partitions.
i. Log in to the PROD1 database as the SH user and create a SALES_HISTORY_2006 table. The table should have the following columns:
PROD_ID NUMBER NOT NULL
CUST_ID NUMBER NOT NULL
TIME_ID DATE NOT NULL
CHANNEL_ID NUMBER NOT NULL
PROMO_ID NUMBER NOT NULL
QUANTITY_SOLD NUMBER(10,2) NOT NULL
AMOUNT_SOLD NUMBER(10,2) NOT NULL
Partitions should be based on the TIME_ID column.
Data for the years 2001, 2002, 2003, and 2004 should be store in separate partitions having partition names SAL1, SAL2, SAL3, and SAL4, respectively, and data after 2004 is stored in a separate partition for each month.
Use the 4_4_22.sql script in the /home/oracle/scripts directory to populate the table.
翻译:2。创建一个分区表,自动存储不存在分区的行。
i.以SH用户身份登录PROD1数据库,并创建SALES_HISTORY_2006表。该表应包含以下列:
产品ID号不为空
客户ID号不为空
时间ID日期不为空
通道ID号不为空
促销ID号不为空
售出数量(10,2)不为空
售出数量(10,2)不为空
分区应该基于TIME\u ID列。
2001年、2002年、2003年和2004年的数据应分别存储在分区名为SAL1、SAL2、SAL3和SAL4的单独分区中,2004年之后的数据每月存储在单独分区中。
使用/home/oracle/scripts目录中的4_4_22.sql脚本填充表。
connect sh/sh@prod1
create table SALES_HISTORY_2006(
PROD_ID NUMBER NOT NULL,
CUST_ID NUMBER NOT NULL,
TIME_ID DATE NOT NULL,
CHANNEL_ID NUMBER NOT NULL,
PROMO_ID NUMBER NOT NULL,
QUANTITY_SOLD NUMBER(10,2) NOT NULL,
AMOUNT_SOLD NUMBER(10,2) NOT NULL)
partition by range(time_id)
interval (NUMTOYMINTERVAL(1,'month'))
(
partition sal1 values less than (to_date('01-01-2002','DD-MM-YYYY')),
partition sal2 values less than (to_date('01-01-2003','DD-MM-YYYY')),
partition sal3 values less than (to_date('01-01-2004','DD-MM-YYYY')),
partition sal4 values less than (to_date('01-01-2005','DD-MM-YYYY'))
);
@/home/oracle/scripts/4_4_22.sql
Section 5: Set Up Fine-Grained Auditing
1. Set up fine-grained auditing (FGA) on the SALARY and COMMISSION_PCT columns of the EMPLOYEES table in the HR schema of the PROD1 database. An audit record should be created if either of these columns is selected as part of the output of a query or is used in the WHERE condition of a SELECT statement and their values are not null.
2. Validate that the FGA is taking place by executing statements that result in auditing records being created and by executing statements where no auditing records will be generated. Do not delete your audit records.
翻译:第5节:建立细粒度审计
1.在PROD1数据库的HR模式中,对EMPLOYEES表的SALARY和COMMISSION\u PCT列设置细粒度审计(FGA)。如果这些列中的任何一列被选择作为查询输出的一部分,或者被用于SELECT语句的WHERE条件,并且它们的值不为空,则应创建审核记录。
2。通过执行导致创建审核记录的语句和执行不生成审核记录的语句来验证是否正在执行FGA。不要删除你的审计记录。
connect sys/oracle@prod1 as sysdba
begin
DBMS_FGA.ADD_POLICY(
object_schema=>'HR',
object_name=>'employees',
policy_name=>'fga_policy_1',
audit_column=>'salary, commission_pct',
enable=>true,
statement_types=>'select');
end;
/
connect hr/hr@prod1
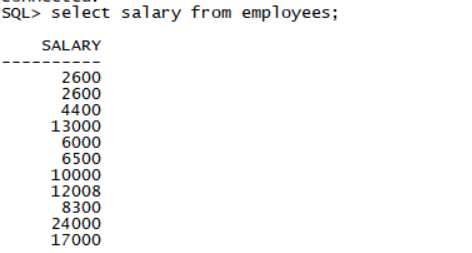
select salary from employees;
connect sys/oracle@prod1 as sysdba
select LSQLTEXT from fga_log$;

Section 6: Configure the Database to Retrieve All Previous Versions of the Table Rows
1. Perform the following tasks.
i. Create a table named ORIGINAL_SALARY in the HR schema in the PROD1 database. ORIGINAL_SALARY includes the EMPLOYEE_ID,COMMISSION_PCT,and SALARY of all records in the HR.EMPLOYEES table.
Note the date and time, and then commit the changes.
翻译:第6节:配置数据库以检索表行的所有早期版本
1.执行以下任务。
i.在PROD1数据库的人力资源模式中创建一个名为ORIGINAL_SALARY的表。原始薪资包括HR.EMPLOYES表中所有记录的员工ID、佣金PCT和薪资。
记下日期和时间,然后提交更改。
connect hr/hr@prod1
create table ORIGINAL_SALARY as
select employee_id, commission_pct, salary
from employees;
select to_char(sysdate,'yyyy-mm-dd hh24:mi:ss') from dual;
SQL> select to_char(sysdate,'yyyy-mm-dd hh24:mi:ss') from dual;
TO_CHAR(SYSDATE,'YY
-------------------
2015-09-21 23:04:47
这个时间是获取的当前时间
如图:

ii. Delete all employees in the HR.ORIGINAL_SALARY table whose HIRE_DATE is before 2002. Commit the changes. Create a HR.SALARY_VIEW view that shows all the original rows before deletion.
翻译:ii.删除HR.ORIGINAL U SALARY表中所有雇佣日期在2002年之前的员工。提交更改。创建一个显示删除前所有原始行的人力资源薪资视图。
connect hr/hr@prod1
delete ORIGINAL_SALARY where employee_id in
(select employee_id from employees where hire_date<to_date('2002-01-01','yyyy-mm-dd'));
commit;
create or replace view SALARY_VIEW as
select employee_id, commission_pct, salary
from ORIGINAL_SALARY
as of timestamp to_timestamp('2015-09-21 23:04:47','yyyy-mm-dd hh24:mi:ss');
create or replace view SALARY_VIEW as
select employee_id, commission_pct, salary
from ORIGINAL_SALARY
as of timestamp to_timestamp('2020-04-07 22:13:35','yyyy-mm-dd hh24:mi:ss'); (这里面的时间是之前获取的当前时间)
iii. A table named MIXED_DATA, owned by HR, is accidentally dropped by a DBA logging in to the wrong database. There may be multiple copies of the table that has been dropped. The user wants you to recover the table that has a column named DEPARTMENT_NAME. Restore the table and name it MD_RCV.
SQL> show recyclebin
ORIGINAL NAME RECYCLEBIN NAME OBJECT TYPE DROP TIME
---------------- ------------------------------ ------------ -------------------
MIXED_DATA BIN$IEG0LNoFF+rgU1BcqMDQ1A==$0 TABLE 2015-09-21:21:17:31
MIXED_DATA BIN$IEG0LNoGF+rgU1BcqMDQ1A==$0 TABLE 2015-09-21:21:17:31

RECYCLEBIN NAME和DROP TIME根据当前时间产生的
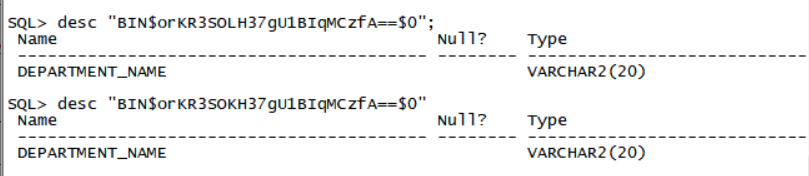
SQL> desc "BIN$IEG0LNoFF+rgU1BcqMDQ1A==$0"
Name Null? Type
----------------------------------------- -------- ----------------------------
DEPARTMENT_NAME VARCHAR2(20)
SQL> desc "BIN$orKR3SOLH37gU1BIqMCzfA==$0"
SQL> desc "BIN$IEG0LNoGF+rgU1BcqMDQ1A==$0"
Name Null? Type
----------------------------------------- -------- ----------------------------
DEPARTMENT_ID VARCHAR2(10)
SQL> desc "BIN$orKR3SOKH37gU1BIqMCzfA==$0"
SQL> flashback table "BIN$IEG0LNoFF+rgU1BcqMDQ1A==$0" to before drop rename to MD_RCV;
SQL> flashback table "BIN$orKR3SOKH37gU1BIqMCzfA==$0" to before drop rename to MD_RCV;
Flashback complete.
SQL>
2. Perform the necessary configurations in the PROD1 database so that all previous versions of the rows for the past one year in the SH.PROMOTIONS table are retrievable.
i. Create and use the following tablespace and user to perform the necessary configurations:
Tablespace named FRATBS with a data file of 50 MB
User named FR_ADMIN
ii. Previous versions of the rows in the SH.PROMOTIONS table should be retrievable from an archive, FRA1, and you should be able to perform data definition language (DDL) operations on the base table, SH.PROMOTIONS. Run the 4_6_22.sql script located in the /home/oracle/scripts directory.
翻译:2。在PROD1数据库中执行必要的配置,以便可以检索SH.PROMOTIONS表中过去一年的所有以前版本的行。
i.创建并使用以下表空间和用户来执行必要的配置:
名为FRATBS的表空间,数据文件为50mb
名为FR_ADMIN的用户
Ii.应该可以从归档文件FRA1中检索SH.PROMOTIONS表中以前版本的行,并且应该能够对基表SH.PROMOTIONS执行数据定义语言(DDL)操作。运行位于/home/oracle/scripts目录中的4_6_22.sql脚本。
connect sys/oracle@prod1 as sysdba
create user fr_admin identified by oracle;
grant dba, FLASHBACK ARCHIVE ADMINISTER to fr_admin;
connect fr_admin/oracle@prod1
create tablespace FRATBS datafile '/u01/app/oracle/oradata/PROD1/FRATBS01.dbf' size 50M;
create flashback archive FRA1 tablespace FRATBS quota 50M retention 1 year;
alter table SH.PROMOTIONS flashback archive FRA1;
@/home/oracle/scripts/4_6_22.sql
Part 5
Description
In this skillset, you will configure the Resource Manager to limit resource usage by users. Use result cache, tune SQL statements, configure future baselines, and gather statistics. Use real application testing features, such as SQL Replay and Workload Replay.
Objectives
- Create a Synonym.
- Configure the Resource Manager.
- Tune SQL statements.
- Perform real application testing.
- Create SQL Plan baselines.
- Capture performance statistics.
- Tune an instance.
End State
At the end of this skillset, your databases PROD1, and PROD2 must be in OPEN mode and available for querying to enable skillset scoring. No credit will be given for the skillset if the databases are not open for access.
翻译:第五部分
说明
在此技能集中,您将配置资源管理器以限制用户使用资源。使用结果缓存、优化SQL语句、配置将来的基线和收集统计信息。使用真实的应用程序测试功能,如SQL重放和工作负载重放。
目标
创建同义词。
配置资源管理器。
调整SQL语句。
执行实际应用程序测试。
创建SQL计划基线。
捕捉性能统计数据。
调整实例。
结束状态
在这个技能集的末尾,您的数据库PROD1和PROD2必须处于打开模式,并且可以查询以启用技能集评分。如果数据库未打开以供访问,则不会授予技能集任何学分。
第五场会对PROD2库进行大破坏 除了pfile其他全部被删 恢复方式就用第三场流程
Section 1: Create a Synonym
1. Create a public synonym named sales for sh.sales@PROD1 in the PROD2 Database.
翻译:第1节:创建同义词
一。在PROD2数据库中为sh.sales@PROD1创建一个名为sales的公共同义词。
Sqlplus sys/oracle@prod2 as sysdba
connect sys/oracle@prod2 as sysdba
create public synonym sales for sh.sales@prod_link;
2. In PROD1, create user APPS, password: Apps1234, Export the schema of SH user.
Import and remap the schema to APPS.
翻译:2。在PROD1中,创建用户应用程序,密码:Apps1234,导出SH user的模式。
导入架构并将其重新映射到应用程序。
connect sys/oracle@prod1 as sysdba
create user apps identified by Apps1234;
grant dba to apps;
Exit;
df -h先查看磁盘空间
如果磁盘空间不足先考虑删掉一些日志
Cd /home/oracle/files
vi expsh.par
userid=system/oracle@prod1
directory=scriptdir
schemas=SH
dumpfile=shdata.dmp
job_name=expjob
expdp parfile=expsh.par
vi impsh.par
userid=system/oracle@prod1
directory=scriptdir
remap_schema=SH:APPS
dumpfile=shdata.dmp
job_name=impjob
impdp parfile=impsh.par
3. In PROD1, create user OLTP_USER, password: OLTP_USER1
Create Table for OLTP_USER:
Table 1 name: CLASSES,
Columns:
CLASS_ID NUMBER(10) PRIMARY KEY
CLASS_NAME VARCHAR2(20)
Table 2 name: CLASSES2,
Columns:
CLASS_ID NUMBER(10) PRIMARY KEY
CUST_LAST_NAME VARCHAR2(10)
翻译:三。在PROD1中,创建用户OLTP_user,密码:OLTP_USER1
为OLTP_用户创建表:
表1名称:类,
列:
类别标识号(10)主键
课程名称VARCHAR2(20)
表2名称:CLASSES2,
列:
类别标识号(10)主键
客户姓氏VARCHAR2(10)
Sqlplus sys/oracle@prod1 as sysdba
connect sys/oracle@prod1 as sysdba
create user OLTP_USER identified by OLTP_USER1;
grant dba to OLTP_USER;
connect OLTP_USER/ OLTP_USER1@prod1
create table oltp_user.CLASSES(
CLASS_ID NUMBER(10) PRIMARY KEY,
CLASS_NAME VARCHAR2(20)
);
create table oltp_user.CLASSES2(
CLASS_ID NUMBER(10) PRIMARY KEY,
CUST_LAST_NAME VARCHAR2(10));
4. In PROD1, create a new tablespace, CUST_TBS with manual segment management option, and a table, SH.NEW_CUST with the columns: cust_id number, cust_name varchar2(50), in that tablespace.
Create a partitioned table SH.PRODUCT_INFORMATION_PART, with columns
PRODUCT_ID NUMBER(10)
PROD_NAME VARCHAR2(10)
The table will be partitioned by range, and using PRODUCT_ID as the partition key.
When PRODUCT_ID <1000 put the data into partition PART1.
When PRODUCT_ID <2000 put the data into partition PART2.
翻译:4.在PROD1中,创建一个新表空间,CUST_TBS with manual segment management选项,以及一个表SH.new_CUST with the columns:CUST_id number,CUST_name varchar2(50),在该表空间中。
创建带列的分区表SH.PRODUCT_INFORMATION_PART
产品识别号(10)
产品名称VARCHAR2(10)
将按范围对表进行分区,并使用产品ID作为分区键。
当产品ID<1000时,将数据放入分区PART1。
当产品ID<2000时,将数据放入分区PART2。
connect sys/oracle@prod1 as sysdba
create tablespace CUST_TBS datafile '/u01/app/oracle/oradata/PROD1/CUST_TBS01.dbf' size 10M
extent management local autoallocate
segment space management manual;
create table sh.NEW_CUST(cust_id number, cust_name varchar2(50)) tablespace CUST_TBS;
create table SH.PRODUCT_INFORMATION_PART(
PRODUCT_ID NUMBER(10),
PROD_NAME VARCHAR2(10))
partition by range(product_id)
(
partition part1 values less than(1000),
partition part2 values less than(2000)
);
Section 2: Configure the Resource Manager
先创建database control
connect sys/oracle@prod1 as sysdba
alter user dbsnmp identified by oracle account unlock;
emca -config dbcontrol db -repos recreate
考试顺利的话第一场已经建立好em,这里无需再建立
1. Set up and configure the Resource Manager on the PROD1 database.
Following are the specifications:
1. Assign the SH user as the resource administrator.
翻译:第2节:配置资源管理器
1.在PROD1数据库上设置和配置资源管理器。
规范如下:
1.将SH用户指定为资源管理员。
grant ADMINISTER RESOURCE MANAGER to sh;
BEGIN
DBMS_RESOURCE_MANAGER_PRIVS.GRANT_SYSTEM_PRIVILEGE(
GRANTEE_NAME => 'SH',
PRIVILEGE_NAME => 'ADMINISTER_RESOURCE_MANAGER',
ADMIN_OPTION => FALSE);
END;
/
另外一种方法可以是用em图形化操作(图方便推荐第二种)
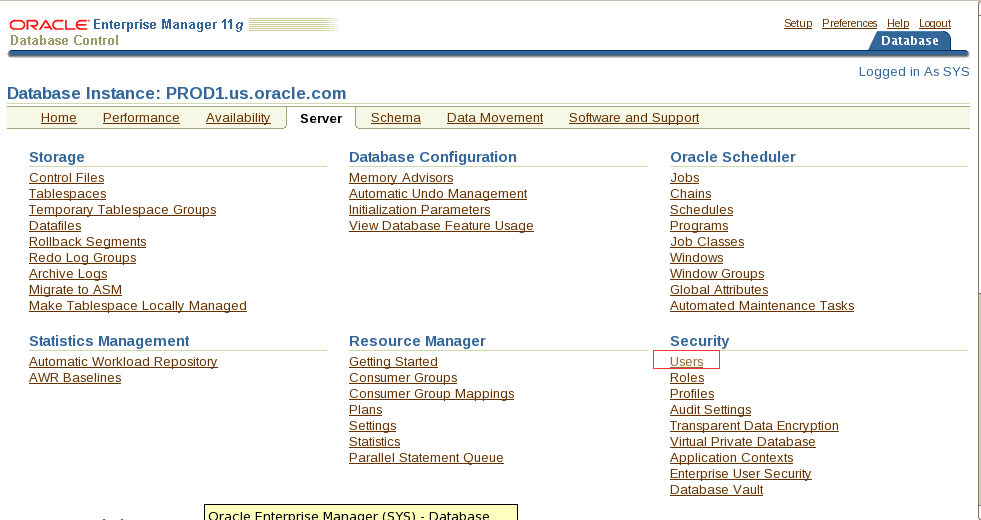
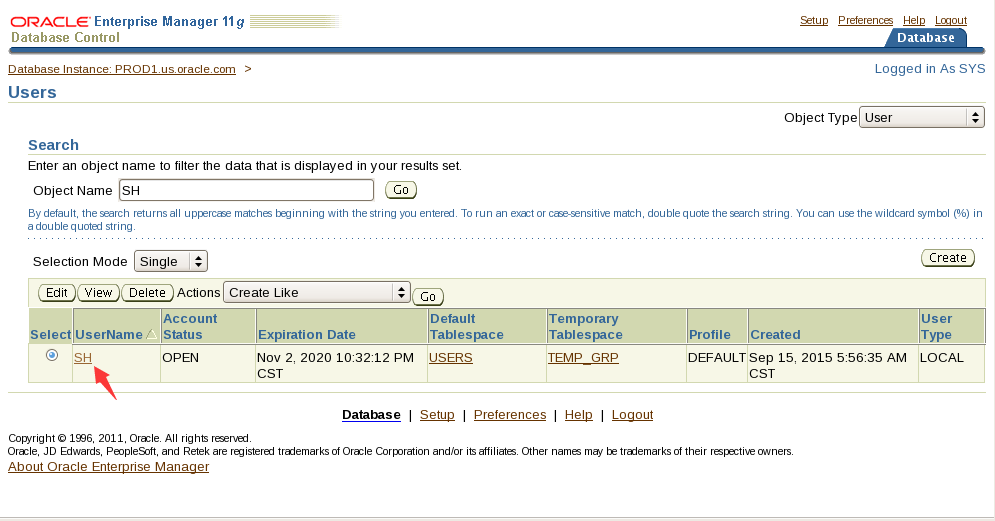
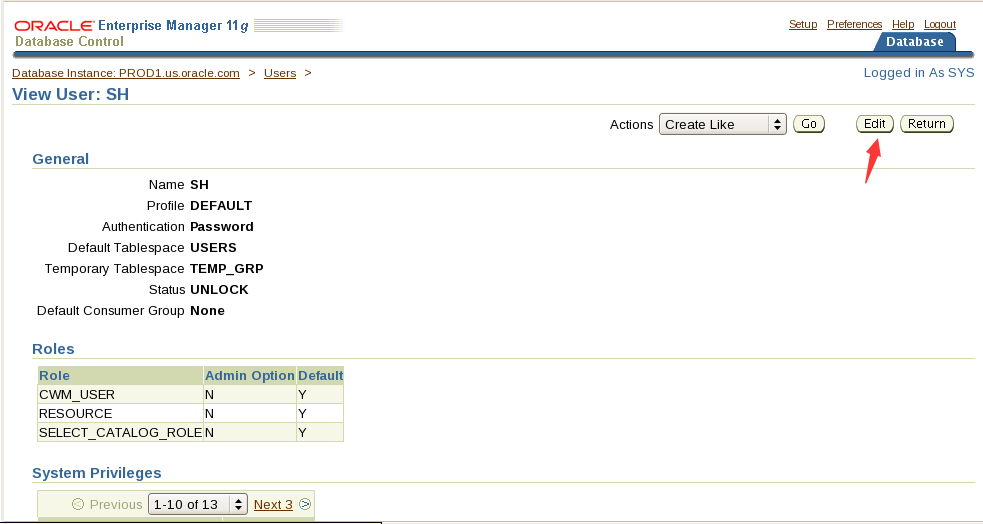
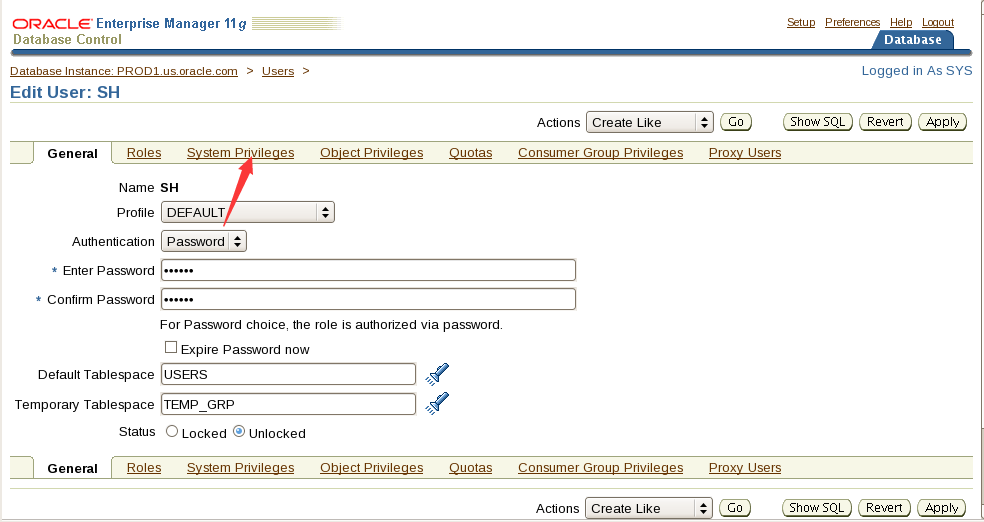
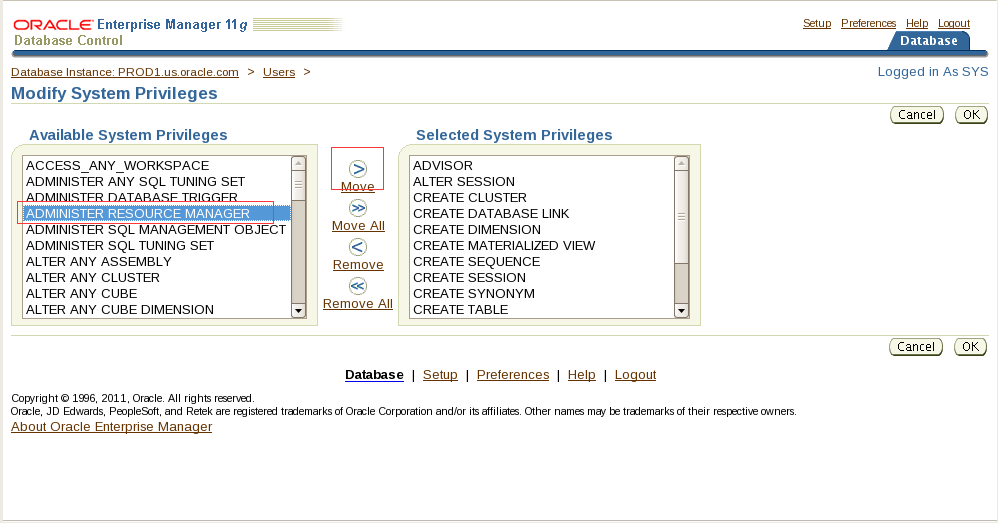
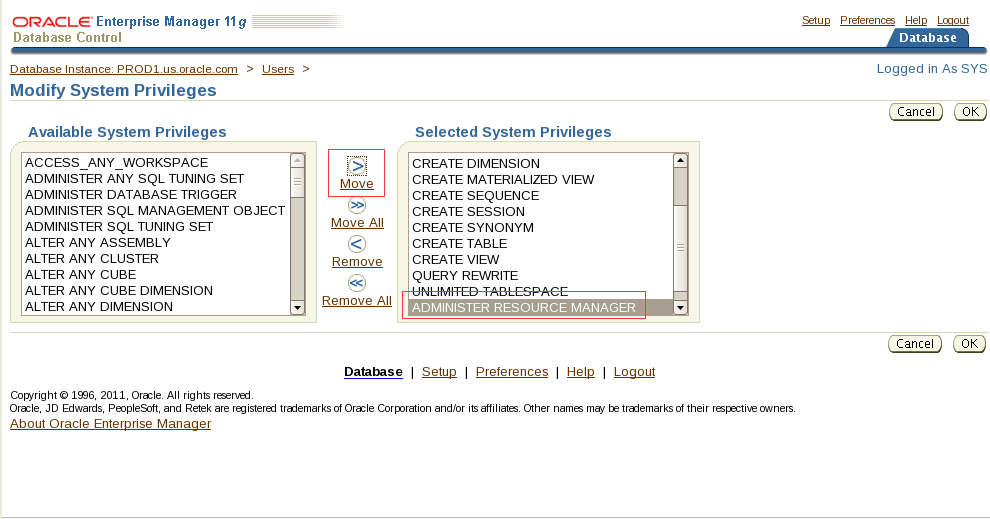
2. Create two resource manager consumer groups: OLTP and DSS. (Use comments to denote what each group will be used for.)
翻译:2。创建两个资源管理器使用者组:OLTP和DSS。(使用注释来表示每个组的用途。)
emctl start dbconsole
打开第一场创建好的em
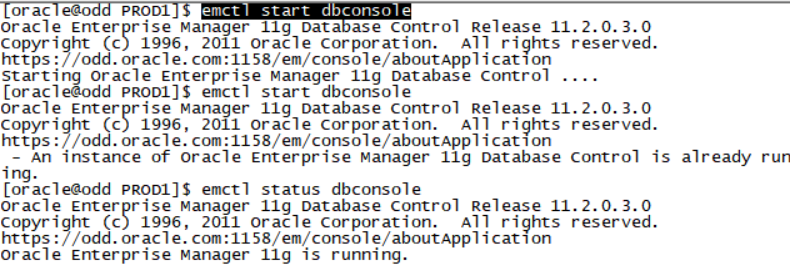
打开火狐浏览器

地址:https://odd.oracle.com:1158/em
登录账号密码 sys oracle 选sysdba
选择server -consumer groups
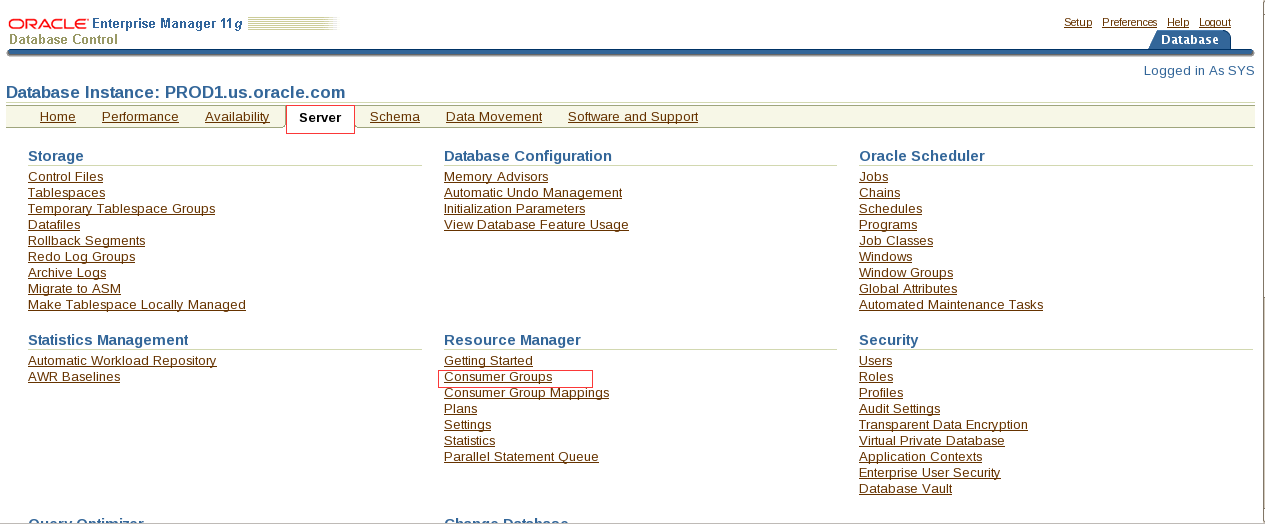
点击create新建
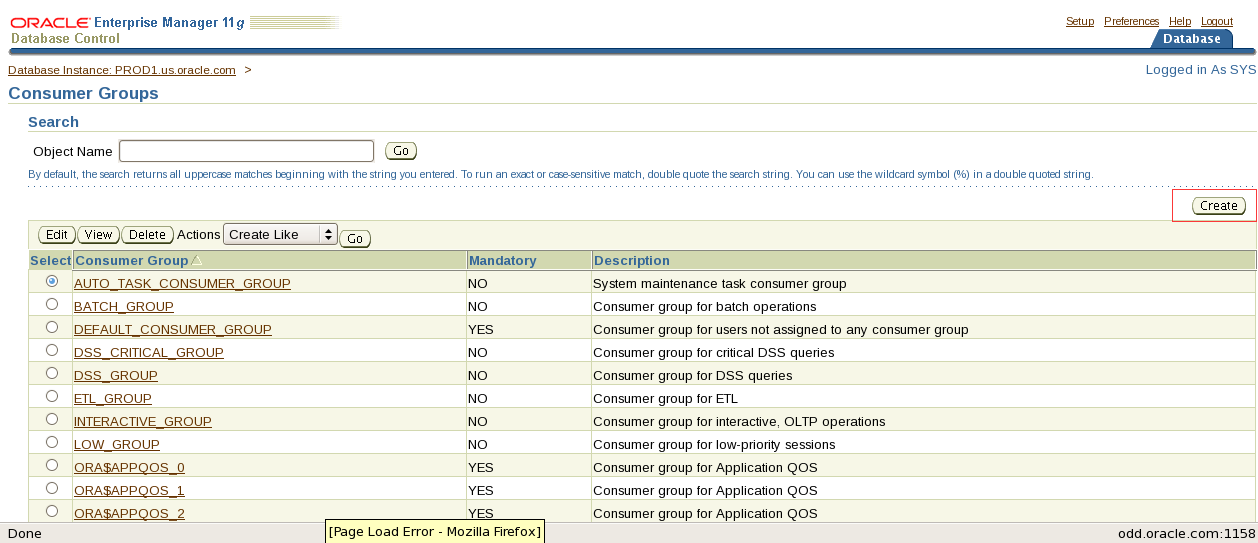
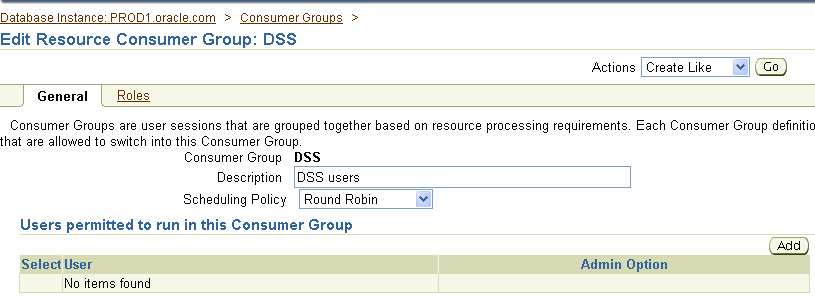
老师文档中少一个新建OLTP
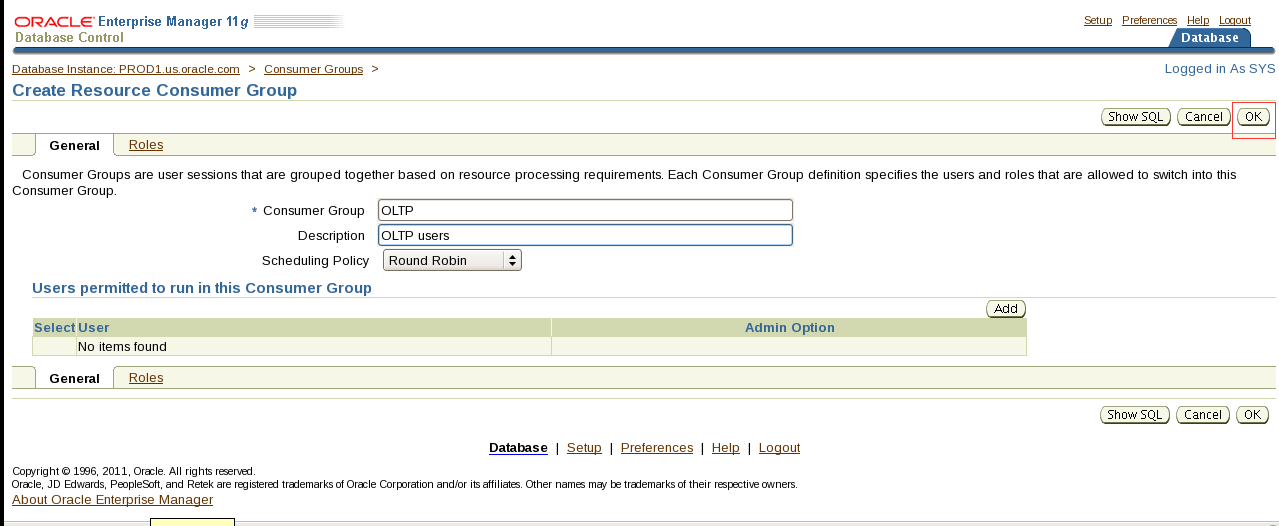
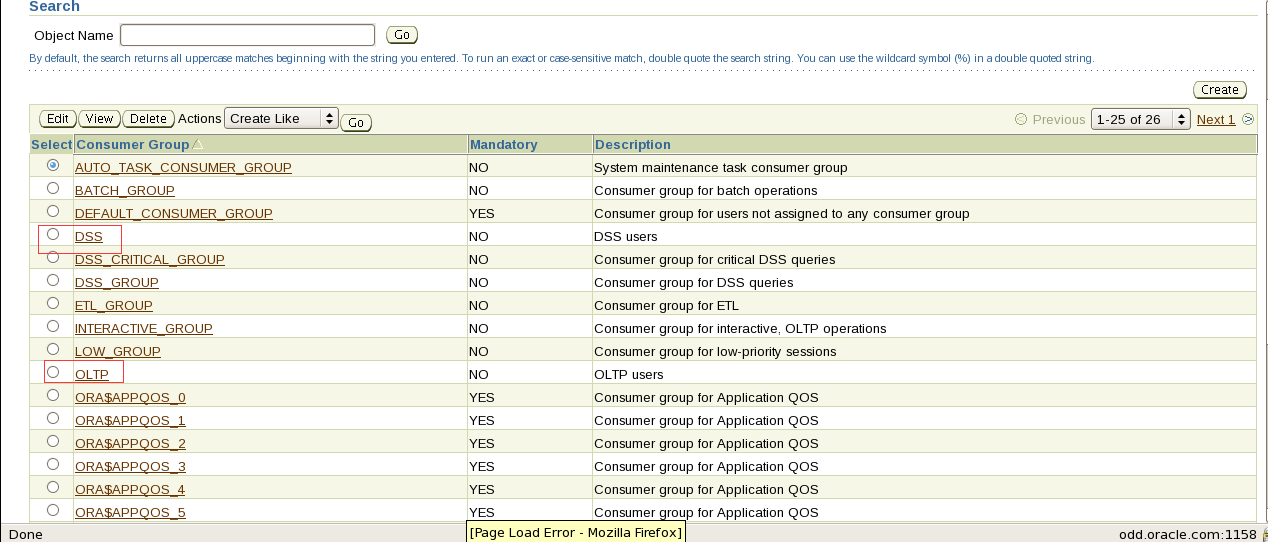
看到这2个表示已经新建成功
3. Create a plan named DAYTIME with the following directives only.
i. For the OLTP group, we cannot allow more than 20 active sessions. If the 21st user attempts to log in, the request should be aborted if the wait exceeds 60 seconds.
翻译.3.仅使用以下指令创建名为DAYTIME的计划。
- 对于OLTP组,我们不能允许超过20个活动会话。如果第21个用户尝试登录,如果等待时间超过60秒,则应中止请求。
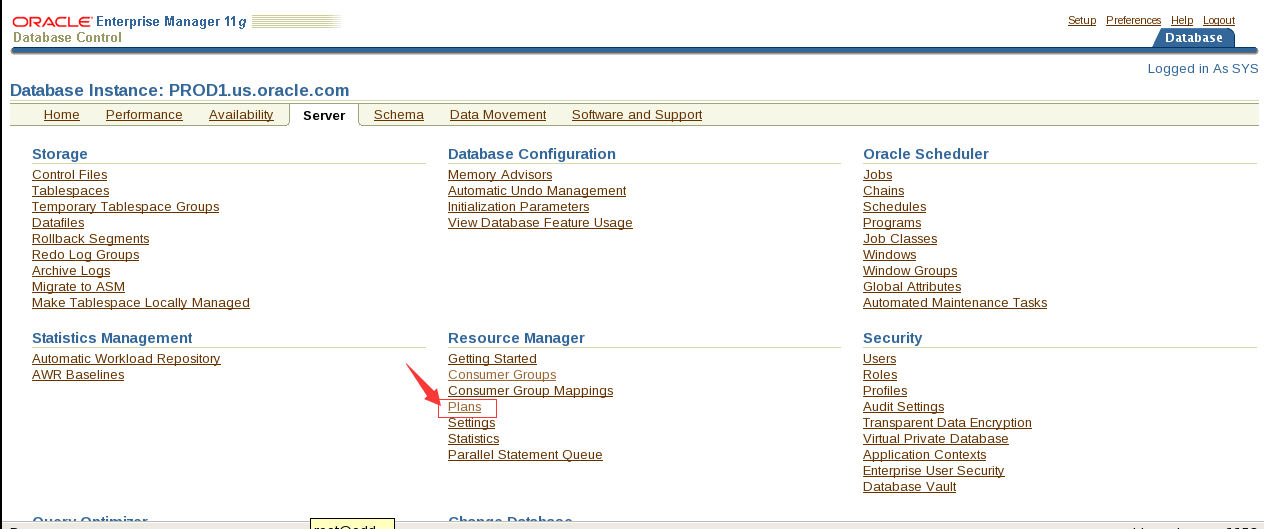
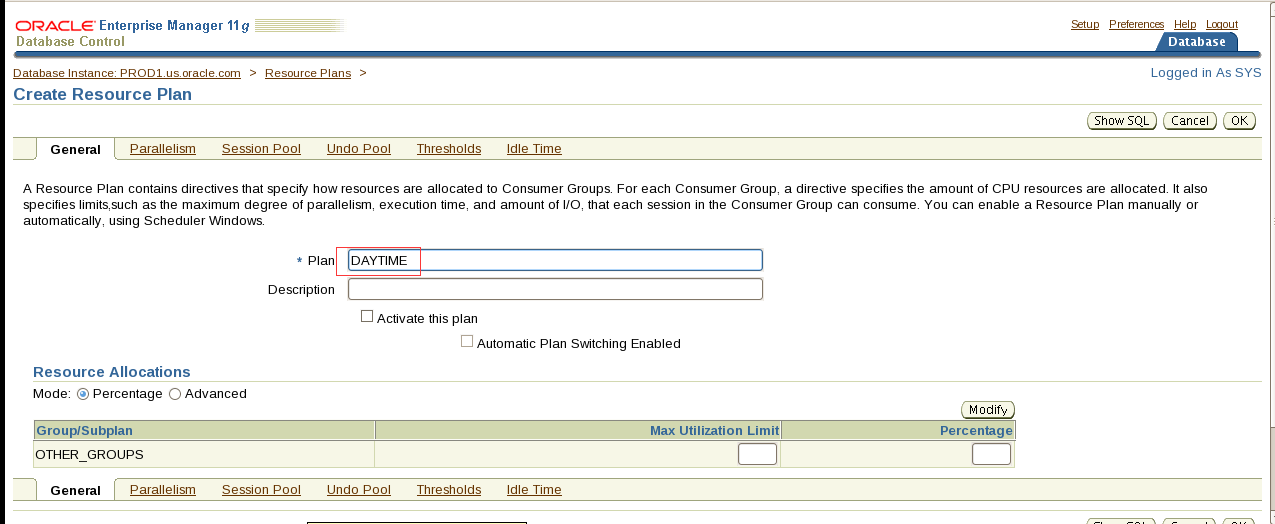
计划名必须先填不然无法进行后面的操作
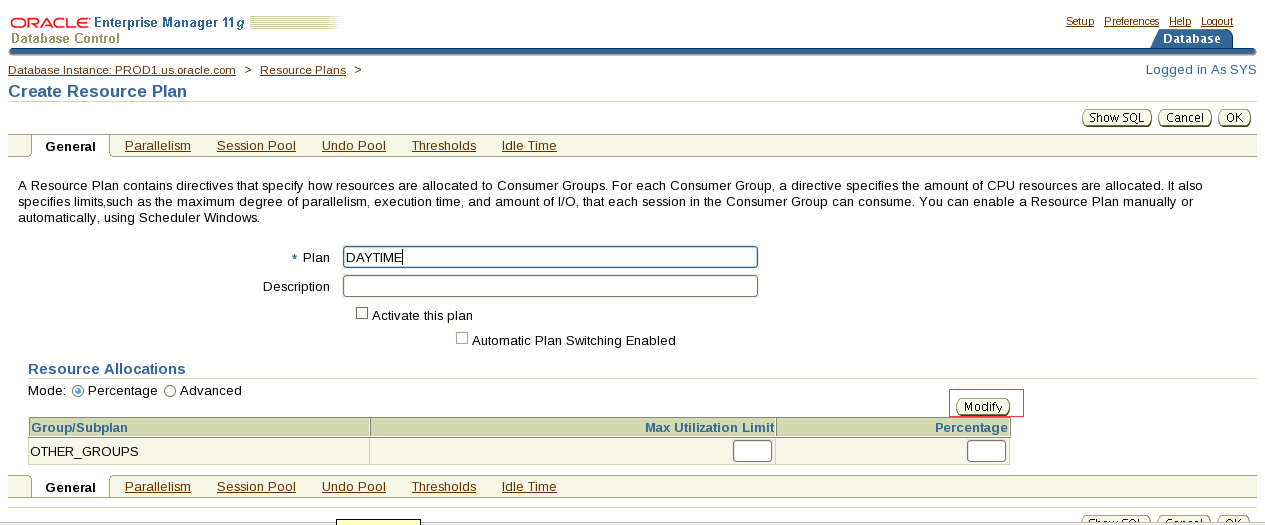
把之前新建的OLTP和DSS组加进来
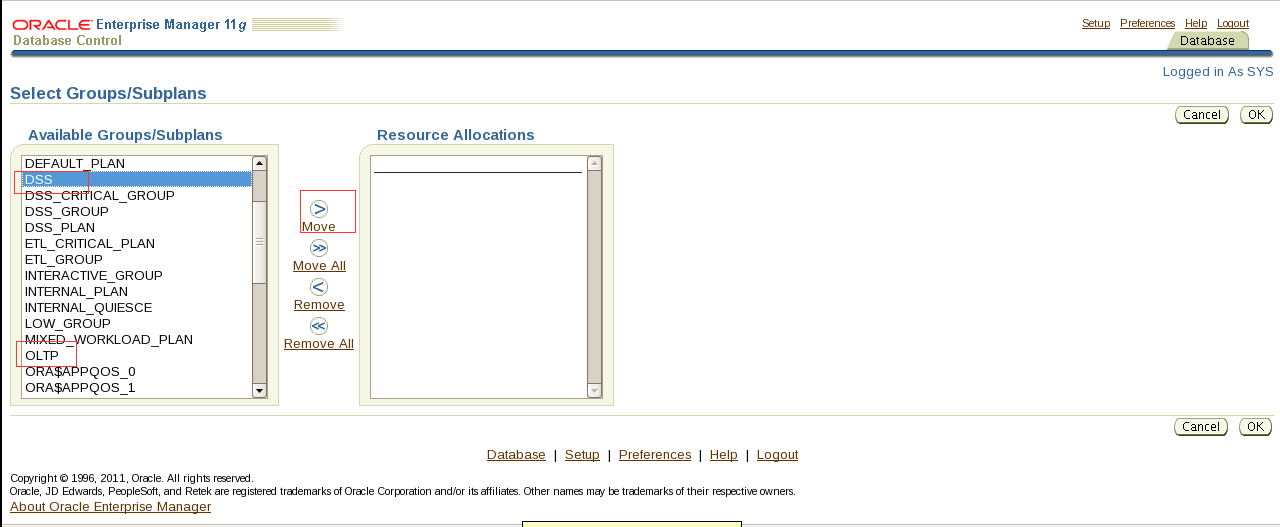
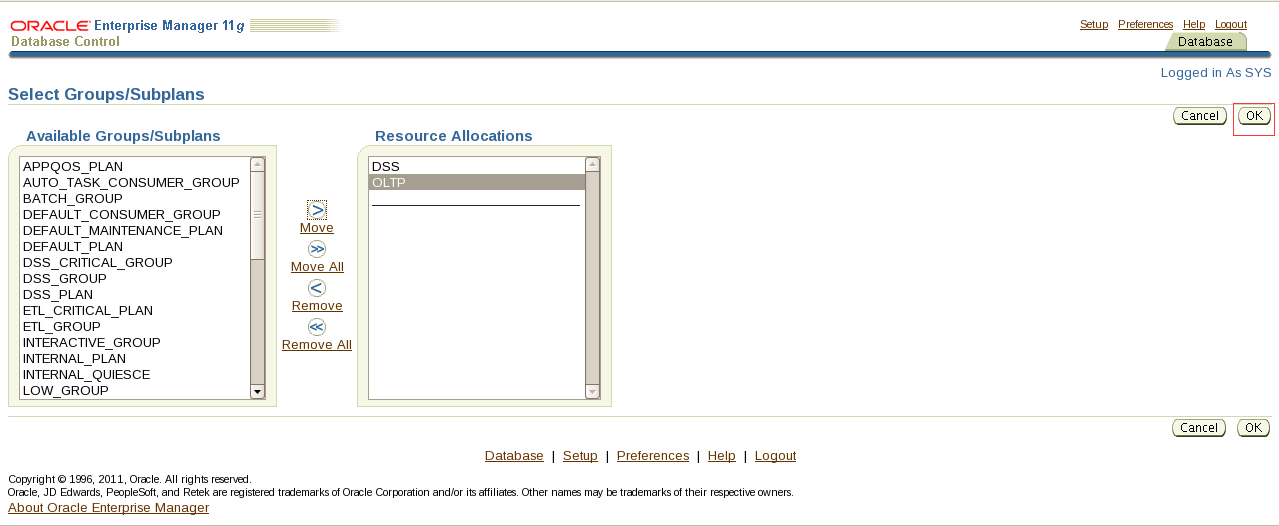

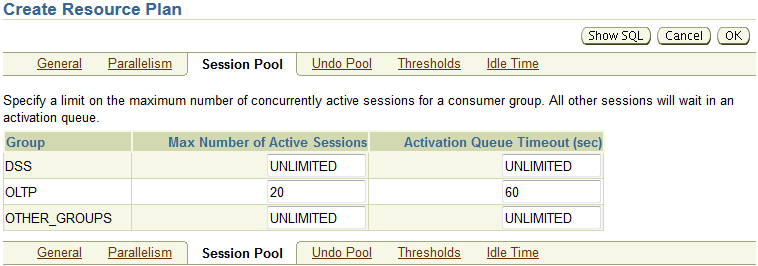
- The maximum number of active sessions for the DSS group is 5. If more than 5 sessions are requested, the request should abort after 120 seconds.
翻译:ii.DSS组的最大活动会话数为5。如果请求的会话超过5个,则请求应在120秒后中止。
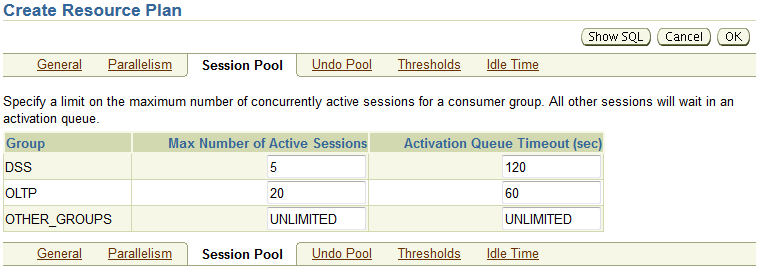
- The maximum idle time for a session in the OLTP group should be set to 120 seconds. If the session is idle and blocking other sessions for more than 80 seconds, then this session should terminate automatically.
翻译:iii.OLTP组中会话的最大空闲时间应设置为120秒。如果会话空闲并且阻塞其他会话超过80秒,则此会话应自动终止。
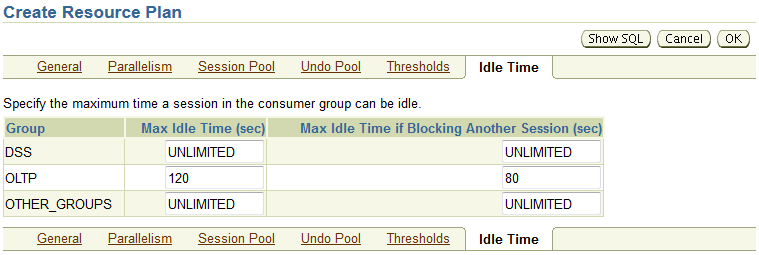
- The maximum amount of undo that the OLTP group can use should be set to 200MB.
翻译:iv.OLTP组可以使用的最大撤消量应设置为200MB。
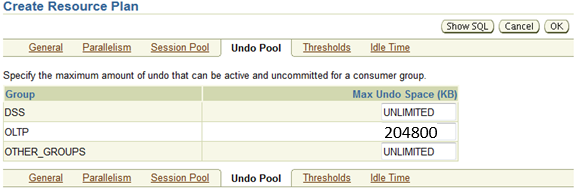
- Set CPU ratios for OLTP, DSS and OTHER_GROUPS as 50, 30, and 20 respectively.
翻译:v、 将OLTP、DSS和其他_组的CPU比率分别设置为50、30和20。
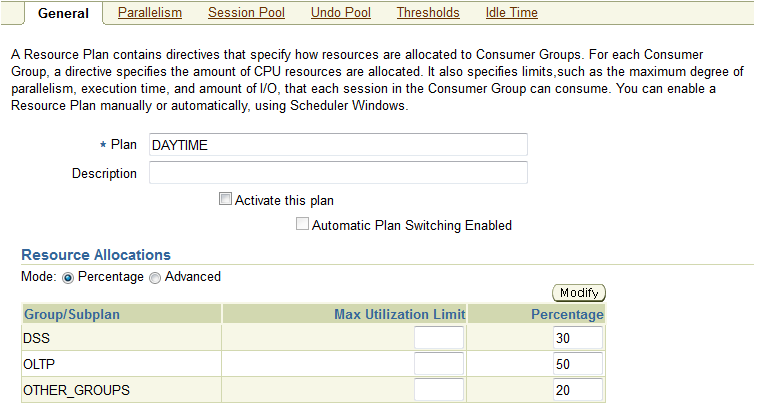
- DSS group has a parallel degree limit of 20.
翻译:决策支持系统组的并行度限制为20。
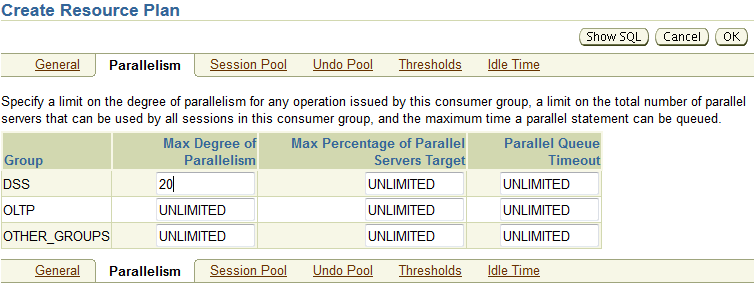
- Temporarily switch any session in DSS group to the LOW_GROUP consumer group if the session exceeds 10,000 I/O requests or exceeds 2,500 megabytes of data transferred. The session should return to its original group after the offending top call is complete.
翻译:vii.如果会话超过10000个I/O请求或传输的数据超过2500兆字节,则将DSS组中的任何会话临时切换到低组使用者组。该会话应在违规的顶部调用完成后返回到其原始组。
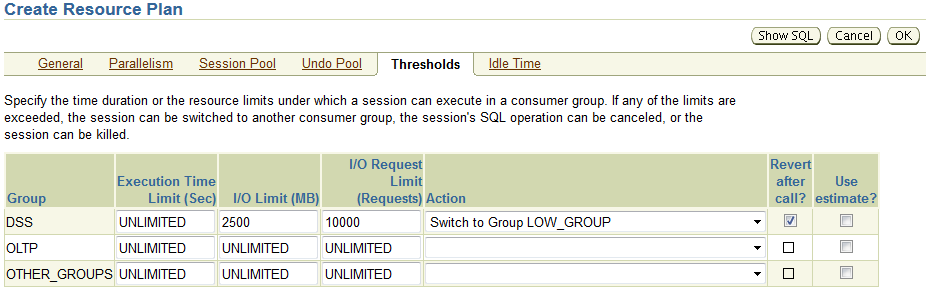
- The DAYTIME resource plan should be an active plan.
翻译:3.日间资源计划应为活动计划。
Sqlplus sys/oracle@prod1 as sysdba
alter system set resource_manager_plan=daytime;
第二种:
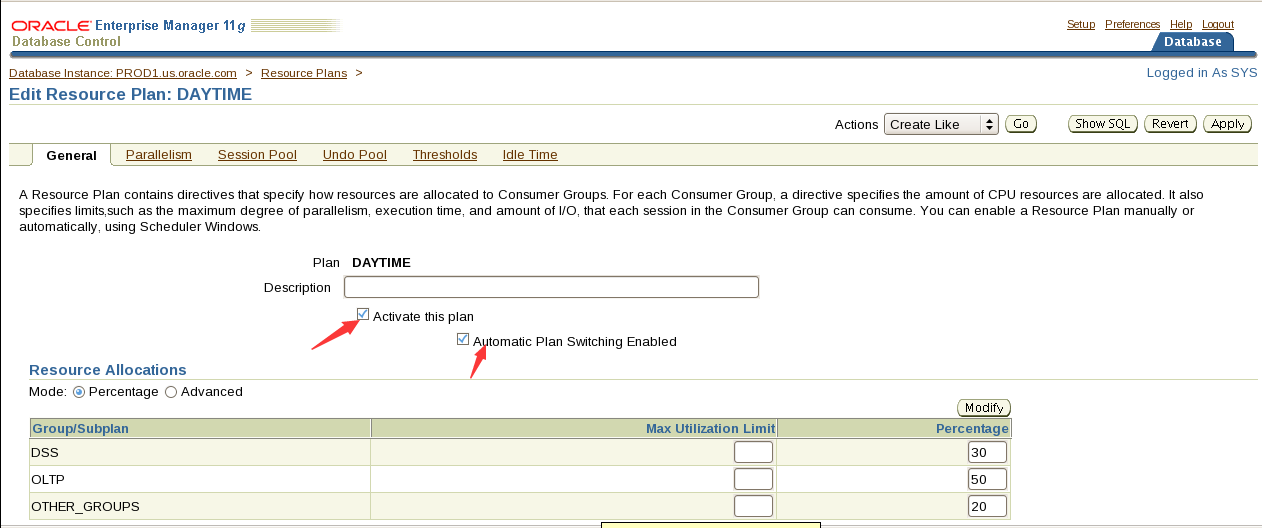
都打钩
Section 3: Optimize Schema Objects
An application needs to access the CUST_LAST_NAME column in the CUSTOMERS table in the SH schema of the PROD1 database. The problem is that users can supply names without regard to case. The application changes all the user-supplied names to uppercase.
- Analysis reveals that a normal index on that column is not used. Create an index on the CUST_LAST_NAME column that will be used by the application.
翻译:第3节:优化模式对象
应用程序需要访问PROD1数据库的SH模式中CUSTOMERS表中的CUST_LAST_NAME列。问题是用户可以不考虑大小写而提供名称。应用程序将所有用户提供的名称更改为大写。
- 分析表明该列上没有使用普通索引。在将由应用程序使用的“客户姓氏”列上创建索引。
Conn sh/sh@prod1
create index idx_customers_lastname on CUSTOMERS(upper(CUST_LAST_NAME));
2. Turn on monitoring for all the indexes on the CUSTOMERS table in the SH schema of the PROD1 database.
翻译:2。打开PROD1数据库的SH模式中CUSTOMERS表上所有索引的监视。
select 'alter index ' || index_name || ' monitoring usage;' from user_indexes where table_name='CUSTOMERS';
SQL> select 'alter index ' || index_name || ' monitoring usage;' from user_indexes where table_name='CUSTOMERS';
'ALTERINDEX'||INDEX_NAME||'MONITORINGUSAGE;'
------------------------------------------------------------
alter index IDX_CUSTOMERS_LASTNAME monitoring usage;
alter index CUSTOMERS_YOB_BIX monitoring usage;
alter index CUSTOMERS_MARITAL_BIX monitoring usage;
alter index CUSTOMERS_GENDER_BIX monitoring usage;
alter index CUSTOMERS_PK monitoring usage;
通过查看V$OBJECT_USAGE视图来获得索引是否被用上了。
Select * from v$OBJECT_USAGE;
3. Create two new tables named STUDENTS and ATTENDEES in the OLTP_USER schema of the PROD1 database. The schema password is OLTP_USER1.
i. The STUDENTS table will contain three columns. STUD_ID will be a number and the primary key.
ii. FNAME and LNAME will be the other two columns and may vary in length with a maximum of 20 characters.
iii. ATTENDEES will be an intersection table in a many-to-many relationship between the STUDENTS and CLASSES tables, which is also in the OLTP_USER schema.
iv. The ATTENDEES table will contain the primary keys of each of the other tables as its primary key.
Create the ATTENDEES table so that the primary key index and the table itself are the same object.
翻译3.在PROD1数据库的OLTP_用户模式中创建两个名为STUDENTS和ATTENDEES的新表。架构密码是OLTP_USER1。
I.学生表将包含三列。STUD_ID将是一个数字和主键。
Ii.FNAME和LNAME是另外两列,长度可能不同,最多20个字符。
iii.与会者将是学生和类表之间多对多关系中的交叉表,该交叉表也在OLTP_用户模式中。
iv.与会者表将包含其他每个表的主键作为其主键。
创建与会者表,使主键索引和表本身是同一对象。
connect oltp_user/OLTP_USER1@prod1
create table STUDENTS(STUD_ID number primary key, FNAME varchar2(20), LNAME varchar2(20));
create table ATTENDEES (stud_id number, class_id number, constraint pk_attendees primary key(stud_id,class_id))
organization index;
4. Because of the unevenly distributed data in the DEPARTMENT_ID column of the EMPLOYEES table of the HR schema of the PROD1 database, you need to supply more information to the optimizer to allow for more efficient use of indexes.
i. Regenerate statistics on the EMPLOYEES table to solve this problem.
5. Analysis has revealed that the COUNTRY_ID column of the CUSTOMERS table of the SH schema of the PROD1 database has very low cardinality.
i. This column is never updated.
Create an index that can take advantage of these attributes of this column.
翻译:4.由于PROD1数据库的HR schema的EMPLOYEES表的DEPARTMENT_ID列中的数据分布不均匀,您需要向优化器提供更多信息,以便更有效地使用索引。
i.重新生成EMPLOYEES表上的统计信息以解决此问题。
exec dbms_stats.gather_table_stats('HR','EMPLOYEES',method_opt=>'for columns DEPARTMENT_ID size 254');
5个。分析表明,PROD1数据库的SH schema的CUSTOMERS表的COUNTRY-ID列具有很低的基数。
本专栏从未更新。
创建可以利用此列的这些属性的索引。
connect sh/sh@prod1
create bitmap index idx_cust_countryid on CUSTOMERS(COUNTRY_ID);
6. Create an index on the COUNTRY_ID and CUST_CITY columns in the CUSTOMERS table of the SH schema of the PROD1 database.
i. The application requires that the leading column of this index must be the COUNTRY_ID column.
ii. Take advantage of the Oracle feature of indexes that allows the creation of the index to use less space when the leading column is often duplicated.
翻译:6。在PROD1数据库的SH模式的CUSTOMERS表中的COUNTRY_ID和CUST_CITY列上创建索引。
i.应用程序要求此索引的前导列必须是COUNTRY\u ID列。
二。利用索引的Oracle特性,当前导列经常重复时,可以使用较少的空间创建索引。
create index idx_cust_cc on CUSTOMERS(COUNTRY_ID,CUST_CITY) compress 1;
7. Make sure that the package named STANDARD in the PROD1 database is available in memory persistently across all startups.
翻译:7.确保PROD1数据库中名为STANDARD的包在所有启动的内存中持久可用。
connect sys/oracle@prod1 as sysdba
exec dbms_shared_pool.keep('sys.STANDARD');
8. Analysis of the PROD1 database reveals that a third-party application is not using bind variables and has skewed data. In addition, you find shared pool latch contention. Find the best solution to reduce shared pool usage.
翻译:8.对PROD1数据库的分析表明,第三方应用程序没有使用bind变量,并且数据倾斜。此外,您还发现共享池锁存争用。找到减少共享池使用率的最佳解决方案。
alter system set cursor_sharing=force;
9. Your junior DBA has created a new tablespace, CUST_TBS, and placed a table, NEW_CUST, in that tablespace.
i. Observation shows that the instance records significant numbers of buffer busy waits on the header block.
ii. The V$WAITSTAT view has accumulated large numbers of waits in the segment header category.
iii. The NEW_CUST table has large numbers of concurrent inserts during business hours.
Take appropriate actions to reduce the contention. Long-term query performance should be maintained. Note: the solution must work whether NEW_CUST table is in a smallfile or a bigfile tablespace.
翻译:9.您的初级DBA创建了一个新表空间CUST_TBS,并在该表空间中放置了一个表new_CUST。
I.观察表明,实例在头块上记录了大量的缓冲区忙等待。
Ii.V$WAITSTAT视图在段头类别中累积了大量等待。
iii.新的CUST表在工作时间内有大量并发插入。
采取适当的措施减少争用。应保持长期查询性能。注意:无论新的CUST表在smallfile还是bigfile表空间中,解决方案都必须有效。
connect sys/oracle@prod1 as sysdba
alter table sh.NEW_CUST move tablespace users;
drop tablespace CUST_TBS including contents and datafiles;
create tablespace CUST_TBS datafile '/u01/app/oracle/oradata/PROD1/CUST_TBS01.dbf' size 10M
extent management local autoallocate
segment space management auto;
alter table sh.NEW_CUST move tablespace CUST_TBS;
10. Log in as the SH user and gather statistics for the SALES table.
Ensure that the cursors pertaining to the object in the cache are never invalidated.
翻译:10.以SH用户身份登录并收集SALES表的统计信息。
确保与缓存中的对象相关的游标永不失效。
connect sh/sh@prod1
exec dbms_stats.gather_table_stats('SH','SALES',no_invalidate=>true);
11. There are performance problems during inserts into the PRODUCT_INFORMATION_PART table in the SH schema in the PROD1 database.
i. A sequence is used to generate the values for the PRODUCT_ID column in this table.
ii. Range scans are also frequently performed on the PRODUCT_ID column.
Create an index, PROD_IDX on the PRODUCT_ID column, which avoids problems during inserts caused by hot blocks.
翻译:11.在PROD1数据库的SH模式的PRODUCT_INFORMATION_PART表中插入时,存在性能问题。
i.序列用于生成此表中产品ID列的值。
Ii范围扫描也经常在产品ID列上执行。
在产品ID列上创建一个索引PROD_IDX,这样可以避免由热块引起的插入问题。
create index PROD_IDX on sh.PRODUCT_INFORMATION_PART(PRODUCT_ID)
global partition by hash(product_id)
partitions 4;
Section 4: Tune SQL Statements
1. In the PROD1 database, log in as HR user and run the 5_4_1.sql script located in the /home/oracle/scripts directory. Tune the queries to use the same query result from the result cache. Set the result cache size to 15 MB.
翻译:第4节:调整SQL语句
- 在PROD1数据库中,以HR用户身份登录,并运行位于/home/oracle/scripts目录中的5_4_1.sql脚本。调整查询以使用结果缓存中的相同查询结果。将结果缓存大小设置为15 MB。
Conn sys/oracle@prod1 as sysdba
alter system set result_cache_max_size=15M;
connect sh/sh@prod1
alter table customers result_cache (mode force);
set autotrace traceonly
Conn sh/sh@prod1
select cust_city,count(*) from customers group by cust_city;(5_4_1.sql的脚本就是这个)
select cust_city,count(*) from customers group by cust_city;(5_4_1.sql的脚本就是这个)
确保consistent gets为0
检查:
select name,status from v$result_cache_objects;
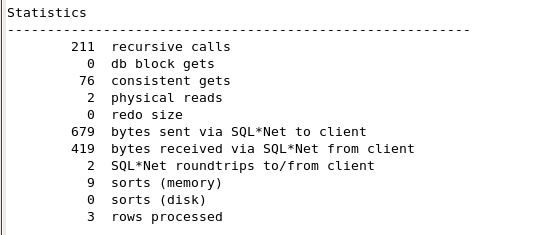
2. Log in as the SH user and run the 5_4_2.sql script located in /home/oracle/scripts.
In the query, the CUST_CITY, CUST_STATE_PROVINCE, and COUNTRY_ID columns are used together as the predicates.
Tune the statement to improve the selectivity calculated by the optimizer for the SQL statement in the 5_4_2.sql script.
翻译:2。以SH用户身份登录并运行位于/home/oracle/scripts中的5_4_2.sql脚本。
在查询中,CUST_CITY、CUST_STATE_PROVINCE和COUNTRY_ID列一起用作谓词。
调整语句以提高优化器为5_4_2.SQL脚本中的SQL语句计算的选择性。
新增题目内容
The sample SQL is as follows:
SELECT count(*) FROM customers WHERE cust_city= 'BJ' and cust_state_province='CA' and country_id=52790;
select dbms_stats.create_extended_stats('SH','customers','(CUST_CITY, CUST_STATE_PROVINCE,COUNTRY_ID)') from dual;

begin
dbms_stats.gather_table_stats('SH','CUSTOMERS');
end;
/
exec dbms_stats.gather_table_stats('SH','CUSTOMERS',method_opt=>'for columns(cust_city,cust_state_province,country_id) size 254');
create index sh.index_cust_country on sh.customers(cust_city,cust_state_province,country_id);(2种应该都可以)
3. Your company is migrating from Oracle Database 10g (10.2.0.1) to Oracle Database 11g.
i. Test the performance of the queries in the new environment.
The appsstg.dmp file contains the set of SQL statements.
The password for the APPS schema is Apps1234.
ii. Import the STS_PS SQL tuning set staged in the STS_PS_TAB table.
Use the appropriate tool to improve the performance of the statements in the STS_PS SQL tuning set. Store the improved plan in the persistent plan table named PLAN_TABLE in the APPS schema.
翻译:3.您的公司正在从Oracle Database 10g(10.2.0.1)迁移到Oracle Database 11g。
I.测试新环境中查询的性能。
dmp文件包含一组SQL语句。
APPS架构的密码是Apps1234。
Ii.导入STS_PS_选项卡表中暂存的STS_PS SQL优化集。
使用适当的工具改进STS_PS SQL优化集中语句的性能。将改进后的计划存储在APPS架构中名为plan_table的持久计划表中。
Exit;
impdp apps/Apps1234@prod1 dumpfile=appsstg.dmp directory=scriptdir
sqlplus sys/oracle@prod1 as sysdba
conn apps/Apps1234
exec DBMS_SQLTUNE.UNPACK_STGTAB_SQLSET('STS_PS','SYS',TRUE,'STS_PS_TAB','APPS');
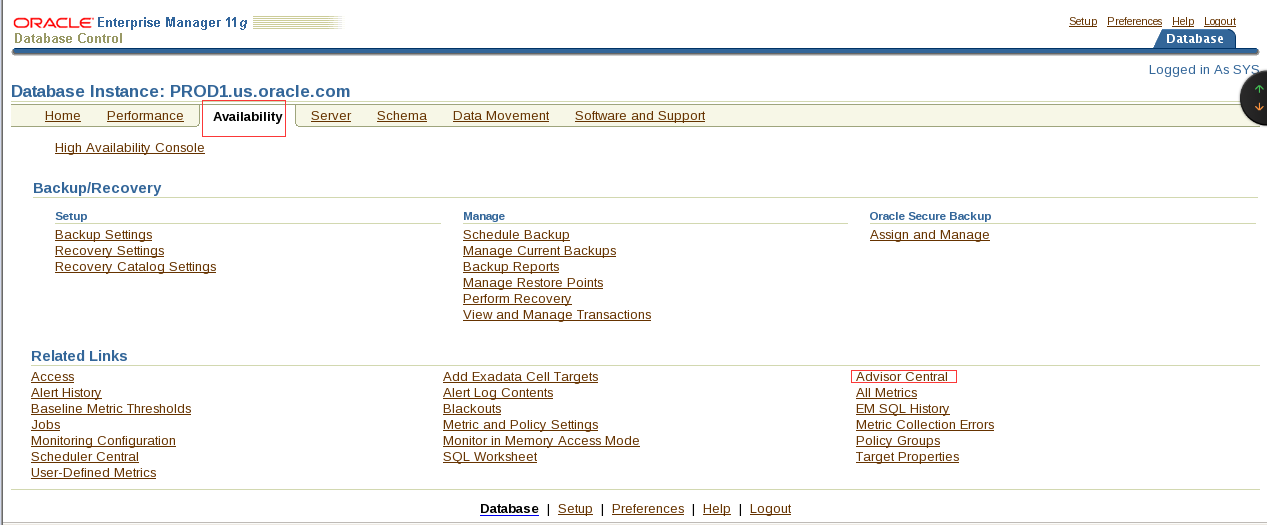
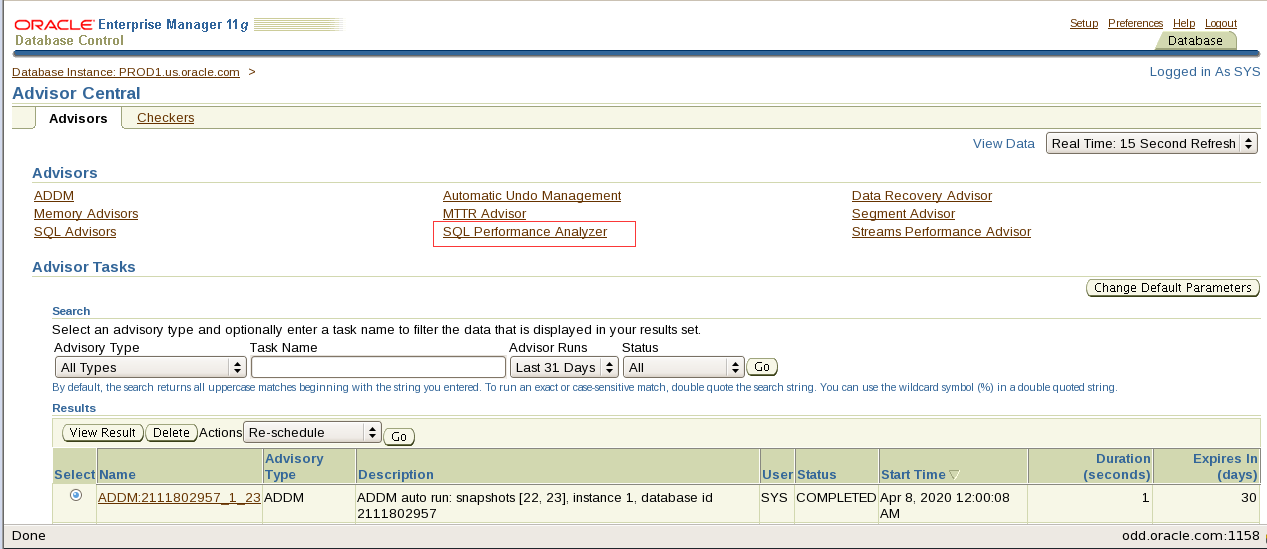
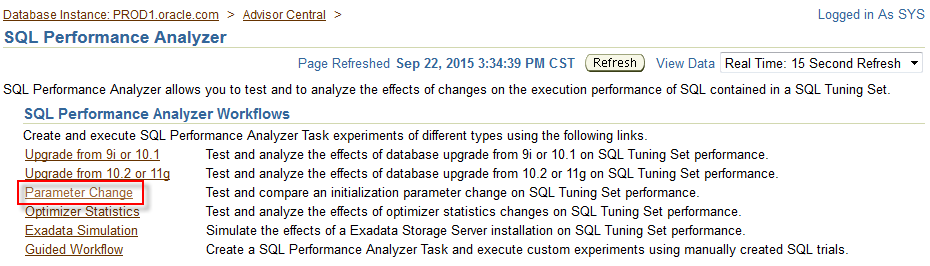
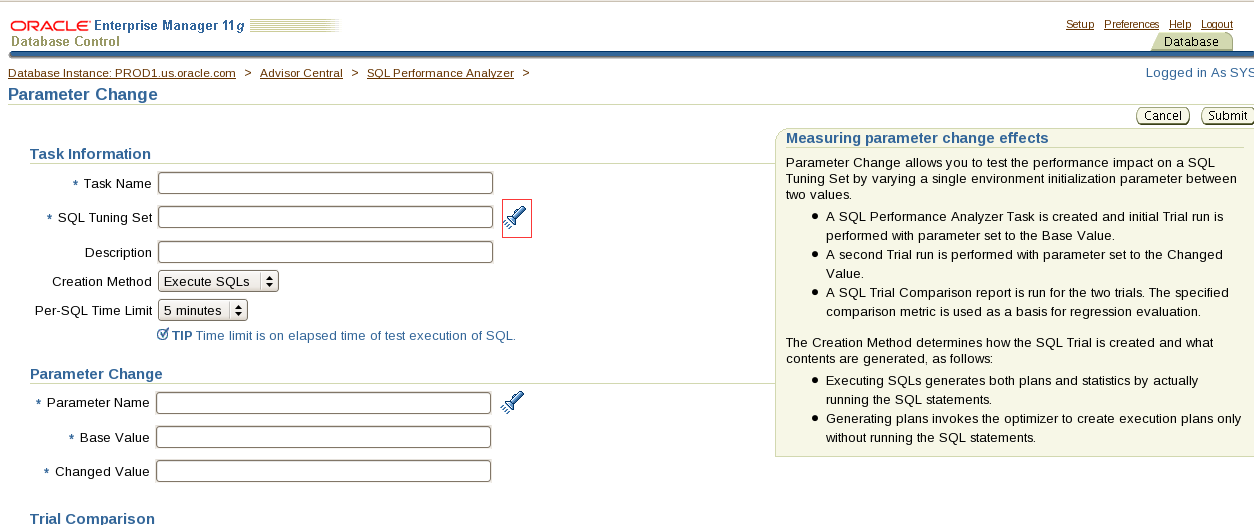
这个图标都是点击进去可选择的不需要自己手输
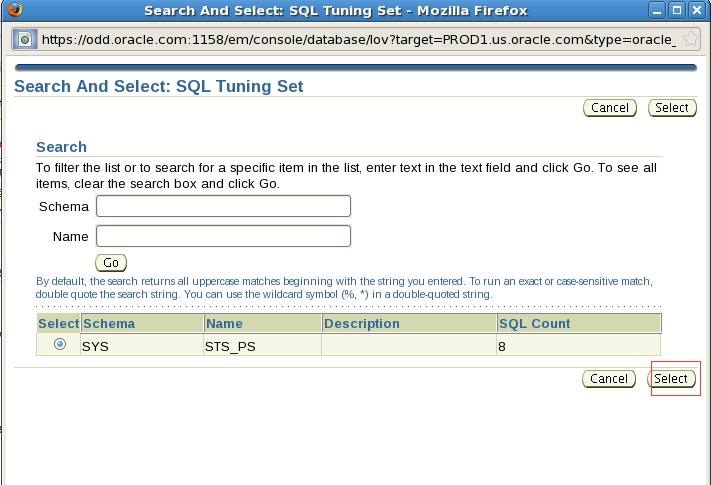
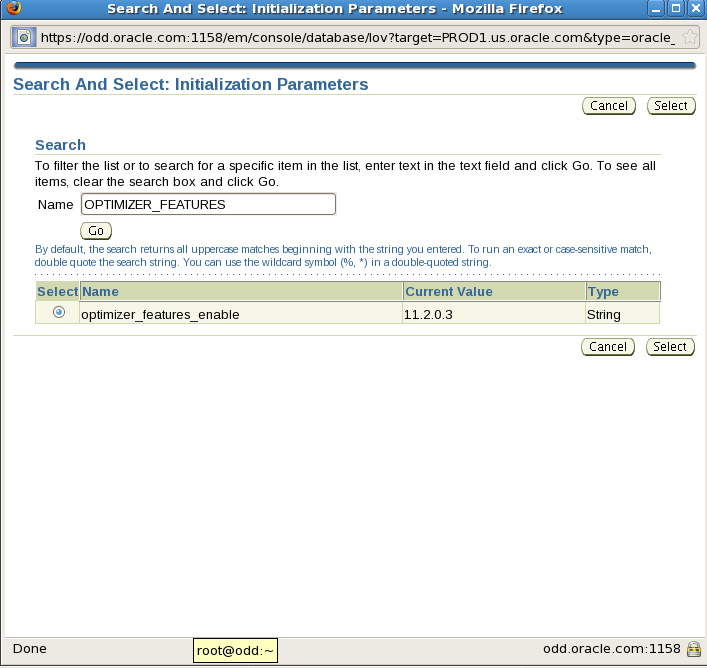
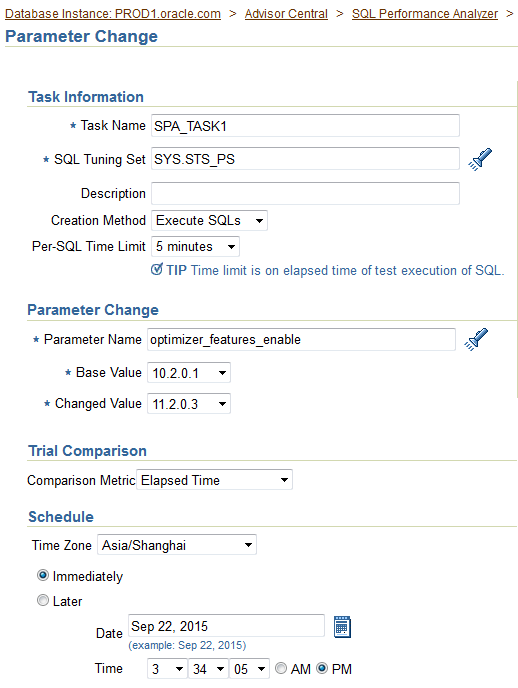
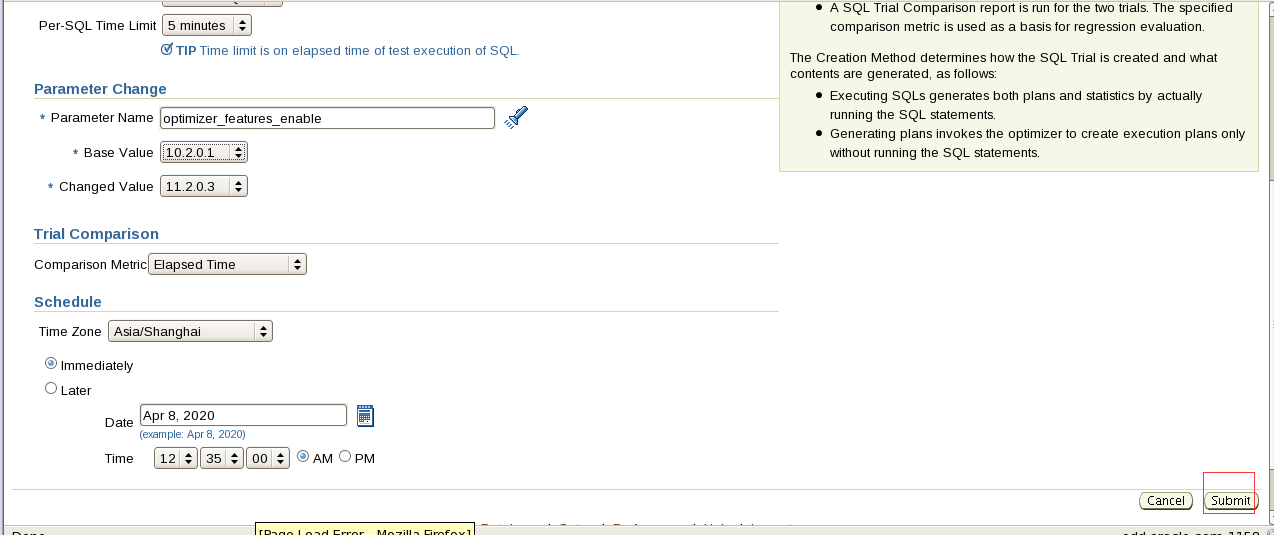
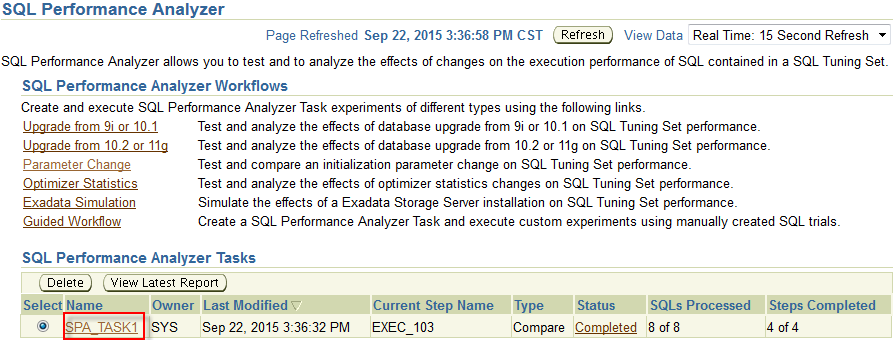
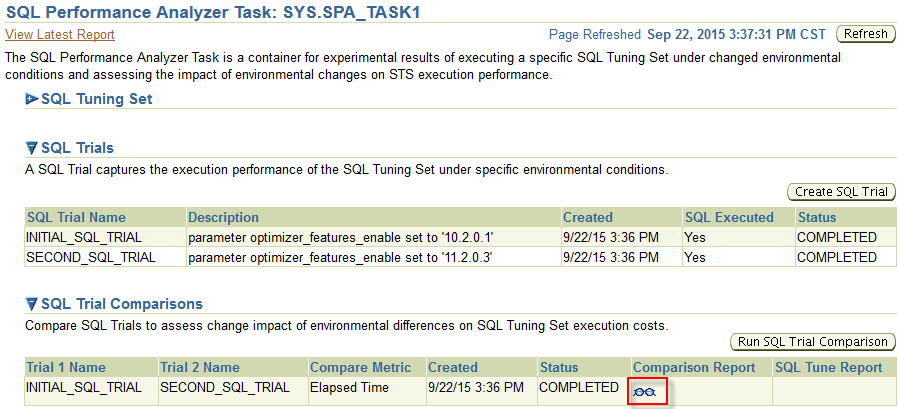
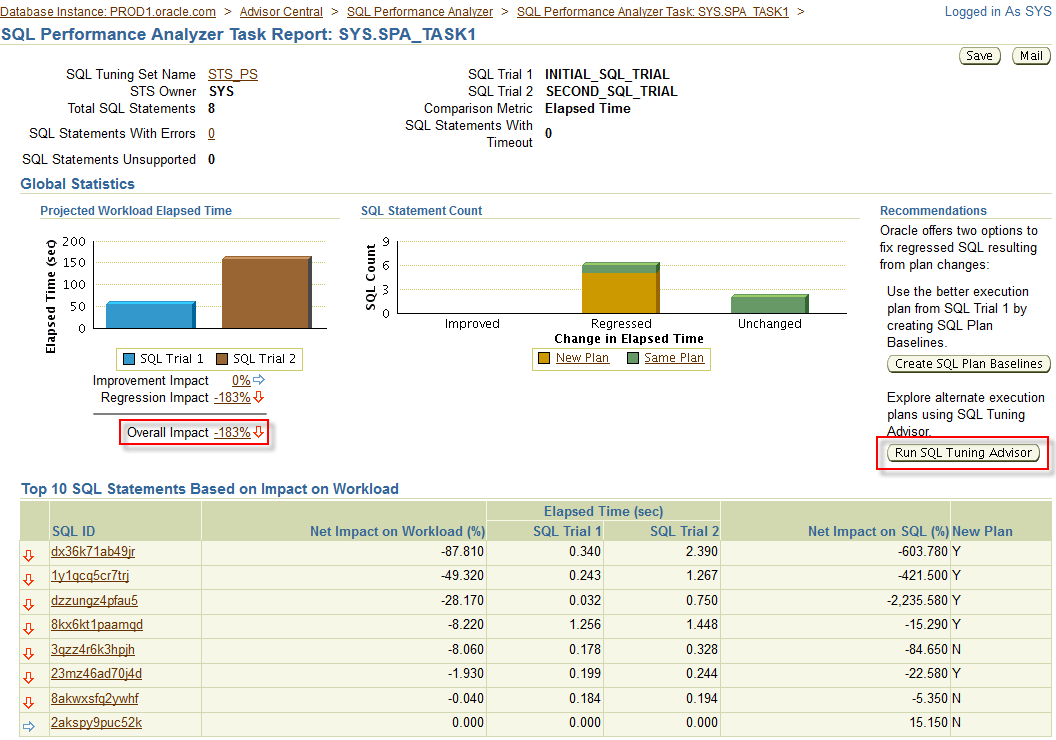
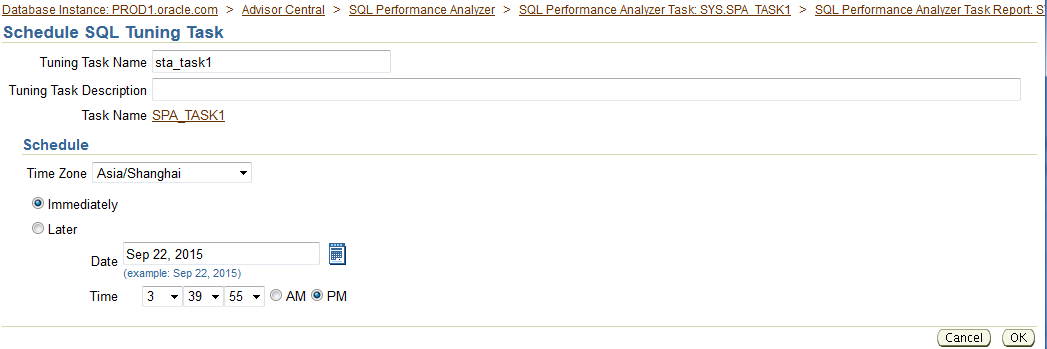
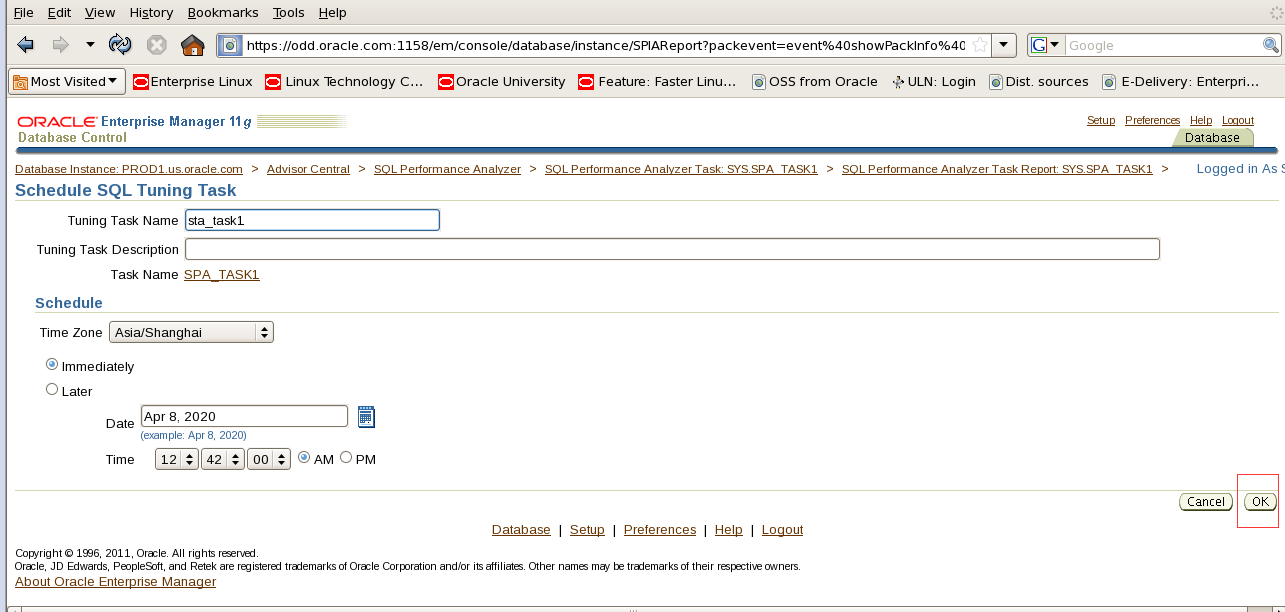
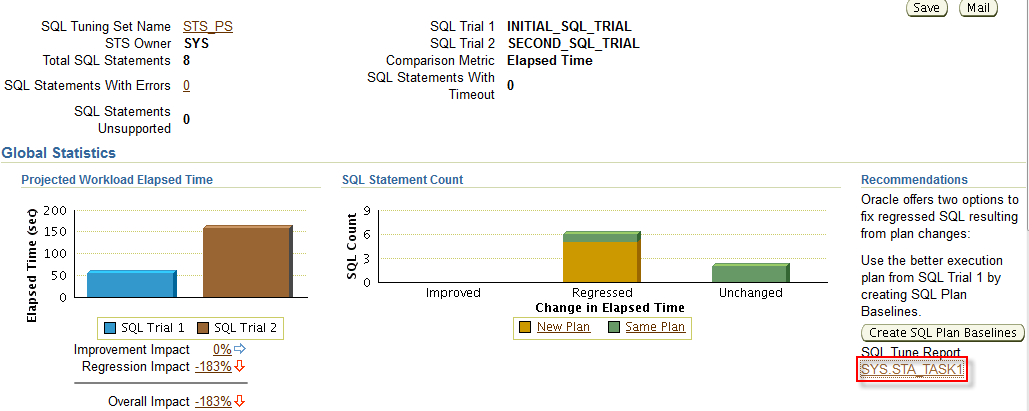
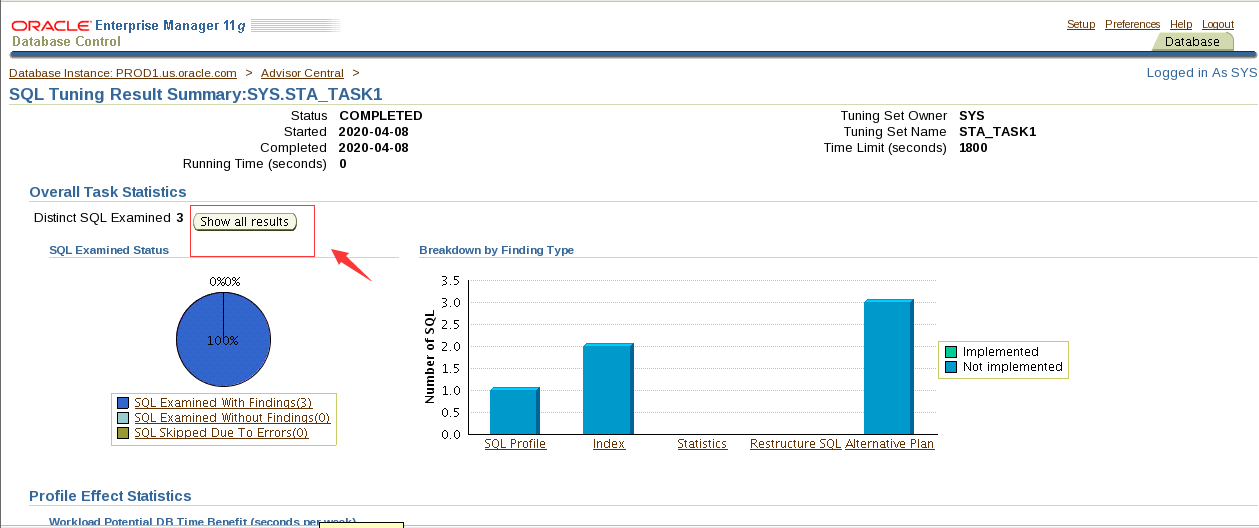
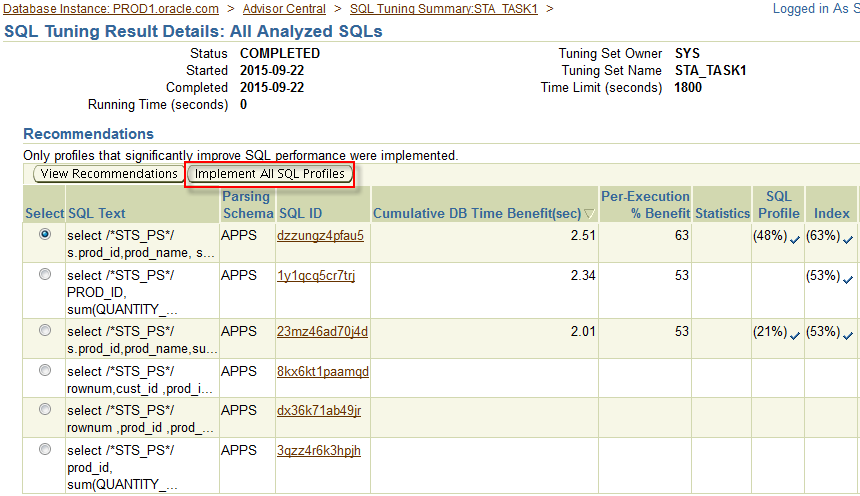


最后的截图
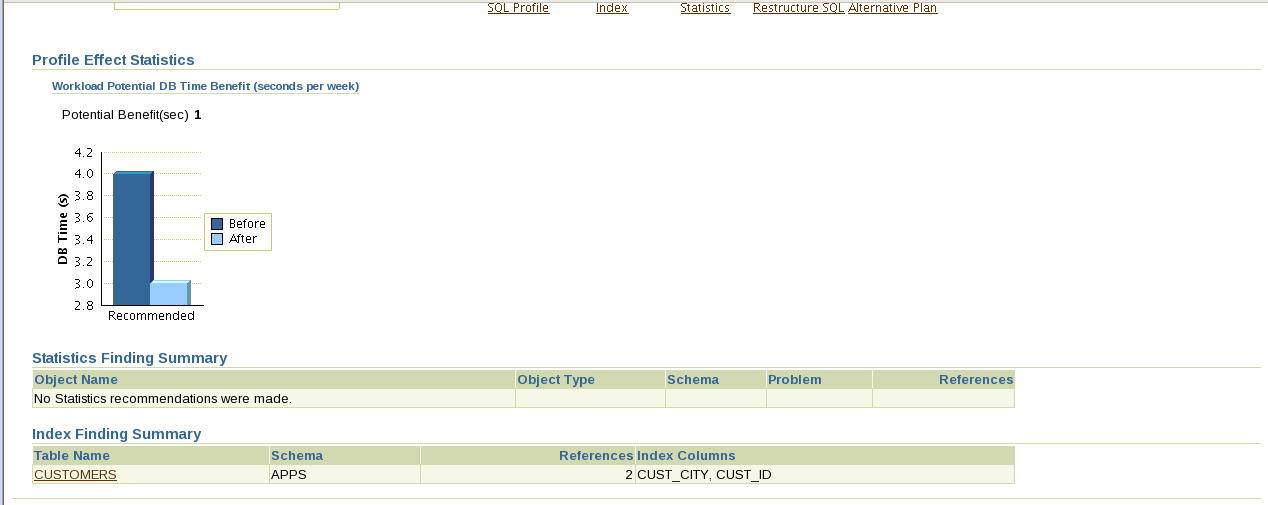
创建正常的persistent的plan_table:
Conn apps/Apps1234
@?/rdbms/admin/utlxplan.sql
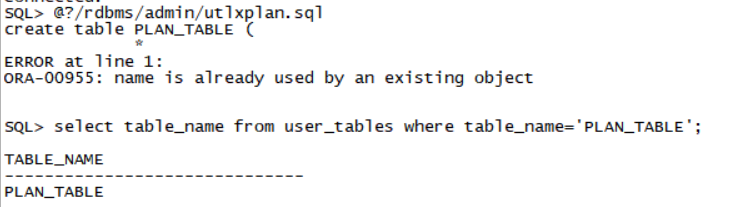
PLAN_TABLE已经存在这个脚本跑不了(请老师看下)
select table_name from user_tables where table_name='PLAN_TABLE';
把这里建议的索引创建好。
针对上面显示的6条sql,用explan plan把它们的执行计划放入plan_table里。
explain plan for
select /*STS_PS*/ s.prod_id,prod_name, sum(amount_sold)
from products p, sales s
where p.prod_id=s.prod_id and promo_id in
(select promo_id
from promotions
where promo_begin_date='27-JAN-99' and promo_end_date='27-may-99') group by s.prod_id, prod_name;
explain plan for
select /*STS_PS*/ PROD_ID, sum(QUANTITY_SOLD), sum( AMOUNT_SOLD)
from sales
where cust_id in
(select cust_id
from customers
where cust_city='San Francisco') group by prod_id,QUANTITY_SOLD,AMOUNT_SOLD;
explain plan for
select /*STS_PS*/ s.prod_id,prod_name,sum(quantity_sold) total
from sales s, customers c, products p
where s.cust_id=c.cust_id and p.prod_id=s.prod_id and cust_city='San Francisco' group by s.prod_id, prod_name;
explain plan for
select /*STS_PS*/ rownum,cust_id ,prod_id ,prod_name, total
from (
Select s.cust_id cust_id, p.prod_id Prod_id ,prod_name,sum(amount_sold) total
from products p, sales s, customers c
where p.prod_id=s.prod_id and s.cust_id=c.cust_id group by s.cust_id, p.prod_id, prod_name order by 4 desc)
where rownum <=5;
explain plan for
select /*STS_PS*/ rownum ,prod_id ,prod_name, total
from
(select p.prod_id Prod_id ,prod_name,sum(QUANTITY_SOLD) total
from products p, sales s
where p.prod_id=s.prod_id group by p.prod_id,prod_name order by 3 desc )
where rownum <=5;
explain plan for
select /*STS_PS*/ prod_id, sum(QUANTITY_SOLD), sum( AMOUNT_SOLD)
from sales
where channel_id=4 group by prod_id, QUANTITY_SOLD, AMOUNT_SOLD;
优化的部分在em中
Availability-Advisor Central-SQL Performance Analyzer

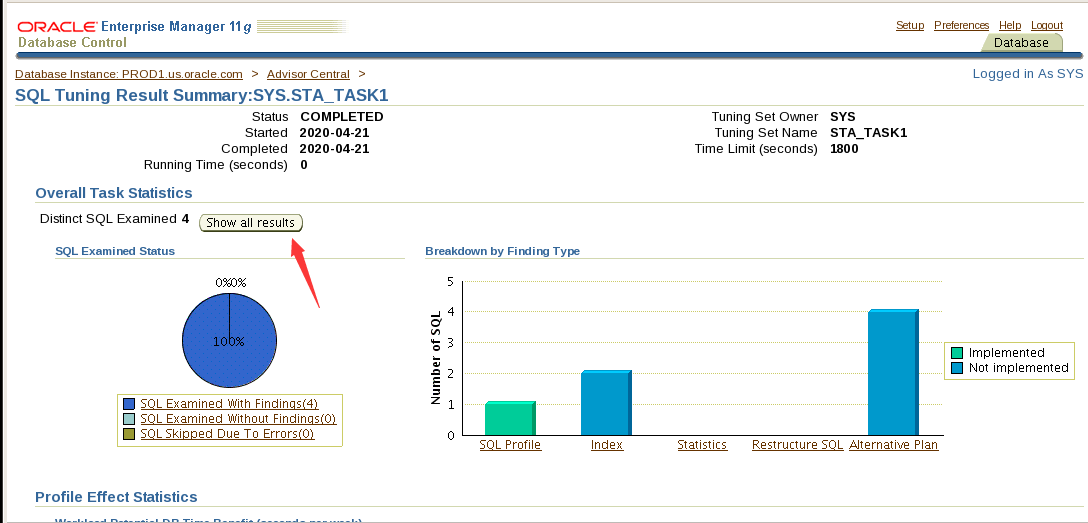
依次点开
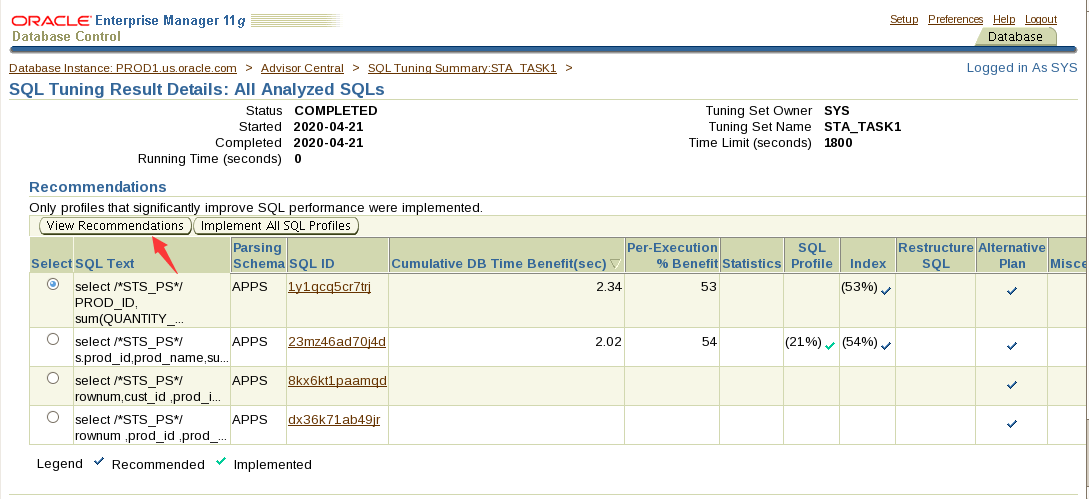
explan plan for
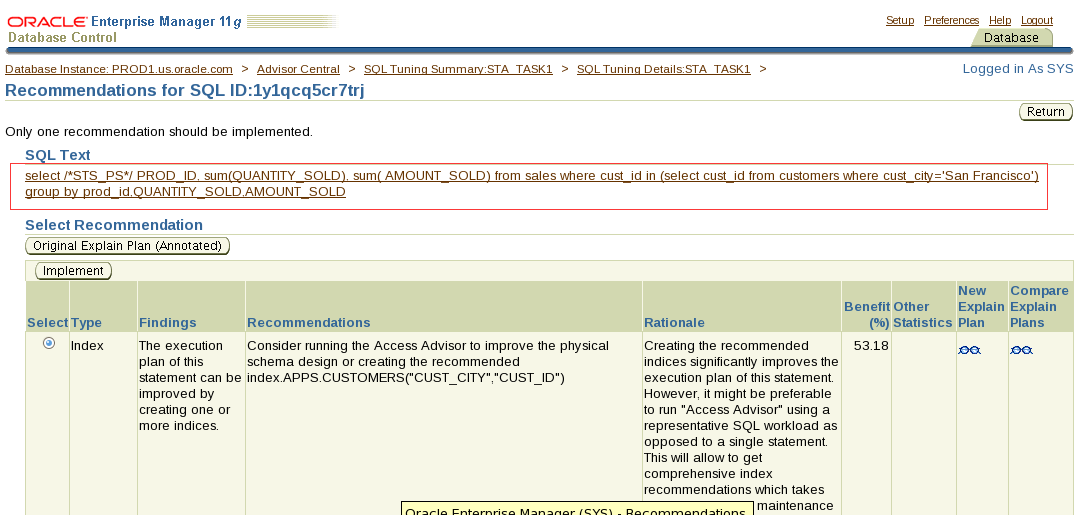
4. Create the SQL plan baselines as per the following specifications:
Log in to the PROD1 database as the SH user and run the 5_4_41.sql script located in the /home/oracle/scripts directory. Create the SQL plan baselines for the SQL statement.
翻译:4.按照以下规范创建SQL计划基线:
以SH用户身份登录到PROD1数据库,并运行位于/home/oracle/scripts目录中的5_4_41.sql脚本。为SQL语句创建SQL计划基线。
Conn sh/sh@Prod1
alter session set optimizer_capture_sql_plan_baselines=true;
@/home/oracle/scripts/5_4_41.sql
@/home/oracle/scripts/5_4_41.sql
show parameter optimizer_capture_sql_plan_baselines 🡸应该是true
select sql_text from dba_sql_plan_baselines; 进行验证,结果集里应该有5_4_41.sql脚本里的sql文本
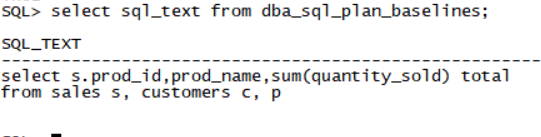
Section 5: Tune an Instance
1. The PROD1 and PROD2 databases are running on a server with 2 CPUs.
Prevent PROD1 instance from interfering with the PROD2 instance.
翻译:第5节:调整实例
1.PROD1和PROD2数据库运行在具有两个cpu的服务器上。
防止PROD1实例干扰PROD2实例。
Conn sys/oracle@prod1 as sysdba
alter system set cpu_count=1 scope=spfile;
Shutdown immediate;
startup force
SQL> select INSTANCE_CAGING from v$rsrc_plan;
INS
---
OFF
SQL> alter system set resource_manager_plan='daytime';
System altered.
SQL> select INSTANCE_CAGING from v$rsrc_plan;
INS
---
ON
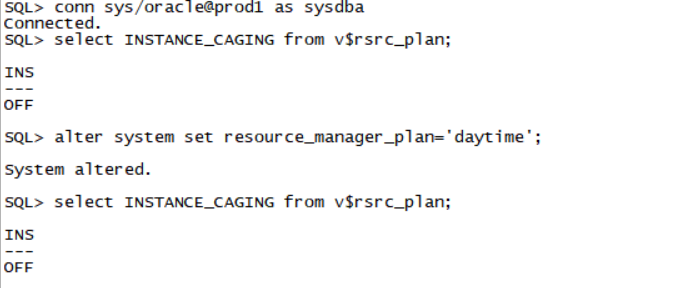
!!!这里一定要注意,重启以后,前面做过的result_cache的内容会被清空,所以需要重新做一遍section 4.1里部分,也就是下面这三条命令:
set autotrace traceonly
select cust_city,count(*) from customers group by cust_city;
select cust_city,count(*) from customers group by cust_city;
最后删除database console。如果没时间做,则在做下一部分的时候,部署agent之前删除database console。
emca -deconfig dbcontrol db -repos drop
END State: The proctor application will connect to your database instances as users SYS and SYSTEM with the password oracle. You can use the following checks to verify your databases are in the correct end state before the scoring process starts:
Log on to the PROD1 database by using:
sys/oracle@prod1 as sysdba
system/oracle@prod1
Query the DUAL table.
Log on to the PROD2 database by using:
sys/oracle@prod2 as sysdba
system/oracle@prod2
Query the DUAL table.
Part 6
Description
In this skillset, you are required to configure, and use Oracle Enterprise Manager 11g Grid Control. After configuring Grid Control, you are required to perform a series of tasks using the Grid Control environment.
Objectives
- Configure EM Grid Control.
- Use Grid Control to manage your database.
- Create users, jobs, and tablespaces.
End State
At the end of this skillset, your databases PROD1, and EMREP must be in OPEN mode and accessible. No credit will be given for the skillset if the databases are not open for access.
- Passwords
- Do not change any of the default passwords for the databases or the OS.
- The sample schemas HR, SH, BI, and OE in the PROD1 database can be accessed with the passwords hr,sh,bi,and oe respectively.
- You do not have root access on your systems. You can use sudo to execute any scripts.
- Directories
- All the scripts are located in the /home/oracle/scripts directory.
- Use the /home/oracle/files location to create any external files that are required to perform a skillset task.
- Do not delete or change the directory structure and files unless specified. Unspecified deletions or changes to the directory structure and files can disable scoring.
- Documentation
- To access the Oracle Database documentation, double-click the Firefox Web Browser icon on your desktop on the Database Server. Enter the following URL:file:///stage/doc/db/English/index.htm
- General
- Data files should not exceed 2 GB in size.
- To access the Grid Control console on the Management Server use the URL https://<<localhost name>>:7799/em
- Log in to the Grid Control console using the username/password: sysman/Oracle123.
- All names and passwords are case sensitive.
- At the end of the skillset before the proctor starts the scoring, ensure you have a minimum of 15% free space for /(i.e. root) filesystem on the Database Server (i.e. odd PC).Use the command df -h at the command prompt to check the free space.
翻译:第六部分
说明
在此技能集中,需要配置和使用Oracle Enterprise Manager 11g网格控件。配置网格控件后,需要使用网格控件环境执行一系列任务。
目标
配置EM电网控制。
使用网格控件管理数据库。
创建用户、作业和表空间。
结束状态
在本技能集的末尾,数据库PROD1和EMREP必须处于打开模式且可访问。如果数据库未打开以供访问,则不会授予技能集任何学分。
密码
1.不要更改数据库或操作系统的任何默认密码。
2.PROD1数据库中的示例模式HR、SH、BI和OE可以分别使用密码HR、SH、BI和OE进行访问。
3.您的系统上没有根访问权限。可以使用sudo执行任何脚本。
目录
1.所有脚本都位于/home/oracle/scripts目录中。
2.使用/home/oracle/files位置创建执行技能集任务所需的任何外部文件。
3.除非指定,否则不要删除或更改目录结构和文件。目录结构和文件的未指定删除或更改可能会禁用评分。
文档
1.要访问Oracle数据库文档,请双击数据库服务器桌面上的Firefox Web浏览器图标。输入以下URL:file:///stage/doc/db/English/index.htm
·概述
1.数据文件大小不应超过2 GB。
2.要访问管理服务器上的网格控制台,请使用URL https://<localhost name>:7799/em
3.使用用户名/密码登录网格控制台:sysman/Oracle123。
4.所有名称和密码均区分大小写。
5.在proctor开始评分之前,在技能集的末尾,确保数据库服务器(即odd PC)上的/(即根)文件系统至少有15%的可用空间。在命令提示符下使用命令df-h检查可用空间。
- Invalid Security Certificate
1. When you enter the URL for Grid Control, the browser displays the "Secure Connection Failed" warning.
Click "Or you can add an exception".
An additional message is displayed. Click "Add Exception".
A pop-up window opens. Click "Get Certificate".
Then, click "Confirm Security Exception".
翻译:安全证书无效
1。输入网格控件的URL时,浏览器将显示“安全连接失败”警告。
单击“或者可以添加异常”。
将显示一条附加消息。单击“添加异常”。
弹出窗口打开。点击“获取证书”。
然后,单击“确认安全异常”。
正式考试环境中,OMS和OMR都已经启动起来了,你不需要做任何操作。
而在测试环境中,你需要自己启动OMS,其顺序为:
- 测试环境中,确保主机名为even.oracle.com。确保/etc/hosts里记录的都是正确的主机名,包括odd.oracle.com和even.oracle.com
- 启动listener,在/u01/app/oracle/product/11.2.0/dbhome_1/network/admin目录下编辑listener.ora文件,如下:
LISTENER =
(DESCRIPTION=
(ADDRESS_LIST=
(ADDRESS=(PROTOCOL=tcp)(HOST=even.oracle.com)(PORT=1521))
)
)
然后lsnrctl start启动监听器
- 启动EMREP数据库,并确保能够通过sqlplus sys/oracle@emrep as sysdba能够连接到EMREP
也就是在lsnrctl status里能够看到EMREP这个service。
3、启动oms:/u02/app/oracle/Middleware/oms11g/bin/emctl start oms
Section 1: Enable Grid Control to Manage Target Database Machine
1. Deploy Oracle Management Agent on your Database Server. Agent registration password is Oracle123.
翻译:第1节:启用网格控件管理目标数据库计算机
1.在数据库服务器上部署Oracle管理代理。代理注册密码是Oracle123。
在管理机上执行下面的操作,如果找不到$OMS_HOME,则ps -ef|grep oms可以看到相关的目录。
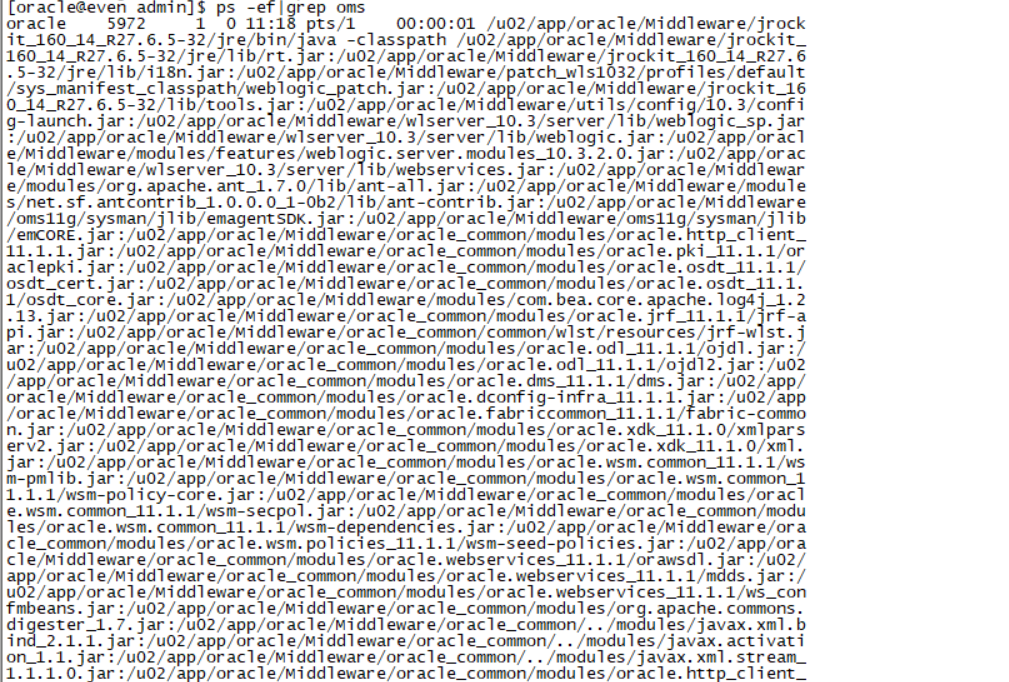
export OMS_HOME=/u02/app/oracle/Middleware/oms11g
cd $OMS_HOME/sysman/agent_download/11.1.0.1.0/linux
scp agentDownload.linux odd:/home/oracle
oracle@odd’s password:oracle

在数据库机上执行:
第二种方式直接在浏览器
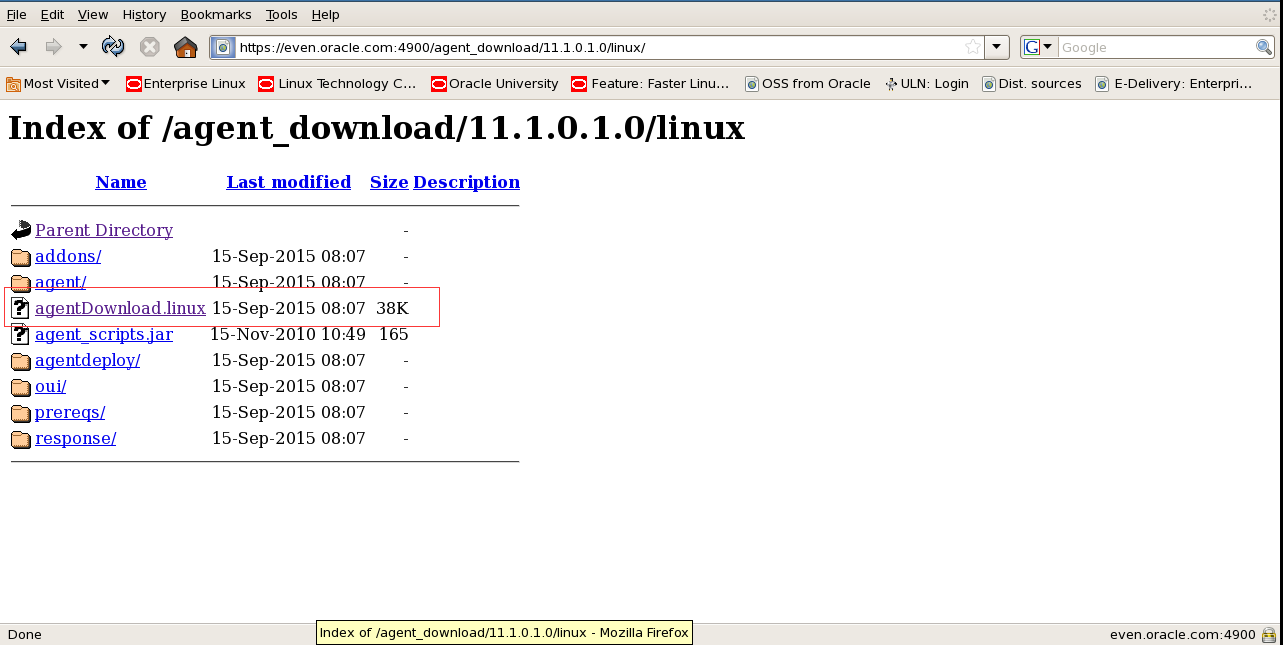
下载agentDownload.linux下载好后桌面移动到/home/oracle下
cd /home/oracle
chmod a+x agentDownload.linux
./agentDownload.linux -b /u01/app/oracle/product/11.2.0 -y
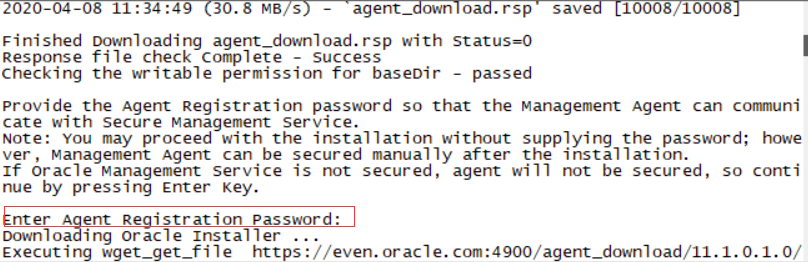
密码是Oracle123
以root执行:/u01/app/oracle/product/11.2.0/agent11g/root.sh
因为root用户被锁 所以只能使用sudo sudo /u01/app/oracle/product/11.2.0/agent11g/root.sh
Sqlplus sys/oracle@prod1 as sysdba
alter user dbsnmp identified by oracle account unlock;
sudo Firefox
打开火狐浏览器
地址:https://even.oracle.com:7799/em/
账号密码 sysman Oracle123
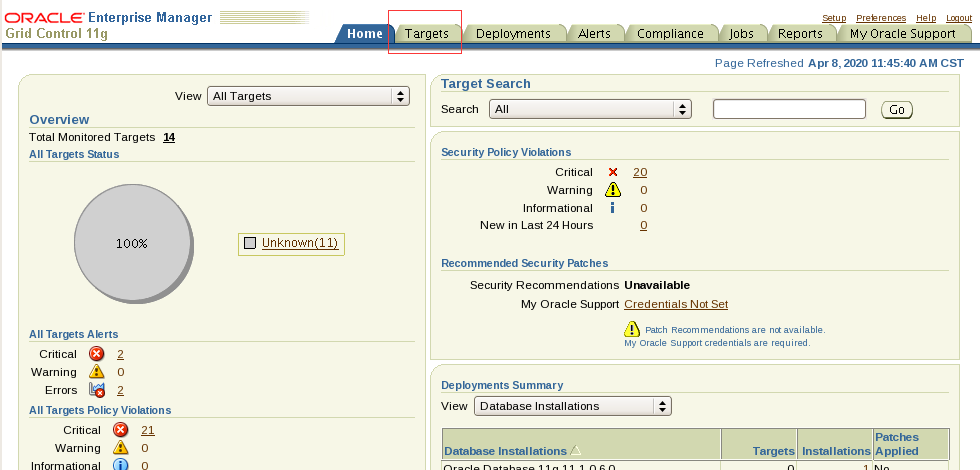
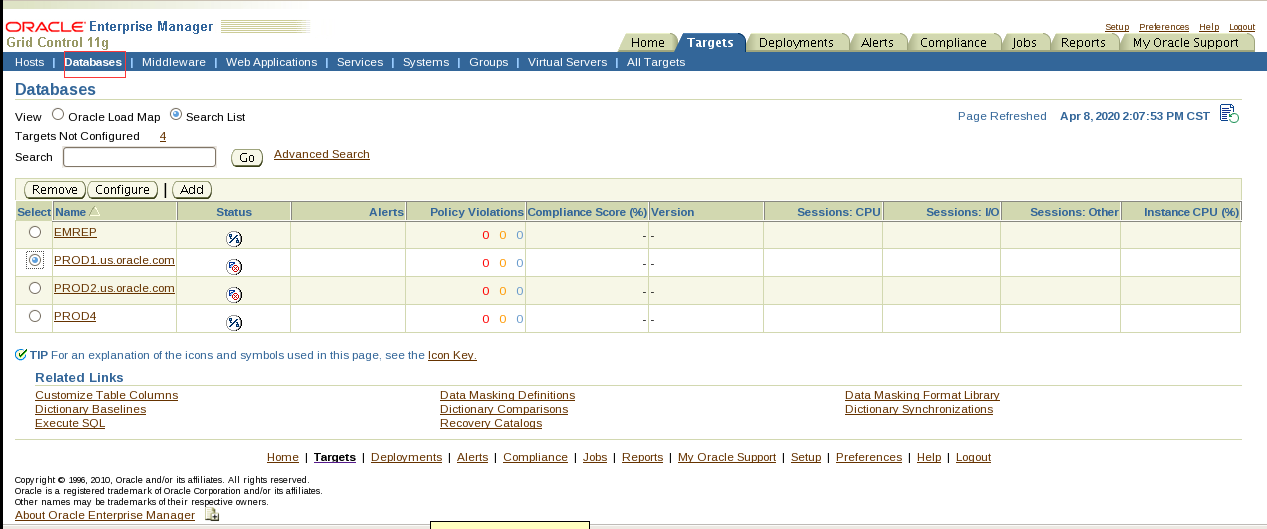
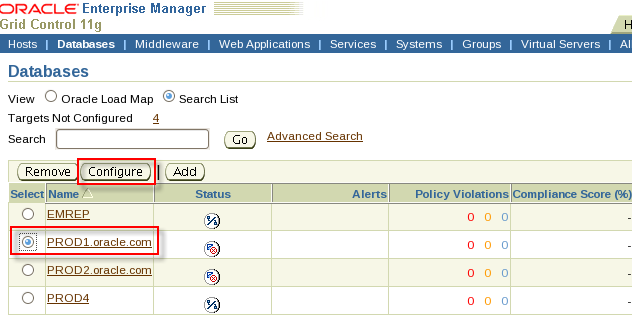
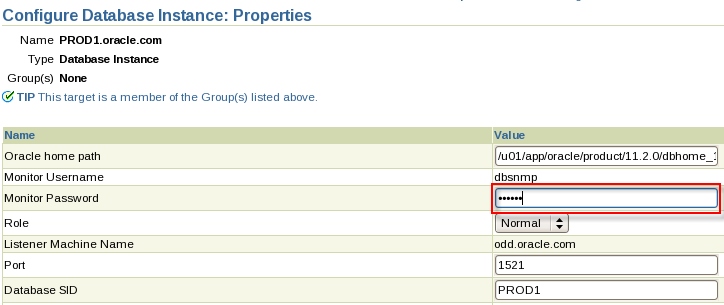
Monitor password是oracle
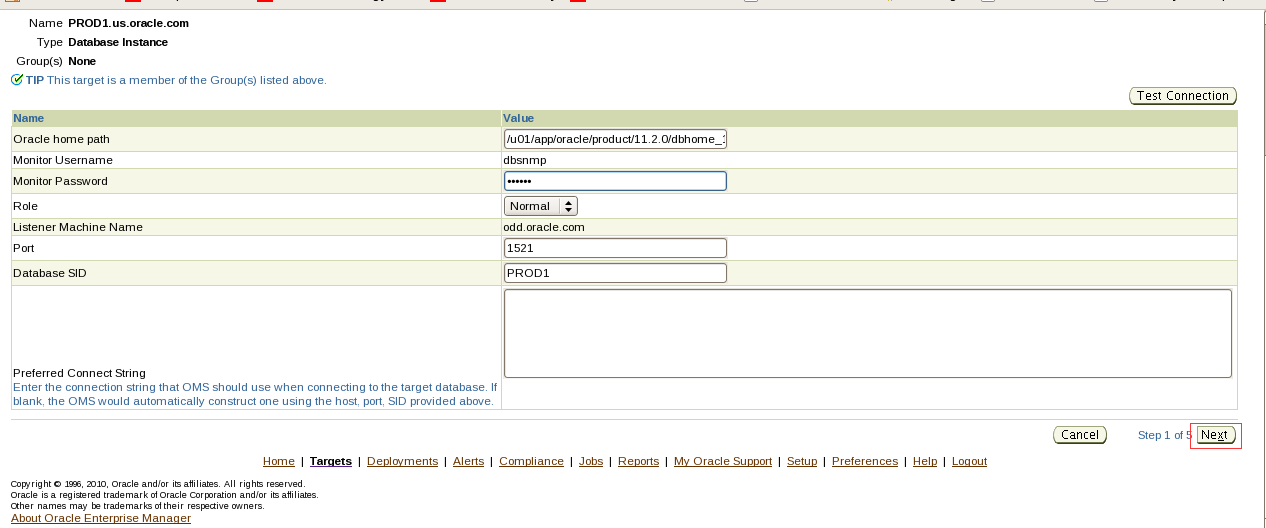
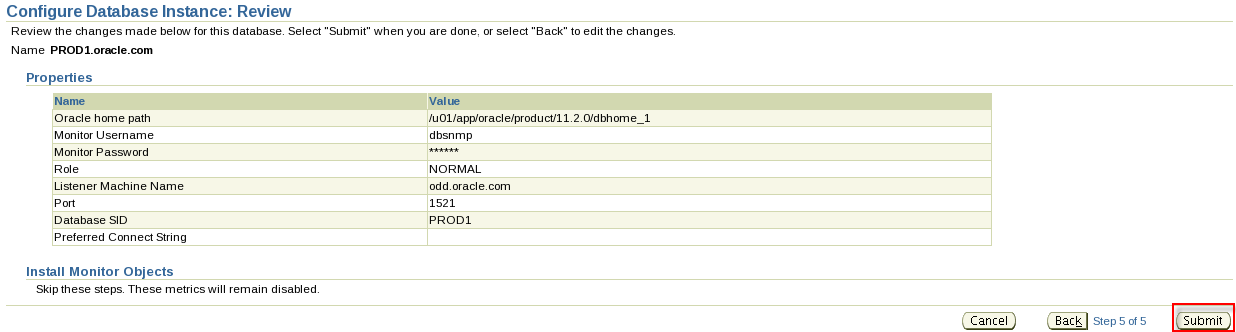
- Create a Grid Control super user called EMADMIN with the password EMADMIN(case sensitive).
翻译:2.创建一个名为EMADMIN的网格控件超级用户,密码为EMADMIN(区分大小写)。
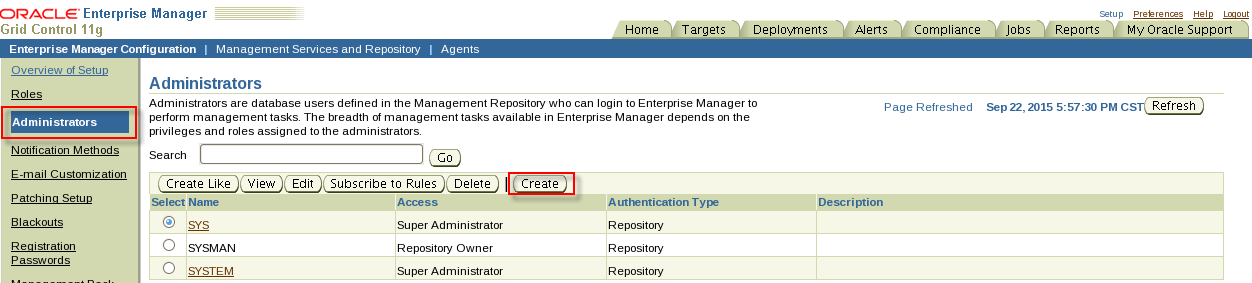
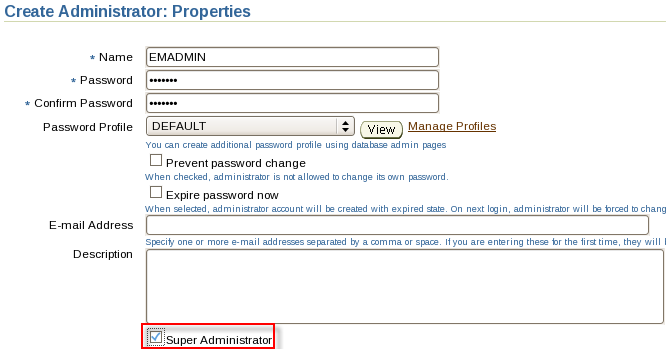
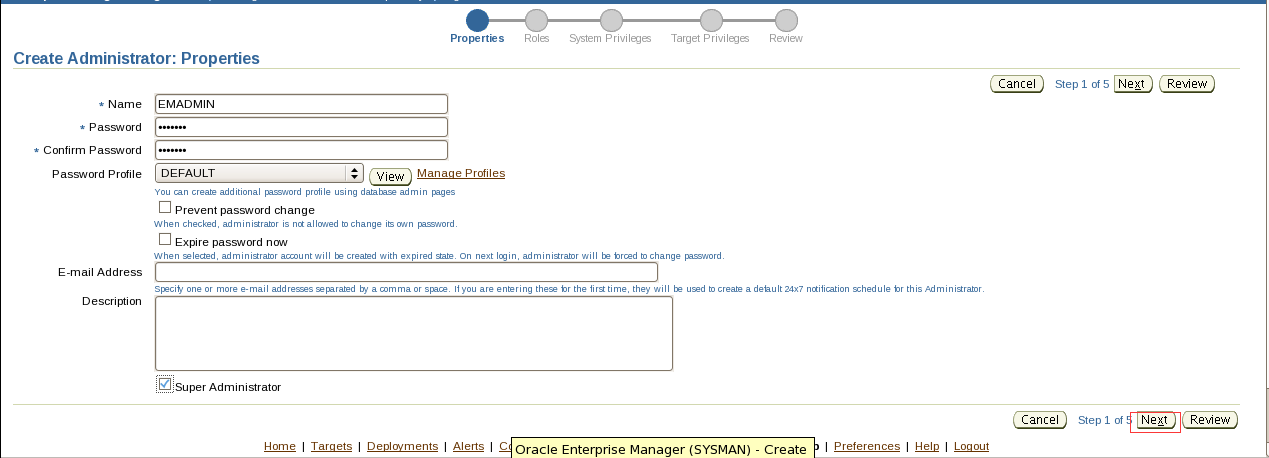
Section 2: Use Grid Control
- Using Grid Control, change PGA_AGGREGATE_TARGET on your PROD1 server to 200 MB so that it will revert when the instance is restarted.
翻译:1.使用网格控件,将PROD1服务器上的PGA_AGGREGATE_TARGET更改为200 MB,以便在实例重新启动时恢复。
也可以直接连到PRID1里执行sql命令:alter system set pga_aggregate_target=200M;
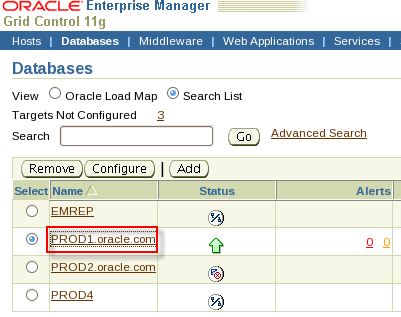
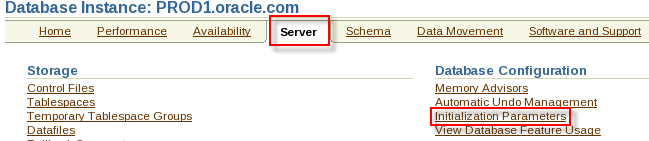
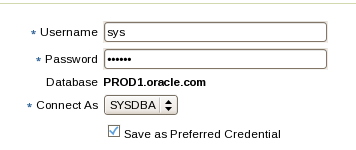
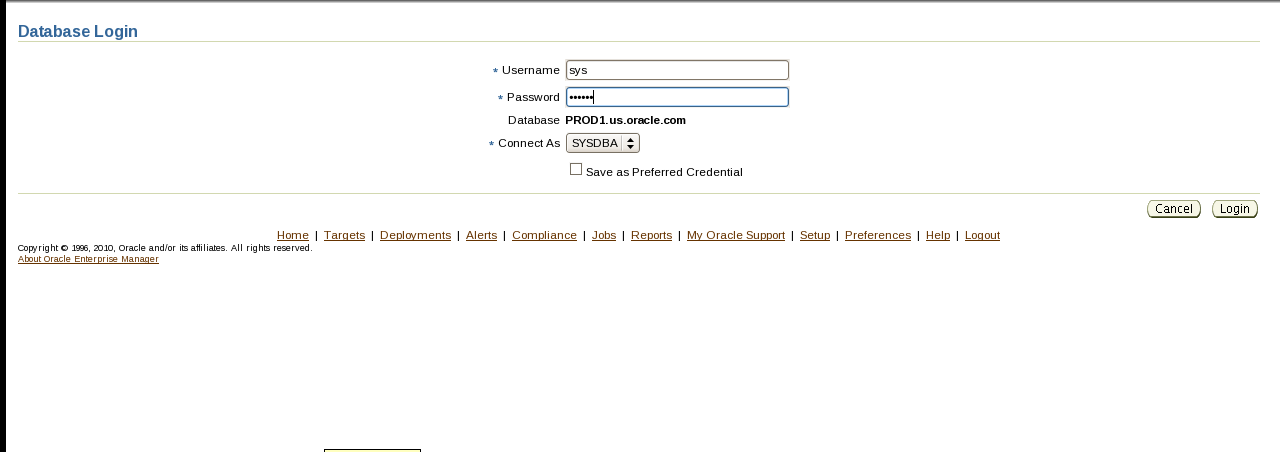
账号密码:sys oracle 选SYSDBA
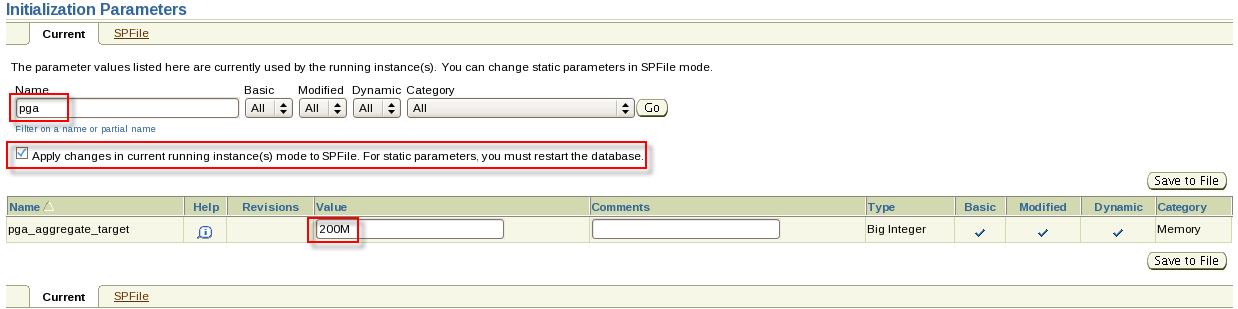
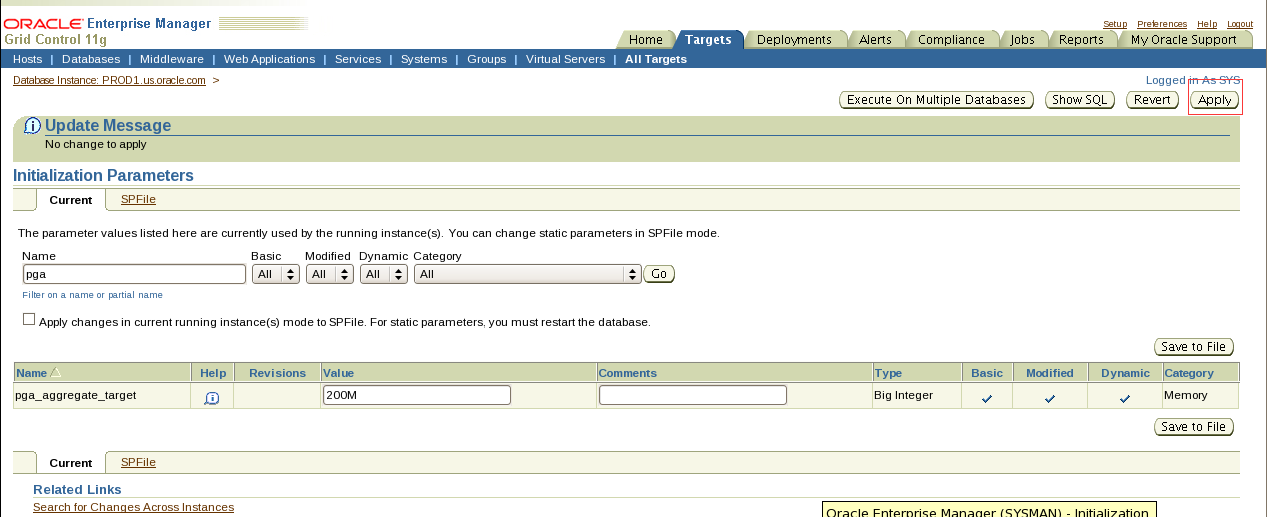
- Using Grid Control, configure the instance to ensure that it will take no more than five minutes to recover your instance following an instance failure.
翻译:2.使用Grid控件,配置实例以确保在实例失败后恢复实例所需的时间不超过5分钟。
也可以直接连到PRID1里执行sql命令:alter system set fast_start_mttr_target=300;
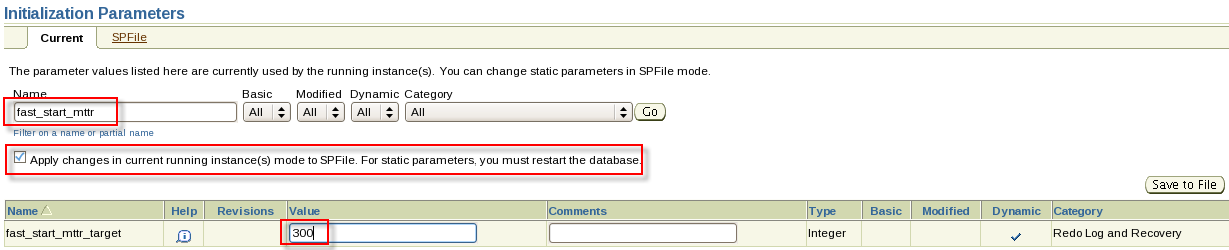
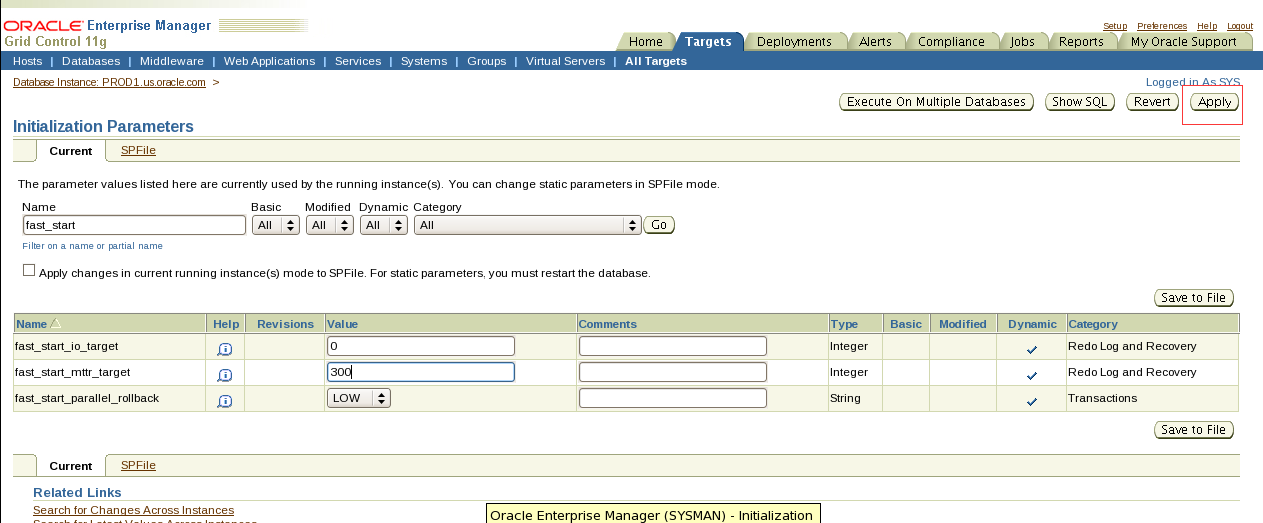
- Using Grid Control, configure an alert on the SYSTEM tablespace of the PROD1 database. The alert should register as a warning at 87% full and critical at 95% full.
翻译:3.使用Grid控件,在PROD1数据库的系统表空间上配置一个警报。警报应在87%满时注册为警告,在95%满时注册为严重警告。
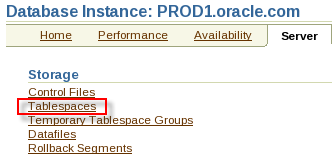


- Using Grid Control, set up notifications to be sent to the email address dba@ocm.com. Notification messages should be sent to this address at any time.
翻译:4.使用网格控件,设置要发送到电子邮件地址dba@ocm.com的通知。通知消息应随时发送到此地址。
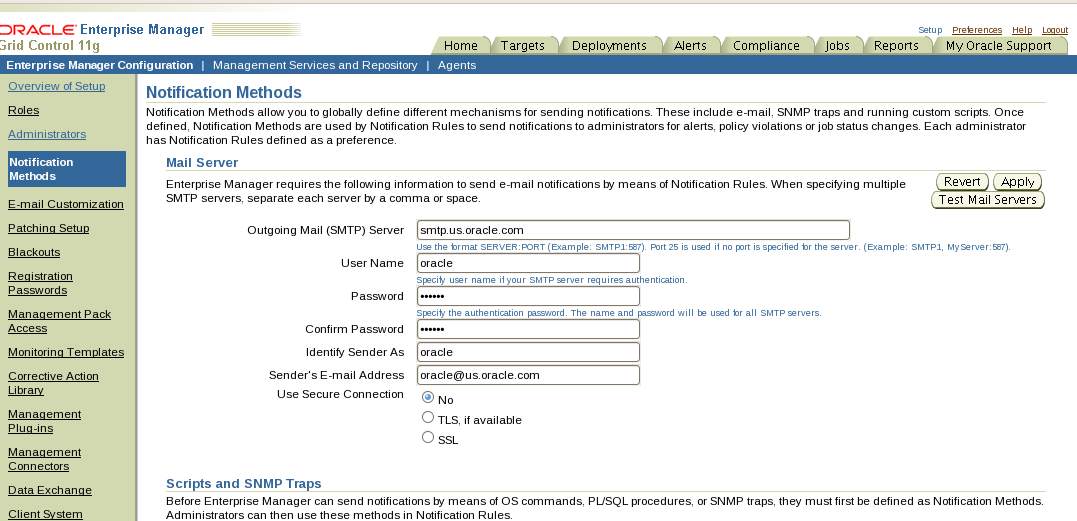

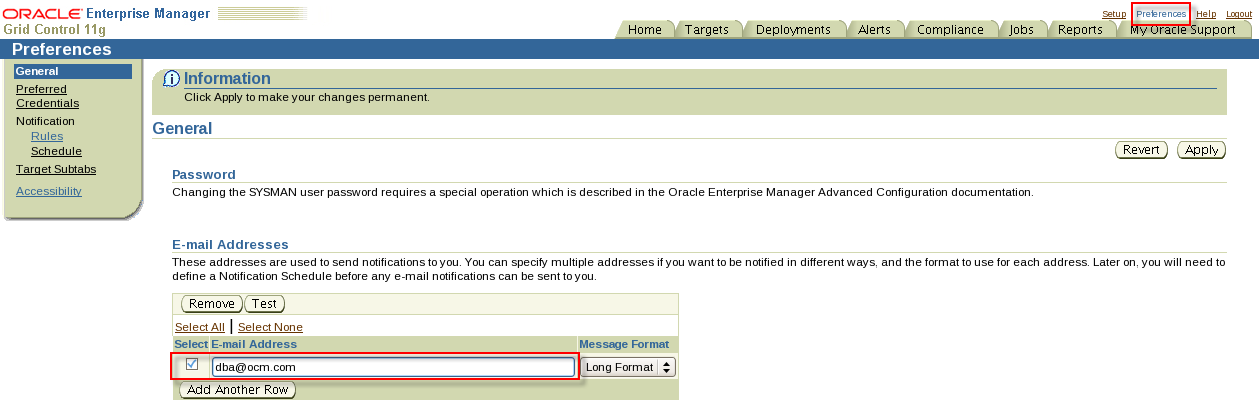
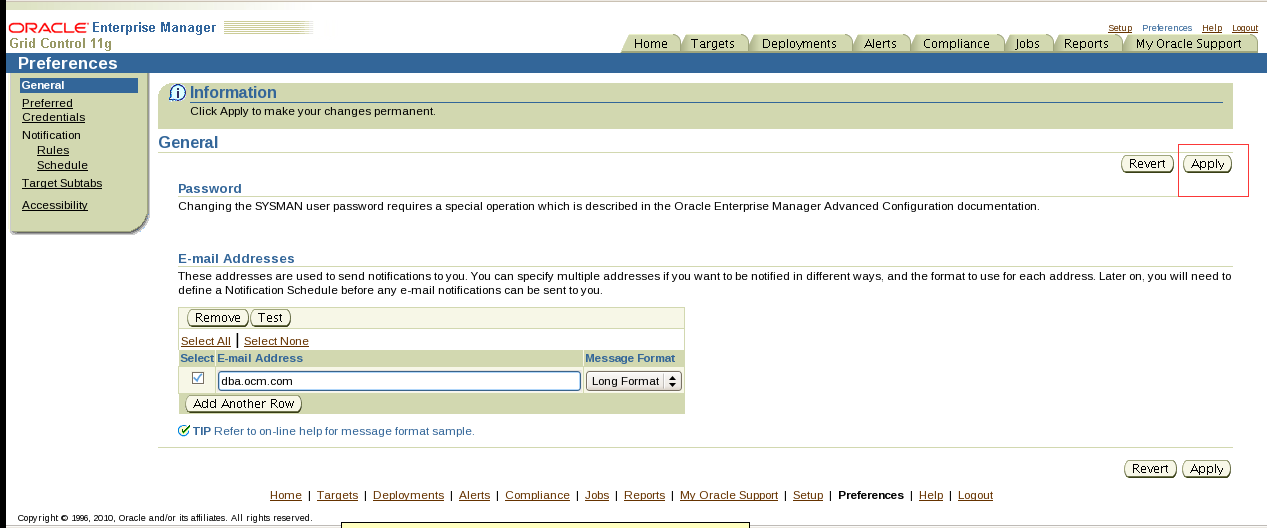
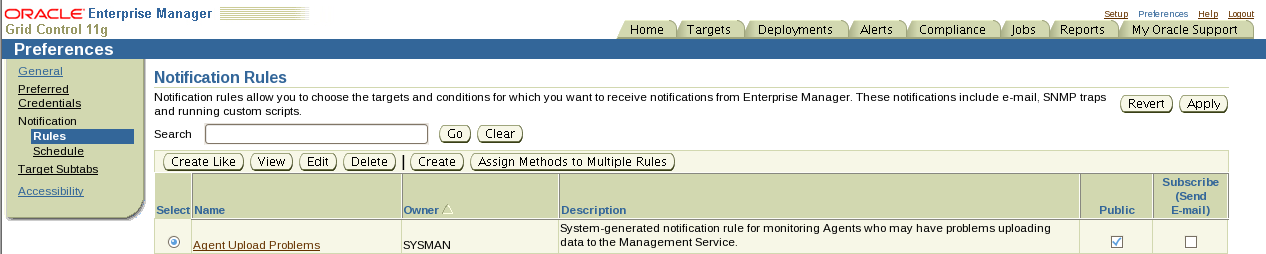
点击create创建通知规则name 韩老师的意思是随便取一个
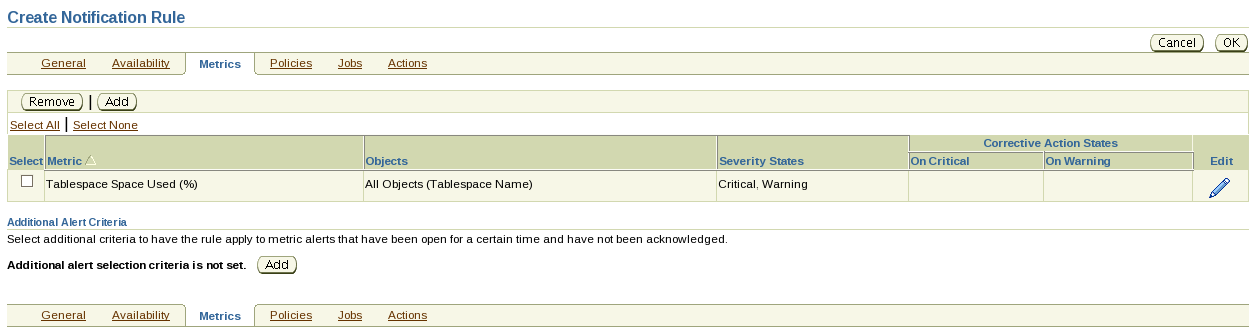

5. Using Grid Control, create a new tablespace in the PROD1 database called REGISTRATION(case sensitive).
Create with one 90 MB data file.
Make sure that this data file can grow to 120 MB.
Configure the tablespace for optimal block space utilization.
翻译:5.使用Grid控件,在PROD1数据库中创建一个名为REGISTRATION(区分大小写)的新表空间。
创建一个90MB的数据文件。
请确保此数据文件可以增长到120 MB。
配置表空间以获得最佳块空间利用率。
create tablespace REGISTRATION
datafile '/u01/app/oracle/oradata/PROD1/REGISTRATION01.dbf' size 90M maxsize 120M
extent management local autoallocate
segment space management auto;
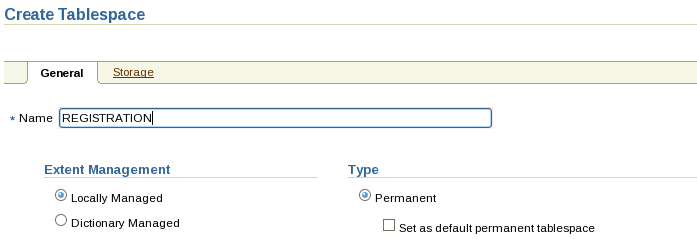
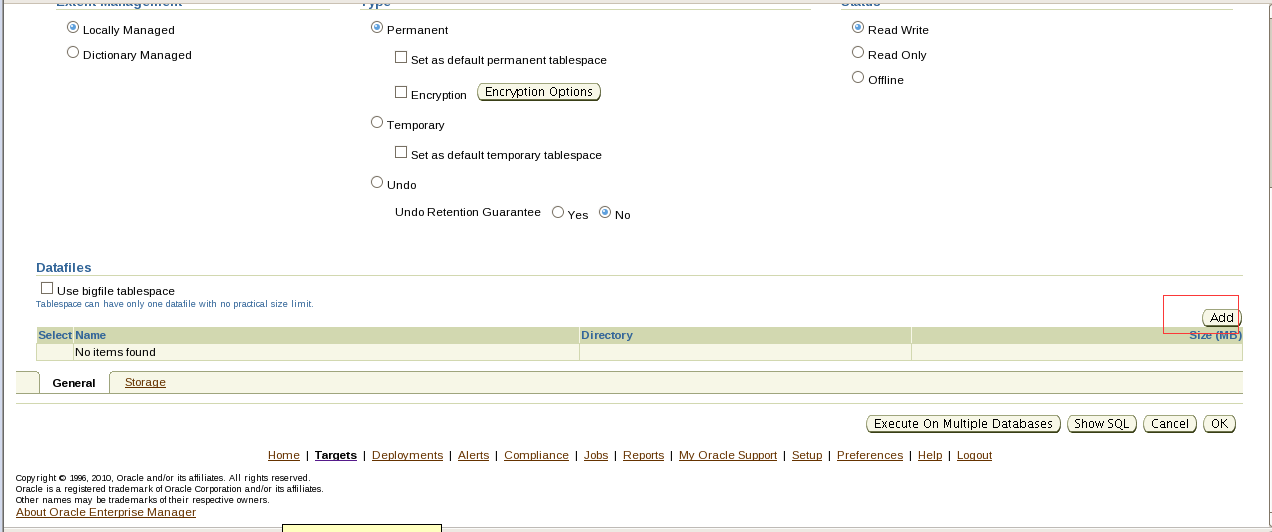
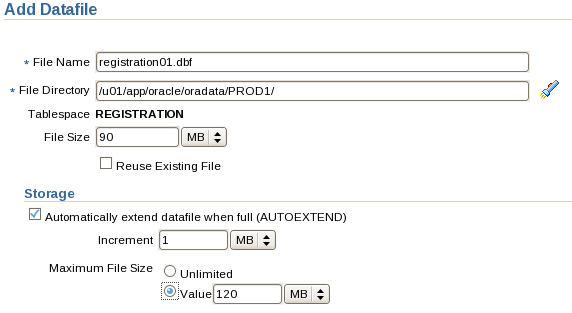
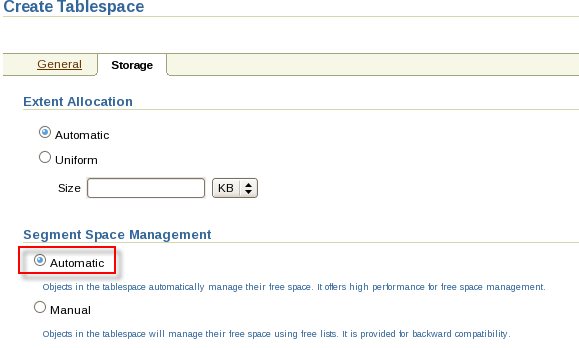
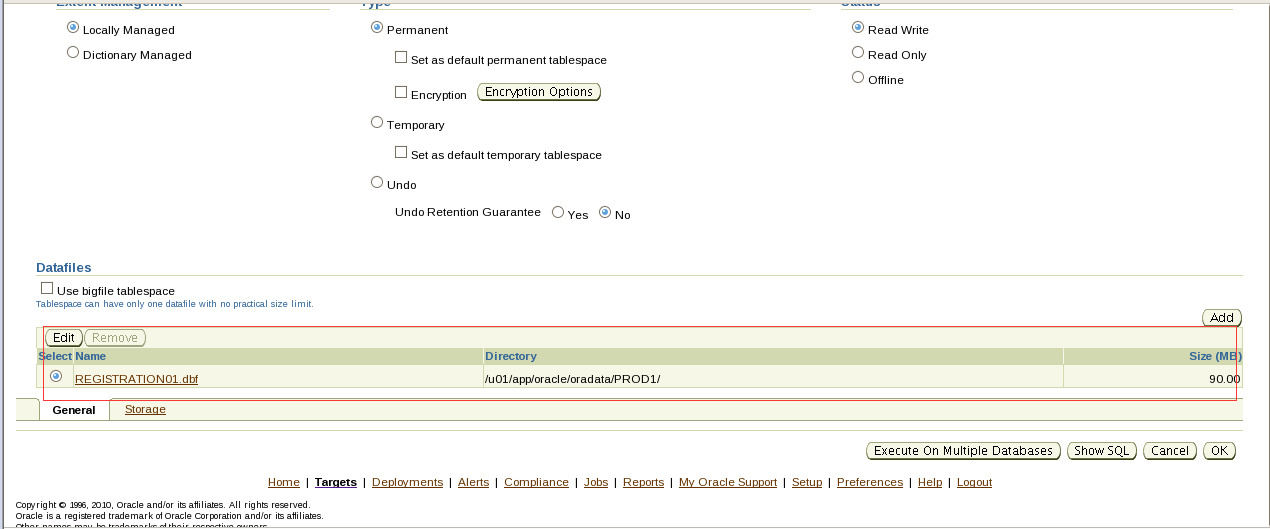
Section 3: Implement Schedules and Jobs
(Note: All names are case sensitive.)
1. Using Grid Control, create a schedule for the PROD1 database.
Call this schedule DAILY_REBUILD.
Configure it to run at 2 PM every day.
翻译:第3节:实施计划和作业
(注意:所有名称都区分大小写。)
一。使用网格控件,为PROD1数据库创建计划。
每天调用此计划重新生成。
将其配置为每天下午2点运行。
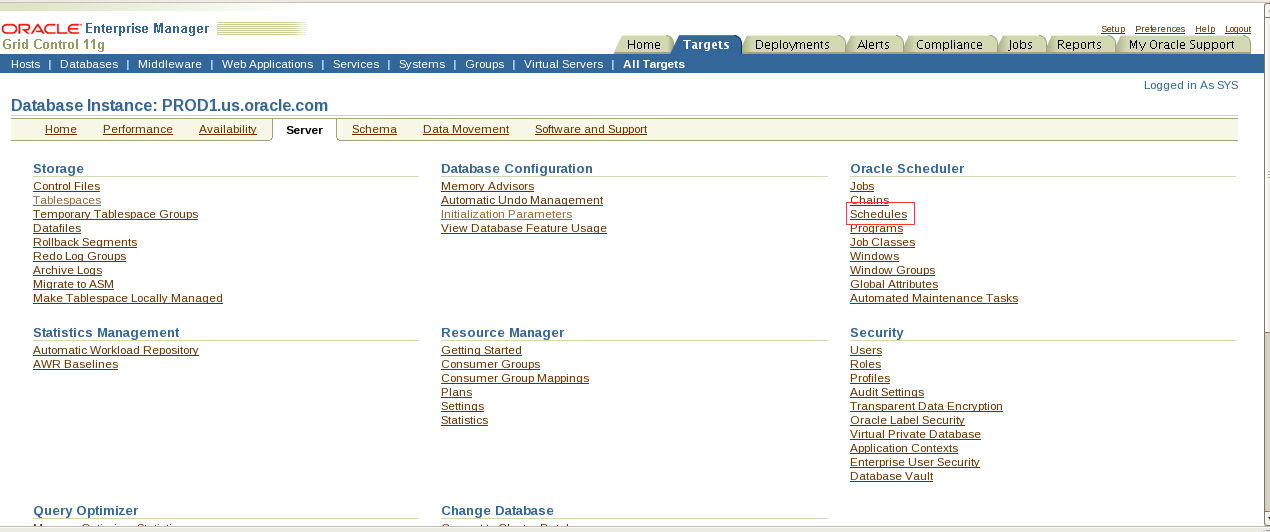
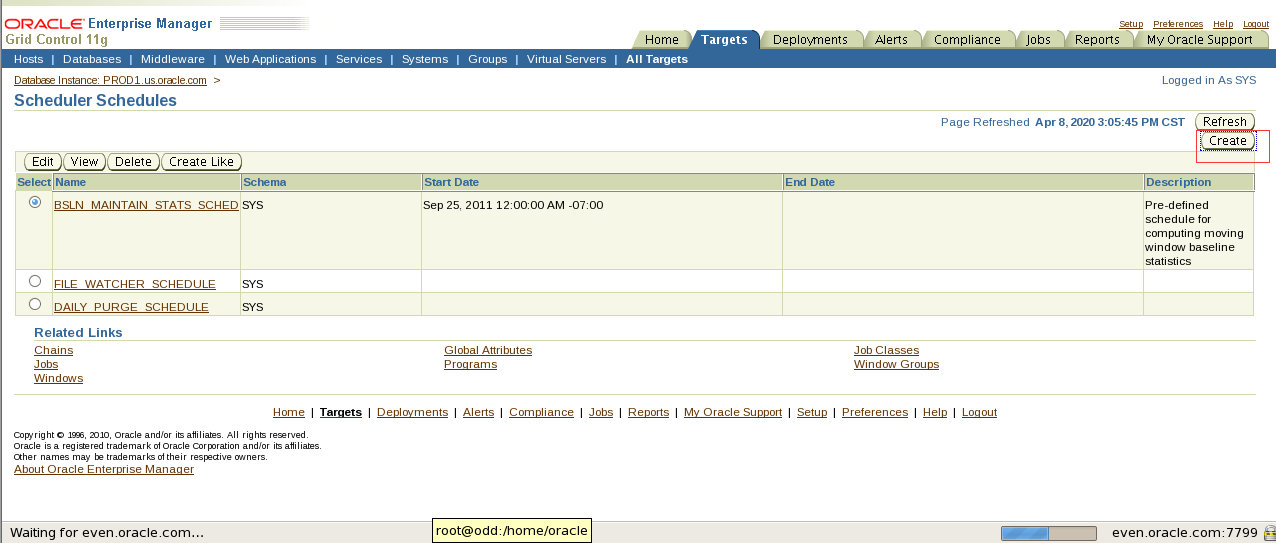

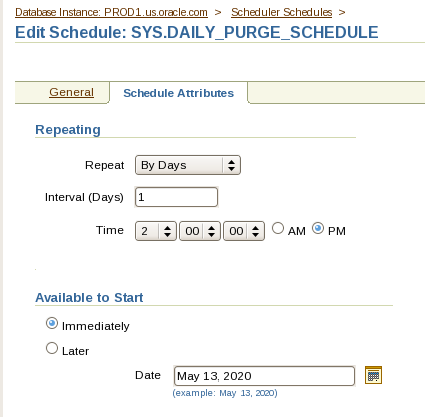
- Using Grid Control, create a program for the PROD1 database called EMP_IND_REBUILD that rebuilds all indexes on the HR.EMPLOYEES table.
翻译:3.使用网格控件,为PROD1数据库创建一个名为EMP_IND_REBUILD的程序,该程序重建HR.EMPLOYEES表上的所有索引。
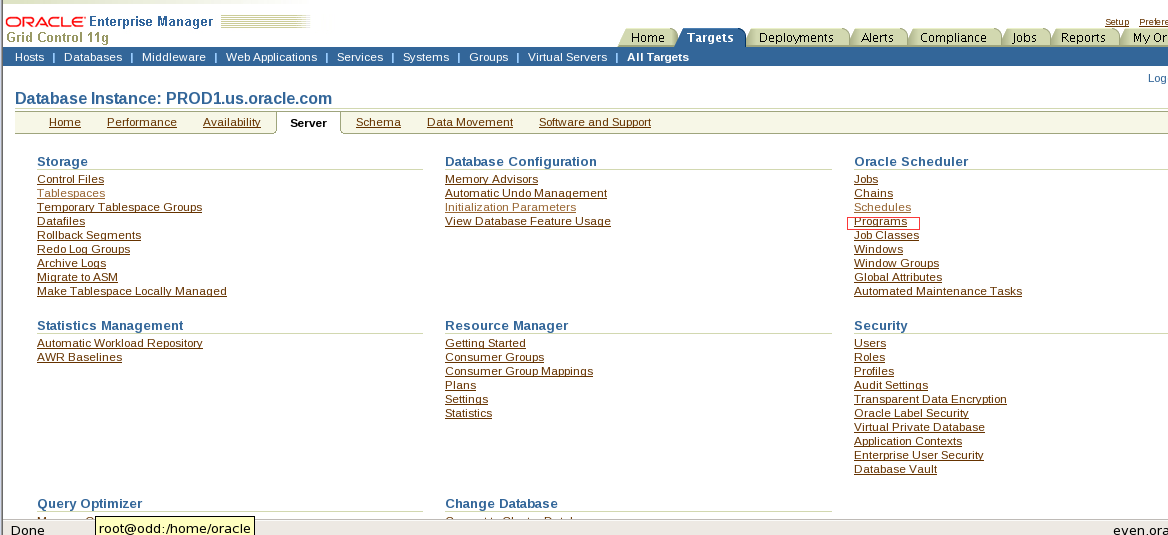
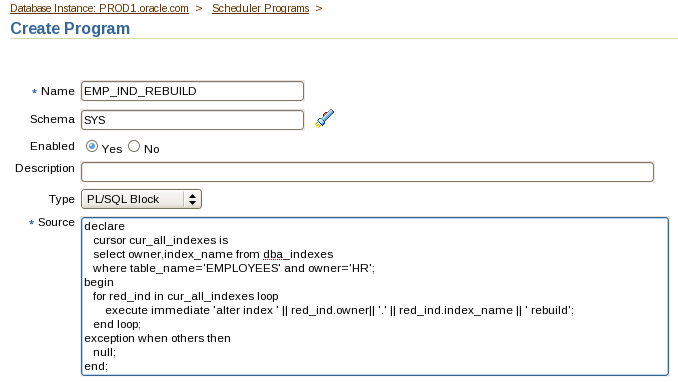
declare
cursor cur_all_indexes is
select owner,index_name from dba_indexes
where table_name='EMPLOYEES' and owner='HR';
begin
for red_ind in cur_all_indexes loop
execute immediate 'alter index '|| red_ind.owner||'.'|| red_ind.index_name || 'rebuild';
end loop;
exception when others then
null;
end;
- Using Grid Control, create a window called USR_WINDOW1 that uses the DAILY_REBUILD schedule and DEFAULT_PLAN resource manager plan.
翻译:4.使用网格控件,创建一个名为USR_WINDOW1的窗口,该窗口使用每日重建计划和默认的_计划资源管理器计划。
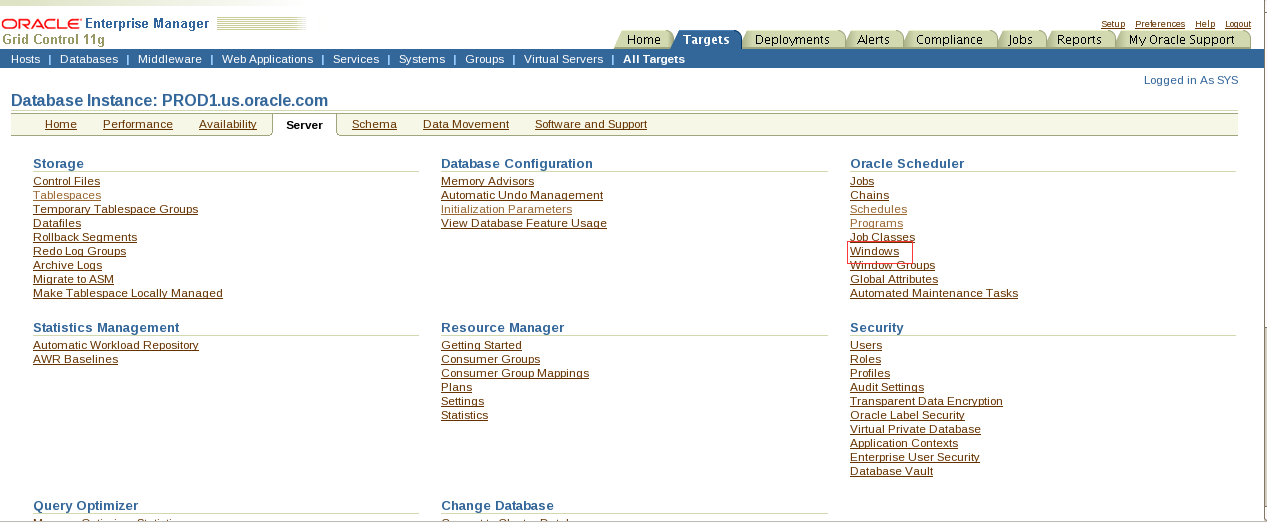
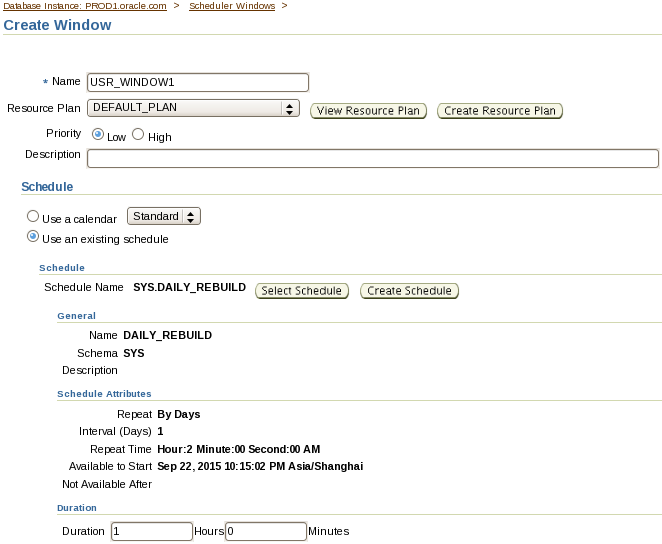
- Using Grid Control, create a job called REBUILD_JOB that uses the DAILY_REBUILD schedule and EMP_IND_REBUILD program.
翻译:5.使用网格控件,创建一个名为REBUILD_job的作业,该作业使用每日重建计划和EMP_IND_REBUILD程序。
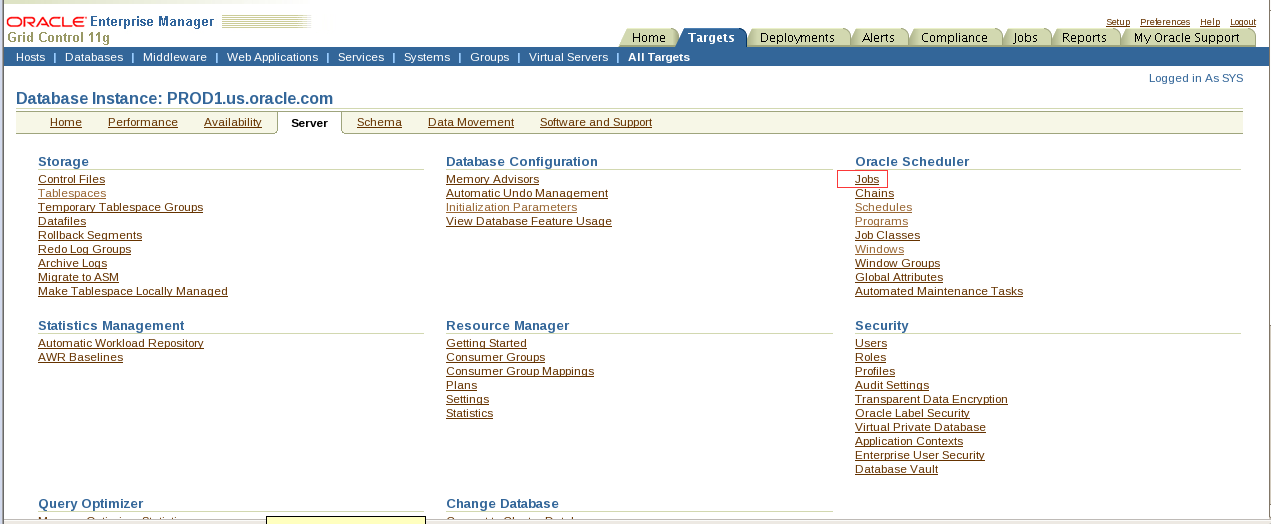
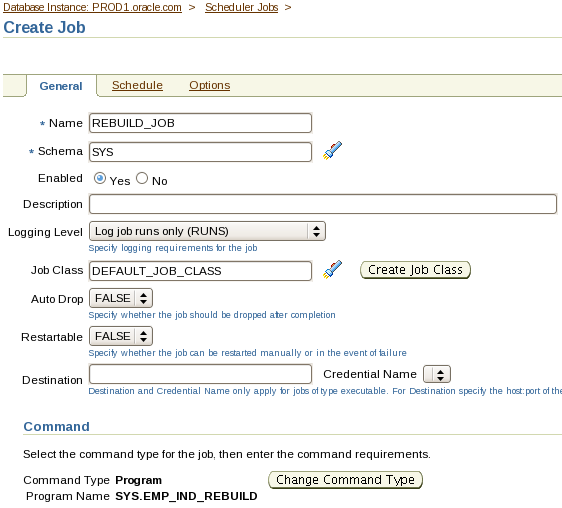
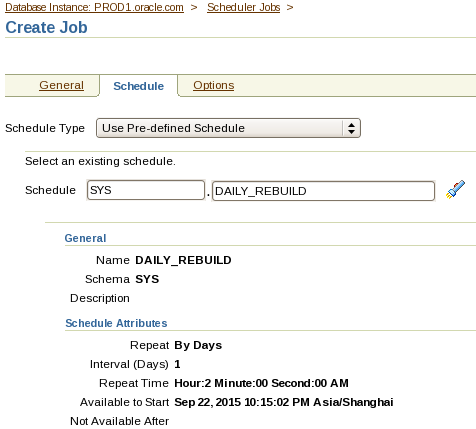
Part 7
Description
In this skillset, you are required to configure and use a standby database.
Objectives
- Create a physical standby database.
- Make the standby database available for testing.
- Restore the standby database to its normal function.
- Configure fast start failover.
End State
The PROD1 database should be open. The SBDB1 database should be open and available for querying with all recent changes available from PROD1.No credit will be given for the skillset if the databases are not open for access.
- Passwords
- Do not change any of the default passwords for the databases or the OS.
- The sample schemas HR,SH,BI, and OE in the PROD1 database can be accessed with the passwords hr,sh,bi, and oe respectively.
- You do not have root access on your systems. You can use sudo to execute any scripts.
- Directories
- All the scripts are located in the /home/oracle/scripts directory.
- Use the /home/oracle/files location to create any external files that are required to perform a skillset task.
- Do not delete or change the directory structure and files unless specified. Unspecified deletions or changes to the directory structure and files can disable scoring.
- Documentation
- To access the Oracle Database documentation, double-click the Firefox Web Browser icon on your desktop on the Database Server. Enter the following URL:file:///stage/doc/db/English/index.htm
- General
- Data files should not exceed 2 GB in size.
- The TRPDATA,INDX,TOOLS,TEST and OLTP tablespaces have been dropped from the PROD1 database. If any of these tablespaces still exist, drop them manually before proceeding with this skillset.
翻译:第7部分
说明
在此技能集中,需要配置和使用备用数据库。
目标
创建物理备用数据库。
使备用数据库可用于测试。
恢复备用数据库的正常功能。
配置快速启动故障转移。
结束状态
PROD1数据库应该打开。SBDB1数据库应该是打开的,并且可以使用PROD1提供的所有最新更改进行查询。如果数据库没有打开以供访问,则不会为技能集提供任何积分。
密码
1.不要更改数据库或操作系统的任何默认密码。
2.PROD1数据库中的示例模式HR、SH、BI和OE可以分别使用密码HR、SH、BI和OE进行访问。
3.您的系统上没有根访问权限。可以使用sudo执行任何脚本。
目录
1.所有脚本都位于/home/oracle/scripts目录中。
2.使用/home/oracle/files位置创建执行技能集任务所需的任何外部文件。
3.除非指定,否则不要删除或更改目录结构和文件。目录结构和文件的未指定删除或更改可能会禁用评分。
文档
1.要访问Oracle数据库文档,请双击数据库服务器桌面上的Firefox Web浏览器图标。输入以下URL:file:///stage/doc/db/English/index.htm
·概述
1.数据文件大小不应超过2 GB。
2.TRPDATA、INDX、TOOLS、TEST和OLTP表空间已从PROD1数据库中删除。如果这些表空间仍然存在,请在继续使用此技能集之前手动删除它们。
drop tablespace TRPDATA including contents and datafiles;
drop tablespace INDX including contents and datafiles;
drop tablespace TOOLS including contents and datafiles;
drop tablespace TEST including contents and datafiles;
drop tablespace OLTP including contents and datafiles;
如果有SHARED_DATA表空间先删掉
Drop tablespace SHARED_DATA including contents and datafiles;
- Ensure the listener is deconfigured from Oracle Restart.
翻译:3.确保从Oracle重新启动中取消配置侦听器。
在管理机上:
srvctl stop listener
srvctl remove listener
这个是rac中关闭监听 命令写的有问题。
- Use the listener running from the database home on the Management Server.
- At the end of the skillset before the proctor starts the scoring, ensure you have a minimum of 15% free space for /(i.e. root) filesystem on the Database Server (i.e. odd PC).Use the command df -h at the command prompt to check the free space.
翻译:
5.使用从管理服务器上的数据库宿主运行的侦听器。
6.在proctor开始评分之前,在技能集的末尾,确保数据库服务器(即odd PC)上/(即根)文件系统至少有15%的可用空间。在命令提示符下使用命令df-h检查可用空间。
Section 1: Creating a Physical Standby Database
Use the following specifications to create the physical standby database:
1. The ORACLE_SID should be SBDB1 (case-sensitive) for the standby database to be created on the Management Server.
2. The entire production database PROD1 should be included in the physical standby database.
3. Specify the new directory location as /u01/app/oracle/oradata/SBDB1 for the data files and online redo log files of the standby database.
4. Allow remote connections to the SBDB1 database.
Example: CONNECT sys/oracle@SBDB1 as sysdba should connect to the SBDB1 database using a dedicated server connection.
翻译:
第1节:创建物理备用数据库
使用以下规范创建物理备用数据库:
一。要在管理服务器上创建备用数据库,ORACLE SID应为SBDB1(区分大小写)。
2。整个生产数据库PROD1应该包含在物理备用数据库中。
三。将备用数据库的数据文件和联机重做日志文件的新目录位置指定为/u01/app/oracle/oradata/SBDB1。
四。允许远程连接到SBDB1数据库。
示例:连接sys/oracle@SBDB1,因为sysdba应该使用专用服务器连接连接到SBDB1数据库。
偶数机:
在管理机上:
建立audit dump和数据文件目录:
mkdir -p /u01/app/oracle/oradata/SBDB1
mkdir -p /u01/app/oracle/admin/SBDB1/adump
建立与PROD1相同的FRA路径:
mkdir -p /home/oracle/flash
奇数机:
在PROD1里创建standby log file:
这里需要先确认PROD1里的onlinelog的大小,假设是50M。
alter database add standby logfile group 11 ('/u01/app/oracle/oradata/PROD1/std01.log') size 50M;
alter database add standby logfile group 12 ('/u01/app/oracle/oradata/PROD1/std02.log') size 50M;
alter database add standby logfile group 13 ('/u01/app/oracle/oradata/PROD1/std03.log') size 50M;
alter database add standby logfile group 14 ('/u01/app/oracle/oradata/PROD1/std04.log') size 50M;
偶数机:
为SBDB1创建密码文件:
orapwd file=/u01/app/oracle/product/11.2.0/dbhome_1/dbs/orapwSBDB1 force=y password=oracle ignorecase=n
cd $ORACLE_HOME/dbs
准备一个初始化参数:
vi initSBDB1.ora
db_name=PROD1
db_unique_name=SBDB1
compatible=11.2.0.0.0
control_files='/u01/app/oracle/oradata/SBDB1/control01.ctl'
db_file_name_convert='/u01/app/oracle/oradata/PROD1','/u01/app/oracle/oradata/SBDB1'
log_file_name_convert='/u01/app/oracle/oradata/PROD1','/u01/app/oracle/oradata/SBDB1'
sga_target=512M
db_domain=us.oracle.com
standby_file_management=auto
奇数机:
在数据库机上配置到备库的连接字符串:
SBDB1=
(DESCRIPTION=
(ADDRESS_LIST=
(ADDRESS=(PROTOCOL=tcp)(HOST=even.oracle.com)(PORT=1521))
)
(CONNECT_DATA=
(SERVICE_NAME=SBDB1.us.oracle.com)
(server=dedicated)
)
)
cd $ORACLE_HOME/bin
Export DISPLAY=192.168.72.1:0.0
Netmgr

偶数机:
在管理机上配置连接字符串:
cat tnsnames.ora
PROD1=
(DESCRIPTION=
(ADDRESS_LIST=
(ADDRESS=(PROTOCOL=tcp)(HOST=odd.oracle.com)(PORT=1521))
)
(CONNECT_DATA=
(SERVICE_NAME=PROD1.us.oracle.com)
(server=dedicated)
)
)
SBDB1=
(DESCRIPTION=
(ADDRESS_LIST=
(ADDRESS=(PROTOCOL=tcp)(HOST=even.oracle.com)(PORT=1521))
)
(CONNECT_DATA=
(SERVICE_NAME=SBDB1.us.oracle.com)
(server=dedicated)
)
)
cd $ORACLE_HOME/bin
export DISPLAY=192.168.72.1:0.0
Netmgr
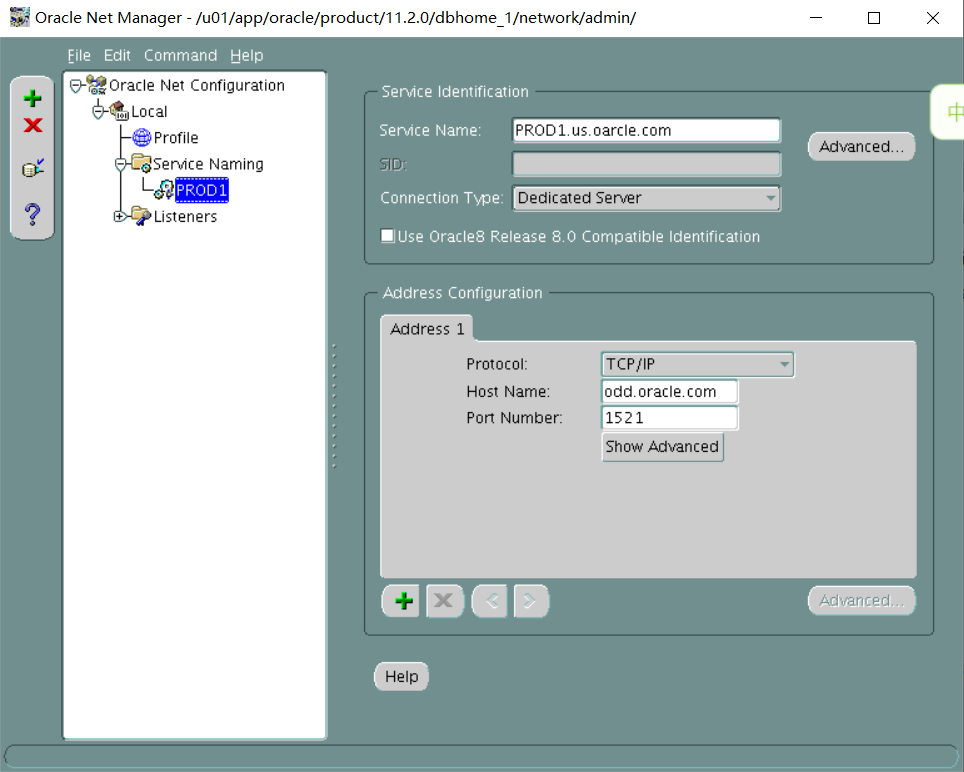
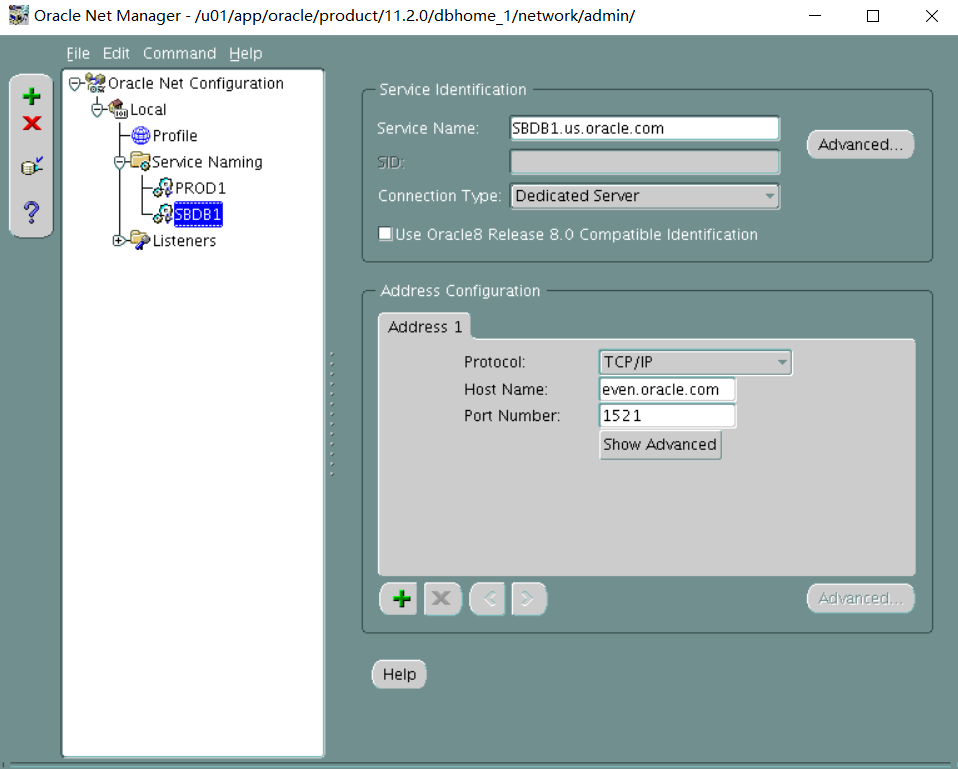
在主库上PROD1上强制日志和做日志切换:
alter database force logging;
alter system archive log current;
奇数机:
在数据库机上配置监听器,添加用于broker的静态注册:
SID_LIST_LISTENER=
(SID_LIST=
(SID_DESC=
(GLOBAL_DBNAME=PROD1.us.oracle.com)
(ORACLE_HOME=/u01/app/oracle/product/11.2.0/dbhome_1)
(SID_NAME=PROD1)
)
(SID_DESC=
(GLOBAL_DBNAME=PROD1_DGMGRL.us.oracle.com)
(ORACLE_HOME=/u01/app/oracle/product/11.2.0/dbhome_1)
(SID_NAME=PROD1)
)
(SID_DESC=
(GLOBAL_DBNAME=PROD1_DGB.us.oracle.com)
(ORACLE_HOME=/u01/app/oracle/product/11.2.0/dbhome_1)
(SID_NAME=PROD1)
)
)
cd $ORACLE_HOME/bin
Netmgr
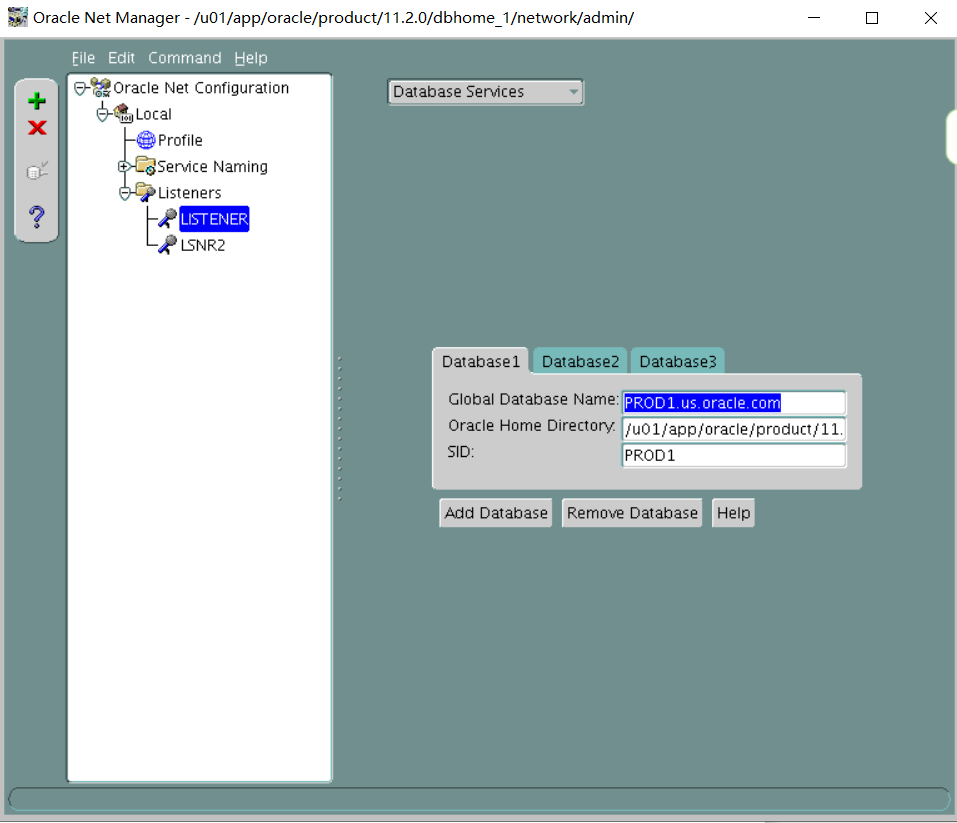
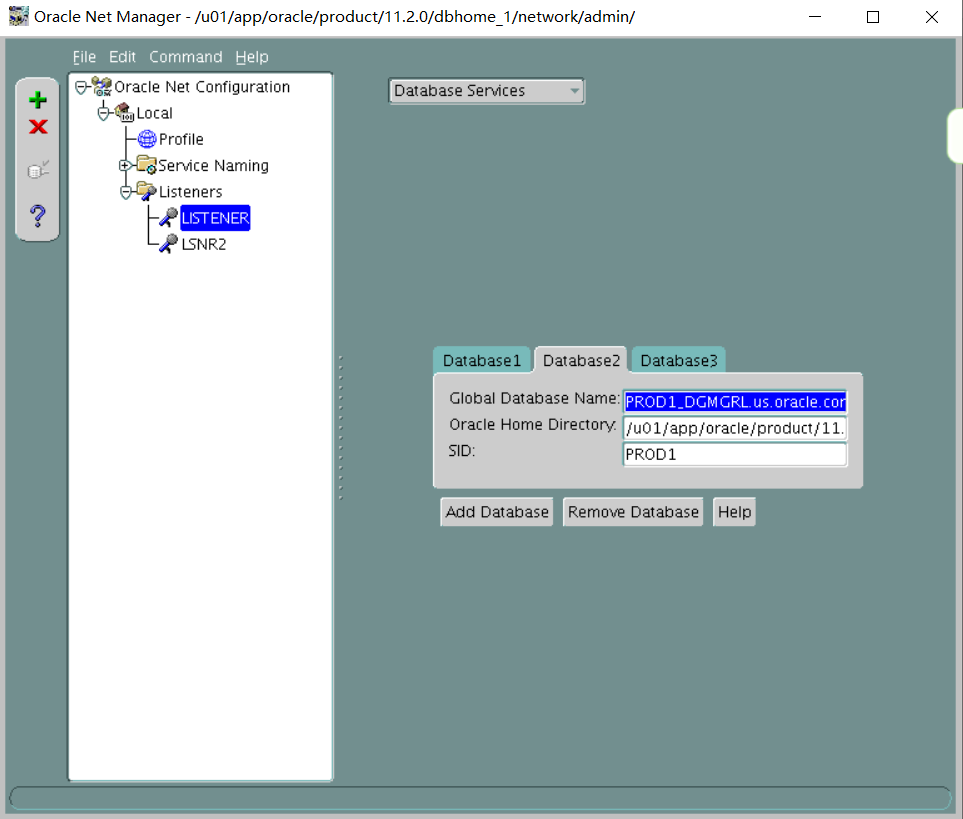

偶数机:
在偶数机(管理服务器)上配置监听器,添加用于broker的静态注册:
LISTENER=
(DESCRIPTION=
(ADDRESS_LIST=
(ADDRESS=(PROTOCOL=tcp)(HOST=even.oracle.com)(PORT=1521))
)
)
SID_LIST_LISTENER=
(SID_LIST=
(SID_DESC=
(GLOBAL_DBNAME=SBDB1.us.oracle.com)
(ORACLE_HOME=/u01/app/oracle/product/11.2.0/dbhome_1)
(SID_NAME=SBDB1)
)
(SID_DESC=
(GLOBAL_DBNAME=SBDB1_DGMGRL.us.oracle.com)
(ORACLE_HOME=/u01/app/oracle/product/11.2.0/dbhome_1)
(SID_NAME=SBDB1)
)
(SID_DESC=
(GLOBAL_DBNAME=SBDB1_DGB.us.oracle.com)
(ORACLE_HOME=/u01/app/oracle/product/11.2.0/dbhome_1)
(SID_NAME=SBDB1)
)
)
cd $ORACLE_HOME/bin
Netmgr
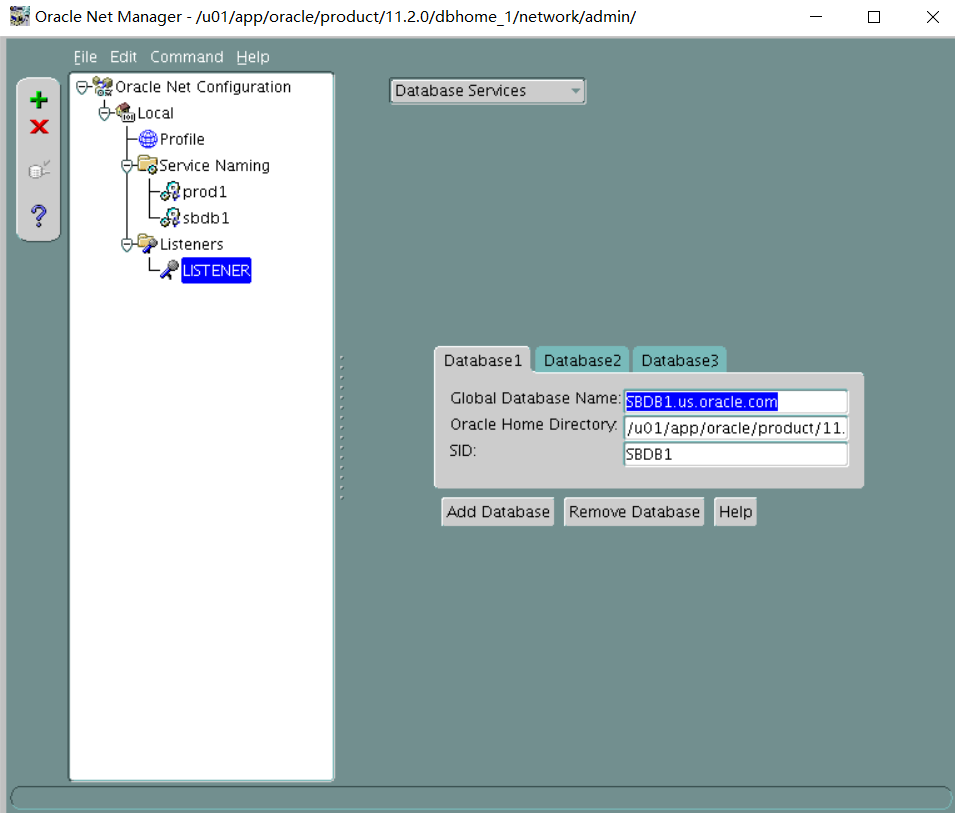
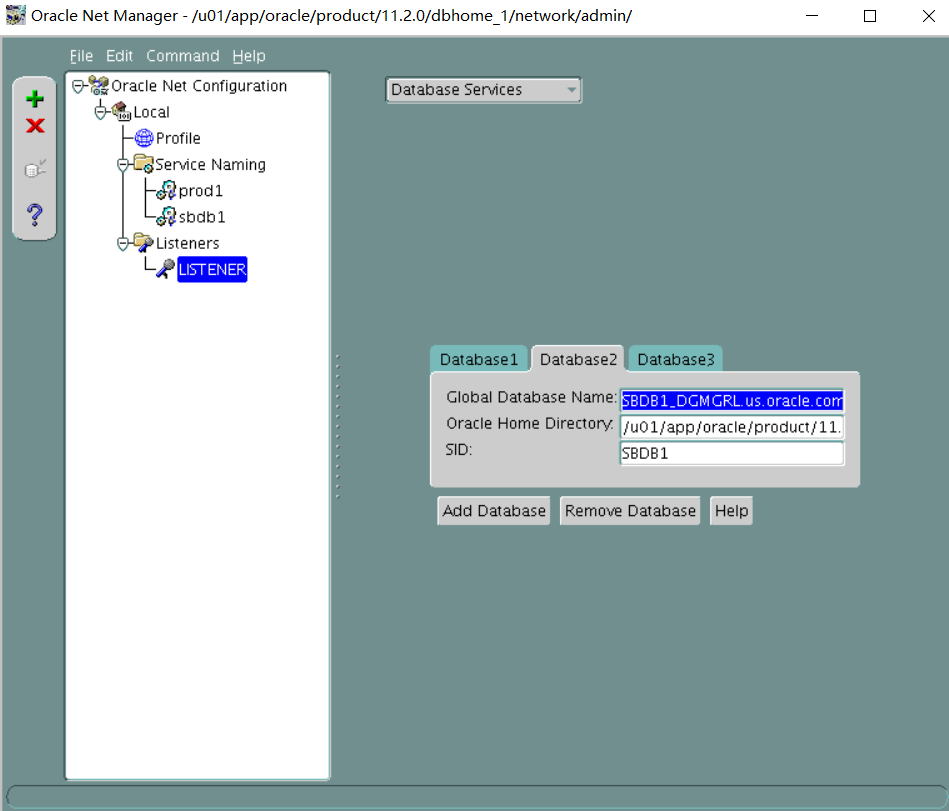
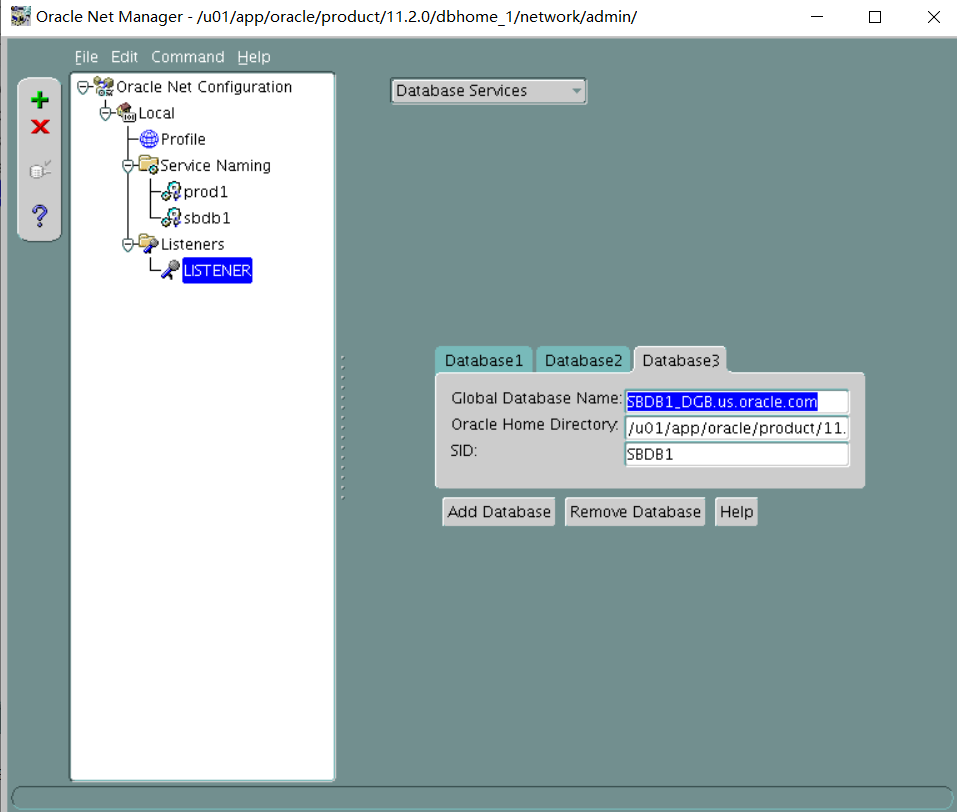
偶数机:
Vi /etc/oratab
SBDB1:/u01/app/oracle/product/11.2.0/dbhome_1:Y
启动duplicate操作:
export ORACLE_SID=SBDB1
sqlplus / as sysdba
startup nomount
如果连不上重启监听
rman target sys/oracle@prod1 auxiliary sys/oracle@sbdb1
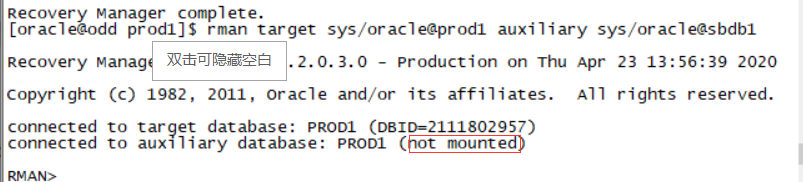

检测必须是not mounted状态
DUPLICATE TARGET DATABASE FOR STANDBY from active database;
Exit
. Oraenv
SBDB1
Sqlplus / as sysdba
创建spfile
create spfile from pfile;
shutdown immediate;
startup mount;
备库里设置flash recovery area:
alter system set db_recovery_file_dest_size=5G;
alter system set db_recovery_file_dest='/home/oracle/flash';
在主库和备库上执行:
PROD1和SBDB1:
alter system set dg_broker_start=true;
奇数机:
使用broker把DG搭建起来:
connect sys/oracle@prod1
cd $ORACLE_HOME/dbs
dgmgrl sys/oracle@prod1
CREATE CONFIGURATION dg1 as PRIMARY DATABASE IS PROD1 CONNECT IDENTIFIER IS 'PROD1';
ADD DATABASE SBDB1 as CONNECT IDENTIFIER IS 'SBDB1' MAINTAINED AS PHYSICAL;
enable configuration;
show configuration;
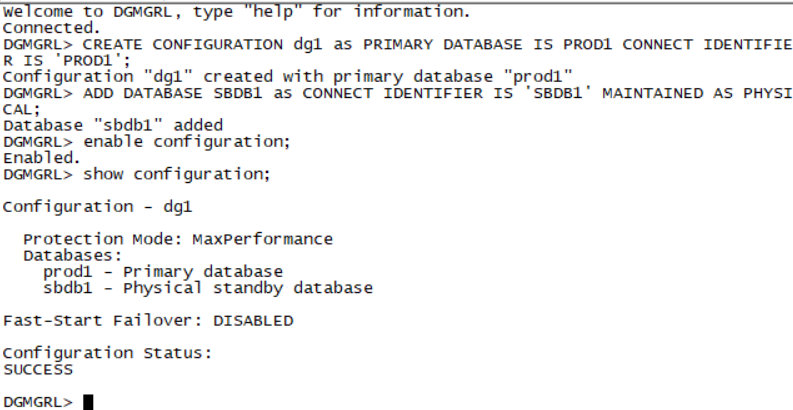
show database verbose prod1;
检查属性:StaticConnectIdentifier,如果不是1521端口,比如:
StaticConnectIdentifier = '(DESCRIPTION=(ADDRESS=(PROTOCOL=tcp)(HOST=odd.oracle.com)(PORT=1621))(CONNECT_DATA=(SERVICE_NAME=PROD1_DGMGRL.us.oracle.com)(INSTANCE_NAME=PROD1)(SERVER=DEDICATED)))'
则改为:
edit database PROD1 set property StaticConnectIdentifier='(DESCRIPTION=(ADDRESS=(PROTOCOL=tcp)(HOST=odd.oracle.com)(PORT=1521))(CONNECT_DATA=(SERVICE_NAME=PROD1_DGMGRL.us.oracle.com)(INSTANCE_NAME=PROD1)(SERVER=DEDICATED)))';
则数据库会自动被broker启动。
Section 2: Test the Standby Database
Perform the following tasks:
1. Configure the standby database SBDB1 to be used for testing, including updates, and make no changes to the primary database.
2. Run the 7_2_2.sql script to perform updates on the SBDB1 database.
翻译:
第2节:测试备用数据库
执行以下任务:
一。将备用数据库SBDB1配置为用于测试(包括更新),并且不对主数据库进行任何更改。
2。运行7_2_2.sql脚本对SBDB1数据库执行更新。
偶数机:
Cd $ORACLE_HOME/dbs
Dgmgrl sys/oracle@SBDB1
CONVERT DATABASE SBDB1 to SNAPSHOT STANDBY;
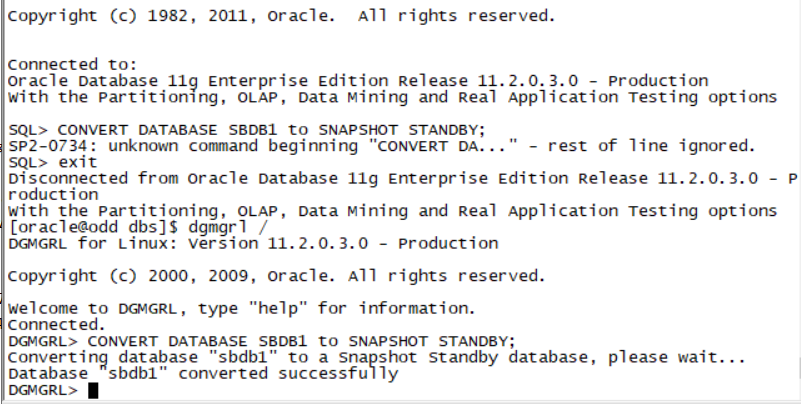
Exit
. Oraenv
SBDB1
Sqlplus / as sysdba
Startup;
@/home/oracle/scripts/7_2_2.sql
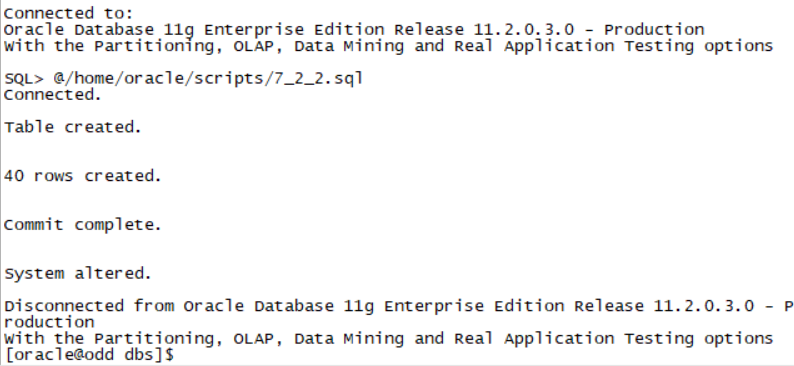
Section 3: Restore the Standby Database
Restore the standby database to its normal function for disaster recovery.
- Restore the standby database to be used as a reporting server and ensure that it is open for querying.
翻译:
第3节:恢复备用数据库
将备用数据库恢复到正常的灾难恢复功能。
- 将备用数据库还原为报表服务器,并确保其已打开供查询。
偶数机:
dgmgrl sys/oracle@sbdb1
CONVERT DATABASE SBDB1 to physical standby;
如果中间遇到任何错误,可以先disable configuration; 在enable configuration; 然后再执行:CONVERT DATABASE SBDB1 to physical standby;
Exit;
Sqlplus sys/oracle@sbdb1 as sysdba
alter database open read only;
Exit;
Dgmgrl sys/oracle@sdbdb1
DGMGRL> show database sbdb1;
Database - sbdb1
Role: PHYSICAL STANDBY
Intended State: APPLY-ON <==注意这里是ON
Transport Lag: 0 seconds
Apply Lag: 0 seconds
Real Time Query: ON
Instance(s):
SBDB1
Database Status:
SUCCESS
2. Configure managed recovery so that the changes to the primary database are reflected in the standby as soon as possible.
因为在部署之初就已经在主库上创建了standby log,所以缺省使用broker配置DG的时候就是实时应用的。
3. Reduce the overheads of fast incremental backups to a minimum on the primary database.
翻译:
2.配置托管恢复,以便对主数据库的更改尽快反映在备用数据库中。
3.将主数据库上快速增量备份的开销降至最低。
在备库上启动change tracking file
偶数机:
Exit;
. Oraenv
Sbdb1
Sqlplus / as sysdba
ALTER DATABASE ENABLE BLOCK CHANGE TRACKING USING FILE '/u01/app/oracle/oradata/SBDB1/change_tracking.file';
4. Archive logs must not be deleted on the primary database until they have been applied to the standby database.
在主库上执行RMAN命令:
奇数机:
. Oraenv
PROD1
rman target /
CONFIGURE ARCHIVELOG DELETION POLICY TO applied on all standby;
Section 4: Configure the Standby Database
Perform the following tasks:
- Create the SBDB1SRV database service and assign it the Data Guard role of PHYSICAL_STANDBY. This service should automatically start only if the role of the EMREP database on the Management Server is changed to physical standby.
翻译:
第4节:配置备用数据库
执行以下任务:
一。创建SBDB1SRV数据库服务并为其分配物理备用的数据保护角色。只有当管理服务器上EMREP数据库的角色更改为物理备用时,此服务才应自动启动。
偶数机:
Exit;
cd /u01/app/11.2.0/grid/bin
./crsctl start has
srvctl add service -d EMREP -s SBDB1SRV -l PHYSICAL_STANDBY -y AUTOMATIC
2. Configure connect time failover for the data guard configuration.
Configure the PRODSRV local net service on the database server machine to connect to the standby database in case of switchover.
奇数机:
. Oraenv
PROD1
Sqlplus / as sysdba
翻译:
2。为数据保护配置配置连接时间故障转移。
在数据库服务器机器上配置PRODSRV本地的网络服务,以便在切换时连接到备用数据库。
exec DBMS_SERVICE.CREATE_SERVICE(SERVICE_NAME => 'PRODSRV', NETWORK_NAME => 'PRODSRV.us.oracle.com');
exec DBMS_SERVICE.start_SERVICE(SERVICE_NAME => 'PRODSRV');
在数据库机和管理机上编辑tnsnames.ora
PRODSRV=
(DESCRIPTION=
(ADDRESS_LIST=
(ADDRESS=(PROTOCOL=tcp)(HOST=even.oracle.com)(PORT=1521))
(ADDRESS=(PROTOCOL=tcp)(HOST=odd.oracle.com)(PORT=1521))
)
(CONNECT_DATA=
(SERVICE_NAME=PRODSRV.us.oracle.com)
(server=dedicated)
)
)
cd $ORACLE_HOME/bin
Netmgr
奇数机:
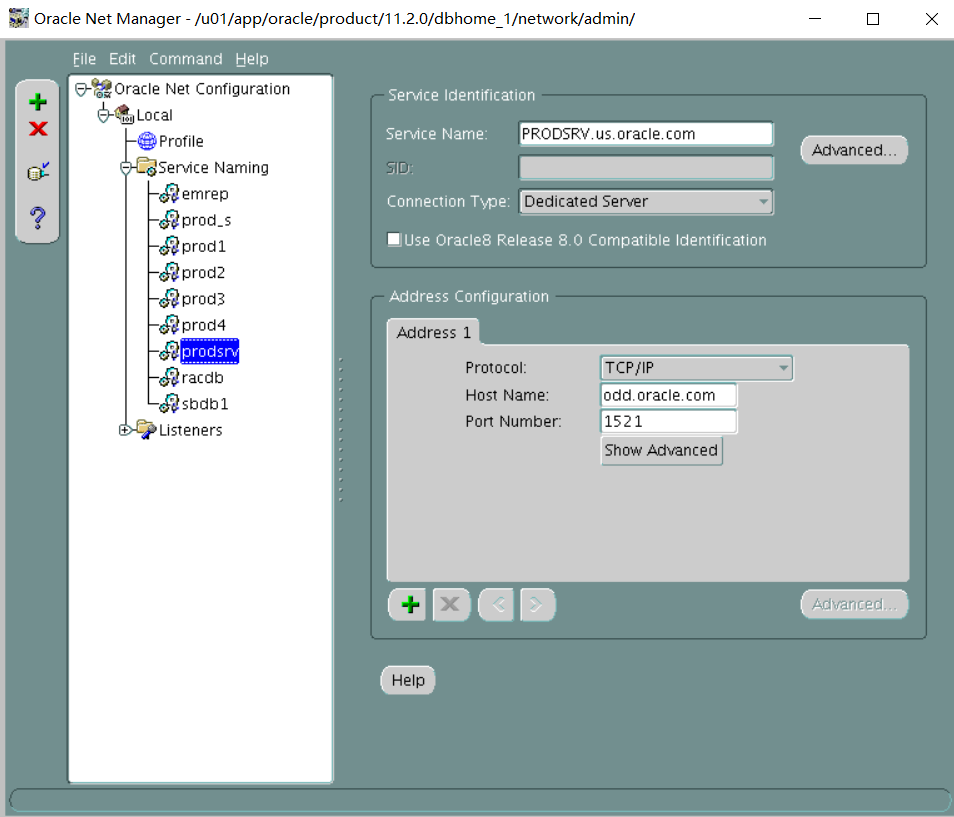
偶数机:
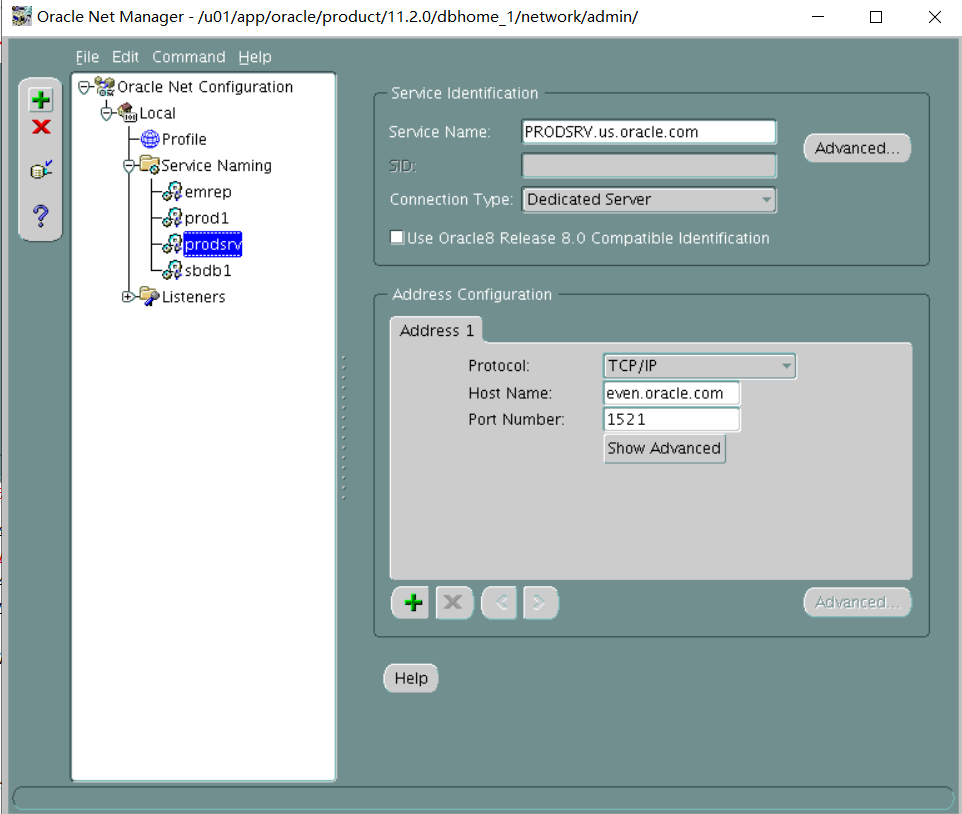
在主库上创建触发器:
PROD1:
CREATE TRIGGER MANAGE_SERVICES AFTER STARTUP ON DATABASE
DECLARE
ROLE VARCHAR2(30);
BEGIN
SELECT DATABASE_ROLE INTO ROLE FROM V$DATABASE;
IF ROLE = 'PRIMARY' THEN
DBMS_SERVICE.START_SERVICE ('PRODSRV');
END IF;
END;
/
Section 5: Automate Failover
1. Automate failover and use the Database Server for any components that provide the automation. Make sure that the configuration is synchronized and fully operational.
翻译:
第5节:自动故障转移
一。自动化故障转移,并将数据库服务器用于提供自动化的任何组件。确保配置已同步且完全可操作。
有人建议自动故障转移放弃
在主库启动flashback database:
奇数机:
PROD1:
alter database flashback on;
(会提示ERROR at line 1:
ORA-38706: Cannot turn on FLASHBACK DATABASE logging.
ORA-38713: Flashback Database logging is already turned on.
第1行出错:
ORA-38706:无法打开闪回数据库日志记录。
ORA-38713:闪回数据库日志记录已打开。)
然后在broker里停止MRP:
Exit;
Dgmgrl sys/oracle@prod1
DGMGRL> EDIT DATABASE SBDB1 SET STATE=apply-off;
然后到备库里启动闪回:
偶数机:
. Oraenv
SBDB1
Sqlplus / as sysdba
alter database flashback on;
然后在broker里启动MRP:
Exit;
Dgmgrl sys/oracle@prod1
DGMGRL> EDIT DATABASE SBDB1 SET STATE=apply-on;
Show database verbose prod1;
edit database PROD1 set property FastStartFailoverTarget='SBDB1';
edit configuration set property FastStartFailoverThreshold='120';
Show configuration;
ENABLE FAST_START FAILOVER;
START OBSERVER;(最后一步会卡在那里)
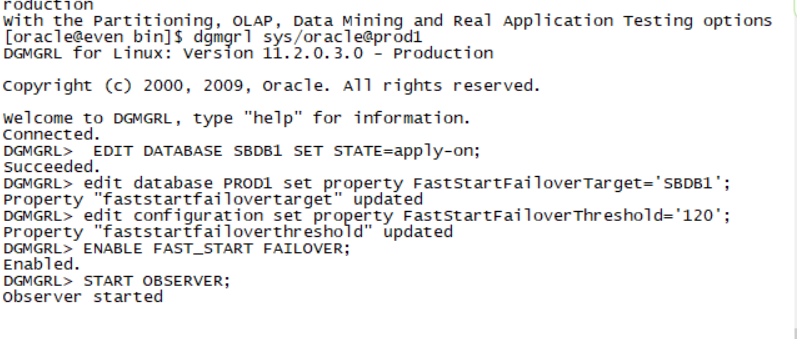
END State: The proctor application will connect to your database instances as users SYS and SYSTEM with the password oracle. You can use the following checks to verify your databases are in the correct end state before the scoring process starts:
Log on to the PROD1 database by using:
sys/oracle@prod1 as sysdba
system/oracle@prod1
Query the DUAL table.
Log on to the SBDB1 database by using:
sys/oracle@SBDB1 as sysdba
system/oracle@SBDB1
Query the DUAL table.
Part 8
Description
In this scenario, you will be given a hardware setup ready for an Oracle Database 11gR2 Real Application Cluster (RAC) installation. You will install Grid Infrastructure for clusters and set up Automatic Storage Manager(ASM).
Objectives
- Install Oracle Grid Infrastructure.
- Create ASM Disk Groups.
- Create and manage an ASM instance.
- Create ACFS.
- Start, stop, configure and administer Oracle Grid Infrastructure.
End State
At the end of this skillset, the PROD1 database should be open. No credit will be given for the scenario if the database is not open for access.
Important-Read First
1. The host names and IP addresses for your two RAC nodes are provided in the /etc/hosts file on your Database Server.
2. The two RAC nodes are host01.example.com and host02.example.com.
3. The ip address for host01.example.com is 192.0.2.101 and for host02.example.com is 192.0.2.102.
4. Use vncviewer machine IP:2 to access your RAC node1 for example, vncviewer 192.0.2.101:2 or host01:2 (note the :2 after the node machine name).The VNC password is oracle.
5. On the RAC node desktop if you find the Smart Card Manager UI open, click the "Close" button and continue with the tasks.
6. You have root access with the password oracle and an oracle user account with the password oracle.
7. The software is staged in the /stage/ folder on host01.
8. For network configuration while installing Grid Infrastructure, choose eth0 as public network adapter and eth1 and eth2 for private interconnect.
9. Use the cluster name cluster01.
10. Use the SCAN name cluster01-scan.example.com for the Grid Infrastructure installation.
11. Do not use the GNS option for the Grid Infrastructure installation.
12. Do not restart the RAC nodes.
13. Minimum System Requirements for Grid Infrastructure Installation
During installation, if any deficiencies are found, the installer will display the messages on the Perform System Prerequisites page.
Click the "Fix & Check Again" button. The installer will generate a fixup script to be run as root on hast01 and host02.Follow the instructions as displayed on your screen.
When finished, return to the installer and click the "Fix & Check Again" button. You may receive a "Device Checks for ASM" warning. Ignore this warning by selecting the "Ignore All" check box, then click Yes on the Confirmation box, and then click Next to continue.
翻译:第八部分
说明
在这种情况下,将为您提供一个硬件设置,以便安装Oracle Database 11gR2 Real Application Cluster(RAC)。您将为群集安装网格基础结构并设置自动存储管理器(ASM)。
目标
安装Oracle网格基础设施。
创建ASM磁盘组。
创建和管理一个ASM实例。
创建ACF。
启动、停止、配置和管理Oracle网格基础设施。
结束状态
在这个技能集的末尾,PROD1数据库应该是打开的。如果数据库未打开以供访问,则不会对该方案给予信任。
重要的先读
1.数据库服务器上的/etc/hosts文件中提供了两个RAC节点的主机名和IP地址。
2.这两个RAC节点是host01.example.com和host02.example.com。
3.host01.example.com的ip地址是192.0.2.101,host02.example.com的ip地址是192.0.2.102。
4.使用vncviewer machine IP:2访问您的RAC节点1,例如,vncviewer 192.0.2.101:2或host01:2(请注意节点计算机名称后面的:2)。VNC密码是oracle。
5.在RAC节点桌面上,如果发现智能卡管理器UI打开,请单击“关闭”按钮并继续执行任务。
6.您可以使用密码oracle进行根访问,并使用密码oracle的oracle用户帐户进行访问。
7.软件在host01上的/stage/文件夹中暂存。
8.对于安装网格基础结构时的网络配置,请选择eth0作为公用网络适配器,选择eth1和eth2作为专用互连。
9.使用集群名称cluster01。
10.使用扫描名cluster01 SCAN.example.com安装网格基础结构。
11.不要使用GNS选项来安装网格基础设施。
12.不要重新启动RAC节点。
13.电网基础设施安装的最低系统要求
在安装过程中,如果发现任何缺陷,安装程序将在“执行系统必备项”页上显示消息。
单击“修复并再次检查”按钮。安装程序将生成一个fixup脚本,在hast01和host02上以根用户身份运行。请按照屏幕上显示的说明进行操作。
完成后,返回安装程序并单击“修复并再次检查”按钮。您可能会收到“Device Checks for ASM”警告。通过选中“全部忽略”复选框忽略此警告,然后在确认框上单击“是”,然后单击“下一步”继续。
TASKS
Section 1: Install Grid Infrastructure and Create ASM Disk Groups
- Install Grid Infrastructure. The grid base directory should be /u01/app/grid and the home directory should be /u01/app/11.2.0/grid. Use the details given in the notes section. The software is staged in the following location on racnode1:/stage/grid/. Create the voting disk and OCR in the ASM disk group DATA.
2. Create a disk group, DATA, with normal redundancy. Select the following asmdisks:
ASMDISK01
ASMDISK02
ASMDISK03
ASMDISK04
通过GI的安装图形界面创建
3. Create a disk group, ACFS with external redundancy for use as an ADVM volume file. Select the following asmdisks:
ASMDISK05
ASMDISK06
ASMDISK07
ASMDISK08
第1节:安装网格基础结构并创建ASM磁盘组
1.安装电网基础设施。网格基本目录应该是/u01/app/grid,主目录应该是/u01/app/11.2.0/grid。使用注释部分提供的详细信息。该软件在racnode1上的以下位置暂存:/stage/grid/。在ASM磁盘组数据中创建投票磁盘和OCR。
2。创建一个具有正常冗余的磁盘组DATA。选择以下asmdisks:
ASMDISK01
ASMDISK02
ASMDISK03
ASMDISK04
三。创建具有外部冗余的磁盘组ACFS,用作ADVM卷文件。选择以下asmdisks:
ASMDISK05
ASMDISK06
ASMDISK07
ASMDISK08
create diskgroup ACFS external redundancy disk
'ORCL:ASMDISK05',
'ORCL:ASMDISK06',
'ORCL:ASMDISK07',
'ORCL:ASMDISK08'
attribute
'compatible.asm'='11.2',
'compatible.rdbms'='11.2',
'compatible.advm'='11.2';
srvctl start diskgroup -g ACFS
4. Create a disk group, FRA with external redundancy to hold the Fast Recovery Area(FRA).Select the following asmdisks:
ASMDISK09
ASMDISK10
ASMDISK11
ASMDISK12
create diskgroup FRA external redundancy disk
'ORCL:ASMDISK09',
'ORCL:ASMDISK10',
'ORCL:ASMDISK11',
'ORCL:ASMDISK12'
attribute
'compatible.asm'='11.2',
'compatible.rdbms'='11.2';
srvctl start diskgroup -g FRA
5. Create ACFS. Create this volume in the ACFS diskgroup name volume DB_FILES, specify 2 GB size, and mount the ACFS on /u01/app/oracle/acfs_share.
进入asmcmd
volcreate -G ACFS -s 2048M DB_FILES
到节点2上执行:asmcmd volenable -G ACFS db_files
两个节点分别执行:
mkdir -p /u01/app/oracle/acfs_share
mkfs -t acfs /dev/asm/db_files-xxx
mount -t acfs /dev/asm/db_files-xxx /u01/app/oracle/acfs_share
Section 2: Configure and Maintain Grid infrastructure
1. Mirror the OCR files into the FRA disk group.
/u01/app/11.2.0/grid/bin/ocrconfig -add + FRA
2. Dump the Oracle Local Repository file on the first node. Name the file MYOLR, and create it in the /home/oracle/ directory.
/u01/app/11.2.0/grid/bin/ocrconfig -local -export /home/oracle/MYOLR
3. Disable automatic startup of the Grid Infrastructure.
在两个节点上执行:
/u01/app/11.2.0/grid/bin/crsctl disable crs
4. Copy the db_images.zip file from /home/oracle on host01 to the ACFS mount point.
cp /home/oracle/ db_images.zip /u01/app/oracle/acfs_share
5. Create a snapshot of the ACFS file system and name it ACFS_SNAP01 (case-sensitive).
acfsutil snap create ACFS_SNAP01 /u01/app/oracle/acfs_share
没有完全按照老师的步骤
准备工作:
解压
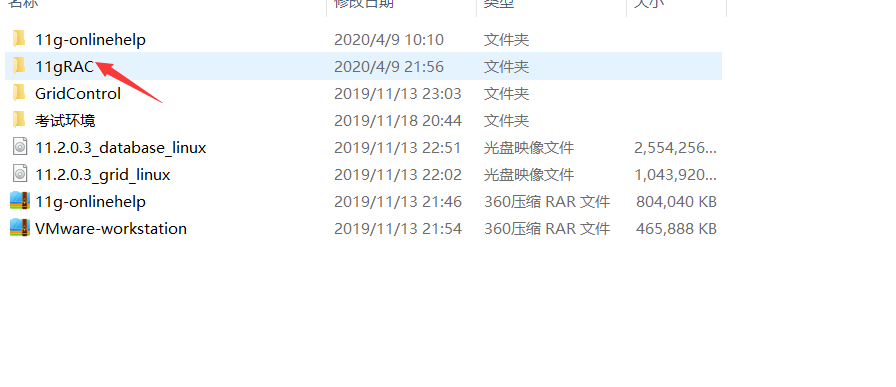

2个压缩包同时解压会出现一个压缩包 再解压一次 出现2个文件
打开11gRAC

虚拟机打开node1与node2
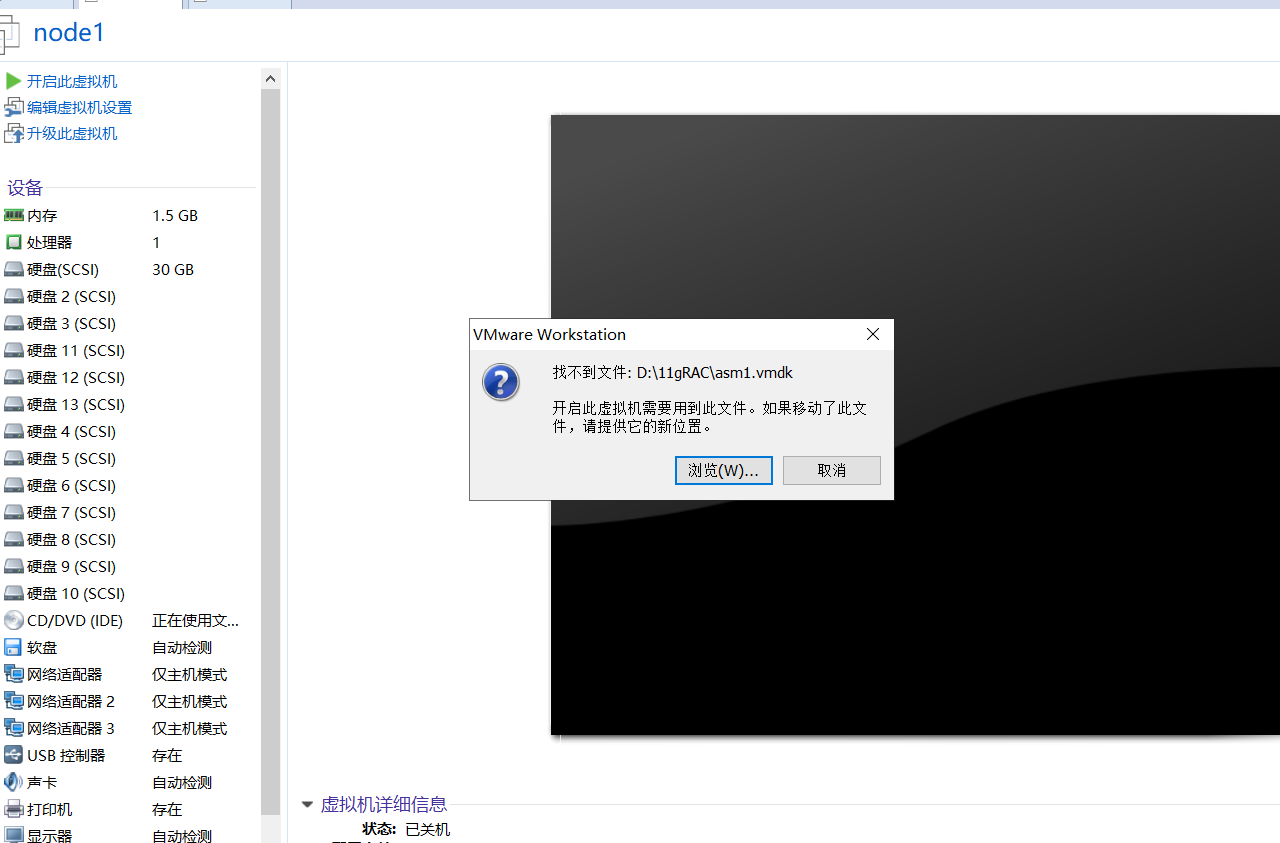
如果解压的文件夹放在d盘不会出现这样的提示 如果不是在d盘则会出现这样的提示 选择该文件夹下的ASM1-ASM12(node1与node2都是这样)
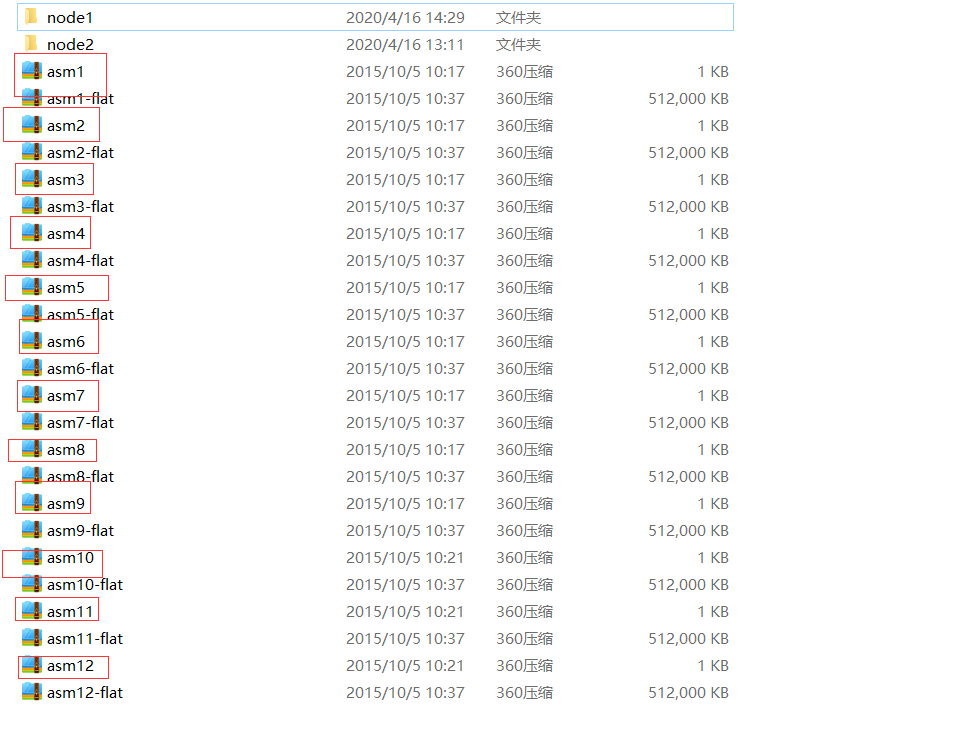
进入node1
root用户下vi /etc/hosts配置hosts根据ifconfig获取的ip自行分配和修改 分配如下
192.168.62.21 node1.oracle.com node1
192.168.62.22 node2.oracle.com node2
191.2.10.1 node1-priv.orcl.com node1-priv
191.2.10.3 node2-priv.orcl.com node2-priv
191.2.11.1 node1-priv2.orcl.com node1-priv2
191.2.11.3 node2-priv2.orcl.com node2-priv2
下面三个#注释必须打开
192.168.62.23 node1-vip.oracle.com node1-vip
192.168.62.24 node2-vip.oracle.com node2-vip
192.168.62.30 node-scan.oracle.com node-scan
vi /etc/sysconfig/network-scripts/ifcfg-eth0
配置静态ip
DEVICE=eth0
BOOTPROTO=static
ONBOOT=yes
HWADDR=00:0c:29:5b:d3:34
IPADDR=192.168.62.21
NETMASK=255.255.255.0
GATEWAY=192.168.62.1
TYPE=Ethernet
USERCTL=no
IPV6INIT=no
PEERDNS=yes
重启网络:service network restart
Node:
root用户下vi /etc/hosts配置hosts根据ifconfig获取的ip自行分配和修改 分配如下
192.168.62.21 node1.oracle.com node1
192.168.62.22 node2.oracle.com node2
191.2.10.1 node1-priv.orcl.com node1-priv
191.2.10.3 node2-priv.orcl.com node2-priv
191.2.11.1 node1-priv2.orcl.com node1-priv2
191.2.11.3 node2-priv2.orcl.com node2-priv2
下面三个#注释必须打开
192.168.62.23 node1-vip.oracle.com node1-vip
192.168.62.24 node2-vip.oracle.com node2-vip
192.168.62.30 node-scan.oracle.com node-scan
vi /etc/sysconfig/network-scripts/ifcfg-eth0
Node1
配置静态ip
DEVICE=eth0
BOOTPROTO=static
ONBOOT=yes
HWADDR=00:0c:29:5b:d3:34
IPADDR=192.168.62.22
NETMASK=255.255.255.0
GATEWAY=192.168.62.1
TYPE=Ethernet
USERCTL=no
IPV6INIT=no
PEERDNS=yes
Node2:
DEVICE=eth0
BOOTPROTO=static
ONBOOT=yes
HWADDR=00:0C:29:38:EF:52
IPADDR=192.168.62.22
NETMASK=255.255.255.0
GATEWAY=192.168.62.1
TYPE=Ethernet
USERCTL=no
IPV6INIT=no
PEERDNS=yes
重启网络:service network restart
Node1配置用户环境变量
vi .bash_profile
export PATH
export ORACLE_BASE=/u01/app/grid
export ORACLE_HOME=/u01/app/11.2.0/grid
export PATH=$ORACLE_HOME/bin:$PATH
export ORACLE_SID=+ASM1
Source .bash_profile
Node2配置用户环境变量
export PATH
export ORACLE_BASE=/u01/app/grid
export ORACLE_HOME=/u01/app/11.2.0/grid
export PATH=$ORACLE_HOME/bin:$PATH
export ORACLE_SID=+ASM2
Source .bash_profile
检查裸设备是否在两个节点(node1与node2)存在
/etc/init.d/oracleasm listdisks
ASMDISK01
ASMDISK02
ASMDISK03
ASMDISK04
ASMDISK05
ASMDISK06
ASMDISK07
ASMDISK08
ASMDISK09
ASMDISK10
ASMDISK11
ASMDISK12
利用远程工具SecureCRT 将

文件上传至media文件夹下
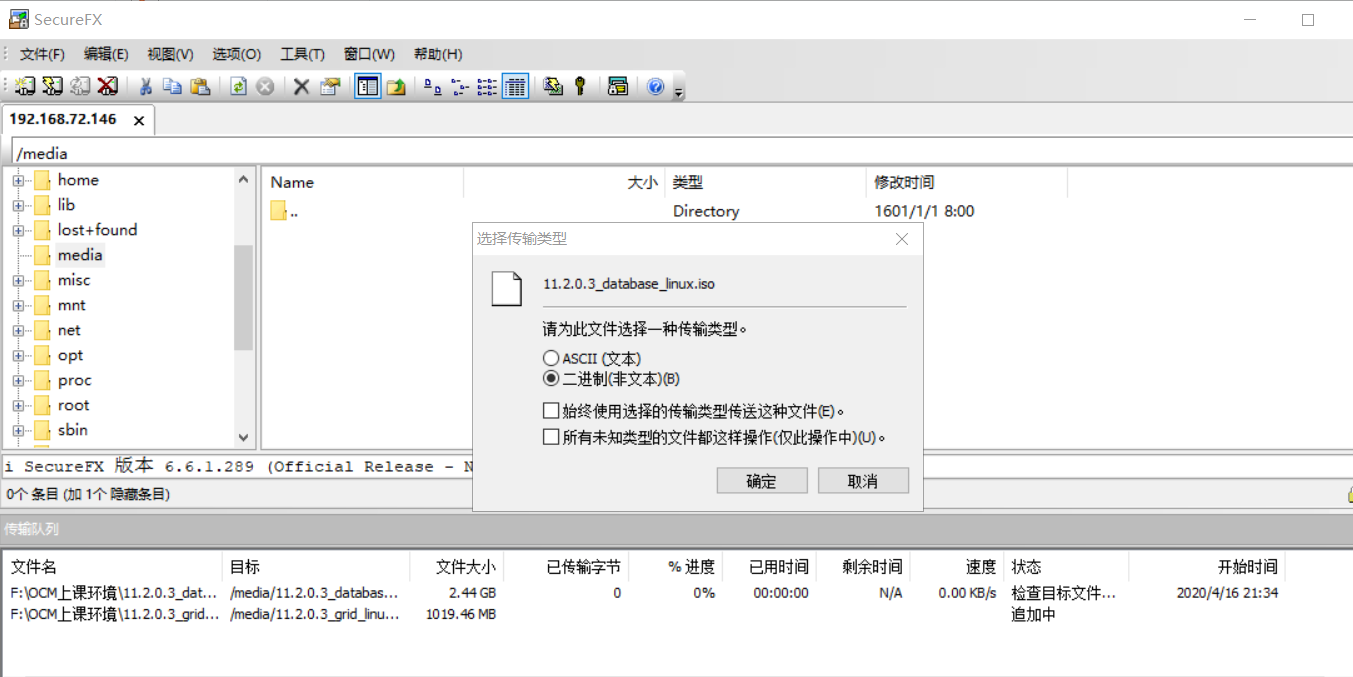
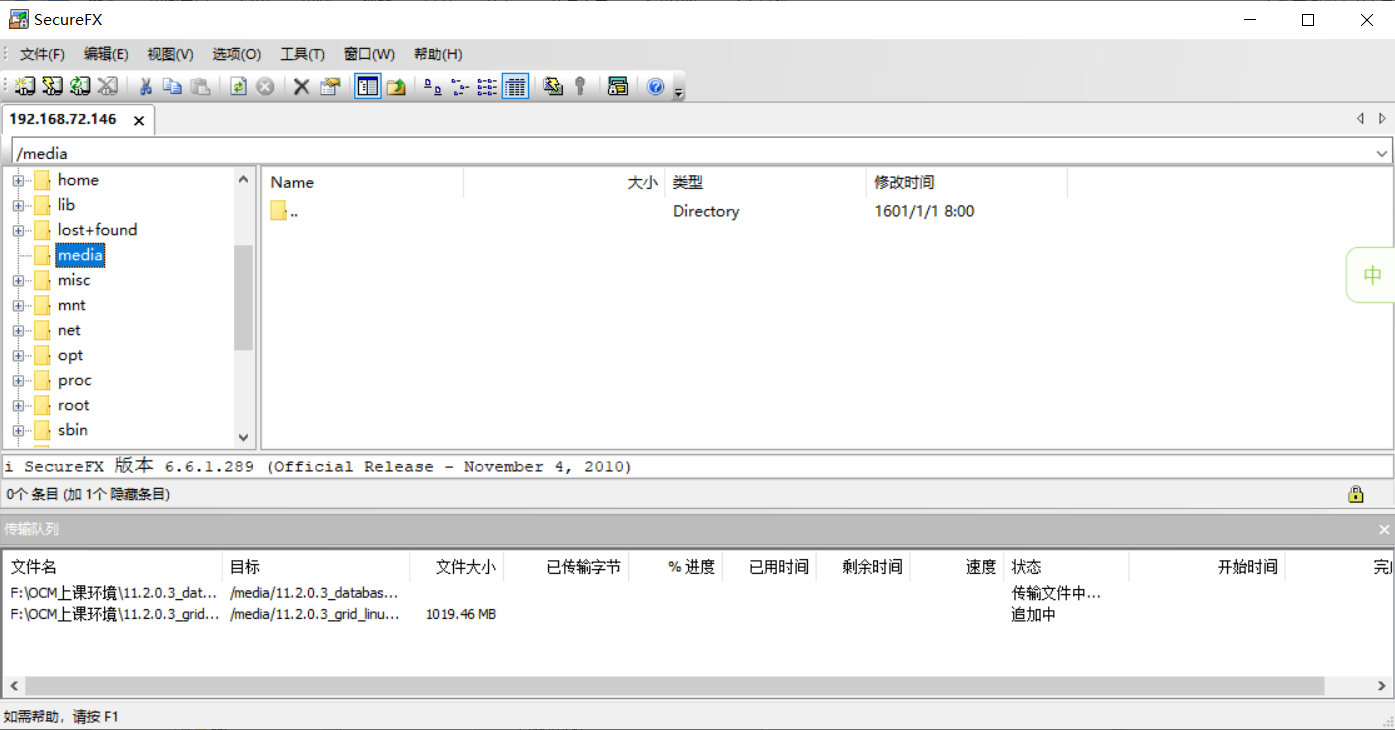
Node1:
创建GI安装包文件夹
mkdir -p /stage/grid
cd /media
挂载iso文件在刚创建的文件夹下
回mount 11.2.0.3_grid_linux.iso /stage/grid/ -t iso9660 -o loop
Su - oracle
Export DISPLAY=192.168.72.1:0.0 (该网关看自动获取的网关)
/stage/grid/grid/runInstaller打开GI安装图形化
第一步选skip software updates

第二步:
默认第一个下一步
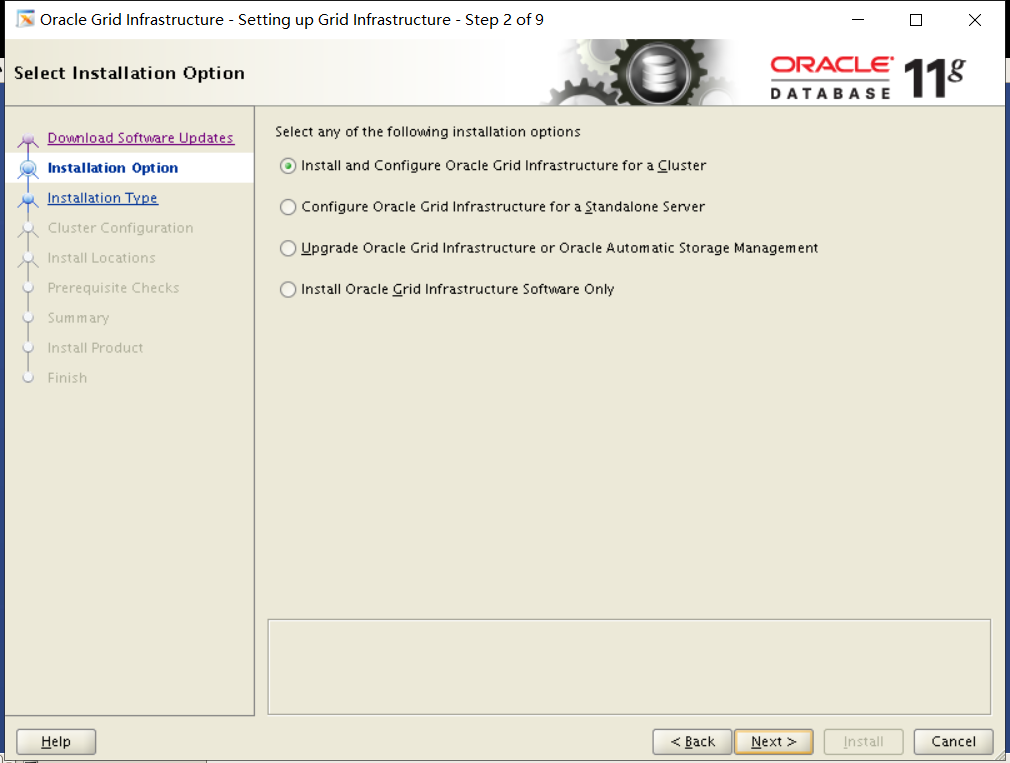
第三步:选择advanced installation
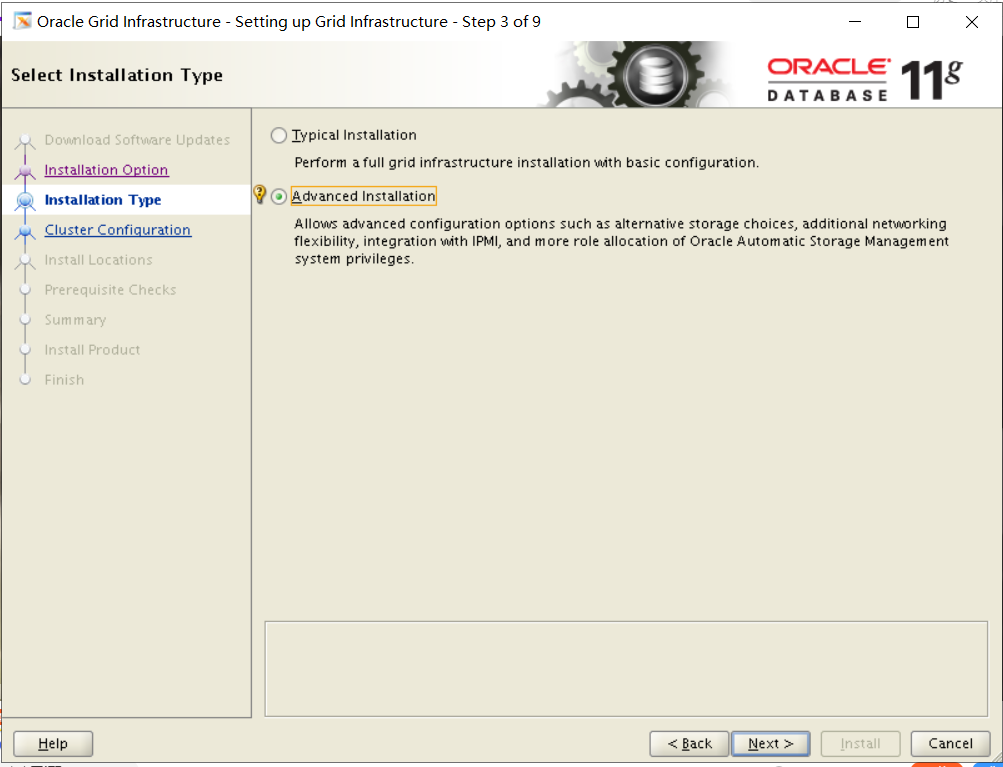
第四步:默认选English下一步
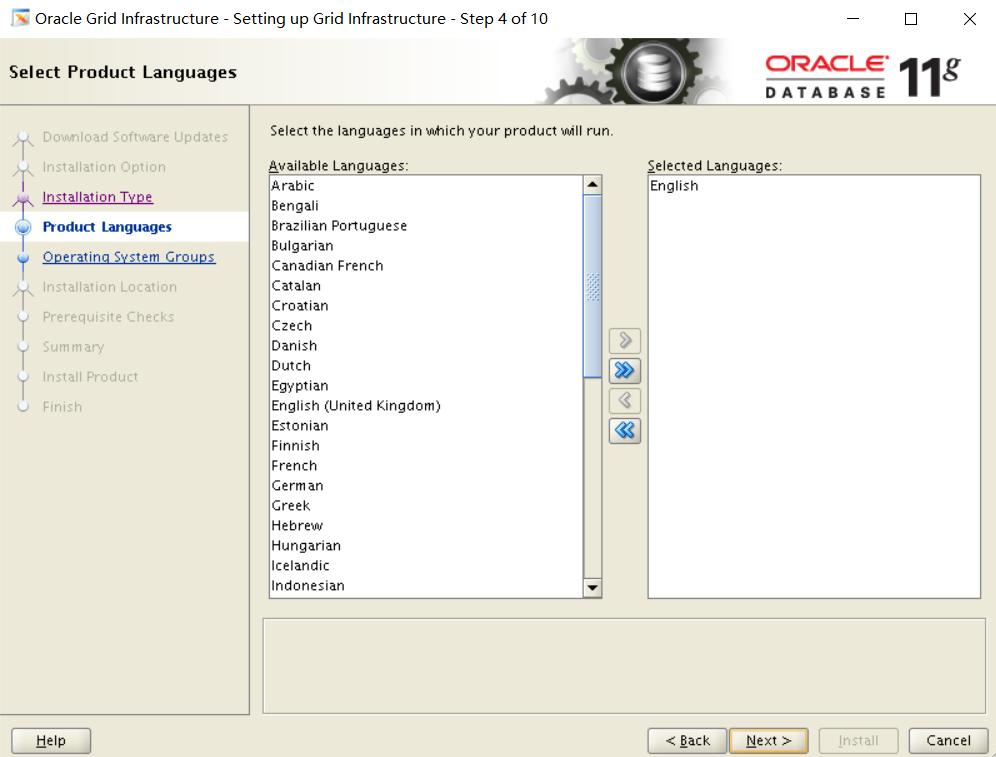
第五步:GNS默认勾选去掉 考试的时候是
Cluster Name:cluster01
SCAN Name:cluster01-scan.example.com
SCAN Port:1521
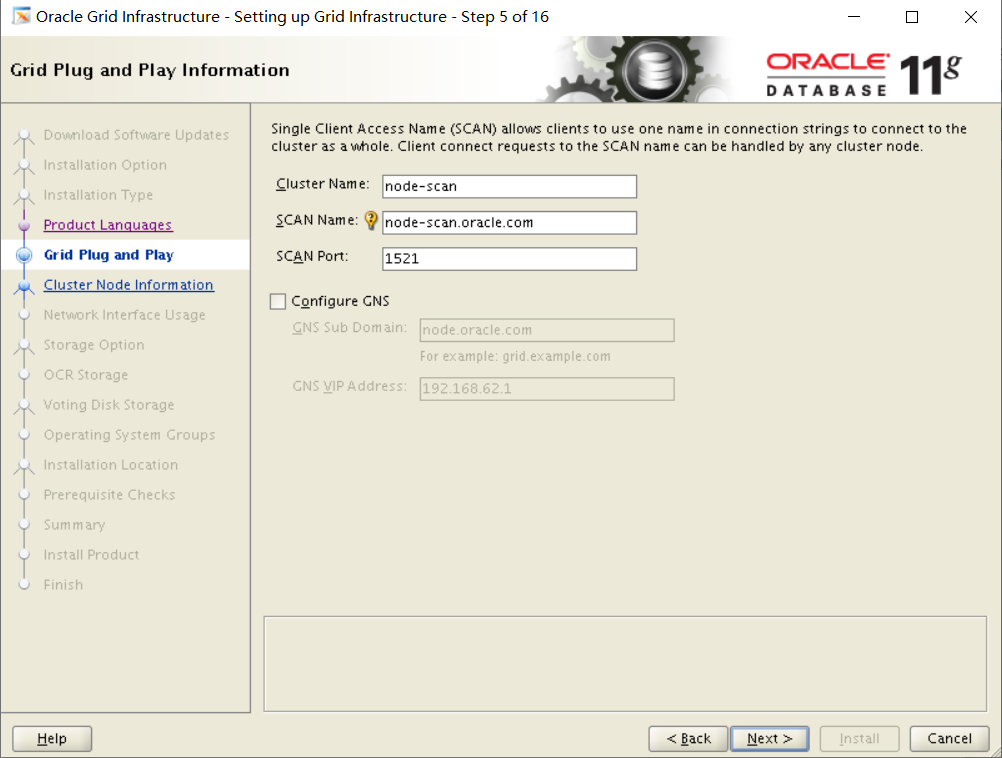
第六步:选择SSH connectivity 密码听说考试是oracle 不是很确定。
添加的节点
考试时是host02.example.com
Host02-vip.example.com

第七步:etho选public eth1选private eth2选private
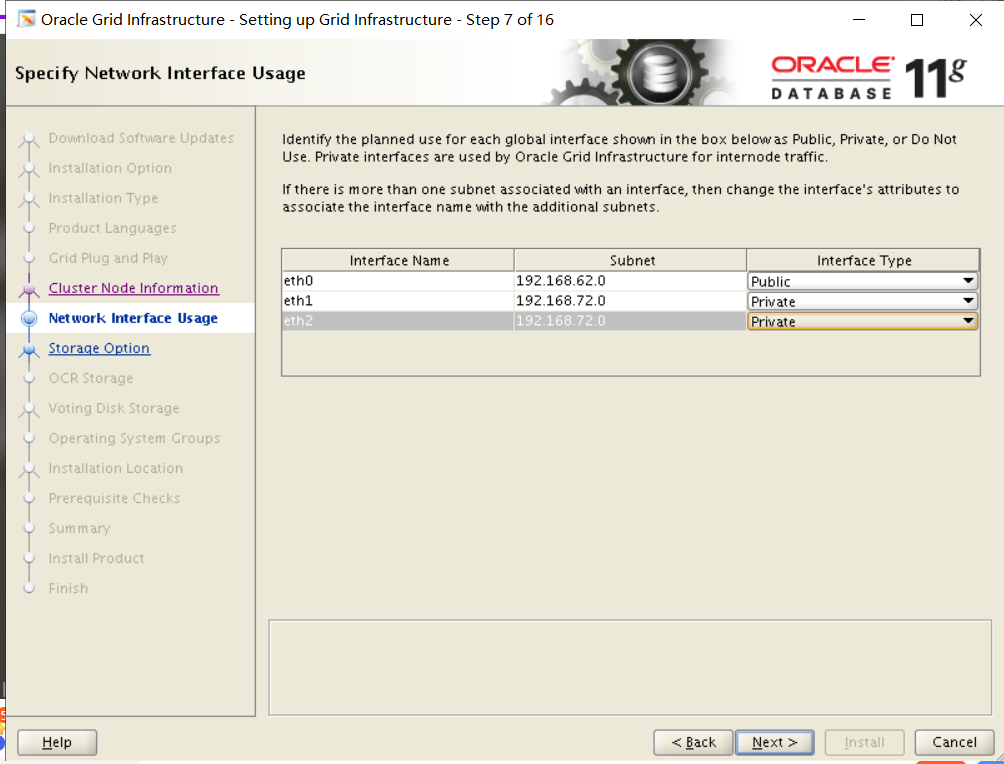
第八步:默认选oracle automatic storage management(oracle ASM)
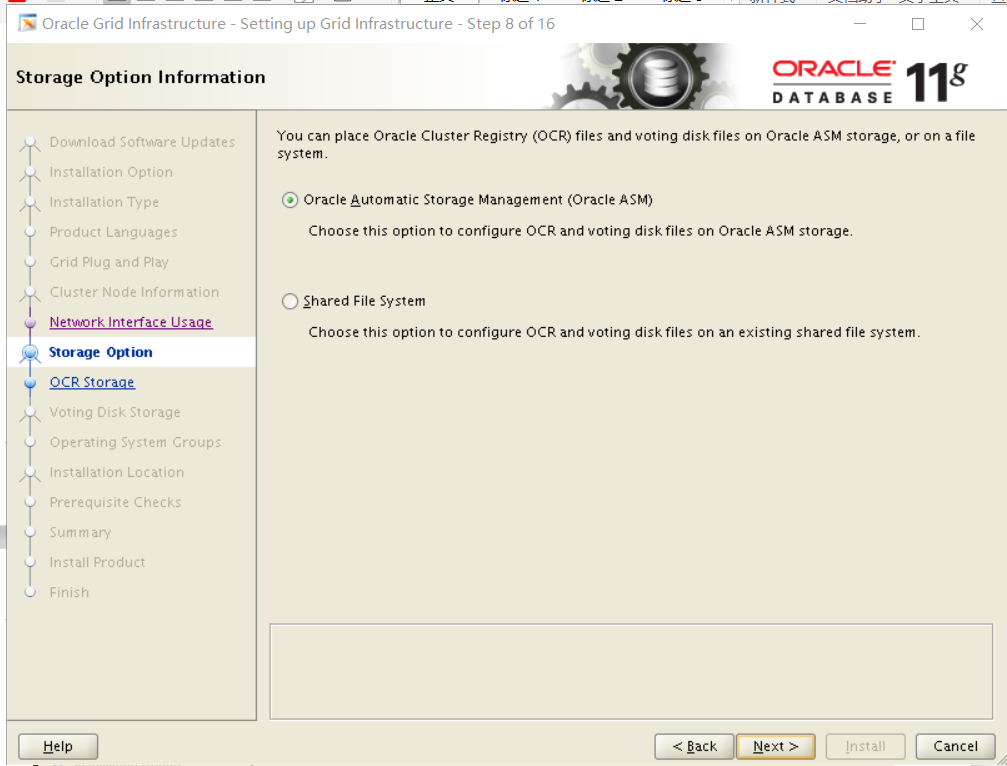
第九步:DISK GROUP NAME:DATA redundancy选normal 磁盘选择ASM1-ASM4
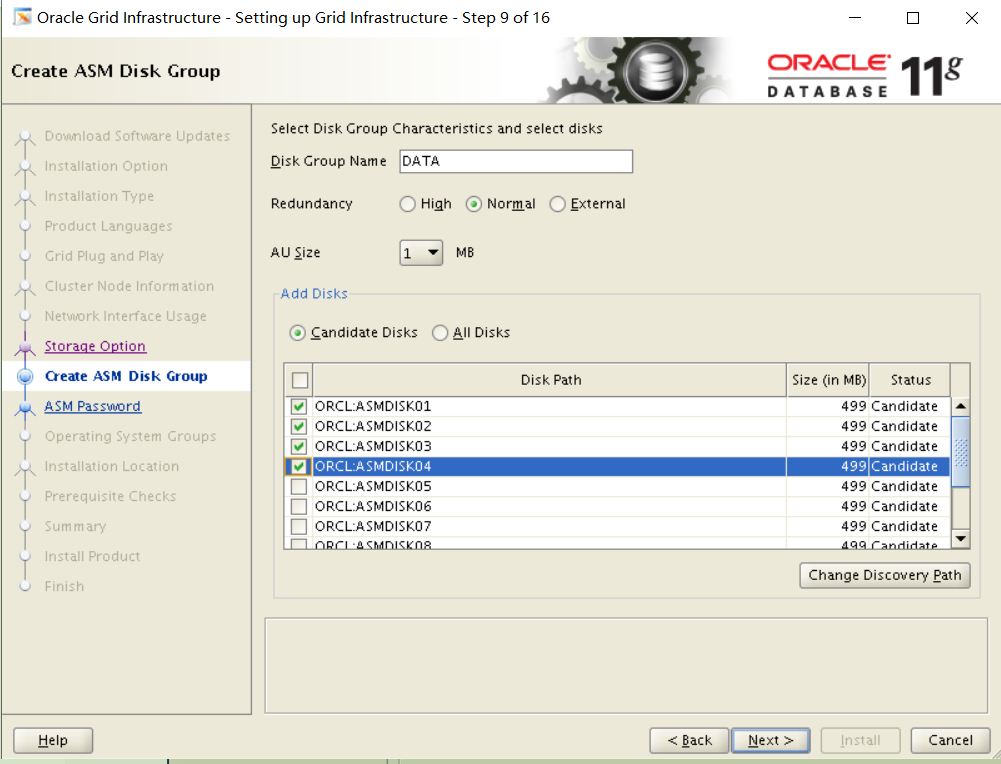
第十步:选择 use same passwords for these accounts 密码oracle 考试不确定密码
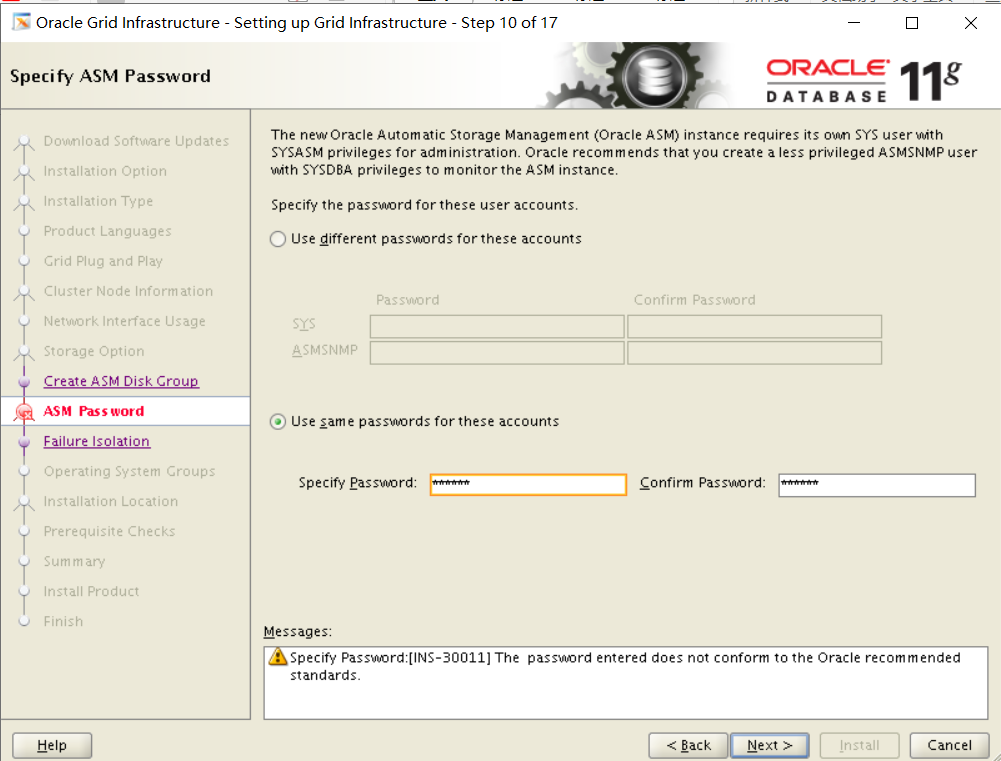
第十一步:Do not use...
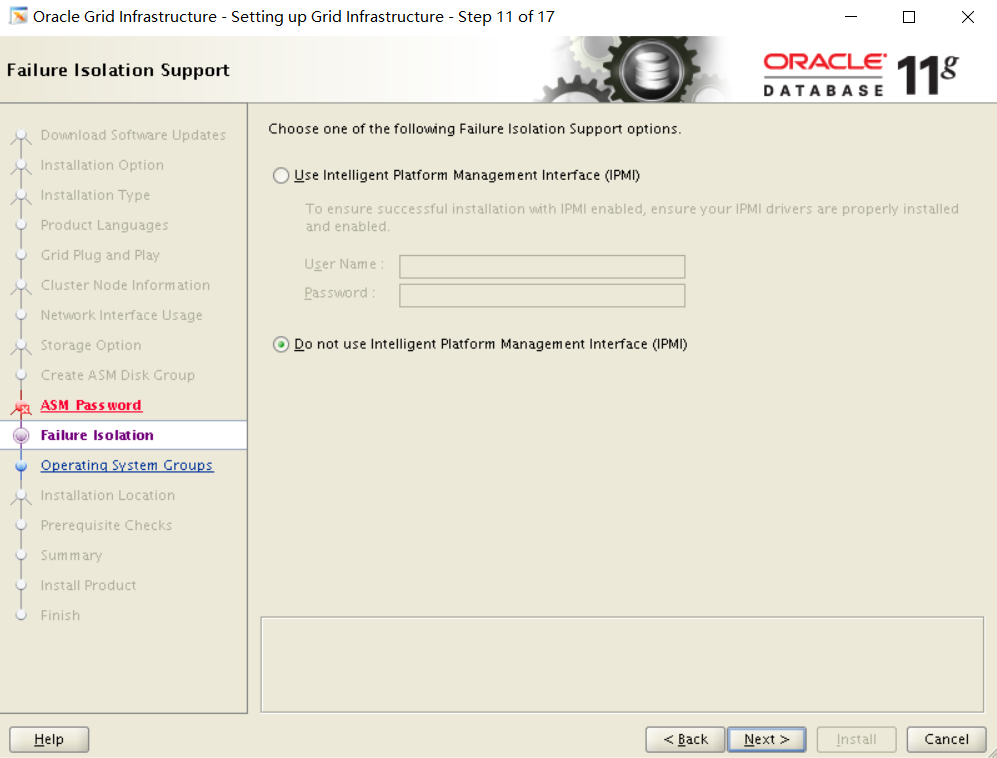
第十二步:
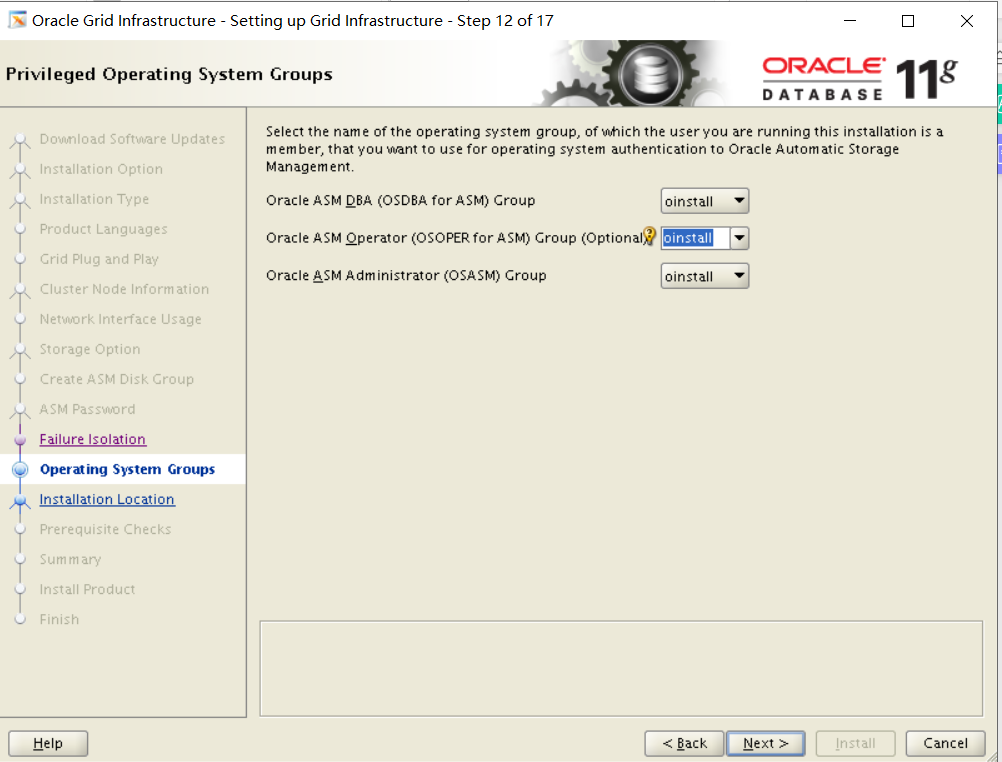
第十三步:Oracle Base改成/u01/app/grid 下面是/u01/app/11.2.0/grid
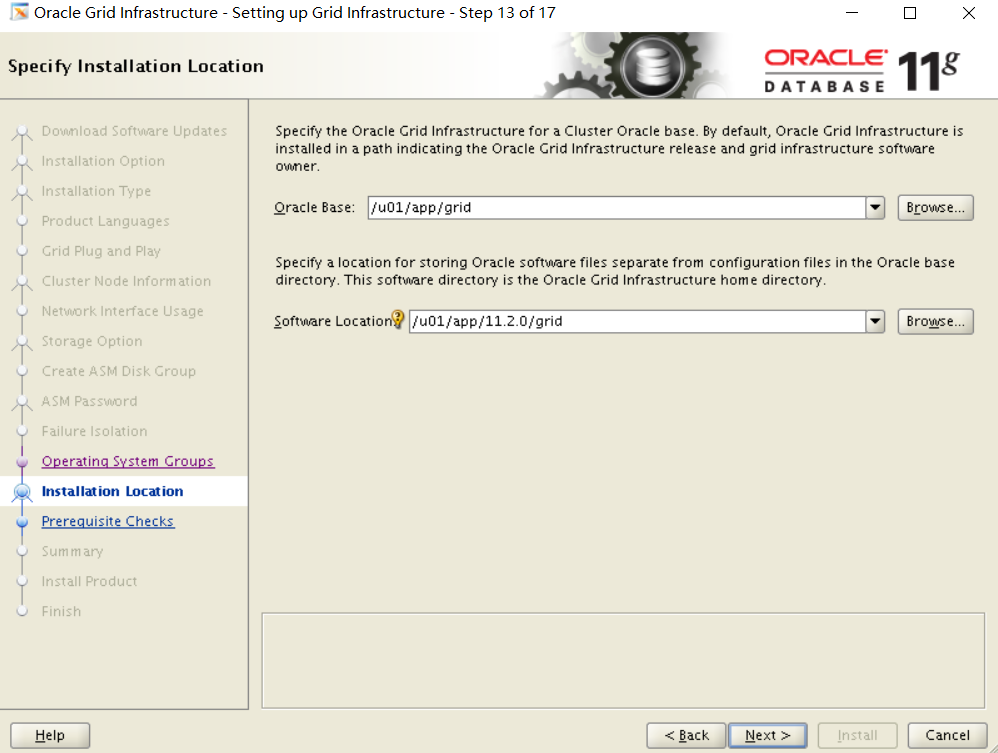
第十四步:
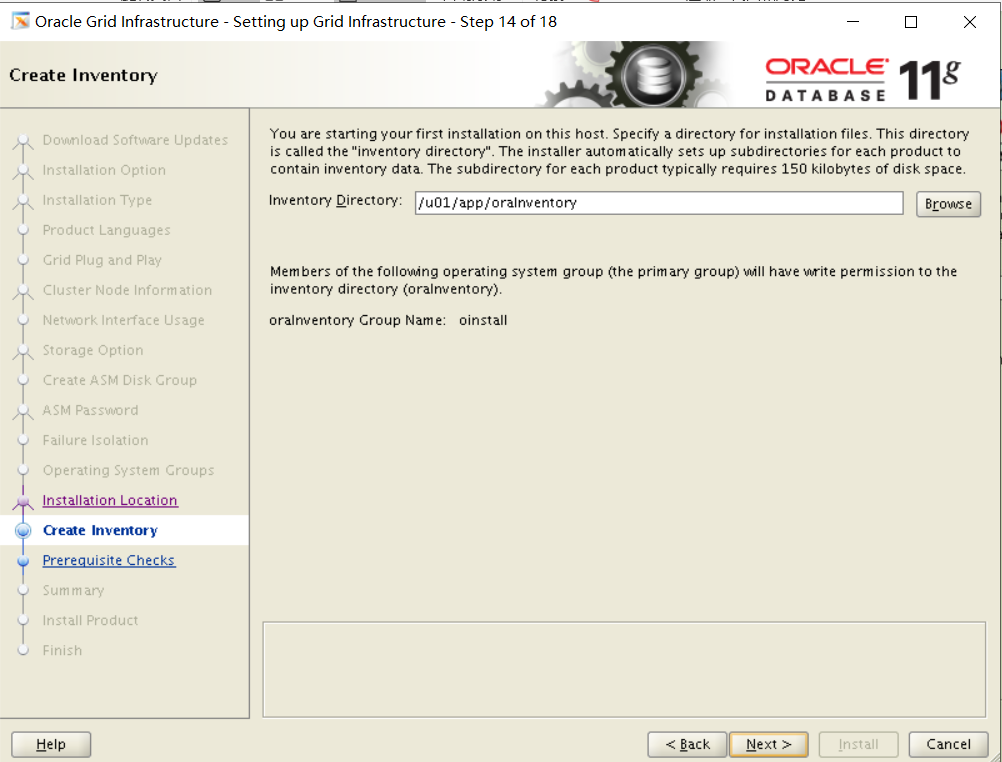
第十五步:检查
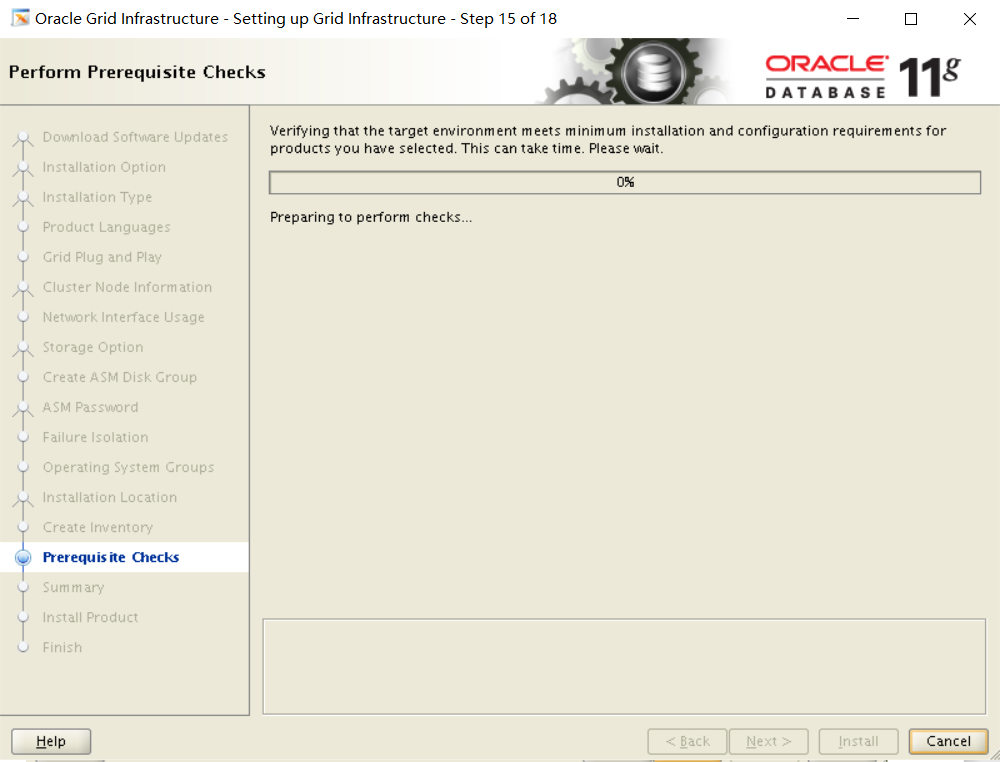
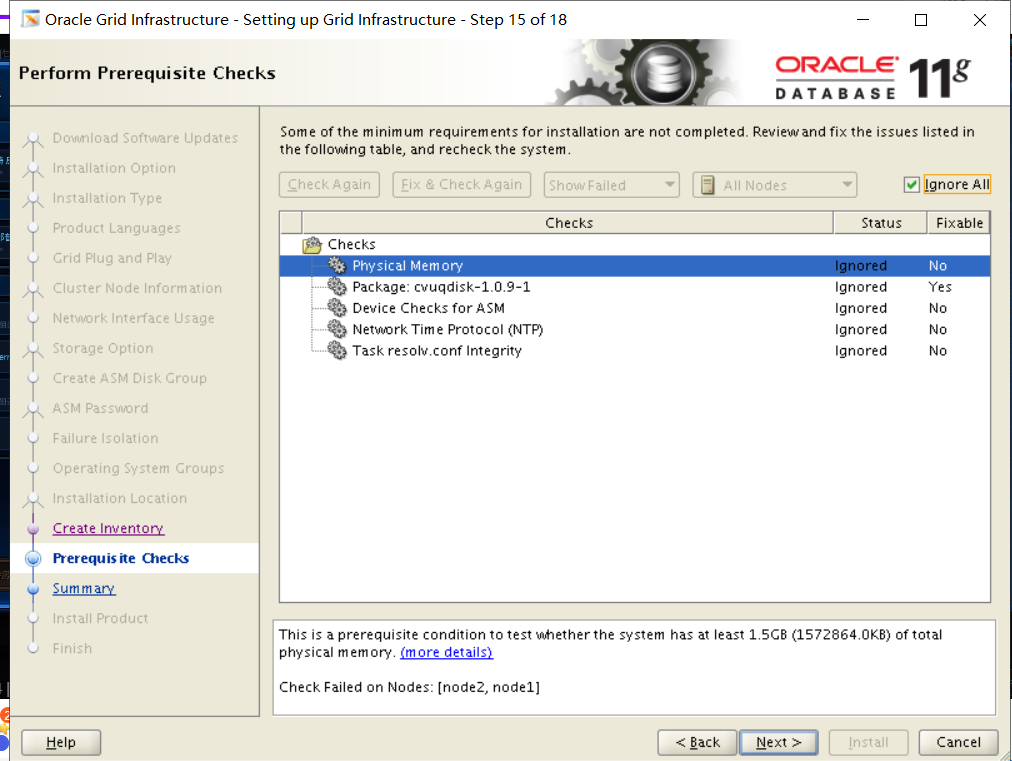
第十六步:安装过程node1与node跑2个脚本/u01/app/oraInventory/orainstRoot.sh /u01/app/11.2.0/grid/root.sh
一定要node1与node2先跑完第一个脚本才可以再执行root脚本 2个节点都要跑(不可以2个节点都执行脚本会报错 先node1执行完再node2)
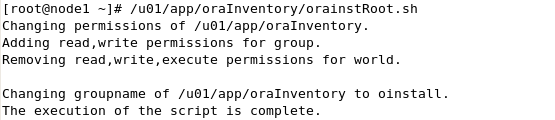
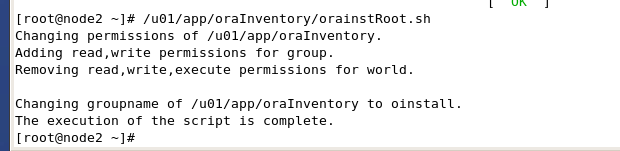
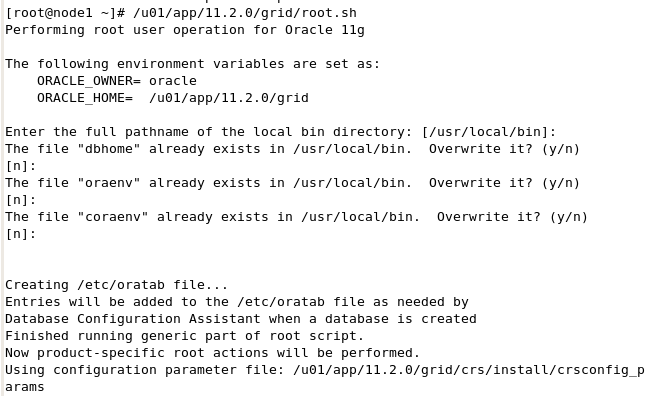
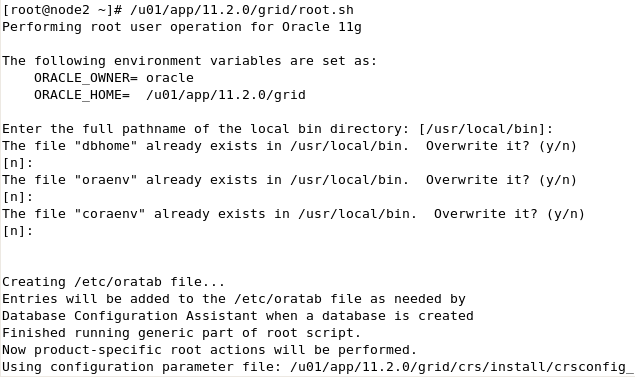
安装完成
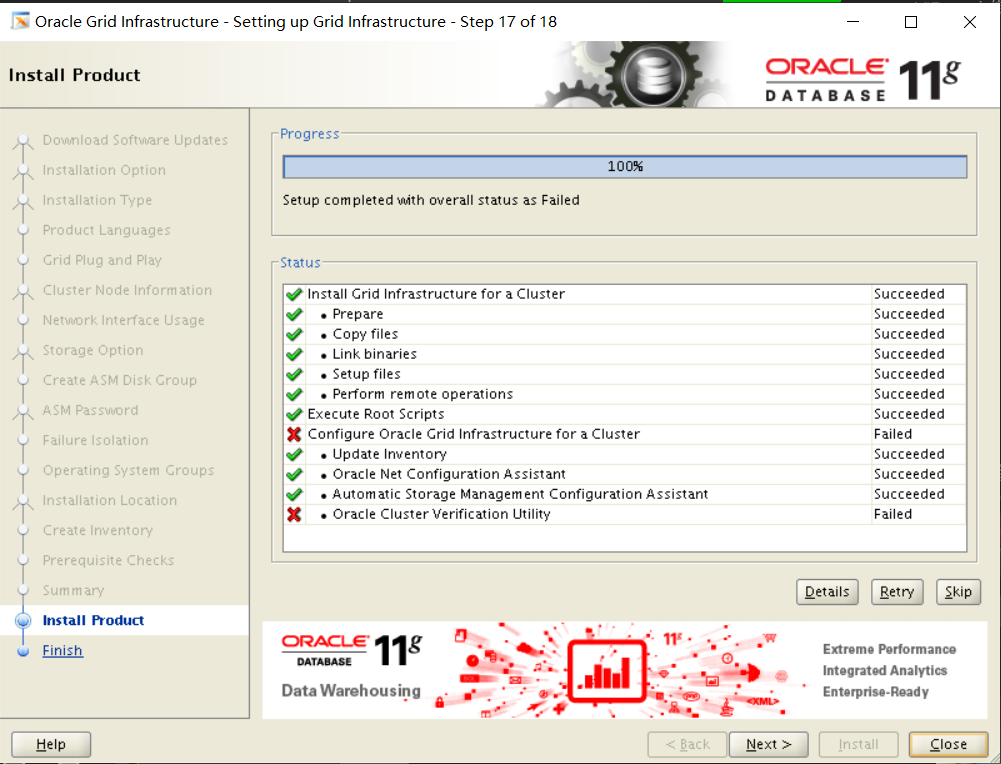
Node1:
/u01/app/11.2.0/grid/bin/asmca
进入asm图形化
新建一个FRA磁盘组ASM5-8

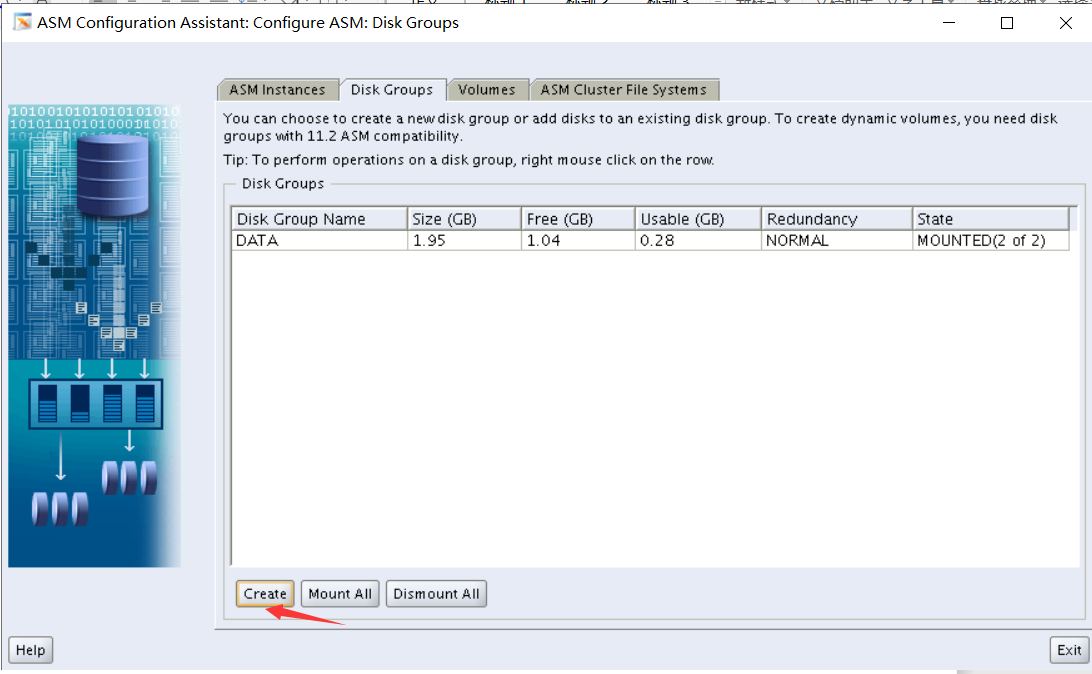
创建ACFS ASM9-12
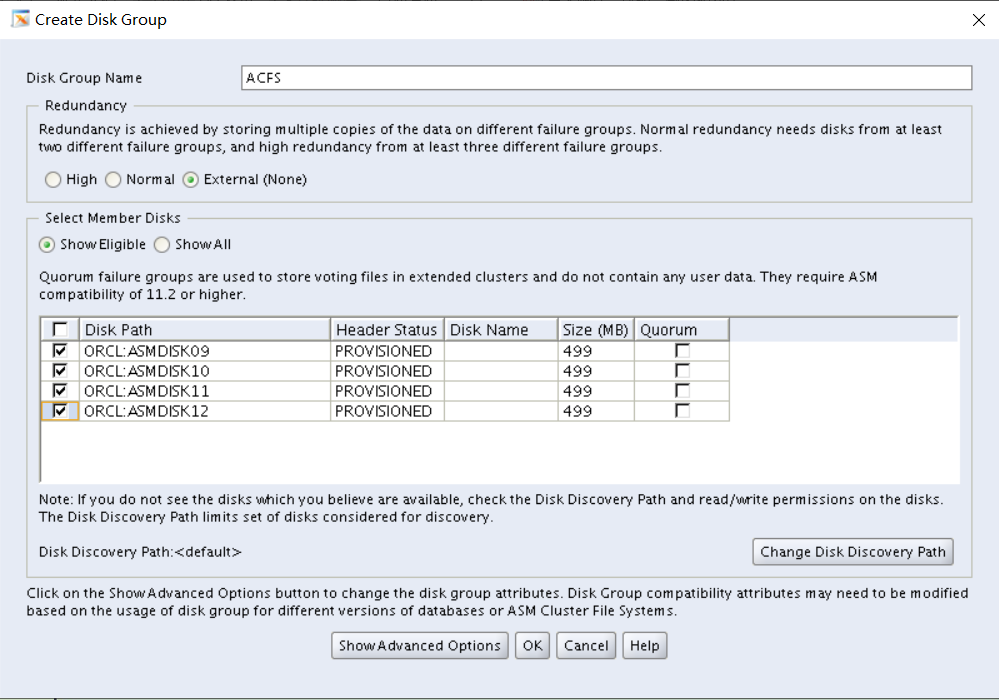
创建db_files卷
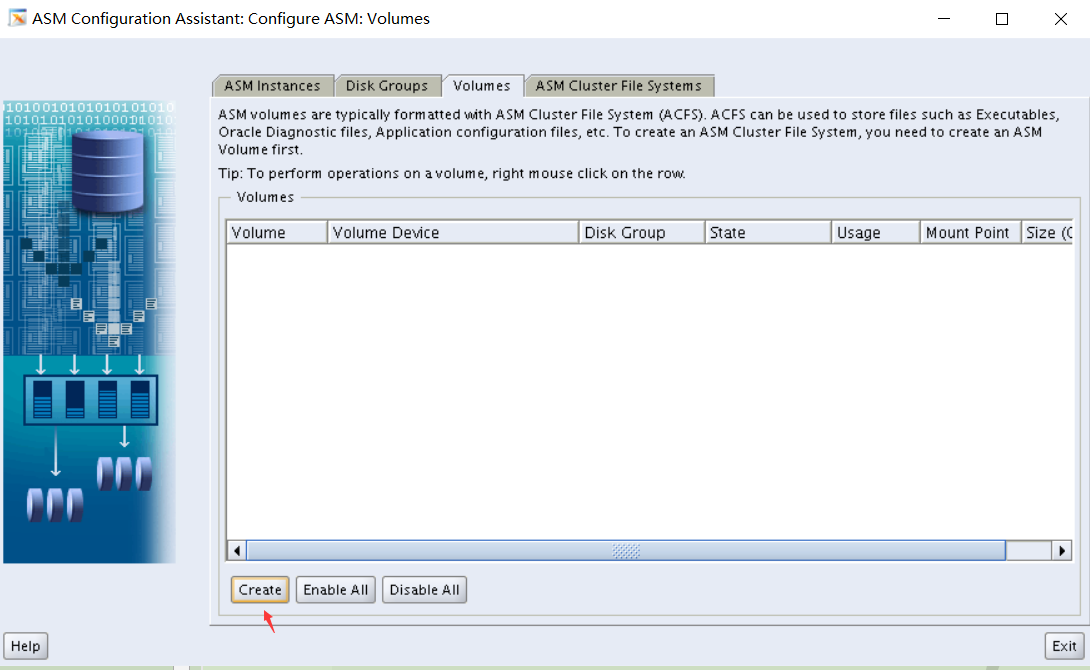
考试的时候应该是填2G 这边因为老师的环境磁盘分配的是500M所以只能填500M
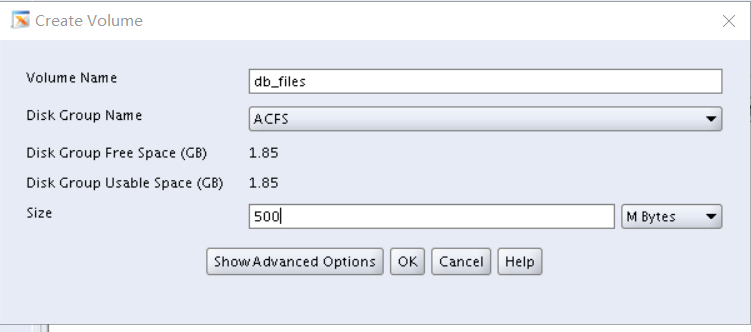
创建ACFS集群文件系统
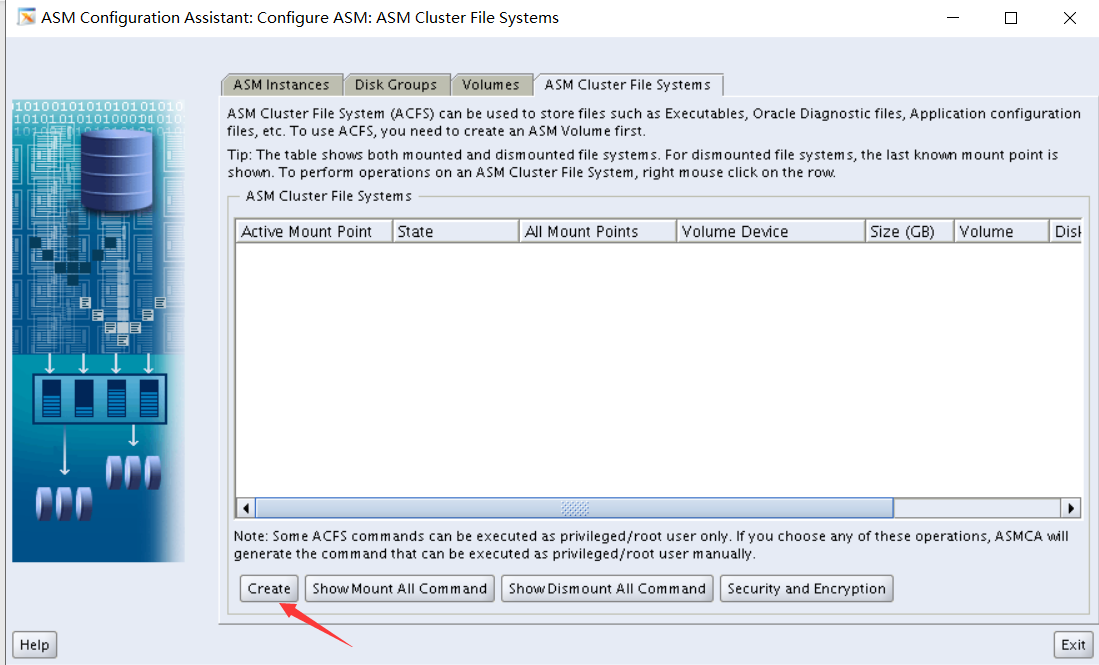
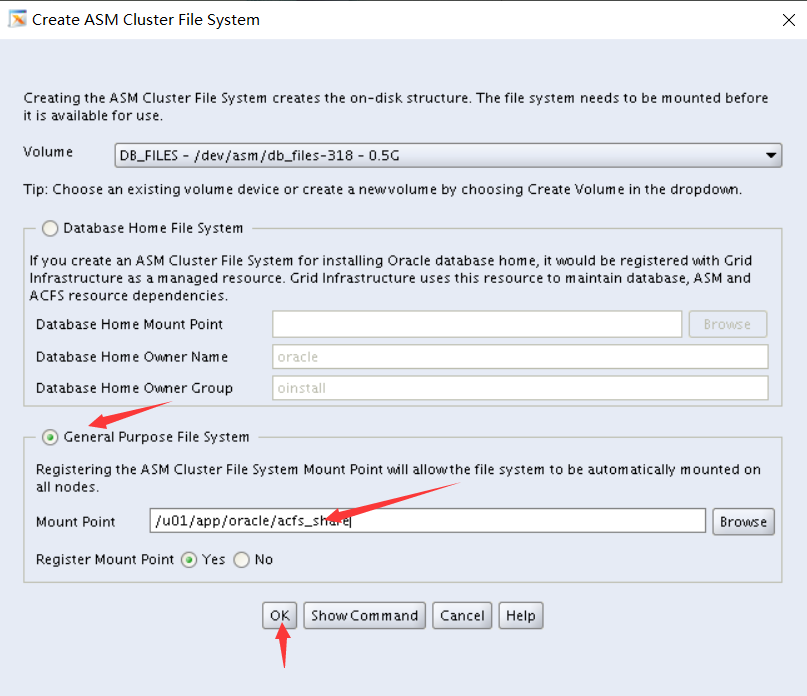
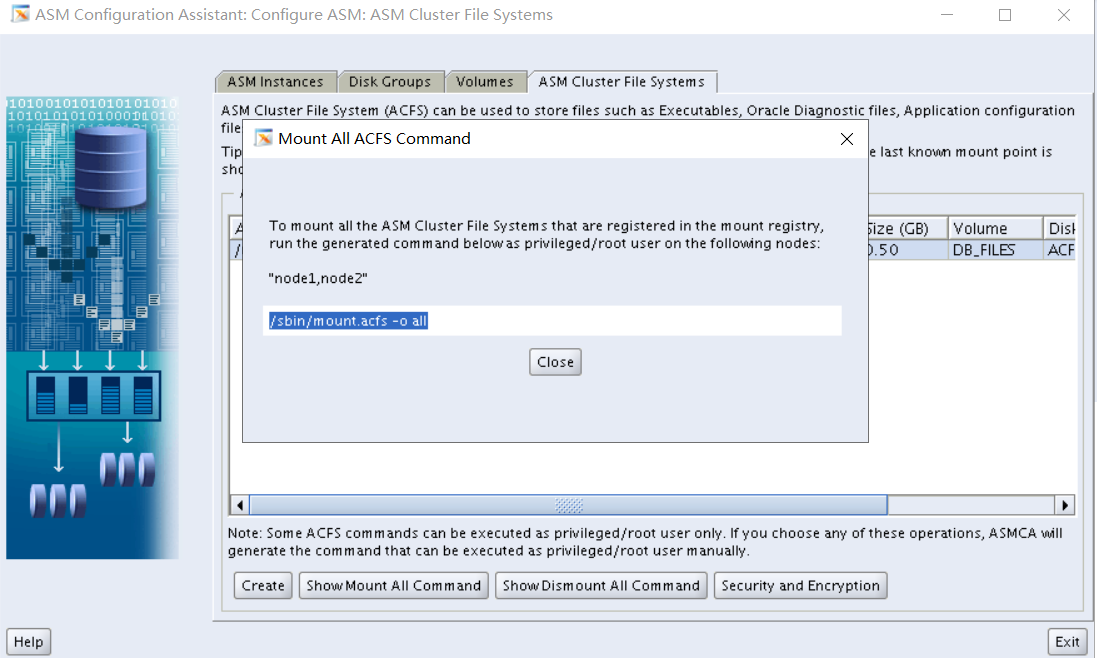
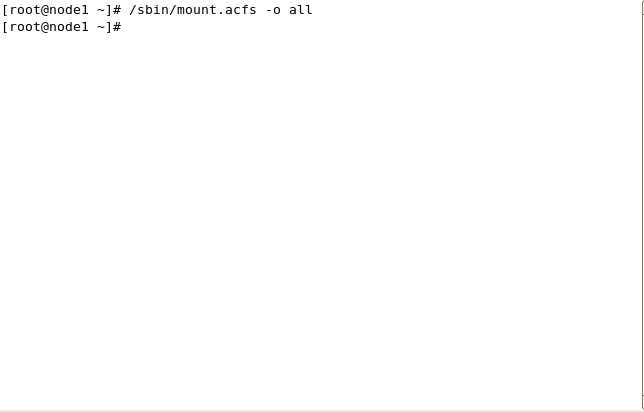
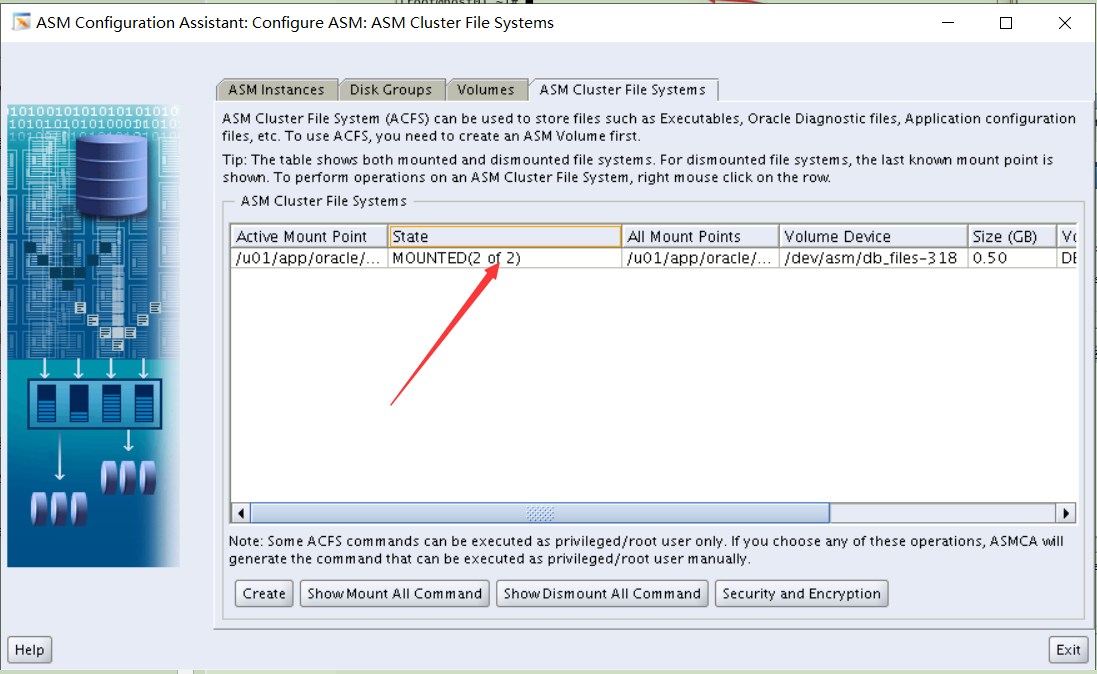
Mounted(2 of 2表示成功)
由于老师的环境没有db_images.zip 所以只能自己在/home/oracle下自己创建 考试中应该是有的
Su - oracle
zip -k db_images.zip *

df -h
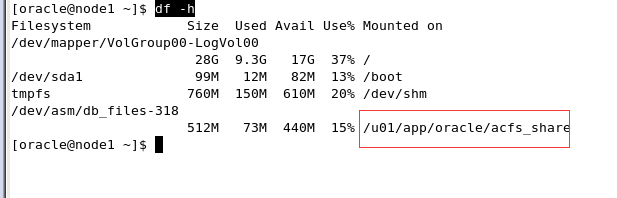
将db_images.zip复制到/u01/app/oracle/acfs_share里面
cp db_images.zip /u01/app/oracle/acfs_share
添加OCR镜像
Su - root
/u01/app/11.2.0/grid/bin/ocrconfig -add +FRA
/u01/app/11.2.0/grid/bin/ocrcheck -config

给 ACFS 做 snapshot,名称 ACFS_SNAP,放在 ACFS 文件系统上
/sbin/acfsutil snap create ACFS_SNAP01 /u01/app/oracle/acfs_share
做 两个节点 的 OLR 的 dump
Su - root
/u01/app/11.2.0/grid/bin/ocrdump -local /home/oracle/MYOLR
两个节点关闭 GI 的自动启动功能
/u01/app/11.2.0/grid/bin/crsctl disable has
Part 9
Description - 注意这一部分不是真题
In this session, you are going to deploy RAC database.
- Installation of RAC database software.
- Create a database named “orcl” with Administrator-managed option. 实际考试是创建policy管理的数据库,同时指定server pool
- Enable archivelog mode for the orcl database. 实际考试的时候,可以在dbca建库的时候直接启用归档模式。2,3,4,5题其实是在dbca建库的时候一起做掉的。
srvctl stop database -d orcl
srvctl start instance -d orcl -i orcl1 -o mount
sqlplus / as sysdba
alter database archivelog;
alter database open;
srvctl start database -d orcl
- Create a server pool named “ocmsrvpool”, and include both RAC nodes into the server pool.
srvctl add serverpool -g ocm_serverpool -l 0 -u 2
srvctl modify serverpool -g ocm_serverpool -n "node1,node2"
- Modify the orcl database to be policy-managed within the ocmsrvpool server pool.
把数据库改为policy管理:
srvctl modify database -d orcl -g ocm_serverpool
srvctl config database -d orcl
或者采用把数据库从OCR里删除再添加进去的方式
srvctl stop database -d orcl
srvctl remove database -d orcl
srvctl add database -d orcl -o /u01/app/oracle/product/11.2.0/dbhome_1 -p +DATA/orcl/spfileorcl.ora -p ocm_serverpool
- Create a service named srv1 and run srv1 on both nodes when start it.
srvctl add service -d orcl -s srv1 -g ocm_serverpool -c UNIFORM
srvctl start service -d orcl -s srv1
srvctl status service -d orcl -s srv1
- Create a service named srv2 and run srv2 on one node when start it.
srvctl add service -d orcl -s srv2 -g ocm_serverpool -c SINGLETON
srvctl start service -d orcl -s srv2
srvctl status service -d orcl -s srv2
- Configure the memory used by Oracle instance is 800MB.
alter system set max_memory_target=800M scope=spfile;
重启实例。
- In the system schema create a table t1(id number, c1 varchar2(10)). The id column is populated from a sequence, how to create index on id to avoid buffer contention and use less space? And create the sequence with the name of SEQ_T1 with the min value 10 and max value 100000 and cache 2000 without performance impact when it’s being used in the 2 instances.
sqlplus system/oracle
create table system.t1(id number, c1 varchar2(10));
create index idx_id on system.t1(id) reverse compress;
create sequence SEQ_T1 start with 10 maxvalue 100000 cache 2000 noorder;
- Keep the sequence SEQ_T1 into the shared pool.
以sys用户登录:connect / as sysdba
exec dbms_shared_pool.keep('system.SEQ_T1','Q');
没有按照老师的步骤来
第一步先配置2个节点的环境变量
Node1:
#export PATH
#export ORACLE_BASE=/u01/app/grid
#export ORACLE_HOME=/u01/app/11.2.0/grid
#export PATH=$ORACLE_HOME/bin:$PATH
#export ORACLE_SID=+ASM1
export ORACLE_BASE=/u01/app/oracle
export ORACLE_HOME=$ORACLE_BASE/product/11.2.0/dbhome_1
export PATH=$ORACLE_HOME/bin:$PATH
export ORACLE_SID=RACDB1
source .bash_profile
Node2:
#export PATH
#export ORACLE_BASE=/u01/app/grid
#export ORACLE_HOME=/u01/app/11.2.0/grid
#export PATH=$ORACLE_HOME/bin:$PATH
#export ORACLE_SID=+ASM1
export ORACLE_BASE=/u01/app/oracle
export ORACLE_HOME=$ORACLE_BASE/product/11.2.0/dbhome_1
export PATH=$ORACLE_HOME/bin:$PATH
export ORACLE_SID=RACDB2
source .bash_profile
Node1和node2
由于权限的问题,需要在每个节点手工创建 oracle 目录并授权(两个节点都要操作)
chown oracle:oinstall /u01/app/oracle
Su - oracle
mkdir -p $ORACLE_HOME
Node1:
挂载iso文件在刚创建的文件夹下
mkdir -p /stage/db
回mount 11.2.0.3_database_linux.iso /stage/db/ -t iso9660 -o loop
打开OUI安装界面
Su - oracle
/stage/db/database/runInstaller
第一步:
I wish to...勾去掉

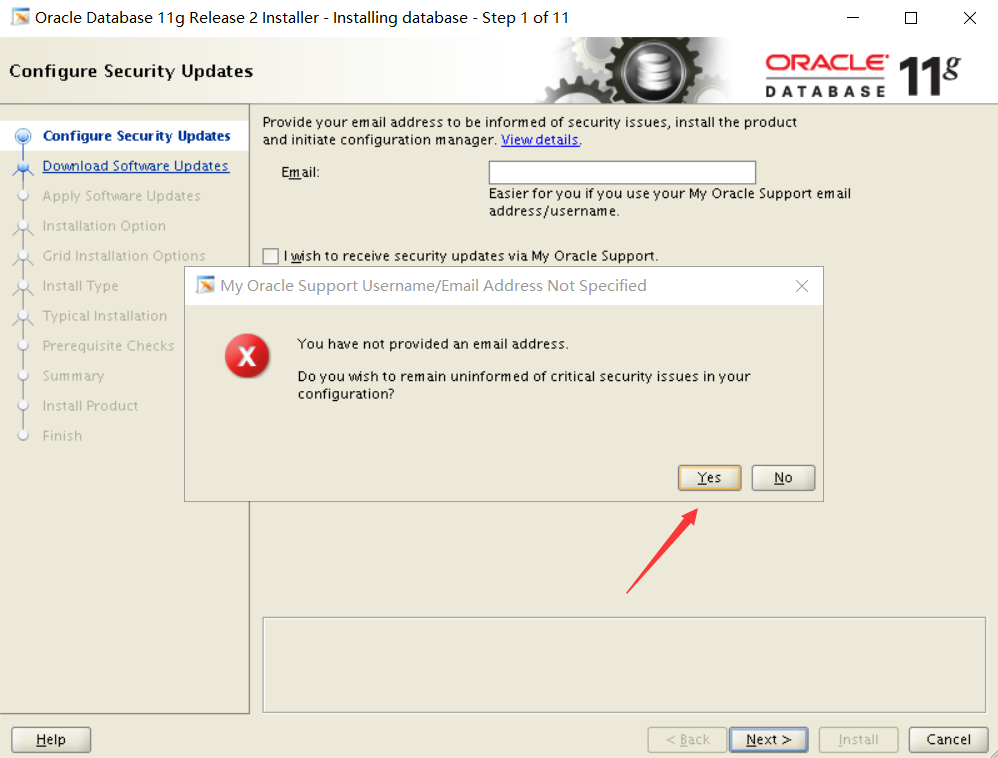
第二步:
第三步:
第四步:
点击“SSH Connectivity” 进行 SSH 互信配置,填写 oracle 密码为oracle 考试不确定
第五步:
第六步:数据库版本选择企业版“Enterprise Edition”,点击“Next”

第七步:考试的时候路径会发生变化一定进行修改
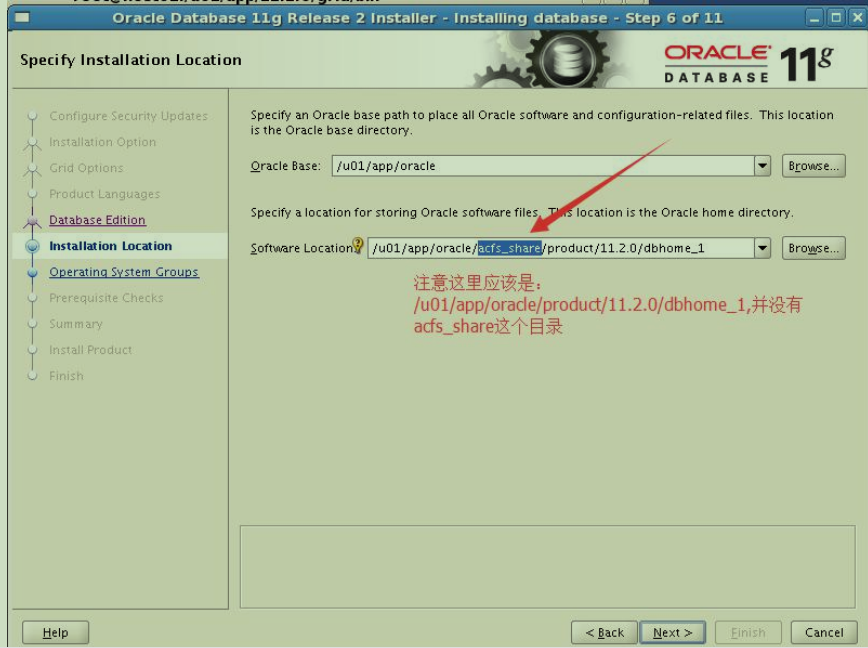
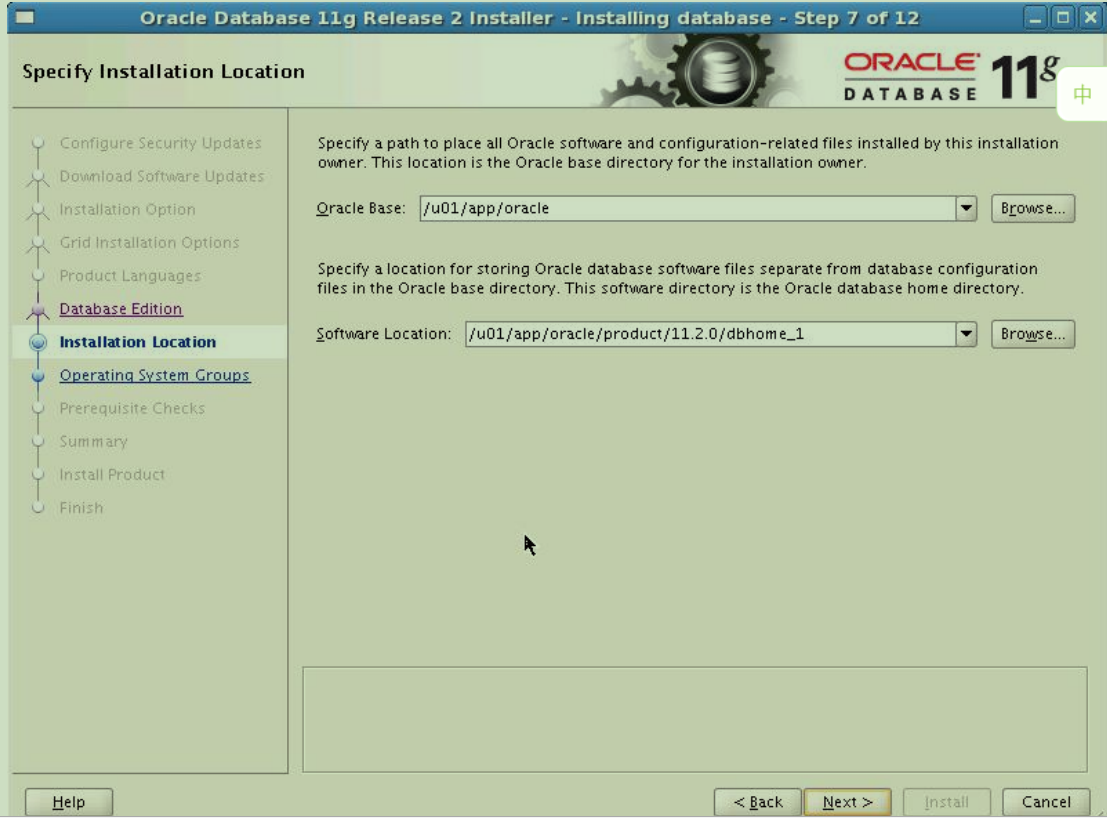
第八步:配置操作系统用户组权限,选择“dba”和“oper”
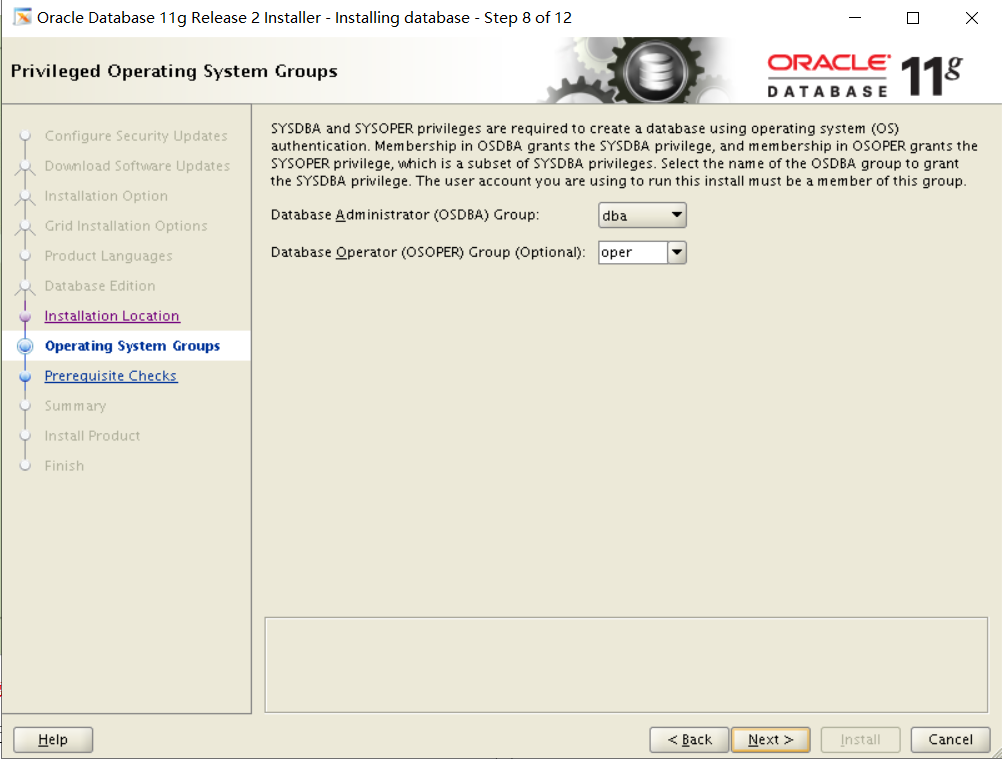
第九步:预安装检查
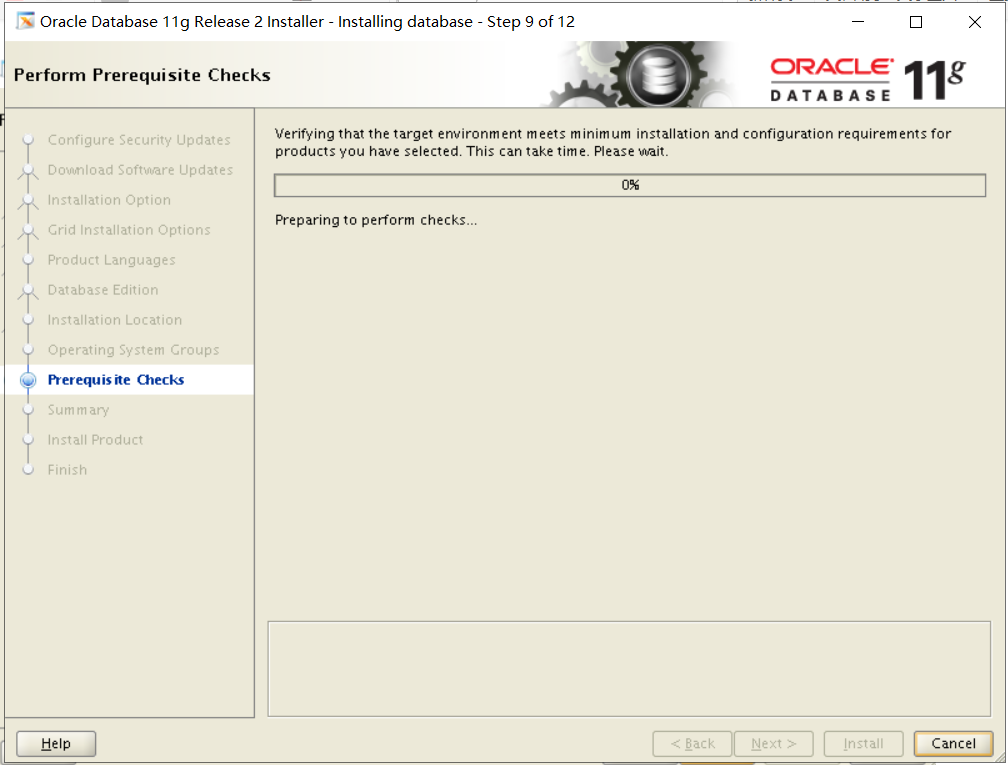

第十步:开始安装
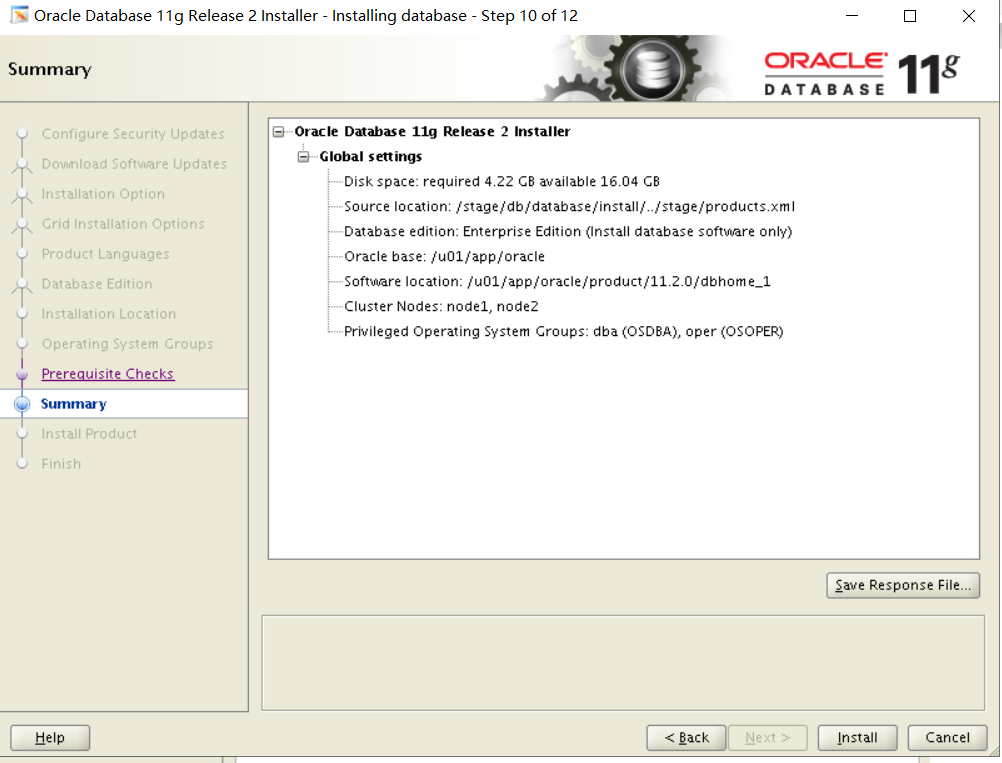

第十一步:运行root脚本(node1执行完再执行node2)
/u01/app/oracle/product/11.2.0/dbhome_1/root.sh
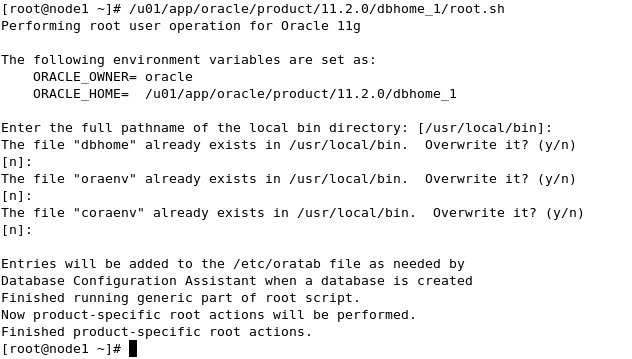
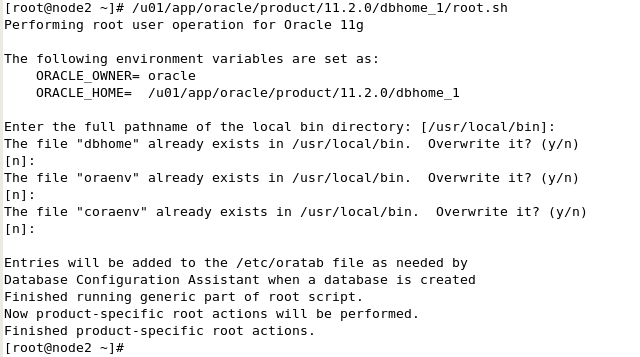
安装完成
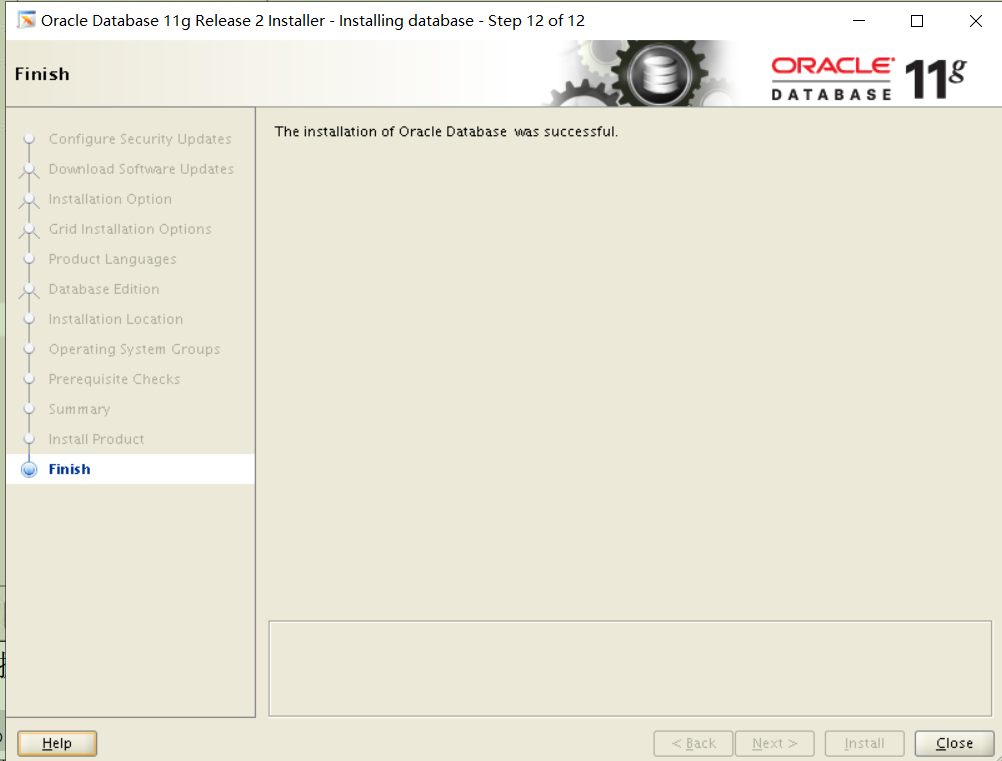
Node1:
Su - oracle
Cd /stage/db
dbca
第一步:
第二步:
第三步:

第四步:取消 Enterprise Manager 配置点击“Next”

第五步:选择统一的用户名密码配置,密码填写oracle 考试不确定
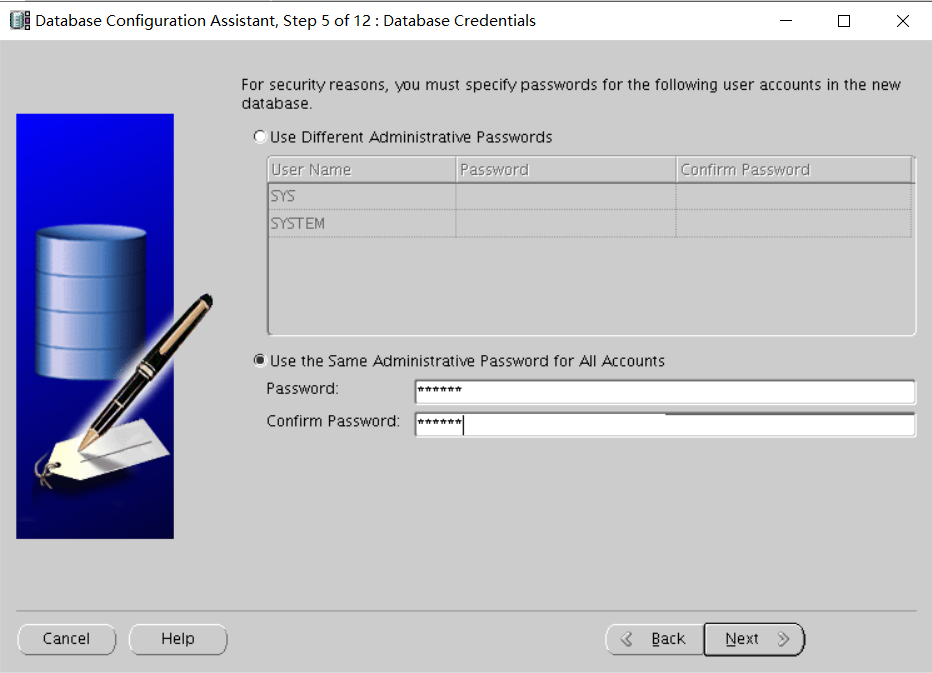
第六步:

第七步:
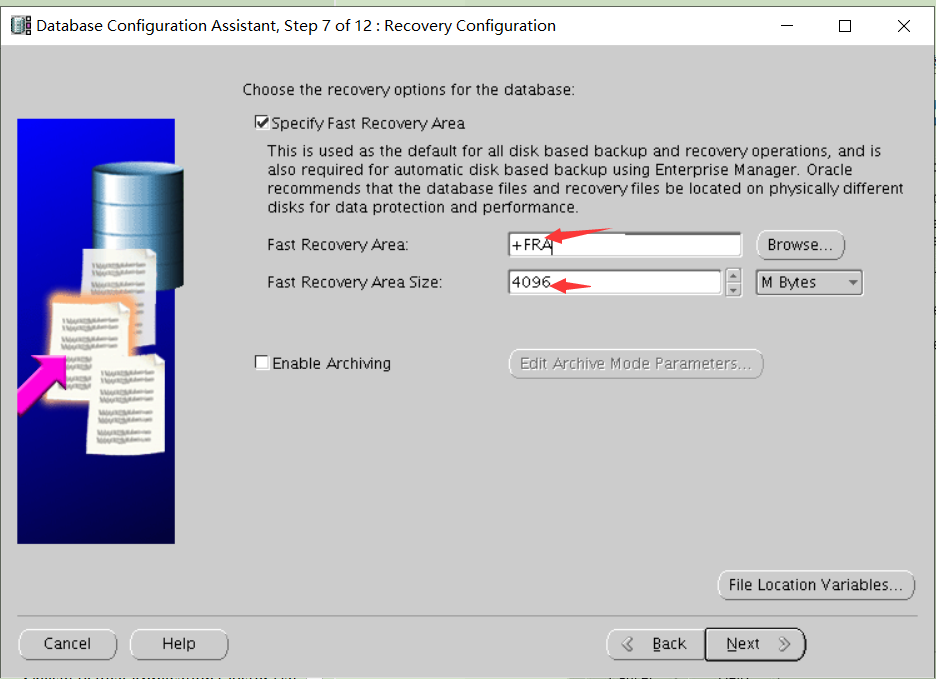
第八步:
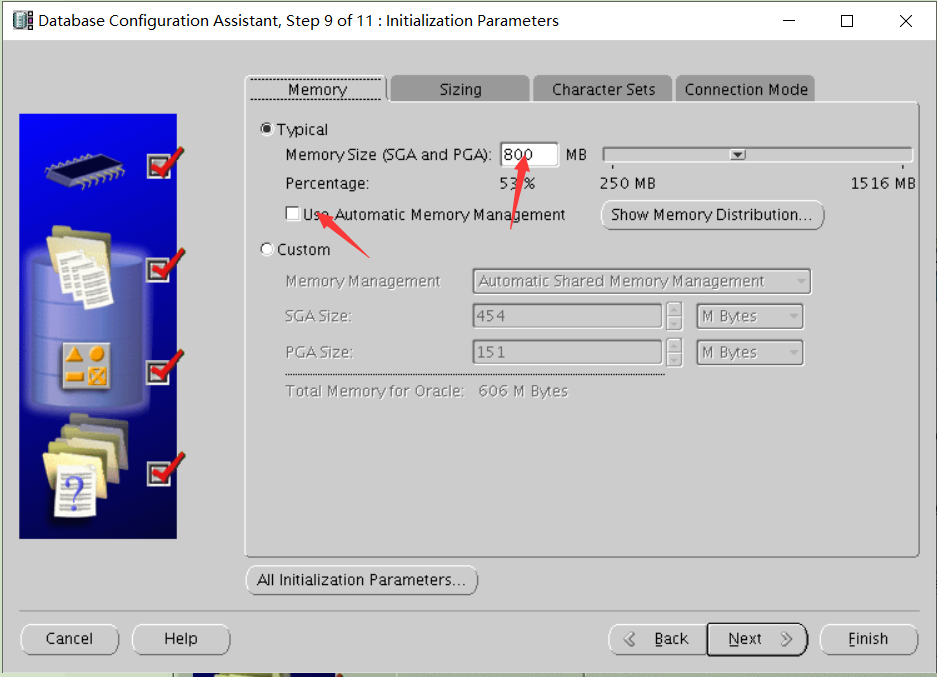
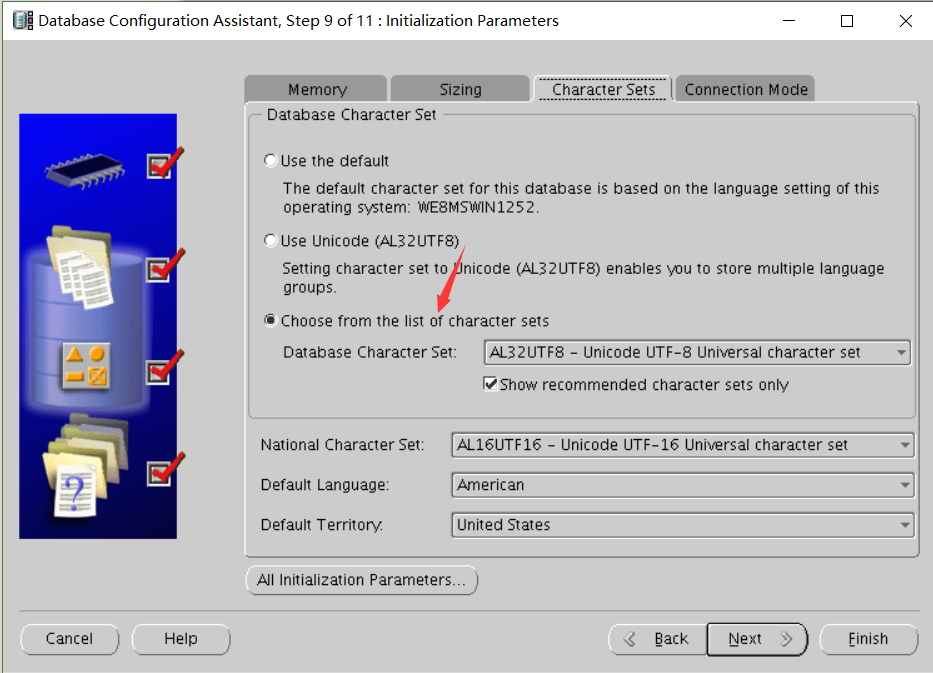
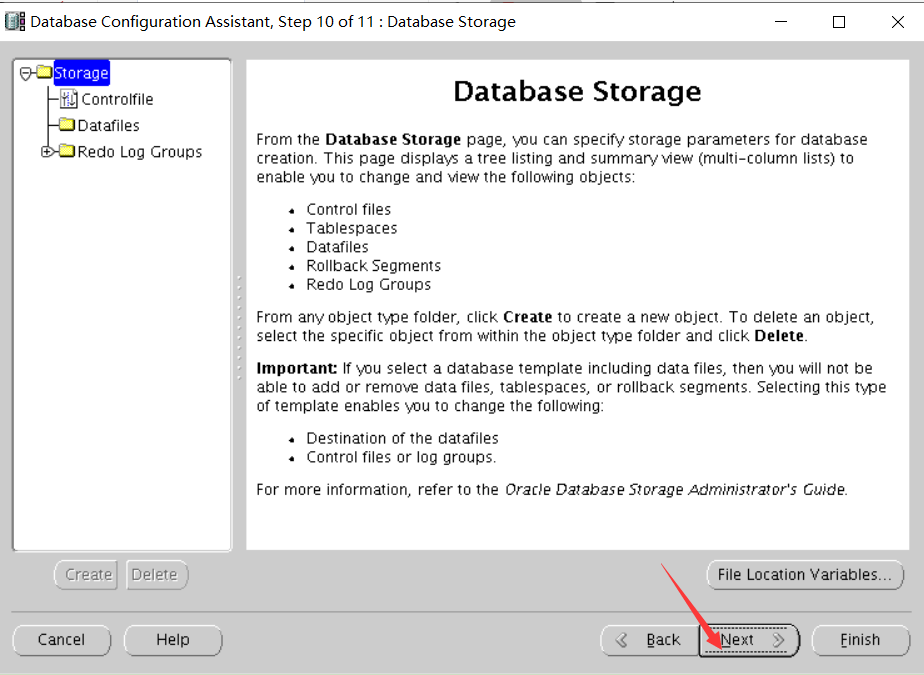
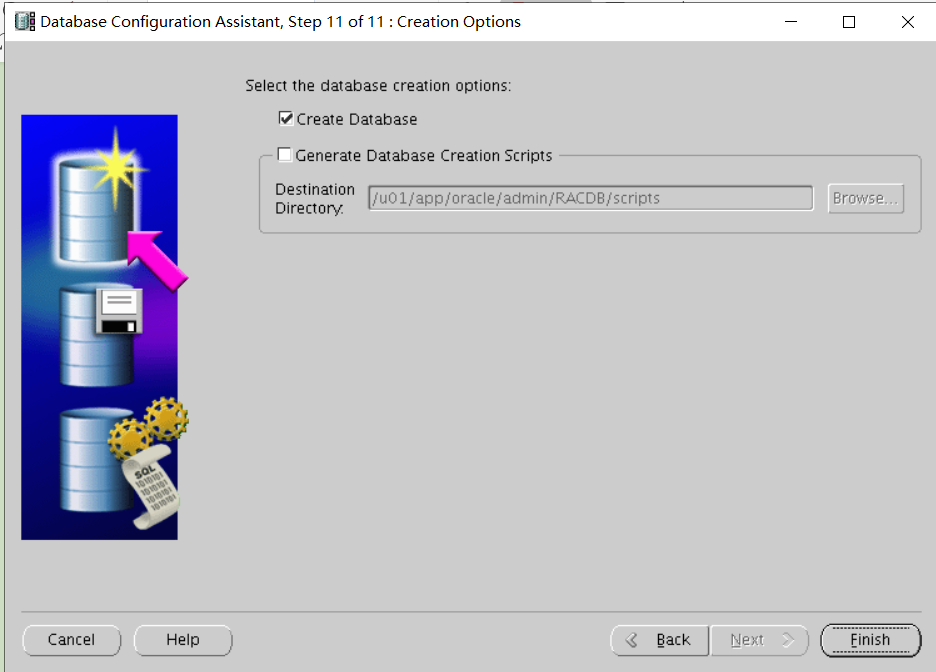
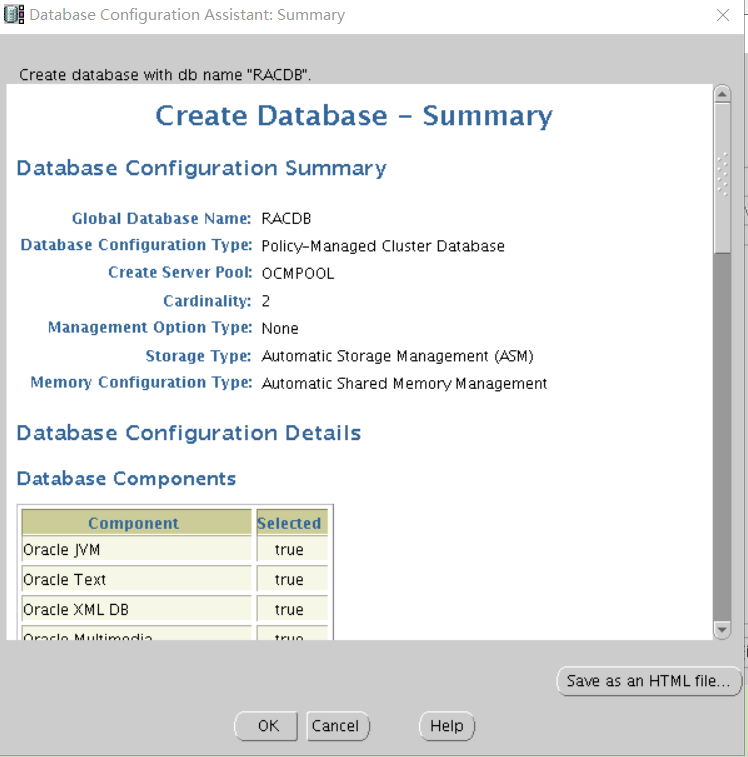
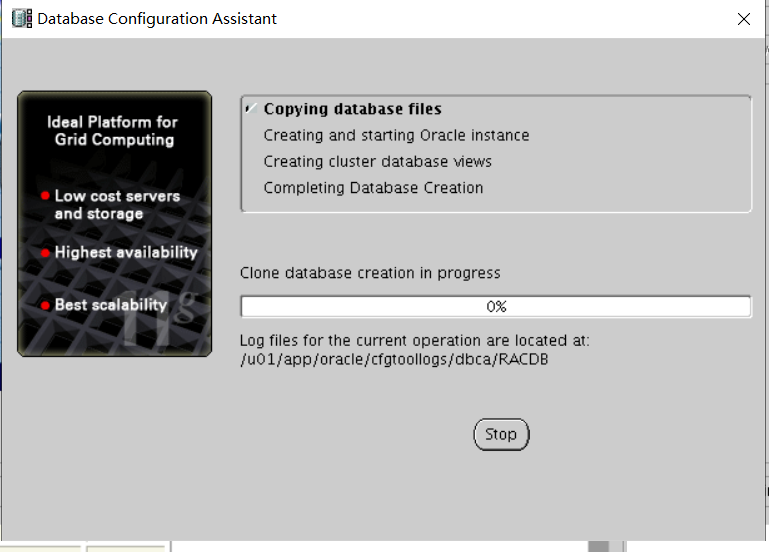
[oracle@host01 bin]$ sqlplus sys/oracle@RACDB as sysdba
SQL*Plus: Release 11.2.0.3.0 Production on Mon Mar 28 12:11:20 2016
Copyright (c) 1982, 2011, Oracle. All rights reserved.
Connected to:
Oracle Database 11g Enterprise Edition Release 11.2.0.3.0 - Production
With the Partitioning, Real Application Clusters, Automatic Storage Management, OLAP,
Data Mining and Real Application Testing options
SQL> select * from v$instance;
INSTANCE_NUMBER INSTANCE_NAME
HOST_NAME
----------------------------------------------------------------
VERSION
STARTUP_T STATUS
PAR
THREAD# ARCHIVE LOG_SWITCH_WAIT
----------------- --------- ------------ --- ---------- ------- ---------------
LOGINS
SHU DATABASE_STATUS INSTANCE_ROLE
ACTIVE_ST BLO
---------- --- ----------------- ------------------ --------- ---
1 RACDB_1
host01.example.com
11.2.0.3.0
28-MAR-16 OPEN
YES
1 STOPPED
ALLOWED
NO ACTIVE
PRIMARY_INSTANCE NORMAL
NO
2)创建序列
SQL> create sequence s_rac start with 100 maxvalue 999999 cache 50000 order;
Sequence created.
3)查看序列内容
SQL> set linesize 300
SQL> select * from user_sequences where sequence_name='S_RAC';
SEQUENCE_NAME
MIN_VALUE MAX_VALUE INCREMENT_BY C O CACHE_SIZE
LAST_NUMBER
------------------------------ ---------- ---------- ------------ - - ----------
S_RAC
1
999999
1 N Y
50000
100
Host01 和 host02 分别执行:
Select s_rac.nextval from dual;缓存到内存中。此步必须执行才能得分。
1.2.2 创建 service: ACNTPAY,要求连到 OCMPOOL 时,每次只使用一个实例
1)查看集群状态
[oracle@host01 ~]$ cd /u01/app/11.2.0/grid/bin
[oracle@host01 bin]$ ./crsctl stat res -t
NAME
TARGET STATE
SERVER
STATE_DETAILS
Local Resources
--------------------------------------------------------------------------------
ora.ACFS.dg
ONLINE ONLINE
host01
ONLINE ONLINE
host02
ora.DATA.dg
ONLINE ONLINE
host01
ONLINE ONLINE
host02
ora.FRA.dg
ONLINE ONLINE
host01
ONLINE ONLINE
host02
ora.LISTENER.lsnr
ONLINE ONLINE
host01
ONLINE ONLINE
host02
ora.asm
ONLINE ONLINE
host01
Started
ONLINE ONLINE
host02
Started
ora.gsd
OFFLINE OFFLINE
host01
OFFLINE OFFLINE
host02
ora.net1.network
ONLINE ONLINE
host01
ONLINE ONLINE
host02
ora.ons
ONLINE ONLINE
host01
ONLINE ONLINE
host02
ora.registry.acfs
ONLINE ONLINE
host01
ONLINE ONLINE
host02
ora.LISTENER_SCAN1.lsnr
1
ONLINE ONLINE
host02
ora.LISTENER_SCAN2.lsnr
1
ONLINE ONLINE
host01
ora.LISTENER_SCAN3.lsnr
1
ONLINE ONLINE
host01
ora.cvu
1
ONLINE ONLINE
host01
ora.host01.vip
1
ONLINE ONLINE
host01
ora.host02.vip
1
ONLINE ONLINE
host02
ora.oc4j
1
ONLINE ONLINE
host01
ora.racdb.db
1
ONLINE ONLINE
host01
Open
2
ONLINE ONLINE
host02
Open
ora.scan1.vip
1
ONLINE ONLINE
host02
ora.scan2.vip
1
ONLINE ONLINE
host01
ora.scan3.vip
1
ONLINE ONLINE
host01
2)创建 service
[oracle@host01 bin]$ ./srvctl add service -d RACDB -s ACNTPAY -c SINGLETON -g OCMPOOL
3)启动 service
[oracle@host01 bin]$ ./srvctl start service -d RACDB -s ACNTPAY
[oracle@host01 bin]$ ./crsctl stat res -t
NAME
TARGET STATE
SERVER
STATE_DETAILS
Local Resources
--------------------------------------------------------------------------------
ora.ACFS.dg
ONLINE ONLINE
host01
ONLINE ONLINE
host02
ora.DATA.dg
ONLINE ONLINE
host01
ONLINE ONLINE
host02
ora.FRA.dg
ONLINE ONLINE
host01
ONLINE ONLINE
host02
ora.LISTENER.lsnr
ONLINE ONLINE
host01
ONLINE ONLINE
host02
ora.asm
ONLINE ONLINE
host01
Started
ONLINE ONLINE
host02
Started
ora.gsd
OFFLINE OFFLINE
host01
OFFLINE OFFLINE
host02
ora.net1.network
ONLINE ONLINE
host01
ONLINE ONLINE
host02
ora.ons
ONLINE ONLINE
host01
ONLINE ONLINE
host02
ora.registry.acfs
ONLINE ONLINE
host01
ONLINE ONLINE
host02
ora.LISTENER_SCAN1.lsnr
1
ONLINE ONLINE
host02
ora.LISTENER_SCAN2.lsnr
1
ONLINE ONLINE
host01
ora.LISTENER_SCAN3.lsnr
1
ONLINE ONLINE
host01
ora.cvu
1
ONLINE ONLINE
host01
ora.host01.vip
1
ONLINE ONLINE
host01
ora.host02.vip
1
ONLINE ONLINE
host02
ora.oc4j
1
ONLINE ONLINE
host01
ora.racdb.acntpay.svc
1
ONLINE ONLINE
host01
ora.racdb.db
1
ONLINE ONLINE
host01
Open
2
ONLINE ONLINE
host02
Open
4)查看 RAC 所使用的服务器池(Server Pools)的方法
[oracle@host01 bin]$ ./srvctl config database -d RACDB
Database unique name: RACDB
Database name: RACDB
Oracle home: /u01/app/oracle/product/11.2.0/dbhome_1
Oracle user: oracle
Spfile: +DATA/RACDB/spfileRACDB.ora
Domain:
Start options: open
Stop options: immediate
Database role: PRIMARY
Management policy: AUTOMATIC
Server pools: OCMPOOL
Database instances:
Disk Groups: DATA,ACFS
Mount point paths:
Services: ACNTPAY
Type: RACDatabase is policy managed
. Oraenv
RACDB
Sqlplus / as sysdba
create sequence PS_SEQ increment by 1 start with 100 maxvalue 99999 minvalue 100 cache 99900 order;
srvctl add service -d RACDB -s ACNTPAY -g OCMPOOL -c singleton -y automatic
./srvctl start service -d RACDB -s ACNTPAY
./crsctl start res -t
crsctl start res ora.racdb.acntpay.svc
