



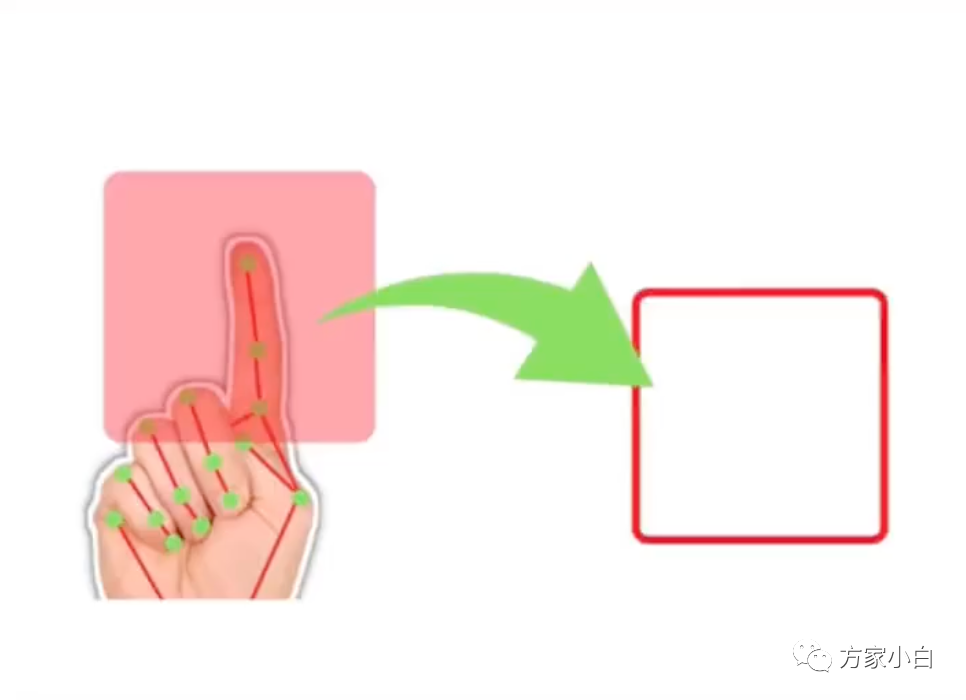
刷抖音,看见了一个虚拟拖放的视频,有点手痒.
so....
今天使用openCV
开发一个简单的手势识别和虚拟拖拽的小案例。
跟着文章做起来吧。轻轻松松实现一个拖拽小工具。
话不多说, 文末附源码。
本着学习的态度,我们一点点去的编写我们的程序。
步骤
安装 依赖
我们使用这个案例中使用的依赖有: cv2
, cvzone
, mediapipe
和 numpy
.
我们可以使用以下 命令进行安装:
pip install cvzone
pip install mediapipe
注意:
文章使用的 python
环境是3.8
.pip
版本是21.2.4
.cvzone
会依赖numpy
,并自动安装numpy
.
获取当前电脑的摄像头
import cv2

cap = cv2.VideoCapture(0)

while True:
    success, img = cap.read()
    # 如果成功打开
    if success:
        # draw
        cv2.imshow("VirtualDrag", img)

    # 当键盘输入 q 时, 跳出循环,关闭窗口
    if cv2.waitKey(1) == ord('q'):
        break

# 释放摄像头
cap.release()
# 关闭所有窗口
cv2.destroyAllWindows()
运行一下当前程序,可以看到我们捕获并打开一个摄像头。
当输入q
时,即可退出。
绘制一个矩形
import cv2

cap = cv2.VideoCapture(0)

+ # 矩形中心点的x,y轴坐标
+ # center point x and y
+ cx, cy = (150, 150)
+ # 矩形的width 和 height.
+ w, h = (200, 200)
+ # 矩形的颜色
+ color = (255, 0, 255)

while True:
    success, img = cap.read()
    # 如果成功打开
    if success:
        # 绘制一个矩形
+       # 计算出矩形的左上定点坐标和,右下定点的坐标。
+       # left top point.
+       ltp_x, ltp_y = (cx - w // 2, cy - h // 2)
+       # right down point.
+       rdp_x, rdp_y = (cx + w // 2, cy + h // 2)
+       cv2.rectangle(img, (ltp_x, ltp_y), (rdp_x, rdp_y), color, cv2.FILLED)

        # draw
        cv2.imshow("VirtualDrag", img)
        # 当键盘输入 q 时, 跳出循环,关闭窗口
        if cv2.waitKey(1) == ord('q'):
            break

# 释放摄像头
cap.release()
# 关闭所有窗口
cv2.destroyAllWindows()
使用 openCV 捕获并识别 画面中的手
import cv2
# 引入手的检测器
from cvzone.HandTrackingModule import HandDetector

cap = cv2.VideoCapture(0)

+ # 生成一个检测器
+ detector = HandDetector(detectionCon=0.9, minTrackCon=0.9)

# 矩形中心点的x,y轴坐标
# center point x and y
cx, cy = (150, 150)
# 矩形的width 和 height.
w, h = (200, 200)
# 矩形的颜色
color = (255, 0, 255)

while True:
    success, img = cap.read()
    # 如果成功打开
    if success:
       # 绘制一个矩形
        # 计算出矩形的左上定点坐标和,右下定点的坐标。
        # left top point.
        ltp_x, ltp_y = (cx - w // 2, cy - h // 2)
        # right down point.
        rdp_x, rdp_y = (cx + w // 2, cy + h // 2)
        cv2.rectangle(img, (ltp_x, ltp_y), (rdp_x, rdp_y), color, cv2.FILLED)

        + # allHands:屏幕中所有的手。
        + allHands, img = detector.findHands(img)
        + if allHands:
        +    hand = allHands[0]
        +    print(hand)

        # draw
        cv2.imshow("VirtualDrag", img)
        # 当键盘输入 q 时, 跳出循环,关闭窗口
        if cv2.waitKey(1) == ord('q'):
            break

# 释放摄像头
cap.release()
# 关闭所有窗口
cv2.destroyAllWindows()
当手指进入矩形框中,矩形改变颜色
import cv2
# 引入手的检测器
from cvzone.HandTrackingModule import HandDetector

cap = cv2.VideoCapture(0)

# 生成一个检测器
detector = HandDetector(detectionCon=0.9, minTrackCon=0.9)

cx, cy = (100, 100)
w, h = (200, 200)
color = (255, 0, 255)

while True:
    success, img = cap.read()
    # 如果成功打开
    if success:
        # 绘制一个矩形
        # 计算出矩形的左上定点坐标和,右下定点的坐标。
        # left top point.
        ltp_x, ltp_y = (cx - w // 2, cy - h // 2)
        # right down point.
        rdp_x, rdp_y = (cx + w // 2, cy + h // 2)
        cv2.rectangle(img, (cx, cy), (cx + w, cy + h), color, cv2.FILLED)

        # allHands:屏幕中所有的手。
        allHands, img = detector.findHands(img)
        if allHands:
            hand = allHands[0]
-            print(hand)
+            # 食指的指尖的坐标
+            cursor = hand['lmList'][8]
+            if cx < cursor[0] < cx + w and cy < cursor[1] < cy + 1:
+                color = (0, 255, 255)
+            else:
+                color = (255, 0, 255)

        # draw
        cv2.imshow("VirtualDrag", img)
        # 当键盘输入 q 时, 跳出循环,关闭窗口
        if cv2.waitKey(1) == ord('q'):
            break

# 释放摄像头
cap.release()
# 关闭所有窗口
cv2.destroyAllWindows()
这时你会发现,画面中手移动的方向和实际移动的方向是相反的。所以,我们需要将画面翻转。
import cv2
# 引入手的检测器
from cvzone.HandTrackingModule import HandDetector

cap = cv2.VideoCapture(0)

# 生成一个检测器
detector = HandDetector(detectionCon=0.9, minTrackCon=0.9)

# 矩形中心点的x,y轴坐标
# center point x and y
cx, cy = (150, 150)
# 矩形的width 和 height.
w, h = (200, 200)
# 矩形的颜色
color = (255, 0, 255)

while True:
    success, img = cap.read()
+    # 翻转画面
+    img = cv2.flip(img, 1)
    # 如果成功打开
    if success:
        # 绘制一个矩形
        # 计算出矩形的左上定点坐标和,右下定点的坐标。
        # left top point.
        ltp_x, ltp_y = (cx - w // 2, cy - h // 2)
        # right down point.
        rdp_x, rdp_y = (cx + w // 2, cy + h // 2)
        cv2.rectangle(img, (ltp_x, ltp_y), (rdp_x, rdp_y), color, cv2.FILLED)

        # allHands:屏幕中所有的手。
        allHands, img = detector.findHands(img)
        if allHands:
            hand = allHands[0]
            # 食指的指尖的坐标
            cursor = hand['lmList'][8]

            if ltp_x < cursor[0] < rdp_x and ltp_y < cursor[1] < rdp_y:
                color = (0, 255, 255)
            else:
                color = (255, 0, 255)

        # draw
        cv2.imshow("VirtualDrag", img)
        # 当键盘输入 q 时, 跳出循环,关闭窗口
        if cv2.waitKey(1) == ord('q'):
            break

# 释放摄像头
cap.release()
# 关闭所有窗口
cv2.destroyAllWindows()
当手指进入矩形框中, 矩形跟踪手指进行移动
这时我们只需要修改矩形的定点位置即可。
import cv2
# 引入手的检测器
from cvzone.HandTrackingModule import HandDetector

cap = cv2.VideoCapture(0)

# 生成一个检测器
detector = HandDetector(detectionCon=0.9, minTrackCon=0.9)

# 矩形中心点的x,y轴坐标
# center point x and y
cx, cy = (150, 150)
# 矩形的width 和 height.
w, h = (200, 200)
# 矩形的颜色
color = (255, 0, 255)

while True:
    success, img = cap.read()
    # 翻转画面
    img = cv2.flip(img, 1)
    # 如果成功打开
    if success:
        # 绘制一个矩形
        # 计算出矩形的左上定点坐标和,右下定点的坐标。
        # left top point.
        ltp_x, ltp_y = (cx - w // 2, cy - h // 2)
        # right down point.
        rdp_x, rdp_y = (cx + w // 2, cy + h // 2)
        cv2.rectangle(img, (ltp_x, ltp_y), (rdp_x, rdp_y), color, cv2.FILLED)

        # allHands:屏幕中所有的手。
        allHands, img = detector.findHands(img)
        if allHands:
            hand = allHands[0]
            # 食指的指尖的坐标
            cursor = hand['lmList'][8]
            if ltp_x < cursor[0] < rdp_x and ltp_y < cursor[1] < rdp_y:
+               cx, cy = cursor
                color = (0, 255, 255)
            else:
                color = (255, 0, 255)

        # draw
        cv2.imshow("VirtualDrag", img)
        # 当键盘输入 q 时, 跳出循环,关闭窗口
        if cv2.waitKey(1) == ord('q'):
            break

# 释放摄像头
cap.release()
# 关闭所有窗口
cv2.destroyAllWindows()
判断食指和中指并在一起时移动矩形
怎么判断 食指和中指 是 并在一起的呢?
如果 食指指尖 和 中指指点的距离小于某个像素值,我们就认为 食指和中指就是并在一起的。这里只会根据你手指离屏幕的远近,其距离也不近相同。
import cv2
# 引入手的检测器
from cvzone.HandTrackingModule import HandDetector

cap = cv2.VideoCapture(0)

# 生成一个检测器
detector = HandDetector(detectionCon=0.8)

# 矩形中心点的x,y轴坐标
# center point x and y
cx, cy = (150, 150)
# 矩形的width 和 height.
w, h = (200, 200)
# 矩形的颜色
color = (255, 0, 255)

while True:
    success, img = cap.read()
    # 翻转画面
    img = cv2.flip(img, 1)
    # 如果成功打开
    if success:
        # 绘制一个矩形
        # 计算出矩形的左上定点坐标和,右下定点的坐标。
        # left top point.
        ltp_x, ltp_y = (cx - w // 2, cy - h // 2)
        # right down point.
        rdp_x, rdp_y = (cx + w // 2, cy + h // 2)
-       cv2.rectangle(img, (ltp_x, ltp_y), (rdp_x, rdp_y), color, cv2.FILLED)

        # allHands:屏幕中所有的手。
        allHands, img = detector.findHands(img)
        if allHands:
            hand = allHands[0]
            # 食指的指尖的坐标
            cursor = hand['lmList'][8]
            distance, _, _ = detector.findDistance(hand['lmList'][8], hand['lmList'][12], img)
            print(distance)
+           if distance < 50 and ltp_x < cursor[0] < rdp_x and ltp_y < cursor[1] < rdp_y:
                cx, cy = cursor
                color = (0, 255, 255)
            else:
                color = (255, 0, 255)

+        cv2.rectangle(img, (ltp_x, ltp_y), (rdp_x, rdp_y), color, cv2.FILLED)
        # draw
        cv2.imshow("VirtualDrag", img)
        # 当键盘输入 q 时, 跳出循环,关闭窗口
        if cv2.waitKey(1) == ord('q'):
            break

# 释放摄像头
cap.release()
# 关闭所有窗口
cv2.destroyAllWindows()
就这么简单,就完成一个 虚拟拖拽的小功能了。基于此. 我们就可以完成 桌面图标的拖动,文件的拖动管理等等小功能了。
源码
import cv2
import cvzone
from cvzone.HandTrackingModule import HandDetector
import numpy as np

# 获取摄像头
cap = cv2.VideoCapture(0)

cap.set(3, 1000)
cap.set(4, 800)

# 检测器
detector = HandDetector(detectionCon=0.8)

colorR = (255, 0, 255)


class Rectangle:
    def __init__(self, posCenter, size, color):
        """
        :param posCenter: 中心点坐标:比如:(150,150)
        :param size: 大小,分别是长和宽: (300,200)
        """
        self.posCenter = posCenter
        self.size = size
        self.color = color
        self.old_color = color

    def update(self, cursor, color):
        """
        更新矩形的位置
        :param color: 颜色
        :param cursor: 手指的坐标
        """
        if cursor and self.in_region(cursor):
            self.posCenter = cursor
            self.color = color
        else:
            self.color = self.old_color

    def update_color(self, color):
        """
        更新颜色
        :param color:  颜色,RGB
        """
        self.color = color

    def in_region(self, cursor):
        """
        判断 cursor 是否在 矩形的范围内
        :param cursor: 手指的点。坐标
        :return: 是否在矩形范围内
        """
        cx, cy = self.posCenter
        width, height = self.size
        return (cx - width // 2) < cursor[0] < (cx + width // 2) and (cy - height // 2) < cursor[1] < (cy + height // 2)

    def get_pos_center(self):
        return self.posCenter

    def get_size(self):
        return self.size

    def get_color(self):
        return self.color

    def get_left_top(self):
        cx, cy = self.posCenter
        width, height = self.size
        return cx - width // 2, cy - height // 2

    def get_right_down(self):
        cx, cy = self.posCenter
        width, height = self.size
        return cx + width // 2, cy + height // 2


rect_list = []
for i in range(3):
    rect_list.append(Rectangle((200, 200), (100, 100), colorR))
    rect_list.append(Rectangle((400, 200), (100, 100), colorR))
    rect_list.append(Rectangle((600, 200), (100, 100), colorR))

while True:
    success, img = cap.read()
    # 翻转图像.
    img = cv2.flip(img, 1)

    # 手 和 图。
    allHands, img = detector.findHands(img)
    # allHands = detector.findHands(img, draw=False)
    if allHands:
        # 图中的一只手
        hand = allHands[0]
        distance, _, _ = detector.findDistance(hand['lmList'][8], hand['lmList'][12], img)
        for rect in rect_list:
            if distance < 50:
                rect.update(hand['lmList'][8], (0, 255, 0))
            else:
                rect.update_color(colorR)

    img_new = np.zeros_like(img, np.uint8)
    # # 画一个矩形,
    for rect in rect_list:
        # 第一个参数和第二个参数 绘制的是两个定点。
        # 左下角顶点的坐标
        ltp = rect.get_left_top()
        # 右上角顶点的坐标
        rdp = rect.get_right_down()
        w, h = rect.get_size()
        cv2.rectangle(img_new, ltp, rdp, rect.get_color(), cv2.FILLED)
        cvzone.cornerRect(img_new, (ltp[0], ltp[1], w, h), l=10, t=2, rt=0)
    out = img.copy()
    alpha = 0.9
    mask = img_new.astype(bool)
    out[mask] = cv2.addWeighted(img_new, alpha, img, 1 - alpha, 0)[mask]

    # draw
    cv2.imshow("Image", out)
    if cv2.waitKey(1) == ord('q'):
        break

# 释放摄像头
cap.release()
# 关闭所有窗口
cv2.destroyAllWindows()
After then.
enjoy three minutes.
forget it . or change it.
分享一句话
测试只能证明程序有错误,而不能证明程序没有错误。
最后
希望和你一起遇见更好的自己
文章转载自方家小白,如果涉嫌侵权,请发送邮件至:contact@modb.pro进行举报,并提供相关证据,一经查实,墨天轮将立刻删除相关内容。
