



之前我们介绍过docker自动化部署Laravel,最近我把我的一个项目改成docker方式进行部署,也是用Laravel开发的项目,并且需要用到Laravel的定时调度功能,并且实现每次部署的时候能够进行数据库迁移的操作,为了实现这两个功能,我自己写了一个PHP+Nginx基础镜像,在这里跟大家分享部署的过程。

01
基础镜像
02
准备Nginx配置文件
server {listen 80;server_name localhost;#charset koi8-r;location {root var/www/html/public;index index.php index.html index.htm;# 如果没有以下4行,laravel将只能访问首页,其他页面都是404try_files $uri $uri/ index.php?$query_string;if (!-e $request_filename){rewrite ^/(.*) index.php last;}# 如果没有以上4行,laravel将只能访问首页,其他页面都是404}#error_page 404 404.html;# redirect server error pages to the static page 50x.html#error_page 500 502 503 504 50x.html;location = 50x.html {root usr/share/nginx/html;}# proxy the PHP scripts to Apache listening on 127.0.0.1:80## location ~ \.php$ {# proxy_pass http://127.0.0.1;# }# pass the PHP scripts to FastCGI server listening on 127.0.0.1:9000#location ~ \.php$ {root /var/www/html/public;index index.php index.html;# 坑在这里,需将原有的127.0.0.1:9000替换成phpfpm:9000fastcgi_pass 127.0.0.1:9000;# 坑在这里,需将原有的127.0.0.1:9000替换成phpfpm:9000fastcgi_index index.php;# 下面这行也改了 中间的$document_rootfastcgi_param SCRIPT_FILENAME $document_root$fastcgi_script_name;include fastcgi_params;}# deny access to .htaccess files, if Apache's document root# concurs with nginx's one##location ~ /\.ht {# deny all;#}}
03
准备定时调度任务
* * * * * /usr/local/bin/php /var/www/html/artisan schedule:run >> /var/www/html/public/timer.log
这里我们放定时任务的执行命令。
04
创建镜像构建文件
FROM hongzhuangxian/php7.3_nginx#复制Nginx配置至默认配置目录ADD default.conf /etc/nginx/conf.d/#复制项目代码至运行目录ADD . /var/www/html/#设置项目目录权限RUN chown www-data:www-data -R /var/www/html/storageRUN chown www-data:www-data -R /var/www/html/bootstrapRUN chown www-data:www-data -R /var/www/html/public#复制定时任务命令到容器COPY ./crontab /var/spool/cron/crontabs/rootRUN chmod 0644 /var/spool/cron/crontabs/rootRUN crontab /var/spool/cron/crontabs/root
这里的基础镜像用我们自己写的镜像,大家可以参考我上一篇文章,自己动手创建一个,或者直接用我的,由于我这个是在docker hub上,速度可能会很慢,建议大家把基础镜像包上传到阿里云镜像仓库,这样会快一点。构建镜像也很简单,就是把代码放到指定Nginx指定读取目录,把我们写的Nginx配置映射到里面,同时把我们设置的调度命令映射到基础镜像的定时调度里面。
05
自动化构建
kind: pipelinetype: dockername: program-manage#构建步骤steps:#安装composer扩展- name: backendpull: if-not-existsimage: hongzhuangxian/php7.3-diycommands:- composer install --prefer-dist- php artisan migrate#推送镜像至镜像仓库- name: publishpull: if-not-existsimage: plugins/dockermirrors: #镜像仓库加速地址,不需要加速,可以直接删除from_secret: registry_mirrorssettings:purge: falseregistry: #镜像仓库域名from_secret: registryrepo: #镜像仓库详细地址from_secret: repouse_cache: truetags:- latestusername: #镜像仓库账户from_secret: registry_user_namepassword: #镜像仓库密码from_secret: registry_password#部署服务- name: ssh commandspull: if-not-existsimage: appleboy/drone-sshsettings:host:from_secret: ssh_ipport: 22username:from_secret: ssh_user_namepassword:from_secret: ssh_passwordscript:- cd /home/php/programManage- docker-compose pull && docker-compose up --force-recreate -d- docker rmi $(docker images | grep docker_diy/program-manage | grep none | awk '{print $3}')#通知发到telegram- name: telegrampull: if-not-existsimage: hongzhuangxian/telegram-drone-pluginsettings:proxy_url: "https://telegram.hongzhuangxian.cn"token:from_secret: telegram_tokenchat_id:from_secret: telegram_chat_id#规定master分支,触发构建branches: master
通知对象,我这里选择用Telegram,大家可以选择其他通知形式,更多通知情况,大家可以到Drone的插件市场查看。
06
部署脚本
version: "3"services:program-manage:image: 代码镜像地址container_name: docker_programManage_composerestart: alwaysvolumes:- /home/php/programManage/uploads:/var/www/html/public/uploadsenvironment:- SET_CONTAINER_TIMEZONE=true- CONTAINER_TIMEZONE=Asia/Shanghaiports:- 7180:80
这样我们基本完成自动化部署的前置工作。
07
试验自动化部署
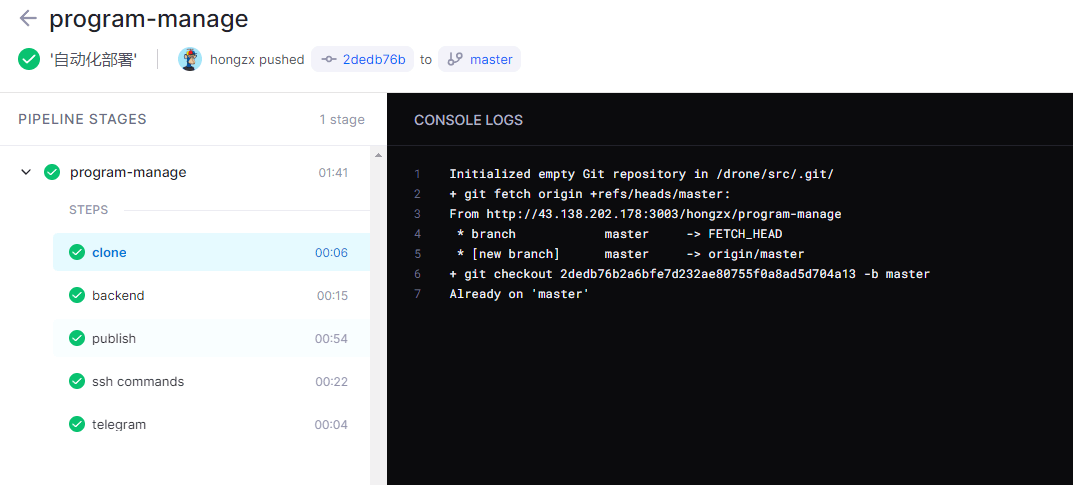
通知内容
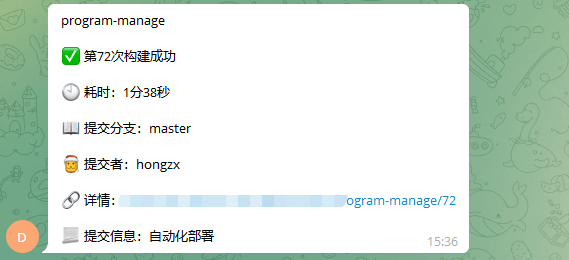
这样就完成了Laravel自动化部署。

文章转载自程序员技术笔记,如果涉嫌侵权,请发送邮件至:contact@modb.pro进行举报,并提供相关证据,一经查实,墨天轮将立刻删除相关内容。
