


Canonical 的 MAAS [https://maas.io/](Metal as a Service)是一款用于服务器自动发现、配置的远程操作系统安装、部署工具,可以将物理服务器转换为类似于虛拟机资源,实现物理物理服务器的自助服务,远程访问。MAAS目前支持 Ubuntu、CentOS、RHEL、Windows、ESXI 和自定义镜像的部署。当在数据中心管理成百上千的物理服务器,比如云、HPC 场景时,使用MAAS 是减少运维成本的最佳选择之一。
在本文的测试 中,展示了如何通过Packer 为 MAAS 构建 openEuler 映像并验证MAAS部署,可使用的临时解决方法以及如MAAS直接支持 openEuler时,cloud-init 和 curtin 可能的加强或修复方法。
测试环境要求
Packer创建openEuler MAAS 映像:
· Ubuntu 18.04+,能够运行 KVM 虚拟机
· Packer 1.8.0+
· 外网访问openEuler官网以下载 openEuler ISO 和 git 访问 packer-maas
MAAS验证部署openEuler映像:
· MAAS 3.0+
· MAAS管理的物理服务器或KVM host
此测试可在Ubuntu Desktop 20.04 的笔记本电脑上进行,其中 MAAS 3.1可安装在 lxd 虚拟机中,主机自身被添加为 KVM host。主机或虚拟机均可用于Packer创建 openEuler 镜像,但需要 20G 可用磁盘空间。在单机上使用MAAS的详细方法可参考附件的文档链接。
Packer构建 openEuler MAAS映像
MAAS 仅在可用于节点的OS映像时才有用。您可以直接从 MAAS GUI 选择和同步Ubuntu、Centos映像。您还可以自己构建 RHEL、Windows、ESXi maas 映像然后上传到 MAAS。有两种方法可以构建要部署到 MAAS 机器的自定义映像:MAAS Image Builder 和 packer。在这个 测试 中,我们使用了packer 借用了rhel8模板。
安装packer:
curl -fsSL https://apt.releases.hashicorp.com/gpg | sudo apt-key add -sudo apt-add-repository "deb [arch=amd64] https://apt.releases.hashicorp.com $(lsb_release -cs) main"sudo apt-get update && sudo apt-get install packer
安装依赖包
sudo apt install qemu-system qemu-utils ovmf cloud-image-utils make
下载packer-maas模板:
git clone https://github.com/canonical/packer-maas.git
因为packer-maas目前没有openeuler 模板,可以使用rhel8模板但需适配。如下直接下载已测试过的适用于openEuler 20.03/22.03 LTS的模板。如想直接查看内容,可浏览器访问。
https://git.launchpad.net/~zhanglei-mao/+git/packer-maas-openeuler/tree/
cd packer-maasgit clone https:// git.launchpad.net/~zhanglei-mao/+git/packer-maas-openeuler openeuler
使用浏览器访问 https://repo.openeuler.org/ 下载openEuler ISO并上传到packer机器。
make ISO=/PATH/TO/openeuler-22.03-LTS-x86_64-dvd.iso例如:ubuntu@vm-k8s-w2:~/packer-maas/openeuler$ ls home/ubuntu/*.iso -lhs3.4G -rw-rw-r-- 1 ubuntu ubuntu 3.4G Jun 29 07:20 home/ubuntu/openEuler-22.03-LTS-x86_64-dvd.iso4.2G -rw-r--r-- 1 ubuntu ubuntu 4.2G Jun 29 01:24 home/ubuntu/openEuler-20.03-LTS-SP1-x86_64-dvd.isoubuntu@vm-k8s-w2:~/packer-maas/ openeuler$ make ISO=/home/ubuntu/openEuler-22.03-LTS-x86_64-dvd.iso...==> qemu: Waiting 3s for boot...==> qemu: Connecting to VM via VNC (0.0.0.0:5976)...==> qemu: Waiting for shutdown…...2022/06/29 07:34:54 packer-builder-qemu plugin: VM shut down.==> qemu: Converting hard drive......qemu (shell-local): Mounting root partition...qemu (shell-local): Creating MAAS image openeuler.tar.gz......ubuntu@ vm-k8s-w2:~/packer-maas/openeuler$ ls openeuler.tar.gz -lhs690M -rw-r--r-- 1 root root 690M Jun 29 07:36 openeuler.tar.gzubuntu@vm- k8s-w2:~/packer-maas/openeuler$ mv openeuler.tar.gz openeuler2203.tar.gzubuntu@vm-k8s-w2:~/packer-maas/ openeuler$ make ISO=/home/ubuntu//home/ubuntu/openEuler-20.03-LTS-SP1-x86_64-dvd.iso...ubuntu@vm- k8s-w2:~/packer-maas/openeuler$ mv openeuler.tar.gz openeuler2003.tar.gz
openeuler.tar.gz 就是创建好的 MAAS 映像,需要上传到MAAS服务器以便导入。packer输出中的vnc 端口可用于vnc访问,注意每次的端口号都不同。
上传openEuler映像到MAAS和部署验证
如下方法将镜像上传到MAAS:
maas $PROFILE boot-resources create \name='rhel/rhel8' title='openEuler 22.03' architecture='amd64/generic' filetype='tgz' \ content@ =openeuler.tar.gz ##例如zlmao@p14s:~/tmp$ scp ubuntu@192.168.122.105:~/packer-maas/openeuler/*.gz ./Openeuler.tar.gz 100% 689MB 209.9MB/s 00 :03zlmao@p14s:~/tmp$ lxc file push openeuler.tar.gz maas2/home/ubuntu/zlmao@p14s:~/tmp$ lxc exec maas2 bashroot@maas2:~# su - ubuntuubuntu@maas2:~$ maas login root http://192.168.122.12:5240/maas/ $(sudo maas apikey --username root)ubuntu@maas2:~$ maas root boot-resources create name=rhel/8 title="openEuler 22.03 LTS" architecture=amd64/generic content@=openeuler2203.tar.gzubuntu@maas2:~$ maas root boot-resources create name=rhel/8.2 title="openEuler 20.03 LTS" architecture=amd64/generic content@=openeuler2003.tar.gz
注意,如果你有更多的不同版本的openEuler映像,请使用不同的rhel/8.x。
在 MAAS图形管理介面中,您可以找到上传的像已同步。

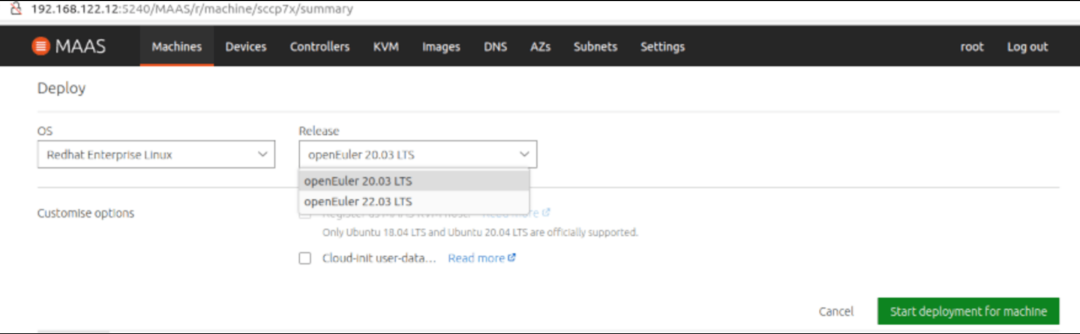
部署,请从“Redhat Enterprise Linux”中选择操作系统,然后选择“openEuler 22.03 LTS”
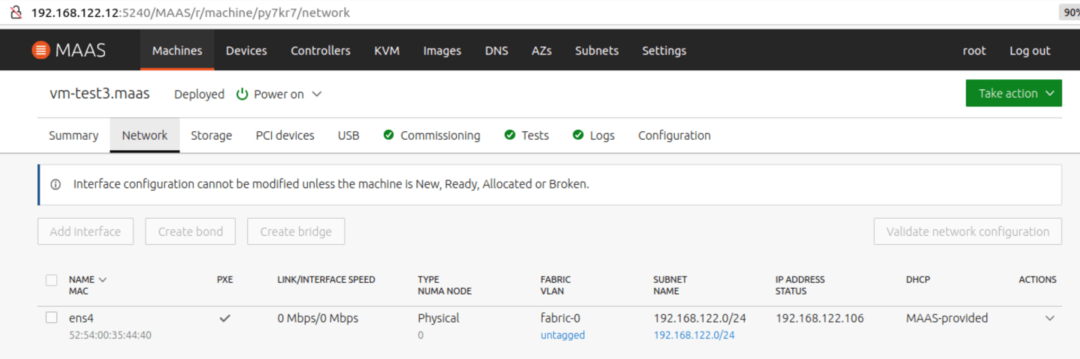
约4-10分钟后, 会显示”Deployed”部署成功。可找到所分配的 IP 地址用于ssh远程访问。
注意对于openEuler 22.04,要使用默认的“openeuler”用户名和ssh密钥进行远程访问。对于openEuler 20.03默认用户为”openEuler”。
zlmao@p14s:~$ ssh openeuler@192.168.122.106Authorized users only. All activities may be monitored and reported.Welcome to 5.10.0-60.18.0.50.oe2203.x86_64System information as of time: Wednesday, June 29, 2022 AM08:23:20 UTCSystem load: 0.05Processes: 97Memory used: 8.9%Swap used: 0%Usage On: 48%IP address: 192.168.122.106Users online: 1To run a command as administrator(user "root"),use "sudo ".[openeuler@vm-test3 ~]$ uname -aLinux vm-test3.maas 5.10.0-60.18.0.50.oe2203.x86_64 #1 SMP Wed Mar 30 03:12:24 UTC 2022 x86_64 x86_64 x86_64 GNU/Linux[openeuler@vm-test3 ~]$zlmao@p14s:~$ ssh openEuler@192.168.122.107
Authorized users only. All activities may be monitored and reported.Welcome to 4.19.90-2109.1.0.0108.oe1.x86_64System information as of time: Thu Jun 30 13:40:24 UTC 2022System load: 0.06Processes: 94Memory used: 6.8%Swap used: 0.0%Usage On: 31%IP address: 192.168.122.107Users online: 1[openEuler@vm-k8s-m1 ~]$ uname -aLinux vm-k8s-m1.maas 4.19.90-2109.1.0.0108.oe1.x86_64 #1 SMP Mon Sep 6 05:27:07 UTC 2021 x86_64 x86_64 x86_64 GNU/Linux[openEuler@vm-k8s-m1 ~]$
如何定制packer模板和发现的问题
Packer在构建时,它读取配置文件(openeuler.js)并创建一个qemu-kvm虛拟机, 使用 ISO 引导及 http/openeuler.ks 的作为自动安装配置文件。一旦自动安装成功完成并关闭电源后,Packer就会调用脚本setup-nbd 和 tar-root 生成最终映像文件。
对于所使用如下openeuler.js 模板,与 rhel8 的区别在于 console=tty0 和 vnc_ind_address, 以使虛拟机输出重定向到 vnc 客户端及可以从网络而不仅仅是本机(127.0.0.1)进行vnc访问。
ubuntu@vm-k8s-w2:~/packer-maas/openeuler$ cat openeuler.json{"variables":{"openeuler_iso_path": "{{env `OPENEULER_ISO_PATH`}}"},"builders": [{"type": "qemu","communicator": "none","iso_url": "{{user `openeuler_iso_path`}}","iso_checksum": "none","boot_command": [" ","inst.ks=http://{{ .HTTPIP }}:{{ .HTTPPort }}/openeuler.ks ","console=ttyS0 console=tty0 inst.cmdline",""],"boot_wait": "3s","disk_size": "4G","headless": true,"vnc_bind_address": "0.0.0.0","memory": 2048,"http_directory": "http","qemuargs": [[ "-serial", "stdio" ]],"shutdown_timeout": "1h"}],"post-processors": [{"type": "shell-local","inline_shebang": "/bin/bash -e","inline": ["source ../scripts/setup-nbd","OUTPUT=${OUTPUT:-openeuler.tar.gz}","source ../scripts/tar-root"]}]}ubuntu@vm-k8s-w2:~/packer-maas/openeuler$
“http/ openeuler.ks”则基于“rhel8.ks”并删除那些在openeuler下会失败的配置。其中最重要修改如下:
ubuntu@vm-k8s-w2:~/packer-maas/openeuler$ cat -n http/openeuler.ks...39 yum clean all40 echo "%rhel 8" >> etc/rpm/ macros.dist41 sed -i s/\^ID=.*\$/ID=\"rhel\"/ etc/os-release42 %end...
这是针对以下2个问题的临时解决方法,它会欺骗 curtin和 cloud-init正处理的是 rhel 操作系统从完成部署而不出错。
部署openEuler时
出现的错误及可能修复方法
MAAS使用curtin 解压上传到 MAAS 的 openeuler 映像并在 MAAS 部署期间安装 grub程序等。cloud-init 则是在 MAAS 部署后的首次启动期间来初始化机器,比如机器名,网络地址,注入ssh pub key等。cloud-int所使用的user-data由MAAS管理及自动提供。如果没有上面的临时解决方法将openeuler 映像假装为rhel, 则在部署时会出现如下2个报错。更详细信息及问題跟踪可访问: https://bugs.launchpad.net/curtin/+bug/1975922
# during deploy, the curtin failed withfinish: cmd-install/stage-curthooks/builtin/cmd-curthooks: FAIL: curtin command curthooksTraceback (most recent call last):File "/curtin/curtin/distro.py", line 120, in get_distroinfovariant = name_to_distro(variant_name)File "/curtin/curtin/distro.py", line 57, in name_to_distroreturn DISTROS[DISTROS.index(distname)]ValueError: tuple.index(x): x not in tuple# after deploy, cloud-init failed with:2022-06-21 02:30:15,216 - stages.py[ERROR]: Unable to render networking. Network config is likely broken: No available network renderers found. Searched through list: ['eni', 'sysconfig', 'netplan']
以下对于 curtin 和 cloud-init 的代码的修改可以测试通过:
#In curtin/curtin/distro.pyDISTRO_NAMES = ['arch', 'centos', 'debian', 'fedora', 'freebsd', 'gentoo','opensuse', 'redhat', 'rhel', 'sles', 'suse', 'ubuntu', 'openEuler']...OS_FAMILIES = {DISTROS.debian: [DISTROS.debian, DISTROS.ubuntu],DISTROS.redhat: [DISTROS.centos, DISTROS.fedora, DISTROS.redhat,DISTROS.rhel, DISTROS.openEuler],#Make openEuler be detected as rhel8 (rpm -E "%rhel")echo "%rhel 8" >> /etc/rpm/macros.dist# In /usr/lib/python3.7/site-packages/cloudinit/net/sysconfig.py, change openEuler to openeulerKNOWN_DISTROS = ['centos', 'fedora', 'rhel', 'suse', 'openeuler']# In /usr/lib/python3.7/site-packages/cloudinit/util.py, add ‘openeuler’'arch', 'centos', 'debian', 'fedora', 'rhel', 'suse', 'openeuler'):
通过vnc来监控packer构建过程
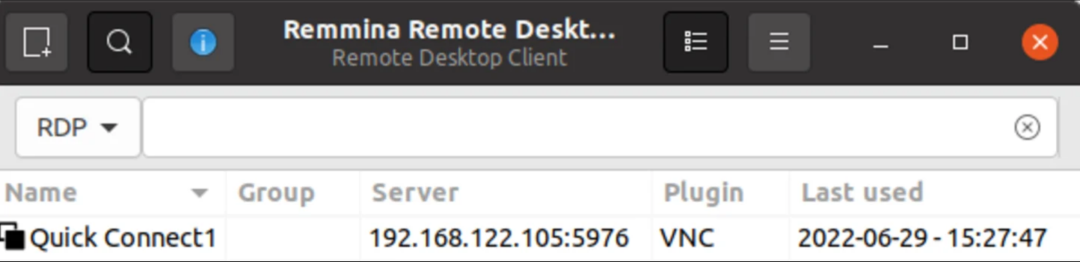
Packer 构建依赖于 kickstart配置文件并等待其所创建的虛拟机在完成安装之后自动关机,通过 vnc 来监控日志输出的错误对调试问题极其有用。如果有Ubuntu 桌面系统,可以使用 Remmina 等 VNC 客户端进行访问。vnc 端口可以在packer构建的输出中找到。
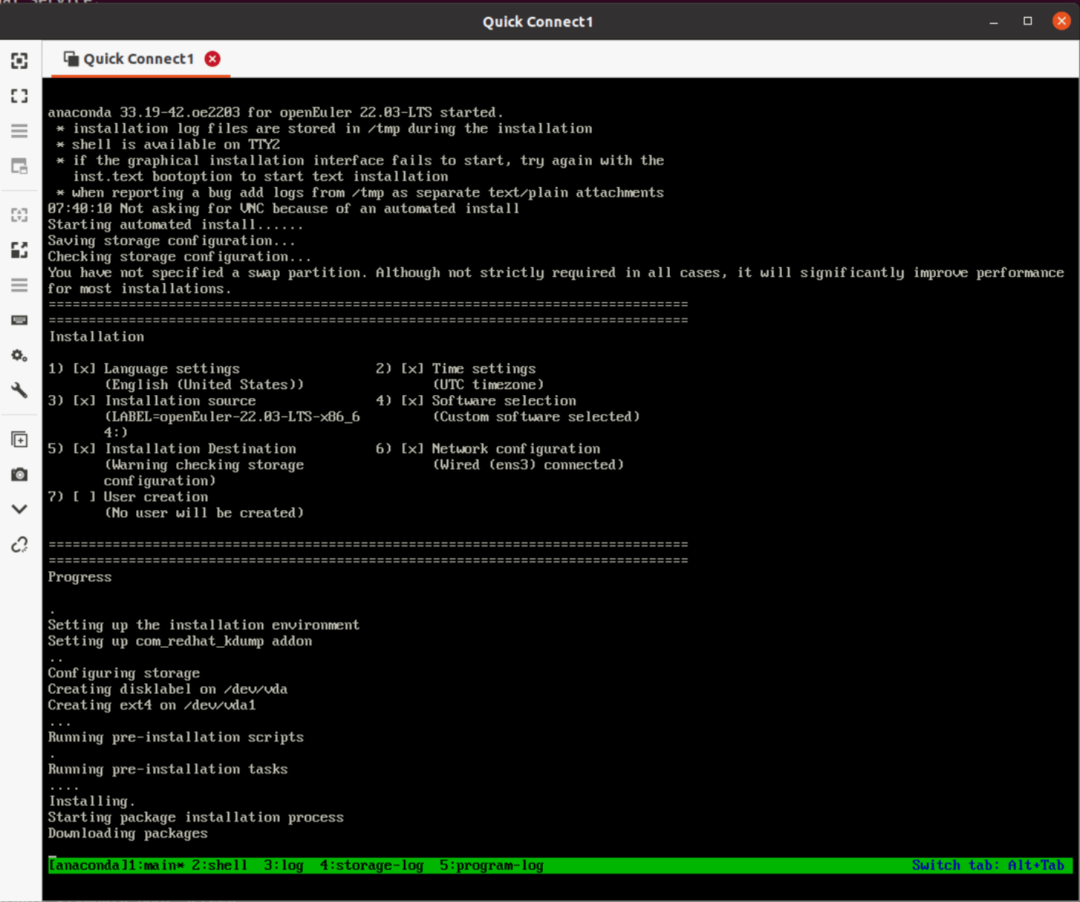
注意可以使用ctrl+b 1-5来切换tmux窗口。
附录-参考文档
1. 如何在一台及其上测试MAAS
第1篇安装
https://cn.ubuntu.com/blog/ubuntu-maas-installation-tutorial
第2篇初始化
https://cn.ubuntu.com/blog/ubuntu-maas-installation-tutorial-1
第3篇 KVM POD/host
https://cn.ubuntu.com/blog/ubuntu-maas-installation-tutorial-2
2. MAAS安装(英文)
https://maas.io/docs/how-to-install-maas#heading--fresh-install-3-1-packages
3. 增加VM host(英文)
https://maas.io/docs/how-to-manage-vm-hosts
4. MAAS官方手册(英文)
https://maas.io/docs
---
本博文由Canonical的Senior Field Engineer: Mao Zhanglei 所写。
原文链接:
https://cn.ubuntu.com/blog/use-canonical-maas-deploy-openeuler-test
- END -
