


服务器规划
| 服务器IP | 部署组件 | |
|---|---|---|
| 10.100232.172 | minio和nginx(为了实现图片文件的缩放,必须和minio在同一台服务器上) | |
| 10.100.232.173 | nginx 方向代理 10.100232.172这台机器上的ng,可以配置域名代理 |
服务器 ip = 10.100.232.172
minio的安装
wget https://dl.minio.io/server/minio/release/linux-amd64/minio我的是在/opt/minio文件夹下执行上面的命令,minio是我自己建的文件夹,你可以自己放到自己喜欢的位置
cd opt/minio#再执行下面的命令,下载minio文件wget https://dl.minio.io/server/minio/release/linux-amd64/minio
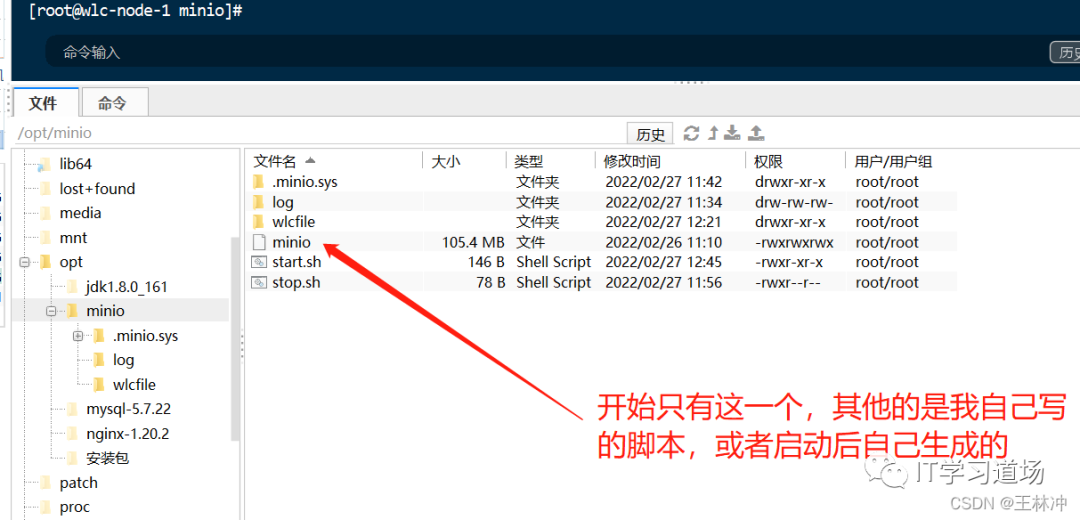
给minio,你刚刚下载的minio的文件赋权:
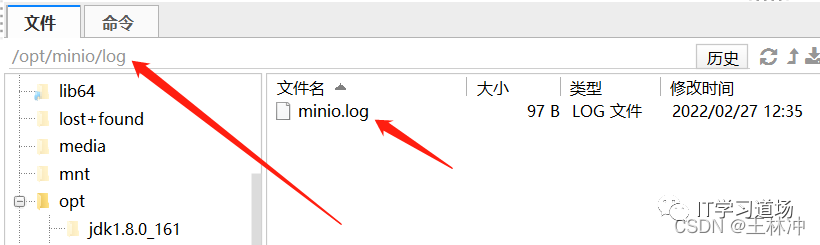
chmod 777 -R minio在minio文件下,创建log文件夹,在log文件夹中创建minio.log文件,方便日志管理
在/opt/minio文件夹下创建启动和停止脚本,和minio文件同级目录最好,方便管理
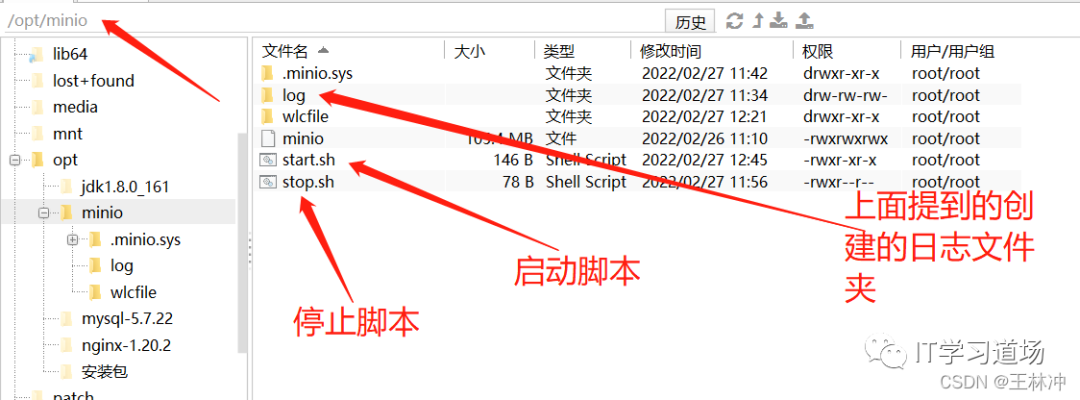
启动脚本,start.sh
nohup opt/minio/minio server --address '你本机内网ip:9000' --console-address '你本机内网ip:9001' opt/minio > opt/minio/log/minio.log 2>&1 &命令解释:
nohup opt/minio/minio server --address '你本机内网ip:9000' --console-address '你本机内网ip:9001' opt/minio > opt/minio/log/minio.log 2>&1 &


--address '你本机内网ip:9000'            minio的api地址端口配置,ip是你的内网地址,端口是9000
                                        上传下载都用9000,也就是--address '你本机内网ip:9000'
                                        你访问可以用你的  外网地址:9000来api访问,也可以用
                                        ng来反向代理

--console-address '你本机内网ip:9001'    minio控制台地址,端口是9001,你自己随意改,
                                        就是浏览器 访问地址

 opt/minio                             安装目录,运行的文件保存夹地址,minio的配置文件
                                        和你上传的文件都在这里面

> opt/minio/log/minio.log 2>&1 &       日志输出地址
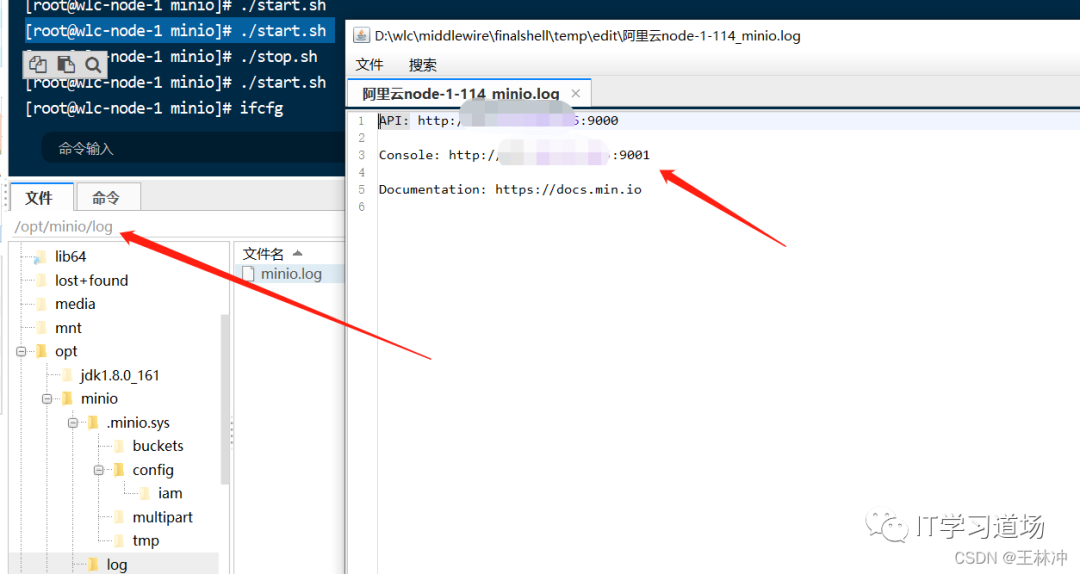
执行启动脚本:
[root@wlc-node-1 minio]# ./start.sh
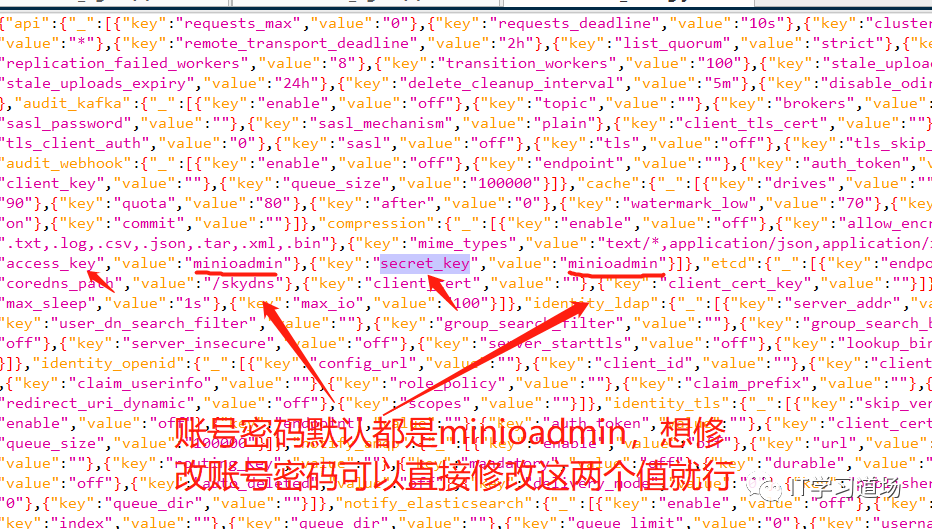
初始密码在.minio.sys文件夹里 /opt
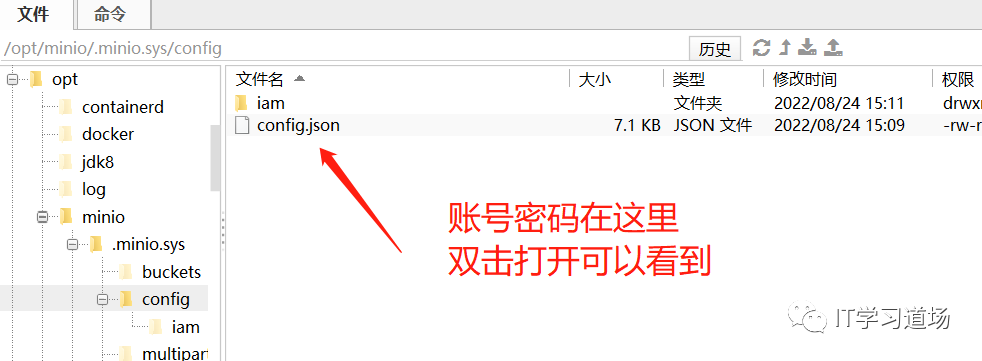
分别是 access_key 和 secret_key 两个属性
在浏览器中输入 ip :9001就可以访问控制台,记得上那个启动脚本吗,9000是服务端端口,9001是控制台端口
http://10.100.232.172:9001/
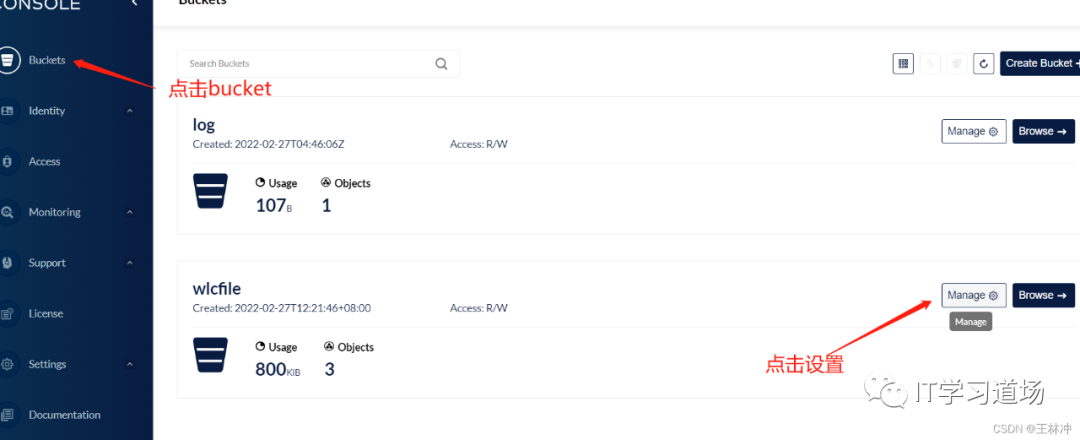
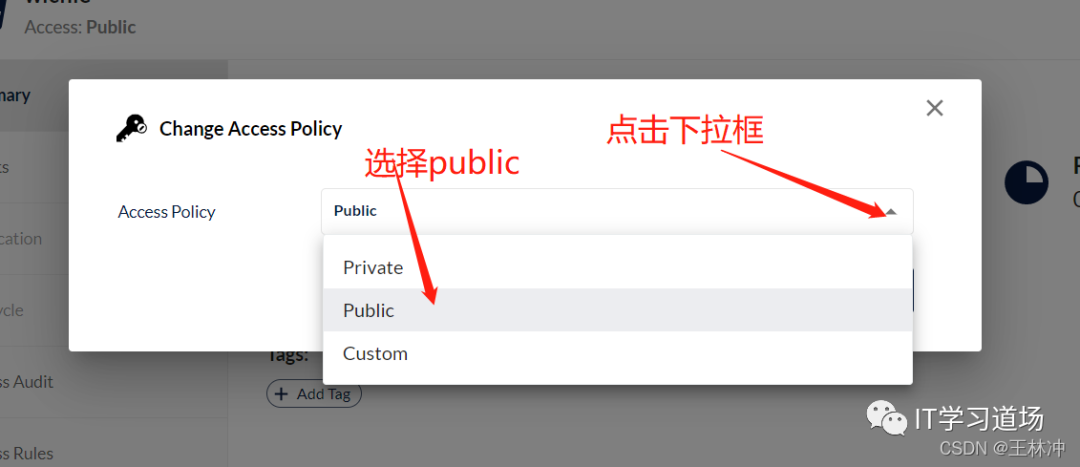
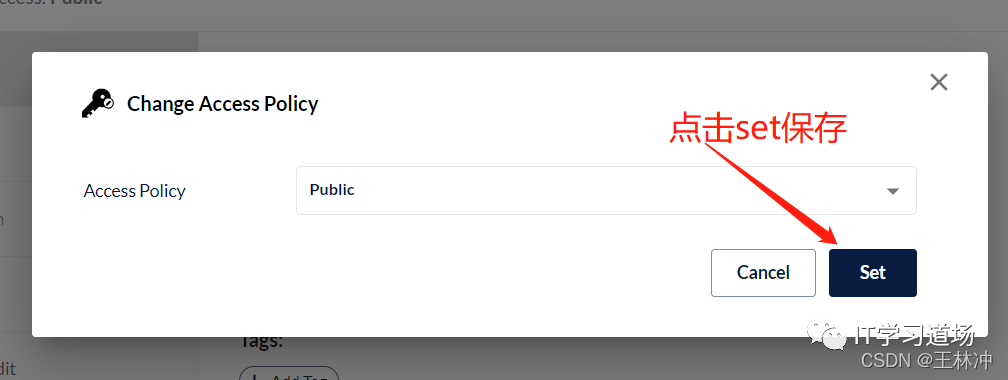
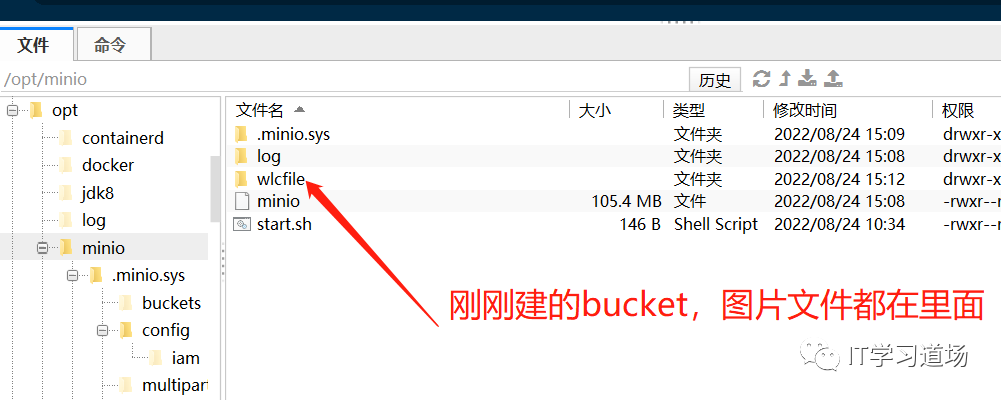
登陆进去之后,可以点击 菜单栏的 Buckets 在右上角有个 create Buckets 按钮,点击进去,给这个bucket输入一个的名字,在保存就行,一个bucket就创建成功了,下面是我自己创建的
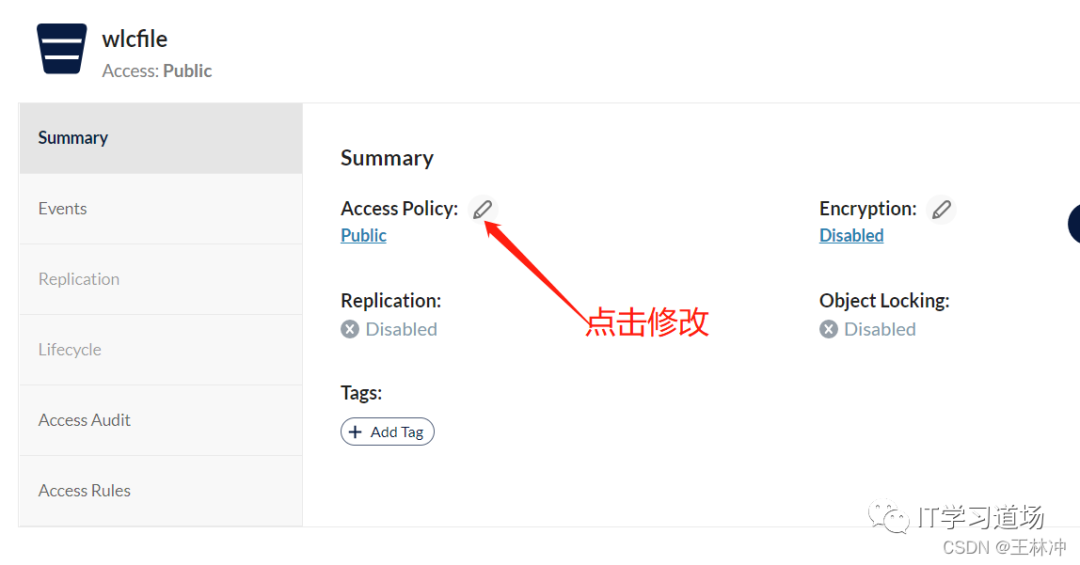
名字是wlcfile,根据下面的步骤,设置bucket的权限,设置public,不然没法访问,private权限的bucket下的文件访问必须登录,public不需要
整合springboot + minio
maven引入依赖
<dependency><groupId>io.minio</groupId><artifactId>minio</artifactId><version>4.0.0</version></dependency>
在springboot的application.yml中新增minio的配置
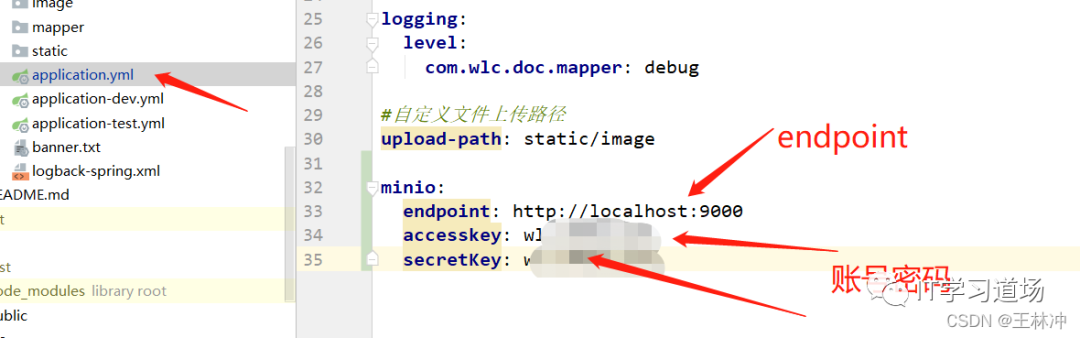
minio:endpoint: http://localhost:9000accesskey: xxxxxxxsecretKey: xxxxxxx
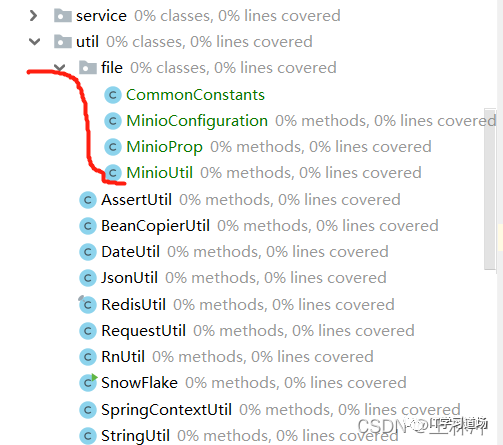
我的都放在我的util下的file文件下,方面统一管理
package com.wlc.doc.util.file;import lombok.Data;import org.springframework.boot.context.properties.ConfigurationProperties;import org.springframework.stereotype.Component;/*** minio配置类*/@Data@Component@ConfigurationProperties(prefix = "minio")public class MinioProp {/*** 连接url*/private String endpoint;/*** 用户名*/private String accesskey;/*** 密码*/private String secretKey;}
package com.wlc.doc.util.file;import io.minio.MinioClient;import io.minio.errors.InvalidEndpointException;import io.minio.errors.InvalidPortException;import org.springframework.beans.factory.annotation.Autowired;import org.springframework.boot.context.properties.EnableConfigurationProperties;import org.springframework.context.annotation.Bean;import org.springframework.context.annotation.Configuration;/*** minio的配置 并注入bean MinioClient*/@Configuration@EnableConfigurationProperties(MinioProp.class)public class MinioConfiguration {@Autowiredprivate MinioProp minioProp;@Beanpublic MinioClient minioClient() throws InvalidPortException, InvalidEndpointException {MinioClient client =new MinioClient(minioProp.getEndpoint(),minioProp.getAccesskey(),minioProp.getSecretKey());return client;}}
package com.wlc.doc.util.file;/*** minio的bucket配置类*/public class CommonConstants {//bucket的名字public static final String MINIO_BUCKET="wlcfile";}
package com.wlc.doc.util.file;import com.google.api.client.util.IOUtils;import com.wlc.doc.exception.BusinessException;import io.minio.MinioClient;import io.minio.ObjectStat;import org.apache.commons.lang3.StringUtils;import org.springframework.beans.factory.annotation.Autowired;import org.springframework.stereotype.Component;import org.springframework.web.multipart.MultipartFile;import javax.servlet.http.HttpServletResponse;import java.io.IOException;import java.io.InputStream;/*** 描述: minio的util </br>* 时间: 2022-02-26 15:10 </br>* 作者:王林冲*/@Componentpublic class MinioUtil {@Autowiredprivate MinioClient minioClient;/*** 上传文件,* @param fileName 文件名* @param inputStream 文件输入流* @param size 文件大小* @param contentType 类型* @return String - 路径 = bucket名字 + "/" + 文件名*/public String uploadByInputStream(String fileName, InputStream inputStream, long size, String contentType){try {minioClient.putObject(CommonConstants.MINIO_BUCKET, fileName, inputStream, size, contentType);return StringUtils.join(CommonConstants.MINIO_BUCKET, "/", fileName) ;} catch (Exception e) {e.printStackTrace();return null;}finally {if (inputStream != null){try {inputStream.close();} catch (IOException e) {e.printStackTrace();}}}}/*** 上传文件* @param file MultipartFile* @return*/public String uploadByFile(MultipartFile file) {if(file==null || file.getSize()==0){throw new BusinessException("上传文件不能为空");}String orgfileName = file.getOriginalFilename();orgfileName = orgfileName;InputStream in = null;try {in = file.getInputStream();String contentType= file.getContentType();minioClient.putObject(CommonConstants.MINIO_BUCKET, orgfileName, in, file.getSize(), contentType);return StringUtils.join(CommonConstants.MINIO_BUCKET, "/", orgfileName);} catch (Exception e) {e.printStackTrace();return null;}finally {if (in != null){try {in.close();} catch (IOException e) {e.printStackTrace();}}}}/*** 下载* @param response* @param fileName 文件名*/public void download( HttpServletResponse response, String fileName) {InputStream in = null;try {//获取文件对象 stat原信息ObjectStat stat = minioClient.statObject(CommonConstants.MINIO_BUCKET, fileName);response.setContentType(stat.contentType());in = minioClient.getObject(CommonConstants.MINIO_BUCKET, fileName);IOUtils.copy(in, response.getOutputStream());} catch (Exception e) {e.printStackTrace();} finally {if (in != null) {try {in.close();} catch (IOException e) {e.printStackTrace();}}}}}
controller测试
@RestController@RequestMapping("/file")public class FileController {@AutowiredMinioUtil minioUtil;//上传@PostMapping("/minioUpload")public String minioUpload(@RequestParam(name = "file",required = false) MultipartFile file, HttpServletRequest request){String path = minioUtil.uploadByFile(file);return path;}//下载@GetMapping("/minioDownload")public void minioDownload(String fileName, HttpServletResponse response){minioUtil.download(response,fileName);}}
一个用postman测试下,我的ok的
还在 10.100232.172这台机器上,和minio相同服务器上,安装nginx,实现图片的动态缩略功能,原理是minio的图片最终还是以静态图片保存在磁盘上
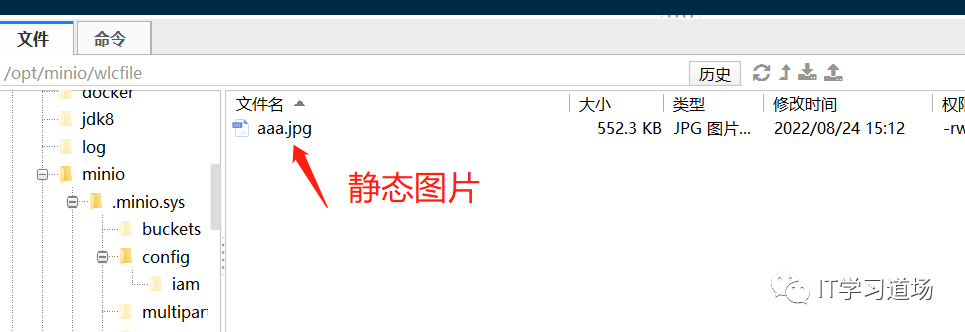
其实ng的缩略图就是把/opt/minio/wlcfile 目录下的静态文件缩略就行,和minio本身没啥关系
nginx的编译安装部署
下载nginx
在opt下下载
cd opt
wget http://nginx.org/download/nginx-1.14.1.tar.gz
解压安装包
tar -xf nginx-1.14.1.tar.gz进入解压之后的文件夹,编译(通过--prefix指定安装目录)
创建nginx的安装目录
mkdir -p opt/nginx这里引入了http_image_filter_module,需要安装一下两个插件
yum install -y gcc gcc-c++ zlib zlib-devel openssl openssl-devel pcre pcre-devel gd-devel


yum install -y libpng libjpeg libpng-devel libjpeg-devel ghostscript libtiff libtiff-devel freetype freetype-devel readline-devel ncurses-devel
编译
cd nginx-1.14.1./configure --prefix=/opt/nginx \
--modules-path=/opt/nginx/modules \
--conf-path=/opt/nginx/conf/nginx.conf \
--error-log-path=/opt/nginx/logs/error.log \
--http-log-path=/opt/nginx/logs/access.log \
--pid-path=/opt/nginx/run/nginx.pid \
--lock-path=/opt/nginx/run/nginx.lock \
--http-client-body-temp-path=/opt/nginx/cache/nginx/client_temp \
--http-proxy-temp-path=/opt/nginx/cache/nginx/proxy_temp \
--http-fastcgi-temp-path=/opt/nginx/cache/nginx/fastcgi_temp \
--http-uwsgi-temp-path=/opt/nginx/cache/nginx/uwsgi_temp \
--http-scgi-temp-path=/opt/nginx/cache/nginx/scgi_temp \
--user=nginx --group=nginx \
--with-compat \
--with-file-aio \
--with-threads \
--with-http_addition_module \
--with-http_auth_request_module \
--with-http_dav_module \
--with-http_flv_module \
--with-http_gunzip_module \
--with-http_gzip_static_module \
--with-http_mp4_module \
--with-http_random_index_module \
--with-http_realip_module \
--with-http_secure_link_module \
--with-http_slice_module \
--with-http_ssl_module \
--with-http_stub_status_module \
--with-http_sub_module \
--with-http_v2_module \
--with-mail \
--with-mail_ssl_module \
--with-stream \
--with-stream_realip_module \
--with-stream_ssl_module \
--with-stream_ssl_preread_module \
--with-http_image_filter_module
安装
make &&make install启动脚本创建
cd opt/nginx

touch start.sh stop.sh reload.sh
#创建 cache/nginx,上边在编译时配置了,这个要自己创建下,不然启动不了
mkdir -p cache/nginx
创建nginx用户
useradd -s sbin/nologin -M nginxstart.sh内容
/opt/nginx/sbin/nginxstop.sh内容
/opt/nginx/sbin/nginx -s stopreload.sh内容
/opt/nginx/sbin/nginx -s reloadnginx开机自启
在/etc/init.d/目录下创建文件nginx,改变该文件权限,设置开机启动
cd etc/init.d

touch nginx

chmod 755 nginx
修改nginx文件的内容
#!/bin/sh
#
#chkconfig: 345 63 37
#description: nginx
#processname: nginx

nginx="/opt/nginx/sbin/nginx"

start() {
    echo -n "启动nginx..........."
    $nginx
    echo "."
}

stop() {
   echo -n "停止nginx..........."
   $nginx -s stop
   echo "."
}

restart() {
    stop
    sleep 1
    start
}

reload() {
    $nginx -s reload
}


case "$1" in
    start)
        start
        ;;
    stop)
        stop
        ;;
    restart)
       restart
        ;;
    reload)
       reload
        ;;
    *)
        echo $"Usage: $0 {start|stop|restart|reload}"
        exit 2
esac
添加服务到开机项
chkconfig --add nginx设置为开机启动
chkconfig nginx on命令
| System V init 命令(RHEL 6 | systemctl 命令(RHEL 7) | 作用 |
|---|---|---|
| service nginx start | systemctl start nginx.service | 启动服务 |
| service nginx stop | systemctl stop nginx.service | 停止服务 |
| service nginx restart | systemctl restart nginx.service | 重启服务 |
| service nginx reload | systemctl reload nginx.service | 重新加载配置文件(不终止服务) |
ng的部署到这里结束
nginx实现缩略
下面配置nginx.conf文件,来实现动态缩略(nginx实现缩略是因为在编译安装nginx时,配置了--with-http_image_filter_module 这个模块)是根据image_filter_module来实现的缩略
nginx.conf内容如下
#user nobody;worker_processes 1;#error_log logs/error.log;#error_log logs/error.log notice;#error_log logs/error.log info;#pid logs/nginx.pid;events {worker_connections 1024;}http {include mime.types;default_type application/octet-stream;#log_format main '$remote_addr - $remote_user [$time_local] "$request" '# '$status $body_bytes_sent "$http_referer" '# '"$http_user_agent" "$http_x_forwarded_for"';#access_log logs/access.log main;sendfile on;#tcp_nopush on;#keepalive_timeout 0;keepalive_timeout 65;#gzip on;server {listen 80;server_name localhost;#charset koi8-r;#access_log logs/host.access.log main;location {root html;index index.html index.htm;}#这段往下为生成缩略图的配置location ~ wlcfile/(.+)_([0-9]+)x([0-9]+)\.(JPG|GIF|PNG|JPEG|jpg|gif|png|jpeg) {#设置root的路径,其实就是minio的文件存储路径,相当于cd到/opt/minio进行代码的运行root opt/minio;set $w $2;set $h $3;if ($w != "0") {rewrite wlcfile/(.+)_(\d+)x(\d+)\.(JPG|GIF|PNG|JPEG|jpg|gif|png|jpeg)$ wlcfile/$1.$4break;}if ($h != "0") {rewrite wlcfile/(.+)_(\d+)x(\d+)\.(JPG|GIF|PNG|JPEG|jpg|gif|png|jpeg)$ wlcfile/$1.$4break;}#根据给定的长宽生成缩略图image_filter resize $w $h;#原图最大50M,要裁剪的图片超过2M返回415错误image_filter_buffer 50M;try_files wlcfile/$1.$4 $1.jpg;}#这段往下为原图配置location ~ wlcfile/(.*)$ {root opt/minio;}#error_page 404 404.html;# redirect server error pages to the static page 50x.html#error_page 500 502 503 504 50x.html;location = 50x.html {root html;}}}
这样就代理的80端口,来这台机器的处理图片的缩略
下面在另一台服务器(10.100.232.173)上来部署另一个nginx来实现 当前机器(10.100.232.172)的团片的反向代理
10.100.232.173机器上部署nginx和方向代理
部署步骤和上边部署nginx一样
下面就是nginx的 nginx.conf 的配置文件内容
#user nobody;worker_processes 1;#error_log logs/error.log;#error_log logs/error.log notice;#error_log logs/error.log info;#pid logs/nginx.pid;events {worker_connections 1024;}http {include mime.types;default_type application/octet-stream;#log_format main '$remote_addr - $remote_user [$time_local] "$request" '# '$status $body_bytes_sent "$http_referer" '# '"$http_user_agent" "$http_x_forwarded_for"';#access_log logs/access.log main;sendfile on;#tcp_nopush on;#keepalive_timeout 0;keepalive_timeout 65;#gzip on;server {listen 80;server_name localhost;#charset koi8-r;#access_log logs/host.access.log main;# location / {# root html;# index index.html index.htm;# }#location /download {proxy_pass http://10.100.232.172:80/;proxy_set_header Host $http_host;proxy_set_header X-Real-IP $remote_addr;proxy_set_header X-Forwarded-For $proxy_add_x_forwarded_for;proxy_set_header X-Forwarded-Proto $scheme;proxy_set_header X-NginX-Proxy true;}#error_page 404 /404.html;# redirect server error pages to the static page /50x.html#error_page 500 502 503 504 /50x.html;location = /50x.html {root html;}}}
测试
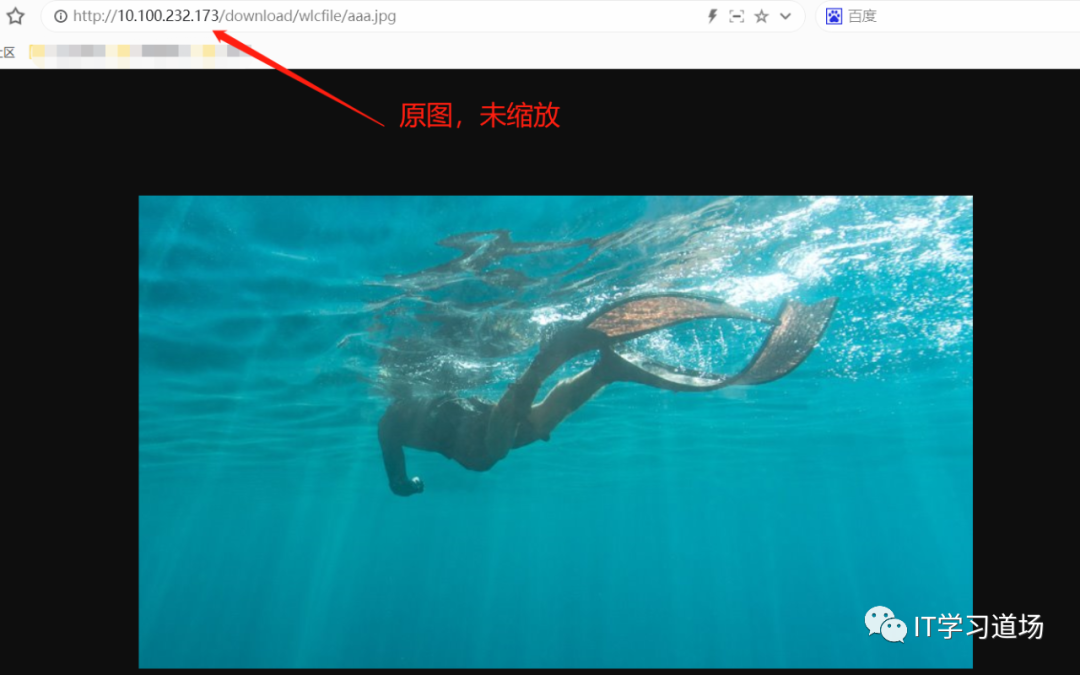
在地址栏输入 wlcfile下的图片地址 http://10.100.232.173/download/wlcfile/aaa.jpg
http://10.100.232.173/download:是10.100.232.173的nginx,会代理路由到 10.100.232.172的ng上。10.100.232.172的ng再访问 /opt/minio/wlcfile 下的文件
缩略测试
在地址栏输入 wlcfile下的图片地址 http://10.100.232.173/download/wlcfile/aaa_200x200.jpg
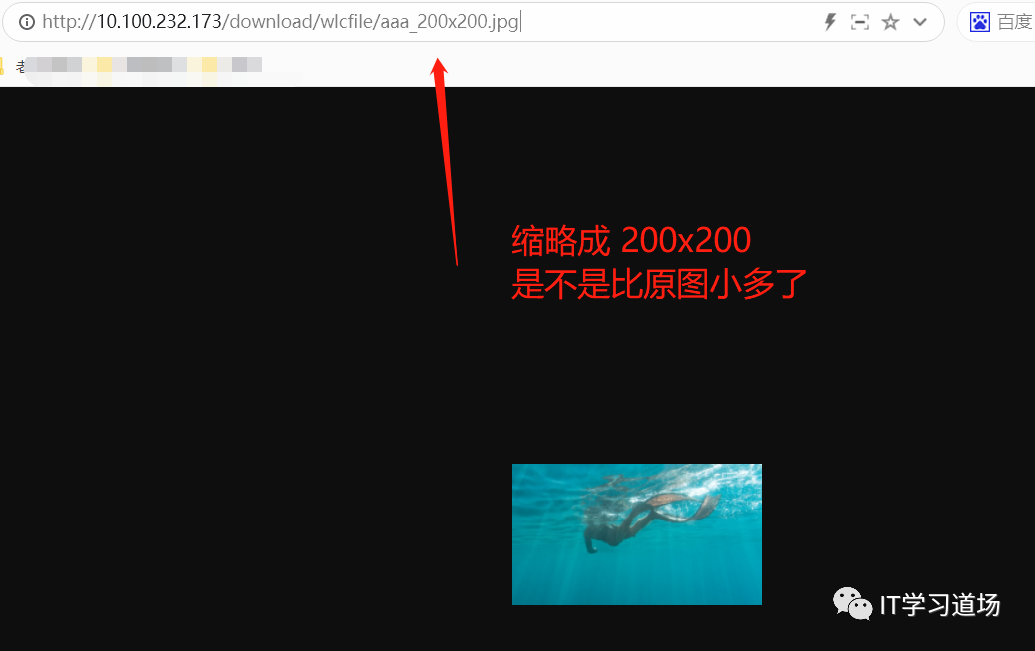
缩略成功
