一、jenkins 安装
jenkins官方网站
#通过官方推荐brew的方式进行安装
brew install jenkins

#默认的安装目录
/usr/local/Cellar

#jenkins的基本操作命令

#启动jenkins:
brew services start jenkins

#停止jenkins:
brew services stop jenkins

#重启Jenkins:
brew services restart jenkins
二、jenkins 配置
1、输入启动命令,启动jenkins 默认 端口8080 进入如下界面 等在加载

2、获取jenkins 管理员密码 根据提示输入/var/lib/jenkins/secrets/initialAdminPassword 复制密码输入

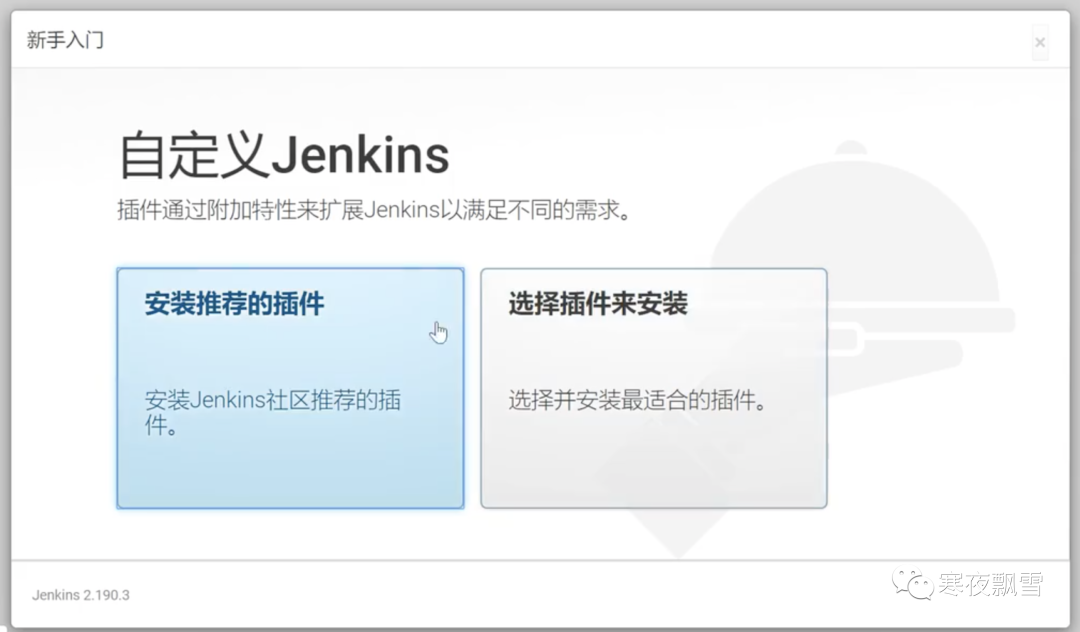
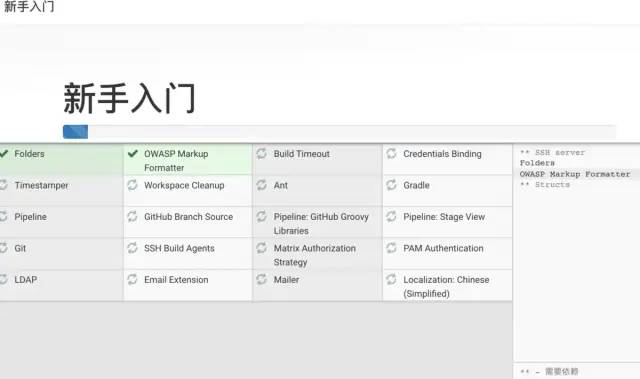
3、选择安装推荐的插件
4、等待插件下载
5、创建第一个管理员用户

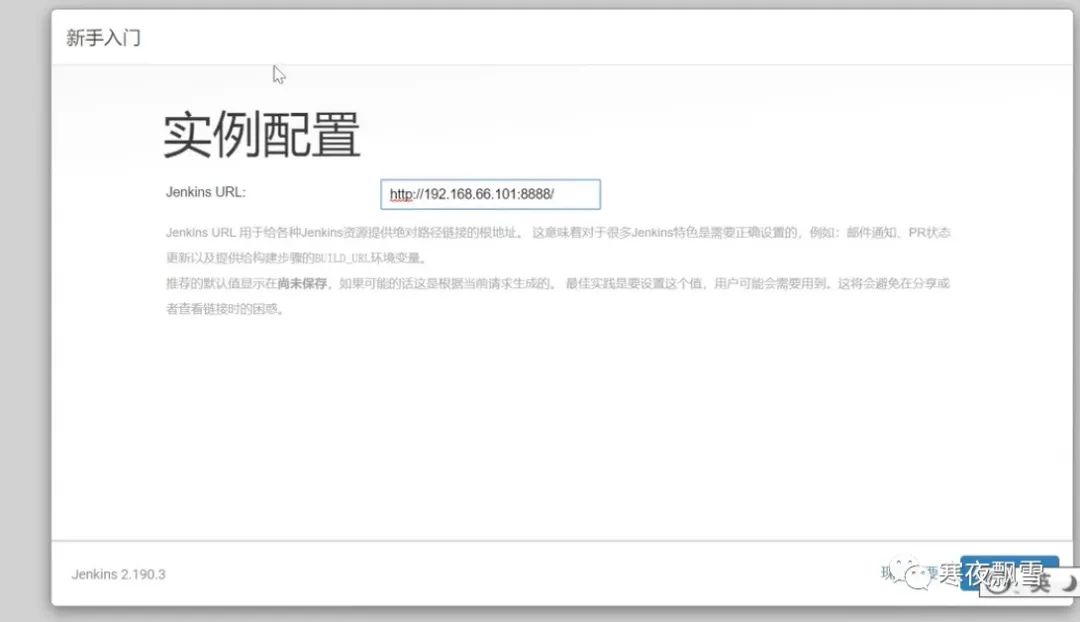
6、实例配置 ,根据自己的的要求设置,本地就localhost,对应的服务器输入自己的ip,端口自己定义
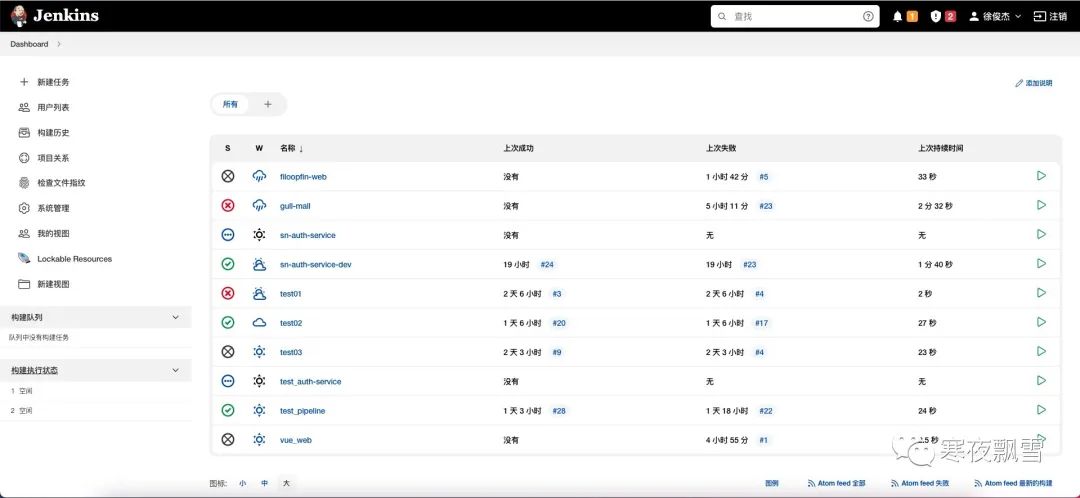
7、进入jenkins 页面
7、点击系统管理,进行系统全局设置和插件的安装
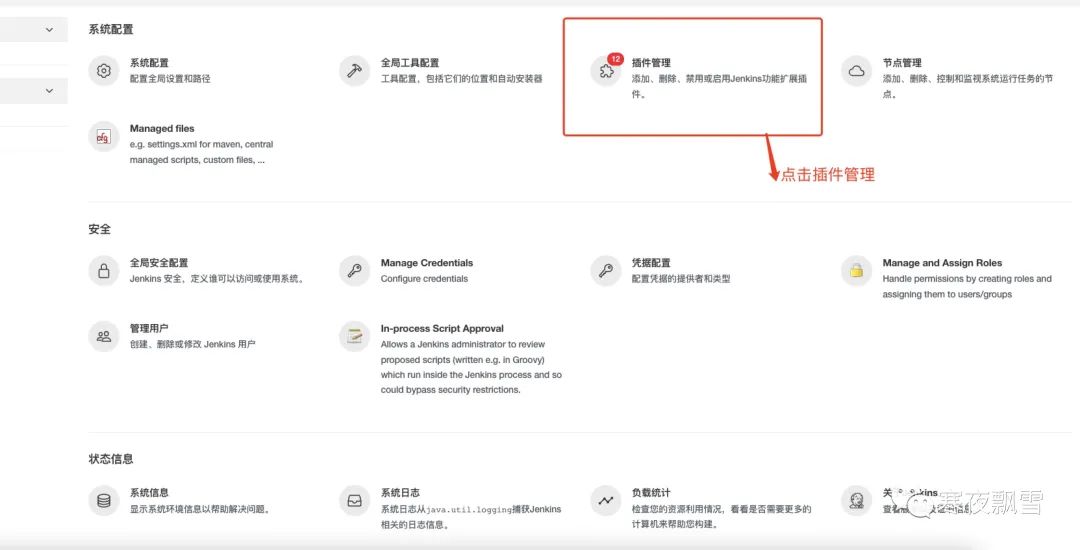
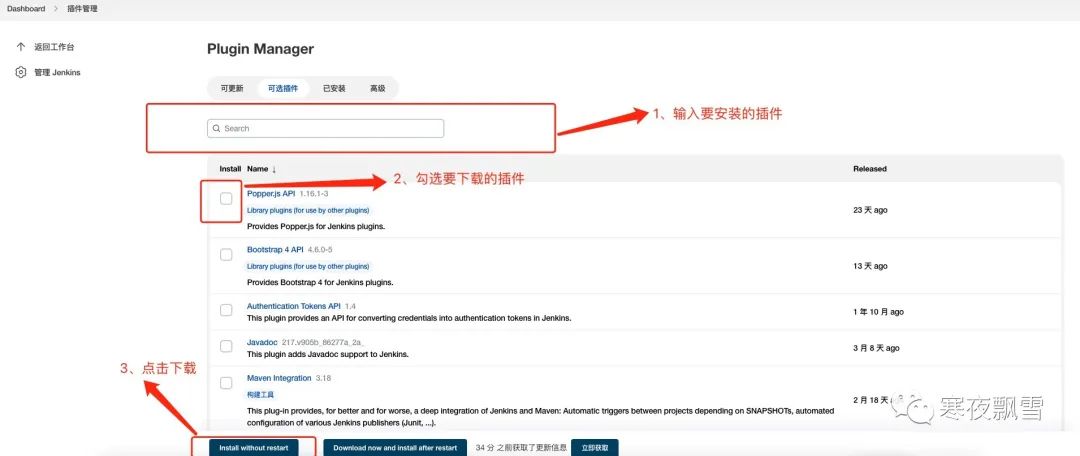
需要安装的插件
chinese 汉化(选装)
nodejs 打包前端的管理工具(必装)
pipeline (流水线工程插件 必装)
Role-base Authorization Strategy (用户权限管理插件 必装)
Credentials Binding (凭证管理插件 必装)
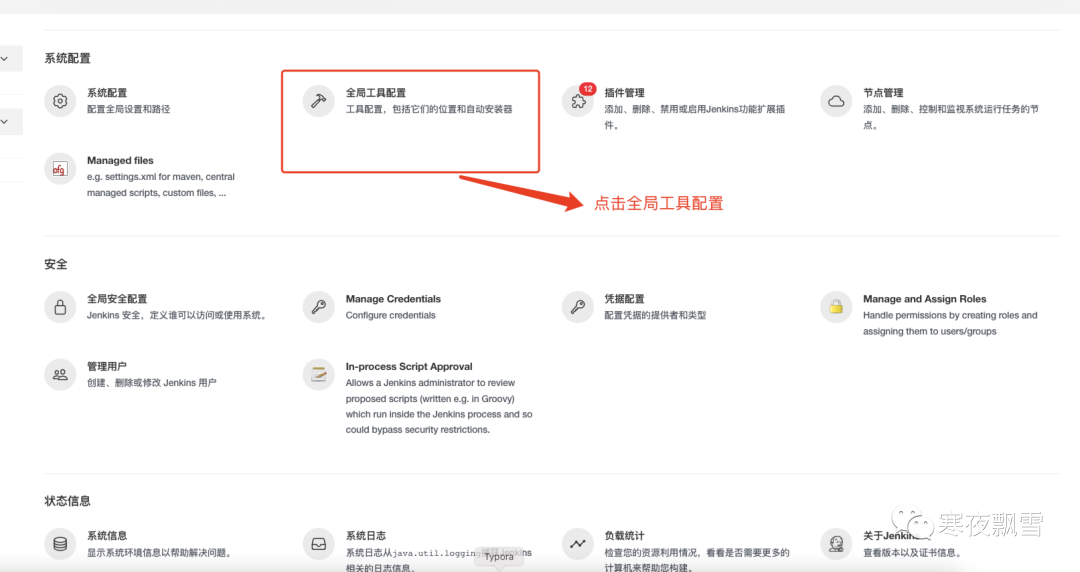
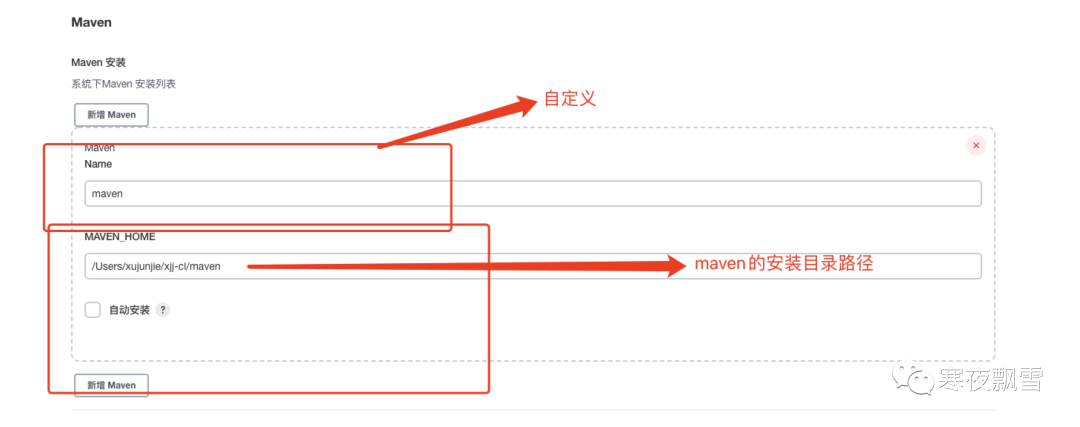
maven 环境配置
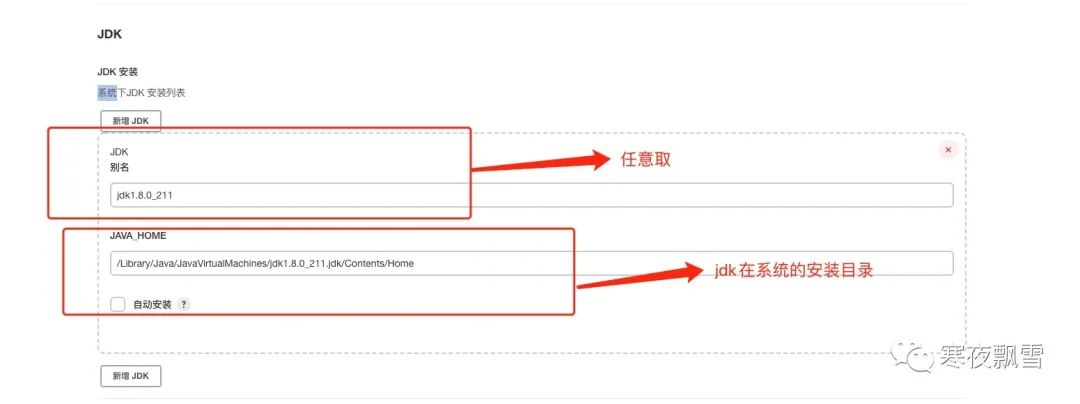
jdk 环境配置
git 环境配置
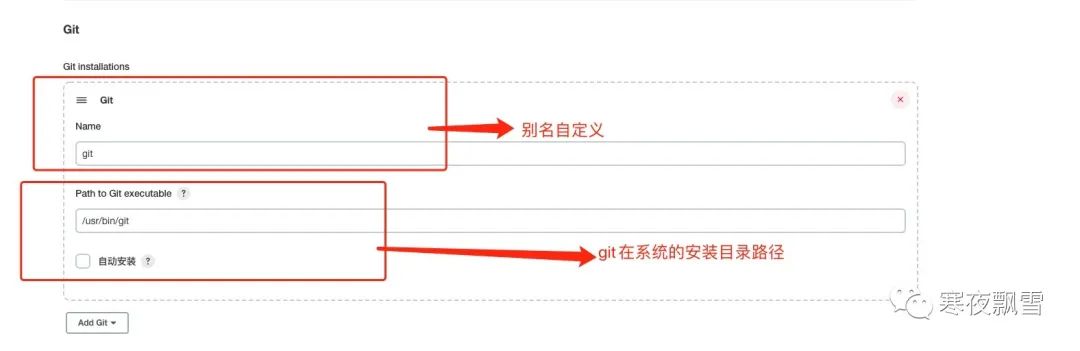
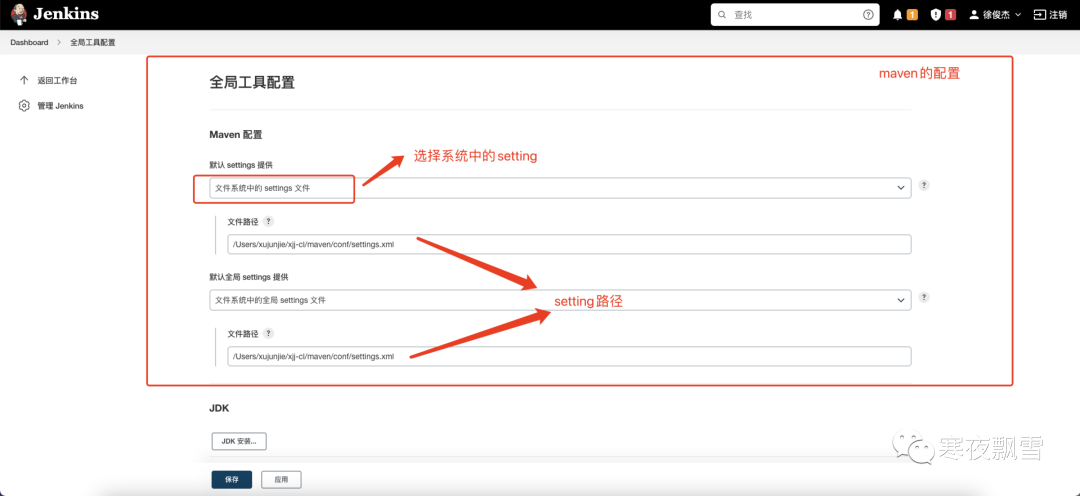
maven 环境配置
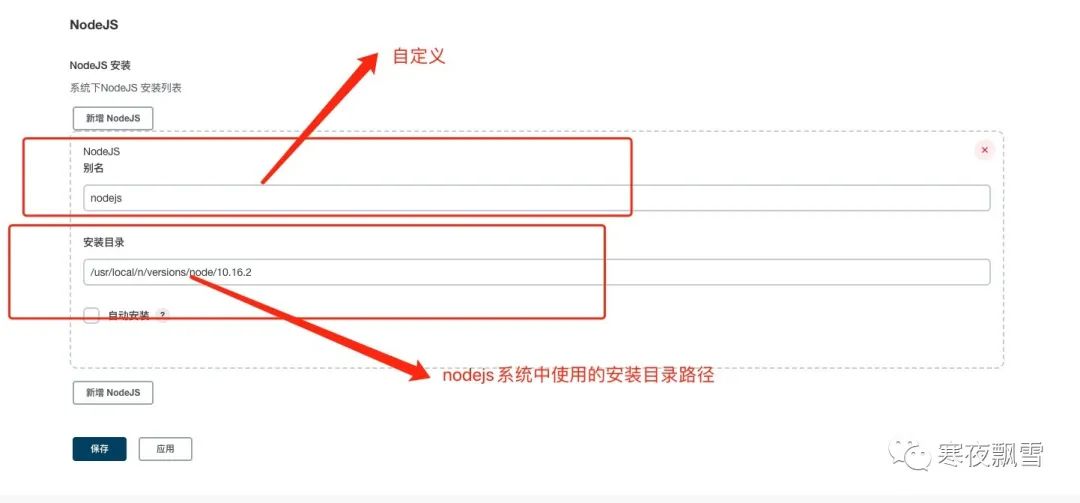
NodeJs 环境配置
以上环境都为全局环境设置,针对某个项目往往会产生一些版本差异可以针对项目进行细化版本配置
三、jenkins 用户权限配置例子
3.1、配置权限
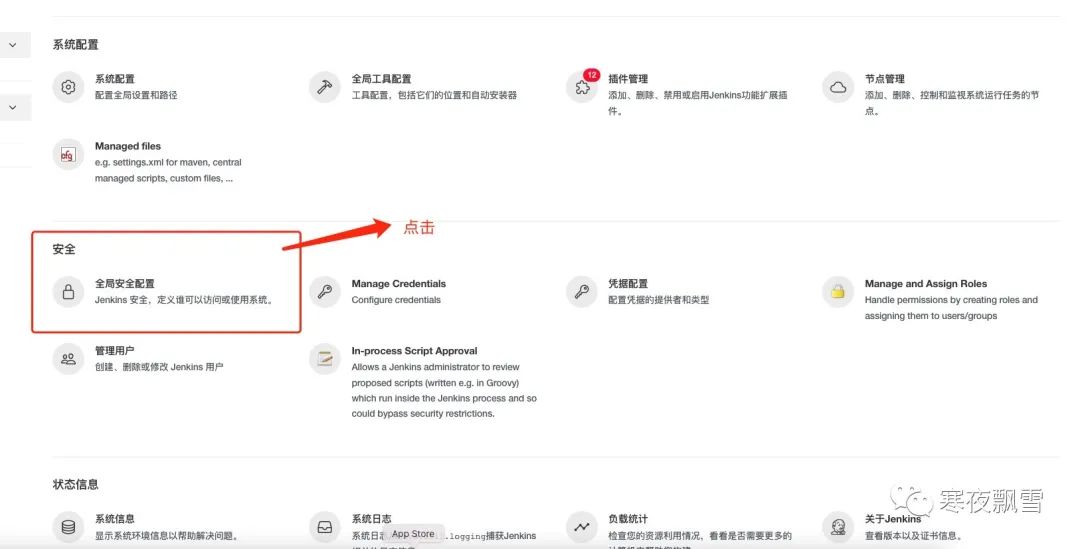
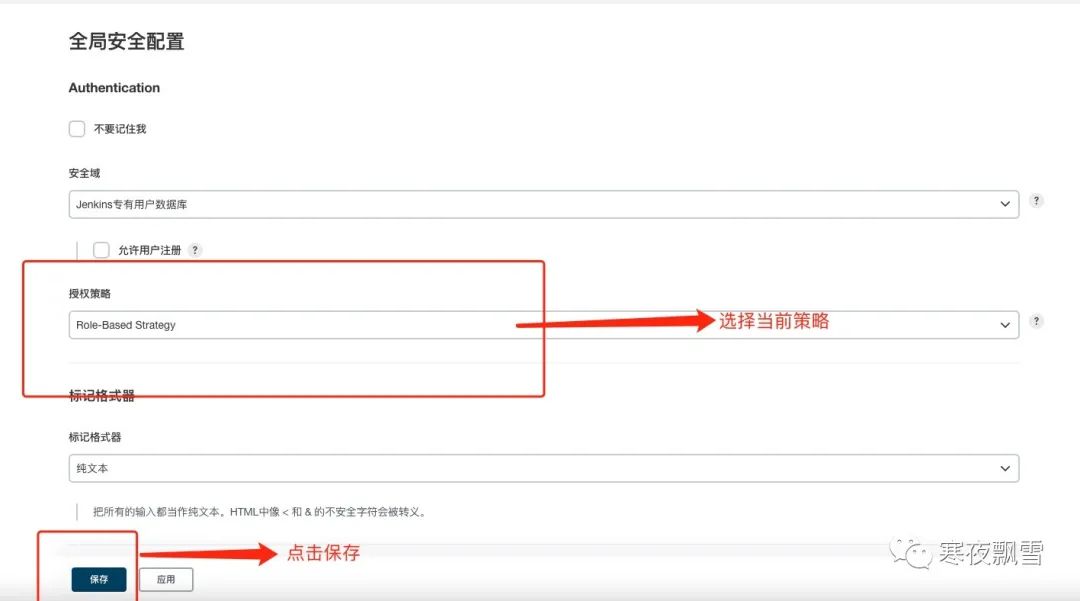
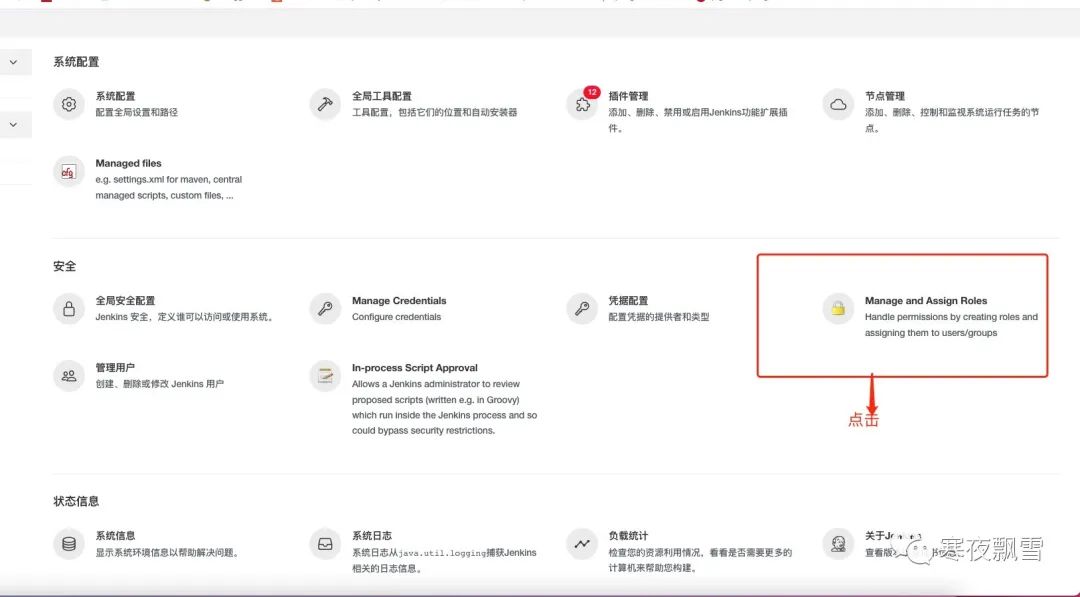
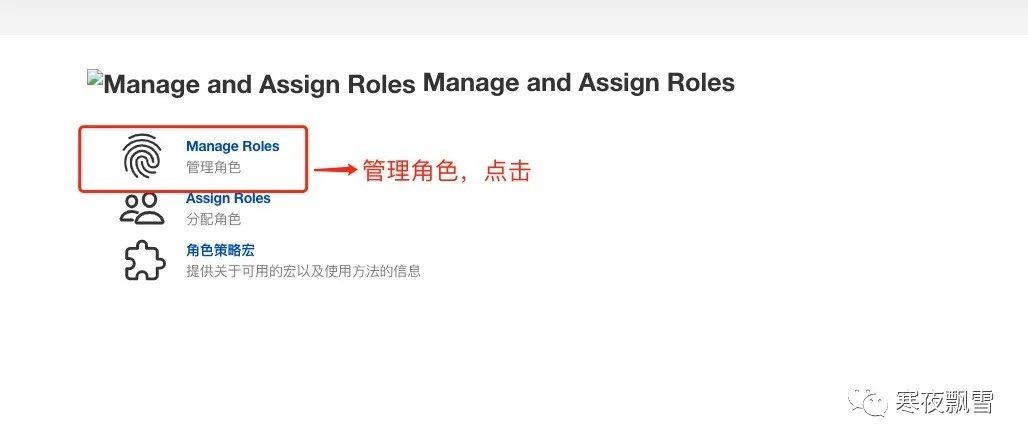

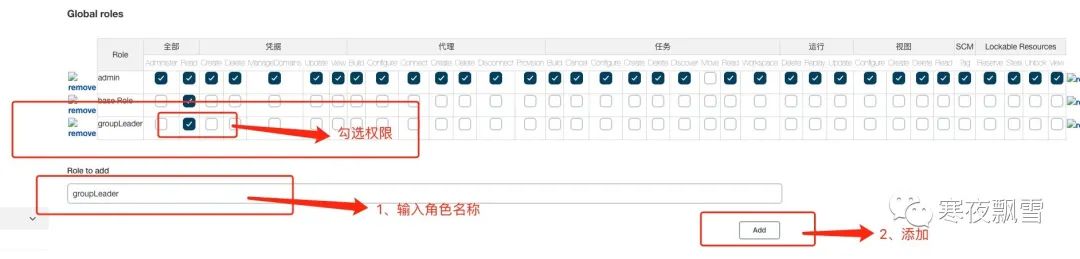
3.1.1、全局权限配置
新建一个groupLeader权限
3.1.2、项目角色配置
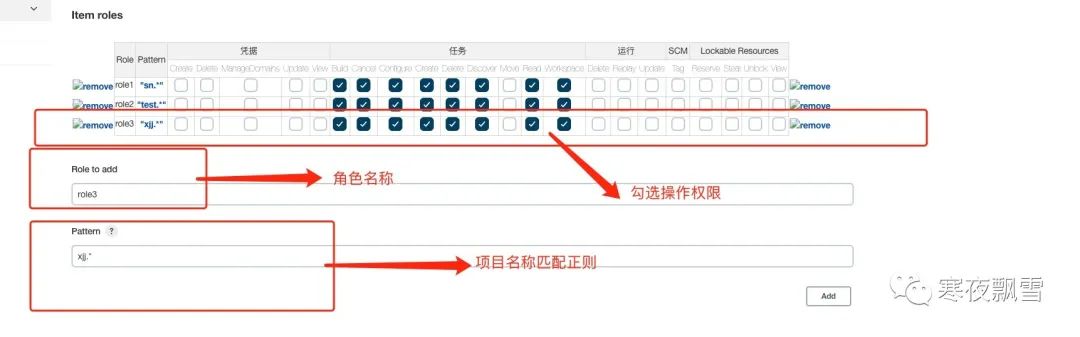
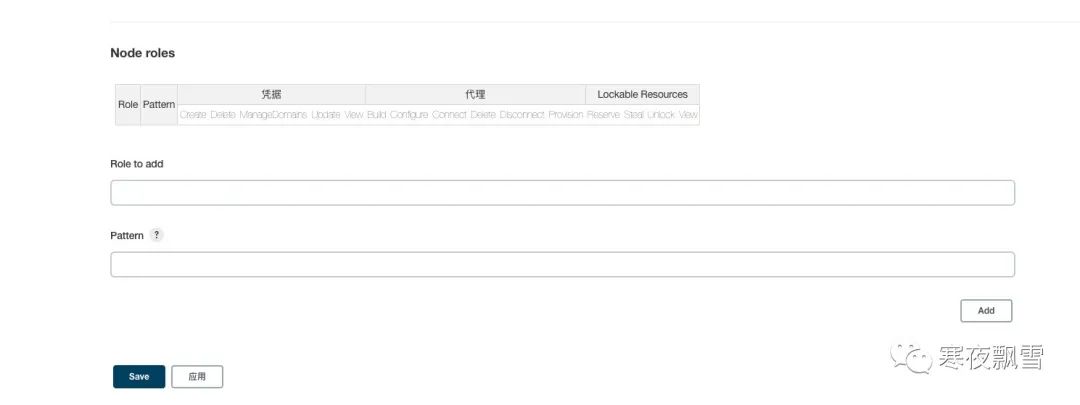
节点角色 一般不使用,不做介绍
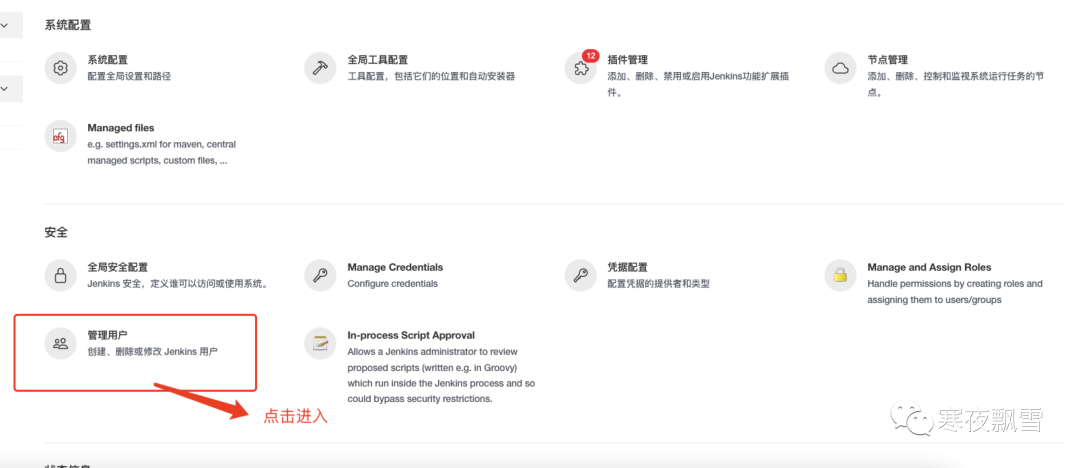
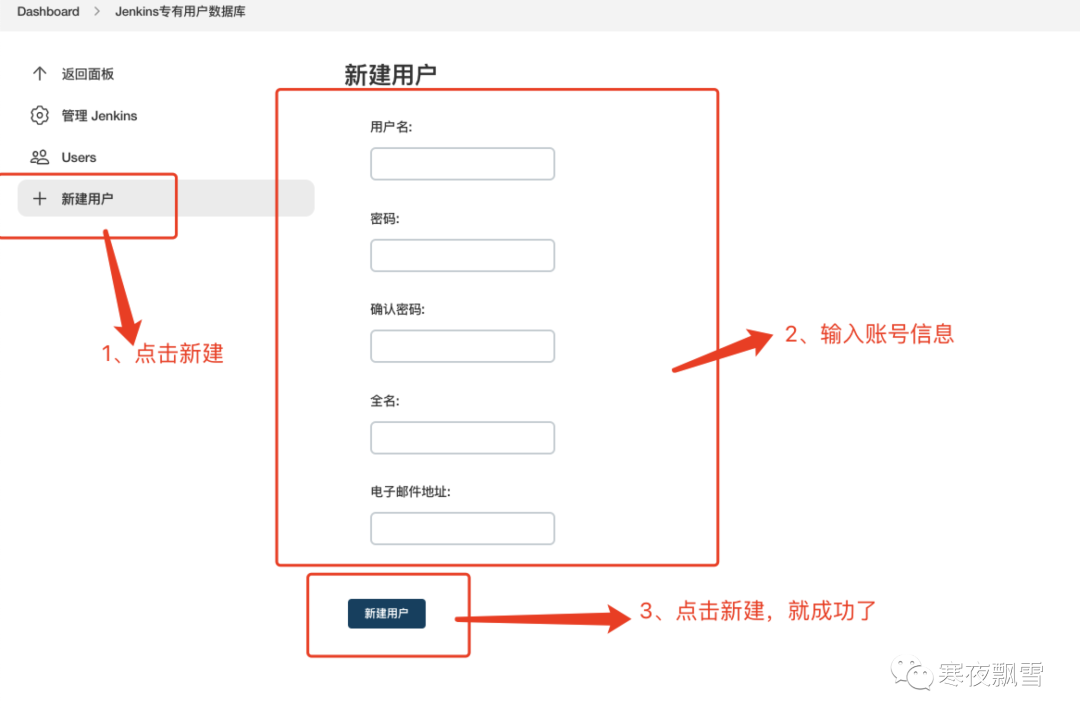
3.2、新增用户
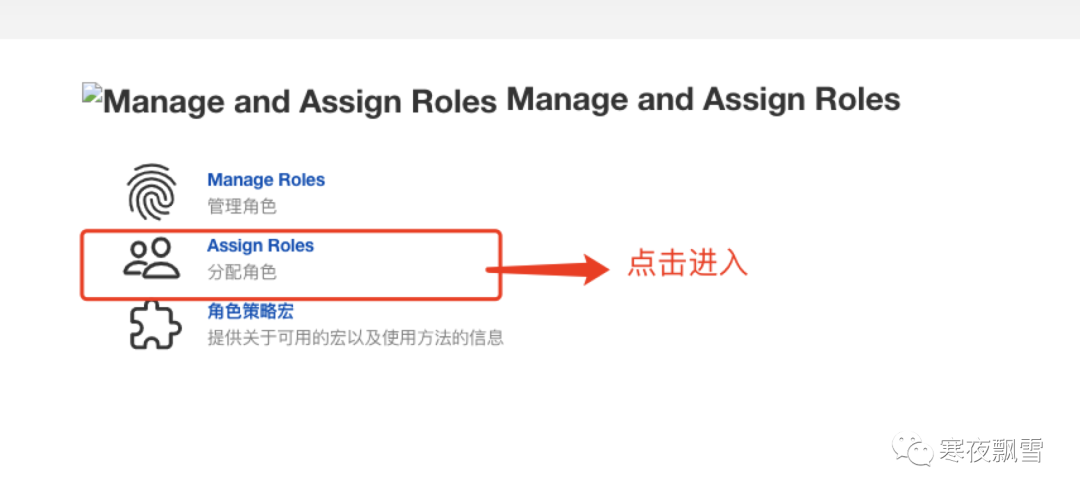
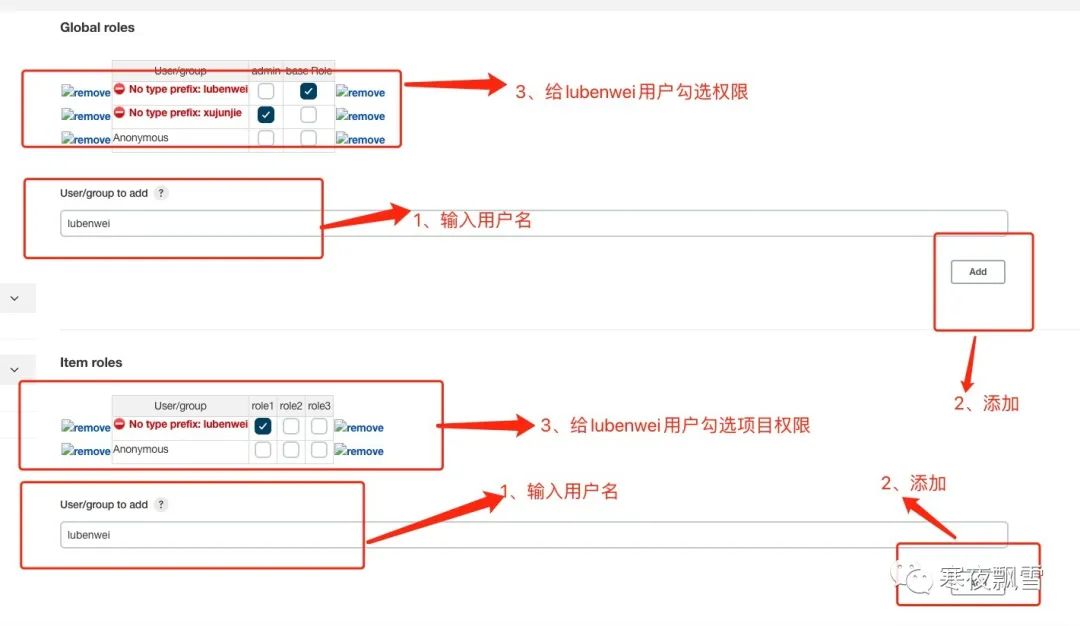
3.2.1、给用户分配角色权限
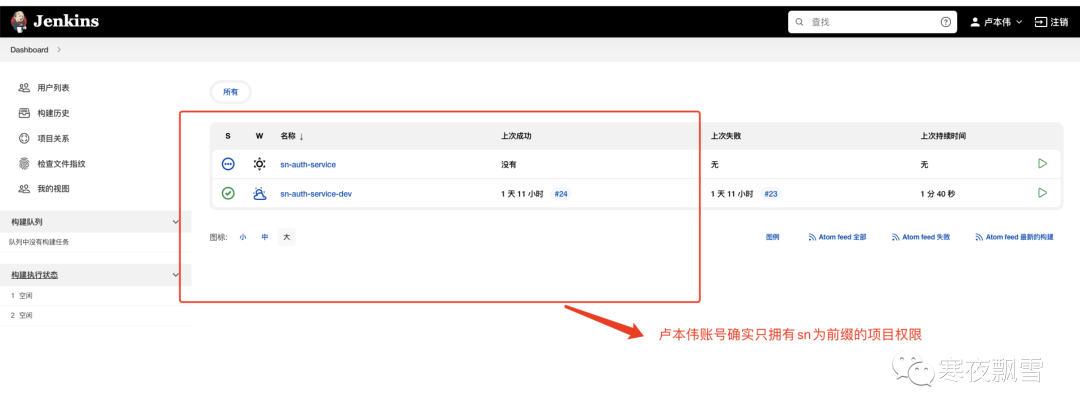
3.2.2、验证配置生效
四、jenkins 打包、构建、部署项目(包含前后端)
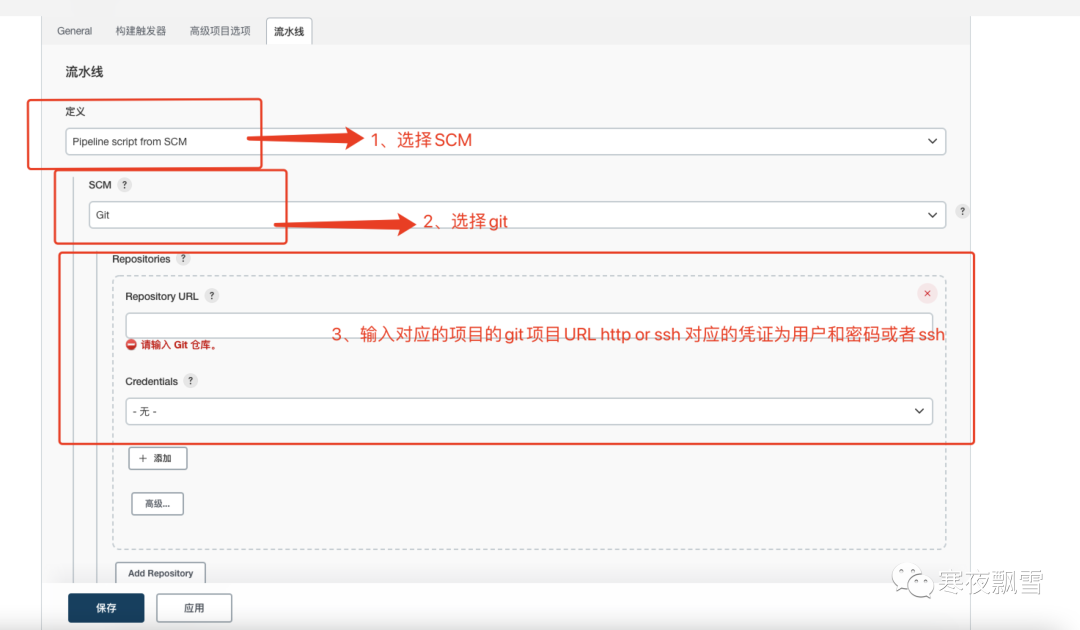
4.1、打通jenkins 和仓库
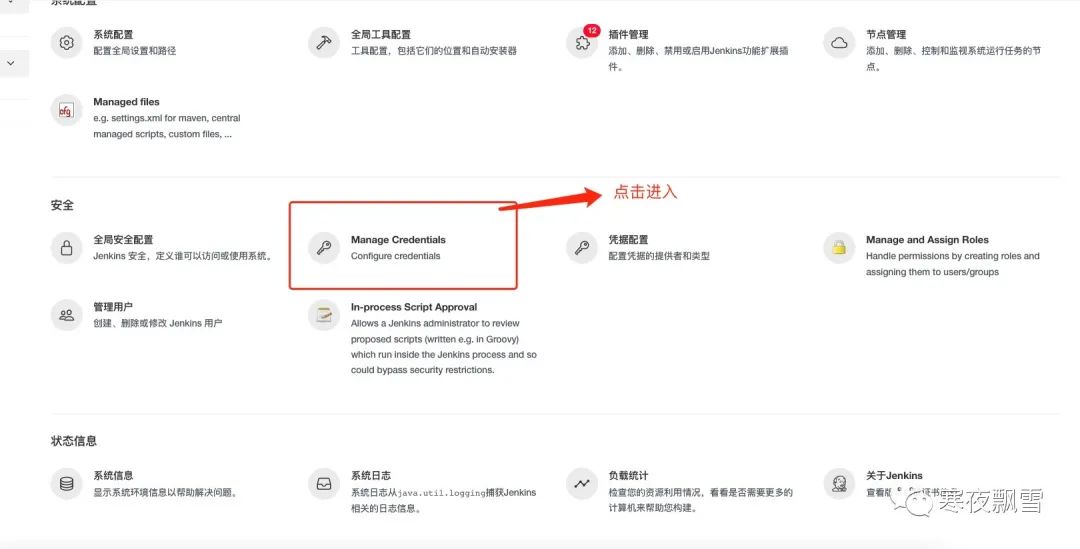
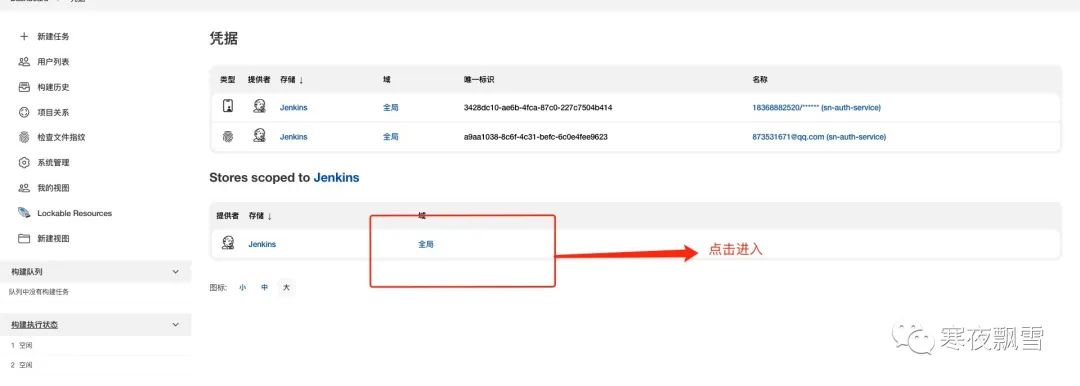
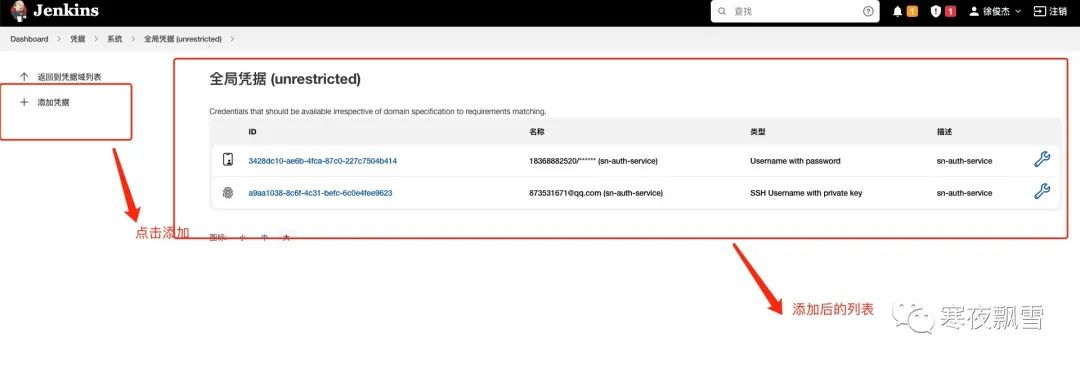
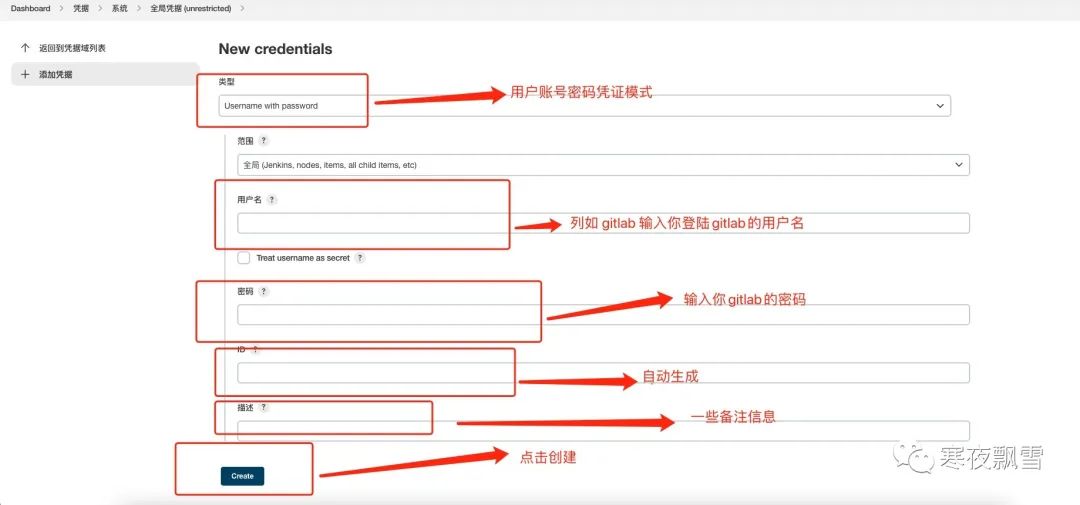
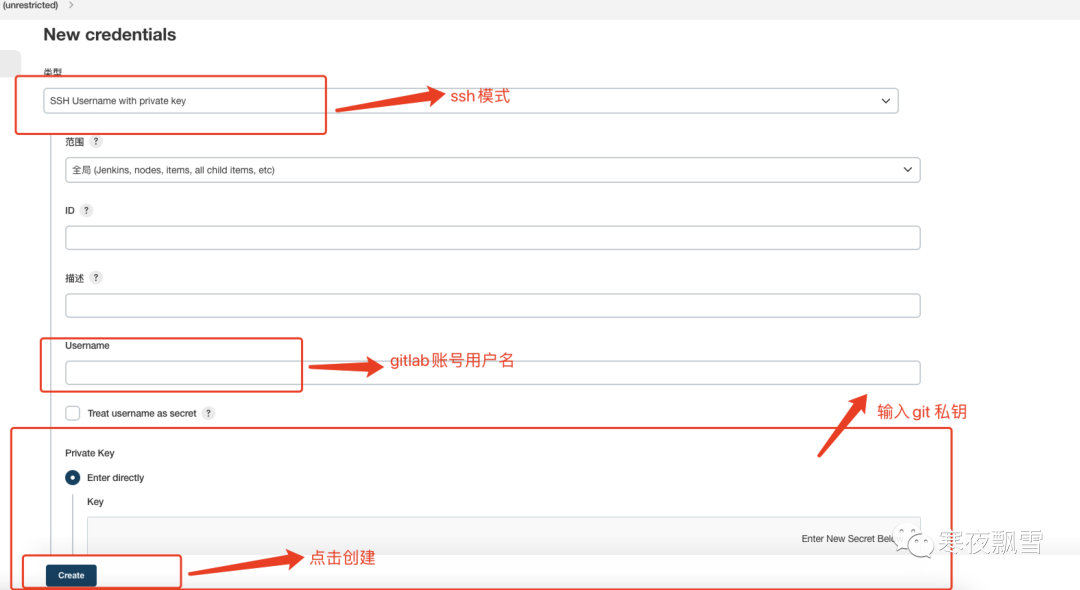
完成以上配置我们就可以通过jenkins拉去gitlab等仓库的代码了。
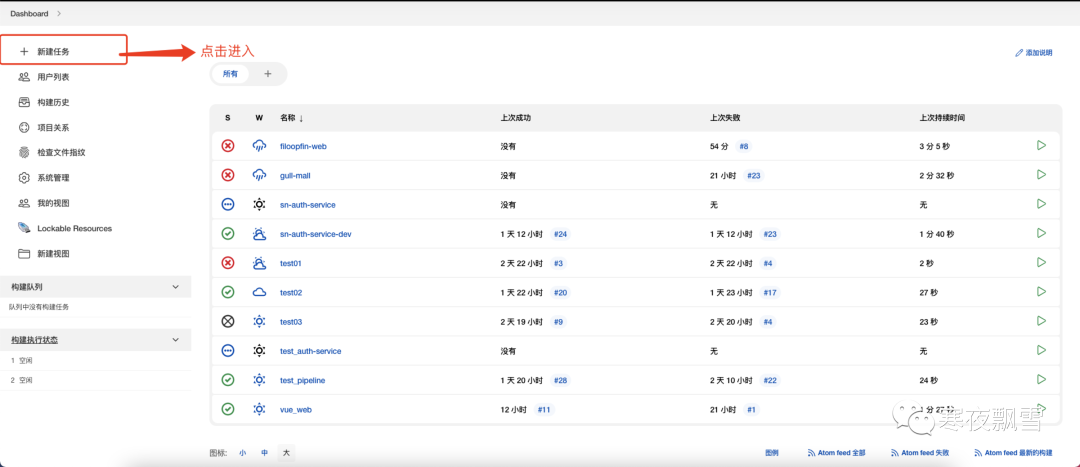
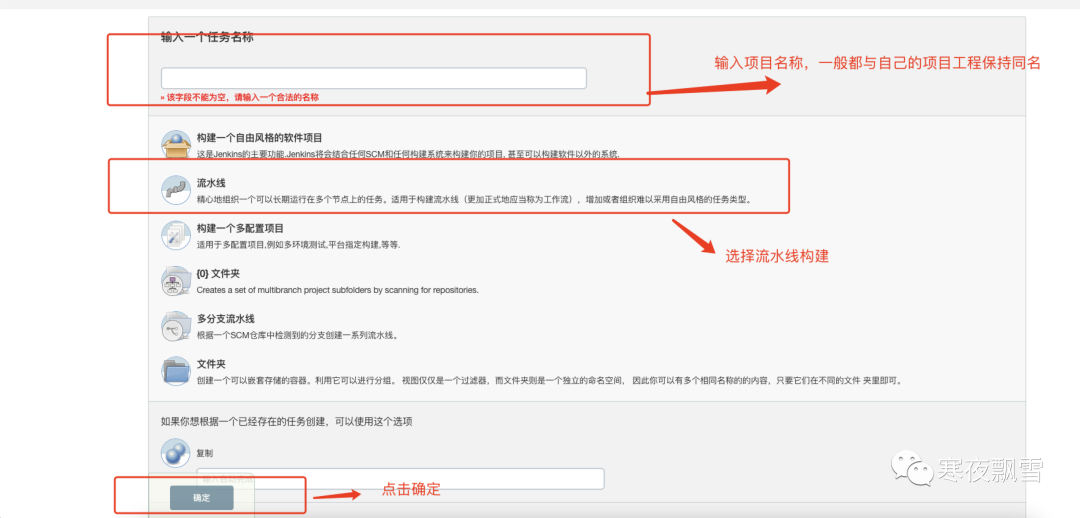
4.2、构建流水线项目
三种项目风格
自由风格软件项目
Maven项目
流水线项目(pipeline Project)
重点第三种 pipeline
Groovy语言实现
两种语法:Declarative(声明式)和Scripted Pipline(脚本式)语法
创建脚本Jenkinsfile脚本文件放入项目源码中
号召实际主流生产jenkins项目搭建 采用pipeline+jenkinsfile的方式进行搭建
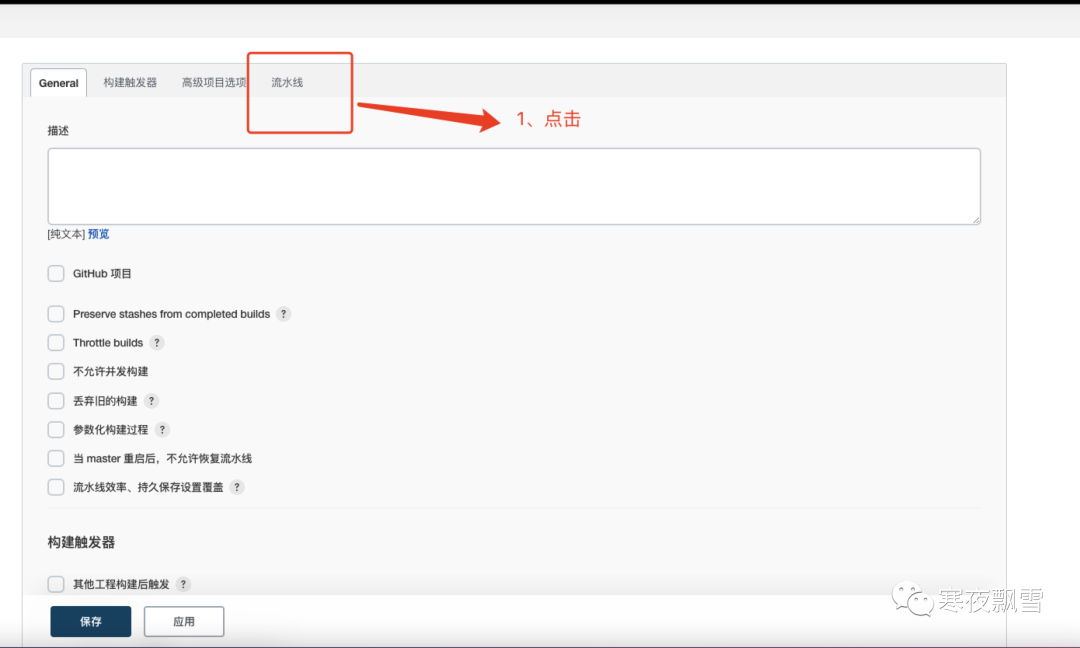
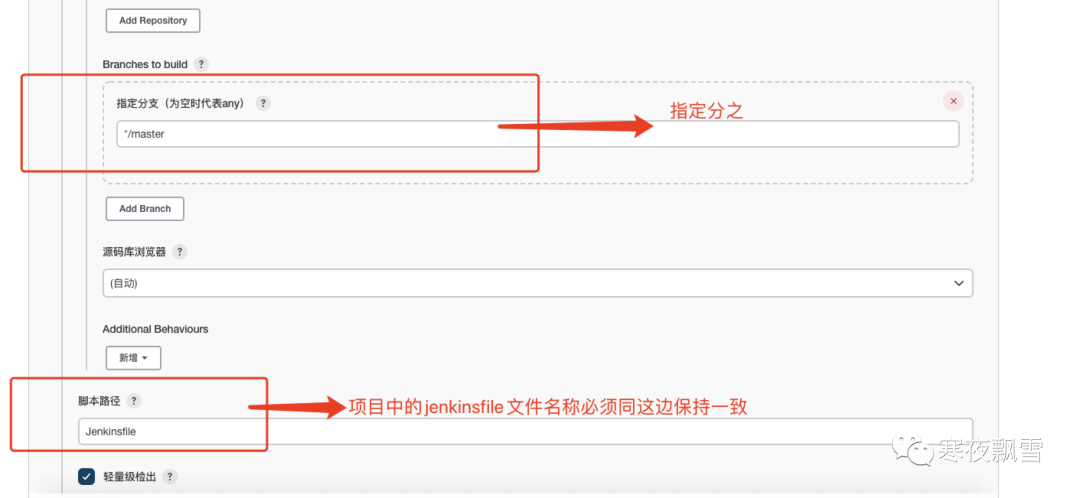
以上操作完成点击保存,完成项目创建。
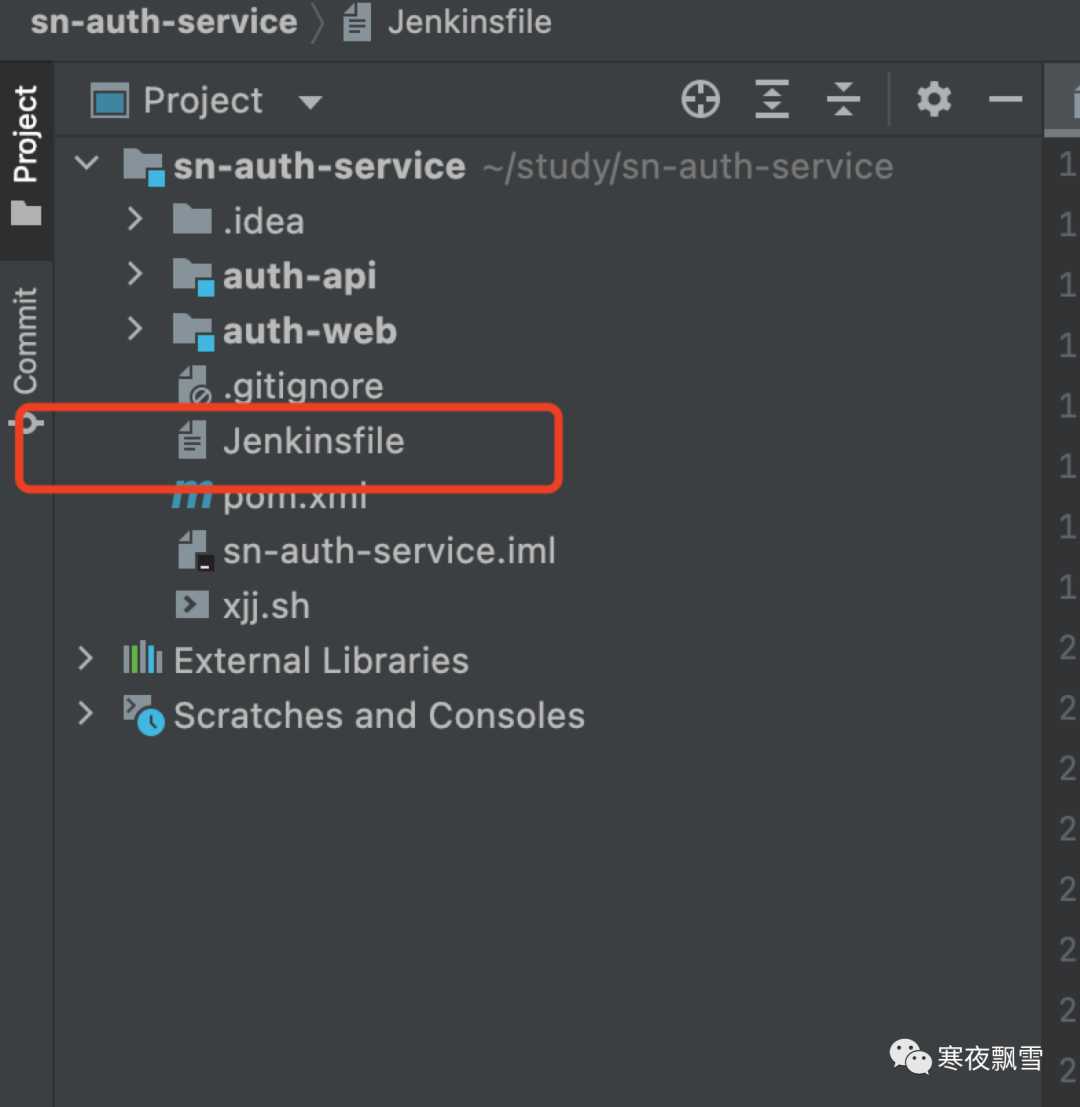
4.3、后端脚本jenkinsfile 编写案例
项目目录
//jar 包放置路径
def TARGET_PATH = '/Users/xujunjie/jenkinsProject/sn-auth-service'
//jenkins 默认生成的 打包路径
def SOURCE_PATH = './auth-web/target'
//启动脚本
def SHELL_NAME = 'xjj.sh'

pipeline {
    agent any
    parameters {
        string(name: 'TAG_NAME', defaultValue: '', description: '')
    }
    stages {
        stage('getGitlabBranchName') {
            steps {
                echo "current branch is: ${env.gitlabBranch}"
            }
        }

        stage('build-master') {
//             when {
//                 environment name: 'gitlabBranch', value: 'master'
//             }
            steps {
                withEnv(['JENKINS_NODE_COOKIE=dontkillme']) {
                        sh "mvn clean package -U -Ptest -DskipTests"
                        sh "pwd"
                        sh "cp $SOURCE_PATH/*.jar $TARGET_PATH"
                        sh "cp ./$SHELL_NAME $TARGET_PATH"
                        sh "sh $TARGET_PATH/$SHELL_NAME restart"
                }
            }
        }
    }
}
#!/bin/sh
# author xujunjie1
# ./auth-web.sh start 启动
# ./auth-web.sh stop 停止
# ./auth-web.sh restart 重启
# ./auth-web.sh status 状态


#项目名称
SERVER_NAME=auth-web
#生成的jar包名称
APP_NAME=auth-web.jar
#存放jar包的目录
APP_HOME=/Users/xujunjie/jenkinsProject/sn-auth-service
#指定生成日志的路径
LOG_PATH=$APP_HOME/logs
JVM_OPTS="-XX:+HeapDumpOnOutOfMemoryError -Xms512m -Xmx512m -Xmn256m"

if [ "$1" = "" ]; then
  echo -e "\033[0;31m 未输入操作名 \033[0m  \033[0;34m {start|stop|restart|status} \033[0m"
  exit 1
fi

if [ "$APP_NAME" = "" ]; then
  echo -e "\033[0;31m 未输入应用名 \033[0m"
  exit 1
fi

# shellcheck disable=SC2112
function start() {
  PID=$(ps -ef | grep java | grep $APP_NAME | grep -v grep | awk '{print $2}')

  if [ x"$PID" != x"" ]; then
    echo "$APP_NAME is running..."
  else
    export DISPLAY=:0
    nohup java $JVM_OPTS -jar $APP_HOME/$APP_NAME > dev/null 2>&1 &
    echo "Start $APP_NAME success..."
  fi
}

# shellcheck disable=SC2112
function stop() {
  echo "Stop $APP_NAME"

  PID=""
  query() {
    PID=$(ps -ef | grep java | grep $APP_NAME | grep -v grep | awk '{print $2}')
  }

  query
  if [ x"$PID" != x"" ]; then
    kill -9 $PID
    echo "$APP_NAME (pid:$PID) exiting..."
    while [ x"$PID" != x"" ]; do
      sleep 1
      query
    done
    echo "$APP_NAME exited."
  else
    echo "$APP_NAME already stopped."
  fi
}

# shellcheck disable=SC2112
function restart() {
  stop
  sleep 2
  start
}

# shellcheck disable=SC2112
function status() {
  PID=$(ps -ef | grep java | grep $APP_NAME | grep -v grep | wc -l)
  if [ $PID != 0 ]; then
    echo "$APP_NAME is running..."
  else
    echo "$APP_NAME is not running..."
  fi
}

case $1 in
start)
  start
  ;;
stop)
  stop
  ;;
restart)
  restart
  ;;
status)
  status
  ;;
*) ;;

esac
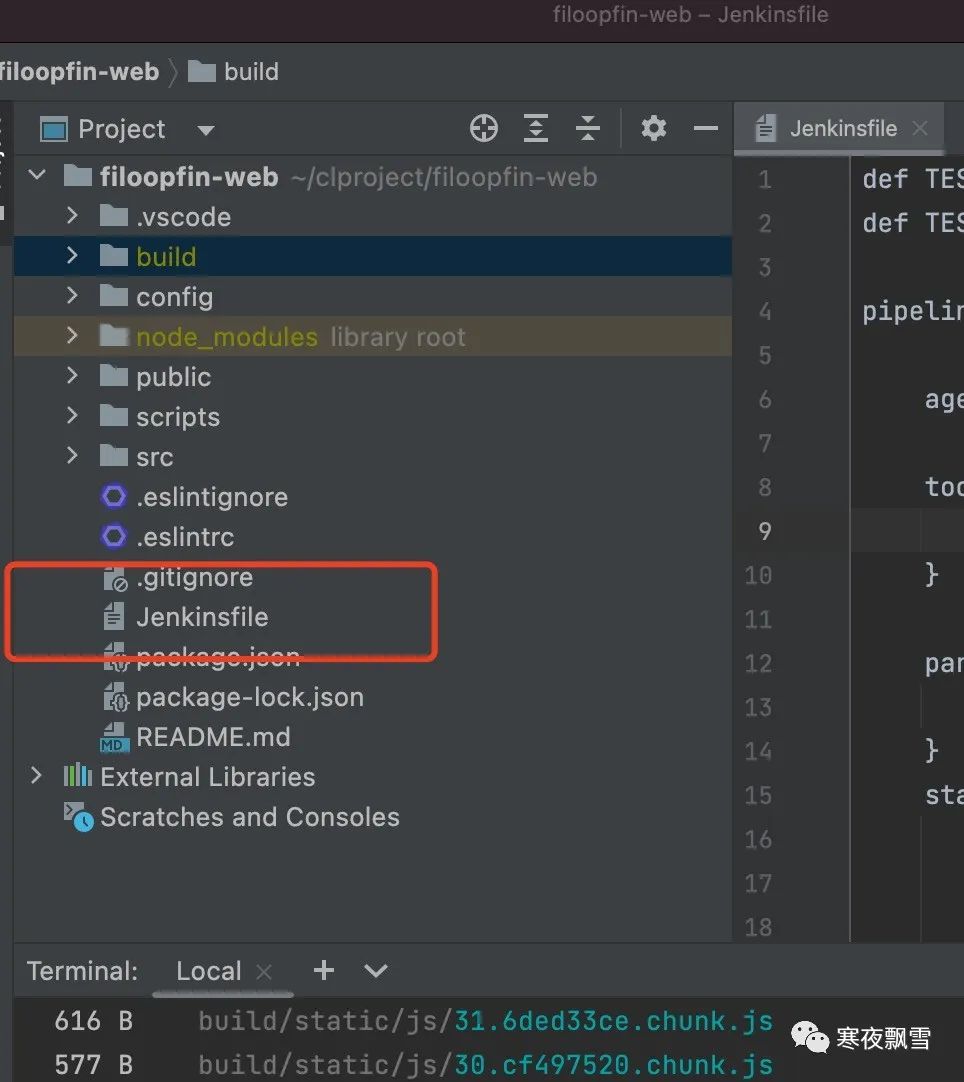
4.4、前端脚本jenkinsfile编写案例
# 前端项目打包 生成路径
def TEST_DEPLOY_TARGET_PATH ='/Users/xujunjie/jenkinsProject/qianduan/filoopfin-web'
#前端打包文件
def TEST_DEPLOY_SOURCE_PATH ='./build/*'

pipeline{

    agent any

    tools{
        nodejs 'nodejs'
    }

    parameters {
        string(name: 'TAG_NAME', defaultValue: '', description: '')
    }
    stages{
        stage('getGitlabBranchName') {
            steps {
                echo "current branch is: ${env.gitlabBranch}"
                sh 'printenv'
            }
        }

        stage('build-master'){
/*             when {
                anyOf {
                    environment name: 'gitlabBranch', value: 'test'
                }
            } */
            steps{
                echo 'master branch'
                sh "node -v"
                sh "npm install"
                sh "npm run build"
                sh "rm -rf $TEST_DEPLOY_TARGET_PATH/*"
                sh "cp -r $TEST_DEPLOY_SOURCE_PATH $TEST_DEPLOY_TARGET_PATH"
            }
        }
    }
}
4.4.1、nginx配置
server {
listen 1080;
server_name localhost;
#charset koi8-r;
#access_log logs/host.access.log main;
location {
root Users/xujunjie/jenkinsProject/qianduan/filoopfin-web;
index index.html index.htm;
try_files $uri $uri/ index.html;
}
#error_page 404 404.html;
# redirect server error pages to the static page 50x.html
#
error_page 500 502 503 504 50x.html;
location = 50x.html {
root html;
}
# proxy the PHP scripts to Apache listening on 127.0.0.1:80
#
#location ~ \.php$ {
# proxy_pass http://127.0.0.1;
#}
# pass the PHP scripts to FastCGI server listening on 127.0.0.1:9000
#
#location ~ \.php$ {
# root html;
# fastcgi_pass 127.0.0.1:9000;
# fastcgi_index index.php;
# fastcgi_param SCRIPT_FILENAME scripts$fastcgi_script_name;
# include fastcgi_params;
#}
# deny access to .htaccess files, if Apache's document root
# concurs with nginx's one
#
#location ~ \.ht {
# deny all;
#}
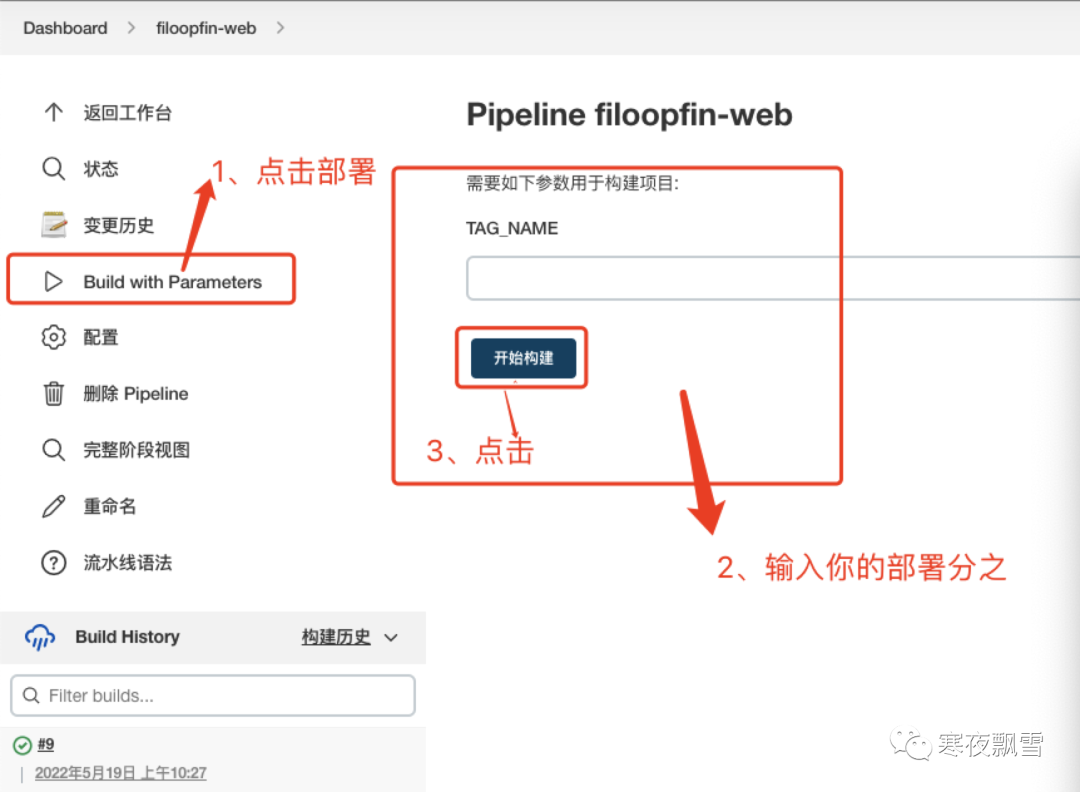
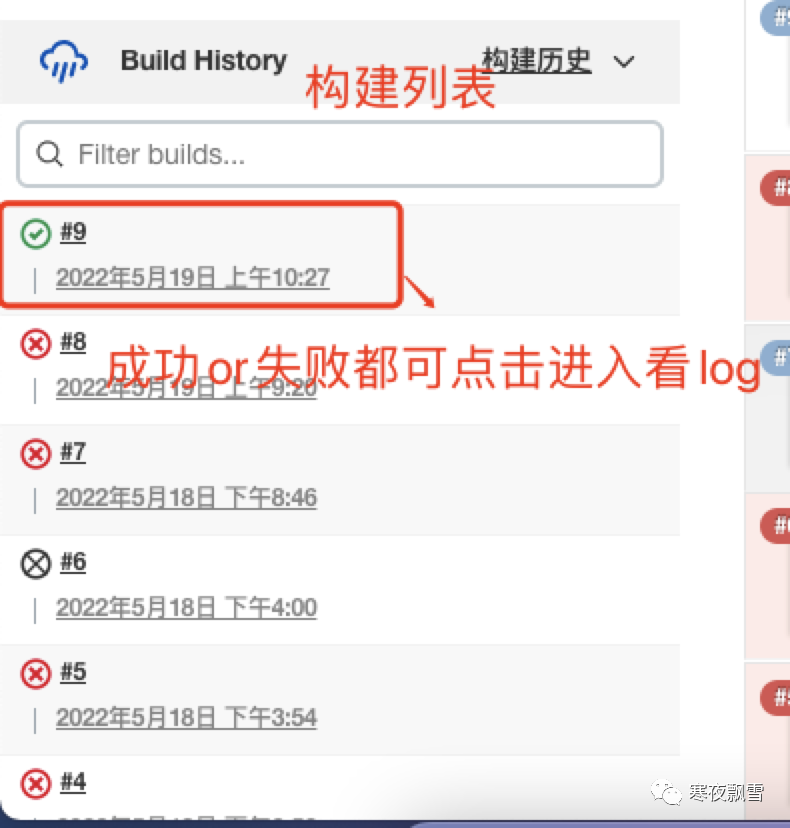
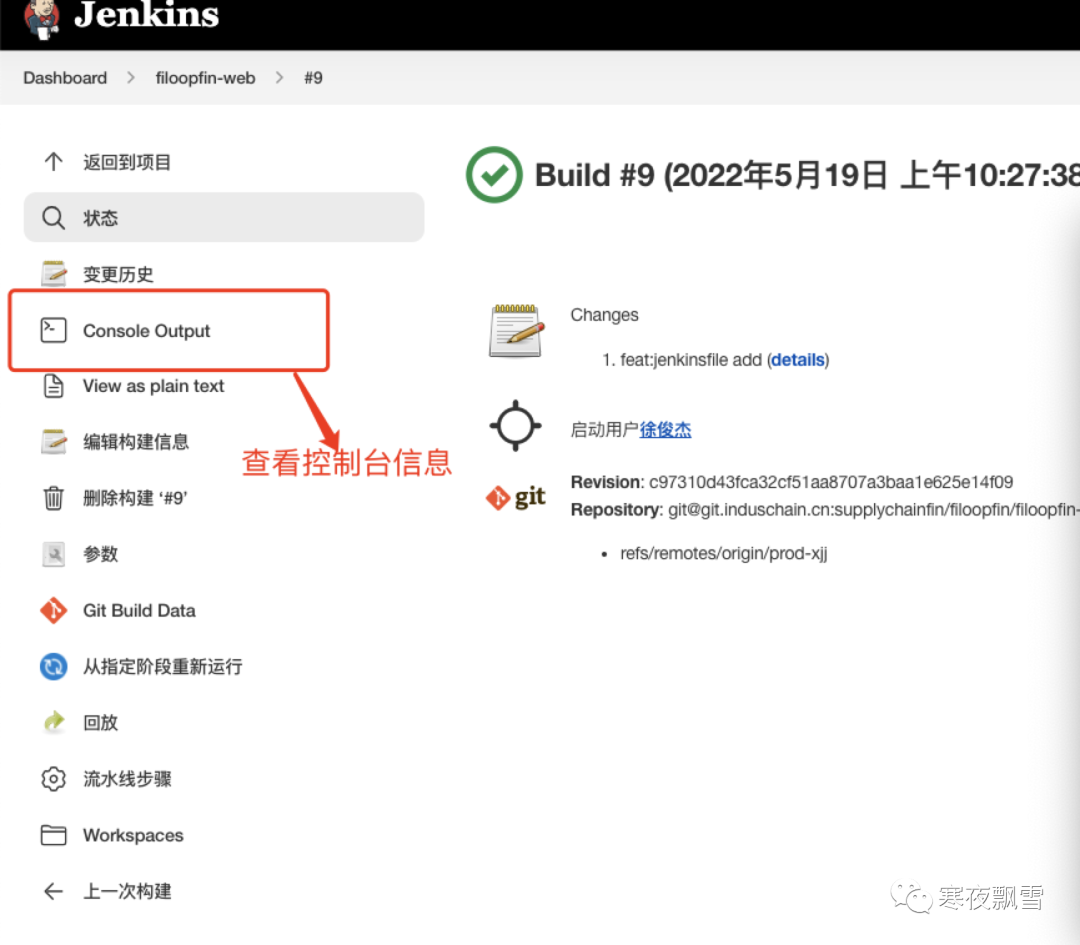
}4.5、部署jenkins 项目