


简介
什么是openGauss
openGauss是一款开源关系型数据库管理系统,采用木兰宽松许可证v2发行。openGauss内核深度融合华为在数据库领域多年的经验,结合企业级场景需求,持续构建竞争力特性。
openGauss核心特性
-
高性能
- 提供了面向多核架构的并发控制技术结合鲲鹏硬件优化,在两路鲲鹏下TPCC Benchmark达成性能150万tpmc。
- 针对当前硬件多核NUMA的架构趋势,在内核关键结构上采用了Numa-Aware的数据结构。
- 提供Sql-bypass智能快速引擎技术。
- 针对频繁更新场景,提供Ustore存储引擎
-
高可用
- 支持主备同步,异步以及级联备机多种部署模式。
- 数据页CRC校验,损坏数据页通过备机自动修复。
- 备机并行恢复,10秒内可升主提供服务。
- 提供基于Paxos分布式一致性协议的日志复制及选主框架。
-
高安全
- 支持全密态计算,访问控制、加密认证、数据库审计、动态数据脱敏等安全特性,提供全方位端到端的数据安全保护
-
易运维
- 基于AI的智能参数调优和索引推荐,提供AI自动参数推荐。
- 慢SQL诊断,多维性能自监控视图,实时掌控系统的性能表现。
- 提供在线自学习的SQL时间预测
-
全开放
- 采用木兰宽松许可证协议,允许对代码自由修改,使用,引用。
- 提供伙伴认证,培训体系和高校课程
版本发布
openGauss版本规划按照6个月一个小版本,1年一个大版本的节奏
- 2020年6月30日openGauss发布第一个版本,版本号为1.0.0
- 2020年12月30日openGauss发布Update版本,版本号为1.1.0
- 2021年3月30日openGauss发布第一个Release版本,版本号为2.0.0
- 2021年9月30日openGauss发布Preview版本,版本号为2.1.0
- 2022年4月1日openGauss发布第二个Release版本,版本号为3.0.0
- 2022年9月30日openGauss发布Preview版本,版本号为3.1.0
安装
本文安装系统以CentOS 7.9版本,openGauss 3.1.0版本为例
安装环境
目前,openGauss仅支持ARM服务器和基于x86_64通用PC服务器
- ARM服务器:
- openEuler 20.03LTS(推荐采用此操作系统)
- 麒麟V10
- Asianux 7.5
- x86服务器:
- openEuler 20.03LTS
- CentOS 7.6
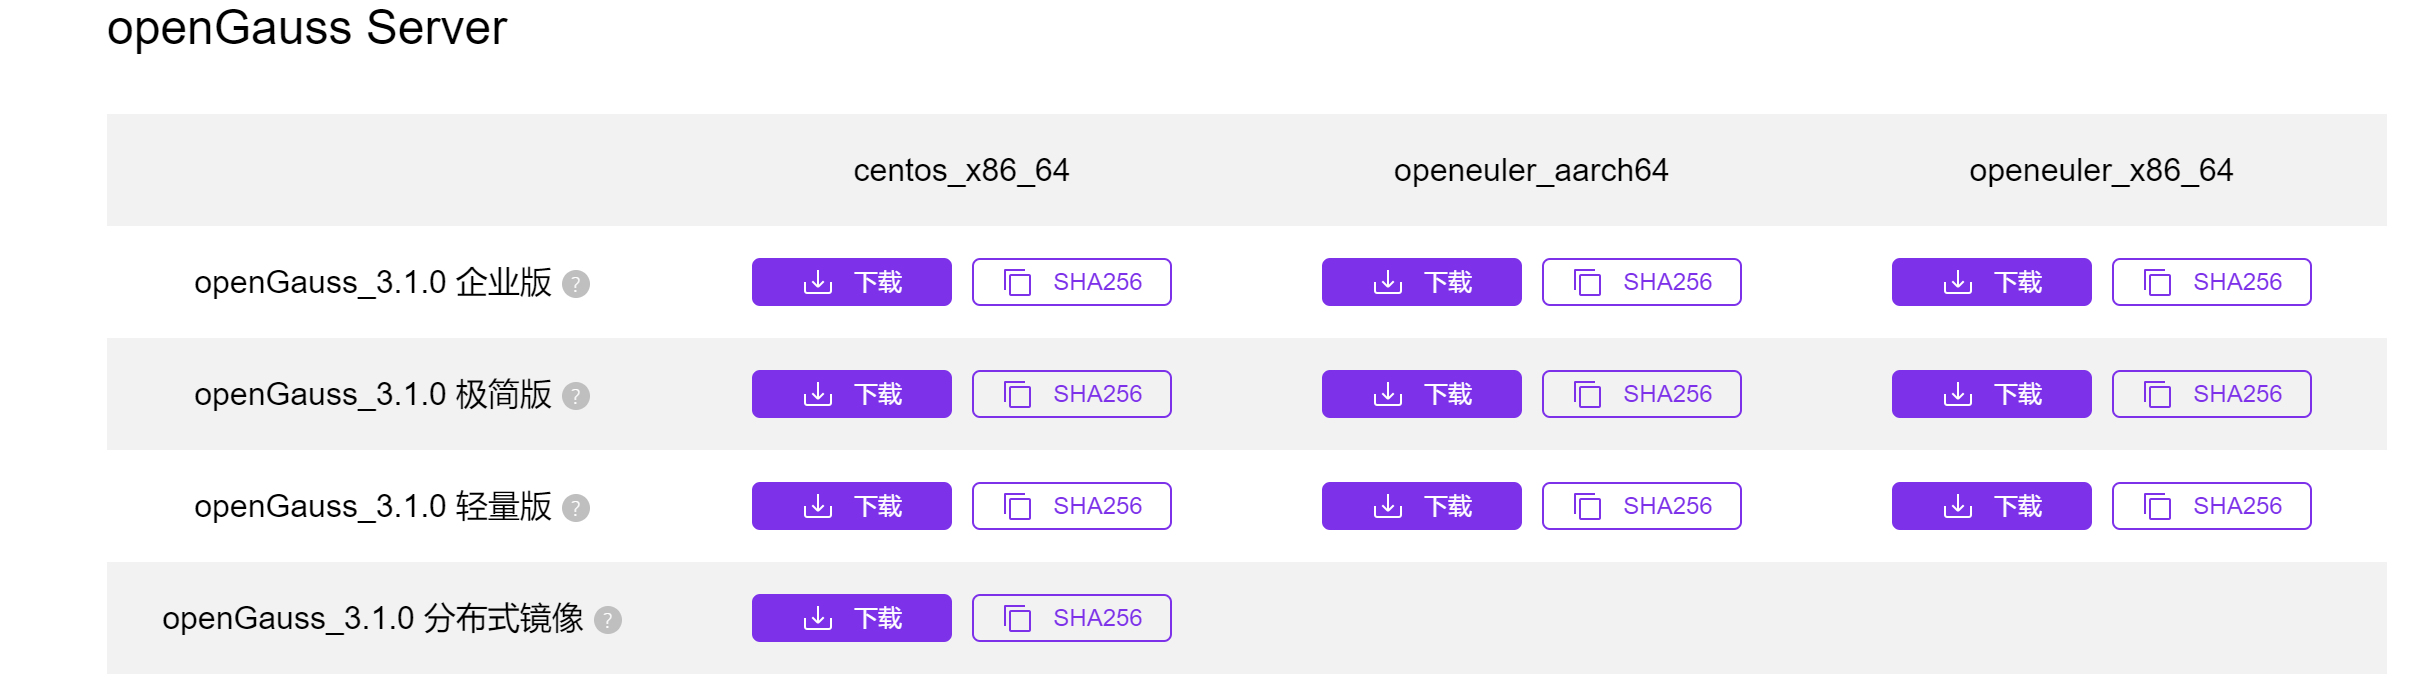
获取安装包
- 安装包下载地址:https://opengauss.org/zh/download.html
- 选择3.1.0版本对应平台极简版安装包下载
安装步骤
1.安装依赖包
依赖如下表
| 所需软件 | 建议版本 |
|---|---|
| libaio-devel | 建议版本:0.3.109-13 |
| flex | 要求版本:2.5.31 以上 |
| bison | 建议版本:2.7-4 |
| ncurses-devel | 建议版本:5.9-13.20130511 |
| glibc-devel | 建议版本:2.17-111 |
| patch | 建议版本:2.7.1-10 |
| redhat-lsb-core | 建议版本:4.1 |
| readline-devel | 建议版本:7.0-13 |
| libnsl(openEuler+x86环境中) | 建议版本:2.28-36 |
安装命令
[root@localhost ~]# yum install libaio-devel flex bison ncurses-devel glibc-devel patch redhat-lsb-core readline-devel libnsl -y
2.关闭操作系统防火墙
为了在防火墙开启的状态下,确保openGauss的正常使用,用户需要将同openGauss相关的服务、协议、IP以及端口添加到openGauss主机的防火墙白名单中。
# 查看防火墙状态,如果是dead那就是关闭的,如果不是就需要继续执行下面的代码
[root@localhost ~]# systemctl status firewalld

# 关闭防火墙
[root@localhost ~]# systemctl disable firewalld.service
[root@localhost ~]# systemctl stop firewalld.service
3.关闭 selinux
# 如果没有安装VIM,请安装VIM
[root@localhost ~]# yum install vim -y

# 1.使用VIM打开config文件
[root@localhost ~]# vim /etc/selinux/config

# 2.修改“SELINUX”的值“disabled”,执行:wq保存并退出修改

# 3.重新启动操作系统
[root@localhost ~]# reboot
4.设置字符集参数
# 1.使用VIM打开profile文件
[root@localhost ~]# vim /etc/profile

# 2.在/etc/profile文件中添加“export LANG=en_US.UTF-8”
5.设置时区和时间
# 使用如下命令将各数据库节点/usr/share/zoneinfo/目录下的时区文件拷贝为/etc/localtime文件
[root@localhost ~]# cp /usr/share/zoneinfo/Asia/Shanghai /etc/localtime
6.创建普通用户和目录,并授权
# 使用root创建用户
[root@localhost ~]# useradd bigsong

#创建安装目录
[root@localhost ~]# mkdir -p /opt/software/openGauss

# 授权
[root@localhost ~]# chmod 755 -R /opt/software
[root@localhost ~]# chown -R bigsong /opt/software/openGauss
7.单节点安装
-
使用普通用户登录到openGauss包安装的主机,解压openGauss压缩包到安装目录
# 把下载好的安装包拷贝到服务器上 # 安装 bzip2 [root@localhost openGauss]# yum -y install bzip2 [root@localhost openGauss]# tar -jxf openGauss-3.1.0-CentOS-64bit.tar.bz2 -C /opt/software/openGauss -
进入解压后目录下的simpleInstall目录,执行install.sh脚本安装openGauss
[bigsong@localhost simpleInstall]$ cd //opt/software/openGauss/simpleInstall
[bigsong@localhost simpleInstall]$ sh install.sh  -w "openGauss1234" &&source ~/.bashrc
安装时的错误提示
password must be at least 8 character and at least three kinds密码至少8个字符,至少3种类型Error: can not install openGauss with root使用普通用户安装,不能使用root用户安装install.sh: line 352: load.log: Permission denied普通用户没有解压路径、安装路径的读、写和执行操作权限the maximum number of SEMMNI is not correct, the current SEMMNI is xxx. Please check it使用有root权限的用户执行如下命令sysctl -w kernel.sem="250 85000 250 330"
8.查看安装是否成功
[bigsong@localhost simpleInstall]$ ps -ef |grep gauss
bigsong    3323      1  4 09:40 ?        00:00:25 /opt/software/openGauss/bin/gaussdb -D /opt/software/openGauss/data/single_node
bigsong    4038   3095  0 09:49 pts/0    00:00:00 grep --color=auto gauss
数据库使用
连接数据库
# 5432为默认端口号

[bigsong@localhost simpleInstall]$ gsql -d postgres -p 5432
简单使用
创建用户
执行 create user 用户名 with password "密码" 创建用户
openGauss=# create user bigosng with password "BigSong@1234";
CREATE ROLE
创建数据库
执行 create database 数据库名 owner 所属用户 创建数据库
openGauss=# create database db_bigsong owner bigsong;
CREATE DATABASE
创建表并测试
openGauss=# \c db_bigsong bigsong;
Non-SSL connection (SSL connection is recommended when requiring high-security)
You are now connected to database "db_bigsong" as user "bigsong".
db_bigsong=# create schema student authorization bigsong;
CREATE SCHEMA
db_bigsong=# create table student(id int,name varchar(100));
CREATE TABLE
db_bigsong=# insert into student values (1,'张三');
INSERT 0 1
db_bigsong=# select * from student;
 id | name
----+------
  1 | 张三
(1 row)
最后修改时间:2022-10-08 09:29:36
「喜欢这篇文章,您的关注和赞赏是给作者最好的鼓励」
关注作者
【版权声明】本文为墨天轮用户原创内容,转载时必须标注文章的来源(墨天轮),文章链接,文章作者等基本信息,否则作者和墨天轮有权追究责任。如果您发现墨天轮中有涉嫌抄袭或者侵权的内容,欢迎发送邮件至:contact@modb.pro进行举报,并提供相关证据,一经查实,墨天轮将立刻删除相关内容。
