


# 前言
前面两篇文章讲了FFmpeg在PC上的编译安装,成功编译安装之后就可以在命令行使用相关的命令进行音视频的操作。作为一款广为所知的开源音视频软件,FFmpeg除了提供丰富的命令行功能外,还提供了丰富而友好的API支持开发者进行二次开发。本文主要讲如何在在macOS平台上快速交叉编译FFmpeg库,并集成到Android平台上进行开发。
# 编译
以编译Android平台上arm64-v8a对应的64位的FFmpeg 静态库和动态库为例子
## 编译环境
macOS: 12.5.1
Android NDK: 21.1.6352462
FFmpeg: 5.1.0
## 编译脚本
在FFmpeg源码目录下,创建编译脚本build_android_arm64_v8a_clang.sh,如下:
#!/bin/bashexport NDK=/Users/allenchen/Library/Android/sdk/ndk/21.1.6352462 #这里配置先你的 NDK 路径TOOLCHAIN=$NDK/toolchains/llvm/prebuilt/darwin-x86_64# 最低支持的android sdk版本API=21# arm64-v8aARCH=arm64CPU=armv8-aCC=$TOOLCHAIN/bin/aarch64-linux-android$API-clangCXX=$TOOLCHAIN/bin/aarch64-linux-android$API-clang++# NDK头文件环境SYSROOT=$TOOLCHAIN/sysroot# 交叉编译CROSS_PREFIX=$TOOLCHAIN/bin/aarch64-linux-android-# so输出路径PREFIX=$(pwd)/android/$CPUOPTIMIZE_CFLAGS="-march=$CPU"function build_android{echo "Compiling FFmpeg for $CPU"./configure \--prefix=$PREFIX \--enable-neon \--enable-hwaccels \--enable-gpl \--disable-postproc \--disable-debug \--enable-small \--enable-jni \--enable-mediacodec \--enable-decoder=h264_mediacodec \--enable-static \--enable-shared \--disable-doc \--disable-ffmpeg \--disable-ffplay \--disable-ffprobe \--disable-avdevice \--disable-doc \--disable-symver \--disable-asm \--cross-prefix=$CROSS_PREFIX \--target-os=android \--arch=$ARCH \--cpu=$CPU \--cc=$CC \--cxx=$CXX \--enable-cross-compile \--sysroot=$SYSROOT \--extra-cflags="-mno-stackrealign -Os $OPTIMIZE_CFLAGS -fPIC" \--extra-ldflags="$ADDI_LDFLAGS"make cleanmake -j16make installecho "The Compilation of FFmpeg for $CPU is completed"}build_android
## 运行编译脚本
修改 build_android_arm64-v8a_clang.sh 的权限为可执行
chmod +x build_android_arm64-v8a_clang.sh
执行
./build_android_arm64-v8a_clang.sh
编译成功后会在上面脚本里面prefix指定的目录下生成三个文件夹
include
share
lib
我们需要的静态库和动态库都在lib目录下,里面主要的文件为:
allenchen@ALLENOCHEN-MB4 lib % ls -ltotal 70688-rw-r--r-- 1 allenchen staff 12743100 9 3 11:39 libavcodec.a-rwxr-xr-x 1 allenchen staff 7535688 9 3 11:39 libavcodec.so-rw-r--r-- 1 allenchen staff 4978658 9 3 11:39 libavfilter.a-rwxr-xr-x 1 allenchen staff 2729648 9 3 11:39 libavfilter.so-rw-r--r-- 1 allenchen staff 4309302 9 3 11:39 libavformat.a-rwxr-xr-x 1 allenchen staff 1853104 9 3 11:39 libavformat.so-rw-r--r-- 1 allenchen staff 664836 9 3 11:39 libavutil.a-rwxr-xr-x 1 allenchen staff 384672 9 3 11:39 libavutil.so-rw-r--r-- 1 allenchen staff 113514 9 3 11:39 libswresample.a-rwxr-xr-x 1 allenchen staff 67184 9 3 11:39 libswresample.so-rw-r--r-- 1 allenchen staff 511292 9 3 11:39 libswscale.a-rwxr-xr-x 1 allenchen staff 276144 9 3 11:39 libswscale.sodrwxr-xr-x 8 allenchen staff 256 9 3 11:39 pkgconfig
注:.a结尾的为静态库,.so结尾的为动态库
# 集成
编译出对应的库之后,接下来我们就可以集成到Android上了
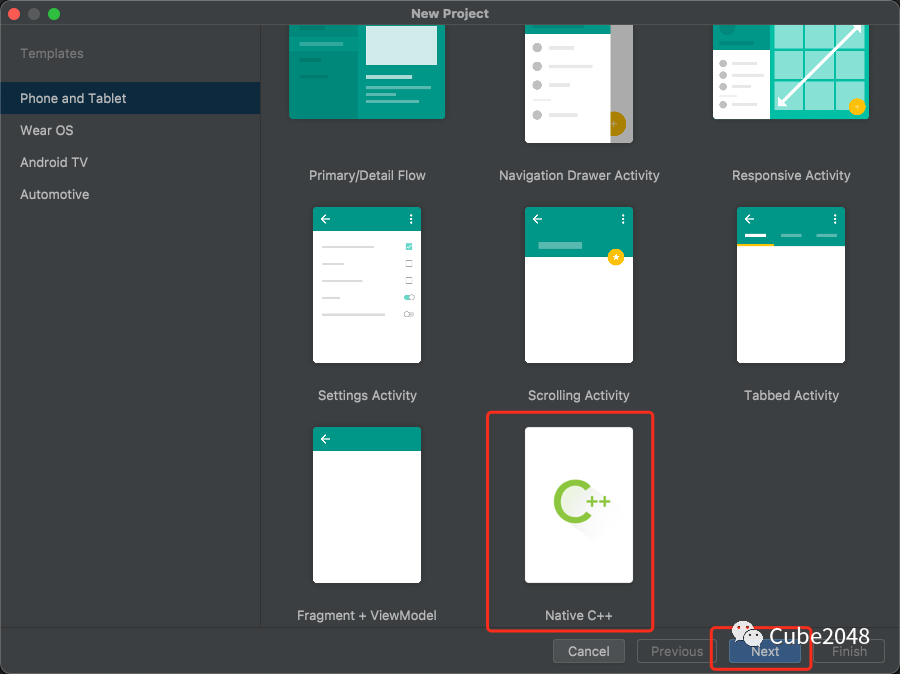
在Android Studio上创建native项目
复制上面编译产物到对应目录下:

把include目录复制到cpp目录下
把lib目录下的.a文件都复制到jniLibs/arm64-v8a目录下
build.gradle配置如下:
android {compileSdk 32defaultConfig {applicationId "com.example.ffmpeg"minSdk 21targetSdk 32versionCode 1versionName "1.0"testInstrumentationRunner "androidx.test.runner.AndroidJUnitRunner"externalNativeBuild {cmake {cppFlags ''}}ndk {abiFilters 'arm64-v8a'}}buildTypes {release {minifyEnabled falseproguardFiles getDefaultProguardFile('proguard-android-optimize.txt'), 'proguard-rules.pro'}}compileOptions {sourceCompatibility JavaVersion.VERSION_1_8targetCompatibility JavaVersion.VERSION_1_8}kotlinOptions {jvmTarget = '1.8'}externalNativeBuild {cmake {path file('src/main/cpp/CMakeLists.txt')version '3.18.1'}}buildFeatures {viewBinding true}}
CMakeList.txt配置如下:
# For more information about using CMake with Android Studio, read the# documentation: https://d.android.com/studio/projects/add-native-code.html# Sets the minimum version of CMake required to build the native library.cmake_minimum_required(VERSION 3.18.1)# Declares and names the project.project("ffmpeg")set(jnilibs ${CMAKE_SOURCE_DIR}/../jniLibs)set(libname learn-ffmpeg)# Creates and names a library, sets it as either STATIC# or SHARED, and provides the relative paths to its source code.# You can define multiple libraries, and CMake builds them for you.# Gradle automatically packages shared libraries with your APK.include_directories(include${CMAKE_SOURCE_DIR}/util)link_directories(${jnilibs}/${ANDROID_ABI})file(GLOB src-files${CMAKE_SOURCE_DIR}/*.cpp)add_library( # Sets the name of the library.${libname}# Sets the library as a shared library.SHARED# Provides a relative path to your source file(s).${src-files})set(third-party-libsavformatavcodecavfilterswresampleswscaleavutil)set(native-libsandroidEGLGLESv3OpenSLESlogmz)# Searches for a specified prebuilt library and stores the path as a# variable. Because CMake includes system libraries in the search path by# default, you only need to specify the name of the public NDK library# you want to add. CMake verifies that the library exists before# completing its build.find_library( # Sets the name of the path variable.log-lib# Specifies the name of the NDK library that# you want CMake to locate.log)# Specifies libraries CMake should link to your target library. You# can link multiple libraries, such as libraries you define in this# build script, prebuilt third-party libraries, or system libraries.target_link_libraries( # Specifies the target library.${libname}# Links the target library to the log library# included in the NDK.${log-lib}${third-party-libs}${native-libs})
native-lib.cpp代码如下
#include <jni.h>#include <string>#include <android/log.h>//由于 FFmpeg 库是 C 语言实现的,告诉编译器按照 C 的规则进行编译extern "C" {#include <libavcodec/version.h>#include <libavcodec/avcodec.h>#include <libavformat/version.h>#include <libavutil/version.h>#include <libavfilter/version.h>#include <libswresample/version.h>#include <libswscale/version.h>#include <libavformat/avformat.h>}#ifdef __cplusplusextern "C" {#endifvoid ffmpegLogOutput(void* ptr, int level, const char* fmt, va_list vl) {__android_log_print(ANDROID_LOG_INFO, "ffmpeg", "[ffmpeg log]%s", fmt);}/** Class: com_example_ffmpeg_FFMediaPlayer* Method: getFFmpegVersion* Signature: ()Ljava/lang/String;*/JNIEXPORT jstring JNICALL Java_com_example_ffmpeg_FFMediaPlayer_getFFmpegVersion(JNIEnv *env, jclass cls) {char strBuffer[1024 * 4] = {0};strcat(strBuffer, "libavcodec : ");strcat(strBuffer, AV_STRINGIFY(LIBAVCODEC_VERSION));strcat(strBuffer, "\nlibavformat : ");strcat(strBuffer, AV_STRINGIFY(LIBAVFORMAT_VERSION));strcat(strBuffer, "\nlibavutil : ");strcat(strBuffer, AV_STRINGIFY(LIBAVUTIL_VERSION));strcat(strBuffer, "\nlibavfilter : ");strcat(strBuffer, AV_STRINGIFY(LIBAVFILTER_VERSION));strcat(strBuffer, "\nlibswresample : ");strcat(strBuffer, AV_STRINGIFY(LIBSWRESAMPLE_VERSION));strcat(strBuffer, "\nlibswscale : ");strcat(strBuffer, AV_STRINGIFY(LIBSWSCALE_VERSION));strcat(strBuffer, "\navcodec_configure : \n");strcat(strBuffer, avcodec_configuration());strcat(strBuffer, "\navcodec_license : ");strcat(strBuffer, avcodec_license());return env->NewStringUTF(strBuffer);}JNIEXPORT jstring JNICALL Java_com_example_ffmpeg_FFMediaPlayer_avFormat(JNIEnv *env, jclass cls) {av_log_set_callback(ffmpegLogOutput);AVFormatContext *pContext = avformat_alloc_context();avformat_open_input(&pContext, "http://devimages.apple.com/iphone/samples/bipbop/bipbopall.m3u8", nullptr, nullptr);int res = avformat_find_stream_info(pContext, nullptr);return env->NewStringUTF("");}#ifdef __cplusplus}#endif// 默认生成的方法extern "C" JNIEXPORT jstring JNICALLJava_com_example_ffmpeg_MainActivity_stringFromJNI(JNIEnv* env,jobject /* this */) {std::string hello = "Hello from C++";return env->NewStringUTF(hello.c_str());}
FFMediaPlayer.kt代码如下:
object FFMediaPlayer {/*** 是kotlin 使用external 关键字声明native 方法*/external fun getFFmpegVersion(): String?external fun avFormat(): String?}
MainActivity.kt代码如下:
class MainActivity : AppCompatActivity() {companion object {// Used to load the 'ffmpeg' library on application startup.init {System.loadLibrary("learn-ffmpeg")}}/*** A native method that is implemented by the 'ffmpeg' native library,* which is packaged with this application.*/external fun stringFromJNI(): Stringprivate lateinit var binding: ActivityMainBindingoverride fun onCreate(savedInstanceState: Bundle?) {super.onCreate(savedInstanceState)binding = ActivityMainBinding.inflate(layoutInflater)setContentView(binding.root)// Example of a call to a native methodbinding.sampleText.text = stringFromJNI()binding.sampleText.text = FFMediaPlayer.getFFmpegVersion()FFMediaPlayer.avFormat()}}
androidManifest.xml添加权限声明如下:
<uses-permission android:name="android.permission.INTERNET" ><uses-permission android:name="android.permission.RECORD_AUDIO" /><uses-permission android:name="android.permission.MODIFY_AUDIO_SETTINGS" /><uses-permission android:name="android.permission.READ_EXTERNAL_STORAGE" /><uses-permission android:name="android.permission.WRITE_EXTERNAL_STORAGE" />
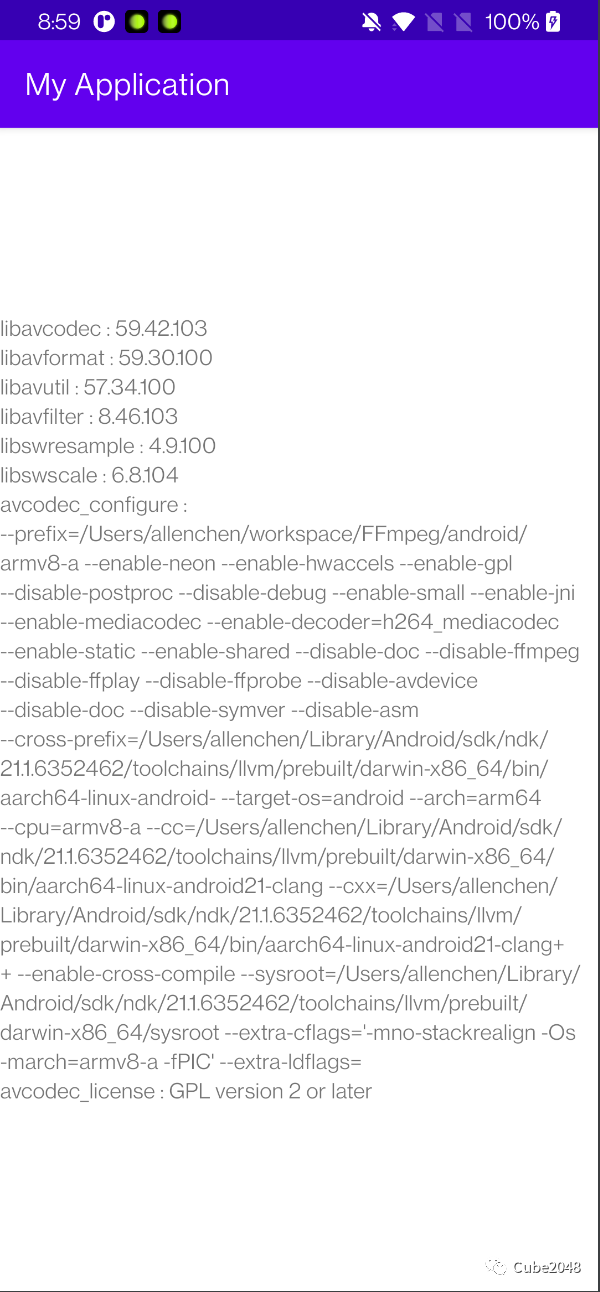
执行结果如下
#结尾
本文以编译Android平台上64位的FFmpeg 静态库和动态库为例子,编译了arm64-v8a对应的库并集成到Android平台进行二次开发。同理如果要编译支持32或是其他ABI的库,则需要修改上面编译脚本对应的配置信息,有兴趣的同学可以自己尝试一下。
