作者:马顺华
从事运维管理工作多年,目前就职于某科技有限公司,熟悉运维自动化、OceanBase部署运维、MySQL 运维以及各种云平台技术和产品。并已获得OceanBase认证OBCA、OBCP证书。

测试环镜资源信息
| 机器类型 | 主机配置 | 备注 |
|---|---|---|
| OS | Centos 7.4 | |
| 中控机 /OBD | CPU:8C | 内存:16G |
| 目标机器 /OBserver | CPU:8C | 内存:32G |
| 系统盘 / | dev/vda 100G | LVS分区、文件系统:EXT4 |
| 数据盘 /data | dev/vdb 200G | GPT分区、文件系统:xfs |
| 事务日志盘 /redo | dev/vdc 100G | GPT分区、文件系统:xfs |

资源规划
| 角色 | 机器IP | 备注 |
|---|---|---|
| OBD | 172.10.3.131 | 中控机 |
| OBserver | 172.10.3.20 | {2881,2882}, {3881,3882} zone1 |
| 172.10.3.21 | {2881,2882}, {3881,3882} zone2 | |
| 172.10.3.22 | {2881,2882}, {3881,3882} zone3 | |
| OBproxy | 172.10.3.20 | {2883,2884} 反向代理 |
| 172.10.3.21 | {2883,2884} 反向代理 | |
| 172.10.3.22 | {2883,2884} 反向代理 | |
| OBAgent | 172.10.3.20 | 监控采集框架 默认端口 8088、8089 |
| 172.10.3.21 | 监控采集框架 默认端口 8088、8089 | |
| 172.10.3.22 | 监控采集框架 默认端口 8088、8089 | |
| OBclient | 172.10.3.131 | OB命令行客户端 |
什么是 OBAgent
OBAgent 是一个监控采集框架。OBAgent 支持推、拉两种数据采集模式,可以满足不同的应用场景。OBAgent 默认支持的插件包括主机数据采集、OceanBase 数据库指标的采集、监控数据标签处理和 Prometheus 协议的 HTTP 服务。要使 OBAgent 支持其他数据源的采集,或者自定义数据的处理流程,您只需要开发对应的插件即可。
特性
OBAgent 具有以下特性:
采用 Go 语言开发,无需外部依赖。
插件驱动,易开发。
一、安装 OBAgent
环境依赖
构建 OBAgent 需要 Go 1.14 版本及以上。
[root@CAIP131 admin]# go version
-bash: go: command not found
[root@CAIP131 admin]#
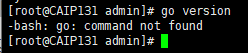
检测无Go环境依赖,需要安装依赖
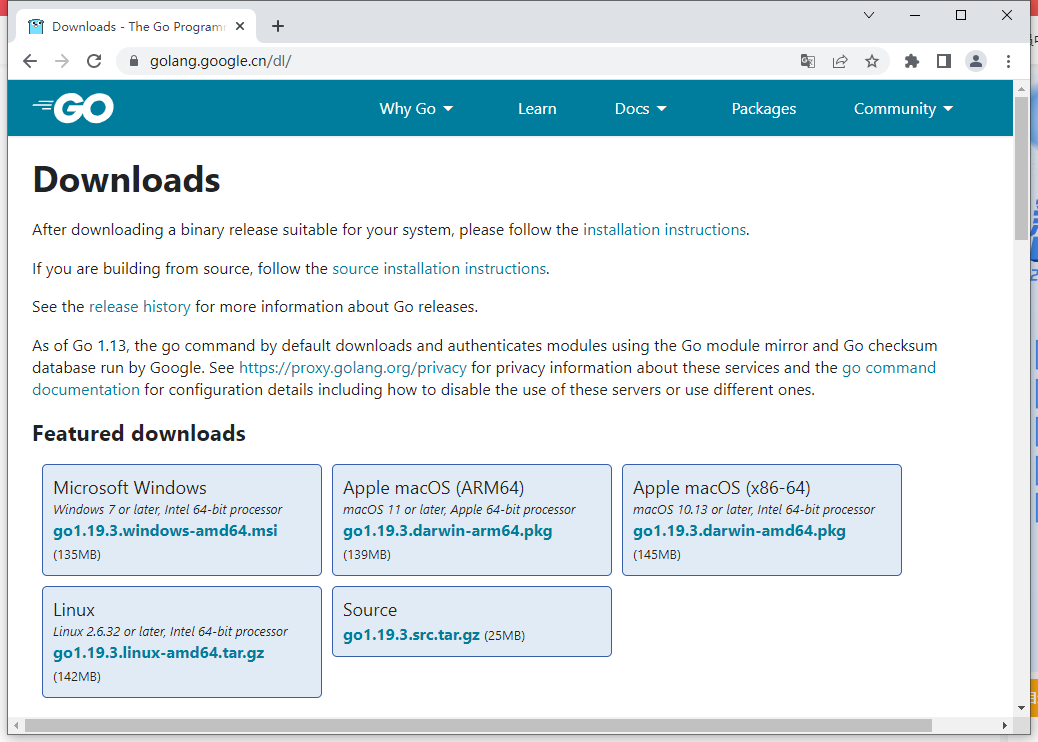
1、安装Go环境
下载Go环境Linux版本安装包
官网下载: https://golang.google.cn/dl/
[root@CAIP131 admin]# yum install golang
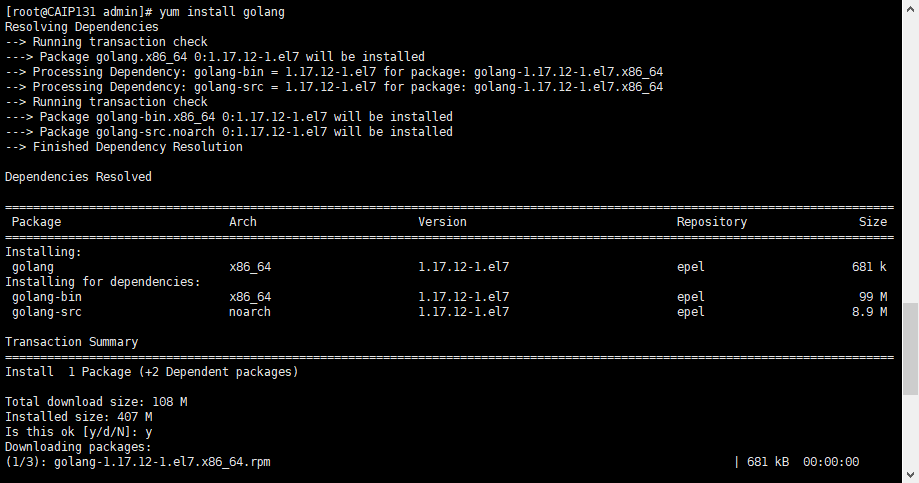
再次检查 GO 环境依赖
[root@CAIP131 admin]# go version
go version go1.17.12 linux/amd64
[root@CAIP131 admin]#

2、PRM 包 安装OBAgent (可选)
OBAgent 提供 RPM 包,您可以去 Release 页面 下载 RPM 包,然后使用以下命令安装:
下载到服务器
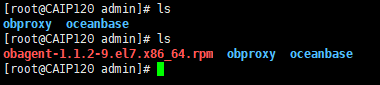
[root@CAIP120 admin]# ls
obproxy  oceanbase
[root@CAIP120 admin]# ls
obagent-1.1.2-9.el7.x86_64.rpm  obproxy  oceanbase
[root@CAIP120 admin]#
[root@CAIP120 admin]# rpm -ivh obagent-1.1.2-9.el7.x86_64.rpm
warning: obagent-1.1.2-9.el7.x86_64.rpm: Header V4 RSA/SHA1 Signature, key ID e9b4a7aa: NOKEY
Preparing...                          ################################# [100%]
Updating / installing...
   1:obagent-1.1.2-9.el7              ################################# [100%]
[root@CAIP120 admin]#

3、使用 OBD 部署 OBAgent (可选)
OBAgent 提供使用 OBD 部署和手动部署。若要手动部署 OBAgent,您要配置 OBAgent、Prometheus 和 Prometheus Alertmanager(可选)。推荐您使用 OBD 部署 OBAgent。本文将介绍如何使用 OBD 部署 OBAgent。
前提条件
在部署 OBAgent 之前,您需要确认 OBAgent 的默认端口 8088、8089 未占用。您也可以自定义端口。
说明:如果您的机器可以连接公网,在您执行了 obd cluster deploy 命令之后,OBD 将检查您的目标机器是否有 OBAgent 安装包。如果没有安装包,OBD 将自动从 yum 源获取。
同时部署 OceanBase 集群和 OBAgent
如果您希望同时部署 OceanBase 集群和 OBAgent,您只需要在 OceanBase 数据库的配置文件中添加以下 OBAgent 的配置信息:
obagent:
  servers:
    - 127.0.0.1
  depends:
    - oceanbase-ce
  global:
    home_path: /root/observer
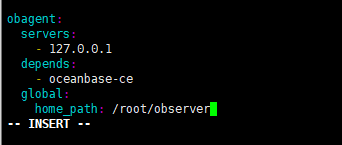
注意;servers 字段必须与 oceanbase-ce 的 servers 字段一致。
4、查看OBAgent 安装目录结构
OBAgent 的安装目录包含三个子目录:bin、conf 和 run。OBAgent 的安装目录如下:
[root@CAIP120 admin]# tree obagent
obagent
├── bin
│   └── monagent
├── conf
│   ├── config_properties
│   │   ├── monagent_basic_auth.yaml
│   │   └── monagent_pipeline.yaml
│   ├── module_config
│   │   ├── monagent_basic_auth.yaml
│   │   ├── monagent_config.yaml
│   │   ├── monitor_mysql.yaml
│   │   ├── monitor_node_host.yaml
│   │   ├── monitor_ob_log.yaml
│   │   └── monitor_ob.yaml
│   ├── monagent.yaml
│   └── prometheus_config
│       ├── prometheus.yaml
│       └── rules
│           ├── host_rules.yaml
│           └── ob_rules.yaml
└── run

7 directories, 13 files
[root@CAIP120 admin]#
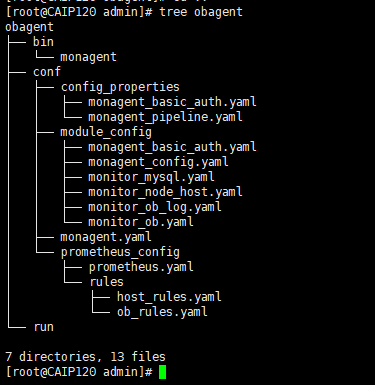
其中,bin 用来存放二进制文件。conf 用来存放程序启动配置、模块配置模板、KV 变量配置和 Prometheus 的配置模板。run 用来存放运行文件。
二、手动部署 OBAgent
OBAgent 提供使用 OBD 部署和手动部署。若要手动部署 OBAgent,您要配置 OBAgent、Prometheus 和 Prometheus Alertmanager(可选)。本文将介绍如何手动部署 OBAgent。
前提条件
在部署 OBAgent 之前,您需要确认以下信息:
OceanBase 数据库服务已经部署并启动。
OBAgent 已经安装。详细信息,请参考 安装 OBAgent。
OBAgent 的默认端口 8088、8089 未占用。您也可以自定义端口。
1、部署 monagent
修改配置文件,详细信息,请参考 monagent 配置文件说明 和 KV 配置文件说明。
启动 monagent 进程。推荐您使用 Supervisor 启动 monagent 进程。
2、将当前目录切换至 OBAgent 的安装目录
cd /home/admin/obagent
# 启动 monagent 进程
```language
[root@CAIP120 obagent]# nohup ./bin/monagent -c conf/monagent.yaml >> ./conf/module_config/monagent_stdout.log 2>&1 &
[1] 120434
[root@CAIP120 obagent]#

Supervisor 配置样例
[program:monagent]
command=./bin/monagent -c conf/monagent.yaml
directory=/home/admin/obagent
autostart=true
autorestart=true
redirect_stderr=true
priority=10
stdout_logfile=log/monagent_stdout.log
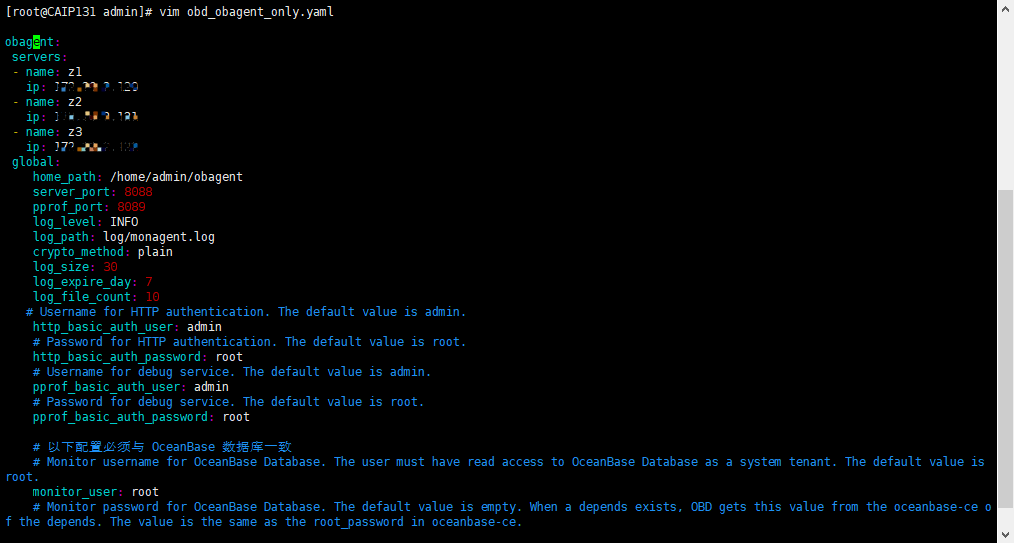
3、编辑 OBAgent 部署配置文件
OBAgent 部署配置文件可以跟 OceanBase 集群部署配置文件一起,也可以后期单独部署。 下面示例是采用单独的配置文件部署 OBAgent 。OBAgent 的部署配置文件风格跟 OceanBase 集群部署配置文件一样。 首先是指定部署节点,包括节点名称和 IP 。节点名称保持唯一就行,可以是主机名(假设主机名是唯一的)。 然后指定全局配置。各个节点共同的配置都放在 global 节下。节点定制化的配置就不用放在这个下面。 然后指定各个节点定制化的配置。比如说每个节点的 zone 名称是不一样的。
obagent:
 servers:
 - name: z1
   ip: 172.0.0.1
 - name: z2
   ip: 172.0.0.1
 - name: z3
   ip: 172.0.0.1
 global:
    home_path: /home/admin/obagent
    server_port: 8088
    pprof_port: 8089
    log_level: INFO
    log_path: log/monagent.log
    crypto_method: plain
    log_size: 30
    log_expire_day: 7
    log_file_count: 10
   # Username for HTTP authentication. The default value is admin.
    http_basic_auth_user: admin
    # Password for HTTP authentication. The default value is root.
    http_basic_auth_password: root
    # Username for debug service. The default value is admin.
    pprof_basic_auth_user: admin
    # Password for debug service. The default value is root.
    pprof_basic_auth_password: root

    # 以下配置必须与 OceanBase 数据库一致
    # Monitor username for OceanBase Database. The user must have read access to OceanBase Database as a system tenant. The default value is root.
    monitor_user: root
    # Monitor password for OceanBase Database. The default value is empty. When a depends exists, OBD gets this value from the oceanbase-ce of the depends. The value is the same as the root_password in oceanbase-ce.
    monitor_password: #####
    # The SQL port for observer. The default value is 2881. When a depends exists, OBD gets this value from the oceanbase-ce of the depends. The value is the same as the mysql_port in oceanbase-ce.
    sql_port: 2881
    # The RPC port for observer. The default value is 2882. When a depends exists, OBD gets this value from the oceanbase-ce of the depends. The value is the same as the rpc_port in oceanbase-ce.
    rpc_port: 2882
    # Cluster name for OceanBase Database. When a depends exists, OBD gets this value from the oceanbase-ce of the depends. The value is the same as the appname in oceanbase-ce.
    cluster_name: obce-test
    # Cluster ID for OceanBase Database. When a depends exists, OBD gets this value from the oceanbase-ce of the depends. The value is the same as the cluster_id in oceanbase-ce.
    cluster_id: 1
    # Zone name for your observer. The default value is zone1. When a depends exists, OBD gets this value from the oceanbase-ce of the depends. The value is the same as the zone name in oceanbase-ce.
    zone_name: z1
    # Monitor status for OceanBase Database.  Active is to enable. Inactive is to disable. The default value is active. When you deploy an cluster automatically, OBD decides whether to enable this parameter based on depends.
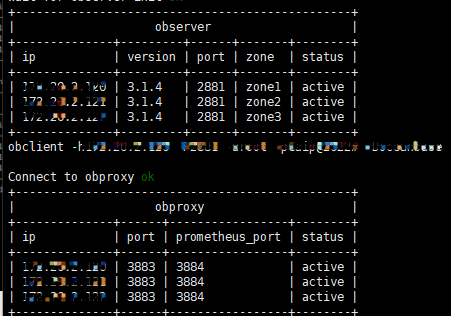
备注
我在启动 OBAgent 之前已经有了一个 ObceanBase 集群,因此我单独启动 OBAgent 就可以了。我的集群信息如下:
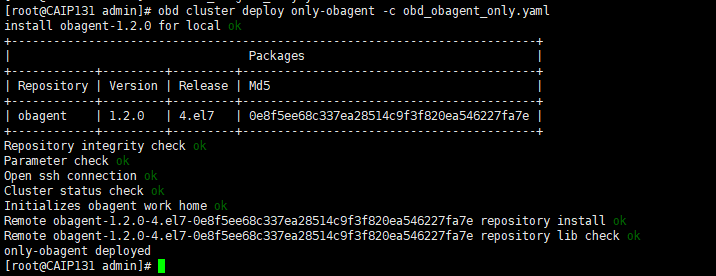
4、OBD 部署 OBAgent
obd cluster deploy obagent-only -c obd_obagent_only.yaml
[root@CAIP131 admin]# obd cluster deploy only-obagent -c obd_obagent_only.yaml
install obagent-1.2.0 for local ok
+---------------------------------------------------------------------------+
|                                  Packages                                 |
+------------+---------+---------+------------------------------------------+
| Repository | Version | Release | Md5                                      |
+------------+---------+---------+------------------------------------------+
| obagent    | 1.2.0   | 4.el7   | 0e8f5ee68c337ea28514c9f3f820ea546227fa7e |
+------------+---------+---------+------------------------------------------+
Repository integrity check ok
Parameter check ok
Open ssh connection ok
Cluster status check ok
Initializes obagent work home ok
Remote obagent-1.2.0-4.el7-0e8f5ee68c337ea28514c9f3f820ea546227fa7e repository install ok
Remote obagent-1.2.0-4.el7-0e8f5ee68c337ea28514c9f3f820ea546227fa7e repository lib check ok
only-obagent deployed
[root@CAIP131 admin]#
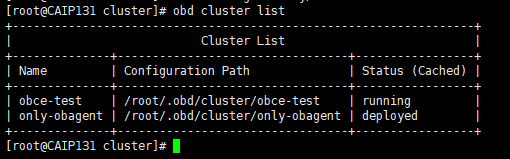
5、检查 obagent 部署
[root@CAIP131 cluster]# obd cluster list
+------------------------------------------------------------------+
|                           Cluster List                           |
+--------------+---------------------------------+-----------------+
| Name         | Configuration Path              | Status (Cached) |
+--------------+---------------------------------+-----------------+
| obce-test    | /root/.obd/cluster/obce-test    | running         |
| only-obagent | /root/.obd/cluster/only-obagent | deployed        |
+--------------+---------------------------------+-----------------+
[root@CAIP131 cluster]#
6、OBD 启动 OBAgent
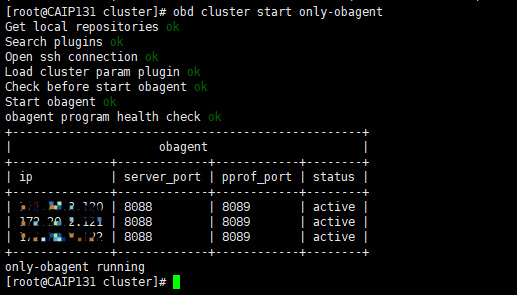
[root@CAIP131 cluster]# obd cluster start only-obagent
Get local repositories ok
Search plugins ok
Open ssh connection ok
Load cluster param plugin ok
Check before start obagent ok
Start obagent ok
obagent program health check ok
+--------------------------------------------------+
|                     obagent                      |
+--------------+-------------+------------+--------+
| ip           | server_port | pprof_port | status |
+--------------+-------------+------------+--------+
| 127.0.0.100 | 8088        | 8089       | active |
| 127.0.0.100 | 8088        | 8089       | active |
| 127.0.0.100 | 8088        | 8089       | active |
+--------------+-------------+------------+--------+
only-obagent running
[root@CAIP131 cluster]#
7、使用以下命令确认进程是否启动成功:
root@CAIP120 prometheus_config]# ps -ef | grep monagent
root      12947      1  0 Nov11 ?        00:26:14 /home/admin/obagent/bin/monagent -c conf/monagent.yaml
root     104299  77755  0 13:43 pts/0    00:00:00 grep --color=auto monagent
[root@CAIP120 prometheus_config]#

8、启动成功之后就可以查看相关的指标了:
查看主机指标
[root@CAIP120 prometheus_config]# curl --user admin:root http://172.20.2.120:8088/metrics/node/host
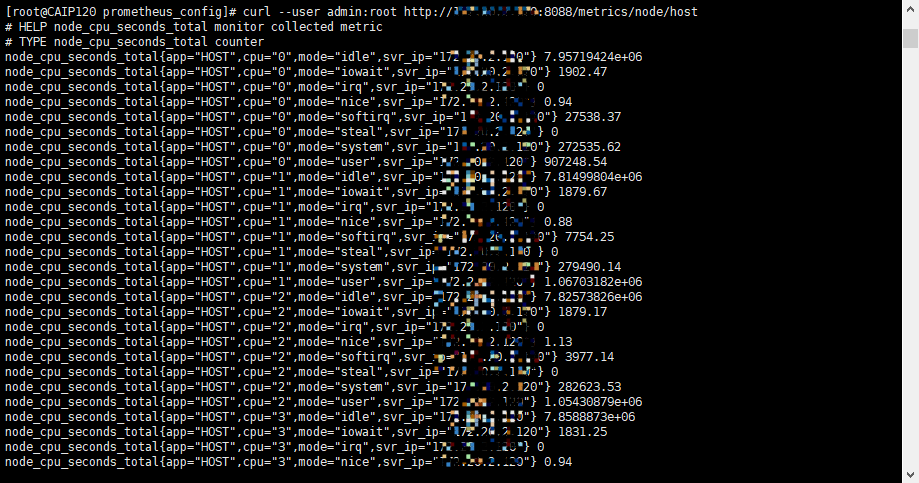
再查看ob基本指标
[root@CAIP120 prometheus_config]# curl --user admin:root http://172.20.2.120:8088/metrics/ob/basic
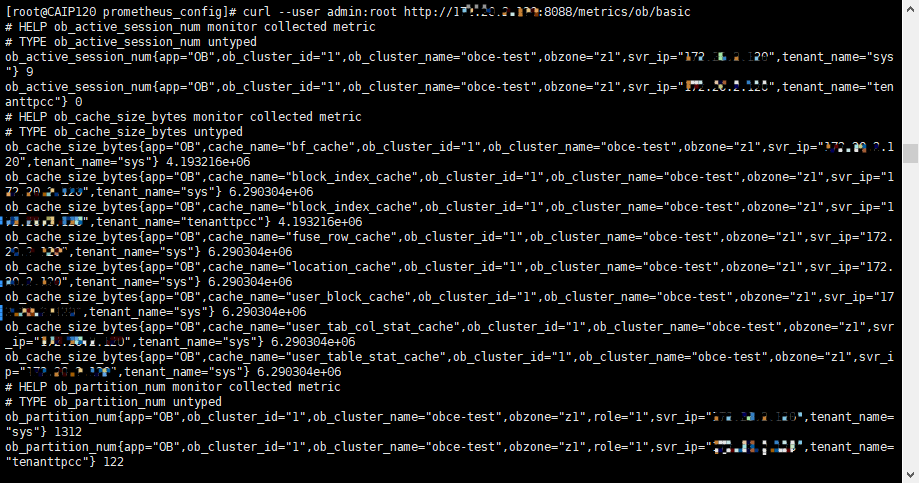
也可以查看指定指标
[root@CAIP120 prometheus_config]# curl --user admin:root http://172.20.2.120:8088/metrics/ob/basic | grep ob_cache_size_bytes
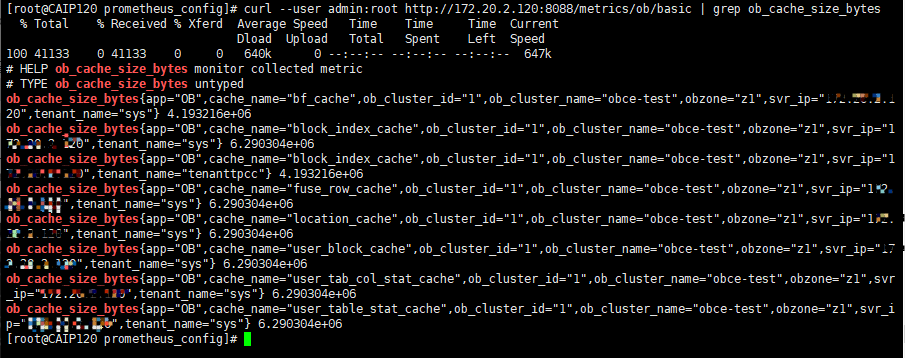
三、通过 Prometheus 监控数据库
监控Prometheus是一个开源的监控解决方案,主要是基于时间序列数据的收集和分析。它使用户能够利用内置的工具集来设置监控功能。它是Kubernetes等容器化环境的理想监控设置。
它能够利用SNMP pings集合各种设备的信息,并从设备的角度检查网络带宽的使用情况以及其他功能。PromQL系统可以分析数据,并允许程序对其监控的系统制作图谱、表格和其他图表。
Alert manager是Prometheus的另一个组件。它处理Prometheus中配置的所有告警规则的警报。
Prometheus可以收集系统指标、应用程序指标以及现代容器化应用程序的指标。此外,它还与Grafana等工具有很好的集成,以实现指标的可视化。
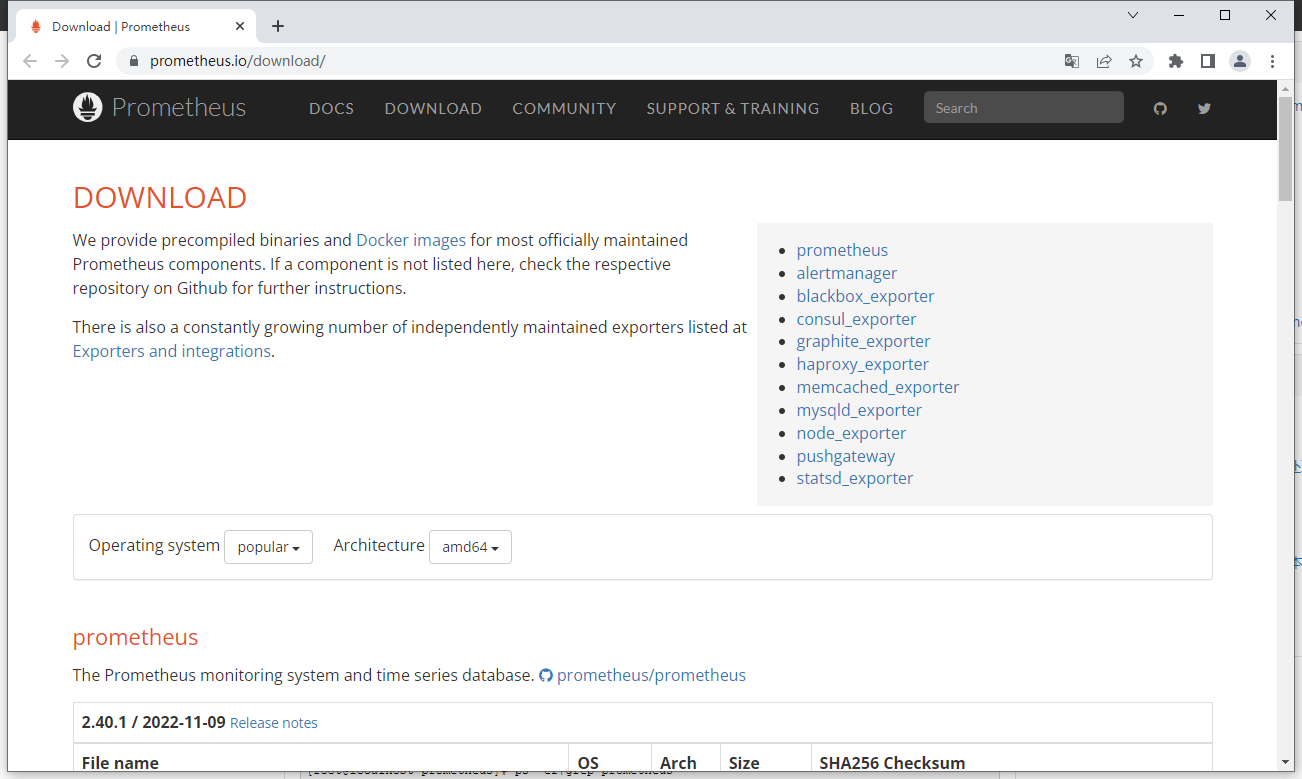
1、下载 Prometheus 软件
下载链接:https://prometheus.io/download/
可选择Linux和Windows版本,本文是针对 Linux 版本进行操作的
2、解压并安装 Prometheus 软件
[root@CAIP120 soft]# ls
prometheus-2.30.3.linux-amd64.tar.gz
[root@CAIP120 soft]# tar -zxvf prometheus-2.30.3.linux-amd64.tar.gz -C /usr/local/
prometheus-2.30.3.linux-amd64/
prometheus-2.30.3.linux-amd64/consoles/
prometheus-2.30.3.linux-amd64/consoles/index.html.example
prometheus-2.30.3.linux-amd64/consoles/node-cpu.html
prometheus-2.30.3.linux-amd64/consoles/node-disk.html
prometheus-2.30.3.linux-amd64/consoles/node-overview.html
prometheus-2.30.3.linux-amd64/consoles/node.html
prometheus-2.30.3.linux-amd64/consoles/prometheus-overview.html
prometheus-2.30.3.linux-amd64/consoles/prometheus.html
prometheus-2.30.3.linux-amd64/console_libraries/
prometheus-2.30.3.linux-amd64/console_libraries/menu.lib
prometheus-2.30.3.linux-amd64/console_libraries/prom.lib
prometheus-2.30.3.linux-amd64/prometheus.yml
prometheus-2.30.3.linux-amd64/LICENSE
prometheus-2.30.3.linux-amd64/NOTICE
prometheus-2.30.3.linux-amd64/prometheus
prometheus-2.30.3.linux-amd64/promtool
[root@CAIP120 soft]#

3、复制 OBAgent 生成的 prometheus 配置文件到 prometheus 安装目录中。
[root@CAIP120 conf]# cp -r prometheus_config /usr/local/prometheus-2.30.3.linux-amd64/

说明:OBAgent 携带了 prometheus 配置文件的模版,使用 OBD 部署 OBAgent, 会自动填充模版中的内容。该配置文件被放在 OBAgent 安装目录下,如 /home/admin/obagent/conf/Prometheus_config/。这个配置文件可以供 Prometheus 软件直接使用。
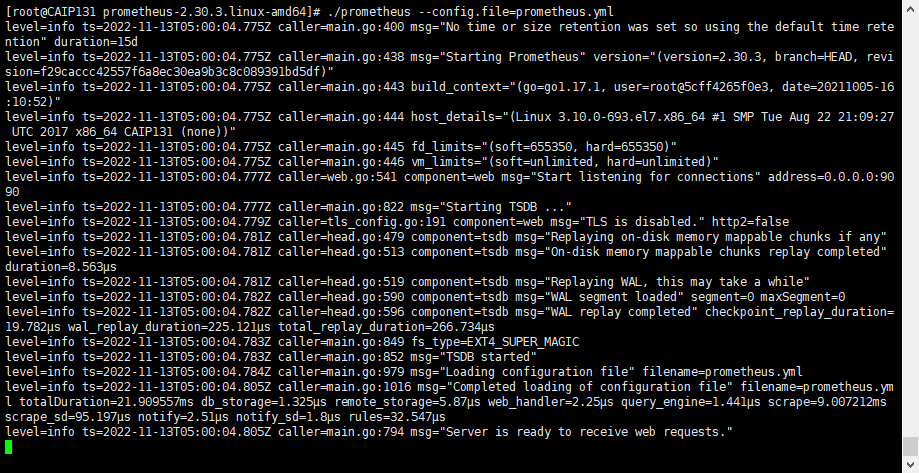
4、启动 Prometheus
来到 Prometheus 的安装目录,现在启动它:
[root@CAIP131 prometheus-2.30.3.linux-amd64]# ./prometheus --config.file=prometheus.yml
5、查看 prometheus 是否启动
[root@CAIP131 ~]# netstat -ntlp | grep 9090
tcp6       0      0 :::9090                 :::*                    LISTEN      28331/./prometheus
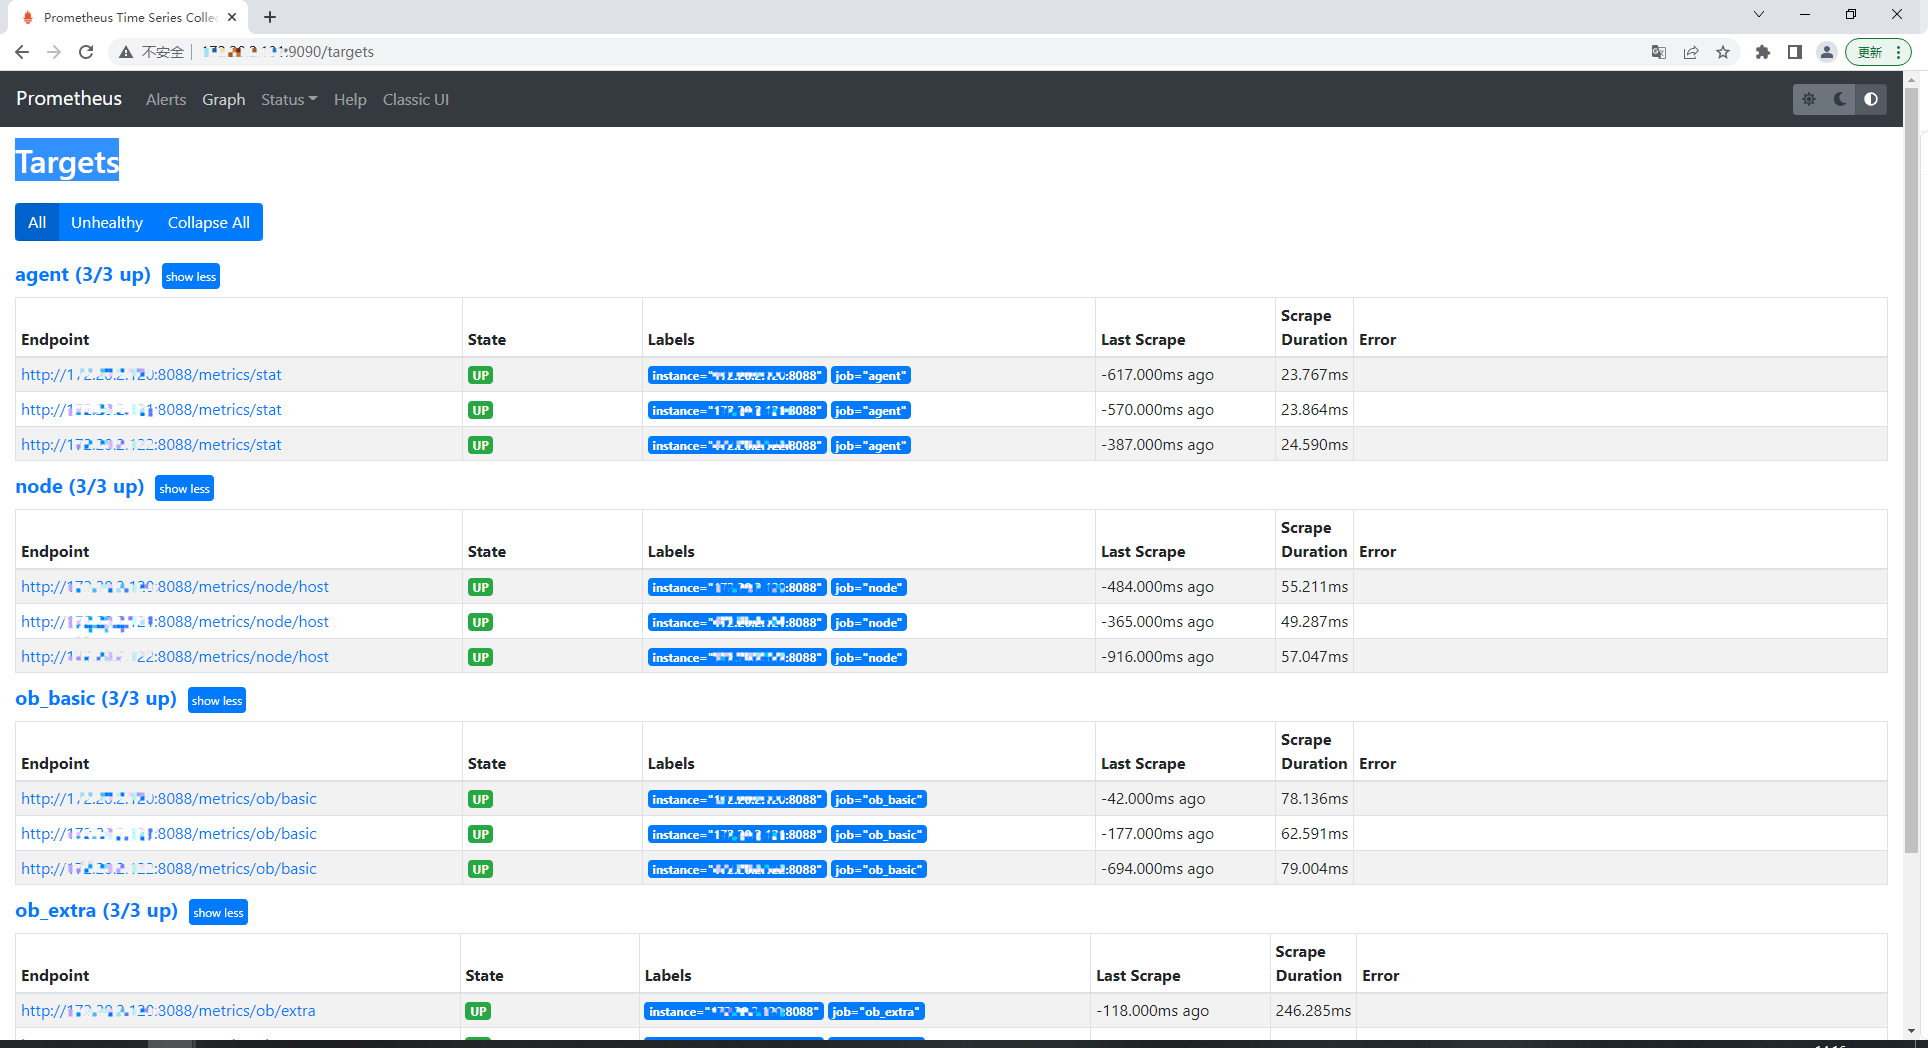
6、访问WEB界面,查看数据库告警
使用浏览器访问:http://ip:9090/
就可以用 Prometheus 查看 OceanBase 的指标了。
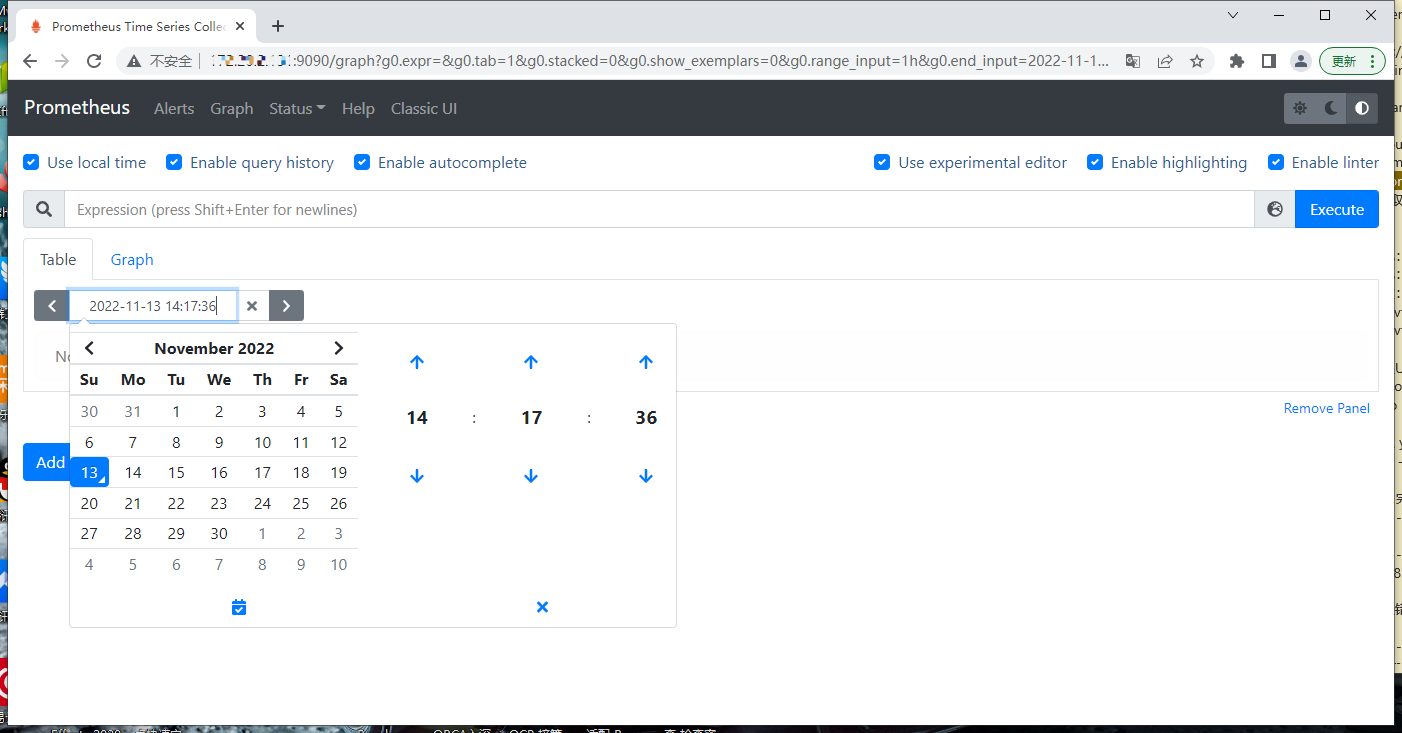
接下是 Status,可以看到 OB 集群每个节点 Targets 的指标状态。