



一、使用场景
定时任务在开发中还是比较常见的,比如:定时发送邮件,定时发送信息,定时更新资源,定时更新数据等等…
二、准备工作
在Spring Boot程序中不需要引入其他Maven依赖
(因为spring-boot-starter-web传递依赖了spring-context模块)
<dependency>
    <groupId>org.springframework.boot</groupId>
    <artifactId>spring-boot-starter-web</artifactId>
</dependency>
三、开始搭建配置
配置启动项
package com.wang.test.demo;

import org.springframework.boot.SpringApplication;
import org.springframework.boot.autoconfigure.SpringBootApplication;
import org.springframework.scheduling.annotation.EnableScheduling;

@SpringBootApplication
@EnableScheduling//启动定时任务
public class DemoApplication {

    public static void main(String[] args) {
        SpringApplication.run(DemoApplication.class, args);
    }

}
cron表达式
关于cron表达式,小编这里不做过多介绍,这里是cron生成器,大家可以参考
https://www.matools.com/cron/
定时任务方法
package com.wang.test.demo.task;

import org.springframework.scheduling.annotation.Scheduled;
import org.springframework.stereotype.Component;

@Component//加载到容器中,可以被发现启动
public class TaskTest {

    //cron表达式,来控制定时执行时间,这里是每5秒执行一次本方法,业务逻辑可以进行在此方法内进行书写
    @Scheduled(cron = "0/5 * * * * ?")
    public void printTimeOne(){

        System.out.println("任务一:时间为-->"+System.currentTimeMillis());
    }

    @Scheduled(cron = "0/6 * * * * ?")
    public void printTimeTwo(){

        System.out.println("任务二:时间为-->"+System.currentTimeMillis());

    }

}
四、结果展示
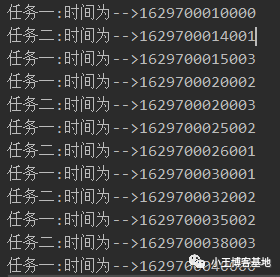
五、总结
这样就完整了SpringBoot整合定时任务了,一个注解全搞定,非常简洁好懂.
文章转载自小王博客基地,如果涉嫌侵权,请发送邮件至:contact@modb.pro进行举报,并提供相关证据,一经查实,墨天轮将立刻删除相关内容。
