作者:马顺华
从事运维管理工作多年,目前就职于某科技有限公司,熟悉运维自动化、OceanBase部署运维、MySQL 运维以及各种云平台技术和产品。并已获得OceanBase认证OBCA、OBCP 证书、OpenGauss社区认证结业证书。OceanBase & 墨天轮第二、三、四、五届技术征文大赛,多次获得 一、二、三 等奖,时常在墨天轮发布原创技术文章,并多次被首页推荐。

大家好,我又来了,我来体验部署 Oceanbase 4.0
社区版 OceanBase 数据库支持多种部署方式:
● 如果想要快速部署单机版的 OceanBase 进行功能体验,可以参考快速部署部分。
● 如果想要在生产环境中进行标准化部署,可以参照标准部署部分。
● 如果想要进行在线体验,可以参考在线体验部分。
我本次测试使用的是标准部署方式
● 对于线下环境,建议使用 OBD 进行标准部署;具体操作参见 部署 OceanBase 数据库生产环境
一、系统基础配置
1、软件资源介绍
下表列出了不同操作系统版本适用的安装包:

注意
建议您下载最新版本的安装包,我在本次采用 CentOS 7 操作系统部署
2、系统基础配置检查
2.1查看操作系统
[root@CAIP131 ~]# cat /etc/redhat-release
CentOS Linux release 7.4.1708 (Core)
[root@CAIP131 ~]#

2.2查看内核
[root@CAIP131 ~]# uname -r
3.10.0-693.el7.x86_64

OceanBase 数据库要求操作系统为 3.10.0 及以上。
2.3查看内存
              total        used        free      shared  buff/cache   available
Mem:             27           0          24           1           2          22
Swap:             7           0           7
[root@CAIP131 ~]#

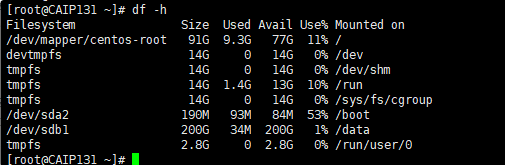
2.4查看磁盘
Filesystem               Size  Used Avail Use% Mounted on
/dev/mapper/centos-root   91G  9.3G   77G  11% /
devtmpfs                  14G     0   14G   0% /dev
tmpfs                     14G     0   14G   0% /dev/shm
tmpfs                     14G  1.4G   13G  10% /run
tmpfs                     14G     0   14G   0% /sys/fs/cgroup
/dev/sda2                190M   93M   84M  53% /boot
/dev/sdb1                200G   34M  200G   1% /data
tmpfs                    2.8G     0  2.8G   0% /run/user/0
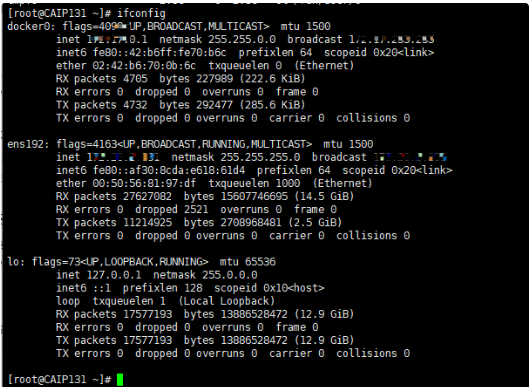
2.5查看网卡名称
        inet 12.20..11  netmask 255.255.255.0  broadcast 1.2.2.2
        inet6 fe80::af30:8cda:e618:61d4  prefixlen 64  scopeid 0x20<link>
        ether 00:50:56:81:97:df  txqueuelen 1000  (Ethernet)
        RX packets 27627082  bytes 15607746695 (14.5 GiB)
        RX errors 0  dropped 2521  overruns 0  frame 0
        TX packets 11214925  bytes 2708968481 (2.5 GiB)
        TX errors 0  dropped 0 overruns 0  carrier 0  collisions 0

lo: flags=73<UP,LOOPBACK,RUNNING>  mtu 65536
        inet 127.0.0.1  netmask 255.0.0.0
        inet6 ::1  prefixlen 128  scopeid 0x10<host>
        loop  txqueuelen 1  (Local Loopback)
        RX packets 17577193  bytes 13886528472 (12.9 GiB)
        RX errors 0  dropped 0  overruns 0  frame 0
        TX packets 17577193  bytes 13886528472 (12.9 GiB)
        TX errors 0  dropped 0 overruns 0  carrier 0  collisions 0
3、配置 SSH 免密登录
如果您是完全手动部署 OceanBase 集群,登录到相应节点上安装相关软件包,并启动 observer 或 obproxy 进程,则不需要配置 SSH 免密登录。
如果您是使用自动化技术部署 OceanBase 集群,所有的命令通过中控机向 OceanBase 集群节点发出。则需要配置中控机中 OBD 运行的用户到 OceanBase 集群节点中 OBServer 安装的用户的 SSH 免密登录。
本文示例是中控机的用户 admin 到 OBServer 节点的用户 admin 的免密登录。
配置 SSH 免密登录方法有很多,这里选择将中控机的 RSA 或 DSA 公钥复制到目标节点的 SSH 配置文件中。
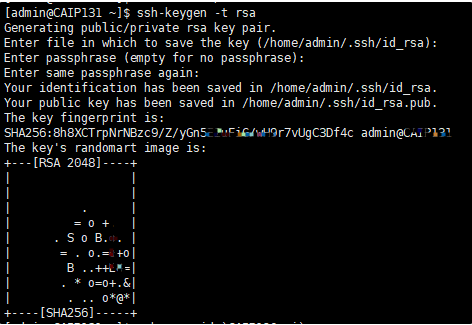
在中控机生成 RSA 或 DSA 公钥和私钥 ssh-keygen -t rsa
Generating public/private rsa key pair.
Enter file in which to save the key (/home/admin/.ssh/id_rsa):
Enter passphrase (empty for no passphrase):
Enter same passphrase again:
Your identification has been saved in /home/admin/.ssh/id_rsa.
Your public key has been saved in /home/admin/.ssh/id_rsa.pub.
The key fingerprint is:
SHA256:8h8XCTrpNrNBzc9/Z/yGn5E2uFiG/wH9r7vUgC3Df4c admin@CAIP131
The key's randomart image is:
+---[RSA 2048]----+
|                 |
|                 |
|          .      |
|         = o +.  |
|      . S o B.o. |
|       = . o.=o+o|
|        B ..++EO=|
|       . * o=o+.&|
|        . .. o*@*|
+----[SHA256]-----+
● 上面命令会在用户的 HOME 目录中生成文件夹 .ssh。注意不要改变文件夹以及里面文件的访问权限。
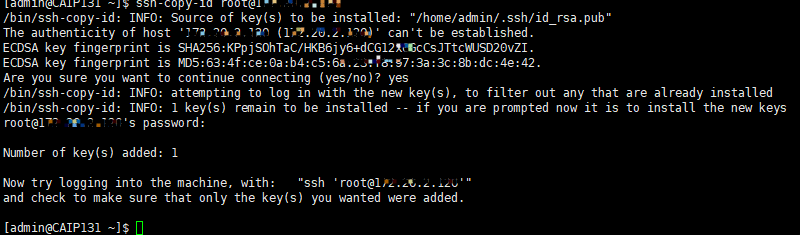
● 打通到本机的 SSH 免密登录复制 RSA 或 DSA 公钥到目标节点,推荐使用命令 ssh-copy-id。
/bin/ssh-copy-id: INFO: Source of key(s) to be installed: "/home/admin/.ssh/id_rsa.pub"
The authenticity of host '12.20.2.10 (12.20.2.10)' can't be established.
ECDSA key fingerprint is SHA256:KPpjSOhTaC/HKB6jy6+dCG12x0GcCsJTtcWUSD20vZI.
ECDSA key fingerprint is MD5:63:4f:ce:0a:b4:c5:6a:23:f8:97:3a:3c:8b:dc:4e:42.
Are you sure you want to continue connecting (yes/no)? yes
/bin/ssh-copy-id: INFO: attempting to log in with the new key(s), to filter out any that are already installed
/bin/ssh-copy-id: INFO: 1 key(s) remain to be installed -- if you are prompted now it is to install the new keys
root@172.20.2.120's password:

Number of key(s) added: 1

Now try logging into the machine, with:   "ssh 'root@12.20.2.10'"
and check to make sure that only the key(s) you wanted were added.

admin
[admin@CAIP131 ~]$ ssh-copy-id admin@12.20.2.10
/bin/ssh-copy-id: INFO: Source of key(s) to be installed: "/home/admin/.ssh/id_rsa.pub"
/bin/ssh-copy-id: INFO: attempting to log in with the new key(s), to filter out any that are already installed
/bin/ssh-copy-id: INFO: 1 key(s) remain to be installed -- if you are prompted now it is to install the new keys
admin@12.0.2.12's password:

Number of key(s) added: 1

Now try logging into the machine, with:   "ssh 'admin@12.0.2.10'"
and check to make sure that only the key(s) you wanted were added.
二、部署 OceanBase 数据库生产环境
前提条件
在连接 OceanBase 数据库之前,请您确认以下信息:
● 您的机器满足软硬件要求。详细信息,参考 软硬件要求。
● 生产环境下,您需要进行环境和配置检查,具体操作请参考 部署前配置
部署模式
本文采用三副本部署模式,推荐使用四台机器,您可以根据自己实际情况选择合适的部署方案。其中:
● 使用一台机器部署 OBProxy、Grafana、Prometheus;如果您已经安装或计划安装OCP,则无需安装 Grafana 和 Prometheus。
● 使用三台机器部署 OceanBase 集群。
说明
● 在生产环境下,推荐将 OBProxy 和应用部署在一台机器上,以节省应用访问 OBProxy 的时间。您可以在每个应用的服务器上部署一个 OBProxy 服务。在本例中,为了更方便使用,将 OBProxy 单独部署。
● 部署 OBProxy 的机器使用的配置可以和部署 OceanBase 数据库的机器配置不一致。部署 OBProxy 只需 1C/1G 内存即可。
注意
以下内容以 x86 架构的 CentOS Linux 7.4 镜像作为环境,其他环境可能略有不同。
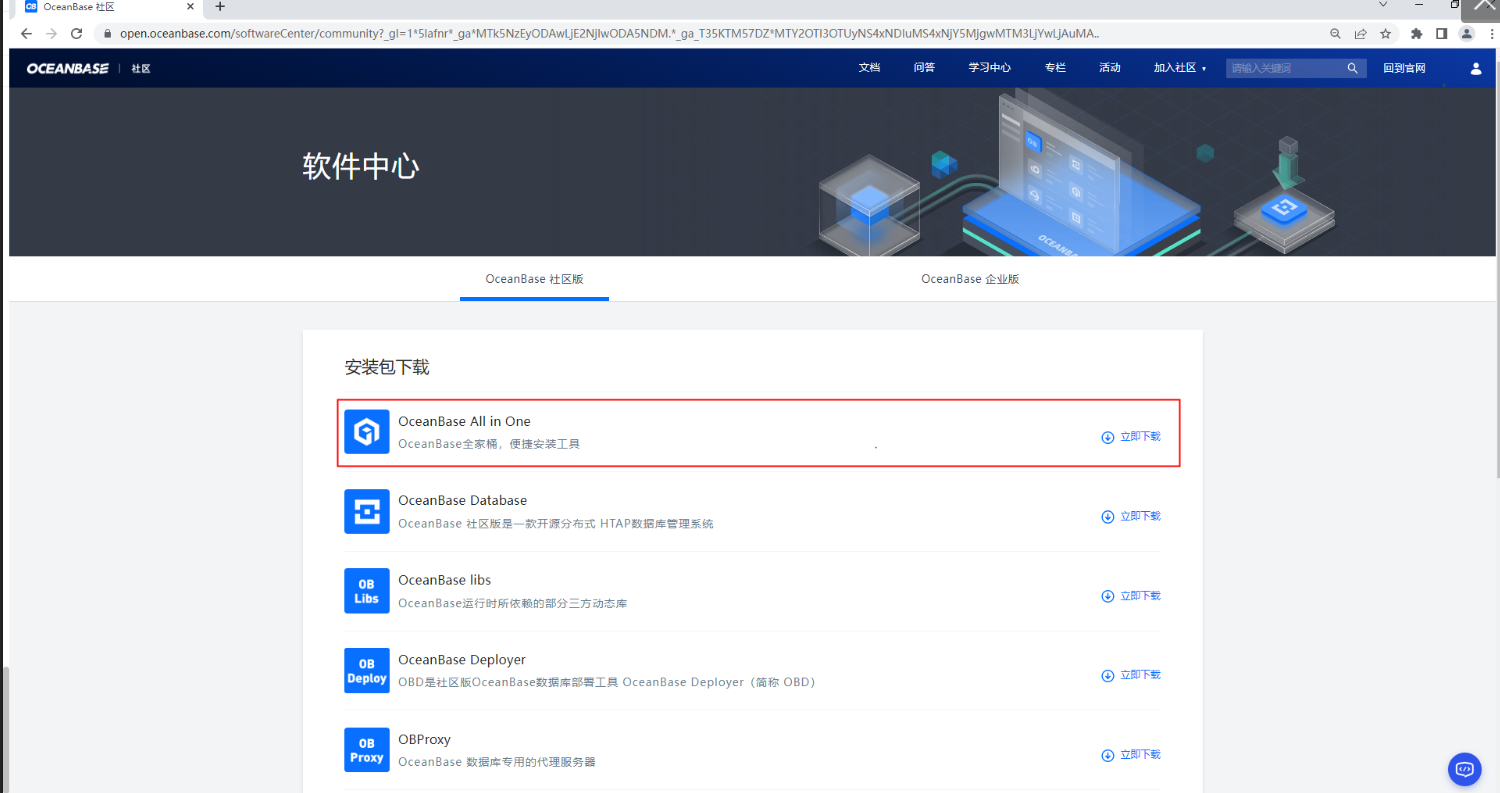
下载并安装 all-in-one package
从 V4.0.0 开始,OceanBase 提供统一的安装包 all-in-one package。您可以通过这个统一的安装包一次性完成 OBD、OceanBase 数据库、OBProxy、obagent、Grafana 和 Prometheus 的安装;您可以根据实际需求选择部分组件安装或者指定组件的版本。
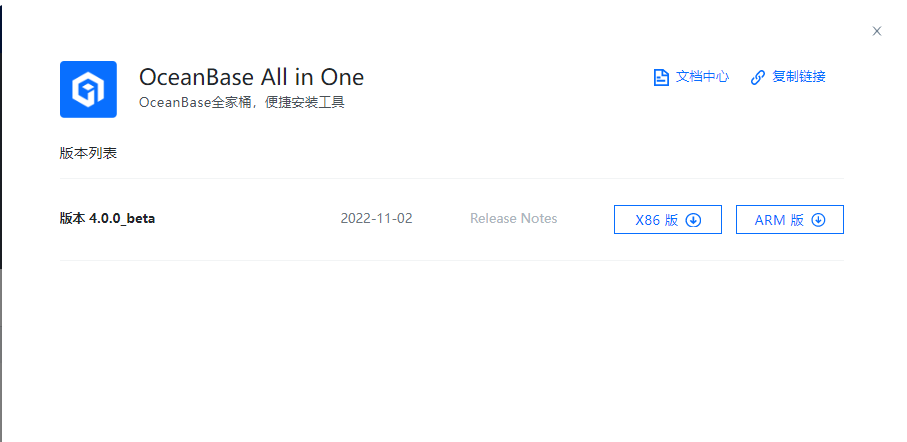
1. 从 OceanBase 社区下载中心 下载最新的
- all-in-one package,oceanbase-all-in-one-4.xx.xx-xxx.tar.gz。
2. 执行以下命令解压安装包并安装。
oceanbase-all-in-one.4.0.0.0-beta-100120221102135736.el7.x86_64.tar.gz  Python-3.9.5  tsar
[root@CAIP131 soft]# tar -xzf oceanbase-all-in-one.4.0.0.0-beta-100120221102135736.el7.x86_64.tar.gz
[root@CAIP131 soft]# cd oceanbase-all-in-one/
[root@CAIP131 oceanbase-all-in-one]# ls
bin  conf  obclient  obd  README.md  rpms  VERSION
[root@CAIP131 oceanbase-all-in-one]#

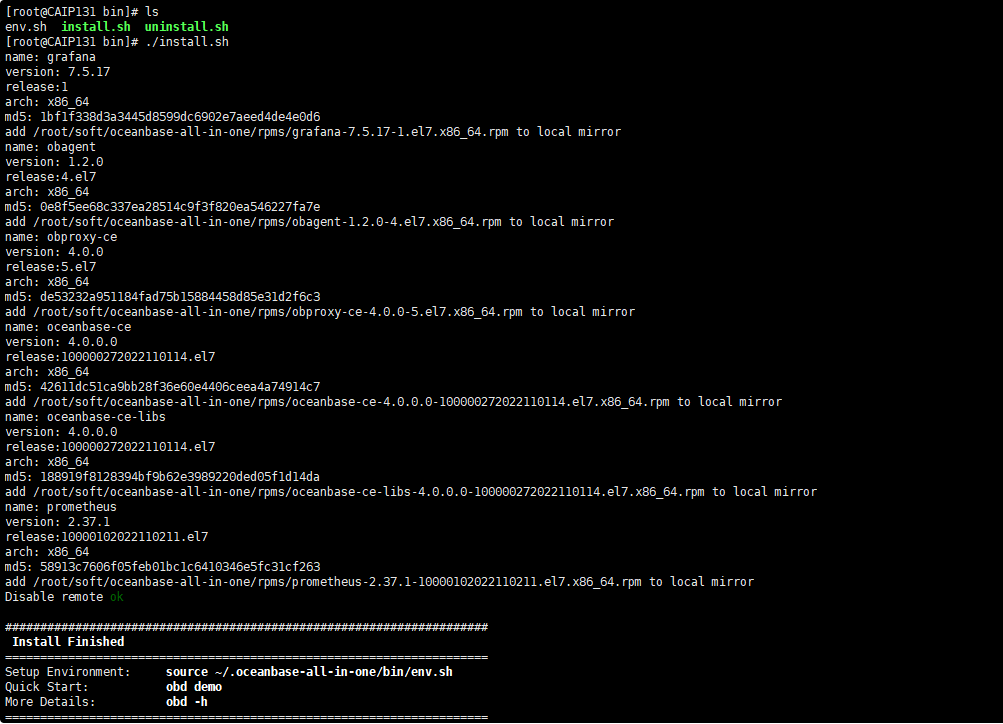
3. 安装 all-in-one
env.sh  install.sh  uninstall.sh
[root@CAIP131 bin]# ./install.sh
name: grafana
version: 7.5.17
release:1
arch: x86_64
md5: 1bf1f338d3a3445d8599dc6902e7aeed4de4e0d6
add /root/soft/oceanbase-all-in-one/rpms/grafana-7.5.17-1.el7.x86_64.rpm to local mirror
name: obagent
version: 1.2.0
release:4.el7
arch: x86_64
md5: 0e8f5ee68c337ea28514c9f3f820ea546227fa7e
add /root/soft/oceanbase-all-in-one/rpms/obagent-1.2.0-4.el7.x86_64.rpm to local mirror
name: obproxy-ce
version: 4.0.0
release:5.el7
arch: x86_64
md5: de53232a951184fad75b15884458d85e31d2f6c3
add /root/soft/oceanbase-all-in-one/rpms/obproxy-ce-4.0.0-5.el7.x86_64.rpm to local mirror
name: oceanbase-ce
version: 4.0.0.0
release:100000272022110114.el7
arch: x86_64
md5: 42611dc51ca9bb28f36e60e4406ceea4a74914c7
add /root/soft/oceanbase-all-in-one/rpms/oceanbase-ce-4.0.0.0-100000272022110114.el7.x86_64.rpm to local mirror
name: oceanbase-ce-libs
version: 4.0.0.0
release:100000272022110114.el7
arch: x86_64
md5: 188919f8128394bf9b62e3989220ded05f1d14da
add /root/soft/oceanbase-all-in-one/rpms/oceanbase-ce-libs-4.0.0.0-100000272022110114.el7.x86_64.rpm to local mirror
name: prometheus
version: 2.37.1
release:10000102022110211.el7
arch: x86_64
md5: 58913c7606f05feb01bc1c6410346e5fc31cf263
add /root/soft/oceanbase-all-in-one/rpms/prometheus-2.37.1-10000102022110211.el7.x86_64.rpm to local mirror
Disable remote ok

#####################################################################
 Install Finished
=====================================================================
Setup Environment:     source ~/.oceanbase-all-in-one/bin/env.sh
Quick Start:           obd demo
More Details:          obd -h
=====================================================================
4. 执行 which obd 和 which obclient 检测是否安装成功
如果可以找到 oceanbase-all-in-one 下的 obd 和 obclient 路径,则表示安装成功。
[root@CAIP131 soft]# which obd
/root/.oceanbase-all-in-one/obd/usr/bin/obd
[root@CAIP131 soft]# which obclient
/root/.oceanbase-all-in-one/obclient/u01/obclient/bin/obclient

三、安装 OceanBase 数据库
为了数据安全,建议您切换到非 root 用户。
1. 选择配置文件。
所有配置文件均存放在 ~/.oceanbase-all-in-one/conf 目录下, 您也可以从 GitHub obdeploy 上下载最新的配置文件。根据您的实际情况选择相应的配置文件:
○ 使用默认安装配置文件(~/.oceanbase-all-in-one/conf/autodeploy/default-example.yaml)。
○ 如果您采用单机安装,即目标机器只有一台,可修改配置文件, 使之适配单机部署。
修改配置文件。以部署分布式 OceanBase 数据库和 OBProxy 为例,按照以下步骤修改配置文件:
a. 修改用户名和密码。
Only need to configure when remote login is required # user: # username: your username # password: your password if need # key_file: your ssh-key file path if need # port: your ssh port, default 22 # timeout: ssh connection timeout (second), default 30
b. 修改每台机器的 IP
home_path、data_dir 和 redo_dir。oceanbase-ce: servers: - name: z1 # Please don’t use hostname, only IP can be supported ip: 172.xx.xxx.200 - name: z2 ip: 172.xx.xxx.201 - name: z3 ip: 172.xx.xxx.202 global: # Please set devname as the network adaptor’s name whose ip is in the setting of severs. # if set severs as “127.0.0.1”, please set devname as “lo” # if current ip is 192.168.1.10, and the ip’s network adaptor’s name is “eth0”, please use “eth0” devname: eth0 # The working directory for OceanBase Database. OceanBase Database is started under this directory. This is a required field. home_path: /home/admin/oceanbase/ob # The directory for data storage. The default value is $home_path/store. data_dir: /data/ob # The directory for clog, ilog, and slog. The default value is the same as the data_dir value. redo_dir: /redo/ob 说明您必须根据您的真实配置修改这些参数。
c. 配置 OBProxy 并修改 IP 和 home_path。
obproxy-ce: servers: - 172.xx.xxx.203 global: # The working directory for obproxy. Obproxy is started under this directory. This is a required field. home_path: /home/admin/obproxy
# user:
# username: your username
# password: your password if need
# key_file: your ssh-key file path if need
# port: your ssh port, default 22
# timeout: ssh connection timeout (second), default 30
oceanbase-ce:
servers:
- name: server1
# Please don't use hostname, only IP can be supported
ip: 12.0.2.10
- name: server2
ip: 12.2.2.11
- name: server3
ip: 12.0.2.12
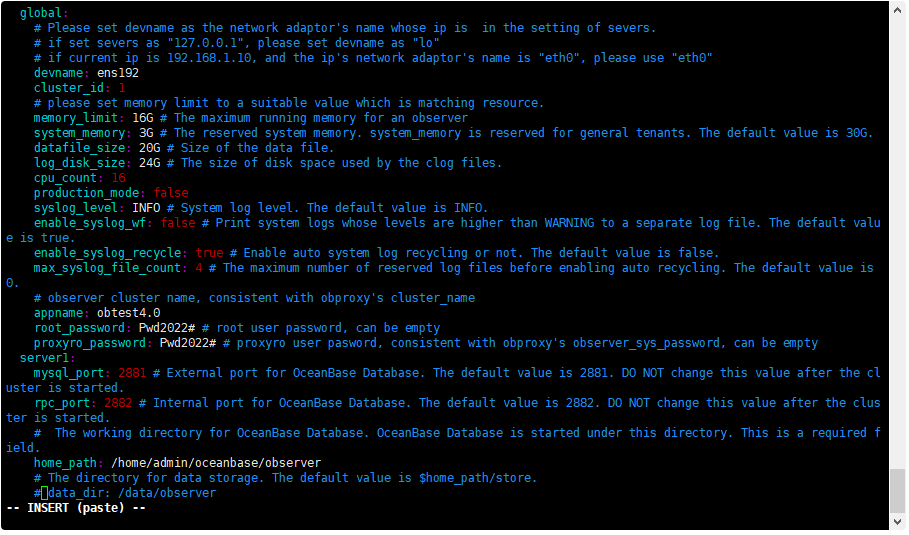
global:
# Please set devname as the network adaptor's name whose ip is in the setting of severs.
# if set severs as "127.0.0.1", please set devname as "lo"
# if current ip is 192.168.1.10, and the ip's network adaptor's name is "eth0", please use "eth0"
devname: ens192
cluster_id: 1
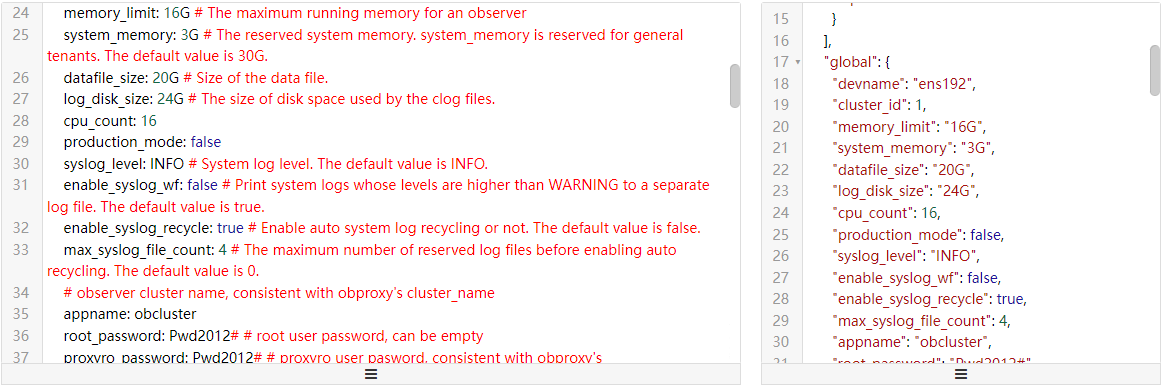
# please set memory limit to a suitable value which is matching resource.
memory_limit: 16G # The maximum running memory for an observer
system_memory: 3G # The reserved system memory. system_memory is reserved for general tenants. The default value is 30G.
datafile_size: 20G # Size of the data file.
log_disk_size: 24G # The size of disk space used by the clog files.
cpu_count: 16
production_mode: false
syslog_level: INFO # System log level. The default value is INFO.
enable_syslog_wf: false # Print system logs whose levels are higher than WARNING to a separate log file. The default value is true.
enable_syslog_recycle: true # Enable auto system log recycling or not. The default value is false.
max_syslog_file_count: 4 # The maximum number of reserved log files before enabling auto recycling. The default value is 0.
# observer cluster name, consistent with obproxy's cluster_name
appname: obtest40
root_password: ### # root user password, can be empty
proxyro_password: #### # proxyro user pasword, consistent with obproxy's observer_sys_password, can be empty
server1:
mysql_port: 2881 # External port for OceanBase Database. The default value is 2881. DO NOT change this value after the cluster is started.
rpc_port: 2882 # Internal port for OceanBase Database. The default value is 2882. DO NOT change this value after the cluster is started.
# The working directory for OceanBase Database. OceanBase Database is started under this directory. This is a required field.
home_path: /home/admin/oceanbase/observer
# The directory for data storage. The default value is $home_path/store.
data_dir: /data/observer
# The directory for clog, ilog, and slog. The default value is the same as the data_dir value.
redo_dir: /redo
zone: zone1
server2:
mysql_port: 2881 # External port for OceanBase Database. The default value is 2881. DO NOT change this value after the cluster is started.
rpc_port: 2882 # Internal port for OceanBase Database. The default value is 2882. DO NOT change this value after the cluster is started.
# The working directory for OceanBase Database. OceanBase Database is started under this directory. This is a required field.
home_path: /home/admin/oceanbase/observer
# The directory for data storage. The default value is $home_path/store.
data_dir: /data/observer
# The directory for clog, ilog, and slog. The default value is the same as the data_dir value.
redo_dir: /redo
zone: zone2
server3:
mysql_port: 2881 # External port for OceanBase Database. The default value is 2881. DO NOT change this value after the cluster is started.
rpc_port: 2882 # Internal port for OceanBase Database. The default value is 2882. DO NOT change this value after the cluster is started.
# The working directory for OceanBase Database. OceanBase Database is started under this directory. This is a required field.
home_path: /home/admin/oceanbase/observer
# The directory for data storage. The default value is $home_path/store.
data_dir: /data/observer
# The directory for clog, ilog, and slog. The default value is the same as the data_dir value.
redo_dir: /redo
zone: zone3
obproxy-ce:
# Set dependent components for the component.
# When the associated configurations are not done, OBD will automatically get the these configurations from the dependent components.
depends:
- oceanbase-ce
servers:
- 12.2.2.11
global:
listen_port: 2883 # External port. The default value is 2883.
prometheus_listen_port: 2884 # The Prometheus port. The default value is 2884.
home_path: /root/obproxy
# oceanbase root server list
# format: ip:mysql_port;ip:mysql_port. When a depends exists, OBD gets this value from the oceanbase-ce of the depends.
# rs_list: 12.0.2.10:2881;1.20.2.11:2881;1.0.2.1:2881
enable_cluster_checkout: false
# observer cluster name, consistent with oceanbase-ce's appname. When a depends exists, OBD gets this value from the oceanbase-ce of the depends.
cluster_name: obtest40
skip_proxy_sys_private_check: true
enable_strict_kernel_release: false
obproxy_sys_password: ### # obproxy sys user password, can be empty. When a depends exists, OBD gets this value from the oceanbase-ce of the depends.
observer_sys_password: Pwd2022# # proxyro user pasword, consistent with oceanbase-ce's proxyro_password, can be empty. When a depends exists, OBD gets this value from the oceanbase-ce of the depends.
obagent:
depends:
- oceanbase-ce
servers:
- name: server1
# Please don't use hostname, only IP can be supported
ip: 12.20.2.10
- name: server2
ip: 12.20.2.11
- name: server3
ip: 12.20.2.12
global:
home_path: /home/admin/obagent
ob_monitor_status: active
prometheus:
depends:
- obagent
servers:
- 12.0.2.11
global:
home_path: /home/admin/prometheus
grafana:
depends:
- prometheus
servers:
- 12.20.2.11
global:
home_path: /home/admin/grafana
login_password: oceanbase
a. 说明
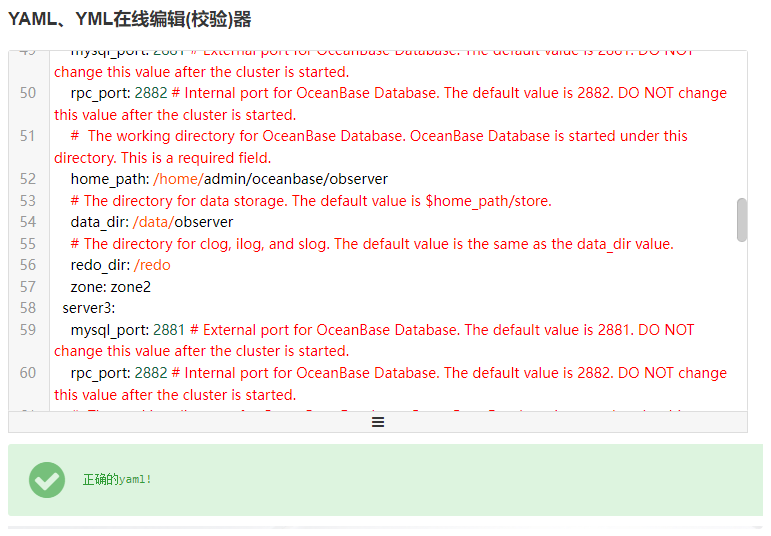
■ 您可以使用在线 YAML 文件校验器对您的配置文件进行检测。详细信息,参考 YAML 在线校验器。
■ 在本例中, 使用的是autodeploy 进行安装部署,autodeploy 会自动探测硬件以调整参数,但有可能资源没有最大化,例如:硬盘空间不足时,会缩小内存的使用。如果您对 OceanBase 各参数较为了解,推荐使用deploy 进行安装部署。如果使用 deploy,则使用的配置文件位于 ~/.oceanbase-all-in-one/conf 目录下,非 ~/.oceanbase-all-in-one/conf/autodeploy 目录下。
2、部署 OceanBase 集群
为了数据安全,建议您切换到非 root 用户。
Last login: Tue Dec 20 15:11:02 CST 2022 on pts/0
[admin@CAIP131 soft]$ vim obce-3zones.yaml
[admin@CAIP131 soft]$ ls
obce-3zones.yaml
[admin@CAIP131 soft]$

执行以下命令部署 OceanBase 集群。此处集群名(obtest40),yaml文件名(obce-3zones)
obd cluster autodeploy obtest40 -c obce-3zones.yaml
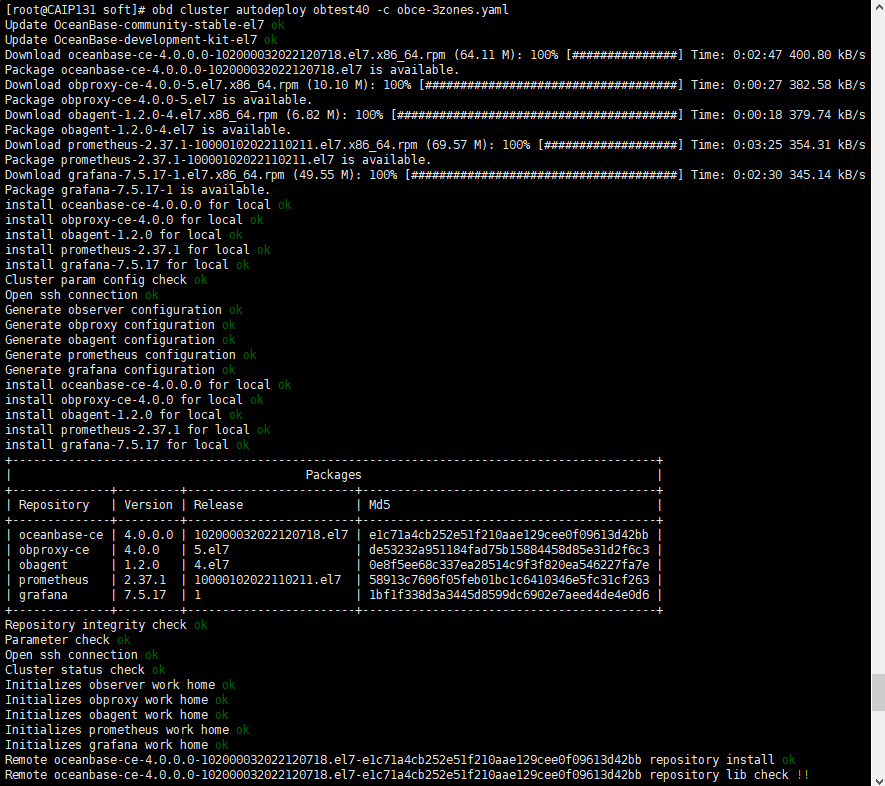
当安装了 Grafana 或 Prometheus 时,会输出 Grafana 或 Prometheus 的访问地址,类似以下输出。在阿里云或其他云环境下,因为安装程序可能无法获取公网 IP,可能输出的是内网地址(在本例中,为 172.30.62.249),此 IP 非公网地址,您需要使用正确的地址。

说明
all-in-one package 提供的组件已经经过相互适配测试,为官方推荐版本。如果您需要安装历史版本或者自己编译的版本,则需要提前将安装的目标 rpm clone 到 OBD 仓库当中,类似参考如下。
sudo yum install -y yum-utils sudo yum-config-manager --add-repo https://mirrors.aliyun.com/oceanbase/OceanBase.repo obd mirror clone oceanbase-ce-3.1.4-10000092022071511.el7.x86_64.rpm obd mirror clone oceanbase-ce-libs-3.1.4-10000092022071511.el7.x86_64.rpm obd cluster autodeploy obtest -c default-example.yaml
3、部署完成后,可以执行以下命令查看 OceanBase 集群。
obd cluster list
(可选)修改集群配置
OceanBase 数据库有数百个配置项,有些配置是耦合的,在您熟悉 OceanBase 数据库之前,不建议您修改示例配件文件中的配置。此处示例用来说明如何修改配置,并使之生效。
使用 edit-config 命令进入编辑模式,修改集群配置 obd cluster edit-config obtest # 修改 sys_bkgd_migration_retry_num 为 5 # 注意 sys_bkgd_migration_retry_num 值最小为 3 # 保存并退出后,OBD 会告知您如何使得此次改动生效 # 此配置项仅需要 reload 即可生效 obd cluster reload obtest
4、observer 连接 OceanBase 数据库
运行以下命令,使用 OBClient 客户端连接 OceanBase 数据库:
obclient -h<your_ip> -P<obproxy_port> -uroot
[root@CAIP131 soft]# obclient -h12.0.2.10 -P2881 -uroot -p -Doceanbase
Reading table information for completion of table and column names
You can turn off this feature to get a quicker startup with -A

Welcome to the OceanBase.  Commands end with ; or \g.
Your OceanBase connection id is 3221643836
Server version: OceanBase_CE 4.0.0.0 (r102000032022120718-58fdb0ef1a9b589ef05e56c1ede65e951986d996) ()

Copyright (c) 2000, 2018, OB Corporation Ab and others.

Type 'help;' or '\h' for help. Type '\c' to clear the current input statement.

obclient [oceanbase]>
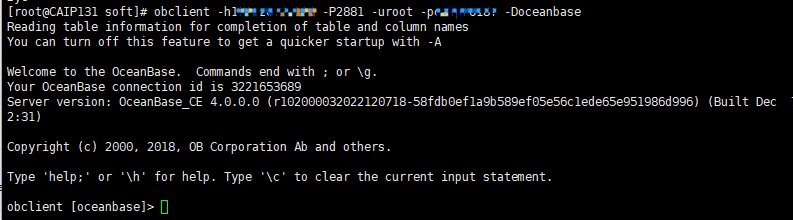
其中,your_ip 为您 OceanBase 实例所在的机器 IP 地址。OBProxy 默认使用端口 2883 连接 OBClient。如果您对端口做了更改,此处使用您实际的端口号。
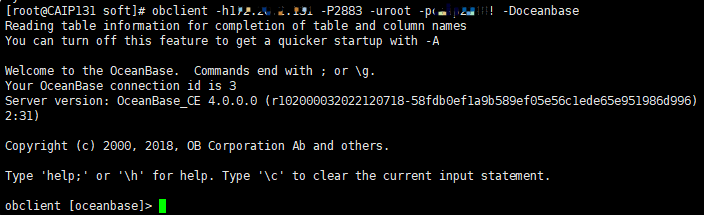
5、obproxy 连接 OceanBase 数据库
运行以下命令,使用 OBClient 客户端连接 OceanBase 数据库:
obclient -h<your_ip> -P<obproxy_port> -uroot
Reading table information for completion of table and column names
You can turn off this feature to get a quicker startup with -A

Welcome to the OceanBase.  Commands end with ; or \g.
Your OceanBase connection id is 3
Server version: OceanBase_CE 4.0.0.0 (r102000032022120718-58fdb0ef1a9b589ef05e56c1ede65e951986d996) (Built Dec  7 2022 18:32:31)

Copyright (c) 2000, 2018, OB Corporation Ab and others.

Type 'help;' or '\h' for help. Type '\c' to clear the current input statement.

obclient [oceanbase]>
其中,your_ip 为您 OceanBase 实例所在的机器 IP 地址。OBProxy 默认使用端口 2883 连接 OBClient。如果您对端口做了更改,此处使用您实际的端口号。
创建普通租户
要使用 OceanBase 数据库,您需要创建普通租户。您的业务数据必须在普通租户下运行。
您可以使用以下方法创建普通租户:
● 使用 OBD 创建普通租户。obd cluster tenant create ${cluster_name} -n ${tenant_name}
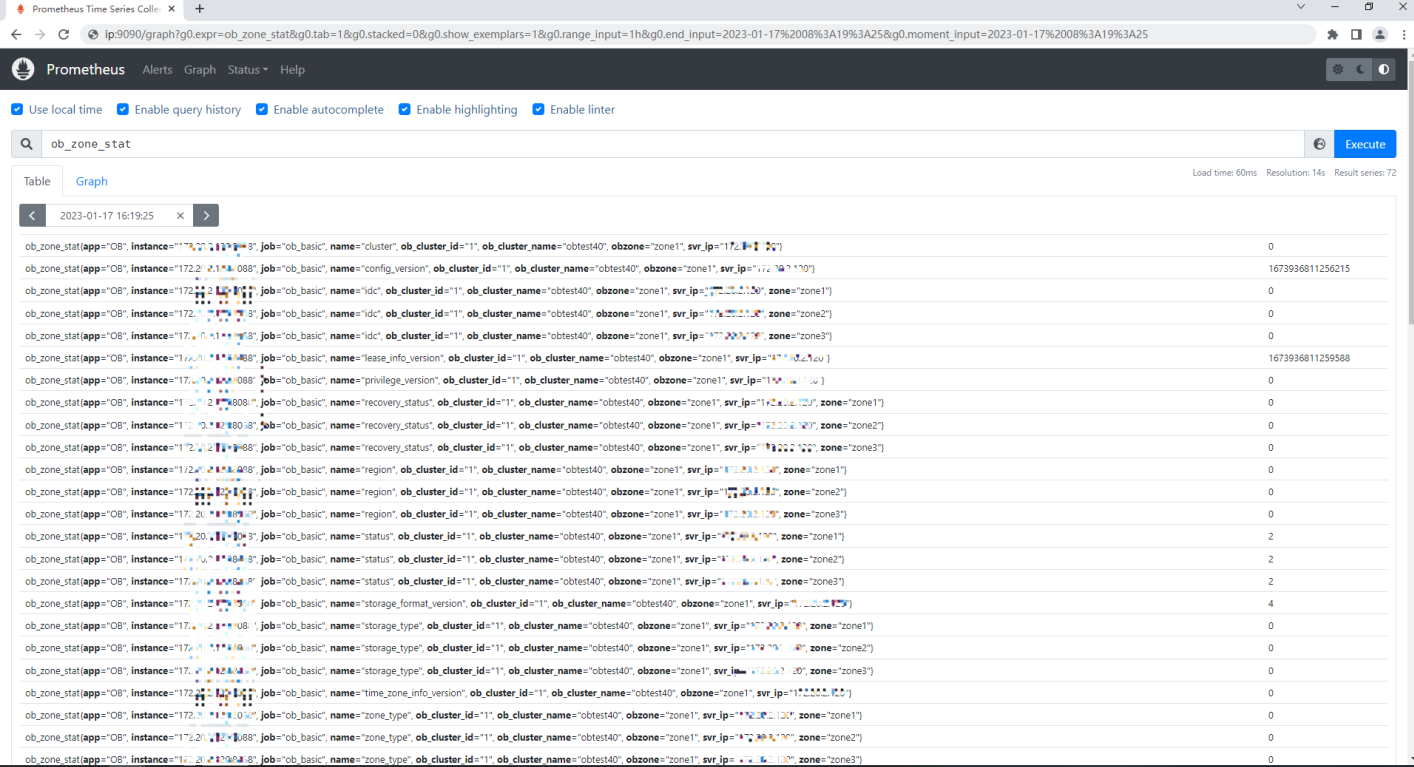
登录 Prometheus
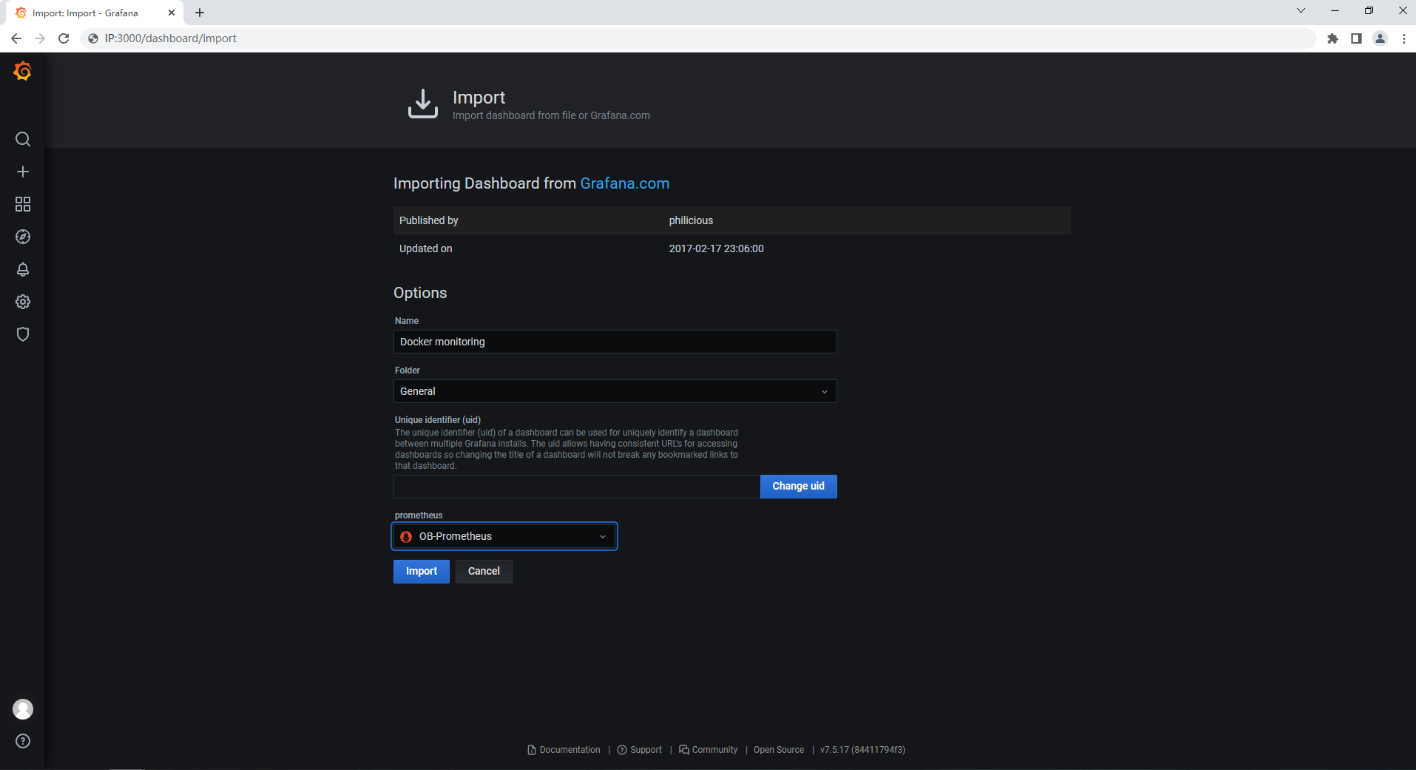
登录 Grafana
默认已经添加 Prometheus 和OB集群
添加193模板插件

选择 prometheus 项目
9276模板
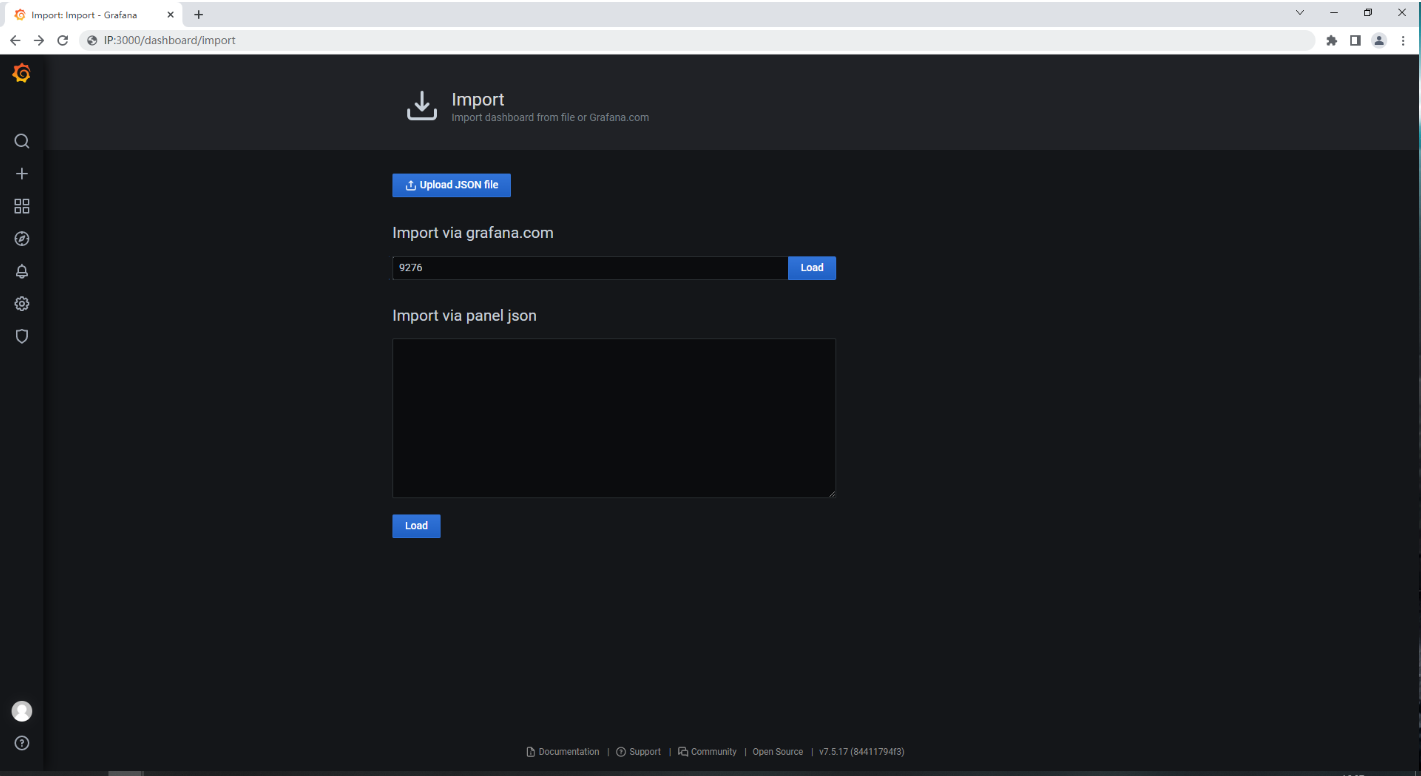
选择项目
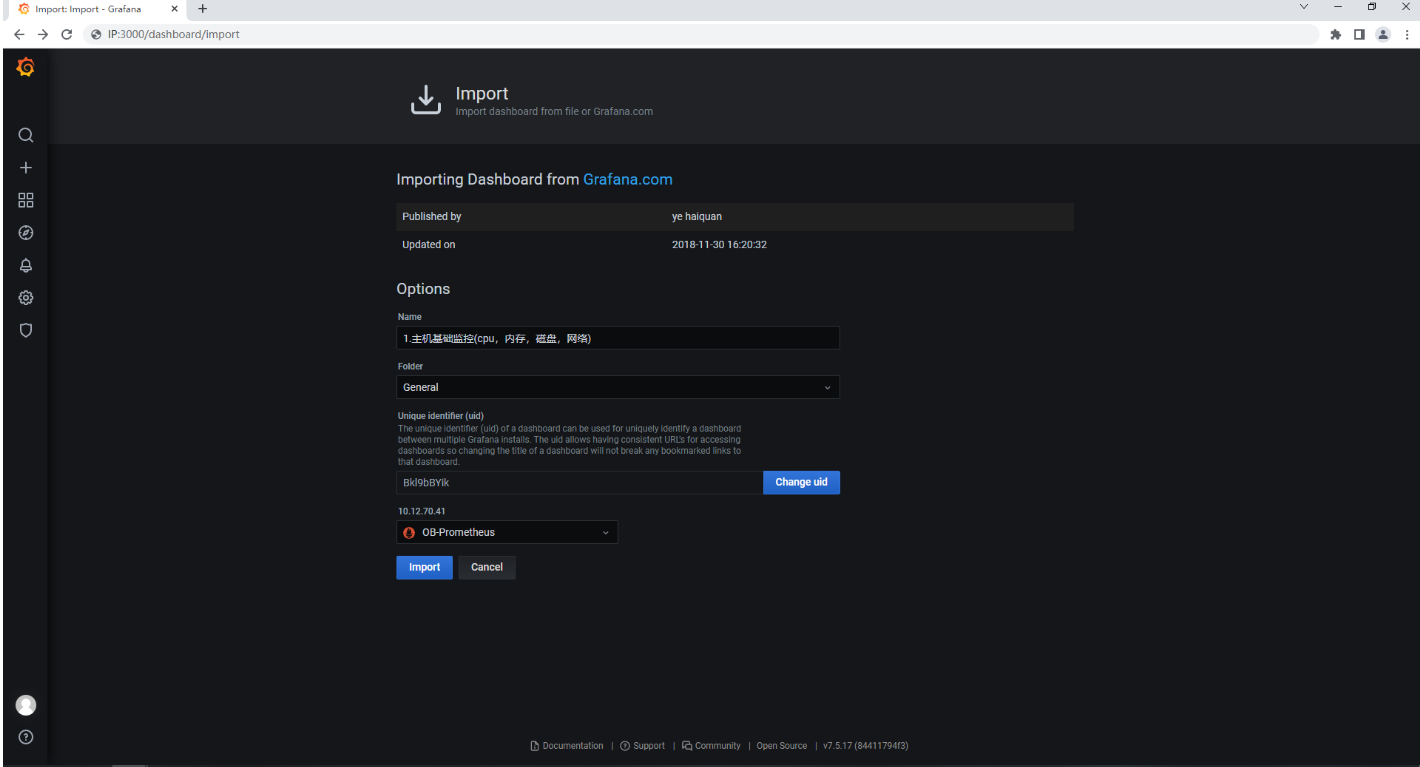
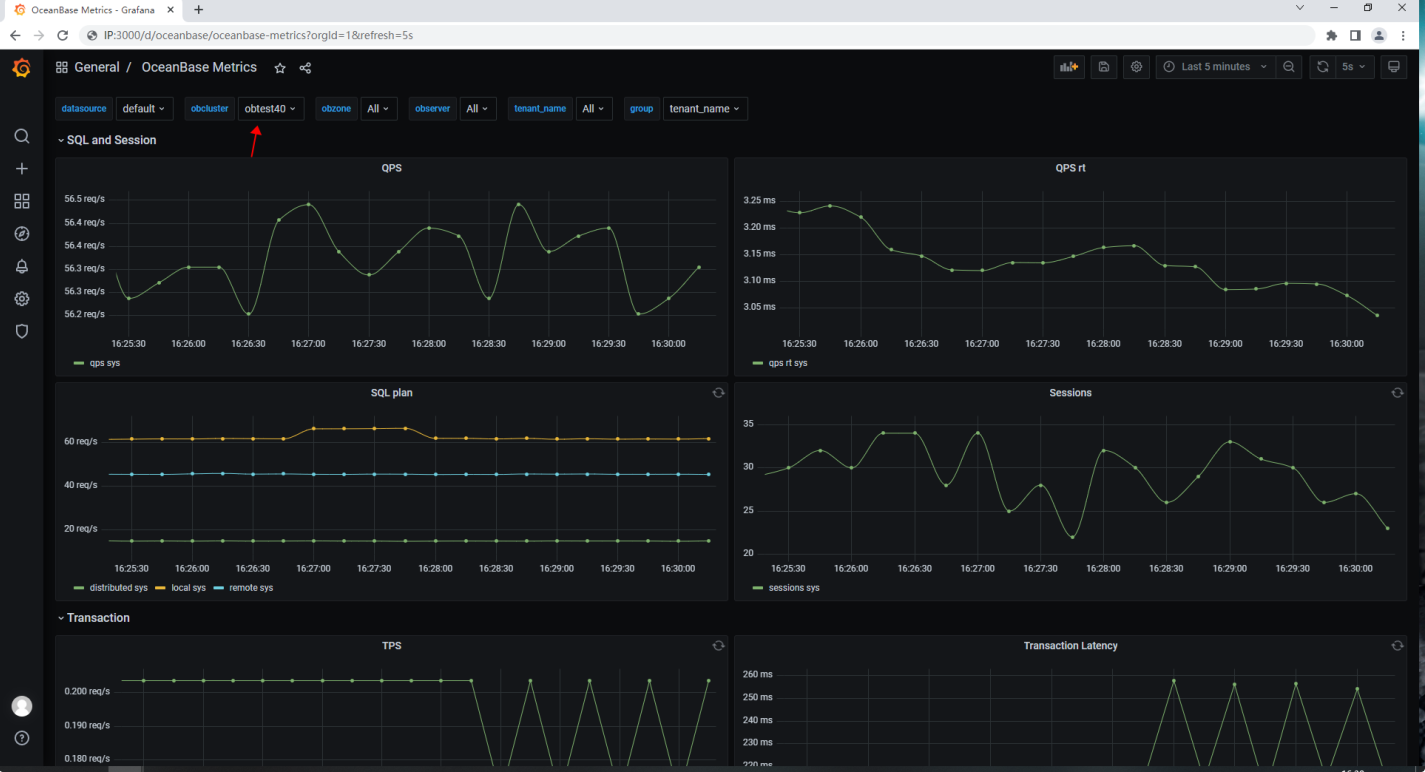
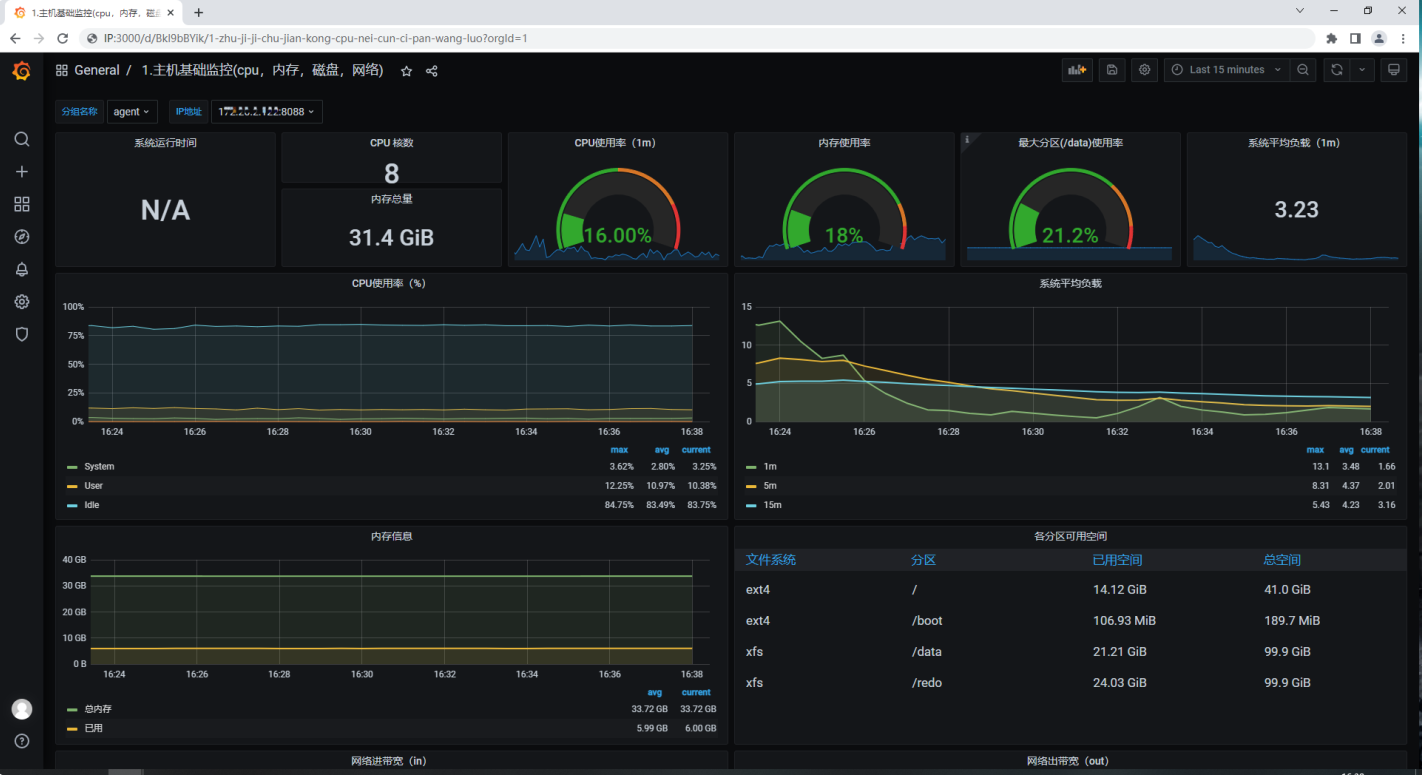
查看效果
四、可选安装组件
1、安装all-in-one
推荐您使用 all-in-one 的 package 进行安装, 但如果您不希望使用 all-in-one package 中包含的组件版本,想要安装其他版本的组件或者自由组合软件的版本,可以参考以下操作进行安装。
2、离线安装 OBD
您可以从 OceanBase 官网下载中心 下载所需版本的 OBD。推荐您使用最新版本的安装包。
下载完成后,将 OBD 复制到您的中控机器上。
在 CentOS 或 RedHat 系统上,执行以下命令安装 OBD:
yum install ob-deploy-x.x.x.el7.x86_64.rpm
在 Ubuntu 或 Debian 系统上,执行以下命令安装 OBD:
alien --scripts -i ob-deploy-x.x.x.el7.x86_64.rpm
3、离线安装 OBClient
您可以从 OceanBase 官网下载中心 下载 OBClient,建议下载最新版本的安装包。
下载完成后,将 OBClient 复制到您的中控机器上。
在 CentOS 或 RedHat 系统上,执行以下命令安装 OBClient:
yum install libobclient-x.x.x.el7.x86_64.rpm yum install obclient-x.x.x-2.el7.x86_64.rpm
在 Ubuntu 或 Debian 系统上,执行以下命令安装 OBLibs:
alien --scripts -i libobclient-x.x.x.el7.x86_64.rpm alien --scripts -i obclient-x.x.x.el7.x86_64.rpm
4、安装 OceanBase 数据库和 OBProxy
安装 OceanBase 数据库和 OBProxy 之前,为了数据安全,建议您切换到非 root 用户。
如果离线安装 OceanBase 数据库和 OBProxy,从 OceanBase 官网下载中心 下载 OceanBase 数据库、OBLibs 和 OBProxy。
● oceanbase-ce-libs-x.x.x.x-xxxx.el7.x86_64
● obproxy-ce-x.x.x-x.el7.x86_64
下载完成后,将 OceanBase 数据库和 OBProxy 复制到您的中控机器上。
跳转至上述安装包的下载目录,按照以下步骤安装 OceanBase 数据库和 OBProxy:
- 禁用远程仓库obd mirror disable remote 离线安装时,您必须禁用远程仓库。注意如果您是在线安装,并且您的操作系统是 Anolis、CentOS 或 RedHat,跳过此步骤。
- 将安装包添加至本地镜像obd mirror clone *.rpm
- 查看镜像列表obd mirror list
- 选择配置文件示例采用自动部署配置文件。自动部署将根据简易配置和目标机器资源生成最大规格配置并启动 OceanBase 数据库。
○ 如果您采用单机安装,即目标机器只有一台,可使用单机安装配置文件(/usr/obd/example/autodeploy/single-example.yaml)。
○ 如果您采用分布式安装,即目标机器有多台,可使用分布式安装配置文件(/usr/obd/example/autodeploy/default-example.yaml)。 - 修改配置文件以部署分布式 OceanBase 数据库和 ODP 为例,按照以下步骤修改配置文件:
  b. 修改每台机器的 IP、home_path、data_dir 和 redo_diroceanbase-ce:   servers:     - name: z1       # Please don't use hostname, only IP can be supported       ip: 172.xx.xxx.200     - name: z2       ip: 172.xx.xxx.201     - name: z3       ip: 172.xx.xxx.202   global:     # Please set devname as the network adaptor's name whose ip is  in the setting of severs.     # if set severs as "127.0.0.1", please set devname as "lo"     # if current ip is 192.168.1.10, and the ip's network adaptor's name is "eth0", please use "eth0"     devname: eth0     # The working directory for OceanBase Database. OceanBase Database is started under this directory. This is a required field.     home_path: /home/admin/oceanbase/ob     # The directory for data storage. The default value is $home_path/store.     data_dir: /data/ob     # The directory for clog, ilog, and slog. The default value is the same as the data_dir value.     redo_dir: /redo/ob 说明您必须根据您的真实配置修改这些参数。
  c. 配置 ODP 并修改 IP 和 home_pathobproxy-ce:   servers:     - 172.xx.xxx.203   global:     # The working directory for obproxy. Obproxy is started under this directory. This is a required field.     home_path: /home/admin/obproxy
您可以使用在线 YAML 文件校验器对您的配置文件进行检测。详细信息,参考 YAML 在线校验器。
五、安装遇到的报错问题和解决办法
1、ssh-keygen问题
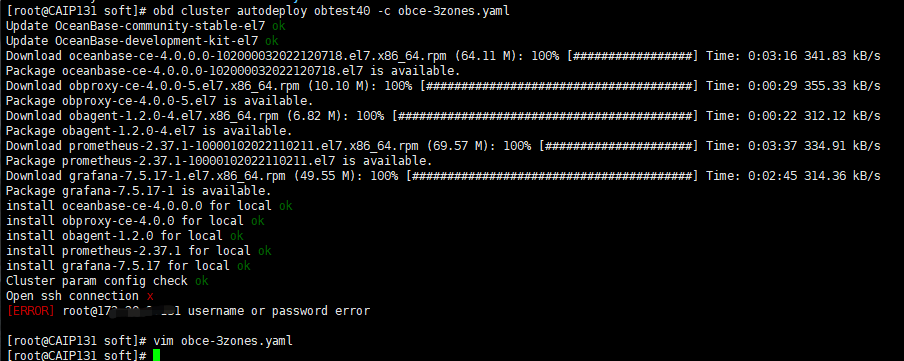
[root@CAIP131 soft]# obd cluster autodeploy obtest40 -c obce-3zones.yaml
Update OceanBase-community-stable-el7 ok
Update OceanBase-development-kit-el7 ok
Download oceanbase-ce-4.0.0.0-102000032022120718.el7.x86_64.rpm (64.11 M): 100% [#################] Time: 0:03:16 341.83 kB/s
Package oceanbase-ce-4.0.0.0-102000032022120718.el7 is available.
Download obproxy-ce-4.0.0-5.el7.x86_64.rpm (10.10 M): 100% [######################################] Time: 0:00:29 355.33 kB/s
Package obproxy-ce-4.0.0-5.el7 is available.
Download obagent-1.2.0-4.el7.x86_64.rpm (6.82 M): 100% [##########################################] Time: 0:00:22 312.12 kB/s
Package obagent-1.2.0-4.el7 is available.
Download prometheus-2.37.1-10000102022110211.el7.x86_64.rpm (69.57 M): 100% [#####################] Time: 0:03:37 334.91 kB/s
Package prometheus-2.37.1-10000102022110211.el7 is available.
Download grafana-7.5.17-1.el7.x86_64.rpm (49.55 M): 100% [########################################] Time: 0:02:45 314.36 kB/s
Package grafana-7.5.17-1 is available.
install oceanbase-ce-4.0.0.0 for local ok
install obproxy-ce-4.0.0 for local ok
install obagent-1.2.0 for local ok
install prometheus-2.37.1 for local ok
install grafana-7.5.17 for local ok
Cluster param config check ok
Open ssh connection x
[ERROR] root@172.20.2.131 username or password error

[root@CAIP131 soft]# vim obce-3zones.yaml
Generating public/private rsa key pair.
Enter file in which to save the key (/root/.ssh/id_rsa):
Created directory '/root/.ssh'.
Enter passphrase (empty for no passphrase):
Enter same passphrase again:
Your identification has been saved in /root/.ssh/id_rsa.
Your public key has been saved in /root/.ssh/id_rsa.pub.
The key fingerprint is:
SHA256:AJ0RBbFloGV5TEhNiIYSFS2e21LUyBkdmAivVPGd/yc root@CAIP131
The key's randomart image is:
+---[RSA 4096]----+
|o+oO+%@^*        |
|..= %=X+=        |
| +.=..o+         |
|..o .  ..        |
|.  +    S.       |
|  o .     .      |
|   .       E .   |
|            o    |
|                 |
+----[SHA256]-----+
[root@CAIP131 ~]# cat ~/.ssh/id_rsa.pub >> ~/.ssh/authorized_keys
[root@CAIP131 ~]#
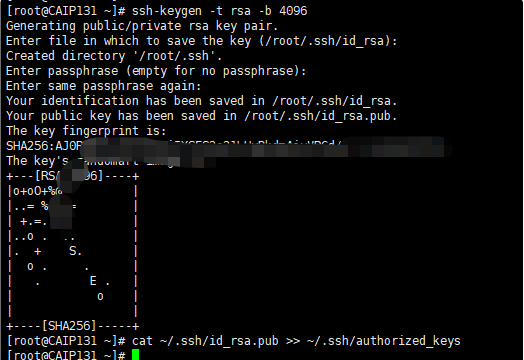
解决办法,复制ssh-keygen到客户机
scp ~/.ssh/authorized_keys admin@12.0.2.1:~/.ssh/authorized_keys

2、admin用户报错
[admin@CAIP131 soft]$ ls
obce-3zones.yaml
[admin@CAIP131 soft]$ obd cluster autodeploy obtest40 -c obce-3zones.yaml
[ERROR] failed to create directory /home/admin/.obd
[ERROR] /home/admin/.obd/version is not file
Traceback (most recent call last):
  File "obd.py", line 1266, in <module>
  File "obd.py", line 285, in do_command
  File "obd.py", line 285, in do_command
  File "obd.py", line 219, in do_command
  File "obd.py", line 193, in init_home
AttributeError: 'NoneType' object has no attribute 'seek'
[55590] Failed to execute script 'obd' due to unhandled exception!
[admin@CAIP131 soft]$
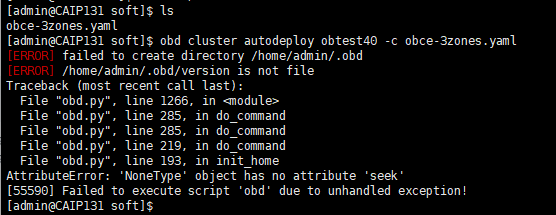
在admin用户下查不到 oceanbase-all-in-one 下的 obd 和 obclient 路径,前面安装操作过在root则可以查看到的。
[admin@CAIP131 soft]$ which obd
/bin/obd
[admin@CAIP131 soft]$ which obclient
/bin/obclient
[admin@CAIP131 soft]$
原因,需要更改目录属主属组权限:
(在中控节点上设置)
[root@CAIP131 ~]# chown -R admin.admin /home/admin
[root@CAIP131 ~]#

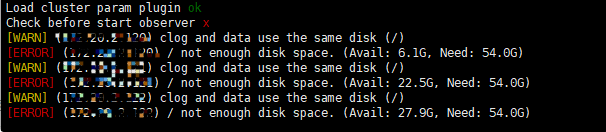
3、错误报错磁盘空间不足
[WARN] (12.0.2.10) clog and data use the same disk (/)
[ERROR] (12.0.2.10) / not enough disk space. (Avail: 6.1G, Need: 54.0G)
[WARN] (12.2.2.11) clog and data use the same disk (/)
[ERROR] (12.0.2.1) / not enough disk space. (Avail: 22.5G, Need: 54.0G)
[WARN] (12.0.2.2) clog and data use the same disk (/)
[ERROR] (12.20.2.2) / not enough disk space. (Avail: 27.9G, Need: 54.0G)
4、配置文件报错
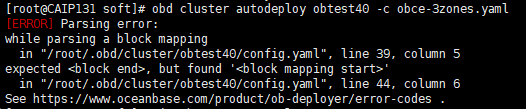
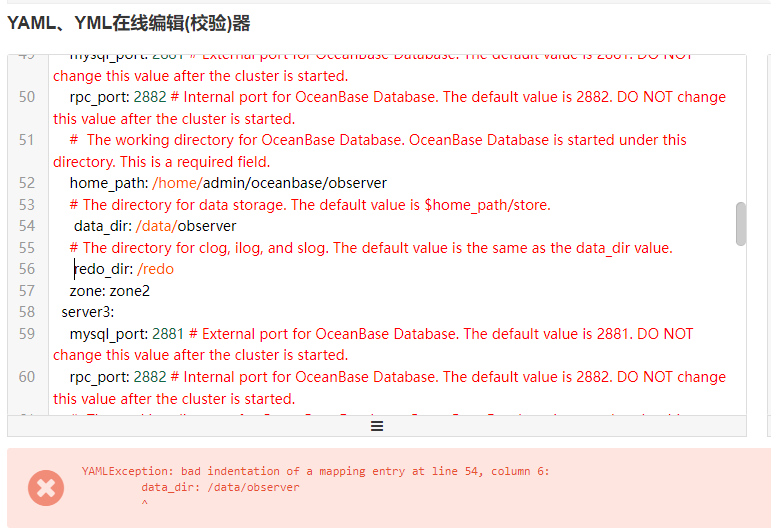
解决办法
YAML、YML在线编辑(校验)器查看,目录多了空格
删除空格就可以用了