


快速体验通过OBD白屏部署Oceanbase 4.1 集群
一、前言
OceanBase 数据库社区版支持多种部署方式:
-
如果想要快速部署单机版的 OceanBase 进行功能体验,可以参考快速部署部分。
- 对于非原生支持的操作系统(比如 MAC 和 Windows),建议使用 Docker 镜像的方式进行部署;具体操作参见 快速体验 OceanBase 数据库 中 方案三:部署 OceanBase 容器环境 一节。
- 对于原生支持的操作系统(Linux 系列,具体见支持的操作系统列表),建议使用 OBD 进行部署;具体操作参见 快速体验 OceanBase 数据库 中 方案一 和 方案二。
-
如果想要在生产环境中进行标准化部署,可以参照标准部署部分。
- 对于线下环境,建议使用 OBD 进行标准部署;具体操作参见 通过 OBD 白屏部署 OceanBase 集群。
- 对于 kubernetes 环境,建议使用 ob-operator 的方式部署;具体操作参见 在 Kubernetes 集群中部署 OceanBase 数据库。
- 如果想要进行在线体验,可以参考在线体验部分。
- 对于需要在线体验的用户,可以登录 OceanBase 体验站 进行功能体验。
本文体验使用OBD白屏部署方式,进行线下OB集群标准化部署, 机器分配如下:
| IP | 角色分配 |
|---|---|
| 10.30.122.6 | 中控机 |
| 10.10.60.40 | OB节点1 |
| 10.10.60.41 | OB节点2 |
| 10.10.60.42 | OB节点3 |
二、离线部署
1. 下载并安装一键安装包 all-in-one package
使用wget下载,从官网找到离线下载安装包的地址:
wget https://obbusiness-private.oss-cn-shanghai.aliyuncs.com/download-center/opensource/oceanbase-all-in-one/7/x86_64/oceanbase-all-in-one-4.1.0.0-100120230323143519.el7.x86_64.tar.gz
解压并进入目录
tar zxvf oceanbase-all-in-one-4.1.0.0-100120230323143519.el7.x86_64.tar.gz
cd oceanbase-all-in-one/bin
执行install.sh 安装脚本
root@mytest-1226:~/oceanbase-all-in-one/bin# ./install.sh
name: grafana
version: 7.5.17
release:1
arch: x86_64
md5: 1bf1f338d3a3445d8599dc6902e7aeed4de4e0d6
add /root/oceanbase-all-in-one/rpms/grafana-7.5.17-1.el7.x86_64.rpm to local mirror
name: obagent
version: 1.3.0
release:22.el7
arch: x86_64
md5: d57fbb4962b2fbecb6282358c59295fdfba4d6ac
add /root/oceanbase-all-in-one/rpms/obagent-1.3.0-22.el7.x86_64.rpm to local mirror
name: obproxy-ce
version: 4.1.0.0
release:7.el7
arch: x86_64
md5: 2a9d9bf67f179dcca2a8c9e7c77373d94e7e2abe
add /root/oceanbase-all-in-one/rpms/obproxy-ce-4.1.0.0-7.el7.x86_64.rpm to local mirror
name: oceanbase-ce
version: 4.1.0.0
release:100000192023032010.el7
arch: x86_64
md5: 8439ecf8db5e0649bd49671b41ea9e8c85756b63
add /root/oceanbase-all-in-one/rpms/oceanbase-ce-4.1.0.0-100000192023032010.el7.x86_64.rpm to local mirror
name: oceanbase-ce-libs
version: 4.1.0.0
release:100000192023032010.el7
arch: x86_64
md5: a83b1dd1cab44d3f610d439931322be7a08555f2
add /root/oceanbase-all-in-one/rpms/oceanbase-ce-libs-4.1.0.0-100000192023032010.el7.x86_64.rpm to local mirror
name: ocp-express
version: 1.0.0
release:100000432023032015.el7
arch: x86_64
md5: 42c6fc921063f24f9e1072d75bfa7f21f42146e3
add /root/oceanbase-all-in-one/rpms/ocp-express-1.0.0-100000432023032015.el7.x86_64.rpm to local mirror
name: prometheus
version: 2.37.1
release:10000102022110211.el7
arch: x86_64
md5: 58913c7606f05feb01bc1c6410346e5fc31cf263
add /root/oceanbase-all-in-one/rpms/prometheus-2.37.1-10000102022110211.el7.x86_64.rpm to local mirror
Trace ID: 53a1a7d6-e1c0-11ed-8797-5a265da2cc91
If you want to view detailed obd logs, please run: obd display-trace 53a1a7d6-e1c0-11ed-8797-5a265da2cc91
Disable remote ok
Trace ID: 58794566-e1c0-11ed-b3b0-5a265da2cc91
If you want to view detailed obd logs, please run: obd display-trace 58794566-e1c0-11ed-b3b0-5a265da2cc91

add auto set env logic to profile: /root/.bashrc

#####################################################################
 Install Finished
=====================================================================
Setup Environment:     source ~/.oceanbase-all-in-one/bin/env.sh
Start Web Service:     obd web
Quick Start:           obd demo
More Details:          obd -h
=====================================================================
安装成功,执行环境脚本
root@mytest-1226:~/oceanbase-all-in-one/bin# source ~/.oceanbase-all-in-one/bin/env.sh
检测obd,obclient命令
root@mytest-1226:~# which obd
/root/.oceanbase-all-in-one/obd/usr/bin/obd
root@mytest-1226:~#
root@mytest-1226:~# which obclient
/root/.oceanbase-all-in-one/obclient/u01/obclient/bin/obclient
2. 使用OBD启动白屏服务
使用下面的命令,启动白屏服务
root@mytest-1226:~# obd web
start OBD WEB in 0.0.0.0:8680
please open http://10.30.122.6:8680
打开浏览器,访问上面显示的url地址,可以看到出现下面的部署界面
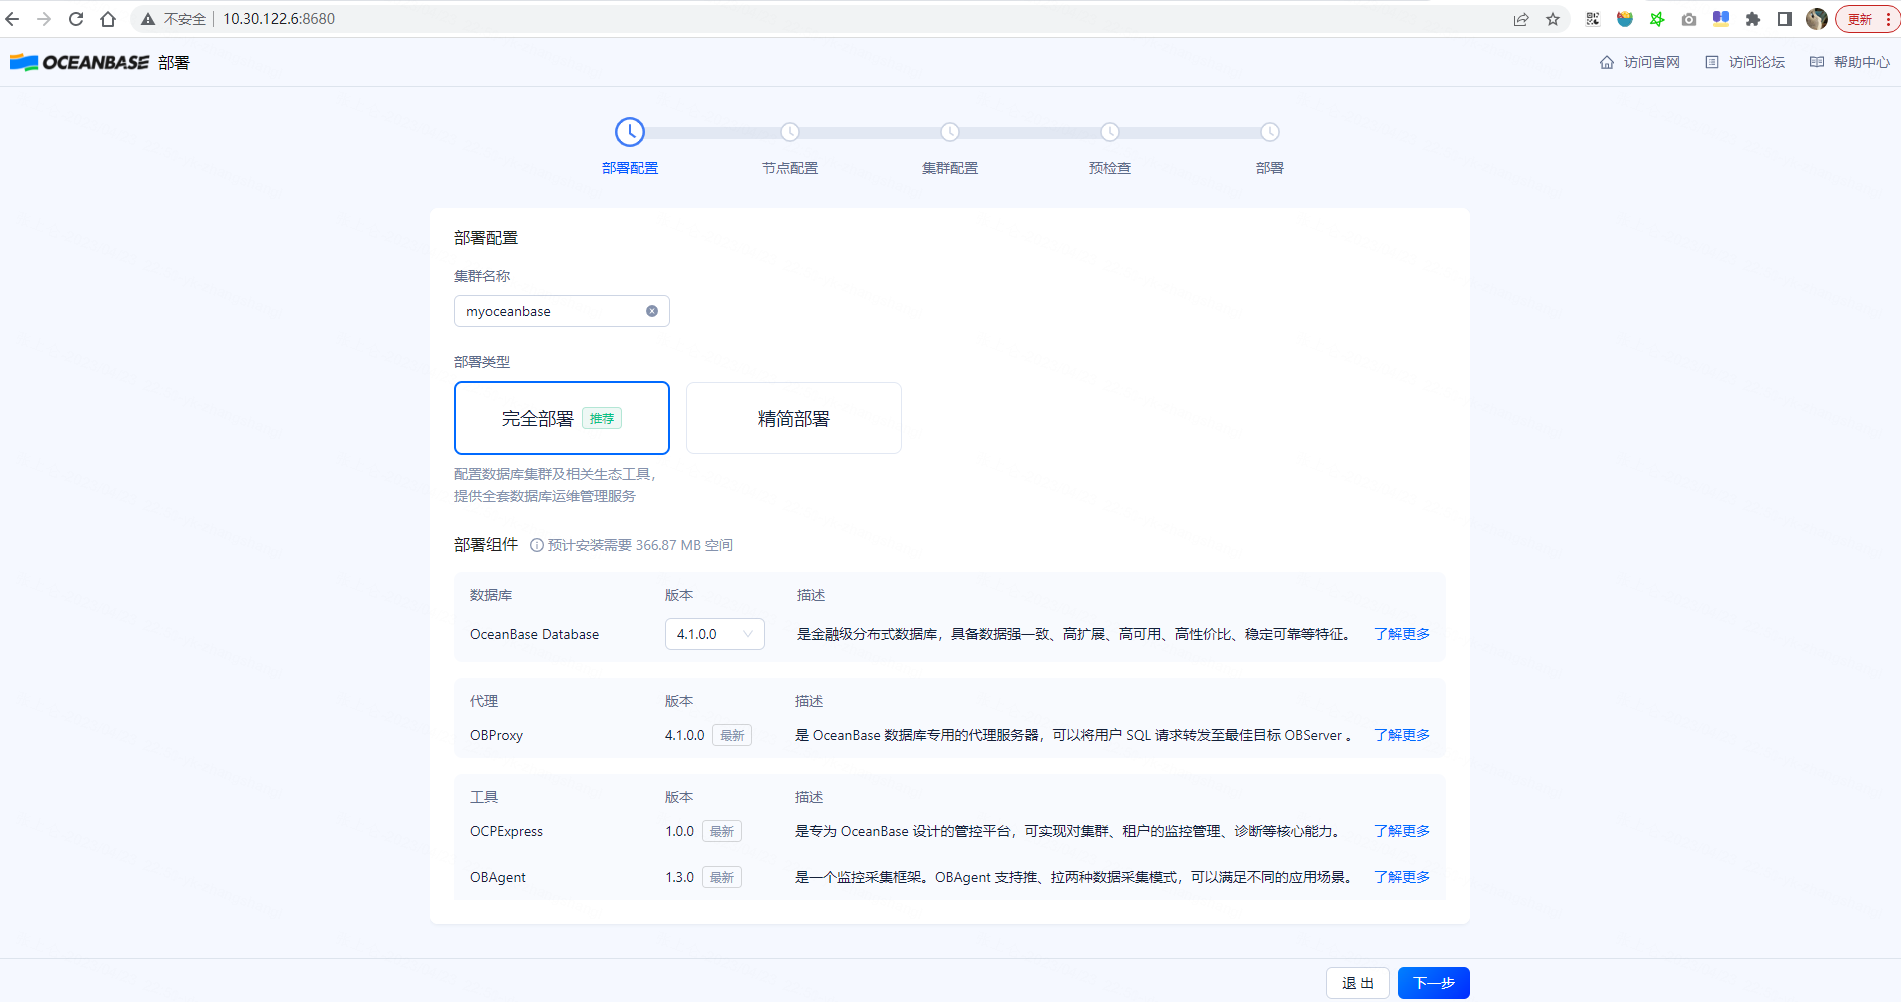
选择完全部署,点击下一步
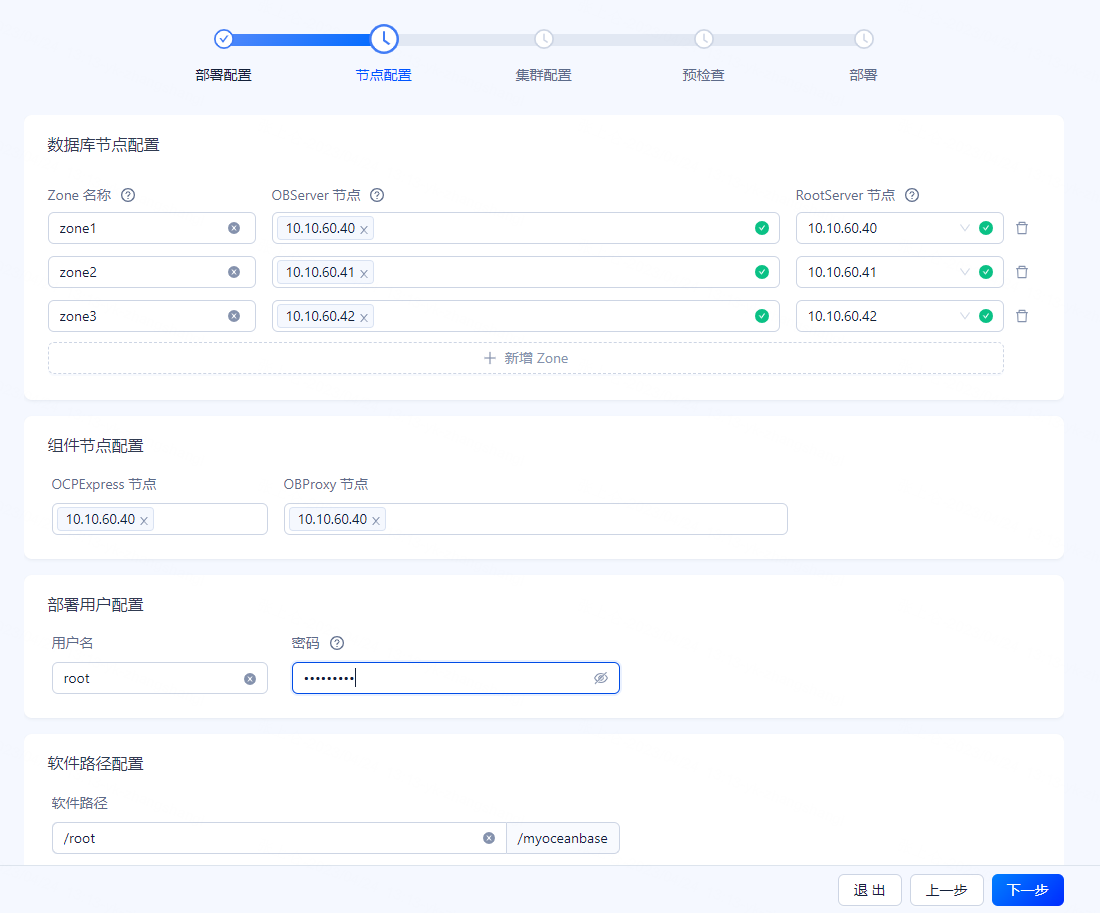
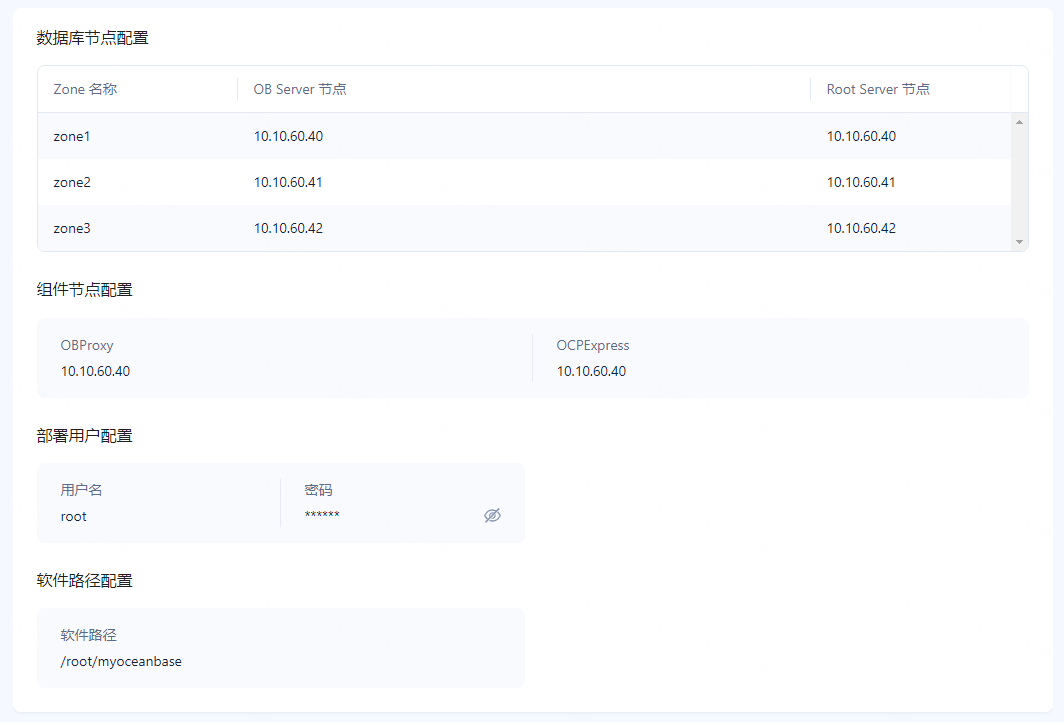
输入前面规划的三台ob节点的IP地址,其他参数会根据输入的IP跳出,点击下一步
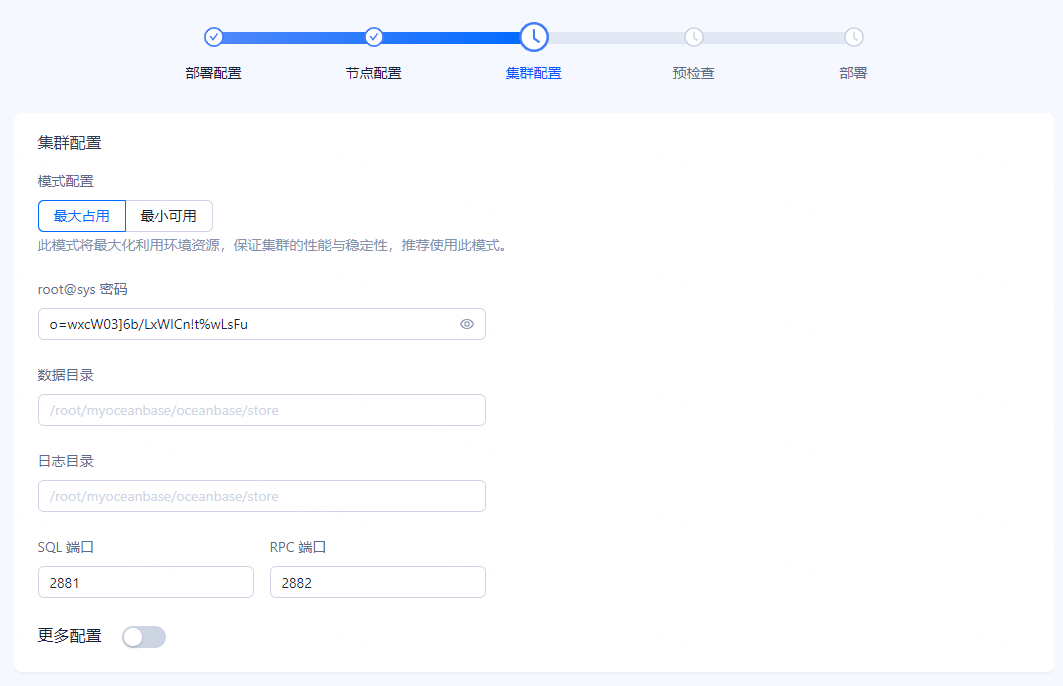
这里 root@sys密码是自动生成的,这里保持默认。其他参数,接收默认设置
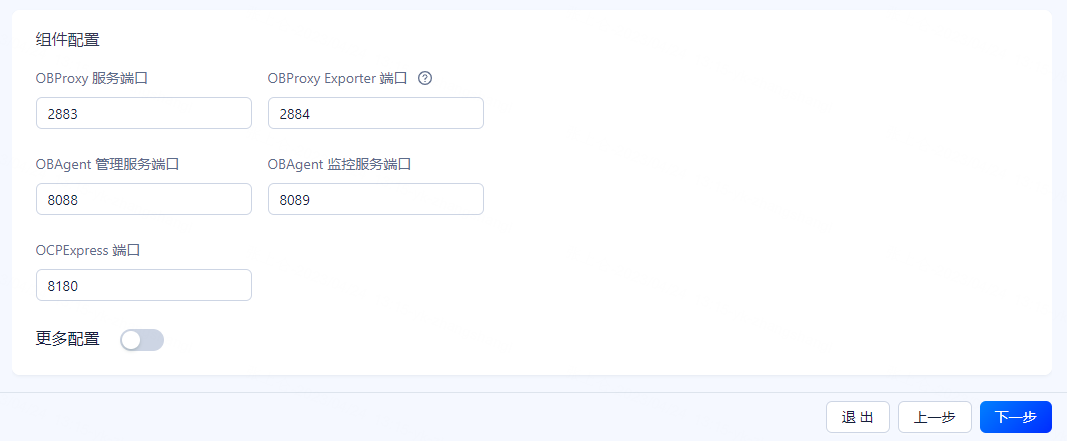
组件端口部分,接收默认设置,点击下一步,继续
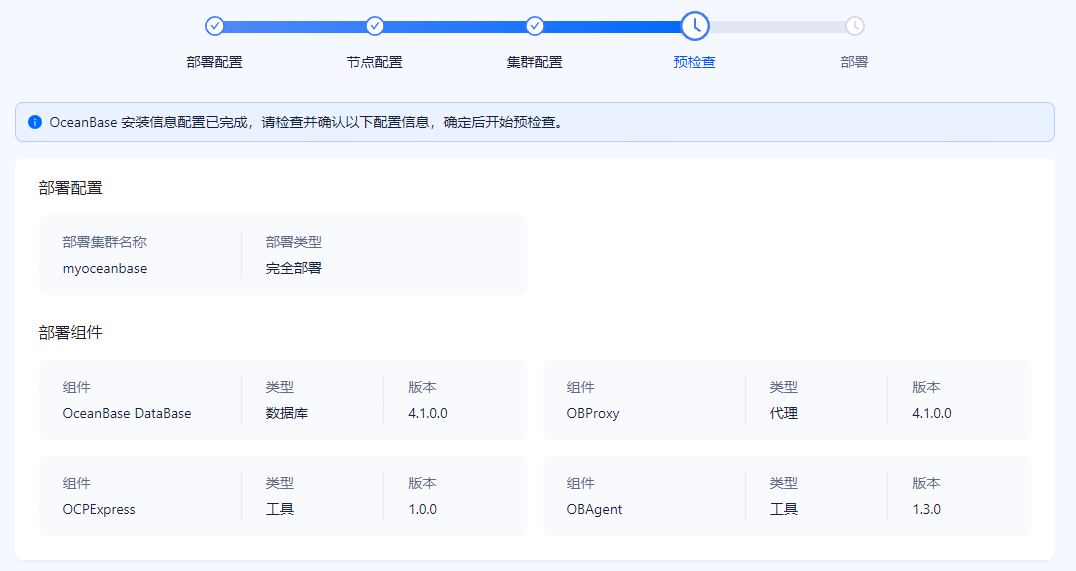
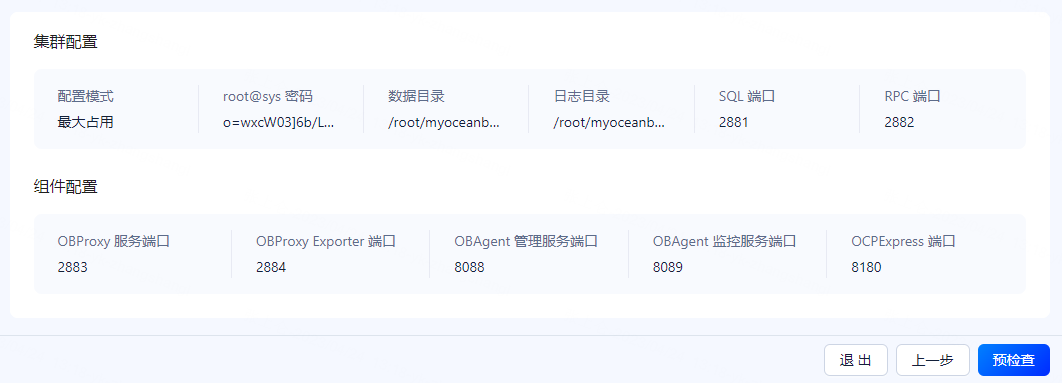
出现Oceanbase集群部署汇总信息,确认无误后,点击预检查,进入预检环境
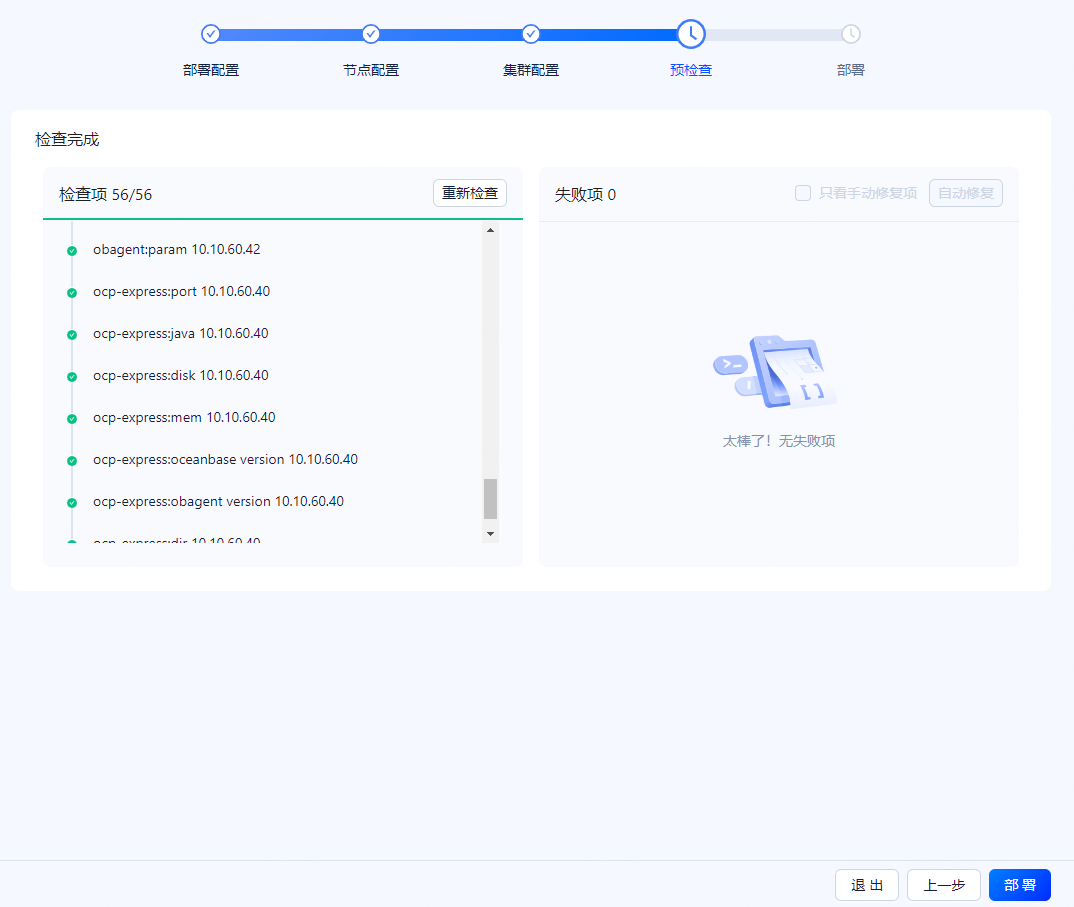
预检查全部通过后,点击部署,正式开始OB集群部署
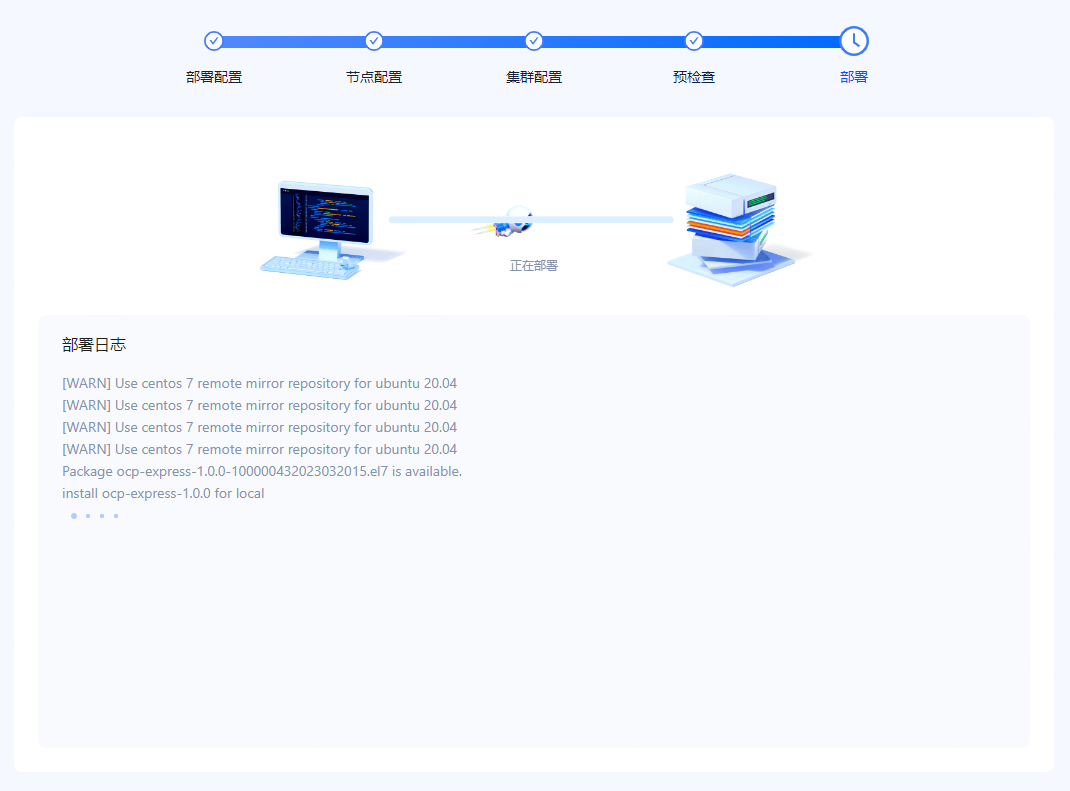
等待OBD部署完成
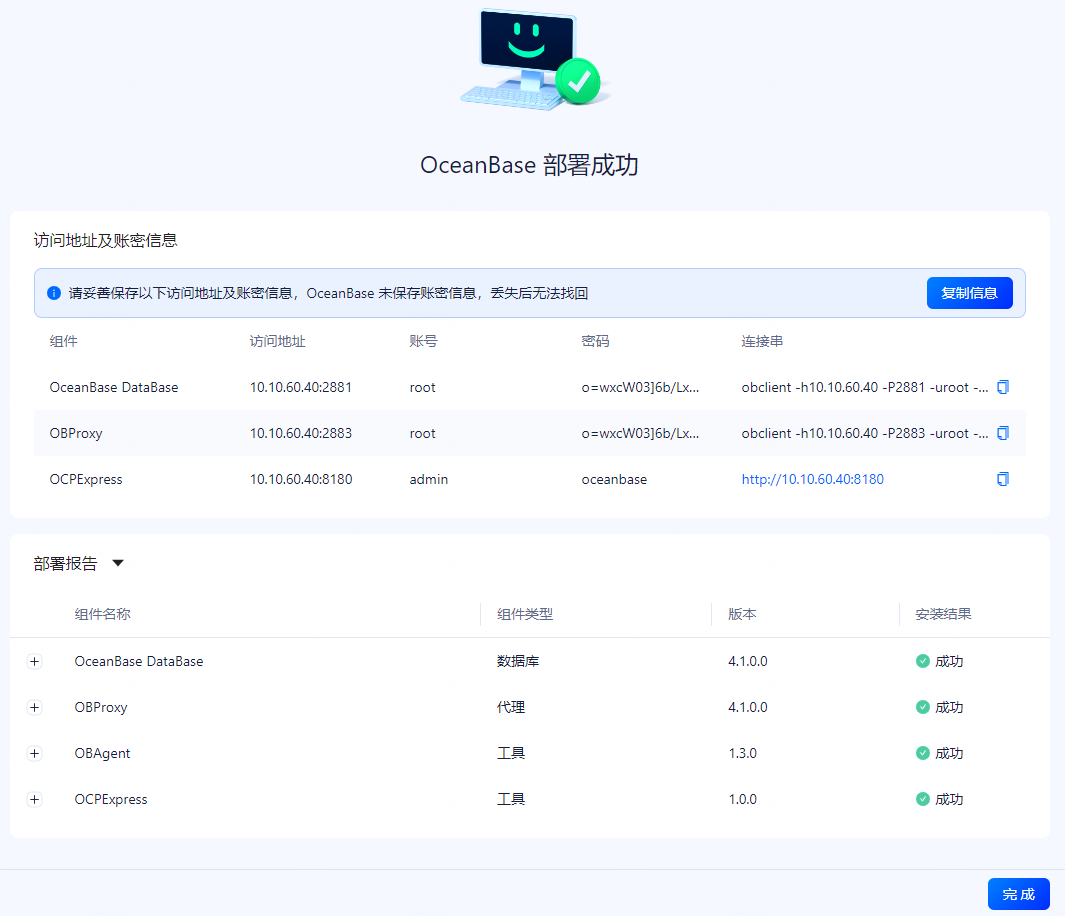
OB部署完成后,出现汇总信息。在点击完成之前,应用会提醒你复制连接信息
3. 验证测试
- 使用OBD命令查看集群
root@mytest-1226:~# obd cluster list
+----------------------------------------------------------------+
|                          Cluster List                          |
+-------------+--------------------------------+-----------------+
| Name        | Configuration Path             | Status (Cached) |
+-------------+--------------------------------+-----------------+
| myoceanbase | /root/.obd/cluster/myoceanbase | running         |
+-------------+--------------------------------+-----------------+
Trace ID: b2ef5028-e26d-11ed-93cc-5a265da2cc91
If you want to view detailed obd logs, please run: obd display-trace b2ef5028-e26d-11ed-93cc-5a265da2cc91
root@mytest-1226:~# obd cluster display myoceanbase
Get local repositories and plugins ok
Open ssh connection ok
Cluster status check ok
Connect to observer ok
Wait for observer init ok
+-----------------------------------------------+
|                    observer                   |
+-------------+---------+------+-------+--------+
| ip          | version | port | zone  | status |
+-------------+---------+------+-------+--------+
| 10.10.60.40 | 4.1.0.0 | 2881 | zone1 | ACTIVE |
| 10.10.60.41 | 4.1.0.0 | 2881 | zone2 | ACTIVE |
| 10.10.60.42 | 4.1.0.0 | 2881 | zone3 | ACTIVE |
+-------------+---------+------+-------+--------+
obclient -h10.10.60.40 -P2881 -uroot -p'o=wxcW03]6b/LxWICn!t%wLsFu' -Doceanbase -A

Connect to obproxy ok
+-----------------------------------------------+
|                    obproxy                    |
+-------------+------+-----------------+--------+
| ip          | port | prometheus_port | status |
+-------------+------+-----------------+--------+
| 10.10.60.40 | 2883 | 2884            | active |
+-------------+------+-----------------+--------+
obclient -h10.10.60.40 -P2883 -uroot -p'o=wxcW03]6b/LxWICn!t%wLsFu' -Doceanbase -A
Connect to Obagent ok
+----------------------------------------------------------------+
|                            obagent                             |
+-------------+--------------------+--------------------+--------+
| ip          | mgragent_http_port | monagent_http_port | status |
+-------------+--------------------+--------------------+--------+
| 10.10.60.40 | 8089               | 8088               | active |
| 10.10.60.41 | 8089               | 8088               | active |
| 10.10.60.42 | 8089               | 8088               | active |
+-------------+--------------------+--------------------+--------+
Connect to ocp-express ok
+----------------------------------------------------------------+
|                          ocp-express                           |
+-------------------------+----------+------------------+--------+
| url                     | username | default_password | status |
+-------------------------+----------+------------------+--------+
| http://10.10.60.40:8180 | admin    | oceanbase        | active |
+-------------------------+----------+------------------+--------+
Trace ID: 316c8fc4-e26e-11ed-96e9-5a265da2cc91
If you want to view detailed obd logs, please run: obd display-trace 316c8fc4-e26e-11ed-96e9-5a265da2cc91
下面可以上面显示的连接串,进行OB连接
- Oceanbase 直连测试
root@mytest-1226:~# obclient -h10.10.60.40 -P2881 -uroot -p'o=wxcW03]6b/LxWICn!t%wLsFu' -Doceanbase -A
Welcome to the OceanBase.  Commands end with ; or \g.
Your OceanBase connection id is 3221731682
Server version: OceanBase_CE 4.1.0.0 (r100000192023032010-0265dfc6d00ff4f0ff4ad2710504a18962abaef6) (Built Mar 20 2023 10:12:57)

Copyright (c) 2000, 2018, OceanBase and/or its affiliates. All rights reserved.

Type 'help;' or '\h' for help. Type '\c' to clear the current input statement.

obclient [oceanbase]> show databases;
+--------------------+
| Database           |
+--------------------+
| information_schema |
| LBACSYS            |
| mysql              |
| oceanbase          |
| ORAAUDITOR         |
| SYS                |
| test               |
+--------------------+
7 rows in set (0.016 sec)
- OBproxy 连接测试
root@mytest-1226:~# obclient -h10.10.60.40 -P2883 -uroot -p'o=wxcW03]6b/LxWICn!t%wLsFu' -Doceanbase -A
Welcome to the OceanBase.  Commands end with ; or \g.
Your OceanBase connection id is 524326
Server version: OceanBase_CE 4.1.0.0 (r100000192023032010-0265dfc6d00ff4f0ff4ad2710504a18962abaef6) (Built Mar 20 2023 10:12:57)

Copyright (c) 2000, 2018, OceanBase and/or its affiliates. All rights reserved.

Type 'help;' or '\h' for help. Type '\c' to clear the current input statement.

obclient [oceanbase]> show databases;
+--------------------+
| Database           |
+--------------------+
| information_schema |
| LBACSYS            |
| mysql              |
| oceanbase          |
| ORAAUDITOR         |
| SYS                |
| test               |
+--------------------+
7 rows in set (0.015 sec
三、总结
- 体验下来,使用OBD白屏部署方式来部署Oceanbase集群还是相当顺利的,在前期打通中控机和OB节点主机的SSH联通的情况下,使用图形化界面一步步的点,就能部署其OB集群环境。
- 大部分参数提供默认值,简化了小白用户的使用,能够快速上手OB集群部署
- 图形化界面,提供了一定参数定制化的能力,不过这部分目前还没有体验,放在后面熟悉OB的情况下再弄吧
最后修改时间:2023-04-25 11:00:46
「喜欢这篇文章,您的关注和赞赏是给作者最好的鼓励」
关注作者
【版权声明】本文为墨天轮用户原创内容,转载时必须标注文章的来源(墨天轮),文章链接,文章作者等基本信息,否则作者和墨天轮有权追究责任。如果您发现墨天轮中有涉嫌抄袭或者侵权的内容,欢迎发送邮件至:contact@modb.pro进行举报,并提供相关证据,一经查实,墨天轮将立刻删除相关内容。
