


OceanBase 开源后,同步推出OceanBase 集群的图形化管理工具OCP。但OCP 对资源占用的要求也较高,对于单集群、小规模集群、个人开发者来说,社区版 OCP 在可获得性、易用性上较难满足要求 ,而且安装包以 Docker 镜像方式提供, 依赖 Docker 管理,因此对运维要求也高。oceanbase4.x对OCP进行轻量化为 OCP Express ,可在使用 OBD 部署 OceanBase 集群时选择一键安装部署,大大降低了上手门槛。 因本人资源有限,上次测试了图形化安装oceanbase4.1精简部署,(参考[oceanbase4.1体验]|图形方式部署oceanbase4.1),没能安装OCP Express。现在手头有台刚下线的服务器,足以部署这个轻量化工具。 这台机器的资源如下:
操作系统
[root@node1 jdk]# cat /etc/os-release
NAME="Oracle Linux Server"
VERSION="7.9"
ID="ol"
ID_LIKE="fedora"
VARIANT="Server"
VARIANT_ID="server"
VERSION_ID="7.9"
PRETTY_NAME="Oracle Linux Server 7.9"
ANSI_COLOR="0;31"
CPE_NAME="cpe:/o:oracle:linux:7:9:server"
HOME_URL="https://linux.oracle.com/"
BUG_REPORT_URL="https://bugzilla.oracle.com/"

ORACLE_BUGZILLA_PRODUCT="Oracle Linux 7"
ORACLE_BUGZILLA_PRODUCT_VERSION=7.9
ORACLE_SUPPORT_PRODUCT="Oracle Linux"
ORACLE_SUPPORT_PRODUCT_VERSION=7.9

硬盘空间
[root@node1 g01]# df -h
Filesystem             Size  Used Avail Use% Mounted on
devtmpfs                63G     0   63G   0% /dev
tmpfs                   63G     0   63G   0% /dev/shm
tmpfs                   63G   51M   63G   1% /run
tmpfs                   63G     0   63G   0% /sys/fs/cgroup
/dev/mapper/ol-root     50G   37G   14G  74% /
/dev/sda1             1014M  395M  620M  39% /boot
/dev/mapper/ol-lvu01   1.5T  711G  809G  47% /g01
/dev/mapper/ol-lvdata  100G   13G   88G  13% /data
tmpfs                   13G     0   13G   0% /run/user/0
内存大小
[root@node1 g01]# free -g
              total        used        free      shared  buff/cache   available
Mem:            125           1         103           0          20         105
Swap:             3           0           3
先安装OBD工具包,然后启动obd web。
下载oceanbase 4.1的安装包
wget https://obbusiness-private.oss-cn-shanghai.aliyuncs.com/download-center/opensource/oceanbase-all-in-one/7/x86_64/oceanbase-all-in-one-4.1.0.0-100120230323143519.el7.x86_64.tar.gz
解压安装包并安装obd
[root@node1 ~]# tar xvf oceanbase-all-in-one-4.1.0.0-100120230323143519.el7.x86_64.tar.gz
[root@node1 ~]# cd oceanbase-all-in-one/bin
[root@node1 bin]# ls
env.sh install.sh uninstall.sh
sh install.sh
启动web工具
[root@node1 ~]# obd web
start OBD WEB in 0.0.0.0:8680
please open http://10.81.1.9:8680
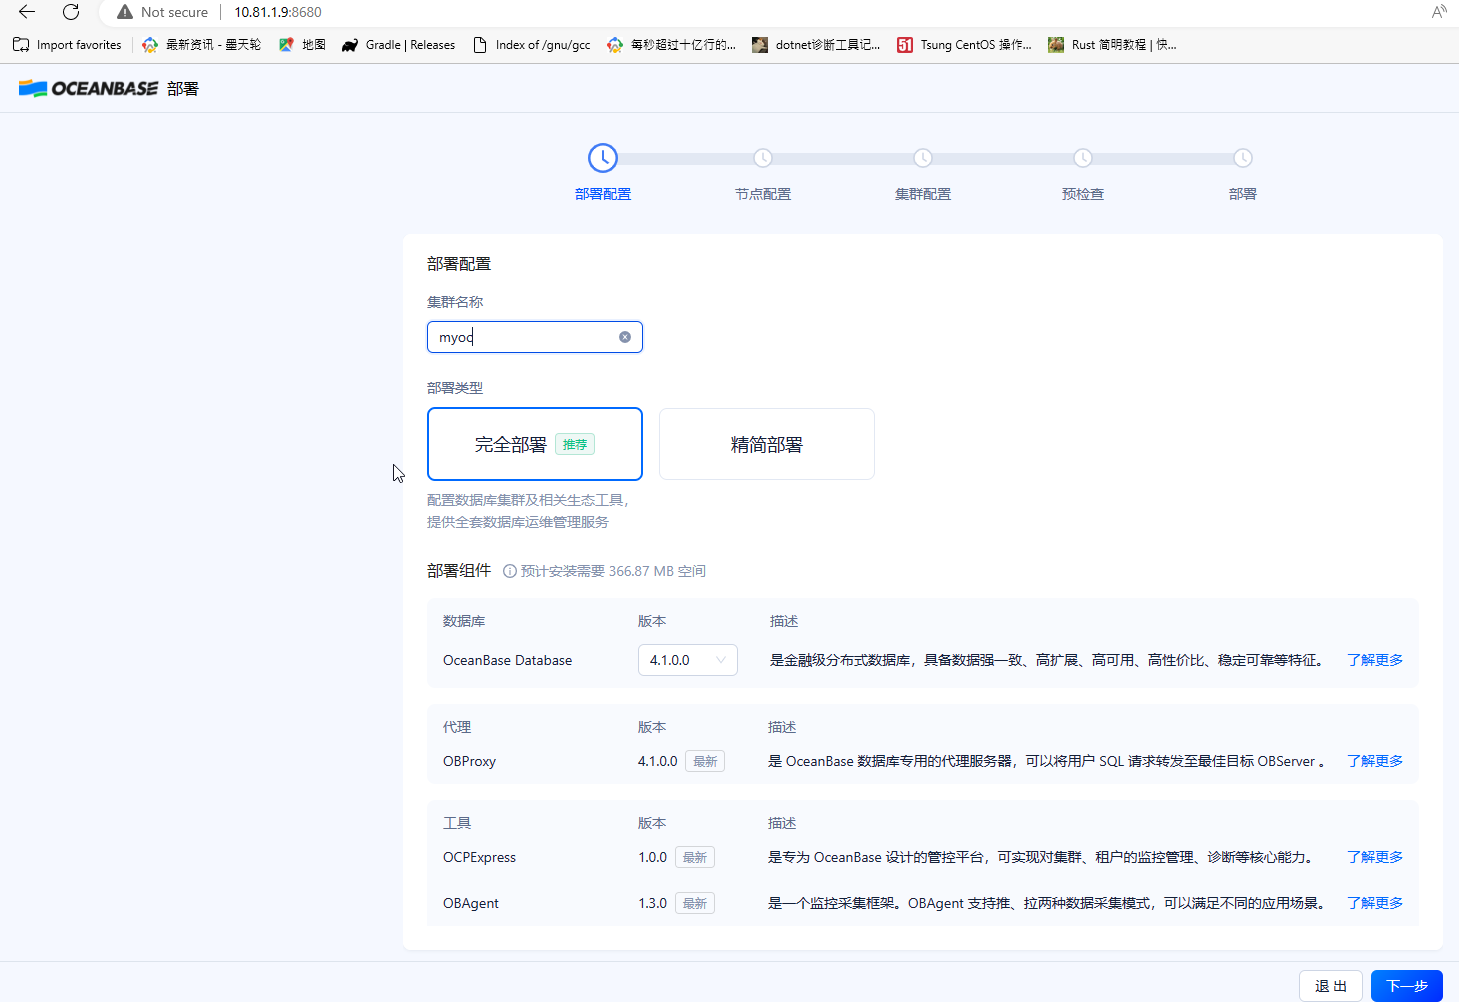
下面进入部署过程

这次选择完全部署
OBD默认部署三节点集群,现在只部署一个节点,删除另外两个节点
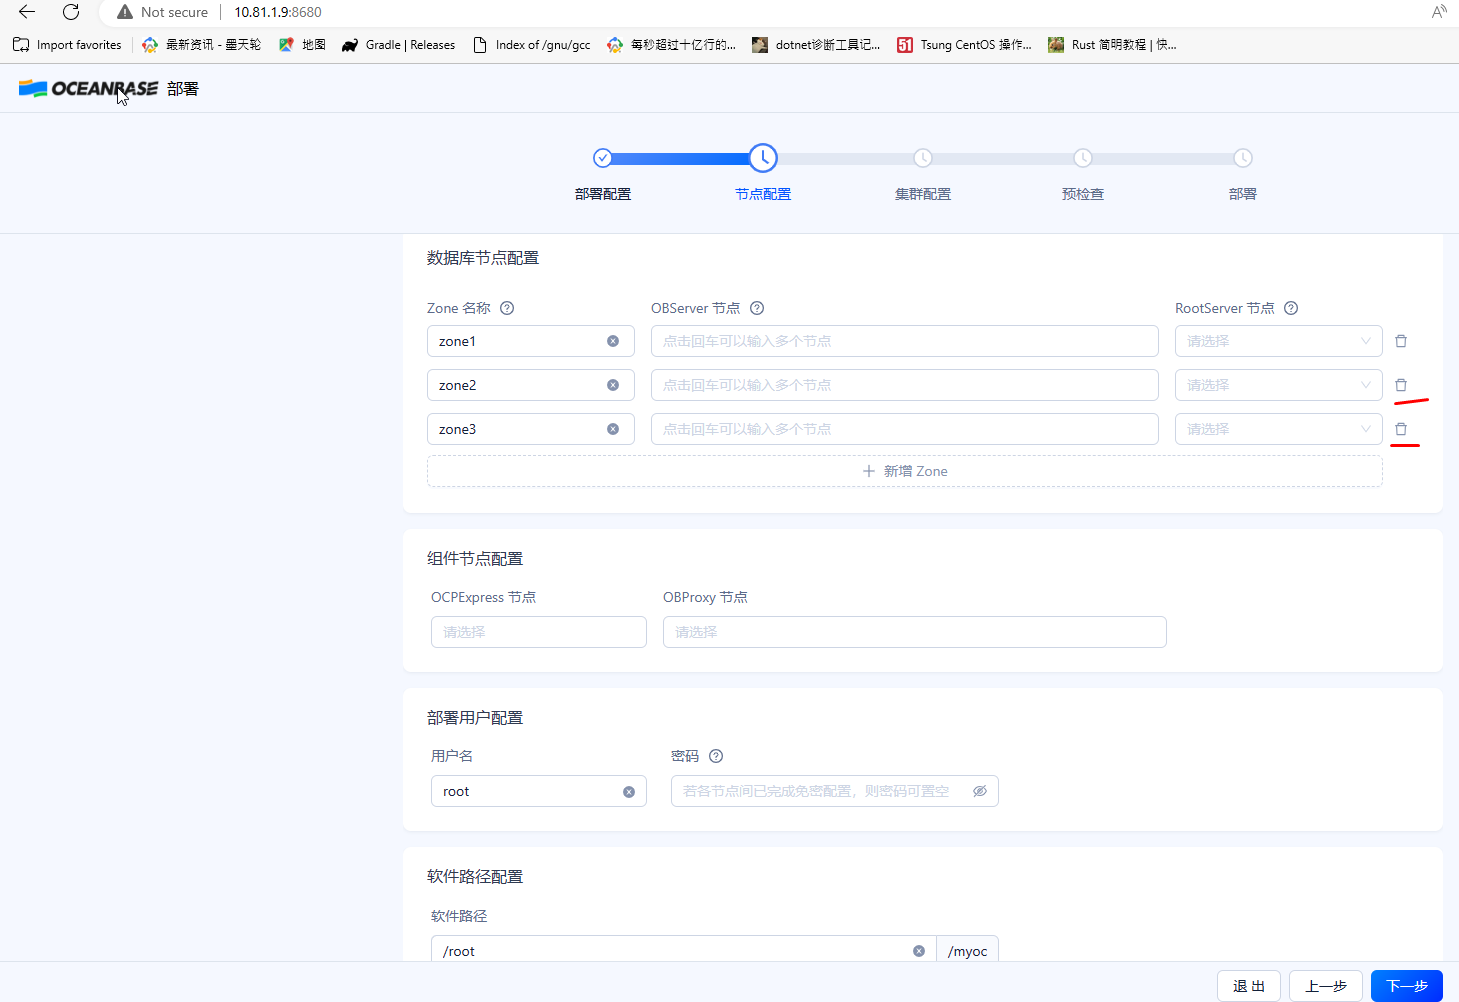
因本机有几个网卡,只取IP对应的网卡名称

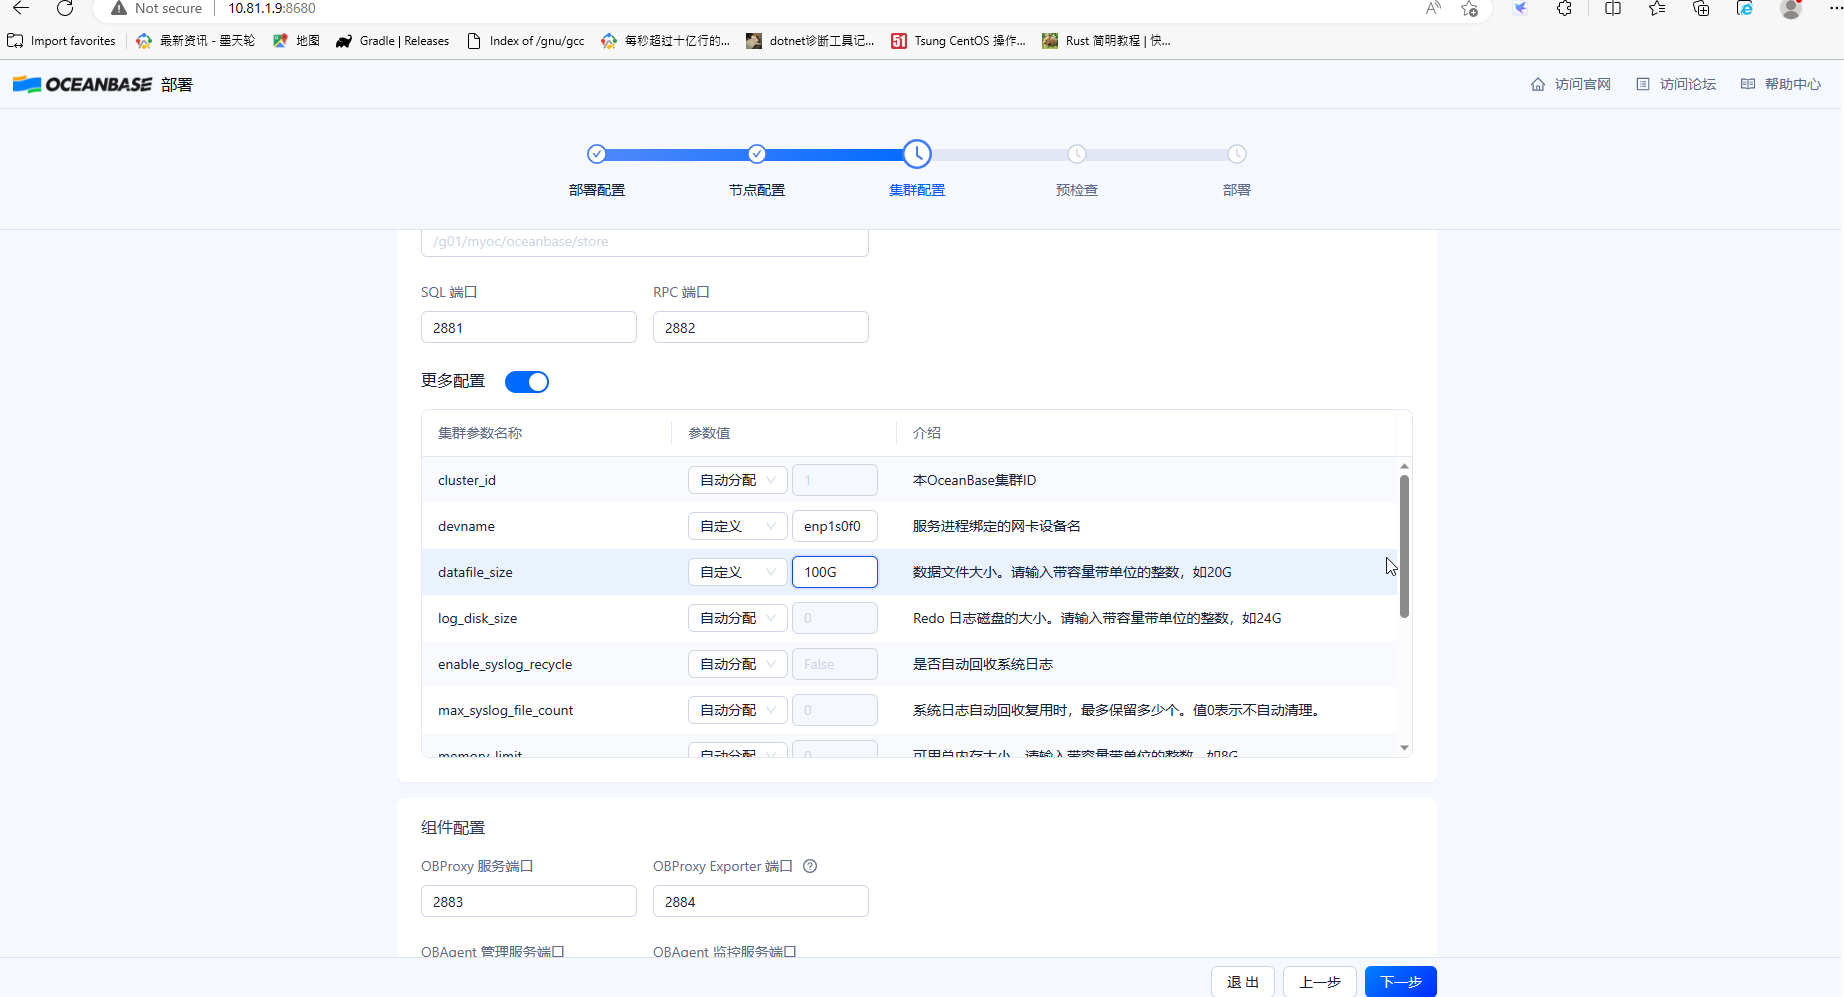
数据文件的大小可以编辑,这里设数据文件大小设为100G
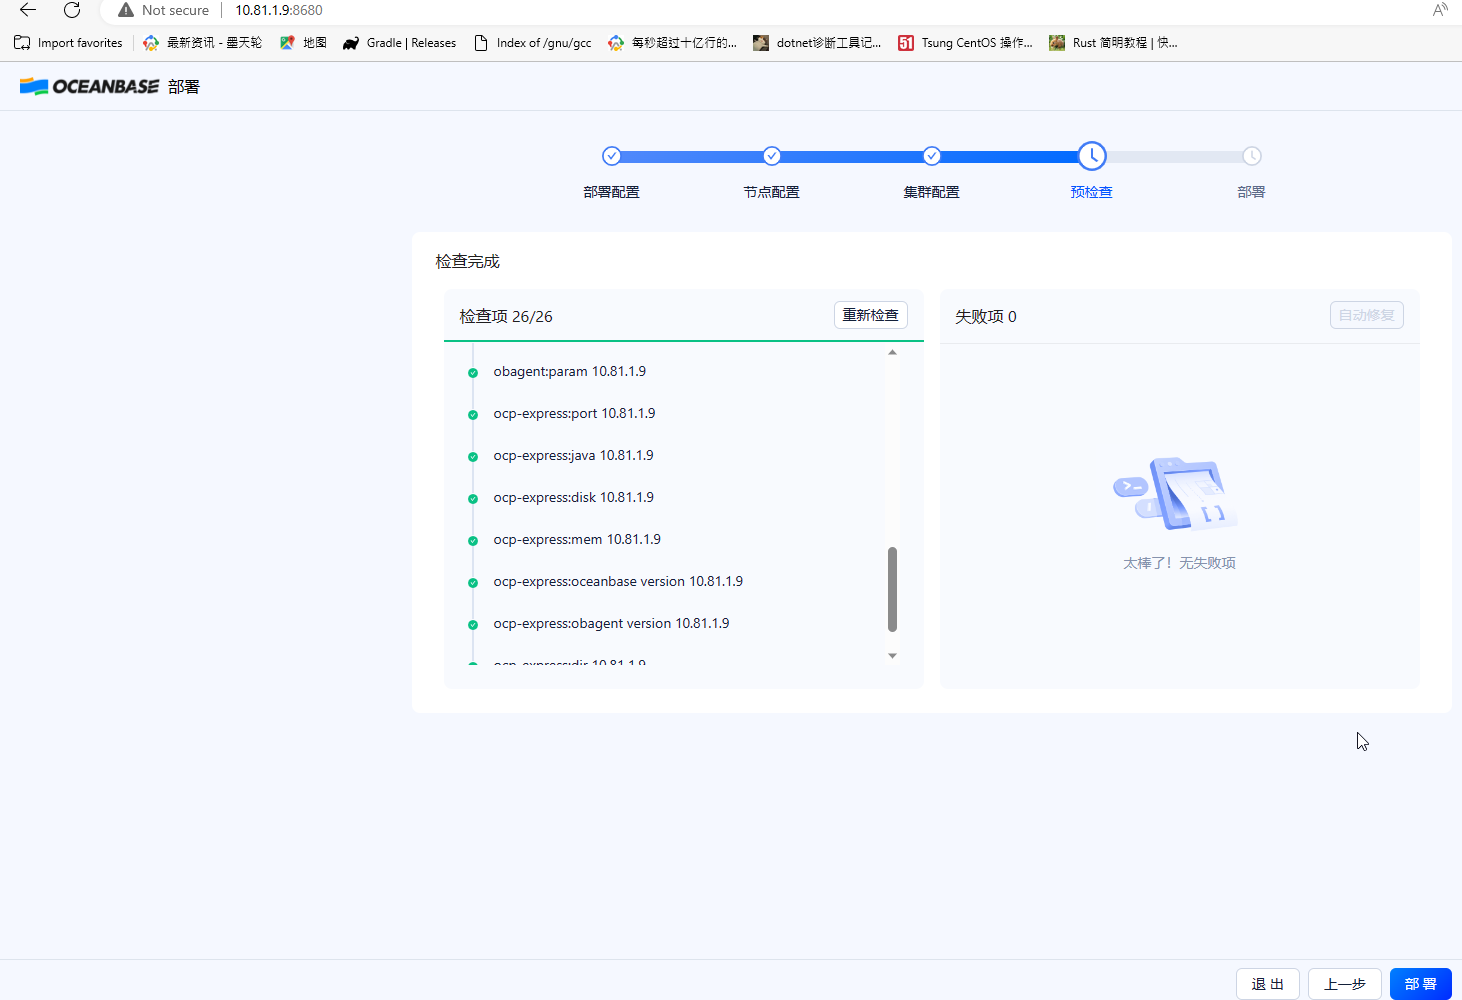
预检查过程有不通过的项目会有提示,根据提示做相应修改直至全部通过

开始部署过程
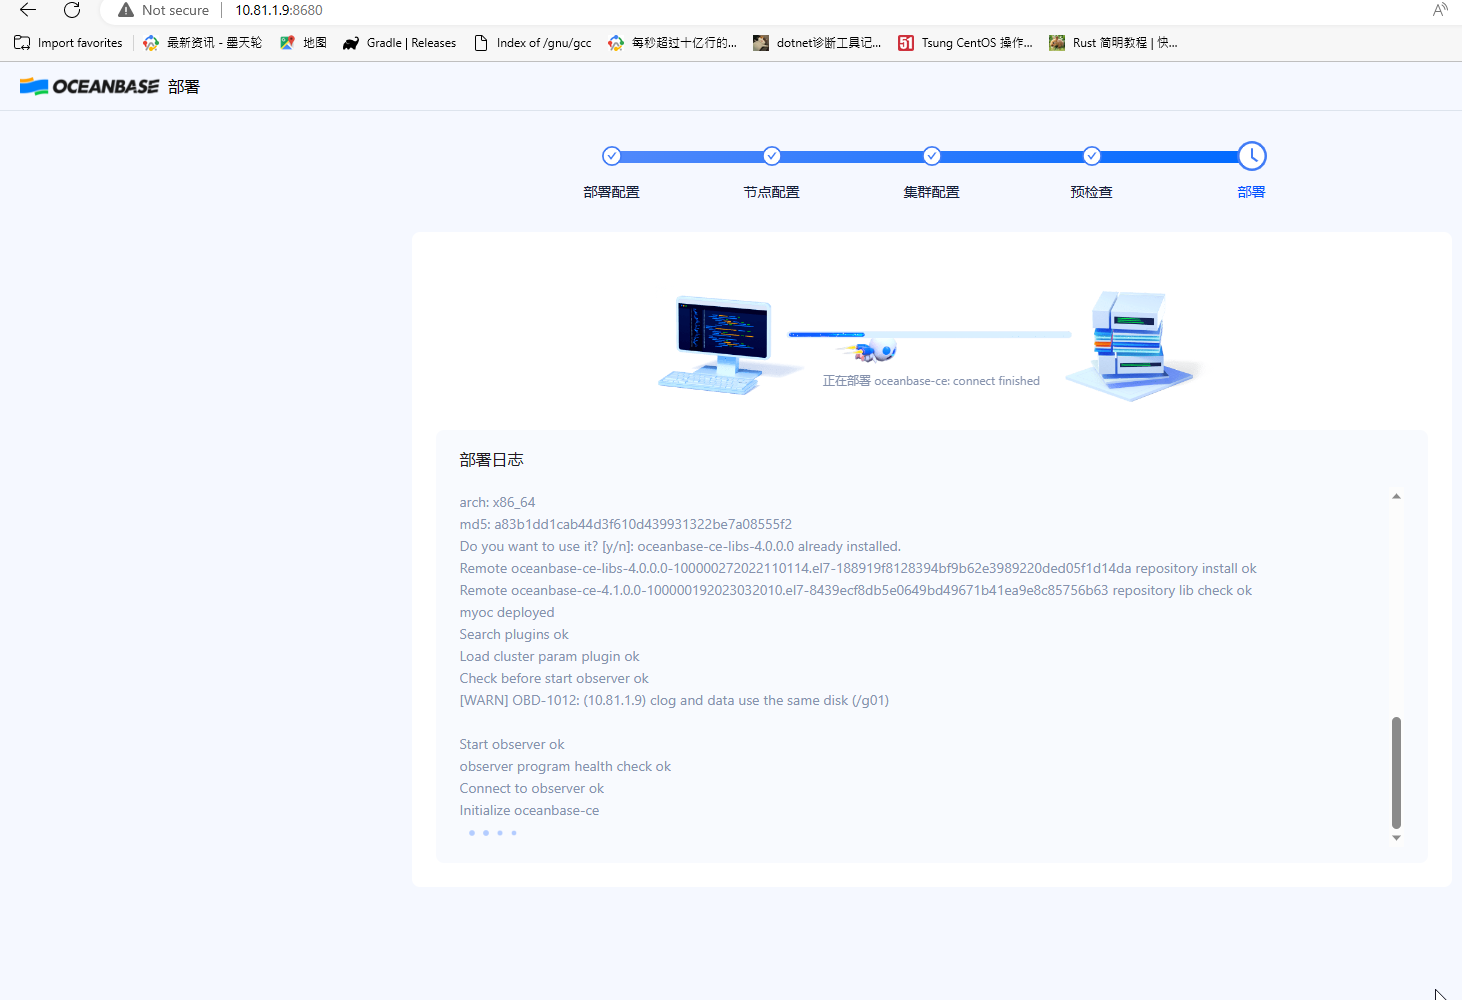
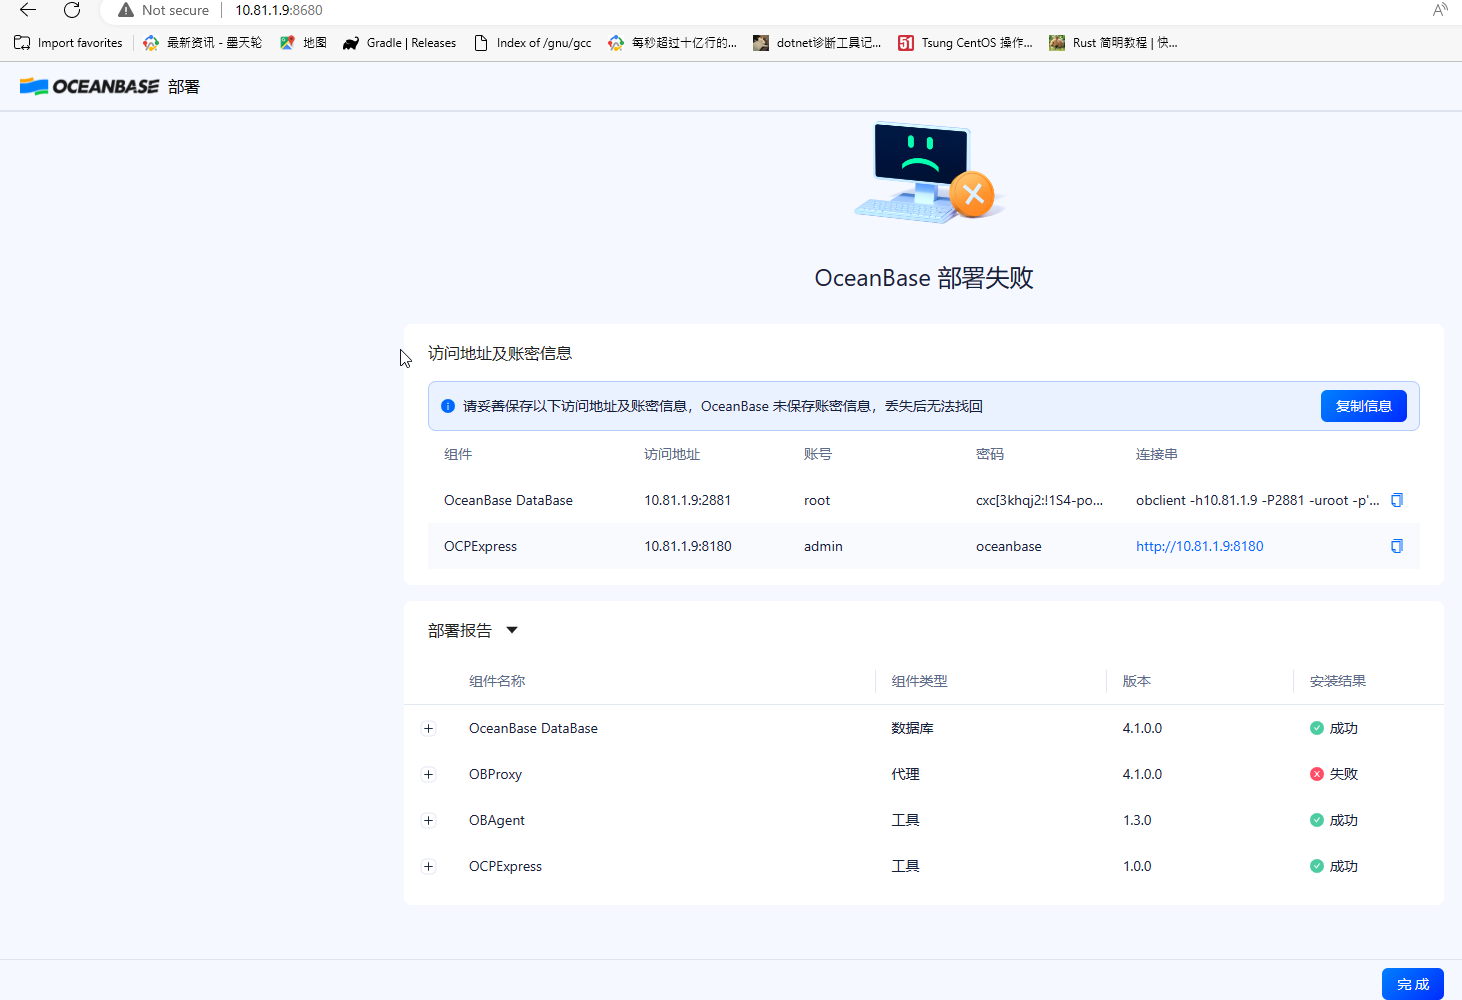
这里提示obproxy部署失败,不影响后续使用,这里跳过,但要记得复制用户信息,用于登录
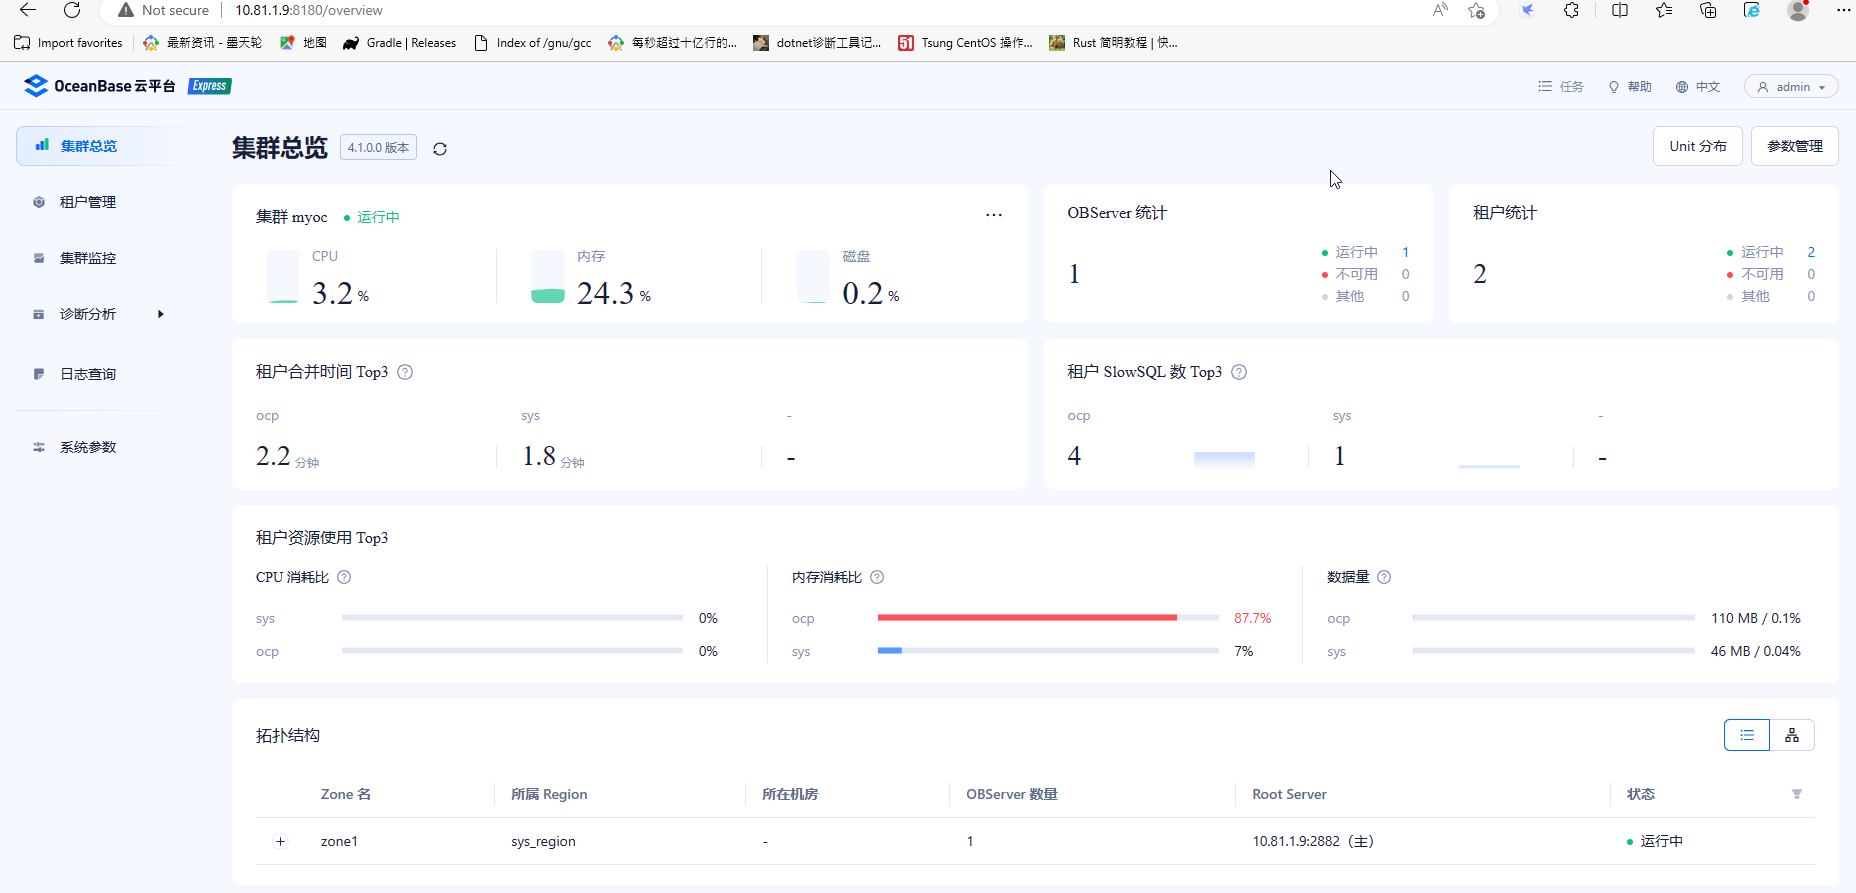
确定后再登录,默认显示集群总览
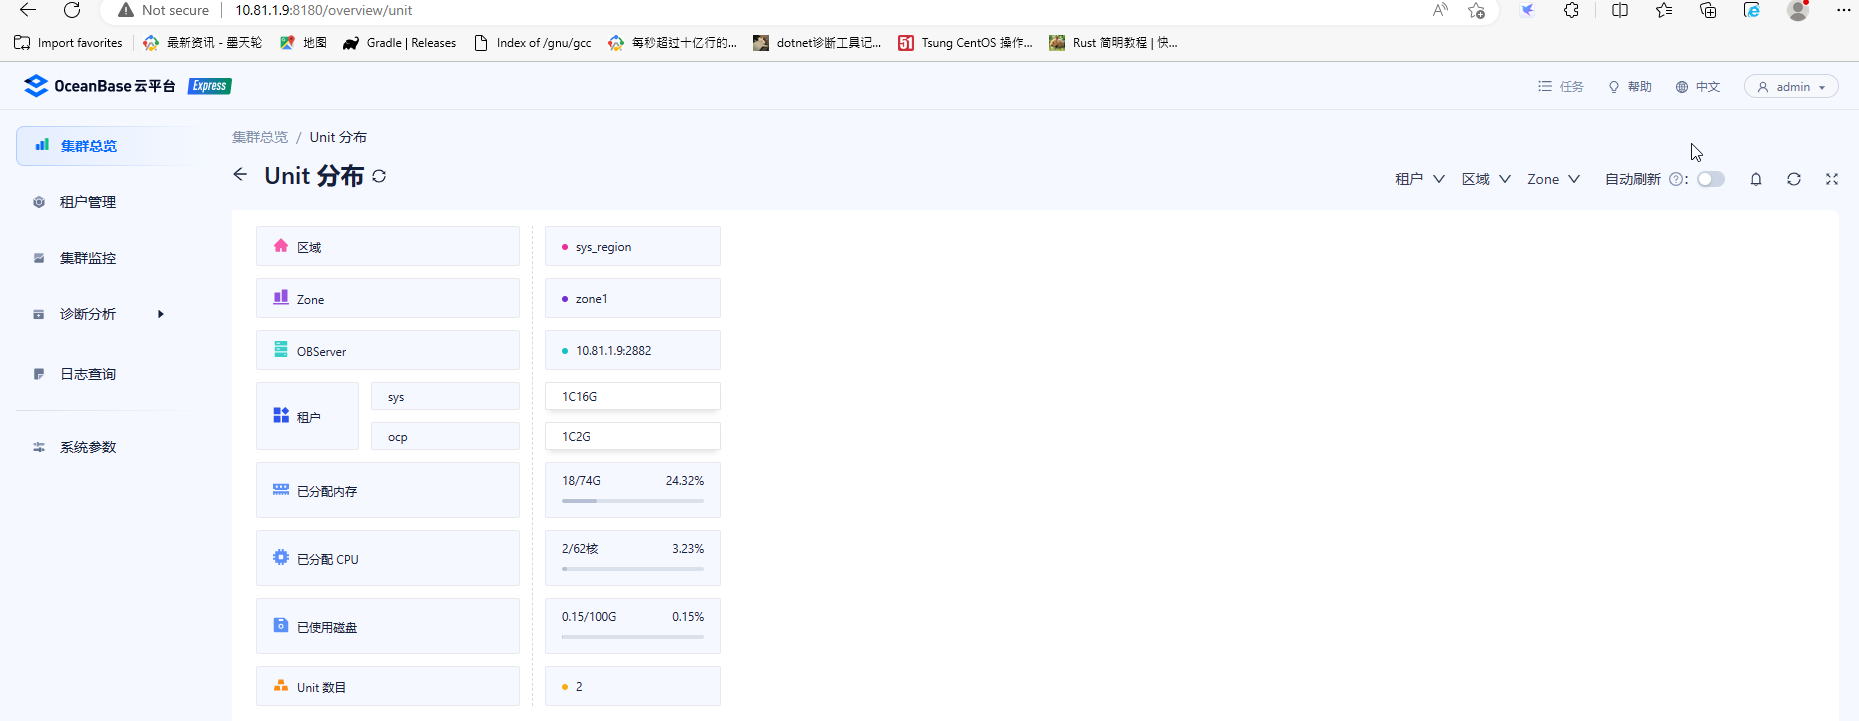
查看UNIT分布,这里只能查看,不能修改新建
租户信息,有新建租户按钮,没有删除功能

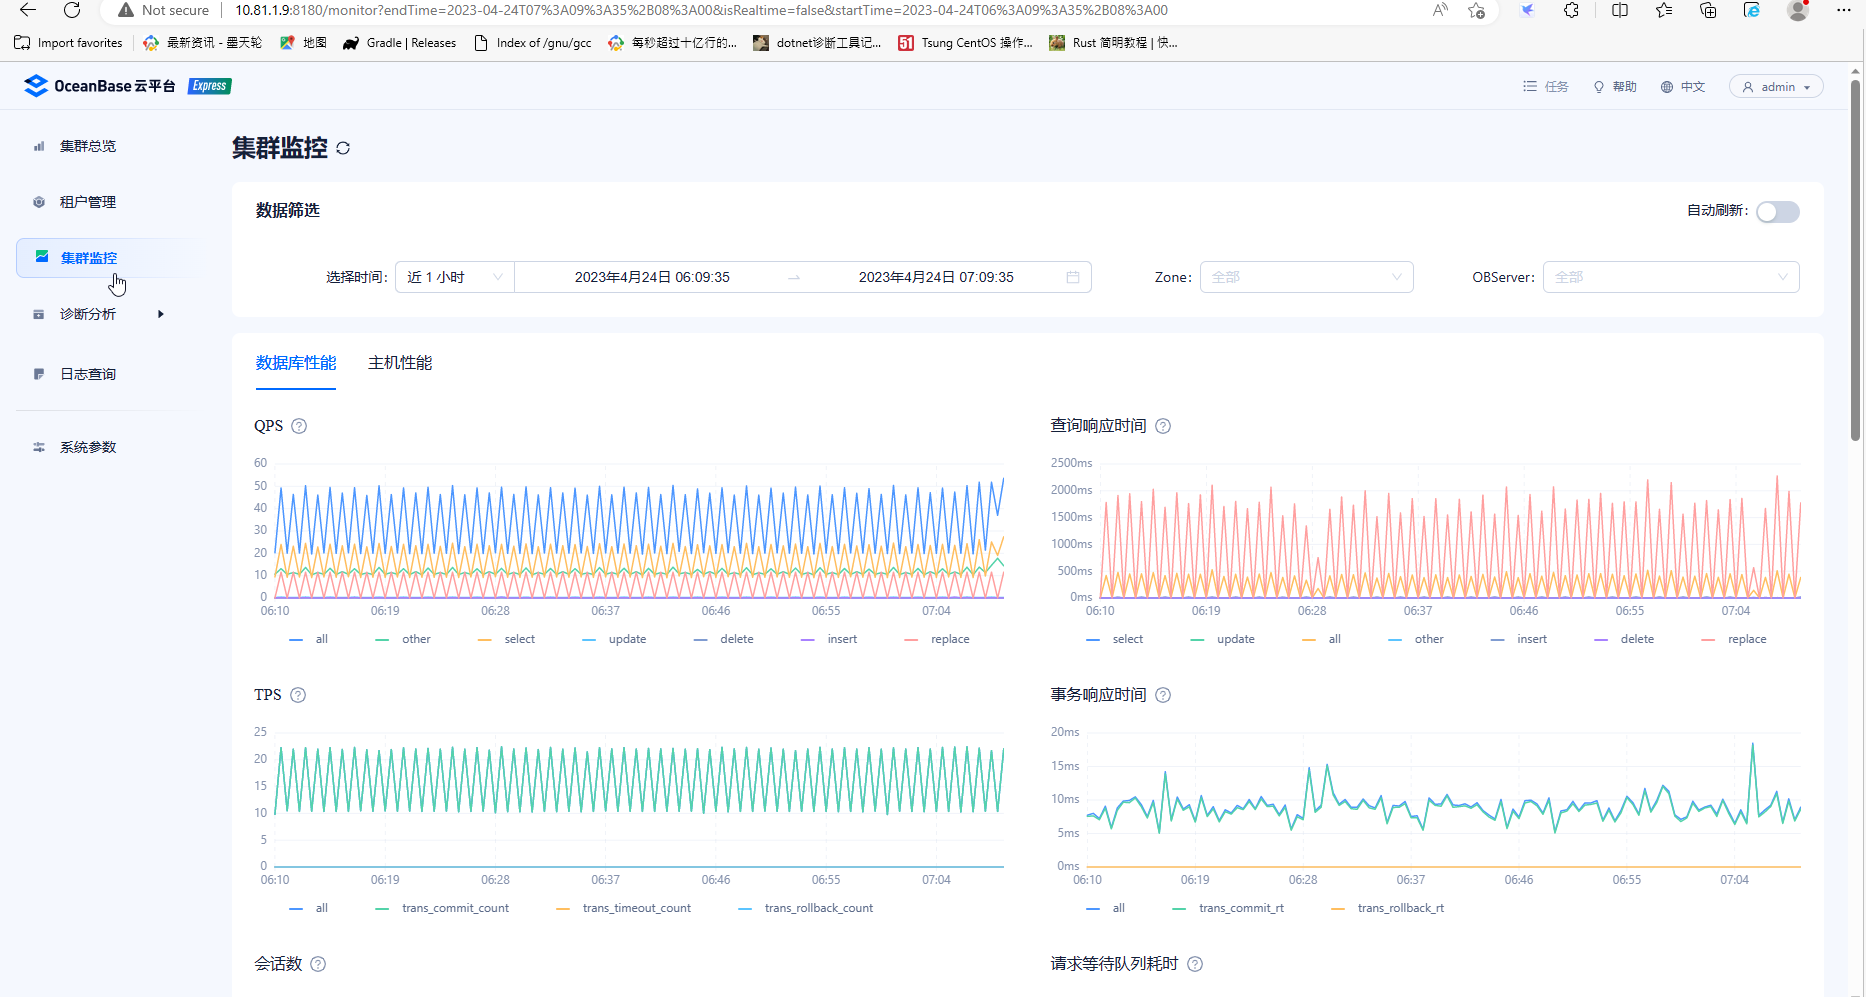
集群监控信息,可以查看数据库性能和主机性能。数据库性能包括了QPS、TPS、IOPS响应时间等,主机性能包括系统负载、CPU、IO等资源使用率、吞吐量指标。
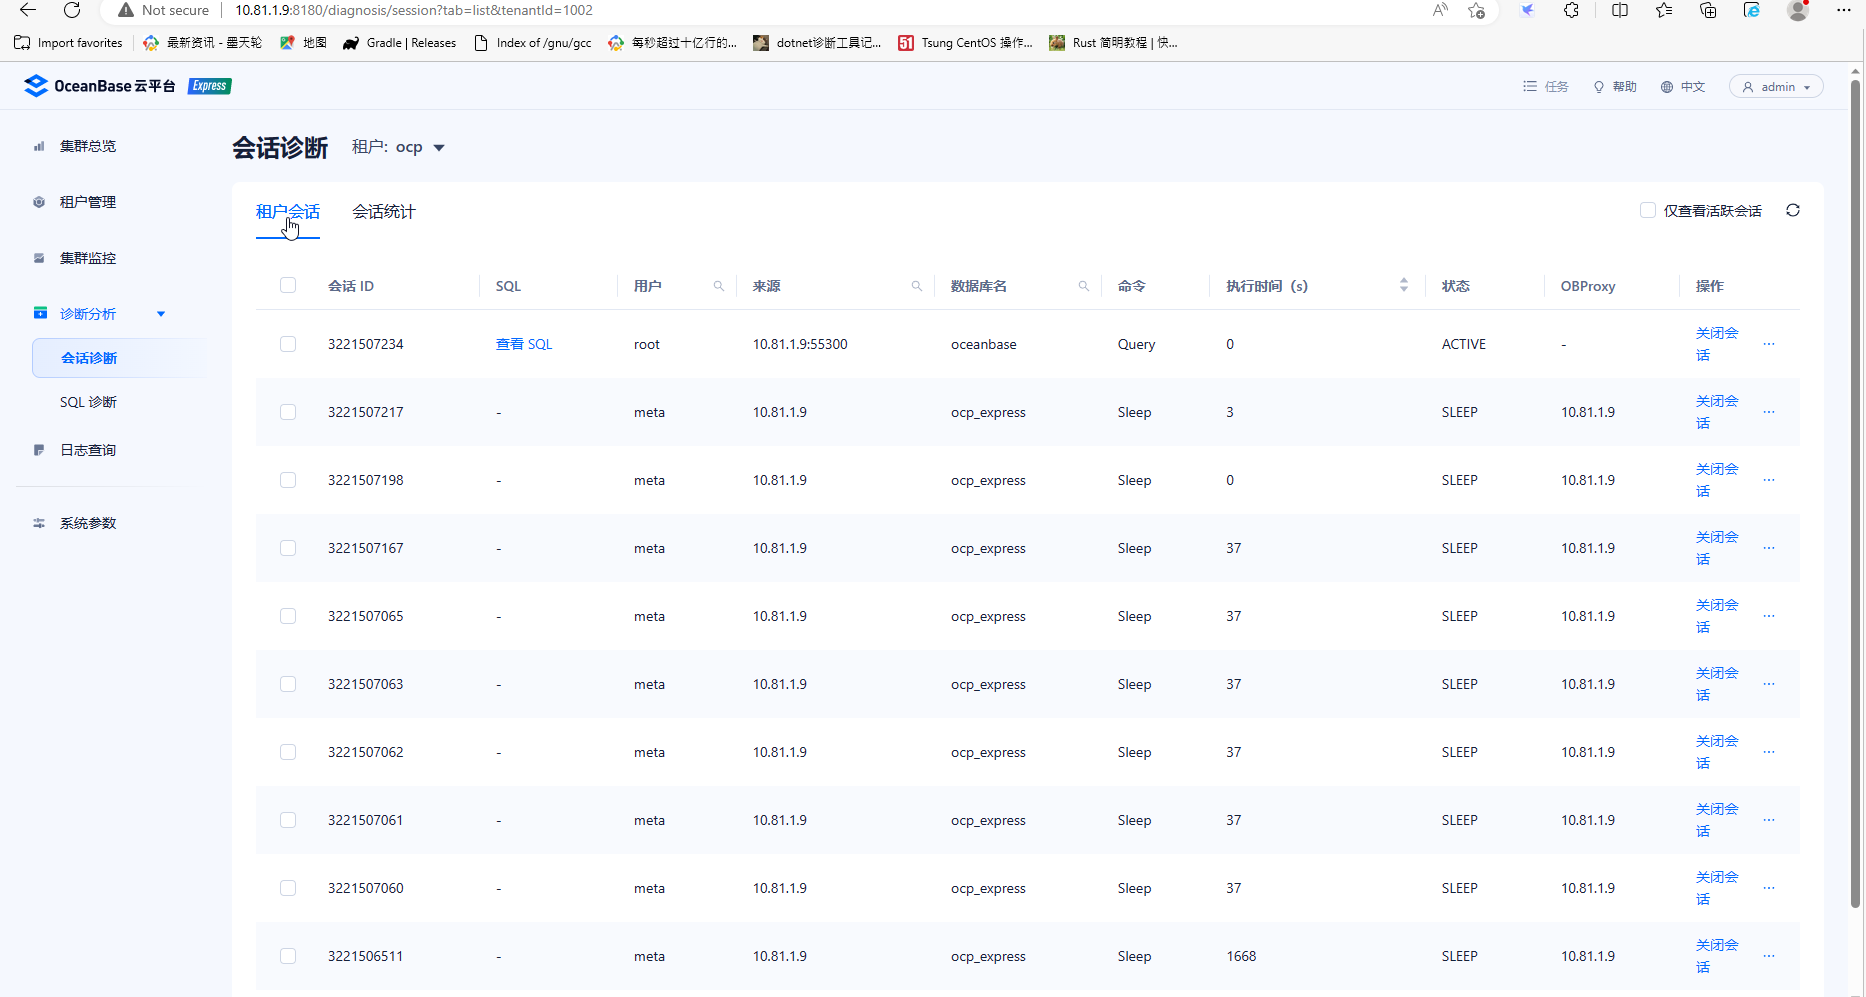
诊断分析包括会话诊断和sql诊断,会话诊断可以切换为不同租户,在租户会话页面可以根据会话ID关闭指定会话。
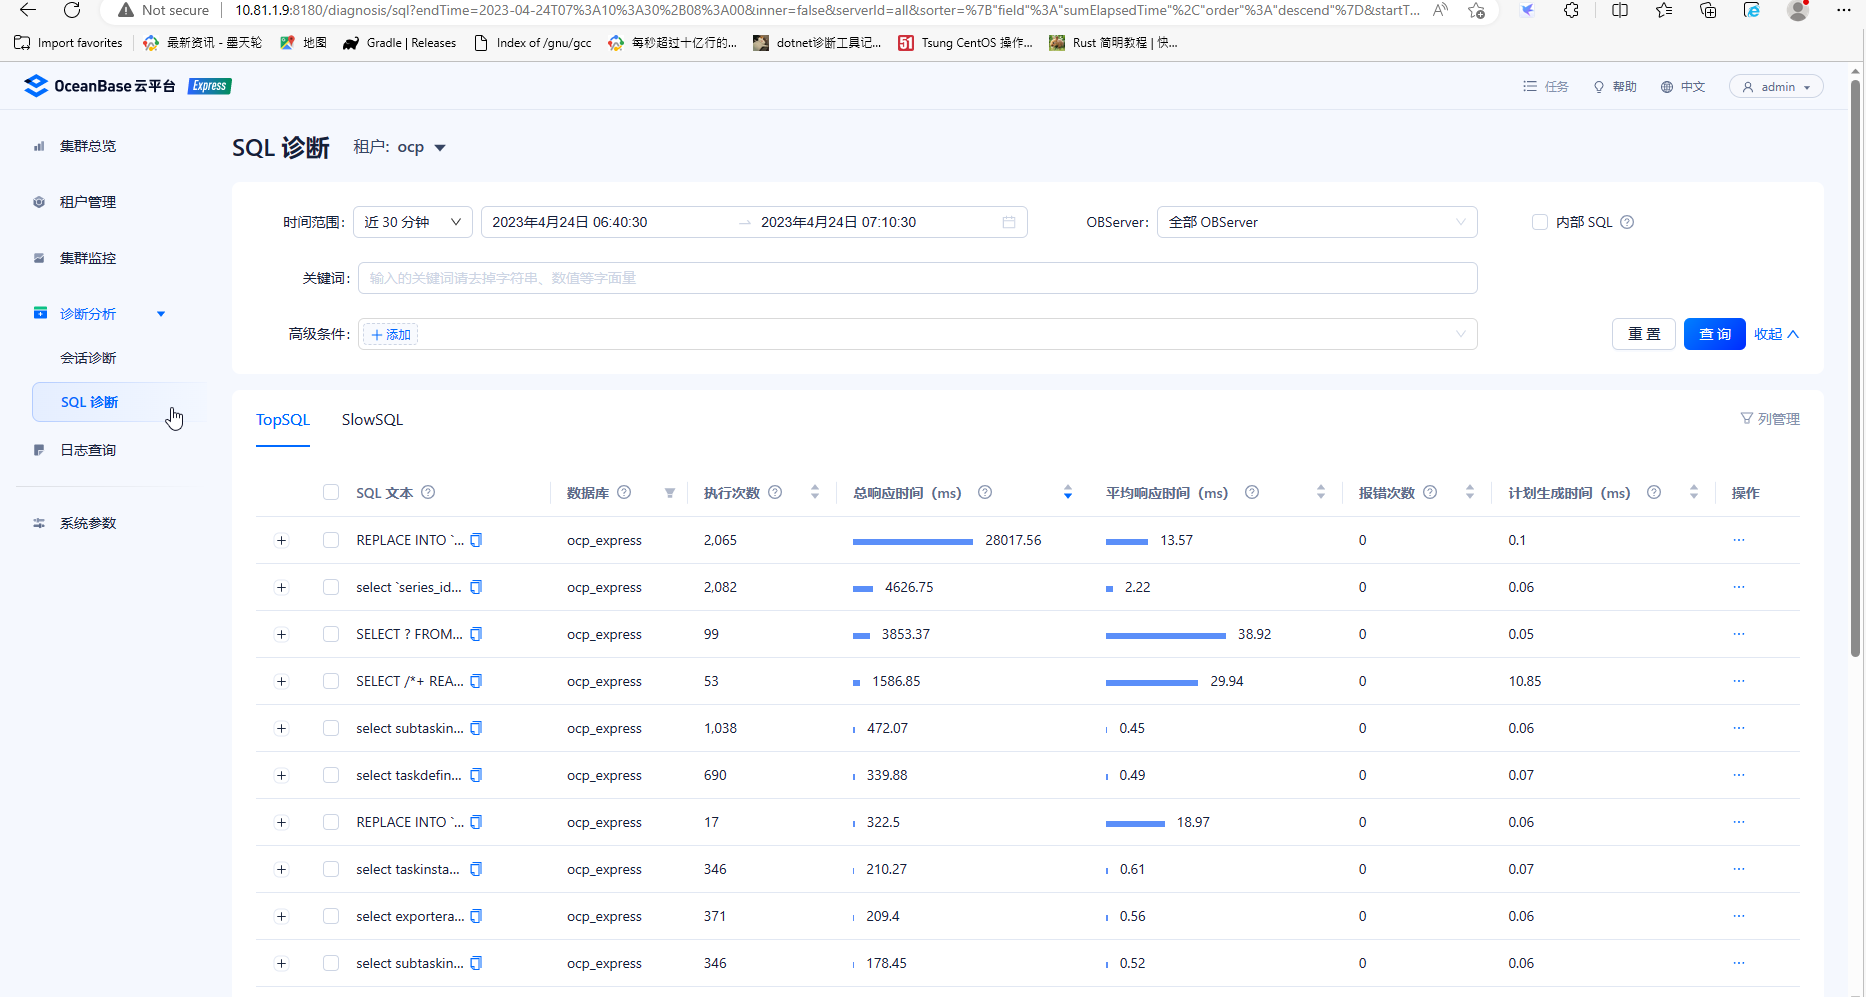
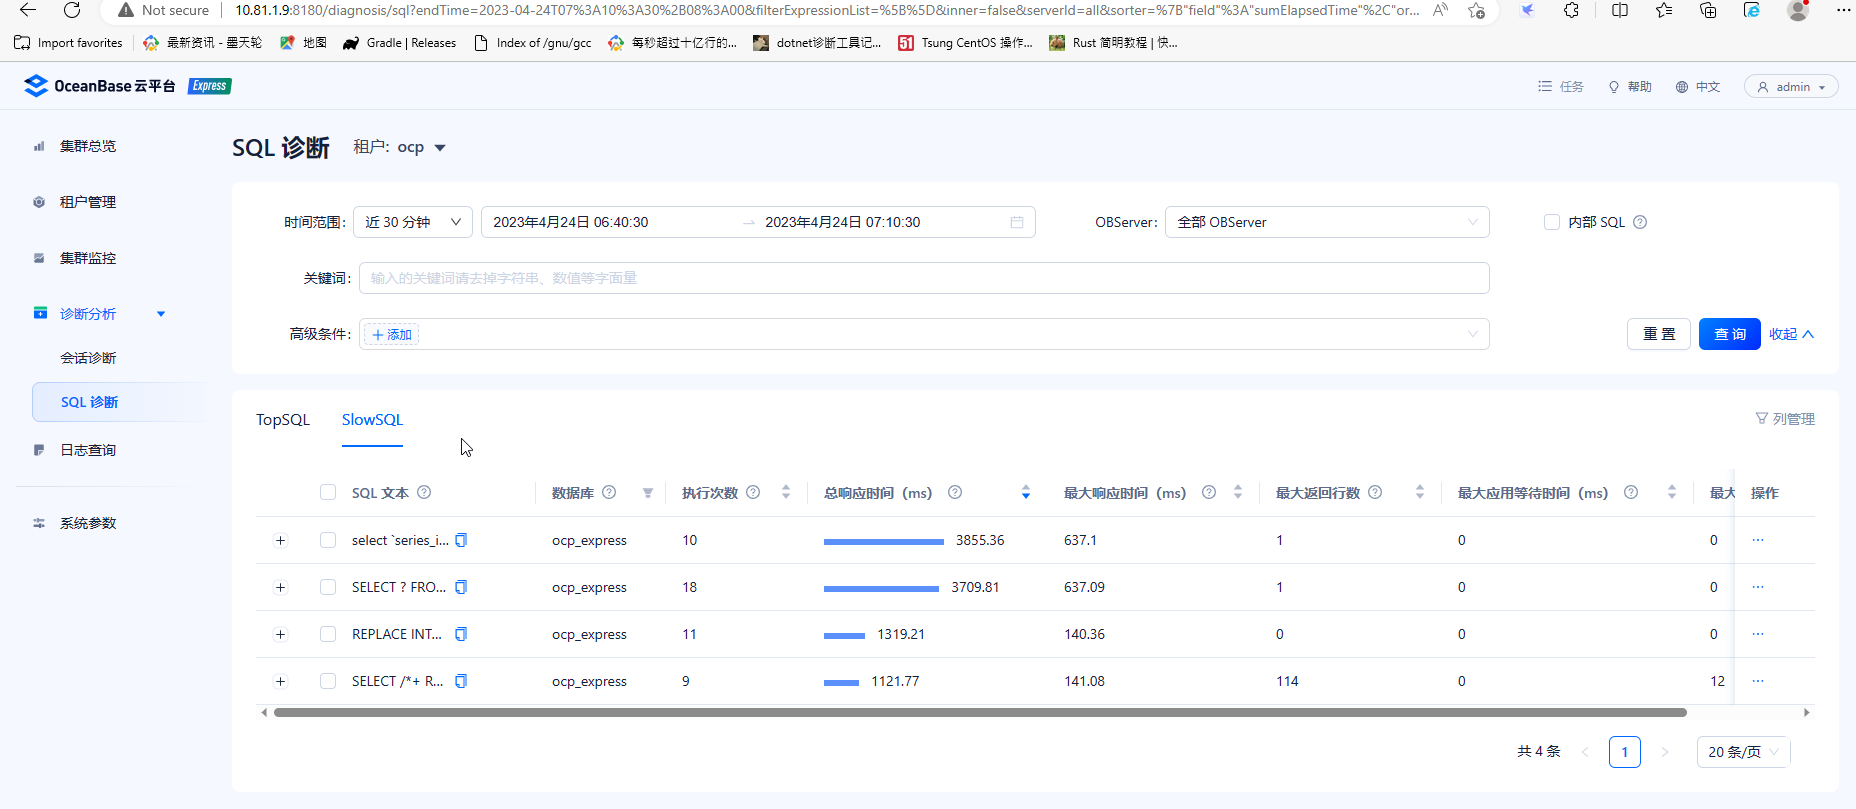
SQL诊断信息提供不同租户在指定时间段的TopSQL和SlowSQL,包括sql的执行次数、总响应时间、平均响应时间、计划生成时间等指标,便于执行效率诊断。
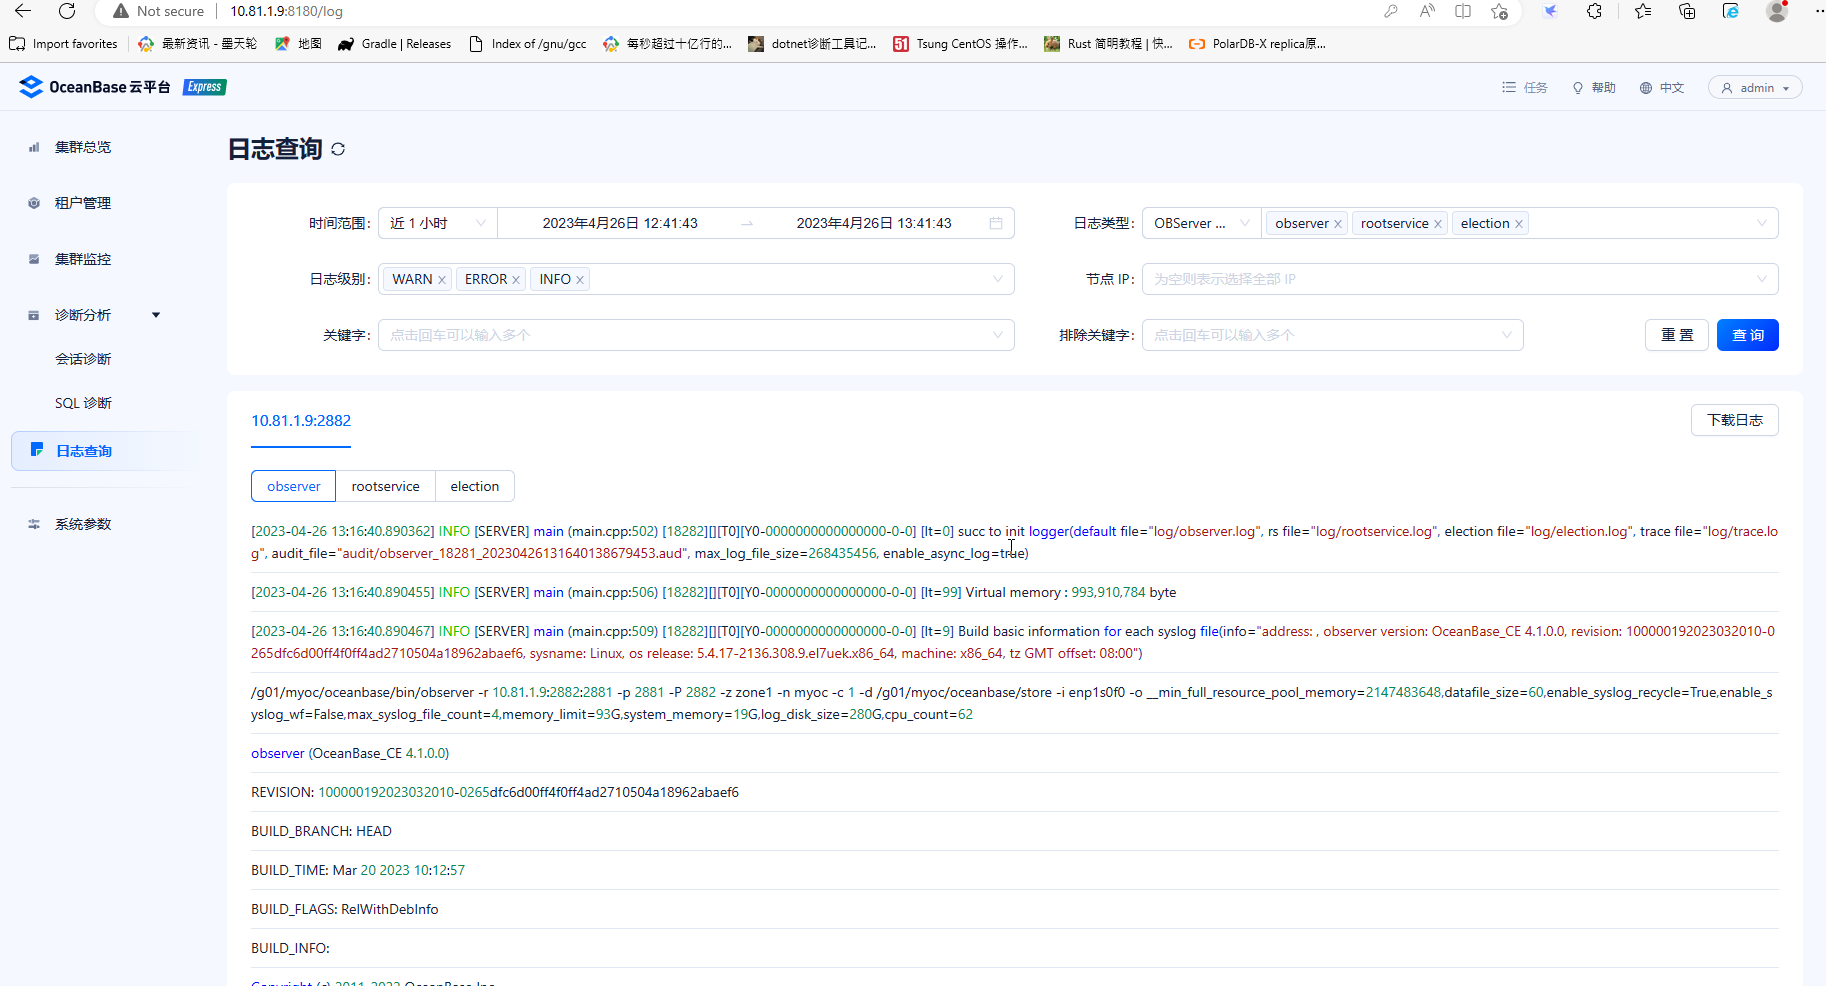
日志查询,可以按时间段,日志类型、日志级别、节点IP、关键字等查询或下载日志。
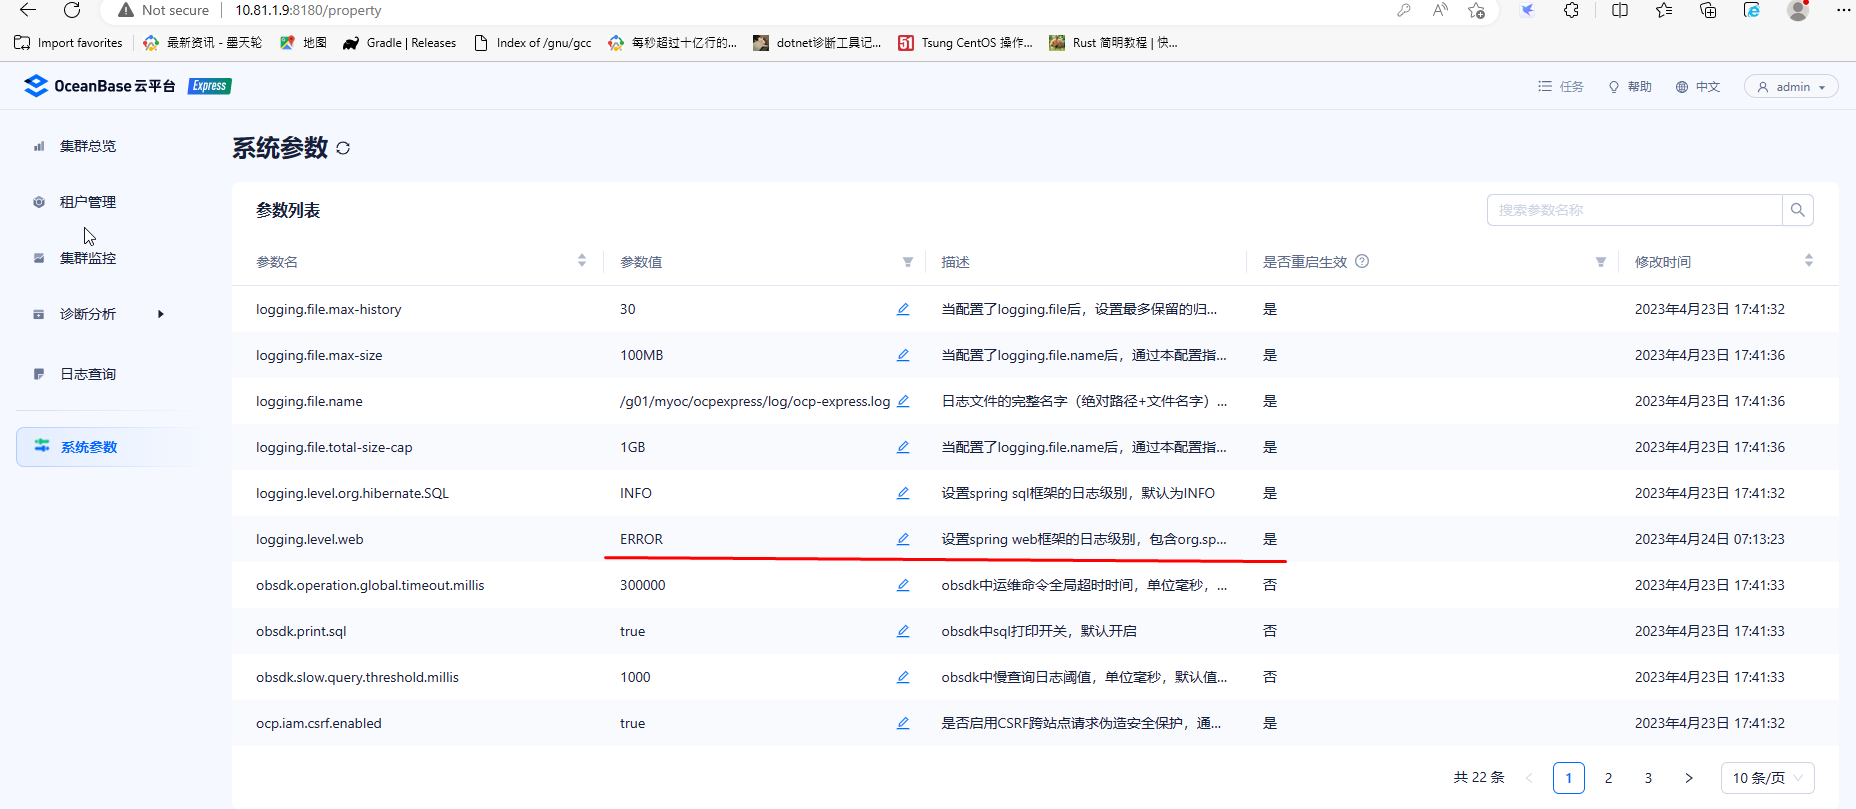
系统参数信息,提示了可以改的参数以及改后需要重启的参数
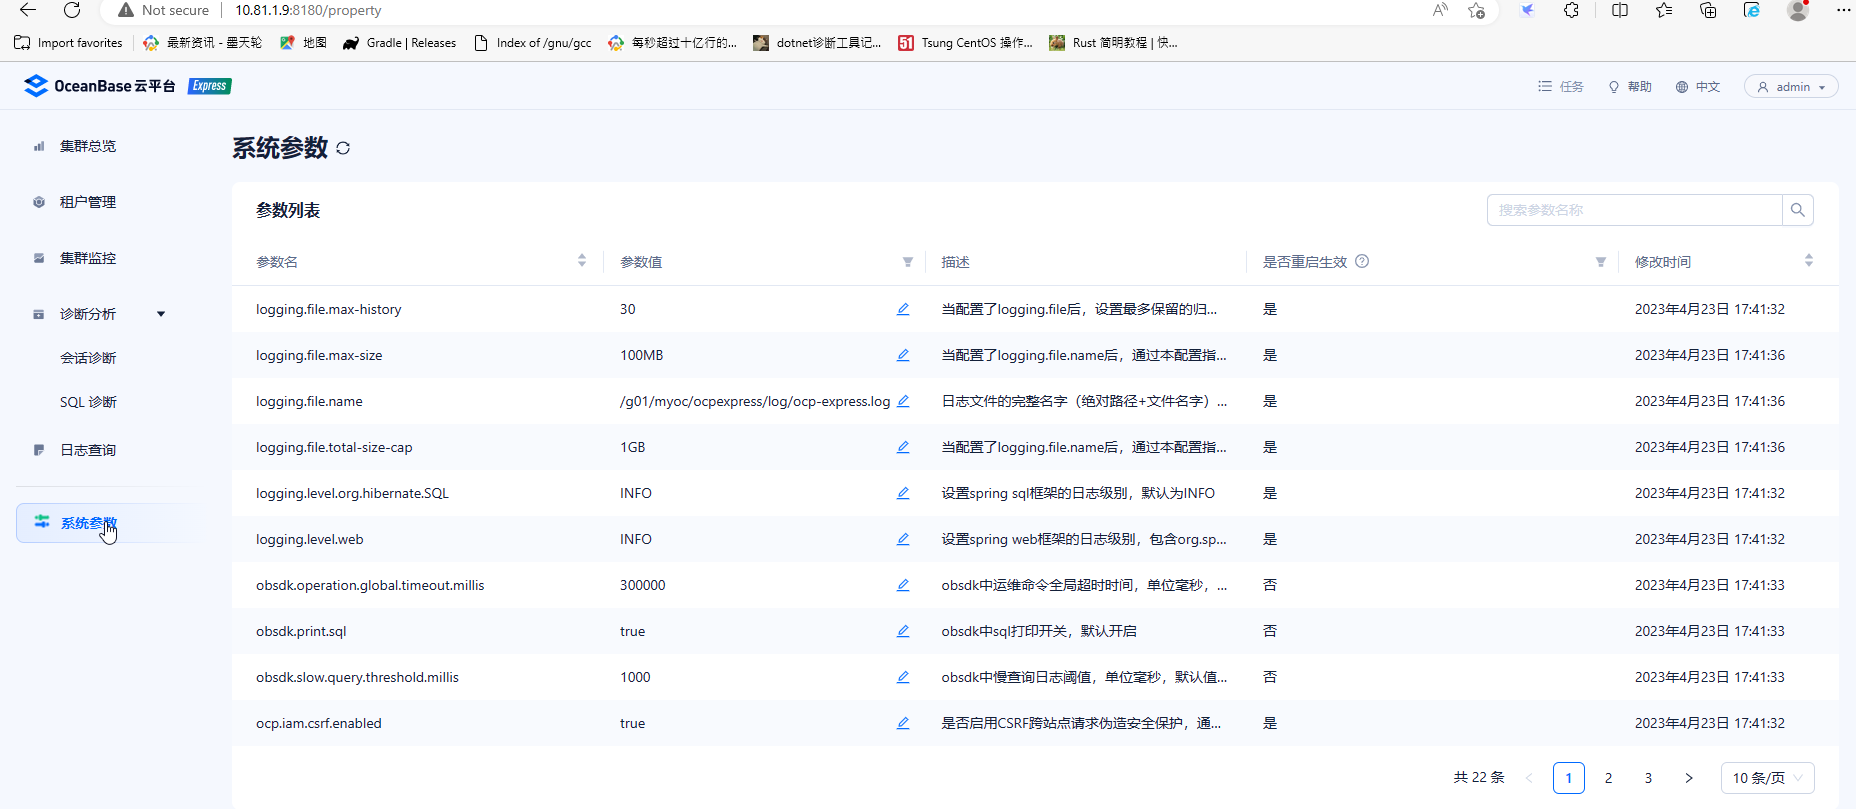
尝试修改logging.level.web
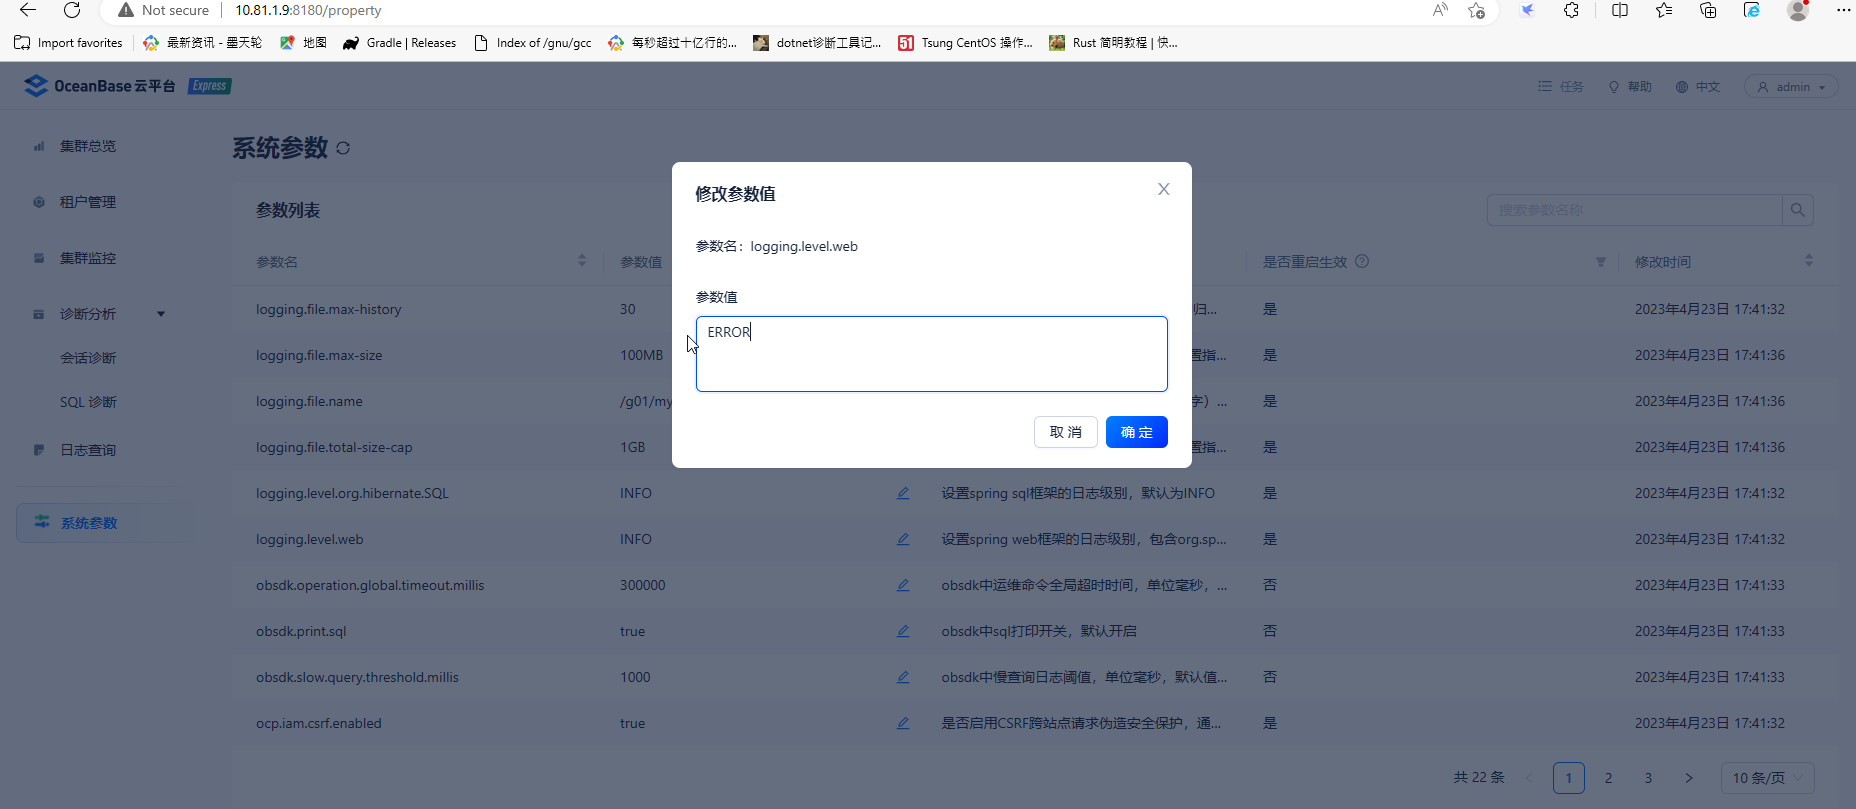
提示需要重启集群
回到操作系统,先关闭集群
[root@node1 g01]# obd cluster stop myoc
Get local repositories ok
Search plugins ok
Open ssh connection ok
Stop observer ok
Stop obproxy ok
Stop obagent ok
Stop ocp-express ok
myoc stopped
Trace ID: a0d35ea2-e22c-11ed-b175-c454441339c4
If you want to view detailed obd logs, please run: obd display-trace a0d35ea2-e22c-11ed-b175-c454441339c4
启动集群
[root@node1 cluster]# obd cluster  start myoc
Get local repositories ok
Search plugins ok
Open ssh connection ok
Load cluster param plugin ok
Check before start observer ok
Check before start obproxy ok
Check before start obagent ok
Check before start ocp-express ok
Start observer ok
observer program health check ok
Connect to observer x
[ERROR] OBD-1006: Failed to connect to oceanbase-ce
See https://www.oceanbase.com/product/ob-deployer/error-codes .
Trace ID: 2b350b48-e405-11ed-884f-c454441339c4
If you want to view detailed obd logs, please run: obd display-trace 2b350b48-e405-11ed-884f-c454441339c4
这里obproxy启动失败,经查obd-1006,是由于修改了root用户的密码,方法一是改回原来的密码,方法二是改配置文件中的密码,文件位于/root/.obd/cluster/myoc
vim config.xml
user:
  username: root
  port: 22
oceanbase-ce:
  version: 4.1.0.0
  release: 100000192023032010.el7
  package_hash: 8439ecf8db5e0649bd49671b41ea9e8c85756b63
  10.81.1.9:
    zone: zone1
  servers:
  - 10.81.1.9
  global:
    appname: myoc
    root_password: AAbb##123456
    mysql_port: 2881
    rpc_port: 2882
    home_path: /g01/myoc/oceanbase
    devname: enp1s0f0
    datafile_size: '60'
    ocp_meta_tenant_max_cpu: '1'
    ocp_meta_tenant_memory_size: 2G
    ocp_meta_tenant_log_disk_size: 6G
    enable_syslog_recycle: true
    enable_syslog_wf: false
    max_syslog_file_count: 4
    memory_limit: 93G
    system_memory: 19G
    log_disk_size: 280G
    cpu_count: 62
obproxy-ce:
  version: 4.1.0.0
  package_hash: 2a9d9bf67f179dcca2a8c9e7c77373d94e7e2abe
  release: 7.el7
  servers:
  - 10.81.1.9
  global:
    prometheus_listen_port: 2884
    listen_port: 2883
    home_path: /g01/myoc/obproxy
    obproxy_sys_password: ''
    skip_proxy_sys_private_check: true
    enable_strict_kernel_release: false
    enable_cluster_checkout: false
  depends:
  - oceanbase-ce
obagent:
  version: 1.3.0
  package_hash: d57fbb4962b2fbecb6282358c59295fdfba4d6ac
  release: 22.el7
  servers:
  - 10.81.1.9
  global:
    monagent_http_port: 8088
    mgragent_http_port: 8089
    home_path: /g01/myoc/obagent
    http_basic_auth_user: admin
    http_basic_auth_password: root
    ob_monitor_status: active
  depends:
  - oceanbase-ce
ocp-express:
  version: 1.0.0
  package_hash: 42c6fc921063f24f9e1072d75bfa7f21f42146e3
  release: 100000432023032015.el7
  servers:
  - 10.81.1.9
  global:
    port: 8180
    home_path: /g01/myoc/ocpexpress
    java_bin: /opt/jdk/bin/java
    logging_file_max_size: 100MB
    logging_file_total_size_cap: 1GB
    memory_size: 752M
  depends:
  - obagent
  - oceanbase-ce
  - obproxy-ce
再次启动集群
[root@node1 myoc]# obd cluster start myoc
Get local repositories ok
Search plugins ok
Open ssh connection ok
Load cluster param plugin ok
Check before start observer ok
Check before start obproxy ok
Check before start obagent ok
Check before start ocp-express ok
Start observer ok
observer program health check ok
Connect to observer ok
Start obproxy ok
obproxy program health check ok
Connect to obproxy ok
Initialize obproxy-ce ok
Start obagent ok
obagent program health check ok
Connect to Obagent ok
Start ocp-express ok
ocp-express program health check ok
Connect to ocp-express ok
Initialize ocp-express ok
Wait for observer init ok
+---------------------------------------------+
|                   observer                  |
+-----------+---------+------+-------+--------+
| ip        | version | port | zone  | status |
+-----------+---------+------+-------+--------+
| 10.81.1.9 | 4.1.0.0 | 2881 | zone1 | ACTIVE |
+-----------+---------+------+-------+--------+
obclient -h10.81.1.9 -P2881 -uroot -p'AAbb##123456' -Doceanbase -A

+---------------------------------------------+
|                   obproxy                   |
+-----------+------+-----------------+--------+
| ip        | port | prometheus_port | status |
+-----------+------+-----------------+--------+
| 10.81.1.9 | 2883 | 2884            | active |
+-----------+------+-----------------+--------+
obclient -h10.81.1.9 -P2883 -uroot -p'AAbb##123456' -Doceanbase -A
+--------------------------------------------------------------+
|                           obagent                            |
+-----------+--------------------+--------------------+--------+
| ip        | mgragent_http_port | monagent_http_port | status |
+-----------+--------------------+--------------------+--------+
| 10.81.1.9 | 8089               | 8088               | active |
+-----------+--------------------+--------------------+--------+
+--------------------------------------------------------------+
|                         ocp-express                          |
+-----------------------+----------+------------------+--------+
| url                   | username | default_password | status |
+-----------------------+----------+------------------+--------+
| http://10.81.1.9:8180 | admin    | oceanbase        | active |
+-----------------------+----------+------------------+--------+
myoc running
Trace ID: 7d347904-e407-11ed-a79a-c454441339c4
If you want to view detailed obd logs, please run: obd display-trace 7d347904-e407-11ed-a79a-c454441339c4
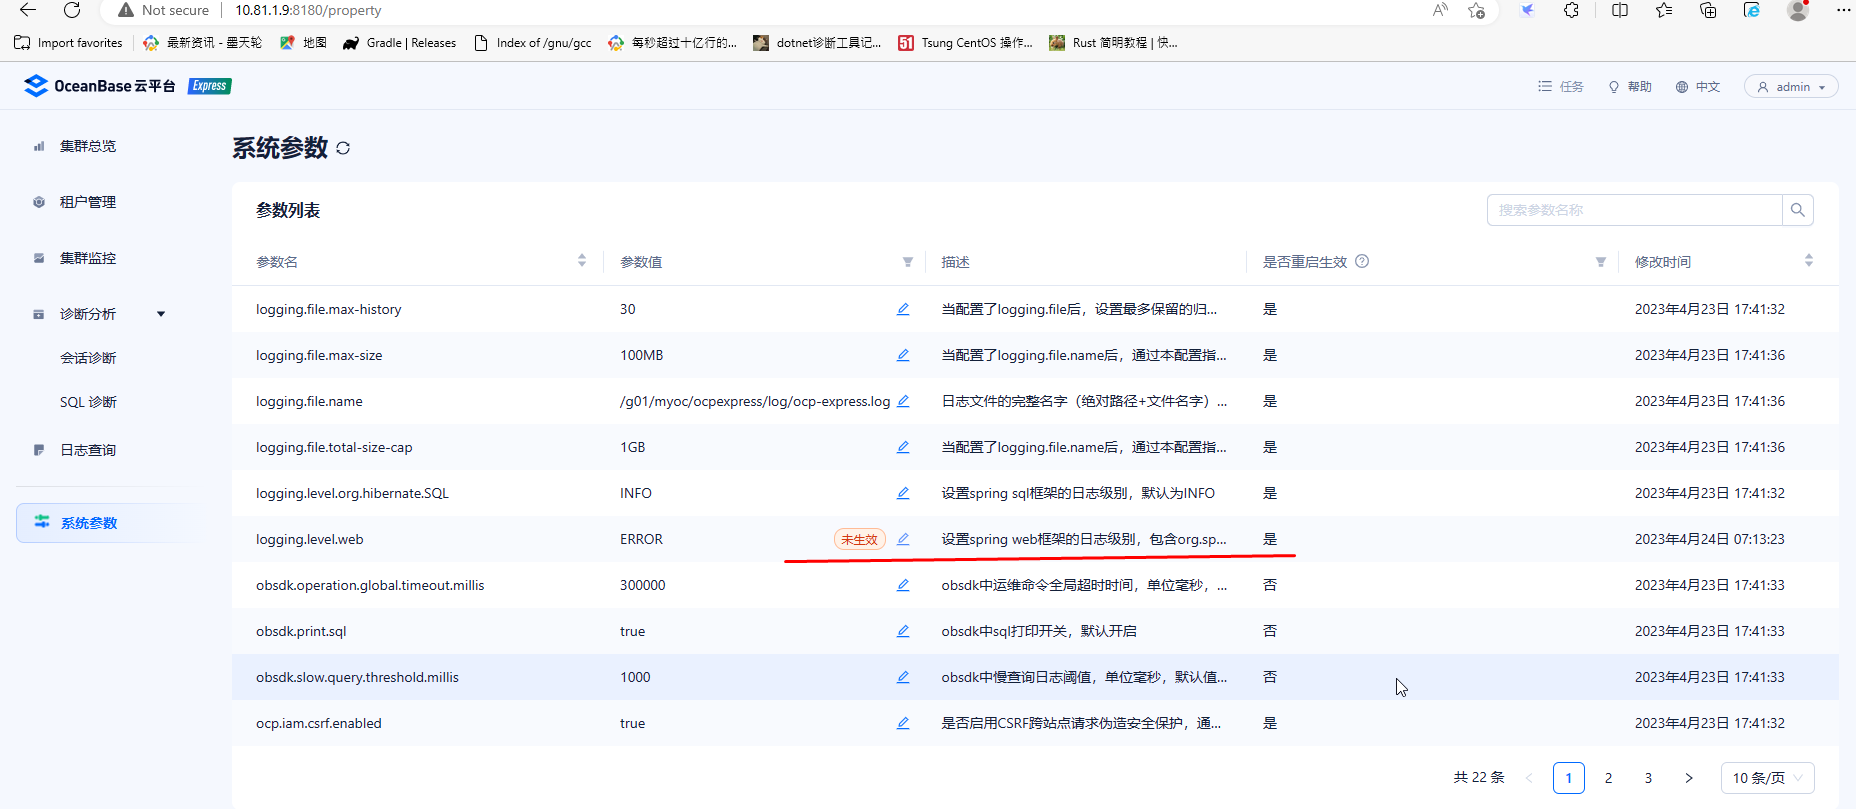
这次成功了。在浏览器登录后,看到参数修改成功
下面建个租户试试
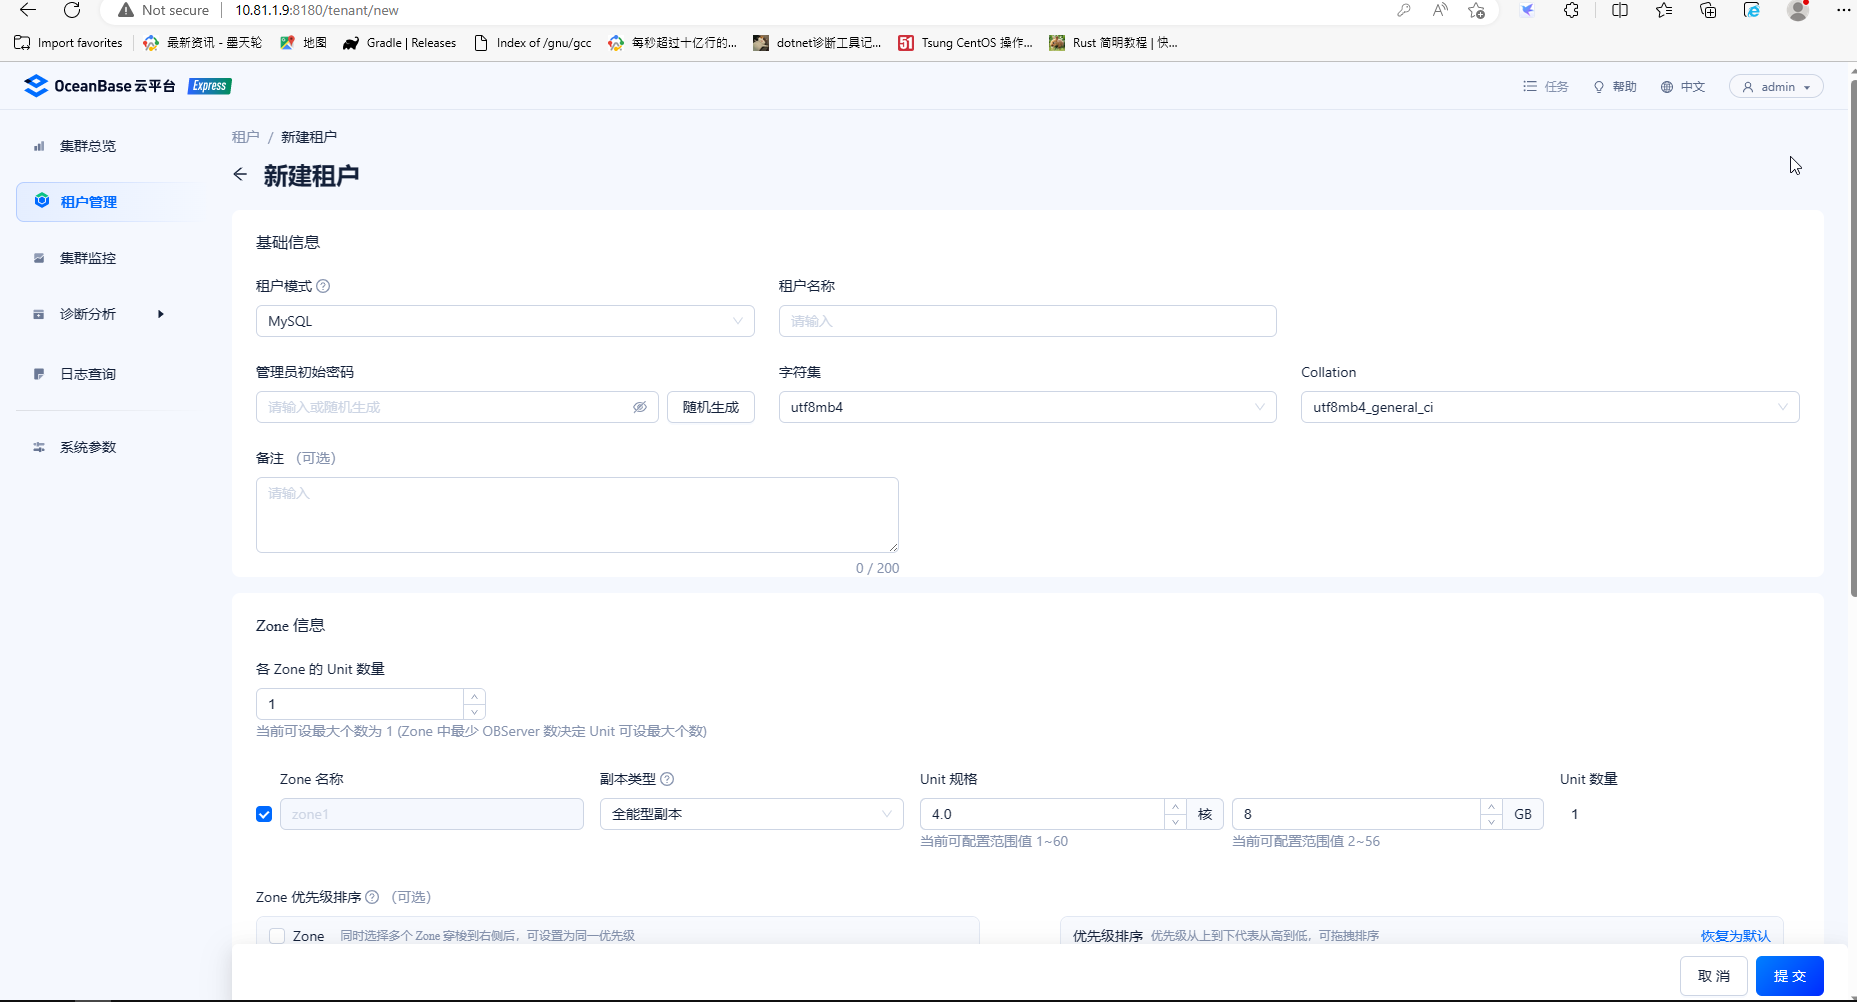
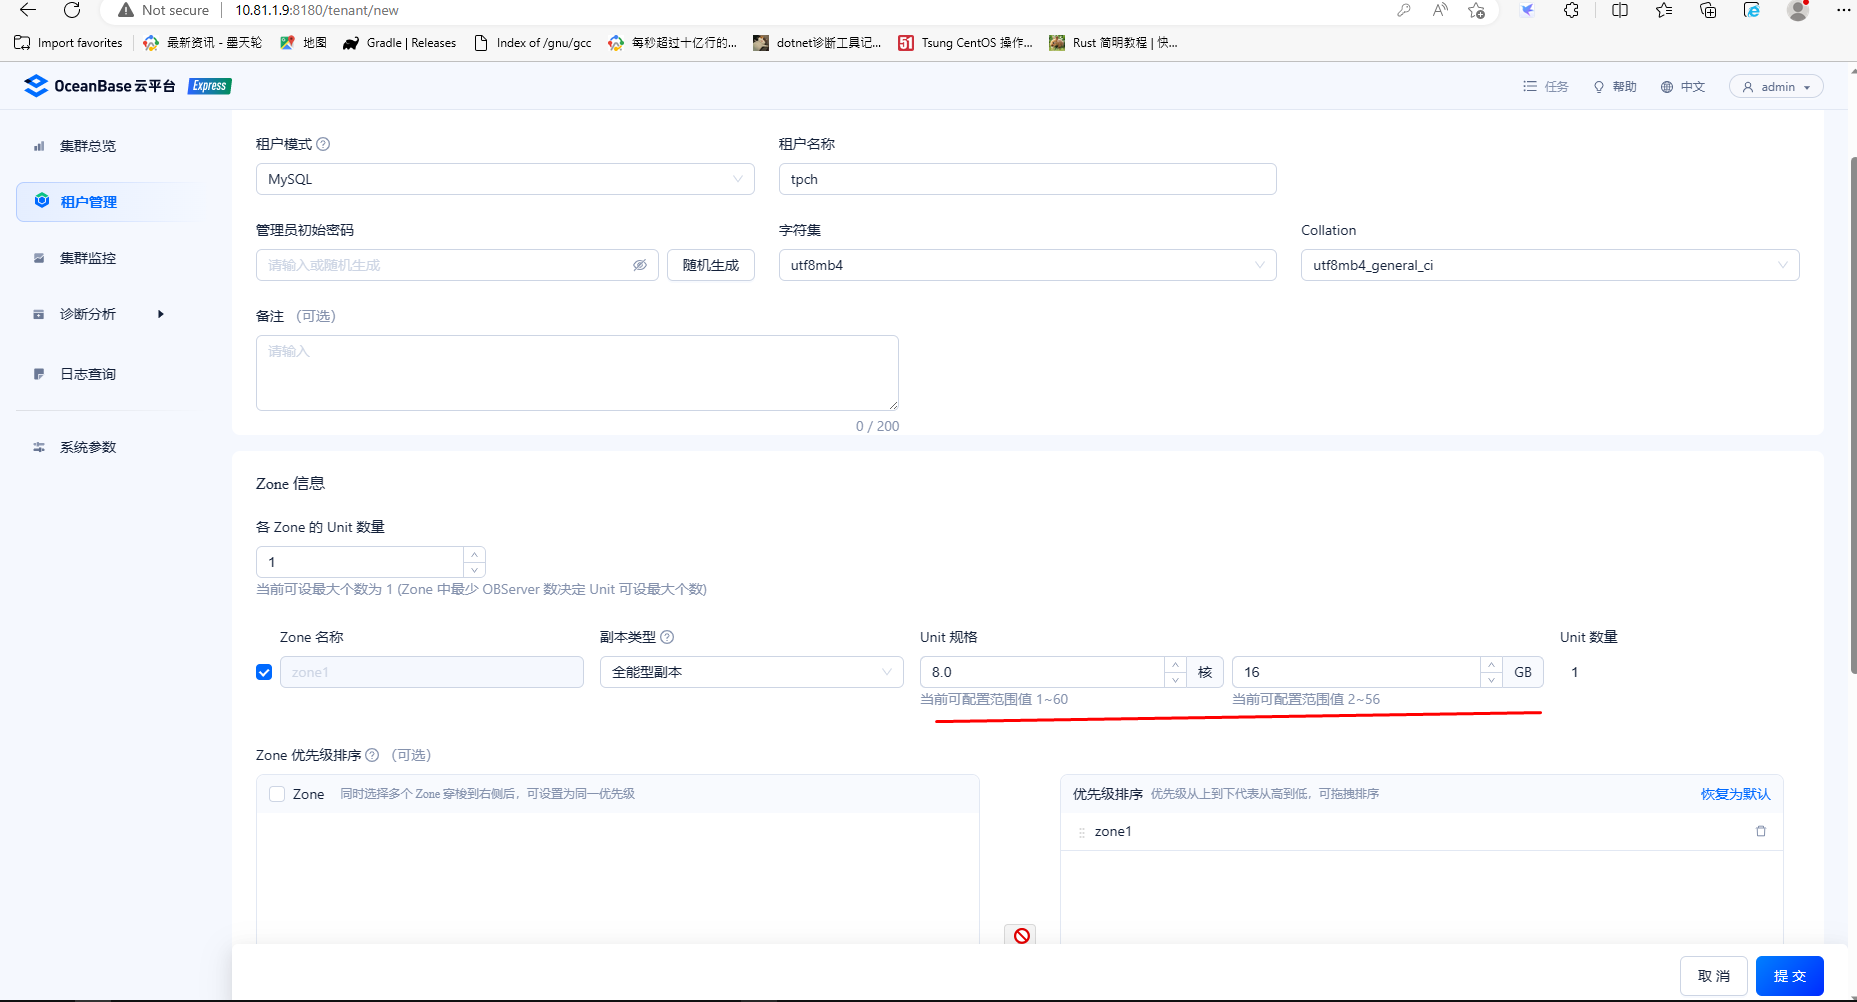
这时修改unit规格和数量
让所有IP可以访问这个租户

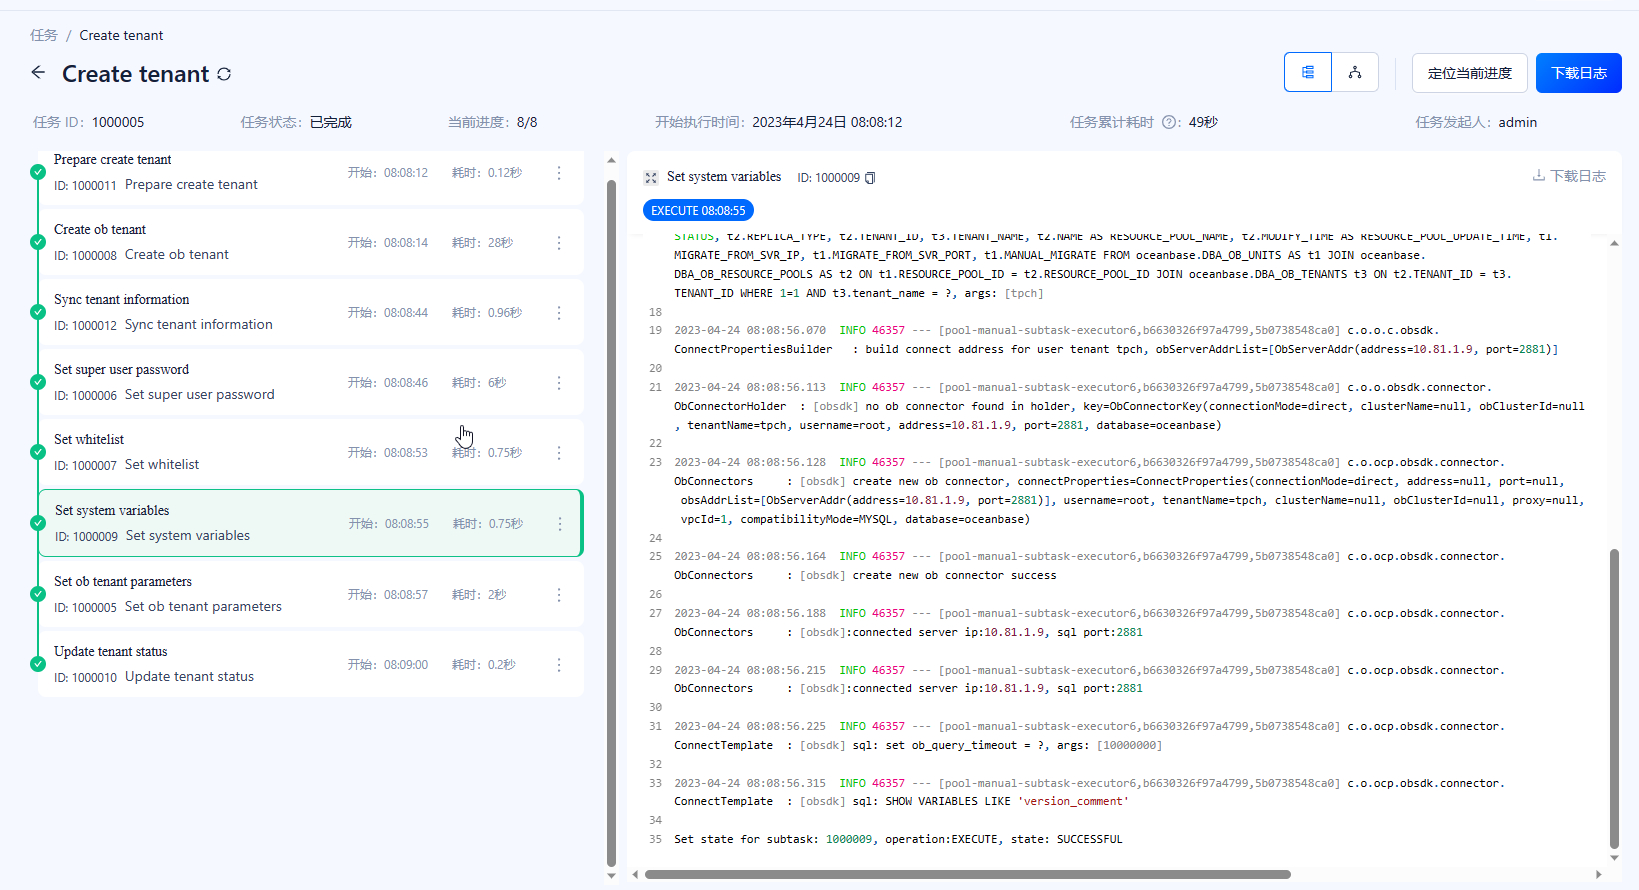
提交后完成租户创建

详情里记录建租户的步骤
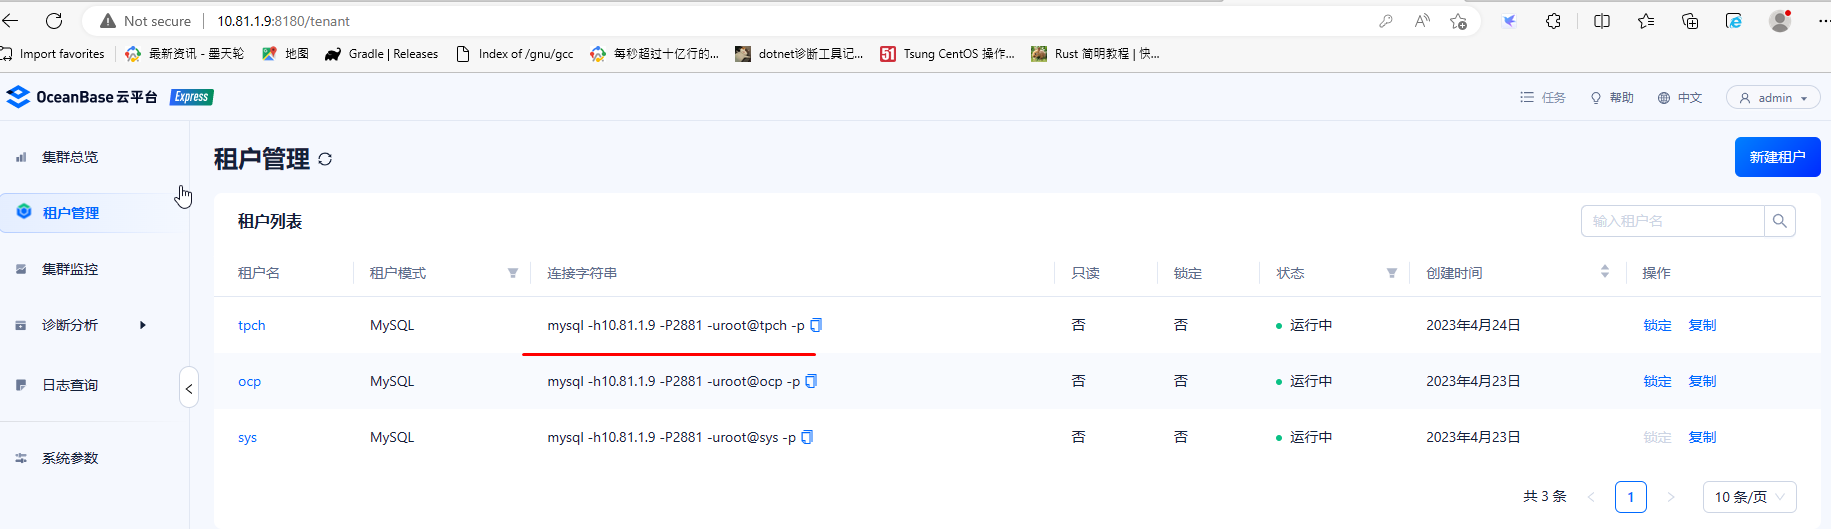
现有的租户列表及登录命令,这里提示用mysql命令连接数据库,需要安装mysql客户端,命令行提示用obclient连接数据库,已随oceanbase一起安装
登录新建租户测试
[root@node1 bin]# obclient -h10.81.1.9 -P2881 -uroot@tpch -p
Enter password:
Welcome to the OceanBase.  Commands end with ; or \g.
Your OceanBase connection id is 3221488032
Server version: OceanBase_CE 4.1.0.0 (r100000192023032010-0265dfc6d00ff4f0ff4ad2710504a18962abaef6) (Built Mar 20 2023 10:12:57)

Copyright (c) 2000, 2018, OceanBase and/or its affiliates. All rights reserved.

Type 'help;' or '\h' for help. Type '\c' to clear the current input statement.
修改用户的密码
obclient [(none)]> alter user root identified by 'AAbb##123456';
Query OK, 0 rows affected (0.067 sec)

obclient [(none)]> exit
Bye
[root@node1 bin]# obclient -h10.81.1.9 -P2881 -uroot@tpch -pAAbb##123456
Welcome to the OceanBase.  Commands end with ; or \g.
Your OceanBase connection id is 3221488051
Server version: OceanBase_CE 4.1.0.0 (r100000192023032010-0265dfc6d00ff4f0ff4ad2710504a18962abaef6) (Built Mar 20 2023 10:12:57)

Copyright (c) 2000, 2018, OceanBase and/or its affiliates. All rights reserved.

Type 'help;' or '\h' for help. Type '\c' to clear the current input statement.

obclient [(none)]>
OCP Express的发布对刚接触oceanbase的新手来说,能快速完成部署,不用编辑复杂的配置文件,降低用户对 OceanBase 的学习成本和运维成本,并将 DBA 从繁杂的运维工作中解放出来。
本次部署是与oceanbase一起部署的,没有提供管理已有集群的路径,也没有提供对资源管理的功能,期待后来的版本中会提供类似功能。
另外未改密码时,命令行启动集群显示的root用户密码是加密的,改了之后是明文的,没有在启动过程中对配置文件中的密码加密。