

本期内容
Debezium + Kafka
实现数据迁移
在项目中,我们遇到已有数据库现存有大量数据,但需要将全部现存数据同步迁移到新的数据库中,我们应该如何处理呢?
本期我们就基于Debezium与Kafka构建数据同步。
一、安装部署
Debezium架构
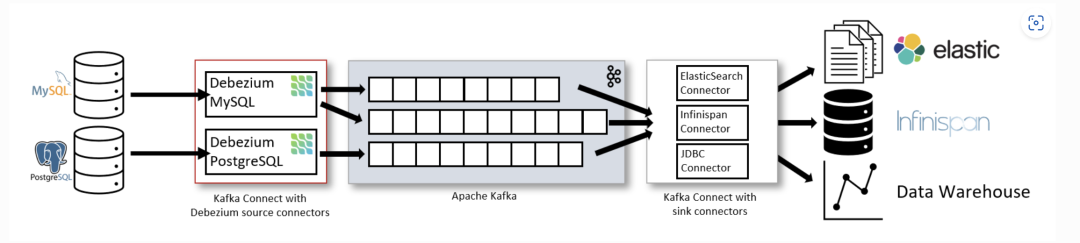
Debezium 是一个基于不同数据库中提供的变更数据捕获功能(例如,PostgreSQL中的逻辑解码)构建的分布式平台。 Debezium是通过Apache Kafka连接部署的。
Kafka Connect是一个用于实现和操作的框架运行时。
源连接器,如Debezium,它将数据摄取到Kafka中(在我们的接下来实际的例子中,Debezium将Mysql数据摄取到Kafka中);
接收连接器,它将数据从Kafka主题写入到其他到系统,这个系统可以有多种,在我们例子中,会将Kafka主题写入到PostgreSQL数据库中。
部署示意图
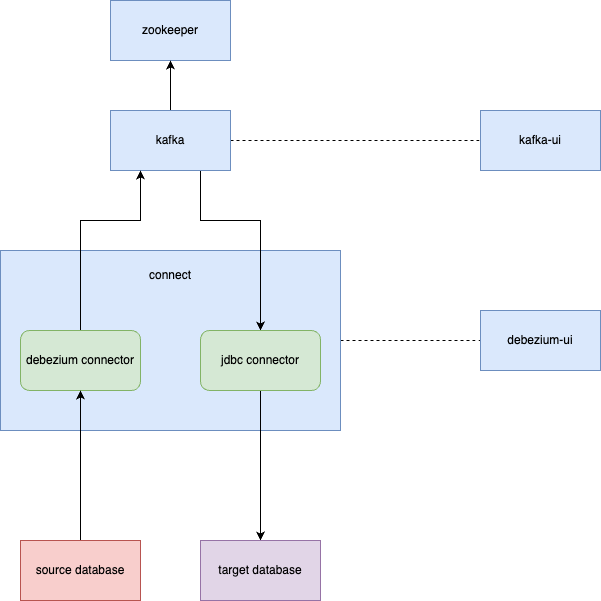
Zookeeper:Zookeeper容器,用于构建Kafka环境;
Kafka:Kafka容器,数据库的变更信息以topic的形式保存在kafka中;
Kafka-ui:kafka的UI页面容器,可以直观的查看kafka中的Brokers,Topics,Consumers等信息;
Connect:Debezium的Connect容器,对接Kafka的Connect,通过Source Connector将数据同步到Kafka中,通过Sink Connect消费Kafka的topic消息;
Debezium Connector:Source Connector插件,以Jar包的形式部署在Connect中,Debezium自带有MongoDB,MySQL,PostgreSQL,SQL Server,Oracle,Db2连接器;
JDBC connector:Sink Connector插件,以Jar包的形式部署在Connect中,本次部署安装的是JDBC连接器,将Kafka上的数据同步到数据库中;
Debezium-ui:Debezium connect的ui页面容器。用于创建和显示Source Connector
Source Database:数据迁移来源方数据库。本次部署中使用的是MySQL和Postgres(10+版本);
Target Database:数据库迁移目标数据库。本次部署中使用的是Postgres。
安装部署
本次部署需要先安装Docker。
Debezium使用Docker安装部署,如下⬇
docker-compose.yaml
部署命令:
部署完成后,Docker容器列表,如下:
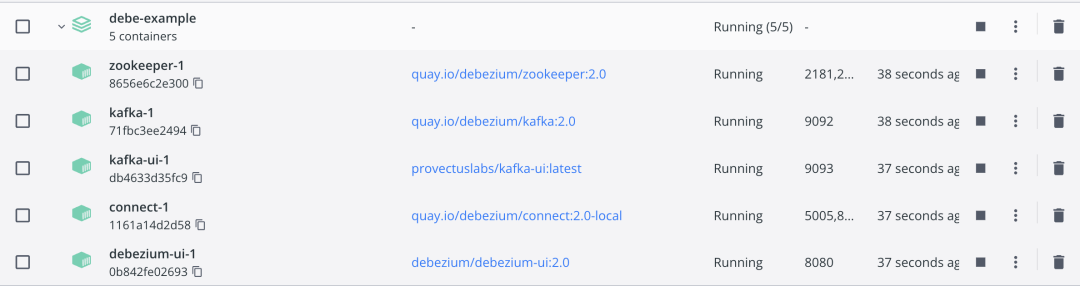
Kafka-ui访问地址:http://localhost:9093
Debezium-ui访问地址:http://localhost:8080
Source Connector和Sink Connector都是以JAR包的方式,存在于Connect容器的/kafka/connect目录下。
Connect容器自带有Debezium的官方Source Connector:
debezium-connector-db2
debezium-connector-mysql
debezium-connector-postgres
debezium-connector-vitess
debezium-connector-mongodb
debezium-connector-oracle
debezium-connector-sqlserver
需要自行注册Sink Connector:Kafka-Connect-JDBC(新建Kafka-Connect-JDBC目录,下载JAR包放入此目录,重启Conenct)。
注册Sink Connector
二、数据迁移

数据迁移经历以下几个步骤:
1)启动源数据库;
2)注册Source Connector,Source Connector监听Source Database的数据变动,发布数据到Kafka的Topic中,一个表对应一个Topic,Topic中包含对表中某条记录的某个操作(新增,修改,删除等);
3)启动目标数据库;
4)注册Sink Connector,Sink Connector消费Kafka中的Topic,通过JDBC连接到Target Database,根据Topic中的信息,对表记录执行对应操作。
Postgres迁移到Postgres
# 1.启动源数据库-Postgres
本次部署通过容器的方式启动:
# 2.注册Source Connecto
通过Debezium UI页面进行注册。
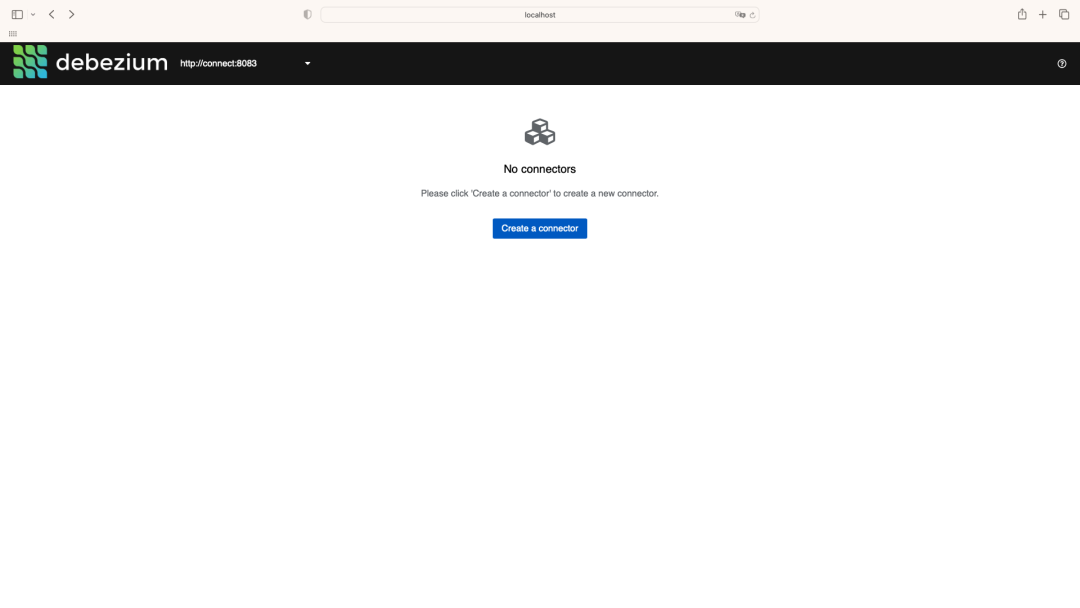
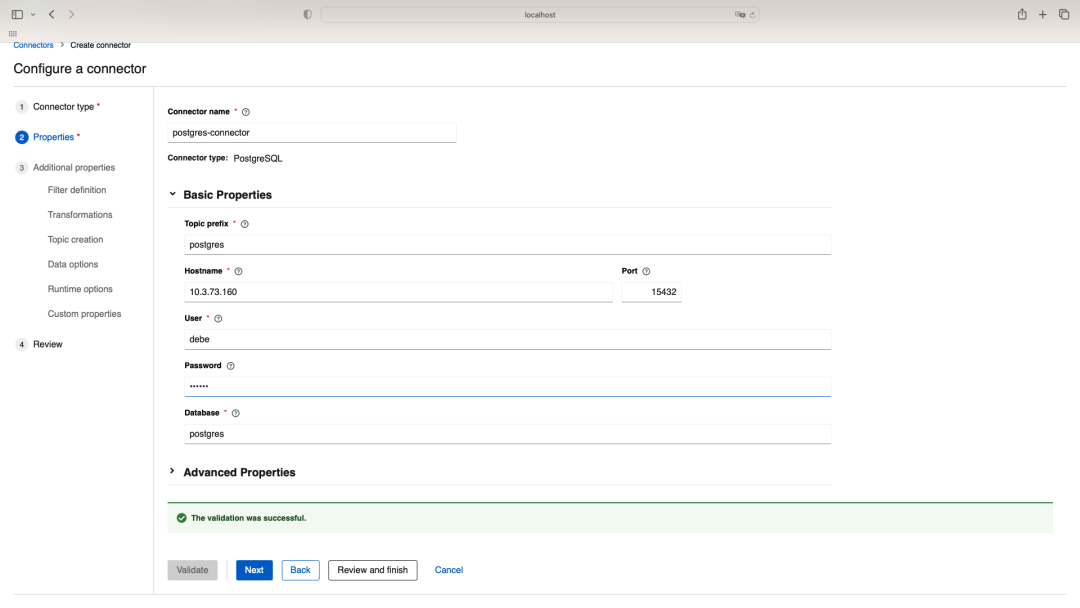
需要注意的有以下几点:
Debezium Postgres类型的Source Connector支持的Postgres需要将wal_level修改为logical;
修改Postgres中的Postgresql.conf文件中的配置(wal_level = logical)并重启Postgres;
Postgres需要支持解码插件,Debezium官方一共提供了两个解码插件:
Decoderbufs:Debezium默认配置,由Debezium维护;
Pgoutput:Postgres 10+版本自带;使用此插件时,需要配置plugin.name=pgoutput
# 3.启动目标数据库-Postgre
本次部署通过容器的方式启动:
# 4.注册Sink Connector
通过Connect提供的API进行注册
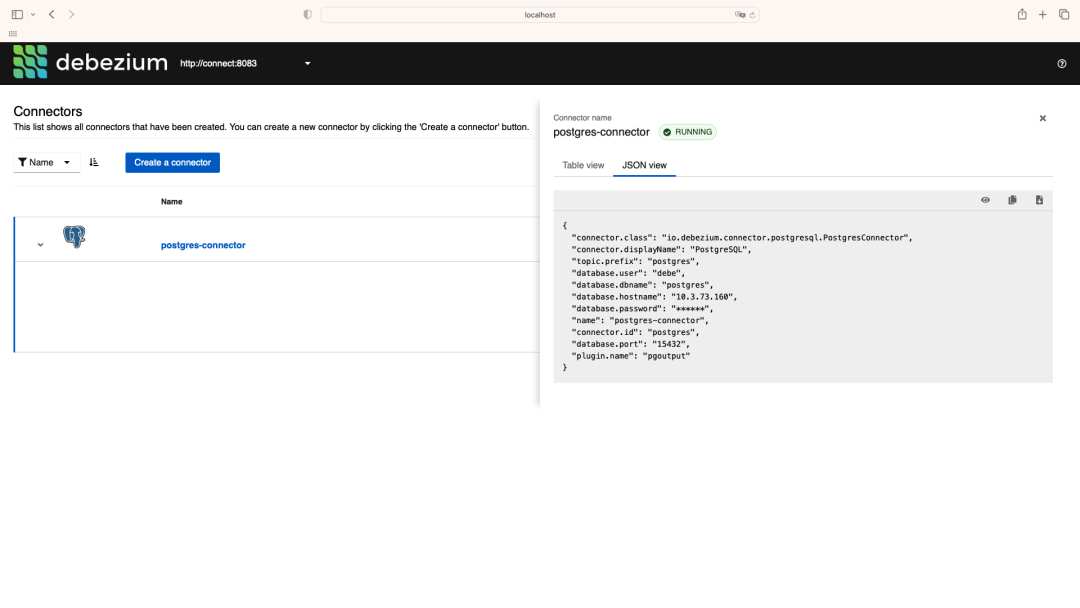
新增Connector
# 5.验证数据迁移过程
# 源数据库中的表数据迁移到Kafka
新建表test_source和test_source1
test_source&test_source1.sql
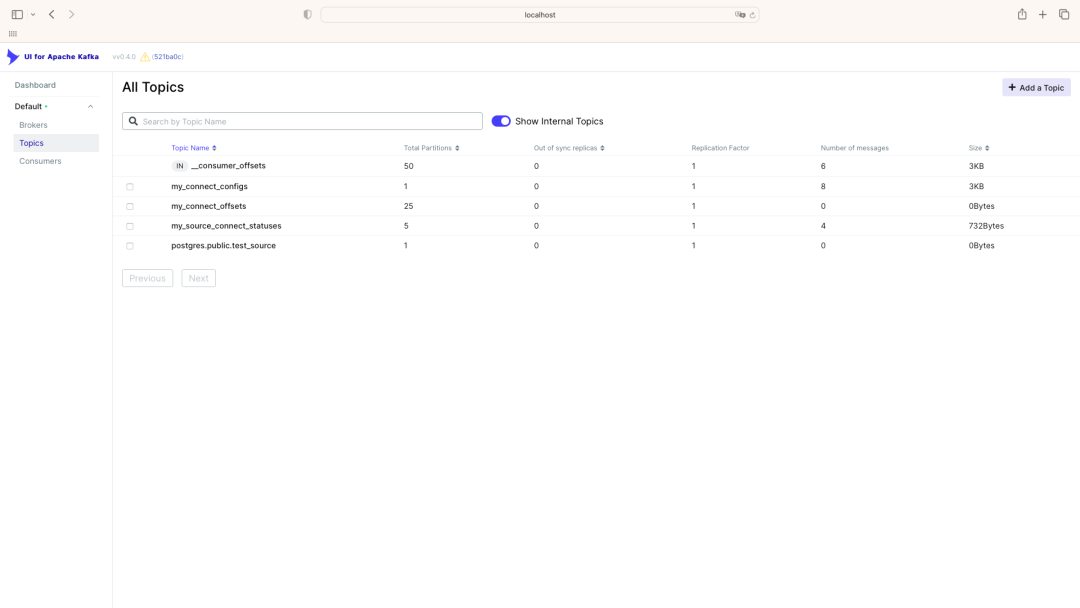
Kafka新建数据前 ⬇
Kafka新建数据后 ⬇
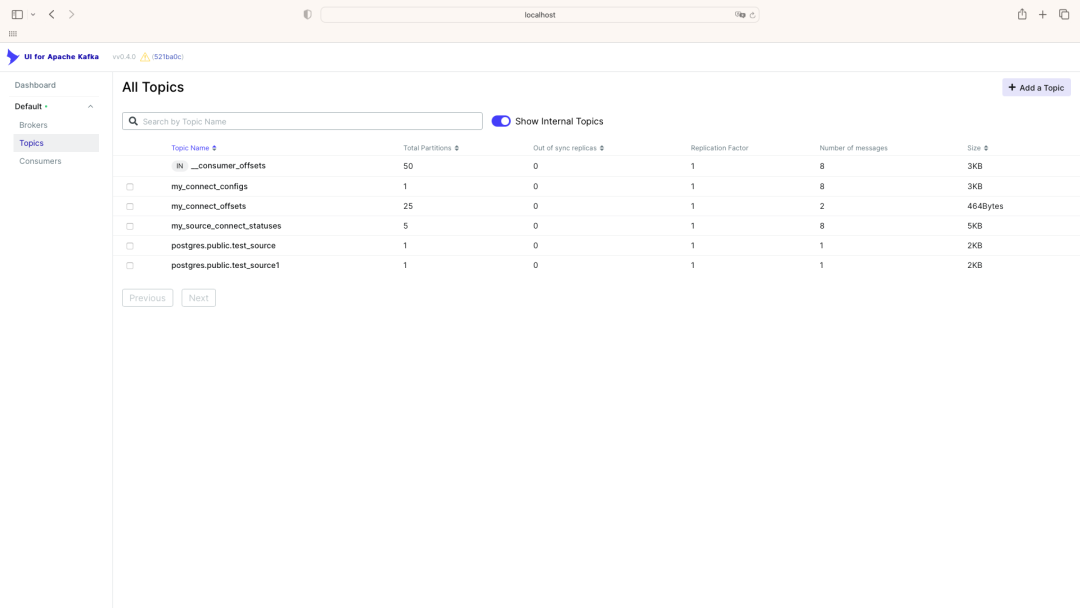
源数据库中新建表test_source和表test_source1后,Kafka中出现了两个Topic:
postgres.public.test_source和postgres.public.test_source1,与这两个表一一对应,topic中的message对应着对表中记录的操作(新增1条记录)。
监听的表可通过连接器配置进行过滤,比如配置"table.include.list": "public.test_source",就只会出现一个Topic:postgres.public.test_source
# Kafka中的数据迁移到目标数据库

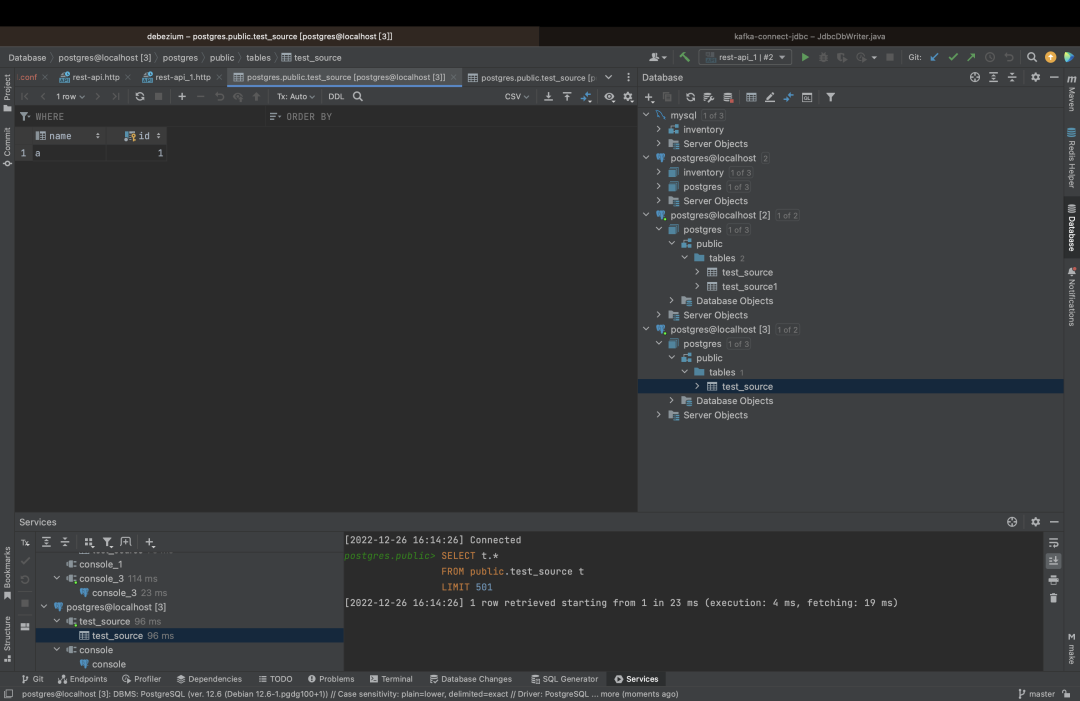
注册Sink Connector后,Kafka中会新增一个Customer,对postgres.public.test_source进行消费(sink connector配置中的"topics": "postgres.public.test_source"指定);
对应的源数据库(sink connector配置中的"connection.url": "jdbc:postgresql://10.3.73.160:25432/postgres?user=debe&password=123456"指定)会新增一个表public.test_source,该表中的数据和源数据库中的public.test_source始终保持同步。
MySQL迁移到PostgresSQL
# 1.启动源数据库-mysql
本次部署通过docker启动:
# 2.注册Source Connector
# 启动MySQL数据源连接注册
注册MySQL数据源有两种方式:
在Debezium UI中直接添加
调用Kafka API 注册
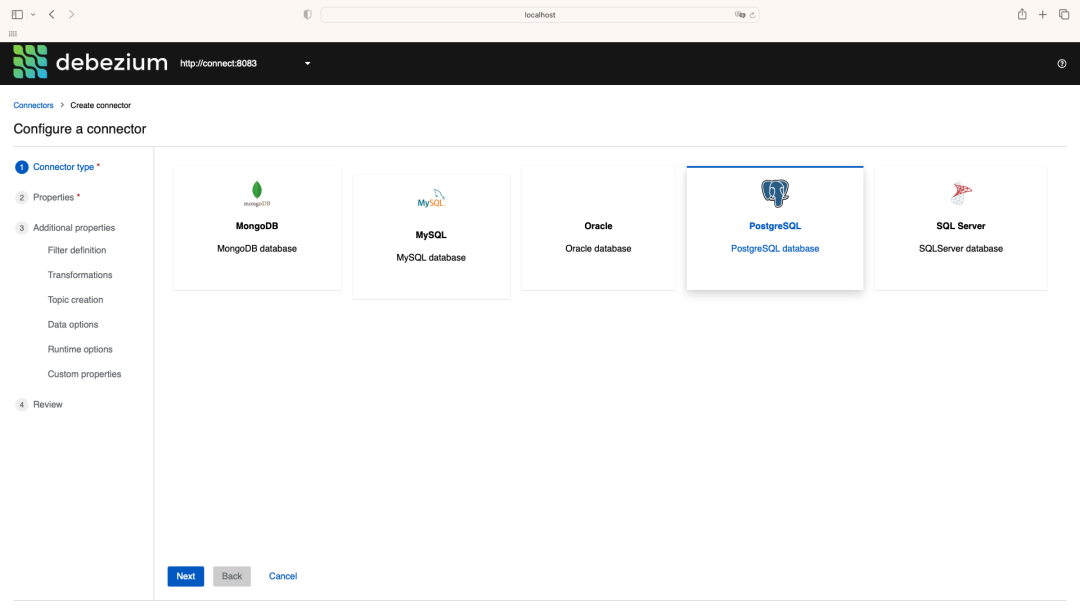
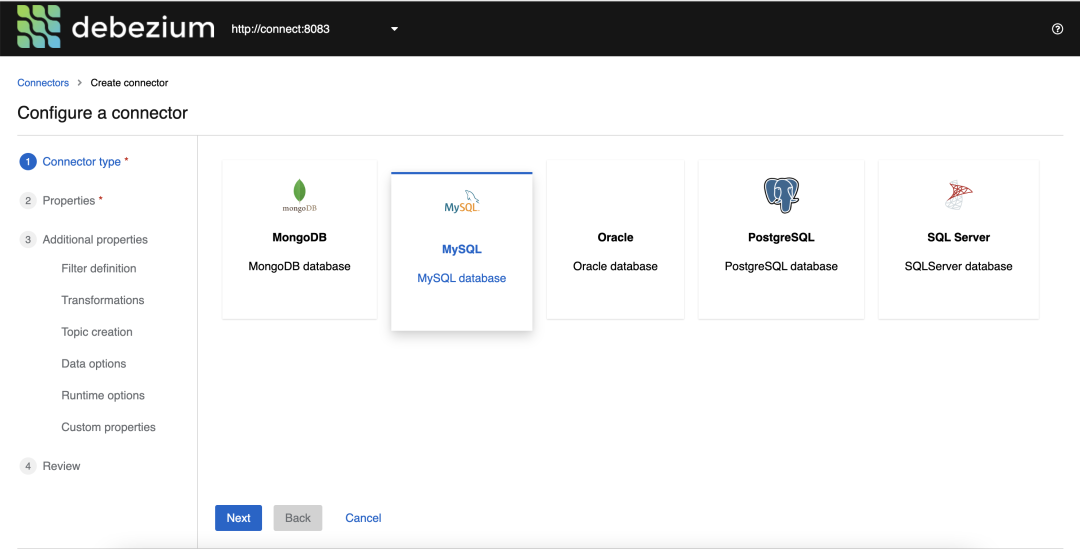
# 在Debezium UI中直接添加

选择MySQL数据源
# 调用Kafka API注册
新增Connector

# 验证Source Connector注册结果
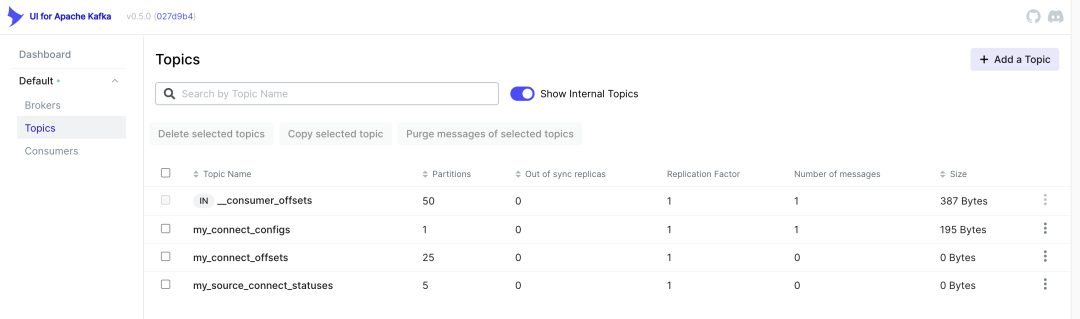
注册连接前:
注册连接后:
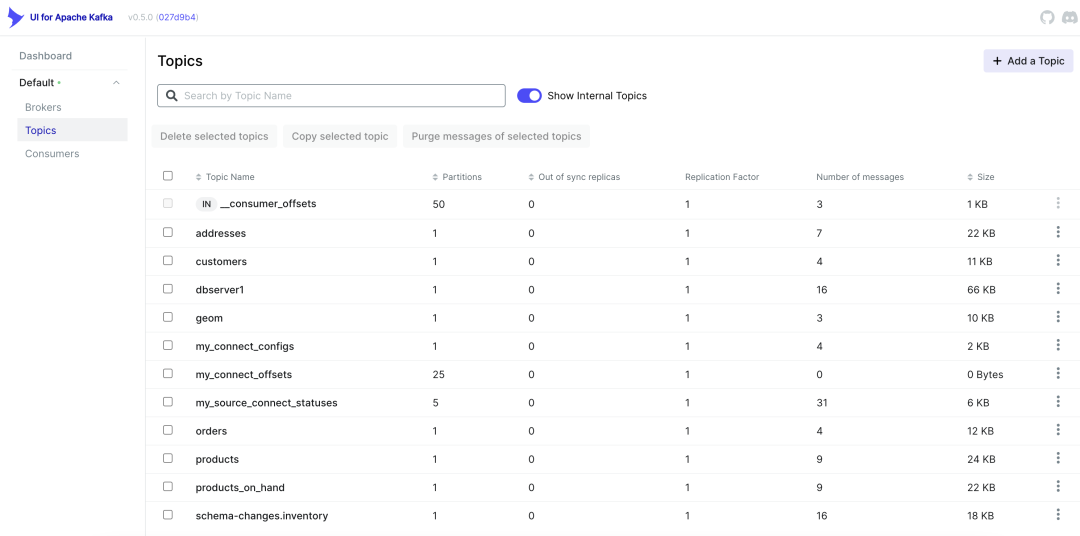
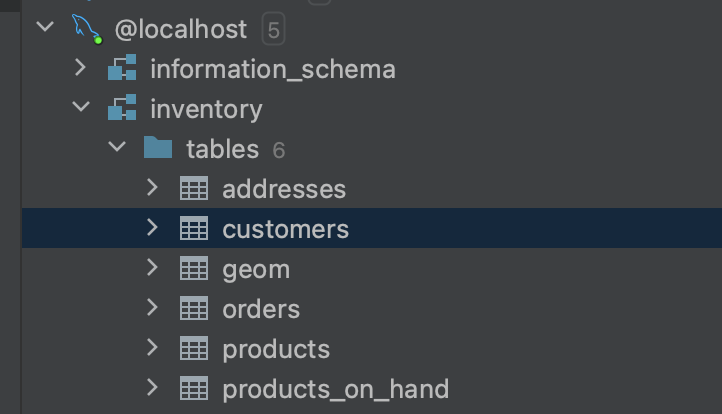
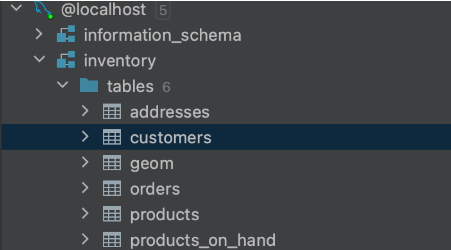
多出来的Topics信息是MySQL source表信息,连接MySQL数据库可见表:
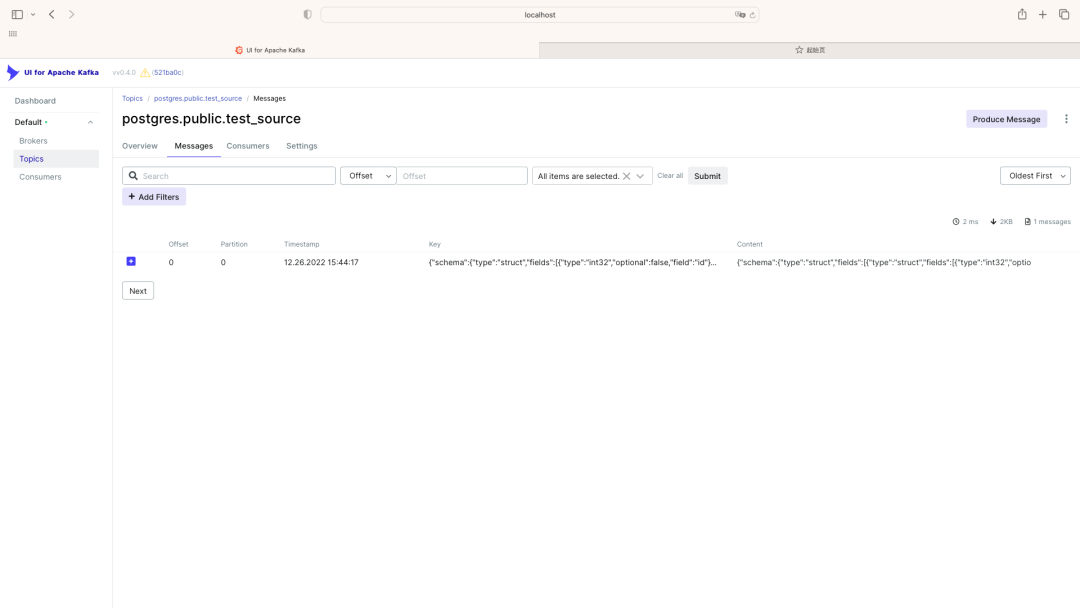
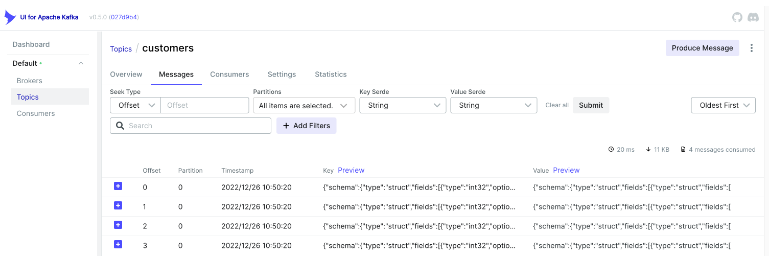
UI for Apache Kafka中可以看到Messages同步信息。
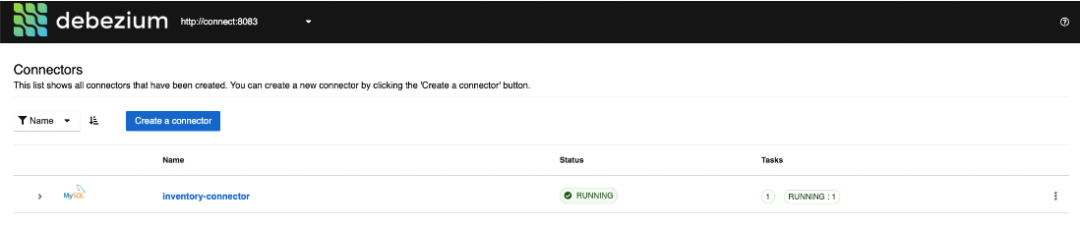
访问Debezium UI(http://localhost:8080/ )可以看到MySQL的连接。
# 3.启动目标数据库-Postgres
本次部署采用Docker方式启动:
# 4.注册Sink Connector (通过API接口)
新增Connector

注册PostgreSQL connector后,不会在Debezium中显示Connector client 信息,但可以在UI for Apache Kafka中看到:

# 5.验证数据迁移过程
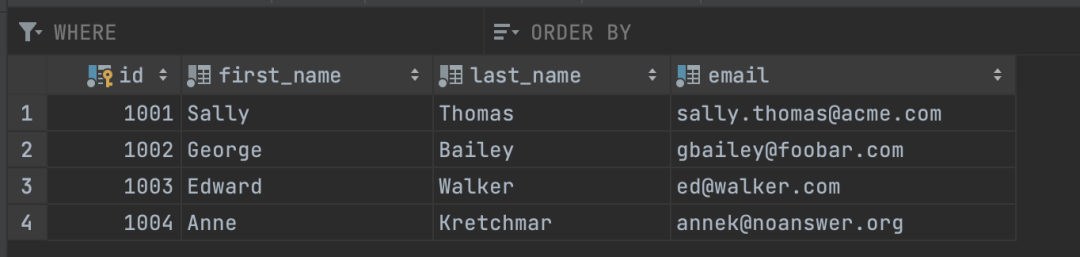
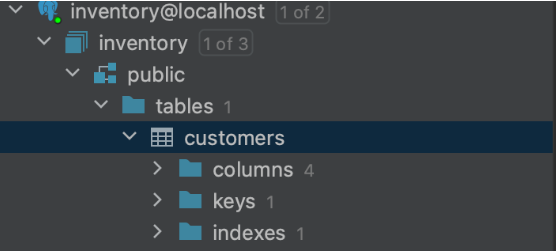
完成安装步骤后,以Customers表为例,做CUD操作语句,实现MySQL数据库同步数据到PostgreSQL 。
Mysql 数据库现有数据:

PostgreSQL数据库现有数据:

手动在MySQL数据库Customers表中添加一条数据 ⬇
customers.sql
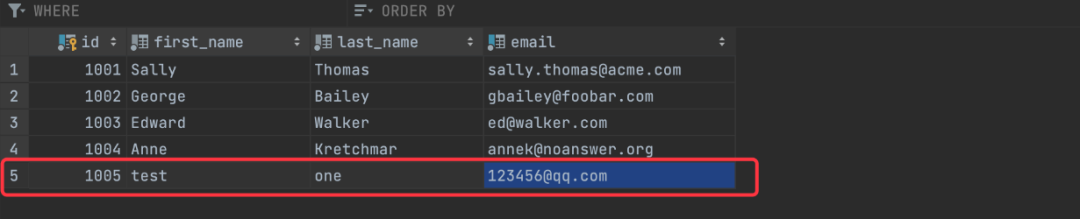
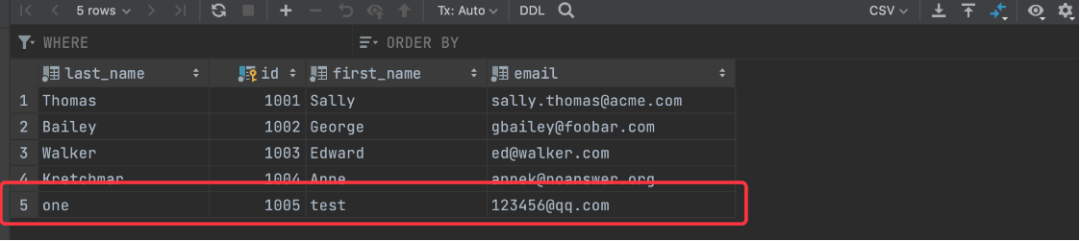
在PostgreSQL数据库中Customers多出一条数据:
Kafka中Messages新增一条数据,完成数据同步:
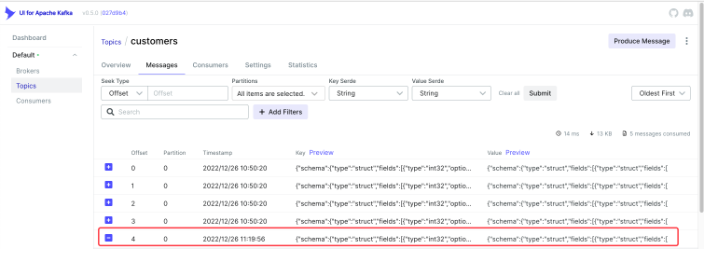
可以看到消费如下信息:
topics-customers.json
重要的部分是 “payload” json 中信息:
source 中会展示“版本”,“数据源”等信息;
after 代表变动信息;
“op” 操作信息,例如“c” 代表创建;
需要注意的是,结果的json格式是Debezium定义好的格式。
Debezium json格式通常前面定义Schema信息,最后才是实际的载荷(payload)信息。
详细格式定义可以查看:https://debezium.io/documentation/reference/1.6/connectors/mysql.html
通过以上步骤,我们在Docker环境上使用Debezium实现了数据同步到kafaka。
本期关于数据同步迁移的内容就到这里了,建议大家收藏学习!~


基于Debezium和kafaka
实现数据同步迁移的实践
感兴趣的小伙伴可以一试~
如果你有更好的办法或疑问
欢迎加入社群一起讨论哦⬇
本期作者
刘健 王凯

更多精彩内容

了解云基地,就现在!
IT技术哪家强
神州数码最在行
行业新星,后起之秀
历史虽不长,但是实 力 强