安装VAULT服务器
4.1 RPM包安装
[root@PERONADB8hashicorp_vault]# yum install -y yum-utils
[root@PERONADB8hashicorp_vault]# yum-config-manager --add-repo https://rpm.releases.hashicorp.com/RHEL/hashicorp.repo
[root@PERONADB8hashicorp_vault]# yum install –y vault
4.2 预编译的Vault二进制安装
载预编译二进制包
wget https://releases.hashicorp.com/vault/1.9.3/vault_1.9.3_linux_amd64.zip
解压到环境变量路径
unzip vault_1.9.3_linux_amd64.zip -d DB/security/hashicorp_vault
这里建议直接使用预编译的二进制包安装,简单快捷。
设置可执行文件
Chmod +x vault
修改ROOT用户环境,把VAULT路径添加到PATH里
Vim ~/.bash_profile
PATH=$PATH:$HOME/bin:/DB/security/hashicorp_vault
当前会话生效
SOURCE ~/.bash_profile
4.3 编辑配置文件
Vim vault.hcl
4.3.1文件存储
listener "tcp" {
address = "192.168.0.114:8200"
tls_cert_file="/etc/sslkeys/vault.crt"
tls_key_file="/etc/sslkeys/vault.key"
}
storage "file" {
path = "/var/lib/vault"
}
网络配置中的 tls_disable 指定不使用 TLS,这时数据传输是明文的,安全性不够高。如果需要使用TLS 以加强安全性的话,那么还需要在这里配置证书,
4.3.2数据库存储
listener "tcp" {
address ="127.0.0.1:8200"
tls_disable = 1
}
storage "mysql" {
address = "localhost:3306"
username = "root"
password = "flm"
database = "vault"
table = "vault"
}
分两个部分一部分监听,另一部分是存储
监听有IP地址,是否启用证书和密钥
我们这里选择文件存储模式
listener "tcp" {
address = "192.168.0.251:8200"
tls_cert_file="/DB/security/hashicorp_vault/vault.crt"
tls_key_file="/DB/security/hashicorp_vault/vault.key"
}
storage "file" {
path = "/DB/security/hashicorp_vault/vault_data.dbf"
}
下面配置增加两个参数,1是加密算法套件,2是API监控端口,API接口是什么鬼,这次暂时不讨论.
ui = true
listener "tcp" {
address = "192.168.0.0:8200"
##tls_disable ="true"
tls_cert_file="/DB/security/hashicorp_vault/vault.crt"
tls_key_file="/DB/security/hashicorp_vault/vault.key"
tls_cipher_suites="TLS_RSA_WITH_AES_128_GCM_SHA256,TLS_RSA_WITH_AES_256_GCM_SHA384,TLS_ECDHE_RSA_WITH_AES_128_GCM_SHA256"
}
api_addr = "http://192.168.0.251:8200"
storage "file" {
path = "/DB/security/hashicorp_vault/vault_data.dbf"
}
我们这里注意下 UI是开启网页版.
监听地址类似监听IP范围, 我们设置192.168.0.0 监听局域网的请求信息
TLS_DISABLE= “TRUE” 是关闭 SSL和TLS 安全协议
下面三个TLS 参数设置是TLS证书(公钥,加密钥); TLS 私钥(解密); TLS的加密算法套件
API_ADDR 基本是命令行请求IP范围
4.4 生成证书和私钥
CENTOS7最小化已经安装了OPENSSL
[root@PERONADB8 hashicorp_vault]# ll/etc/sslkeys/ssl.conf
ls: cannotaccess etc/sslkeys/ssl.conf: No such fileor directory
4.4.1 配置SSL
配置VAULT 需要如下样子,暂时看不明白
[req]
distinguished_name= req_distinguished_name
x509_extensions= v3_req
prompt = no
[req_distinguished_name]
C = ID
ST = Jakarta
L = R
O = shark_labs
CN = *
[v3_req]
subjectKeyIdentifier= hash
authorityKeyIdentifier= keyid,issuer
basicConstraints= CA:TRUE
subjectAltName =@alt_names
[alt_names]
IP.1 = 192.168.0.222
IP.2 = 192.168.0.223
[alt_names]
DNS = vault
IP.1 = 10.248.201.8
[root@vault1 ~]# cat/etc/sslkeys/ssl.conf
[req]
distinguished_name= req_distinguished_name
x509_extensions= v3_req
prompt = no
[req_distinguished_name]
C = US
ST = NC
L = R
O = Percona
CN = *
[v3_req]
subjectKeyIdentifier= hash
authorityKeyIdentifier= keyid,issuer
basicConstraints= CA:TRUE
subjectAltName =@alt_names
[alt_names]
IP = 192.168.0.251
4.4.2 SSL配置说明
有3个节段分别是 [ req] [req_distinguished_name] [v3_req] [alt_names] 稍微看下 形成爷->子->孙的关系
[req]
x509_extensions= v3_req
-x509:本选项将产生自签名的证书。一般用来错测试用,或者自己玩下做个Root CA。证书的扩展项在 config文件里面指定
[req_distinguished_name]
DN -- DistinguishedName,证书持有人的唯一标识符。一个DN是指一系列通过逗号连接起来的RDN。 一个RND是一对属性值
String | Attribute type | |
DC | domainComponent | |
CN | commonName | |
OU | organizationalUnitName | 组织单位名称 |
O | organizationName | 组织名称 |
STREET | streetAddress | 街区 |
L | localityName | |
ST | stateOrProvinceName | 省名 |
C | countryName | 国家名 |
UID | userid |
举个例子:DC=COM,CN=test.com, O=org 这就是一个DN.
[v3_req]
1:keyusage/extkeyusage
用以描述证书的用法,改证书可以进行证书的签发?CRL的签发?客户端认证?服务器认证?一般严格的CA机构都谨慎设置这个字段,避免自己签发的证书被滥用。
2:subectkeyidentifier
自己公钥进行hash运算后的值,可以快速判断证书。
3:authoritykeyidentifier
上级证书的公钥进行hash运算后的值。一般来说,两个上下级关系的证书,下级证书的authoritykeyidentifier值就是上级证书的subectkeyidentifier值。
keyid表示从ParentCA拷贝key identifier,本参数优先。 issuer表示拷贝 issuer and serial number from the issuer certificate
4:subjectAltname
证书的别名。例如一个网站有多个域名,例如www.baidu.com和www.hao123.com对应的都是一个服务器,commonname只能写一个,为了不让浏览器告警,可以在subjectAltname拓展中添加这个网站的其他域名。浏览器收到这个证书,除了判断host和common name是否一致外,也会判断host和subjectAltname是否有一致项,有的话就成功。
5:basicConstraints
一般CA证书里面ca:Ture
[alt_names]
VAULT本机IP
[root@vault1 ~]# vim/etc/sslkeys/ssl.conf
[req]
distinguished_name= req_distinguished_name
x509_extensions= v3_req
prompt = no
[req_distinguished_name]
C = RP
ST = NC
L = R
O = Mysql
CN = *
[v3_req]
subjectKeyIdentifier= hash
authorityKeyIdentifier= keyid,issuer
basicConstraints= CA:TRUE
subjectAltName =@alt_names
[alt_names]
IP = 192.168.0.251
4.4.4 生成自签名证书
openssl req-config ssl.conf -x509 -days 365 -batch -nodes -newkeyrsa:4096 -keyout vault.key -out vault.crt
openssl req -config ssl.conf -x509 -days365 -batch -nodes -newkey rsa:2048 -keyout vault.key -out vault.crt
Generating a 4096 bit RSA private key
........................................................++
.......................................................++
writing newprivate key to 'vault.key'
[root@PERONADB8hashicorp_vault]# ll
total 183284
-rw-r--r-- 1 rootroot 319 Mar 3 18:15 ssl.conf
-rwxr-xr-x 1rootroot187665656 Mar 216:55 vault
-rw-r--r-- 1 rootroot 1935 Mar 3 18:17 vault.crt
-rw-r--r-- 1 rootroot 233 Mar 2 17:35 vault.hcl
-rw-r--r-- 1 rootroot 3272 Mar 3 18:17 vault.key
打包在一起
catvault.key vault.crt > vault.pem
4.5 启动VAULT
4.5.1 命令行启动
[root@PERONADB8hashicorp_vault]# ./vault server-config=vault.hcl
==> Vault serverconfiguration:
Cgo: disabled
GoVersion: go1.17.5
Listener 1: tcp (addr: "192.168.0.251:8200", cluster address: "192.168.0.251:8201",max_request_duration: "1m30s",max_request_size: "33554432", tls: "enabled")
LogLevel: info
Mlock: supported: true, enabled: true
Recovery Mode: false
Storage: file
Version: Vault v1.9.3
Version Sha:7dbdd57243a0d8d9d9e07cd01eb657369f8e1b8a
==> Vault serverstarted! Logdata will stream in below:
2022-03-03T18:27:14.351+0800 [INFO] proxy environment: http_proxy="\"\"" https_proxy="\"\"" no_proxy="\"\""
2022-03-03T18:27:14.351+0800 [WARN] no`api_addr`value specified in config orin VAULT_API_ADDR;falling back to detection if possible, butthis value should be manually set
2022-03-03T18:27:14.401+0800 [INFO] core: Initializing VersionTimestamps for core
CTRL+C 退出
^C==> Vault shutdown triggered
帮助
[root@PERONADB8hashicorp_vault]# ./vault --help
Usage: vault<command> [args]
Common commands:
read Readdataand retrievessecrets
write Write data, configuration, and secrets
delete Delete secrets andconfiguration
list List dataor secrets
login Authenticate locally
agent Start a Vault agent
server Start a Vault server
status Print seal and HA status
unwrap Unwrap a wrapped secret
Other commands:
audit Interact withaudit devices
auth Interact with auth methods
debug Runs the debug command
kv Interact with Vault isKey-Value storage
lease Interact with leases
monitor Stream log messages from a Vault server
namespace Interact with namespaces
operator Perform operator-specific tasks
path-help Retrieve API help for paths
plugin Interact with Vault plugins andcatalog
policy Interact with policies
print Prints runtime configurations
secrets Interact with secrets engines
ssh Initiate an SSH session
token Interact with tokens
4.5.2 编辑VAULT 启动脚本
#!/bin/bash
VAULT_HOME=/DB/security/hashicorp_vault
VAULT_NAME=$VAULT_HOME/vault
#使用说明,用来提示输入参数
usage()
{
echo"Usage: shrobotcenter.sh [start|stop|restart|status]"
exit 1
}
#检查程序是否在运行
is_exist()
{
pid=`ps -ef|grep $VAULT_NAME|grep -v grep|awk '{print$2}'`
#如果不存在返回1,存在返回0
if [ -z "${pid}" ]; then
return 1
else
return 0
fi
}
#启动方法
start()
{
is_exist
if [ $? -eq 0 ]; then
echo"${VAULT_NAME} is alreadyrunning. pid=${pid}"
else
${VAULT_NAME} server -config=$VAULT_HOME/vault.hcl >vault.out 2>&1 &
fi
}
#停止方法
stop()
{
is_exist
if [ $? -eq "0" ]; then
kill -9 $pid
else
echo"${VAULT_NAME} is notrunning"
fi
}
#输出运行状态
status(){
is_exist
if [ $? -eq "0" ]; then
echo"${VAULT_NAME} is running. Pidis ${pid}"
${VAULT_NAME} status
else
echo"${VAULT_NAME} is NOTrunning."
fi
}
#重启
restart()
{
stop
sleep 5
start
}
#根据输入参数,选择执行对应方法,不输入则执行使用说明
case"$1"in
"start")
start
;;
"stop")
stop
;;
"status")
status
;;
"restart")
restart
;;
*)
usage
;;
esac
测试脚本
[root@PERONADB8hashicorp_vault]# sh vault.ser status
/DB/security/hashicorp_vault/vaultis NOT running.
##启动
[root@PERONADB8hashicorp_vault]# sh vault.ser start
##查看输出情况
[root@PERONADB8hashicorp_vault]# cat vault.out
==> Vaultserver configuration:
Cgo: disabled
Go Version: go1.17.5
Listener 1: tcp (addr: "192.168.0.251:8200", clusteraddress: "192.168.0.251:8201",max_request_duration: "1m30s",max_request_size: "33554432", tls: "enabled")
Log Level: info
Mlock: supported: true,enabled: true
Recovery Mode: false
Storage: file
Version: Vault v1.9.3
Version Sha:7dbdd57243a0d8d9d9e07cd01eb657369f8e1b8a
==> Vault serverstarted! Log data will stream in below:
2022-03-03T18:42:16.298+0800[INFO] proxy environment: http_proxy="\"\"" https_proxy="\"\"" no_proxy="\"\""
2022-03-03T18:42:16.298+0800[WARN] no `api_addr` value specifiedin config or in VAULT_API_ADDR;falling back to detection if possible, butthis value should be manually set
2022-03-03T18:42:16.314+0800[INFO] core: Initializing VersionTimestamps for core
##查看状态
[root@PERONADB8hashicorp_vault]# sh vault.ser status
/DB/security/hashicorp_vault/vaultis running. Pid is 4556
Error checkingseal status: Get "https://127.0.0.1:8200/v1/sys/seal-status": dial tcp127.0.0.1:8200: connect: connection refused
4.5.3 SYSTEMD启动脚本
[Unit]
Description=vault service
Documentation=https://www.vaultproject.io/docs/
Requires=network-online.target
After=network-online.target
ConditionFileNotEmpty=/etc/vault/config/default.hcl
[Service]
User=vault
Group=vault
ProtectSystem=full
ProtectHome=read-only
PrivateTmp=yes
PrivateDevices=yes
SecureBits=keep-caps
AmbientCapabilities=CAP_IPC_LOCK
Capabilities=CAP_IPC_LOCK+ep
CapabilityBoundingSet=CAP_SYSLOGCAP_IPC_LOCK
NoNewPrivileges=yes
ExecStart=/usr/local/bin/vault server -config=/etc/vault/config/default.hcl -log-level=info
ExecReload=/bin/kill --signal HUP \$MAINPID
KillMode=process
KillSignal=SIGINT
Restart=on-failure
RestartSec=5
TimeoutStopSec=30
StartLimitIntervalSec=60
StartLimitBurst=3
LimitNOFILE=65536
[Install]
WantedBy=multi-user.target
4.6 初始化VAULT
初始化问题1
[root@PERONADB8 hashicorp_vault]# export VAULT_ADDR=http://192.168.0.251:8200
[root@PERONADB8 hashicorp_vault]# vaultoperator init -key-shares=5 -key-threshold=3
Error initializing: Error making APIrequest.
URL: PUThttp://192.168.0.251:8200/v1/sys/init
Code: 400. Raw Message:
Client sent an HTTP request to an HTTPSserver.
[root@PERONADB8 hashicorp_vault]# exportVAULT_ADDR=http://127.0.0.1:8200
[root@PERONADB8 hashicorp_vault]# vaultoperator init -key-shares=5 -key-threshold=3
Error initializing: Put"http://127.0.0.1:8200/v1/sys/init": dial tcp 127.0.0.1:8200:connect: connection refused
FAQ
这里理解配置文件两个地址 监听地址:是类似黑名单概念,是监听客户端的IP请求. 而我们DBA ORACLEMYSQL 监听地址都是本实例的IP
API_ADDR 是监听查不多是命令行的请求IP地址
初始化问题2
[root@PERONADB8 hashicorp_vault]# exportVAULT_ADDR=https://127.0.0.1:8200
[root@PERONADB8 hashicorp_vault]# vaultoperator init -key-shares=5 -key-threshold=3
Error initializing: Put"https://127.0.0.1:8200/v1/sys/init": x509: certificate is valid for192.168.0.251, not 127.0.0.1
FAQ
配置文件的证书使用的是192.168.0.251 API_ADDR 不是127.0.0.1
关闭防火墙
[root@PERONADB8 hashicorp_vault]# systemctlstatus firewalld.service
firewalld.service - firewalld - dynamicfirewall daemon
Loaded: loaded (/usr/lib/systemd/system/firewalld.service; enabled)
Active: active (running) since Tue 2022-03-01 15:15:40 CST; 3 days ago
MainPID: 582 (firewalld)
CGroup: system.slice/firewalld.service
└─582 usr/bin/python -Es usr/sbin/firewalld --nofork --nopid
Mar 01 15:15:39 PERONADB8 systemd[1]:Starting firewalld - dynamic firewall daemon...
Mar 01 15:15:40 PERONADB8 systemd[1]:Started firewalld - dynamic firewall daemon.
[root@PERONADB8 hashicorp_vault]# systemctlstop firewalld
[root@PERONADB8 hashicorp_vault]# systemctldisable firewalld
rm'/etc/systemd/system/dbus-org.fedoraproject.FirewallD1.service'
rm'/etc/systemd/system/basic.target.wants/firewalld.service'
修改配置文件
[root@PERONADB8hashicorp_vault]# cat vault.conf
listener "tcp" {
address = "0.0.0.0:8200"
tls_cert_file="/DB/security/hashicorp_vault/vault.crt"
tls_key_file="/DB/security/hashicorp_vault/vault.key"
}
api_addr = "http://192.168.0.251:8200"
storage "file" {
path = "/DB/security/hashicorp_vault/vault_data.dbf"
}
启动信息:
[root@PERONADB8hashicorp_vault]# cat vault.out
==> Vaultserver configuration:
Api Address: http://192.168.0.251:8200
Cgo: disabled
Cluster Address: https://192.168.0.251:8201
Go Version: go1.17.5
Listener 1: tcp (addr: "0.0.0.0:8200", clusteraddress: "0.0.0.0:8201", max_request_duration:"1m30s", max_request_size: "33554432", tls: "enabled")
Log Level: info
Mlock: supported: true,enabled: true
Recovery Mode: false
Storage: file
Version: Vault v1.9.3
Version Sha:7dbdd57243a0d8d9d9e07cd01eb657369f8e1b8a
==> Vaultserver started! Log data will stream in below:
2022-03-04T17:23:32.928+0800[INFO] proxy environment: http_proxy="\"\"" https_proxy="\"\"" no_proxy="\"\""
2022-03-04T17:23:32.945+0800[INFO] core: Initializing VersionTimestamps for core
++
初始化问题3
[root@PERONADB8 hashicorp_vault]# exportVAULT_ADDR=https://192.168.0.251:8200
[root@PERONADB8 hashicorp_vault]# vaultoperator init -key-shares=5 -key-threshold=3
Error initializing: Put"https://192.168.0.251:8200/v1/sys/init": x509: certificate signed byunknown authority
[root@PERONADB8 hashicorp_vault]#
要导出证书:
[root@PERONADB8hashicorp_vault]# exportVAULT_CACERT="/DB/security/hashicorp_vault/vault.pem"
[root@PERONADB8hashicorp_vault]# exportVAULT_ADDR=https://192.168.0.251:8200
[root@PERONADB8hashicorp_vault]# vault operator init -key-shares=5-key-threshold=3
Unseal Key 1:yqb1vBJRq4dWolDqoKuKmg3oKCPVNPvix0AEwGSdU+u9
Unseal Key 2: 60FZZ2hiBv70rVv4wNNYK/2OqUMtxlgZqhWb4pxahvhY
Unseal Key 3:+RHfO7O1/ta7ajVGM6HDr+FEPfcKdEDa70UHdUBWDClU
Unseal Key 4:XUaRe5O4AA/+AkVN4F4sIGJVQsuzuSKZ0ibHi6e4DeG7
Unseal Key 5:T0cIBjmM03LDnd1/Ugs2AAbSIiNYUVkXV9J/NAq5iyDl
Initial RootToken: s.Ily7DeSMzdYIP71Ea0NbSn0A
Vaultinitialized with 5 key shares and a key threshold of 3. Please securely
distribute thekey shares printed above. When the Vault is re-sealed,
restarted, orstopped, you must supply at least 3 of these keys to unseal it
before it can startservicing requests.
Vault does notstore the generated master key. Without at least 3 keys to
reconstruct themaster key, Vault will remain permanently sealed!
It is possibleto generate new unseal keys, provided you have a quorum of
existing unsealkeys shares. See "vault operator rekey"for moreinformation.
把5个KEY 和TOKEN 保存起来
[root@PERONADB8hashicorp_vault]# vim vault.key.token
Unseal Key 1:yqb1vBJRq4dWolDqoKuKmg3oKCPVNPvix0AEwGSdU+u9
Unseal Key 2:60FZZ2hiBv70rVv4wNNYK/2OqUMtxlgZqhWb4pxahvhY
Unseal Key 3:+RHfO7O1/ta7ajVGM6HDr+FEPfcKdEDa70UHdUBWDClU
Unseal Key 4:XUaRe5O4AA/+AkVN4F4sIGJVQsuzuSKZ0ibHi6e4DeG7
Unseal Key 5:T0cIBjmM03LDnd1/Ugs2AAbSIiNYUVkXV9J/NAq5iyDl
Initial RootToken: s.Ily7DeSMzdYIP71Ea0NbSn0A
· 解封数据初始化的时候获取的5个密钥中的3个对Vault进行解封操作:
[root@PERONADB8hashicorp_vault]# vault operator unseal
Unseal Key (willbe hidden):
Key Value
--- -----
Seal Type shamir
Initialized true
Sealed true
Total Shares 5
Threshold 3
Unseal Progress 1/3
Unseal Nonce 12ef9b20-570a-44fc-ecf2-ebea710f9a44
Version 1.9.3
Storage Type file
HA Enabled false
[root@PERONADB8hashicorp_vault]# vault operator unseal
Unseal Key (willbe hidden):
Key Value
--- -----
Seal Type shamir
Initialized true
Sealed true
Total Shares 5
Threshold 3
Unseal Progress 2/3
Unseal Nonce 12ef9b20-570a-44fc-ecf2-ebea710f9a44
Version 1.9.3
Storage Type file
HA Enabled false
[root@PERONADB8hashicorp_vault]# vault operator unseal
Unseal Key (willbe hidden):
Key Value
--- -----
Seal Type shamir
Initialized true
Sealed false
Total Shares 5
Threshold 3
Version 1.9.3
Storage Type file
Cluster Name vault-cluster-0c68f203
Cluster ID 6ee48ce1-8088-0326-e558-6ed2ae2cca1f
HA Enabled false
[root@PERONADB8hashicorp_vault]#
4.7 编辑环境变量
为了方便CLI使用vault命令,建议配置环境变量;安全起见,建议设置环境变量只在当前客户端生效,
命令:
说明 | 命令 | 说明 |
设置vault访问地址 | export VAULT_ADDR=http://127.0.0.1:8200 | vault命令作用的vault服务的地址 |
设置Vault PATH | export PATH=$PATH:< vault install path > | vault install path:vault安装路径 |
设置访问token | export VAULT_TOKEN=< token > | token:登录vault时的token,首次登录可使用root token |
设置证书 | VAULT_CACERT= |
LINUX 重启后 启动VAULT 查看状态 报证书怎么怎么地? 然后我们编辑好了环境变量后就OK
[root@PERONADB8hashicorp_vault]# sh vault.server start
[root@PERONADB8hashicorp_vault]# sh vault.server status
/DB/security/hashicorp_vault/vaultis running. Pid is 1977
Error checkingseal status: Get "https://127.0.0.1:8200/v1/sys/seal-status": x509:certificate is valid for 192.168.0.251,not 127.0.0.1
[root@PERONADB8hashicorp_vault]# vim ~/.bash_profile
[root@PERONADB8hashicorp_vault]# source ~/.bash_profile
[root@PERONADB8hashicorp_vault]# sh vault.server stop
[root@PERONADB8hashicorp_vault]# sh vault.server start
[root@PERONADB8hashicorp_vault]# sh vault.server status
/DB/security/hashicorp_vault/vaultis running. Pid is 2024
Key Value
--- -----
Seal Type shamir
Initialized true
Sealed true
Total Shares 5
Threshold 3
Unseal Progress 0/3
Unseal Nonce n/a
Version 1.9.3
Storage Type file
HA Enabled false
[root@PERONADB8hashicorp_vault]#
下面就是环境变量
vim ~/.bash_profile
# .bash_profile
# Get thealiases and functions
if [ -f ~/.bashrc]; then
. ~/.bashrc
fi
# User specificenvironment and startup programs
PATH=$PATH:$HOME/bin:/DB/security/hashicorp_vault
export PATH
export LANG="en_US.UTF-8"
export VAULT_CACERT="/DB/security/hashicorp_vault/vault.pem"
exportVAULT_ADDR=https://192.168.0.251:8200
export VAULT_TOKEN='s.Ily7DeSMzdYIP71Ea0NbSn0A'
4.8 重启后再解封
# vault初始化及重新启动后处于封闭状态,需要解封才能使用;
# 解封需要使用初始化vault时的多组key,解封操作如下;
$ vault operator unseal <key>
# 说明:解封vault需要多组key,具体需要几组由初始化vault时的-key-threshold参数指定,默认为3,即进行三次解封操作
vault operatorunseal yqb1vBJRq4dWolDqoKuKmg3oKCPVNPvix0AEwGSdU+u9
vault operatorunseal 60FZZ2hiBv70rVv4wNNYK/2OqUMtxlgZqhWb4pxahvhY
vault operatorunseal +RHfO7O1/ta7ajVGM6HDr+FEPfcKdEDa70UHdUBWDClU
[root@PERONADB8hashicorp_vault]# sh vault.server status
/DB/security/hashicorp_vault/vaultis running. Pid is 2024
Key Value
--- -----
Seal Type shamir
Initialized true
Sealed false
Total Shares 5
Threshold 3
Version 1.9.3
Storage Type file
Cluster Name vault-cluster-0c68f203
Cluster ID 6ee48ce1-8088-0326-e558-6ed2ae2cca1f
HA Enabled false
4.9 登陆
[root@PERONADB8hashicorp_vault]# vault login
Token (will behidden):
WARNING! TheVAULT_TOKEN environment variable is set! This takes precedence
over the value set by thiscommand. To use the value set by thiscommand,
unset the VAULT_TOKENenvironment variable or set it to the tokendisplayed
below.
Success! You arenow authenticated. The token information displayed below
is alreadystored in the token helper. You do NOT need to run"vault login"
again. FutureVault requests will automatically use this token.
Key Value
--- -----
token s.Ily7DeSMzdYIP71Ea0NbSn0A
token_accessor hh3TIKybq0Arh43YJQktNpKC
token_duration ∞
token_renewable false
token_policies ["root"]
identity_policies []
policies ["root"]
开启网页管理
配置文件添加
ui = true
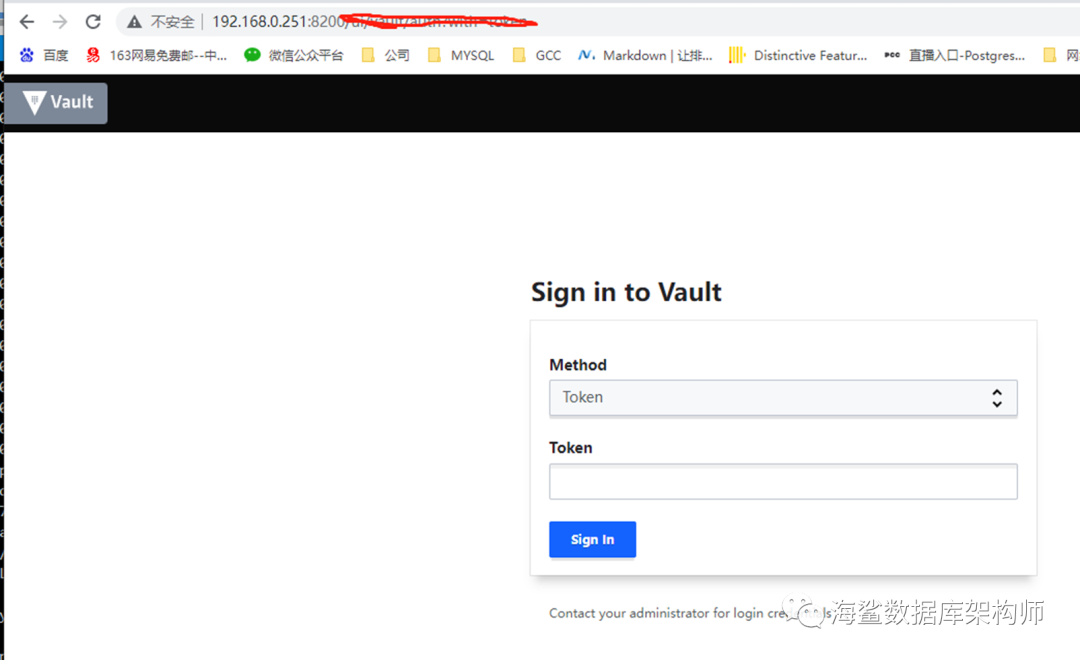
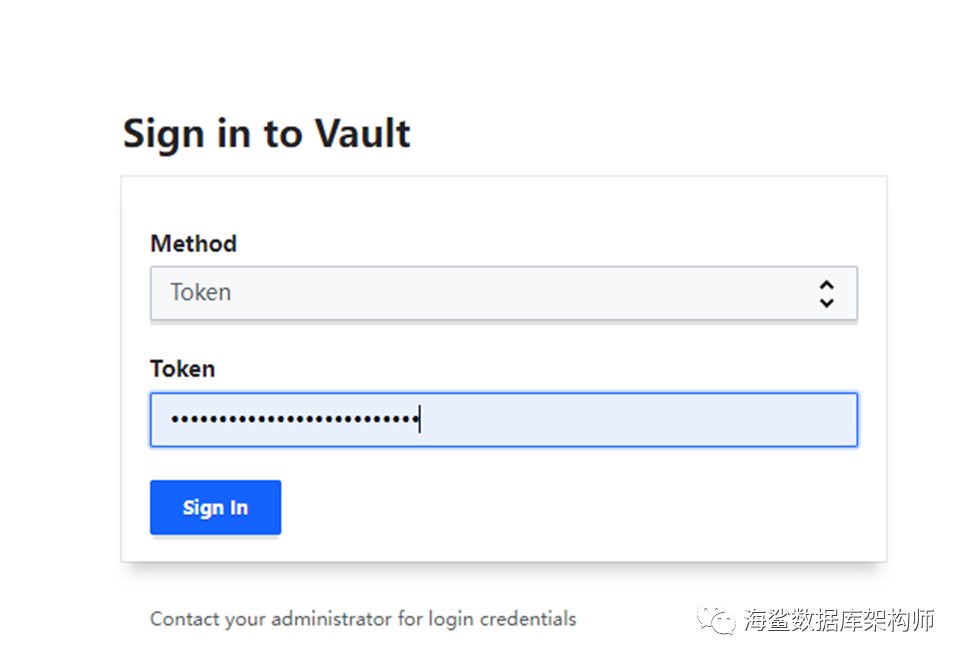
使用ROOT的TOKEN 登陆
加密引擎列表
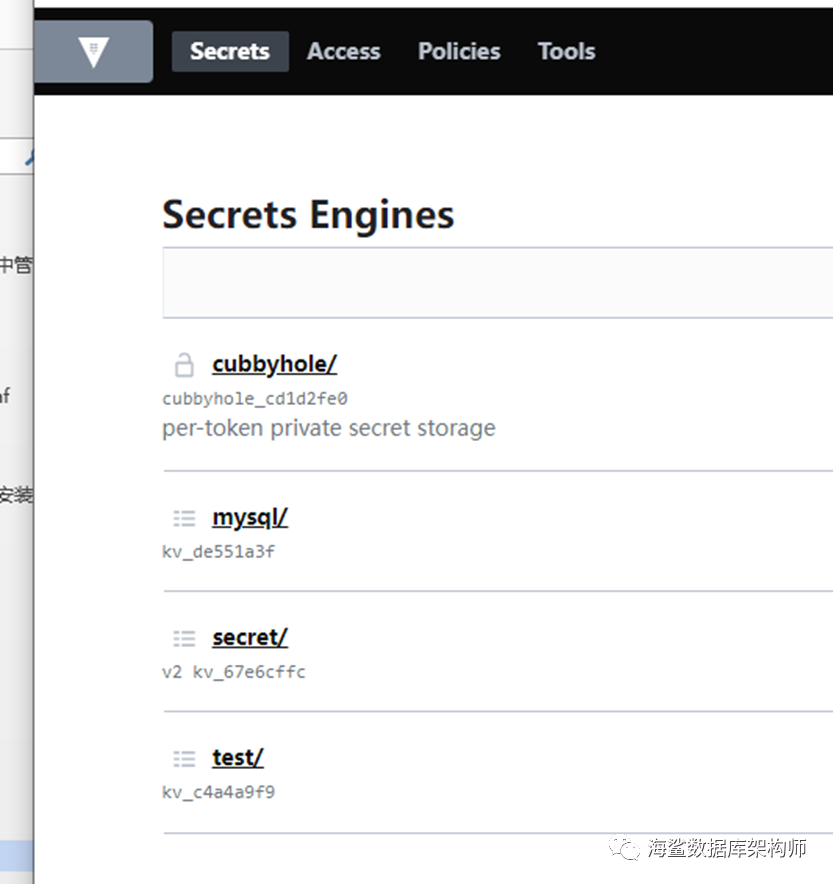
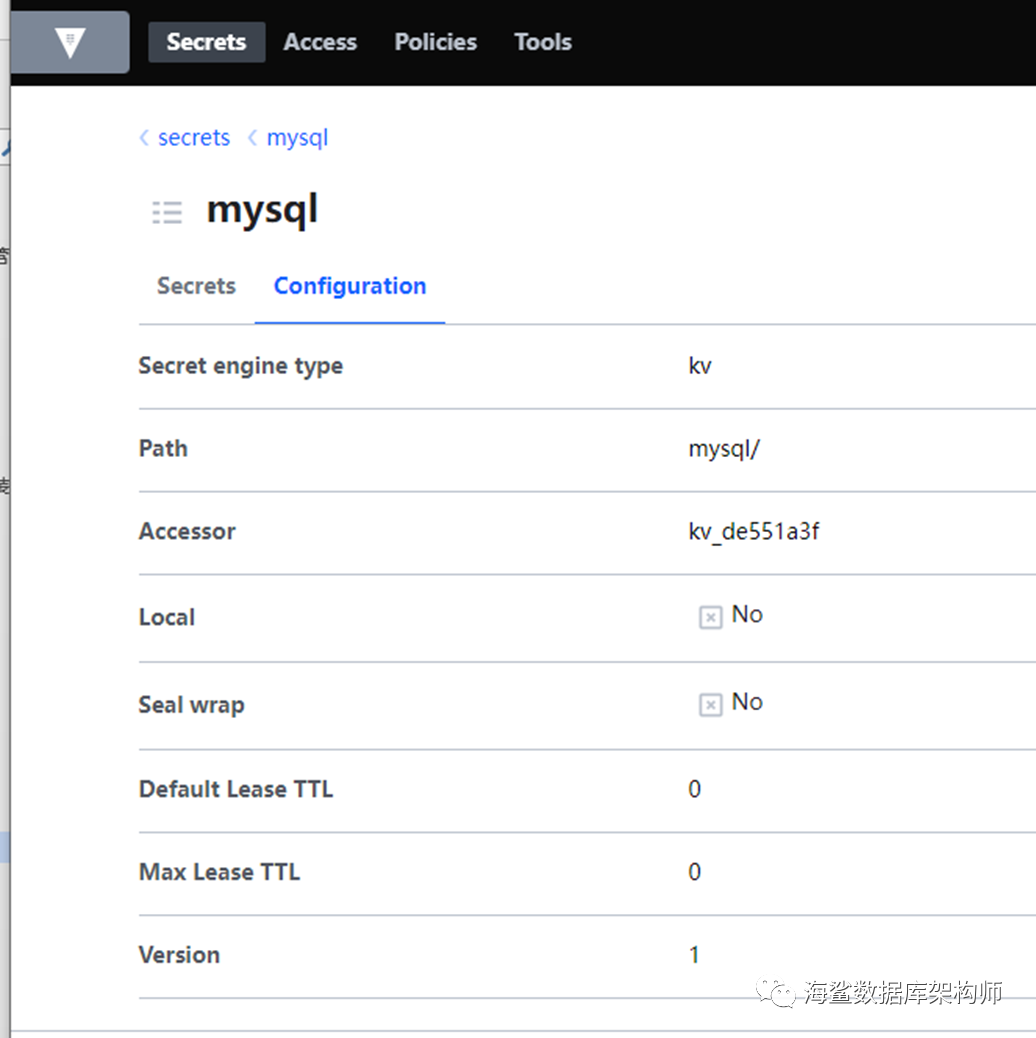
查看引擎配置