


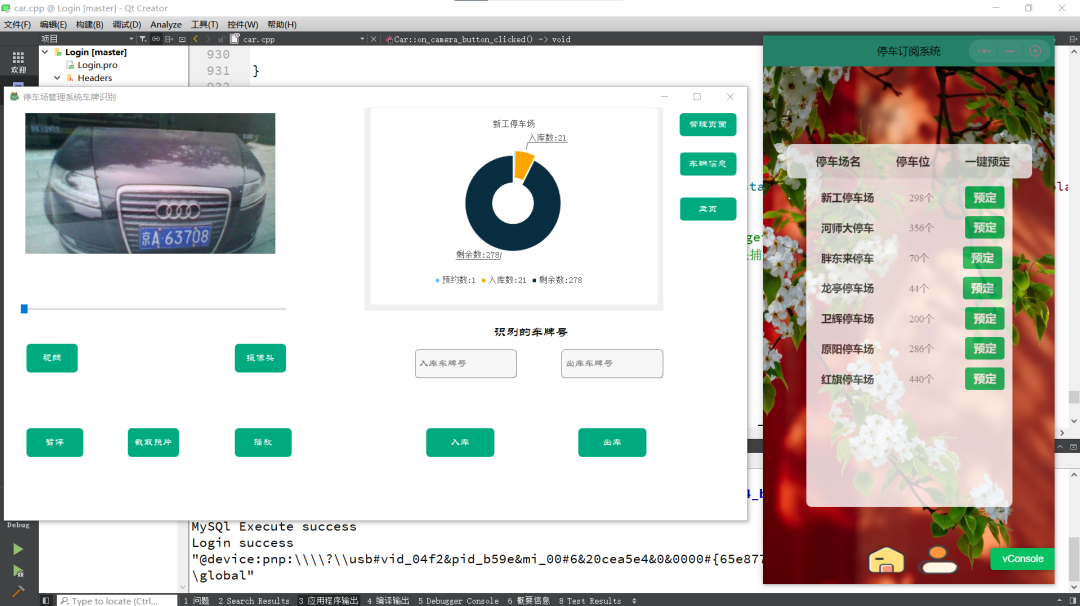
实现功能
登陆
功能注册
功能账户 信息管理
增删改查停车 信息查询车辆 入库
和车辆出库出库入库判断车牌信息判断 微信小程序调用 PHP
数据库后端查询车场车位微信小程序预定系统 调用 摄像头
和视频车牌识别剩余车位预定可视化展示(实时同步小程序) 前端多线程连接池 优化数据库和QT多次调用的TCP开销
UI展示


环境
尽量选择已下文件版本 安装Qt ,EasyPR,OpenCV路径中不要出现任何中文路径
Qt5.12.1~3 //3版本以上需要自己编译MySQL Qt Creator 4.8.1 C++11 MySql 8.0.27 OpenCV3.4.5 (难点) EasyPR 1.6 //也会有警告,忽略 (大难点) win10
Qt安装
由于直接将在QT中引用MySQL
并不能
直接使用,所以需要将MySQL的动态链接库存放到QT的bin目录下,才可以调用MySQL。QT默认使用C++11
编译
Qt下载链接[1]
编译选择要选mingw73_64,调试OpenCV需要
MySql配置
下载没有要求,能在CMD运行,Navicat调用基本没有问题 Qt+MySql
1,在QT所创建项目中的pro文件中添加sql
QT += core gui sql
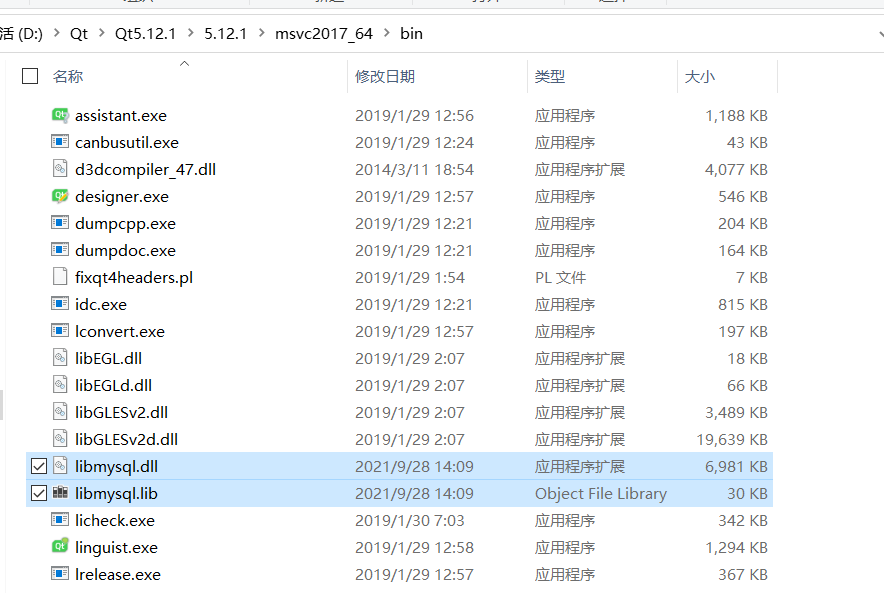
2,将
MySQL
中lib
库里面的libmysql.dll
文件和libmysql.lib
文件赋值粘贴到QT5.12.1
的msvc2017_64
文件夹bin文件内即可成功调用
OpenCV3.4.5
仔细阅读参考OpenCV的安装[2]
参考上面连接注意
使用 Qt
自带的C和C++编译器
C: "D:\Qt\Qt5.13.2\Tools\mingw730_64\bin\gcc.exe"
C++: "D:\Qt\Qt5.13.2\Tools\mingw730_64\bin\g++.exe"
不用编译生成OpenCV_world也可
不想编译/编译失败,偷懒版,百度网盘下载[3]
:https://pan.baidu.com/s/1UXjX8DrKgBaW5nWF-XppzQ?pwd=13v2
将下面对应的链接加入换将变量(解压,修改为自己位置)
D:\Qt\openCV3.4.12\openCV3.4.12-build\install\x64\mingw\bin
添加环境变量后,配置换将即可运行,关键是 Qt对应的环境
一定要对,博主使用的Qt5.13,我使用的5.12.1理论上中间版本都可以修建Qt项目,配置.pro文件, 链接修改对
,很关键
INCLUDEPATH += D:\Qt\openCV3.4.12\openCV3.4.12-build\install\include\
               D:\Qt\openCV3.4.12\openCV3.4.12-build\install\include\opencv2\
               D:\Qt\openCV3.4.12\openCV3.4.12-build\install\include\opencv

LIBS += -L D:\Qt\openCV3.4.12\openCV3.4.12-build\install\x64\mingw\lib\libopencv_*.a
修改main函数,测试
#include "mainwindow.h"
#include <QApplication>

#include <opencv2/core/core.hpp>
#include <opencv2/highgui/highgui.hpp>
#include <opencv2/imgproc/imgproc.hpp>

using  namespace cv;

int main(int argc, char *argv[])
{
    QApplication a(argc, argv);
	//修改为自己的图片链接,使用绝对地址,使用`\\`区分,注意`多`一个,或`少`一个
    cv::Mat image = imread("D:\\Qt\\Project\\OpenCV_Test\\1.jpg");
    namedWindow("Display window",WINDOW_AUTOSIZE);
    imshow("Display window",image);
    waitKey(0);

    MainWindow w;
    w.show();
    return a.exec();
}
测试视频
#include "mainwindow.h"
#include <QApplication>
#include <QDebug>
#include <QFileDialog>

#include <opencv2/highgui.hpp>
#include <opencv2/imgproc/imgproc.hpp>

using namespace cv;

int main(int argc, char *argv[])
{
    QApplication a(argc, argv);

    namedWindow("Display", WINDOW_AUTOSIZE);
    VideoCapture cap;
    cap.open("D:/Qt/Project/OpenCV_Test/Resources/test.mp4");
    if(cap.isOpened())
        qDebug()<<"Sucess!";
    else
        qDebug()<<"False!";
    Mat frame;
    for(;;)
    {
        cap >> frame;
        if(frame.empty())
            break;
        imshow("Display", frame);
        if(waitKey(33) >= 0)
            break;
    }

    return a.exec();
}
到此出
OpenCV
环境变量成功,如果失败,注意qt的版本
,以及使用qt编译的版本是不是qt编译时用的mingw73_64
EasyPR
其实也简单,关键时导入换将之后会有很多报错,对于初学者,慢慢修改是个挺熬人的过程
下载源文件EasyPR[4] OpenCV的引用,直接使用上面的就行 使用C++11编译
CONFIG += c++11
QMAKE_CXXFLAGS+=-std=c++11
下载
EasyPR1.6
之后的文件目录,我们需要也就是所选的
,test
也要,要部分代码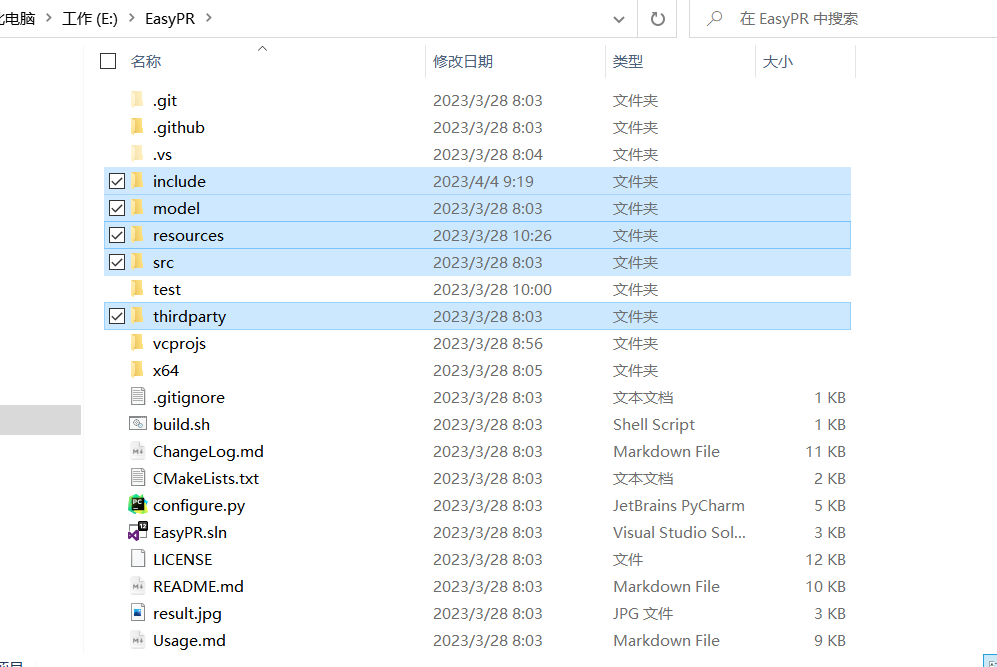
将上面
五
个文件夹保存到Qt创建
的项目地址对应
的根目录
下qt创建一个普通项目之后,添加已经存在的文件
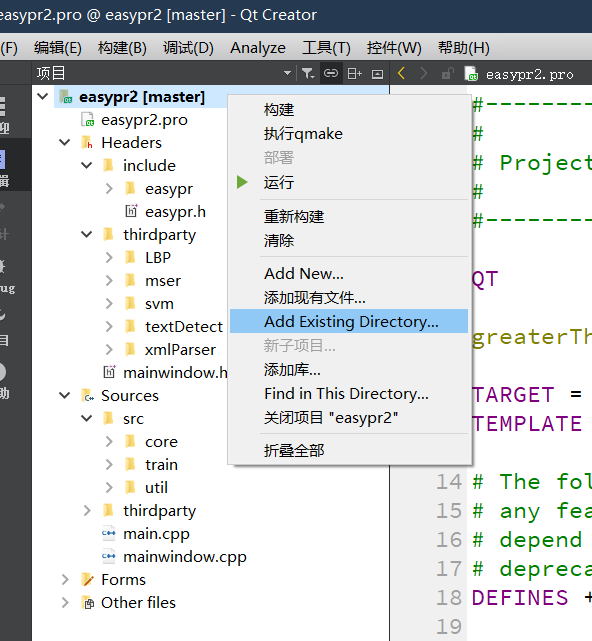
test不用添加,将剩余
4
个文件夹全部选进去,选好之后对应的.pro文件,#为删掉的,切记可能在加入test后,将会对应两个main.cpp导致最后无法运行
SOURCES += \
	    main.cpp \
    mainwindow.cpp \
        src/core/chars_identify.cpp \
    src/core/chars_recognise.cpp \
    src/core/chars_segment.cpp \
    src/core/core_func.cpp \
    src/core/feature.cpp \
    src/core/params.cpp \
    src/core/plate_detect.cpp \
    src/core/plate_judge.cpp \
    src/core/plate_locate.cpp \
    src/core/plate_recognize.cpp \
#    src/train/ann_train.cpp \
#    src/train/annCh_train.cpp \
#    src/train/create_data.cpp \
#    src/train/svm_train.cpp \
#    src/train/train.cpp \
    src/util/kv.cpp \
    src/util/program_options.cpp \
    src/util/util.cpp \
    thirdparty/LBP/helper.cpp \
    thirdparty/LBP/lbp.cpp \
    thirdparty/mser/mser2.cpp \
    thirdparty/svm/corrected_svm.cpp \
    thirdparty/textDetect/erfilter.cpp \
    thirdparty/xmlParser/xmlParser.cpp

HEADERS += \
    car.h \
    mainwindow.h \
    signup.h \
    mysql.h \
    initfile.h\
    include/easypr/core/character.hpp \
    include/easypr/core/chars_identify.h \
    include/easypr/core/chars_recognise.h \
    include/easypr/core/chars_segment.h \
    include/easypr/core/core_func.h \
    include/easypr/core/feature.h \
    include/easypr/core/params.h \
    include/easypr/core/plate.hpp \
    include/easypr/core/plate_detect.h \
    include/easypr/core/plate_judge.h \
    include/easypr/core/plate_locate.h \
    include/easypr/core/plate_recognize.h \
#    include/easypr/train/ann_train.h \
#    include/easypr/train/annCh_train.h \
#    include/easypr/train/create_data.h \
#    include/easypr/train/svm_train.h \
#    include/easypr/train/train.h \
    include/easypr/util/kv.h \
    include/easypr/util/program_options.h \
    include/easypr/util/switch.hpp \
    include/easypr/util/util.h \
    include/easypr/api.hpp \
    include/easypr/config.h \
    include/easypr/version.h \
    include/easypr.h \
#    test/accuracy.hpp \
#    test/chars.hpp \
#    test/config.hpp \
#    test/plate.hpp \
#    test/result.hpp \
    thirdparty/LBP/helper.hpp \
    thirdparty/LBP/lbp.hpp \
    thirdparty/mser/mser2.hpp \
    thirdparty/svm/precomp.hpp \
    thirdparty/textDetect/erfilter.hpp \
    thirdparty/xmlParser/xmlParser.h
# 引入easyPR所需要的依赖
DISTFILES += \
#    resources/train/ann.7z \
#    resources/train/annCh.7z \
#    resources/train/annGray.7z \
#    resources/train/svm.7z \
    model/ann.xml \
    model/ann_chinese.xml \
    model/annCh.xml \
    model/svm_hist.xml \
#    resources/image/general_test/GroundTruth_others.xml \
#    resources/image/general_test/GroundTruth_windows.xml \
#    resources/image/native_test/GroundTruth_others.xml \
#    resources/image/native_test/GroundTruth_windows.xml \
#    resources/result/Result.xml \
#    resources/text/chinese_mapping \
#    resources/text/dev_team \
#    resources/text/province_mapping \
#    resources/text/thanks \
#    resources/text/batch_test_menu \
#    resources/text/main_menu \
#    resources/text/test_menu \
#    resources/text/train_menu
加入EasyPR文件成功,接下来该Bug 首先打开 Header/include/config.h
将#define
的修改为
#define CV_VERSION_THREE_TWO
接下来发现所有的文件好像
都无法
加载EasyPR
对应的文件每个文件都打开,将头
文件无法读取
的,查
看对应的位置
,都是在include
文件夹下的文件无法
读取,所以在头文件
上面加
上include
,例如下面,有耐心查看,基本上每个文件都要修改。所有文件都打开一遍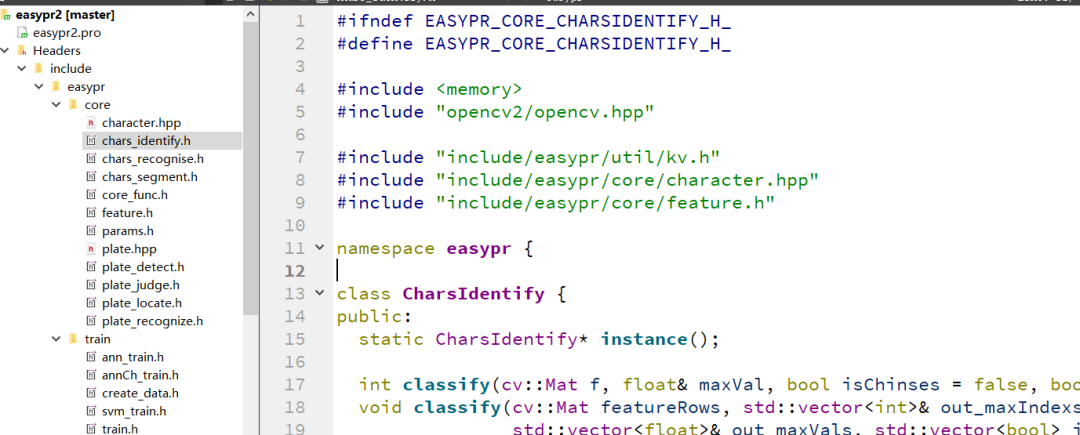
修改
Header/include/config.h
读取的model路径全部该为自己的绝对路径
,记得//
很容易不细心
,最后OpenCV无法读取
而失败
.例如下面的报错
加载断点
OpenCV: terminate handler is called! The last OpenCV error is:
OpenCV(3.4.5) Error: Parsing error (Missing or invalid SVM type) in read_params, file C:\Users\Administrator\Desktop\opencv-3.4.5\opencv-3.4.5\modules\ml\src\svm.cpp, line 2203
将其修改为如下,改成自己的路径,当然会有文件不存在的,改成统一路径就可
static const char* kDefaultSvmPath = "E://Cstudy//QT//QT_exercise//easyPR//easypr2//model/svm_hist.xml";
static const char* kLBPSvmPath = "E://Cstudy//QT//QT_exercise//easyPR//easypr2//model/svm_lbp.xml";
static const char* kHistSvmPath = "E://Cstudy//QT//QT_exercise//easyPR//easypr2//model/svm_hist.xml";

static const char* kDefaultAnnPath = "E://Cstudy//QT//QT_exercise//easyPR//easypr2//model/ann.xml";
static const char* kChineseAnnPath = "E://Cstudy//QT//QT_exercise//easyPR//easypr2//model/ann_chinese.xml";
static const char* kGrayAnnPath = "E://Cstudy//QT//QT_exercise//easyPR//easypr2//model/annCh.xml";

//This is important to for key transform to chinese
static const char* kChineseMappingPath = "E://Cstudy//QT//QT_exercise//easyPR//easypr2//model/province_mapping";
修改Qt项目 创建对应的main.cpp文件
#include <QCoreApplication>
#include <opencv2/opencv.hpp>
#include "include/easypr.h"
#include <QDebug>

using  namespace easypr;

int main(int argc, char *argv[])
{
    QCoreApplication a(argc, argv);
    qDebug()<<"加载断点";
    // 1. 加载车牌识别模型
    CPlateRecognize pr;
    pr.LoadSVM("E://Cstudy//QT//QT_exercise//easyPR//easypr2//model//svm_hist.xml");
    qDebug()<<"AVM";
    pr.LoadANN("E://Cstudy//QT//QT_exercise//easyPR//easypr2//model//ann.xml");
    qDebug()<<"ANN";
    pr.LoadChineseANN("E://Cstudy//QT//QT_exercise//easyPR//easypr2//model//ann_chinese.xml");
    qDebug()<<"ChineseANN";

    // new in v1.6
    pr.LoadGrayChANN("E://Cstudy//QT//QT_exercise//easyPR//easypr2//model//annCh.xml");
    pr.LoadChineseMapping("E://Cstudy//QT//QT_exercise//easyPR//easypr2//model//province_mapping");
    // 2. 读入待识别的车牌图片
    cv::Mat src = cv::imread("D://car.png");

    // 3. 车牌识别
    std::vector<CPlate> plates;

    pr.plateRecognize(src, plates);

    // 4. 输出识别结果
    for (auto plate : plates) {
        std::cout << "plate: " << plate.getPlateStr() << std::endl;
    }

    return a.exec();
}
修改 main.cpp
后会有大量的警告unused
,或者使用老旧
的格式,会警告,不
用管,毕竟八年没有更新
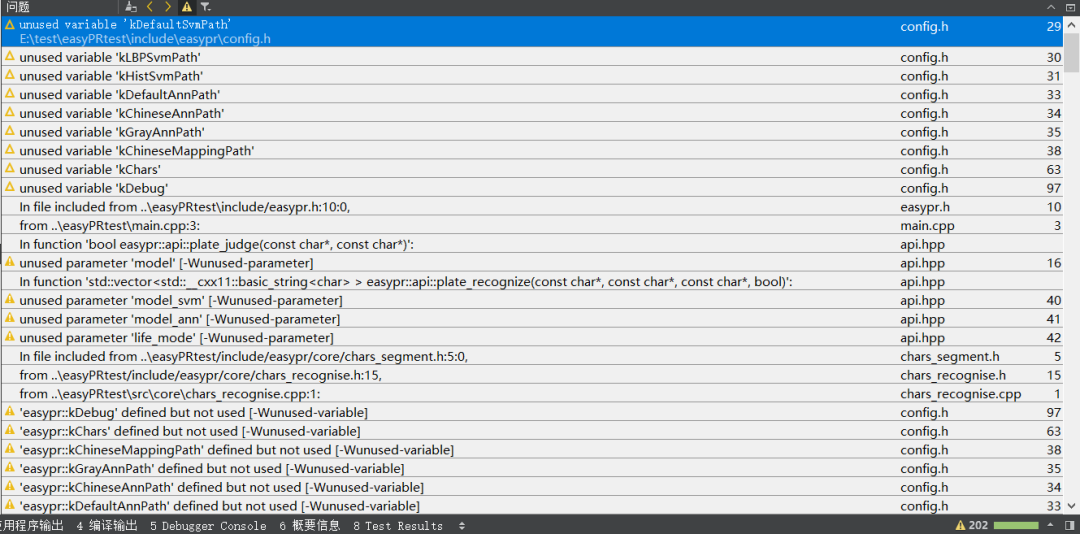
当然编译运行后,肯定 不会成功
,会有各种各样
的找不到,报错 ,肯定会有下面函数找不到,根据对应名字,在core文件里,找到头文件,把它添加到对应的文件当中
| 文件 | 解释 |
|---|---|
| plate_locate | 车牌定位 |
| plate_judge | 车牌判断 |
| plate_detect | 车牌检测,是车牌定位与车牌判断功能的组合 |
| chars_segment | 字符分割 |
| chars_identify | 字符鉴别 |
| chars_recognise | 字符识别,是字符分割与字符鉴别功能的组合 |
| plate_recognize | 车牌识别,是车牌检测与字符识别的共有子类 |
| feature | 特征提取回调函数 |
| plate | 车牌抽象 |
| core_func.h | 共有的一些函数 |
当然不想修改EasyPR,你可以把我改好的拿过去,直接修改一下model对应的绝对路径就可以运行啦。又节约了好长时间 EasyPR+OpenCV +Qt 代码测试,从停车场管理信息系统中提取吧!!!
https://github.com/foryouos/Parking_System
EasyPR在停车管理系统中的使用
代码不全,仅为例子
#include <opencv2/opencv.hpp>
#include "include/easypr.h"
#include <QDebug>

using namespace easypr;

// 1. 加载车牌识别模型
    CPlateRecognize pr;
//加载模型
pr.LoadSVM("E://Cstudy//QT//QT_exercise//easyPR//easypr2//model//svm_hist.xml");
    qDebug()<<"AVM";
    pr.LoadANN("E://Cstudy//QT//QT_exercise//easyPR//easypr2//model//ann.xml");
    qDebug()<<"ANN";
    pr.LoadChineseANN("E://Cstudy//QT//QT_exercise//easyPR//easypr2//model//ann_chinese.xml");
    qDebug()<<"ChineseANN";

    // new in v1.6
    pr.LoadGrayChANN("E://Cstudy//QT//QT_exercise//easyPR//easypr2//model//annCh.xml");
    pr.LoadChineseMapping("E://Cstudy//QT//QT_exercise//easyPR//easypr2//model//province_mapping");

//如果摄像头播放
    if(camera->state() == QCamera::ActiveState)
    {
        camera->setCaptureMode(QCamera::CaptureStillImage);  //捕获图片
        //弹出标准对话框
        //QString fileName = QFileDialog::getSaveFileName(nullptr, QString(), QString(), QString(), nullptr, QFileDialog::DontConfirmOverwrite); 保存的文件名字

        imageCapture = new QCameraImageCapture(camera);  //创建一个用于捕获图片的对象

      //当摄像头成功捕获一张图片后进行车牌识别
      connect(imageCapture, &QCameraImageCapture::imageCaptured, this, [=](int /*id*/, const QImage& img "=")
      {
          Mat src;
          Mat rgbImg;
          //src = Mat(img.height(), img.width(), CV_8UC4, (uchar*)img.bits(), img.bytesPerLine()).clone();
          src = Mat(img.height(), img.width(), CV_8UC4, const_cast<unsigned char*>(img.bits()), static_cast<size_t>(img.bytesPerLine())).clone();

          cvtColor(src, rgbImg, CV_BGRA2RGB);  //将OpenCV中颜色通道排列方式与Qt中不同的图片格式转换为Qt中正常的图片格式
          //QImage qImg(rgbImg.data, rgbImg.cols, rgbImg.rows, rgbImg.step, QImage::Format_RGB888);
          QImage qImg(rgbImg.data, rgbImg.cols, rgbImg.rows, static_cast<int>(rgbImg.step), QImage::Format_RGB888);

          //缩放图片到指定大小
          QSize newSize(200,100);
          QImage scaledImg = qImg.scaled(newSize,Qt::KeepAspectRatio);

          //使用easyPR获取车牌信息
          std::vector<easypr::CPlate> plates;
          m_plateRecognize.plateRecognize(rgbImg,plates,0);
          for (auto plate : plates) {
              std::cout << "plate: " << plate.getPlateStr() << std::endl;
          }
          qDebug()<<"内部输出";
          if(plates.size()>0)
          {
              //显示车牌图片和号码
              easypr::CPlate plate = plates[0];
              Mat plateImg = plate.getPlateMat();
              QImage qPlateImg(plateImg.data,plateImg.cols,plateImg.rows,static_cast<int>(plateImg.step), QImage::Format_RGB888);
              ui->screen_label->setPixmap(QPixmap::fromImage(qPlateImg));

              QString plateStr = QString::fromLocal8Bit(plate.getPlateStr().c_str());
              // 获取车牌号码的部分字符串
              QStringList list = plateStr.split(":");
              if (list.size() >= 2) {
                  plateStr = list[1].trimmed();
              }
              ui->Car_idinput->setText(plateStr);
              ui->Car_output->setText(plateStr);
              qDebug()<<plateStr;
              std::cout << "plate: " << plate.getPlateStr() << std::endl;
          }


      });

        //开始进行捕获
        imageCapture->capture(fileName);  //捕获图片,保存到要保存的目录为上面对话框设定的目录
    }
参考资料
Qt下载链接: https://download.qt.io/archive/qt/5.12/5.12.1/
[2]安装: https://blog.csdn.net/Mr_robot_strange/article/details/110677323
[3]下载: https://pan.baidu.com/s/1UXjX8DrKgBaW5nWF-XppzQ?pwd=13v2
[4]EasyPR: https://github.com/liuruoze/EasyPR
