


TutorialsPoint Rust 教程
来源:易百教程
Rust教程
Rust是现代系统编程语言侧重于安全性和速度。它通过不使用垃圾收集实现了内存安全。Rust是针对多核体系提出的语言,并且吸收一些其他动态语言的重要特性,比如不需要管理内存,比如不会出现Null指针等。 Rust官方网站:http://www.rust-lang.org/
Rust特点:
- 零成本抽象
- 移动语义
- 保证内存安全
- 线程没有数据竞争
- 特性为基础的泛型
- 模式匹配
- 类型推断
- 最小运行时
- 高效的C绑定
Rust 最早是在2010年7月的Mozilla的社区峰会上公之于众的,当时就有人问以后是否会用Rust重写Firefox,Brenda说希望如此。Rust目前还处于初期的开发阶段,开发团队目前并不想花太多的时间在语法上。
注意: Rust 示例使用了最新版本来构建。确保计算机上已经安装最新版本Rust(v1.0)。
Rust下载和安装 - Rust教程
1、在Linux和Mac上安装Rust:
在Linux和Mac上安装Rust(稳定的二进制)的一个简单的方法,只需要在shell中运行以下命令:
$ curl -sSf https://static.rust-lang.org/rustup.sh | sh
一个简单的方法来安装测试版二进制的Rust在Linux和Mac上,只需要在shell中运行这个:
$ curl -sSf https://static.rust-lang.org/rustup.sh | sh -s -- --channel=beta
一个简单的方法来安装Rust的二进制在Linux和Mac上,只需要在shell中运行这个命令:
$ curl -sSf https://static.rust-lang.org/rustup.sh | sh -s -- --channel=nightly
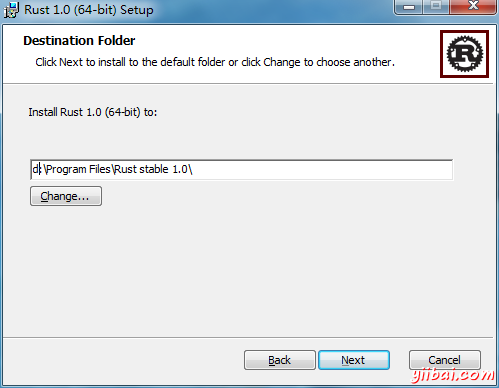
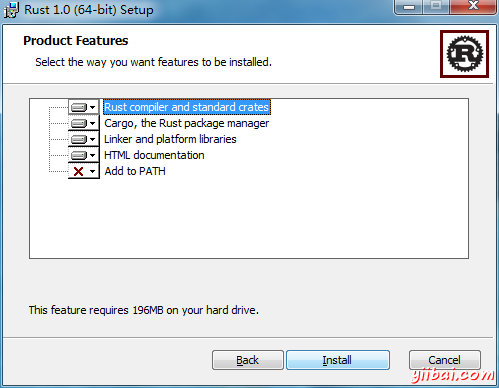
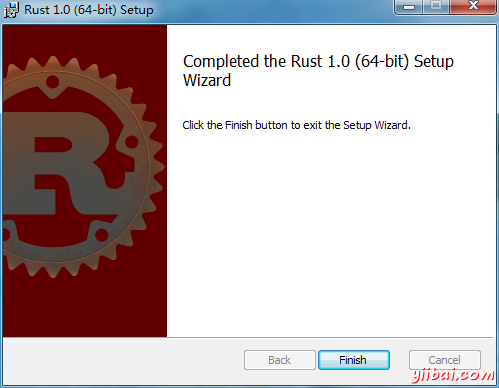
2、在Windows上安装Rust:
请访问以下网址:http://www.rust-lang.org/ ,并下载 rust-1.0.0-x86_64-pc-windows-gnu.msi 安装过程参考以下: 第一步: 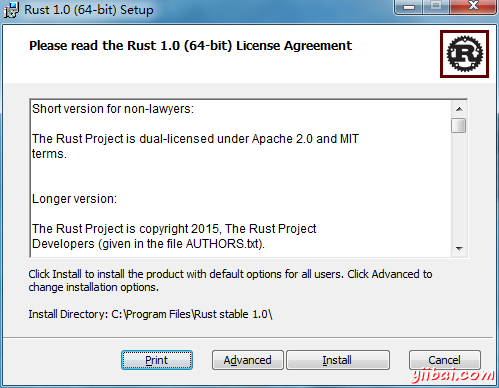
Rust Hello World - Rust教程
Rust第一个程序 Hello World
这是传统的Hello World程序的源代码(Rust语言看就是这个样子)。
// This is the main function
fn main() {
// The statements here will be executed when the compiled binary is called
// Print text to the console
println!("Hello World!");
}
println! 是文本打印到控制台的一个宏。
可以用Rust编译器生成二进制文件: rustc.
$ rustc hello.rs
rustc 将会产生一个二进制文件 hello ,并可以被执行:
$ ./hello
Hello World!
Rust注释 - Rust教程
Rust注释
任何程序都有注释,并且Rust确实支持以下几个不同的注释:
- 规则注释其由编译器忽略:
- // 行注释,到该行的末尾.
- /* 块注释,直到结束分隔符. */
- 这会被解析成HTML库文档注释:文档:
- /// 下列项目生成文档库.
- //! 生成文档库的封闭项.
fn main() {
// This is an example of a line comment
// Notice how there are two slashes at the beginning of the line
// And that nothing written inside these will be read by the compiler
// println!("Hello, world!");
// Run it. See? Now try deleting the two slashes, and run it again.
/*
* This is another type of comment, the block comment. In general,
* the line comment is the recommended comment style however the
* block comment is extremely useful for debugging
*/
/*
Note, the previous column of `*` was entirely for style. There's
no actual need for it.
*/
// Observe how block comments allow easy expression manipulation
// which line comments do not. Deleting the comment deliminators
// will change the result:
let x = 5 + /* 90 + */ 5;
println!("Is `x` 10 or 100? x = {}", x);
}
可参考:
Rust格式化打印 - Rust教程
1.2 Rust格式化打印
打印是通过一系列在标准定义std::fmt其中一些宏处理包括:
- format!: 写格式化的文本到字符串
- print!: 类似于 format! 但文本打印到控制台上。
- println!: 类似于 print! 但追加一个换行符。
以相同的方式解析全部文本。加号是正确的格式将在编译时进行检查。
fn main() {
// In general, the `{}` will be automatically replaced with any
// arguments. These will be stringified.
println!("{} days", 31);
// Without a suffix, 31 becomes an i32\. You can change what type 31 is,
// with a suffix.
// There are various optional patterns this works with. Positional
// arguments can be used.
println!("{0}, this is {1}. {1}, this is {0}", "Alice", "Bob");
// As can named arguments.
println!("{subject} {verb} {predicate}",
predicate="over the lazy dog",
subject="the quick brown fox",
verb="jumps");
// Special formatting can be specified after a `:`.
println!("{} of {:b} people know binary, the other half don't", 1, 2);
// It will even check to make sure the correct number of arguments are
// used.
println!("My name is {0}, {1} {0}", "Bond");
// FIXME ^ Add the missing argument: "James"
// Create a structure which contains an `i32`. Name it `Structure`.
struct Structure(i32);
// However, custom types such as this structure require more complicated
// handling. This will not work.
println!("This struct `{}` won't print...", Structure(3));
// FIXME ^ Comment out this line.
}
std::fmt 包括多个 traits 支配文本的显示。 两个重要的基本形式如下:
- fmt::Debug: 使用 {:?} 标记。格式文本用于调试的目的。
- fmt::Display: 使用 {} 标记。在一个更优雅的,用户友好的方式设置文本格式。
这里, fmt::Display 被使用,因为std库提供这些类型。 打印文本自定义类型,需要更多的步骤。
Rust原语 - Rust教程
Rust可以访问各种原语。一个示例包括:
- 有符号整数: i8, i16, i32, i64 和isize (指针大小)
- 无符号整数: u8, u16, u32, u64 和 usize (指针大小)
- 浮点: f32, f64
- char Unicode标值一样 'a', 'α' 和 '∞' (每4字节)
- bool 以及 true 或 false
- 和单元类型 (), 其唯一的值也是 ()
- 数组类似于 [1, 2, 3]
- 元组类似于 (1, true)
变量是可以注释类型。数字可另外经由后缀或默认值。整数默认为 i32 ,浮点数到 f64.
fn main() {
// Variables can be type annotated.
let logical: bool = true;
let a_float: f64 = 1.0; // Regular annotation
let an_integer = 5i32; // Suffix annotation
// Or a default will be used.
let default_float = 3.0; // `f64`
let default_integer = 7; // `i32`
let mut mutable = 12; // Mutable `i32`.
// Error! The type of a variable can't be changed
mutable = true;
}
另请参见:
Rust常量和运算符 - Rust教程
Rust常量和运算符
整数 1, 浮点数 1.2, 字符 'a', 字符串 "abc", 布尔 true 和单位类型 () 可以用常量来表示。
整数可选地,使用十六进制,或者使用八进制或二进制记数法表示为前缀: 0x, 0o 或 0b.
下划线可以插在数值常量来提高可读性,如:. 1_000 就类似于 1000, 并且 0.000_001 类似于 0.000001.
我们需要告诉编译器,使用常量的类型。现在,我们将使用 u32 后缀表明该文本是一个无符号的32位整数, 和 i32 后缀以表明它是一个符号的32位整数。
现有运算符和它们的优先级类似于<font color="#4183c4">C-类语言</font>
fn main() {
// Integer addition
println!("1 + 2 = {}", 1u32 + 2);
// Integer subtraction
println!("1 - 2 = {}", 1i32 - 2);
// TODO ^ Try changing `1i32` to `1u32` to see why the type is important
// Short-circuiting boolean logic
println!("true AND false is {}", true && false);
println!("true OR false is {}", true || false);
println!("NOT true is {}", !true);
// Bitwise operations
println!("0011 AND 0101 is {:04b}", 0b0011u32 & 0b0101);
println!("0011 OR 0101 is {:04b}", 0b0011u32 | 0b0101);
println!("0011 XOR 0101 is {:04b}", 0b0011u32 ^ 0b0101);
println!("1 << 5 is {}", 1u32 << 5);
println!("0x80 >> 2 is 0x{:x}", 0x80u32 >> 2);
// Use underscores to improve readability!
println!("One million is written as {}", 1_000_000u32);
}
Rust元组 - Rust教程
元组是不同类型的值的集合。 元组使用括号构造 (), 每个元组本身是类型签名值 (T1, T2, ...), 这里 T1, T2 是其成员的类型。 函数可以使用元组返回多个值,元组可以包含任意数量的值。
// Tuples can be used as function arguments and as return values
fn reverse(pair: (i32, bool)) -> (bool, i32) {
// `let` can be used to bind the members of a tuple to variables
let (integer, boolean) = pair;
(boolean, integer)
}
fn main() {
// A tuple with a bunch of different types
let long_tuple = (1u8, 2u16, 3u32, 4u64,
-1i8, -2i16, -3i32, -4i64,
0.1f32, 0.2f64,
'a', true);
// Values can be extracted from the tuple using tuple indexing
println!("long tuple first value: {}", long_tuple.0);
println!("long tuple second value: {}", long_tuple.1);
// Tuples can be tuple members
let tuple_of_tuples = ((1u8, 2u16, 2u32), (4u64, -1i8), -2i16);
// Tuples are printable
println!("tuple of tuples: {:?}", tuple_of_tuples);
let pair = (1, true);
println!("pair is {:?}", pair);
println!("the reversed pair is {:?}", reverse(pair));
// To create one element tuples, the comma is required to tell them apart
// from a literal surrounded by parentheses
println!("one element tuple: {:?}", (5u32,));
println!("just an integer: {:?}", (5u32));
}
Rust数组和切片 - Rust教程
Rust数组和切片
数组是同一类型的对象的集合 T, 存储在连续内存中。 用方括号 [] 创建数组, 以及它们的大小在编译的时候判定,是它们的类型签名的一部分 [T; size].
切片和数组相似,但它们的大小在编译时是不知道的. 相反,切片是一个双字对象,第一个字是一个指针中的数据,第二个字是切片的长度。切片可借用数组的截面,并具有式签名 &[T].
use std::mem;
// This function borrows a slice
fn analyze_slice(slice: &[i32]) {
println!("first element of the slice: {}", slice[0]);
println!("the slice has {} elements", slice.len());
}
fn main() {
// Fixed-size array (type signature is superfluous)
let xs: [i32; 5] = [1, 2, 3, 4, 5];
// All elements can be initialized to the same value
let ys: [i32; 500] = [0; 500];
// Indexing starts at 0
println!("first element of the array: {}", xs[0]);
println!("second element of the array: {}", xs[1]);
// `len` returns the size of the array
println!("array size: {}", xs.len());
// Arrays are stack allocated
println!("array occupies {} bytes", mem::size_of_val(&xs));
// Arrays can be automatically borrowed as slices
println!("borrow the whole array as a slice");
analyze_slice(&xs);
// Slices can point to a section of an array
println!("borrow a section of the array as a slice");
analyze_slice(&ys[1 .. 4]);
// Out of bound indexing yields a panic
println!("{}", xs[5]);
}
Rust自定义类型 - Rust教程
Rust自定义类型
Rust 自定义数据类型主要通过两个关键字:
- struct: 定义一个结构
- enum: 定义枚举
常量,也可以通过 const 和 static 关键字创建。 参考: 可视性
Rust结构 - Rust教程
Rust结构
有三种类型的结构(“structs”),可以使用被struct 关键字创建 :
- 元组结构,这是命名为元组的基础。
- 典型的 C 结构)
- 单元结构,这是无字段,对泛型有用。
// A unit struct
struct Nil;
// A tuple struct
struct Pair(i32, f64);
// A struct with two fields
struct Point {
x: f64,
y: f64,
}
// Structs can be reused as fields of another struct
#[allow(dead_code)]
struct Rectangle {
p1: Point,
p2: Point,
}
fn main() {
// Instantiate a `Point`
let point: Point = Point { x: 0.3, y: 0.4 };
// Access the fields of the point
println!("point coordinates: ({}, {})", point.x, point.y);
// Destructure the point using a `let` binding
let Point { x: my_x, y: my_y } = point;
let _rectangle = Rectangle {
// struct instantiation is an expression too
p1: Point { x: my_y, y: my_x },
p2: point,
};
// Instantiate a unit struct
let _nil = Nil;
// Instantiate a tuple struct
let pair = Pair(1, 0.1);
// Destructure a tuple struct
let Pair(integer, decimal) = pair;
println!("pair contains {:?} and {:?}", integer, decimal);
}
Rust枚举 - Rust教程
Rust枚举
enum关键字允许创建标签联合, 它可以被用作代数数据类型 (ADT)。
// Allow Cons and Nil to be referred to without namespacing
use List::{Cons, Nil};
// A linked list node, which can take on any of these two variants
enum List {
// Cons: Tuple struct that wraps an element and a pointer to the next node
Cons(u32, Box<list>),
// Nil: A node that signifies the end of the linked list
Nil,
}
// Methods can be attached to an enum
impl List {
// Create an empty list
fn new() -> List {
// `Nil` has type `List`
Nil
}
// Consume a list, and return the same list with a new element at its front
fn prepend(self, elem: u32) -> List {
// `Cons` also has type List
Cons(elem, Box::new(self))
}
// Return the length of the list
fn len(&self) -> u32 {
// `self` has to be matched, because the behavior of this method
// depends on the variant of `self`
// `self` has type `&List`, and `*self` has type `List`, matching on a
// concrete type `T` is preferred over a match on a reference `&T`
match *self {
// Can't take ownership of the tail, because `self` is borrowed;
// instead take a reference to the tail
Cons(_, ref tail) => 1 + tail.len(),
// Base Case: An empty list has zero length
Nil => 0
}
}
// Return representation of the list as a (heap allocated) string
fn stringify(&self) -> String {
match *self {
Cons(head, ref tail) => {
// `format!` is similar to `print!`, but returns a heap
// allocated string instead of printing to the console
format!("{}, {}", head, tail.stringify())
},
Nil => {
format!("Nil")
},
}
}
}
fn main() {
// Create an empty linked list
let mut list = List::new();
// Append some elements
list = list.prepend(1);
list = list.prepend(2);
list = list.prepend(3);
// Show the final state of the list
println!("linked list has length: {}", list.len());
println!("{}", list.stringify());
}</list>
Rust常量 - Rust教程
Rust常量
Rust有两种不同类型,可以在任何范围内,包括全局声明的常量。这都需要显式类型注解声明:
- const: 一个不可改变值(通常情况下)。
- static: 有一个可能是可变的变量 'static 使用寿命。
一个特殊情况是 "string" 常量. 它可以直接被分配到一个 static 变量不需要修改,因为它的类型签名: &'static str 具有所要求的使用寿命为 'static. 所有其他类型的引用必须特别注明,以便它们完成 'static 使用寿命. 这看似微小,但因为需要明确标注隐藏以区别。
// Globals are declared outside all other scopes.
static LANGUAGE: &'static str = "Rust";
const THRESHOLD: i32 = 10;
fn is_big(n: i32) -> bool {
// Access constant in some function
n > THRESHOLD
}
fn main() {
let n = 16;
// Access constant in the main thread
println!("This is {}", LANGUAGE);
println!("The threshold is {}", THRESHOLD);
println!("{} is {}", n, if is_big(n) { "big" } else { "small" });
// Error! Cannot modify a `const`.
THRESHOLD = 5;
// FIXME ^ Comment out this line
}
另请参见:
const/static RFC, 'static 使用寿命
Rust变量绑定 - Rust教程
Rust通过静态类型提供类型安全。变量绑定可以在声明类型注解的时候。然而,在大多数情况下,编译器将能够推断出变量的类型从上下文,严重降低了注解负担。
值(如文本)可以绑定变量,使用 let 绑定。
fn main() {
let an_integer = 1u32;
let a_boolean = true;
let unit = ();
// copy `an_integer` into `copied_integer`
let copied_integer = an_integer;
println!("An integer: {:?}", copied_integer);
println!("A boolean: {:?}", a_boolean);
println!("Meet the unit value: {:?}", unit);
// The compiler warns about unused variable bindings; these warnings can
// be silenced by prefixing the variable name with an underscore
let _unused_variable = 3u32;
let noisy_unused_variable = 2u32;
// FIXME ^ Prefix with an underscore to suppress the warning
}
Rust变量绑定-可变性 - Rust教程
可变性
变量绑定在默认情况下是不可变的, 但是这可以使用 mut 修辞符来覆盖。
fn main() {
let _immutable_binding = 1;
let mut mutable_binding = 1;
println!("Before mutation: {}", mutable_binding);
// Ok
mutable_binding += 1;
println!("After mutation: {}", mutable_binding);
// Error!
_immutable_binding += 1;
// FIXME ^ Comment out this line
}
编译器将抛出一个详细的诊断有关的可变性的错误。
Rust变量绑定-范围和阴影 - Rust教程
范围和阴影
变量绑定有一个范围,并且被约束在一个块中。块是语句的集合括在大括号 {} 内,所以, 变量阴影 是被允许的。
fn main() {
// This binding lives in the main function
let long_lived_binding = 1;
// This is a block, and has a smaller scope than the main function
{
// This binding only exists in this block
let short_lived_binding = 2;
println!("inner short: {}", short_lived_binding);
// This binding *shadows* the outer one
let long_lived_binding = 5_f32;
println!("inner long: {}", long_lived_binding);
}
// End of the block
// Error! `short_lived_binding` doesn't exist in this scope
println!("outer short: {}", short_lived_binding);
// FIXME ^ Comment out this line
println!("outer long: {}", long_lived_binding);
}
Rust变量绑定-声明 - Rust教程
可以先声明变量绑定,以后(然后)在初始化。 然而,这种形式很少使用,因为它可能导致使用未初始化的变量。
fn main() {
// Declare a variable binding
let a_binding;
{
let x = 2;
// Initialize the binding
a_binding = x * x;
}
println!("a binding: {}", a_binding);
let another_binding;
// Error! Use of uninitialized binding
println!("another binding: {}", another_binding);
// FIXME ^ Comment out this line
another_binding = 1;
println!("another binding: {}", another_binding);
}
编译器禁止使用未初始化变量,因为这将导致不确定的行为。
Rust类型转换 - Rust教程
Rust类型转换
Rust提供原始类型到隐式类型之间的转换(强制)。但是,显式类型转换可以使用关键字as进行。
整数类型之间的转换规则遵循C约定, 除了在C是未定义行为的转换。所有类型转换整型的行为在Rust都很好的定义。
fn main() {
let decimal = 65.4321_f32;
// Error! No implicit conversion
let integer: u8 = decimal;
// FIXME ^ Comment out this line
// Explicit conversion
let integer = decimal as u8;
let character = integer as char;
println!("Casting: {} -> {} -> {}", decimal, integer, character);
// when casting any value to an unsigned type, T,
// std::T::MAX + 1 is added or subtracted until the value
// fits into the new type
// 1000 already fits in a u16
println!("1000 as a u16 is: {}", 1000 as u16);
// 1000 - 256 - 256 - 256 = 232
println!("1000 as a u8 is : {}", 1000 as u8);
// -1 + 256 = 255
println!(" -1 as a u8 is : {}", (-1i8) as u8);
// For positive numbers, this is the same as the modulus
println!("1000 mod 256 is : {}", 1000 % 256);
// When casting to a signed type, the result is the same as
// first casting to the corresponding unsigned type then
// taking the two's complement.
// Unless it already fits, of course.
println!(" 128 as a i16 is: {}", 128 as i16);
// 128 as u8 -> 128, whose two's complement in eight bits is:
println!(" 128 as a i8 is : {}", 128 as i8);
// repeating the example above
// 1000 as u8 -> 232
println!("1000 as a i8 is : {}", 1000 as i8);
// and the two's complement of 232 is -24
println!(" 232 as a i8 is : {}", 232 as i8);
}
