


1、准备工作
1.1、虚拟机准备
#配置静态IP#因为我这里的虚拟机网络模式是桥接模式,所以在配置的时候,一定要注意虚拟机的IP网段要你和主机保持#一致#主机的IP可以通过运行命令:ipconfig /all 进行查询[root@linux-oracle1 ~]# vim /etc/sysconfig/network-scripts/ifcfg-enp0s3TYPE="Ethernet"BOOTPROTO="static"DEFROUTE="yes"PEERDNS="yes"PEERROUTES="yes"IPADDR="192.168.100.88"GATEWAY="192.168.100.1"NETMASK="255.255.255.0"DNS1="202.96.128.86"IPV4_FAILURE_FATAL="no"IPV6INIT="yes"IPV6_AUTOCONF="yes"IPV6_DEFROUTE="yes"IPV6_PEERDNS="yes"IPV6_PEERROUTES="yes"IPV6_FAILURE_FATAL="no"IPV6_ADDR_GEN_MODE="stable-privacy"NAME="enp0s3"UUID="41947f86-52f0-41d7-b5e1-767a77373e9e"DEVICE="enp0s3"ONBOOT="yes"#以上是我的虚拟机配置,可以参考。GATEWAY、NETMASK及DNS1(为了能上网)这些和主机的默认网关、子#网掩码和DNS保持一次,只是IPADDR和主机做区分,例如我的主机IP为192.168.100.80,虚拟机的IP我这#里设置了192.168.100.88#重启网络,让配置生效[root@linux-oracle1 ~]# service network restartRestarting network (via systemctl): [ 确定 ]#这里静态IP就配置完成了!#配置主机名[root@Linux-init ~]# hostnamectl set-hostname 主机名例如:hostnamectl set-hostname Linux-oracle1退出后重新登录,就可以看到主机名已经生效#配置hosts[root@linux-oracle1 ~]# vim /etc/hosts127.0.0.1 localhost localhost.localdomain localhost4 localhost4.localdomain4::1 localhost localhost.localdomain localhost6 localhost6.localdomain6192.168.100.88 Linux-oracle1#把虚拟机IP和主机名的映射关系写在配置文件最后一行
1.2、系统环境准备
#关闭Selinux[root@linux-oracle1 ~]# vim /etc/selinux/config# This file controls the state of SELinux on the system.# SELINUX= can take one of these three values:# enforcing - SELinux security policy is enforced.# permissive - SELinux prints warnings instead of enforcing.# disabled - No SELinux policy is loaded.SELINUX=disabled# SELINUXTYPE= can take one of three two values:# targeted - Targeted processes are protected,# minimum - Modification of targeted policy. Only selected processes are protected.# mls - Multi Level Security protection.SELINUXTYPE=targeted#SELINUX参数由原来的enforcing改成disabled#关闭防火墙[root@linux-oracle1 ~]# systemctl stop firewalld.service[root@linux-oracle1 ~]# systemctl disable firewalld.serviceRemoved symlink /etc/systemd/system/dbus-org.fedoraproject.FirewallD1.service.Removed symlink /etc/systemd/system/basic.target.wants/firewalld.service.#优化系统内核[root@linux-oracle1 ~]# vim /etc/sysctl.conf# sysctl settings are defined through files in# /usr/lib/sysctl.d/, /run/sysctl.d/, and /etc/sysctl.d/.## Vendors settings live in /usr/lib/sysctl.d/.# To override a whole file, create a new file with the same in# /etc/sysctl.d/ and put new settings there. To override# only specific settings, add a file with a lexically later# name in /etc/sysctl.d/ and put new settings there.## For more information, see sysctl.conf(5) and sysctl.d(5).net.ipv4.ip_local_port_range= 9000 65500fs.file-max = 6815744kernel.shmall = 10523004kernel.shmmax = 6465333657kernel.shmmni = 4096kernel.sem = 250 32000 100 128net.core.rmem_default=262144net.core.wmem_default=262144net.core.rmem_max=4194304net.core.wmem_max=1048576fs.aio-max-nr = 1048576[root@linux-oracle1 ~]# sysctl -pnet.ipv4.ip_local_port_range = 9000 65500fs.file-max = 6815744kernel.shmall = 10523004kernel.shmmax = 6465333657kernel.shmmni = 4096kernel.sem = 250 32000 100 128net.core.rmem_default = 262144net.core.wmem_default = 262144net.core.rmem_max = 4194304net.core.wmem_max = 1048576fs.aio-max-nr = 1048576
2、安装数据库
#安装依赖[root@linux-oracle1 ~]# yum -y install gcc gcc-c++ make binutilscompat-libstdc++-33 elfutils-libelf elfutils-libelf-devel glibc glibc-commonglibc-devel libaio libaio-devel libgcclibstdc++ libstdc++-devel unixODBC unixODBC-devel#创建用户和组[root@linux-oracle1 ~]# groupadd -g 200 oinstall[root@linux-oracle1 ~]# groupadd -g 201 dba[root@linux-oracle1 ~]# useradd -u 440 -g oinstall -G dba oracle[root@linux-oracle1 ~]# passwd oracle更改用户 oracle 的密码 。新的 密码:无效的密码:密码包含用户名在某些地方重新输入新的 密码:passwd:所有的身份验证令牌已经成功更新。#修改系统资源限制[root@linux-oracle1 ~]# vim /etc/security/limits.conf #末尾添加如下oracle soft nproc 2047oracle hard nproc 16384oracle soft nofile 1024oracle hard nofile 65536[root@linux-oracle1 ~]# vim /etc/pam.d/loginsession required pam_namespace.so #在该行下面添加session required pam_limits.so#创建安装目录及设置权限[root@linux-oracle1 ~]# mkdir /opt/oracle/app/ -p[root@linux-oracle1 ~]# mkdir /opt/oracle/oradata/[root@linux-oracle1 ~]# chmod 755 /opt/oracle/[root@linux-oracle1 ~]# chmod 775 /opt/oracle/app/[root@linux-oracle1 ~]# chown oracle.oinstall -R /opt/oracle/#切换到Oracle用户,通过rz命令将安装介质上传到服务器。也可以通过其他软件(例如:winscp、sftp等)#如果没有rz命令可以用root用户通过yum -y install lrzsz命令来安装[root@linux-oracle1 ~]# su - oracle[oracle@linux-oracle1 ~]$ cd /opt/oracle/[oracle@linux-oracle1 oracle]$ rz[oracle@linux-oracle1 oracle]$ ll总用量 2487200drwxrwxr-x. 2 oracle oinstall 6 1月 19 09:55 appdrwxr-xr-x. 2 oracle oinstall 6 1月 19 09:55 oradata-rw-r--r--. 1 oracle oinstall 1395582860 10月 10 2016 p13390677_112040_Linux-x86-64_1of7.zip-rw-r--r--. 1 oracle oinstall 1151304589 10月 10 2016 p13390677_112040_Linux-x86-64_2of7.zip#解压[oracle@linux-oracle1 oracle]$ unzip p13390677_112040_Linux-x86-64_1of7.zip[oracle@linux-oracle1 oracle]$ unzip p13390677_112040_Linux-x86-64_2of7.zip[oracle@linux-oracle1 oracle]$ ll总用量 2487200drwxrwxr-x. 2 oracle oinstall 6 1月 19 09:55 appdrwxr-xr-x. 7 oracle oinstall 136 8月 27 2013 databasedrwxr-xr-x. 2 oracle oinstall 6 1月 19 09:55 oradata-rw-r--r--. 1 oracle oinstall 1395582860 10月 10 2016 p13390677_112040_Linux-x86-64_1of7.zip-rw-r--r--. 1 oracle oinstall 1151304589 10月 10 2016 p13390677_112040_Linux-x86-64_2of7.zip#我们可以看到当前目录下生成了一个叫database的目录#设置oracle环境变量,oracle用户下执行[oracle@linux-oracle1 ~]$ vi ~/.bash_profile #末尾添加如下内容:export ORACLE_BASE=/opt/oracle/appexport ORACLE_HOME=$ORACLE_BASE/product/11.2.0/dbhome_1export PATH=$PATH:$ORACLE_HOME/binexport ORACLE_PID=orclexport ORACLE_SID=orcl[oracle@linux-oracle1 ~]$ source ~/.bash_profile #立即生效#掉图形界面开始安装#安装xhost[root@linux-oracle1 ~]# yum whatprovides "*/xhost"已加载插件:fastestmirror, langpacksLoading mirror speeds from cached hostfile* base: mirrors.aliyun.com* extras: mirrors.aliyun.com* updates: mirror.bit.edu.cnextras/7/x86_64/filelists_db | 207 kB 00:00:00updates/7/x86_64/filelists_db | 3.5 MB 00:00:02xorg-x11-server-utils-7.7-20.el7.x86_64 : X.Org X11 X server utilities源 :base匹配来源:文件名 :/usr/bin/xhost[root@linux-oracle1 ~]# yum install xorg-x11-server-utils-7.7-20.el7.x86_64 #安装的包名根据上一步执行结果不同而不同#此时我们发现执行xhost + 命令还是有报错。如下:[root@linux-oracle1 ~]# export DISPLAY=linux-oracle1:1[root@linux-oracle1 ~]# xhost +xhost: unable to open display "linux-oracle1:1"#我可以通过安装vnc服务来解决[root@linux-oracle1 ~]# yum install tigervnc-server#启动vnc服务[root@linux-oracle1 ~]# vncserverYou will require a password to access your desktops.Password:Verify:Would you like to enter a view-only password (y/n)? yPassword:Verify:xauth: file /root/.Xauthority does not existNew 'linux-oracle1:1 (root)' desktop is linux-oracle1:1Creating default startup script /root/.vnc/xstartupCreating default config /root/.vnc/configStarting applications specified in /root/.vnc/xstartupLog file is /root/.vnc/linux-oracle1:1.log#再次执行xhost +[root@linux-oracle1 ~]# export DISPLAY=linux-oracle1:1[root@linux-oracle1 ~]# xhost +access control disabled, clients can connect from any host#此时我们看到的输出结果就正常了。#为了方便Xmanager调用图形界面。我们需要安装xterm[root@linux-oracle1 ~]# yum install xterm
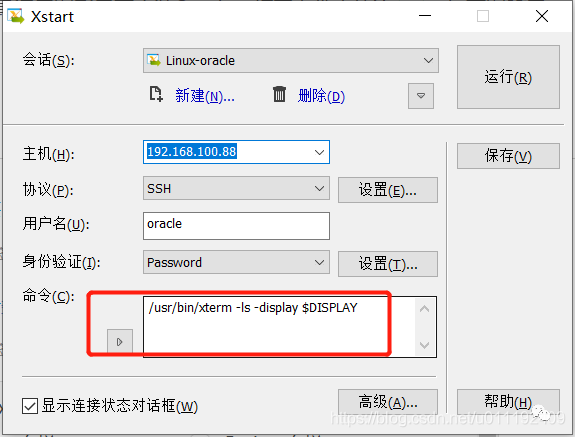
#通过Xmanager工具调用图形界面安装Oracle,打开套件中的Xstart,如下图所示:
#在上图所在的页面再次执行xhost +[root@linux-oracle1 ~]# export DISPLAY=linux-oracle1:1[root@linux-oracle1 ~]# xhost +access control disabled, clients can connect from any host
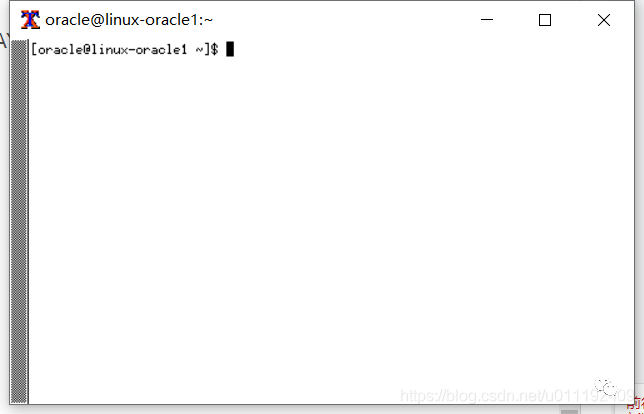
命令执行后的效果如下图:
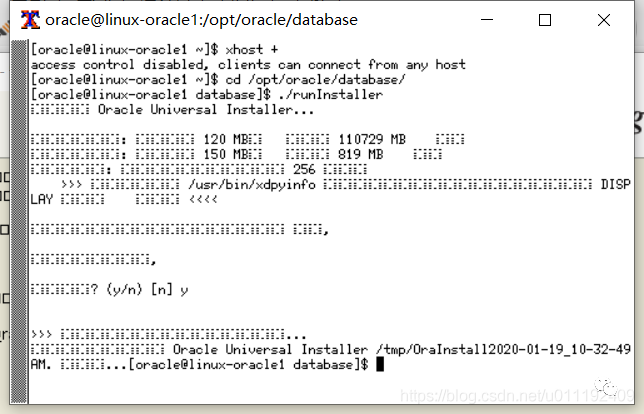
此时,我们看到调出来的图形界面是乱码,如下图:

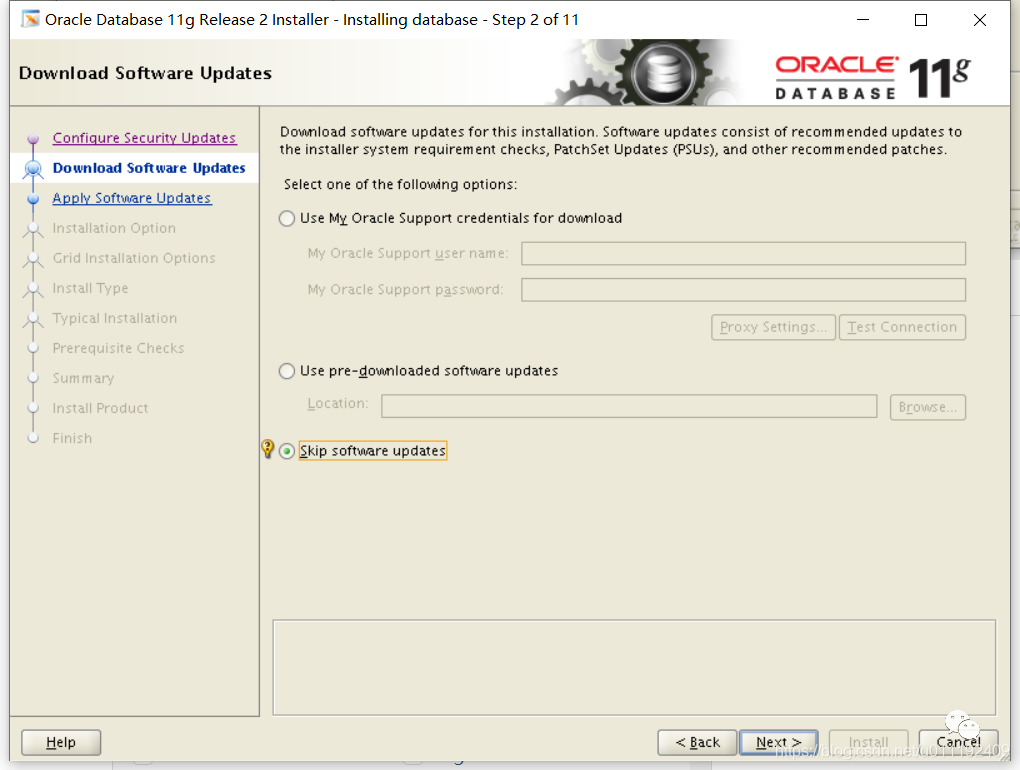
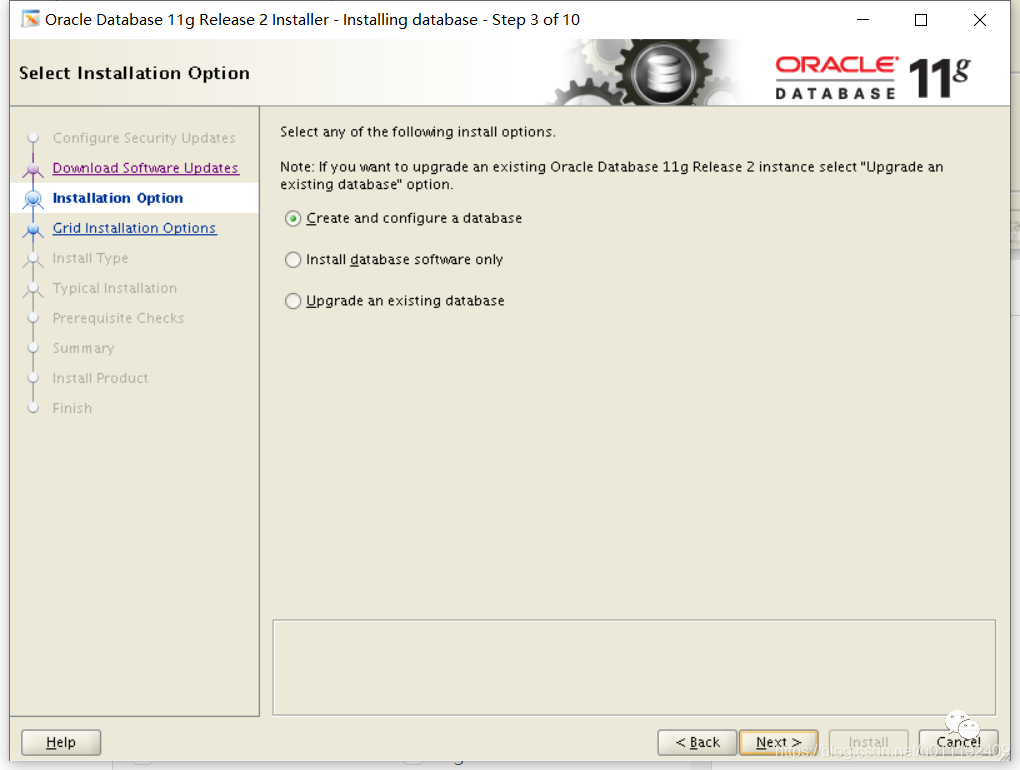
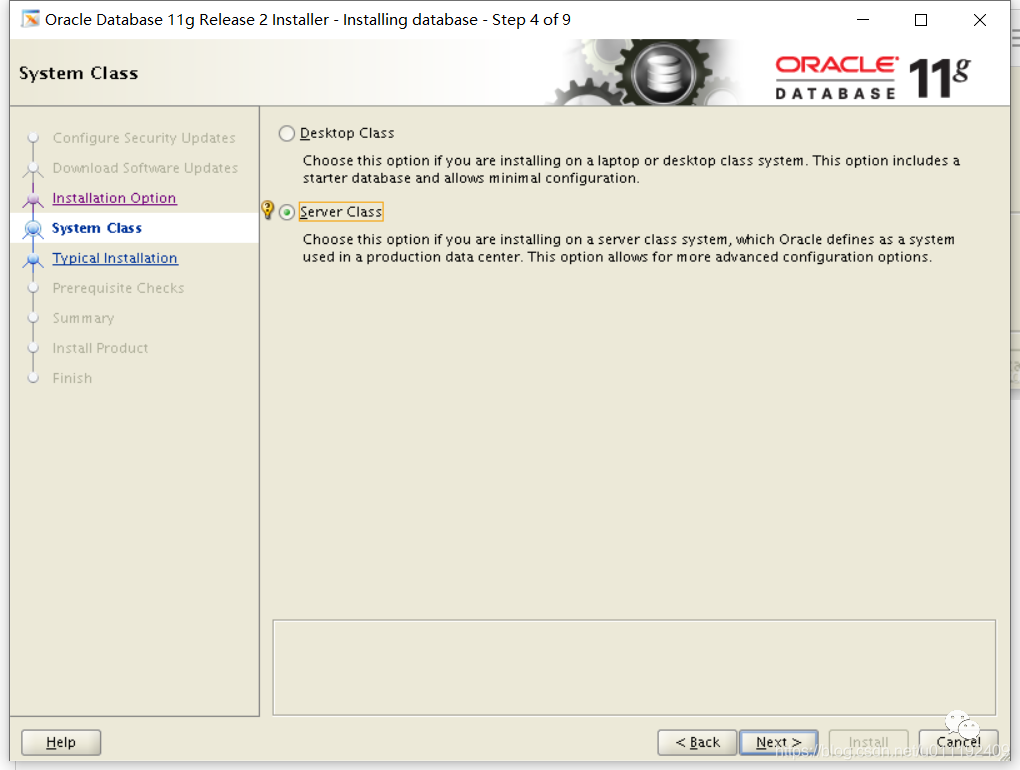
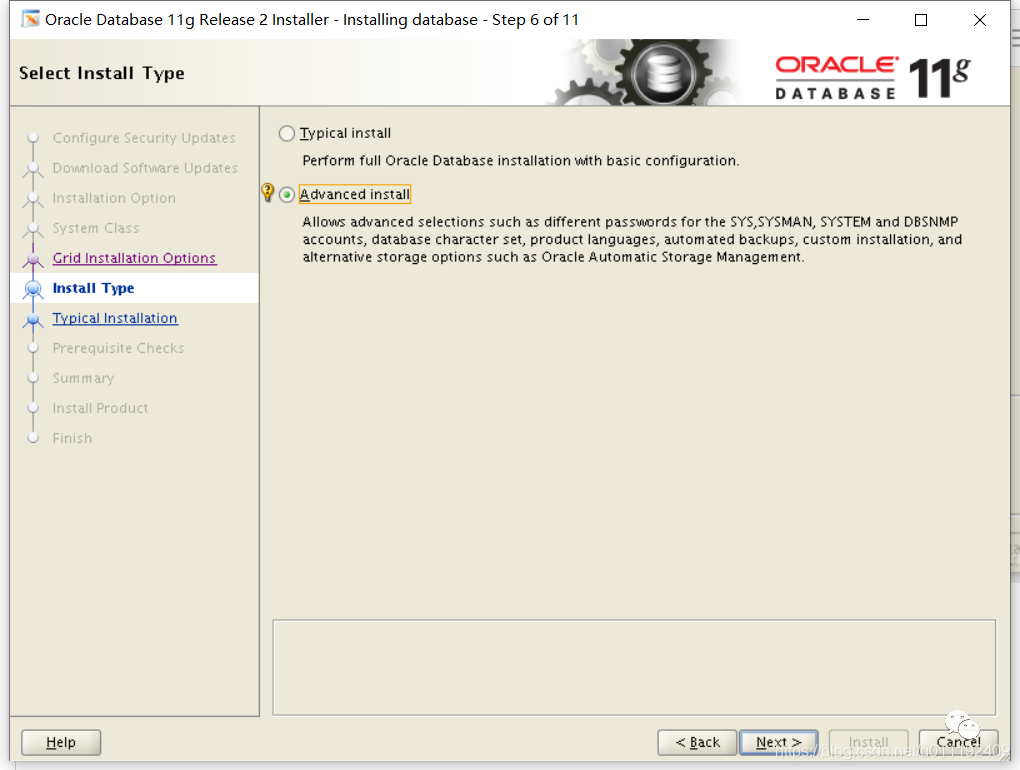
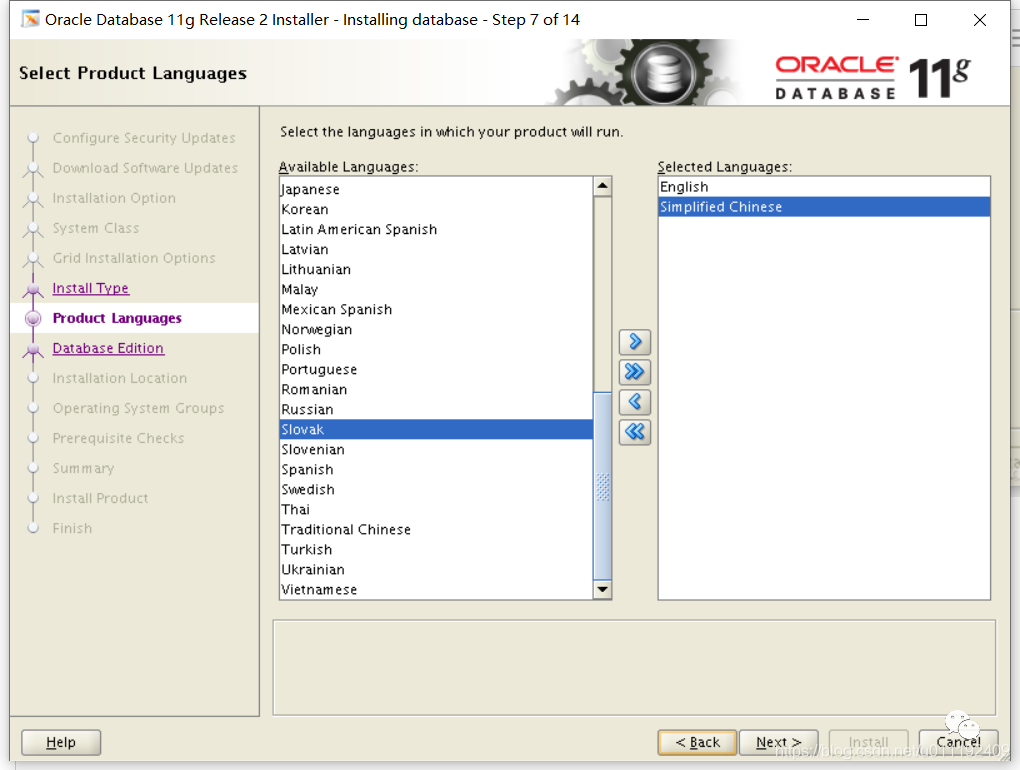
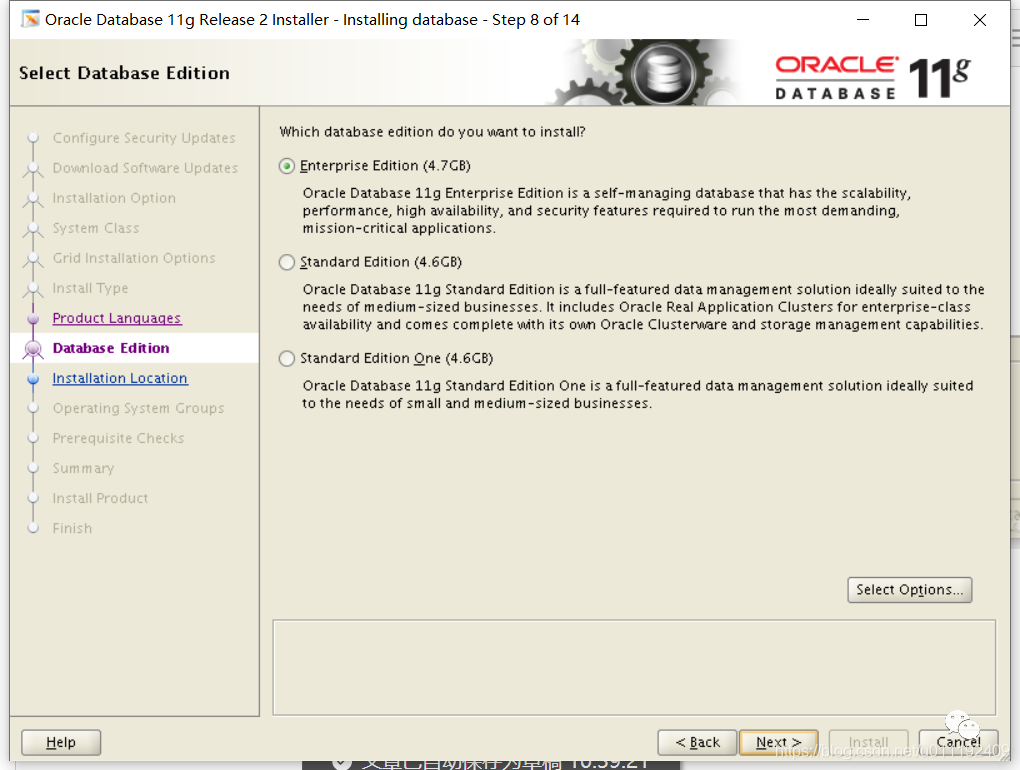
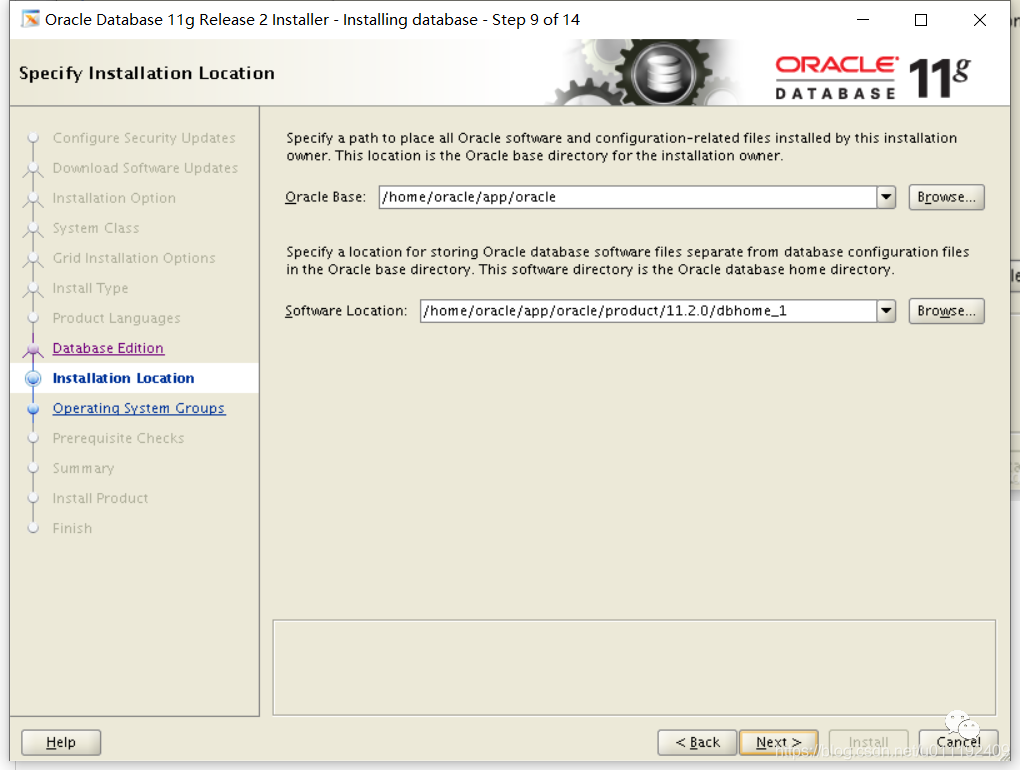
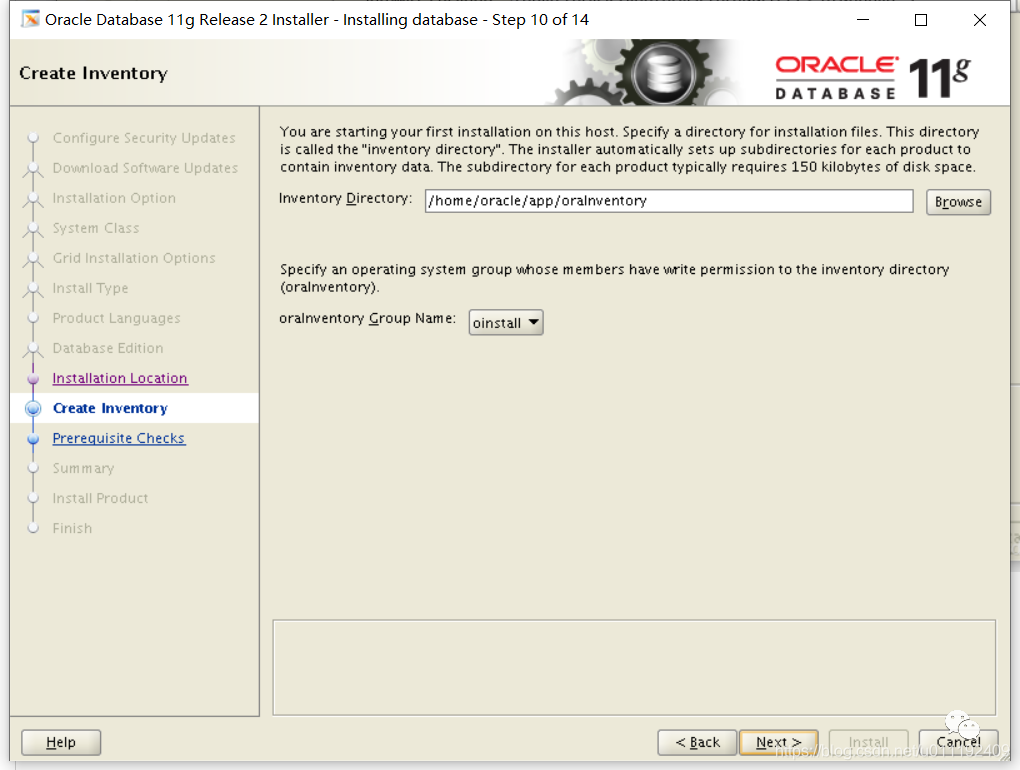
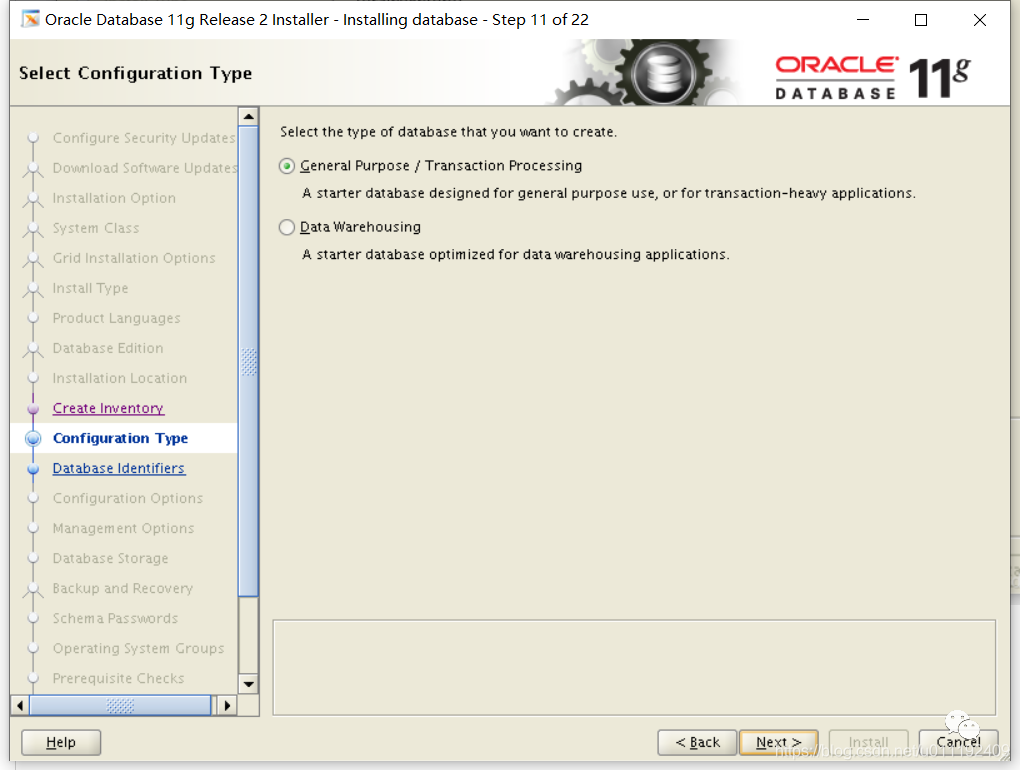
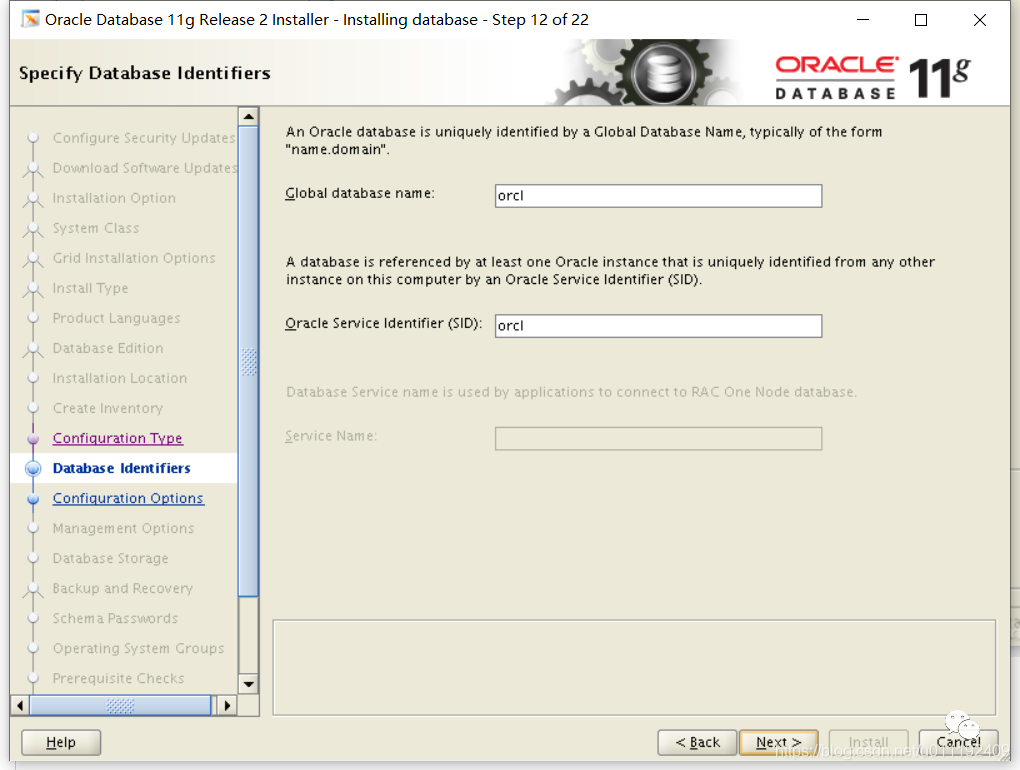
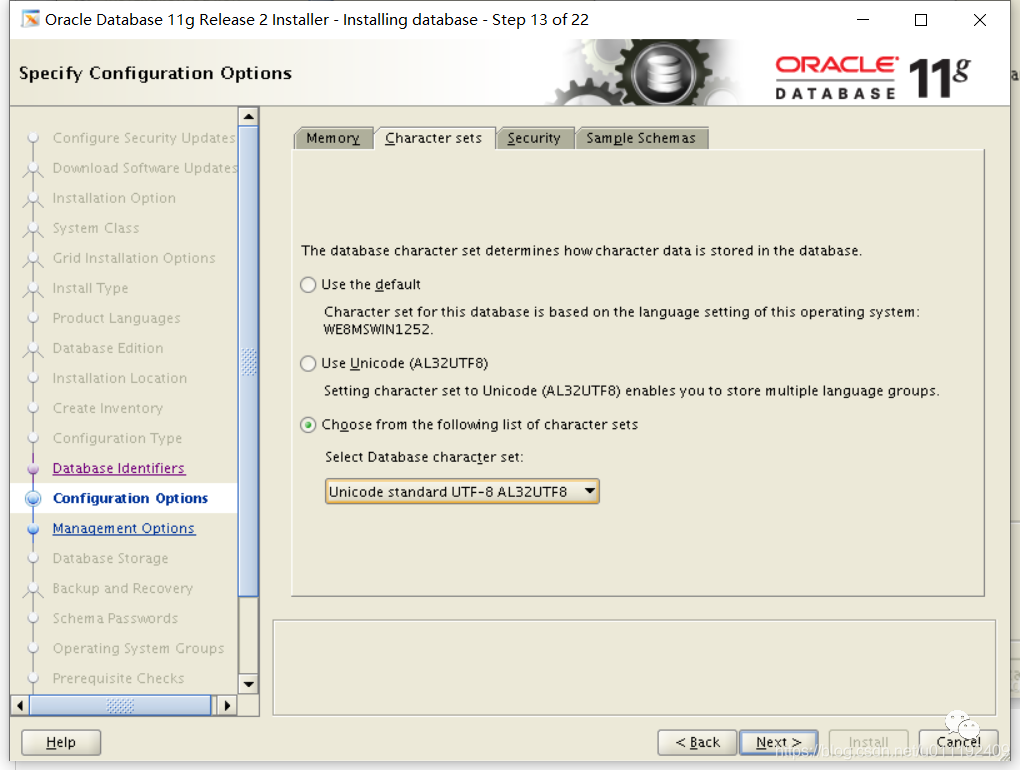
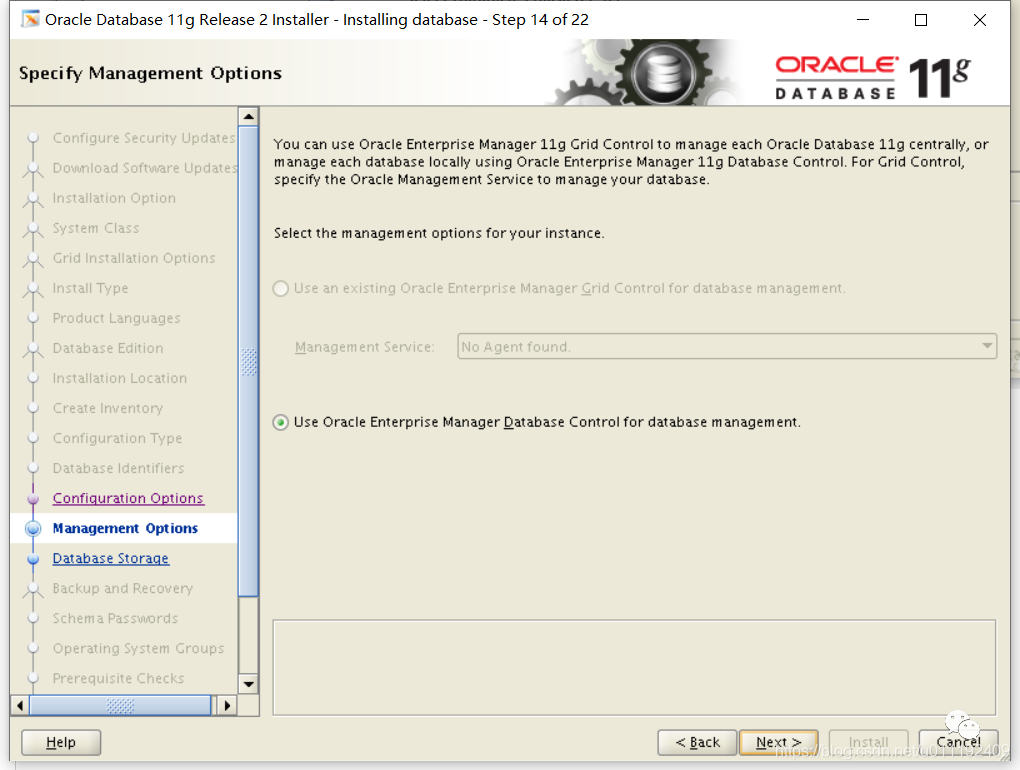
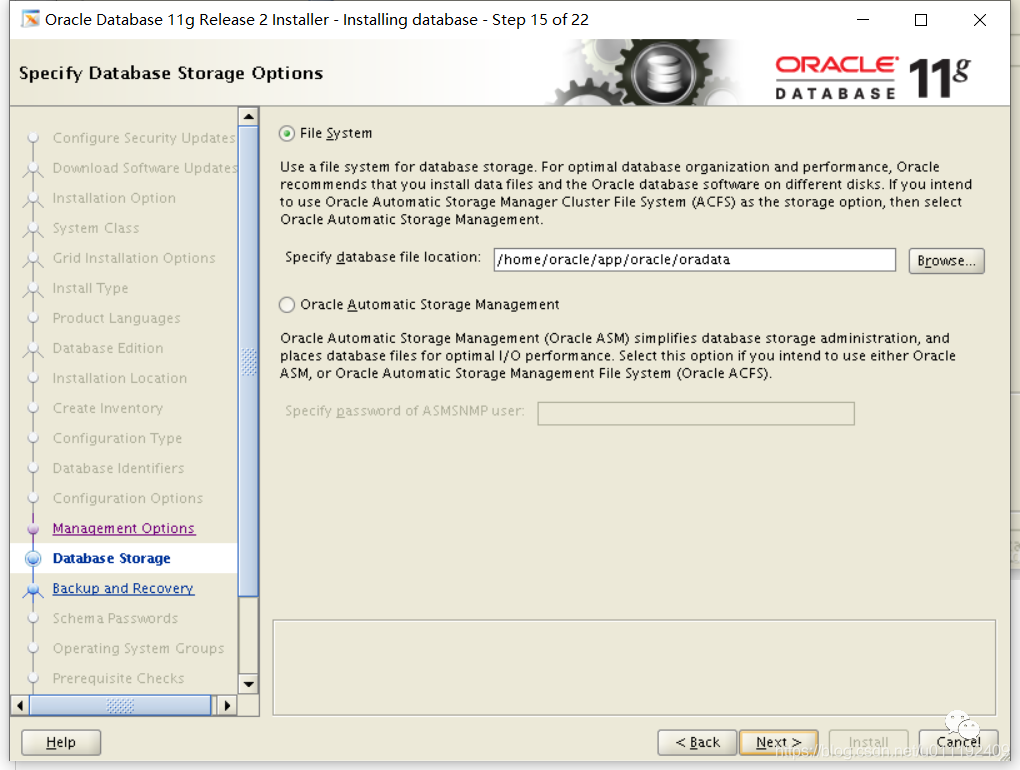
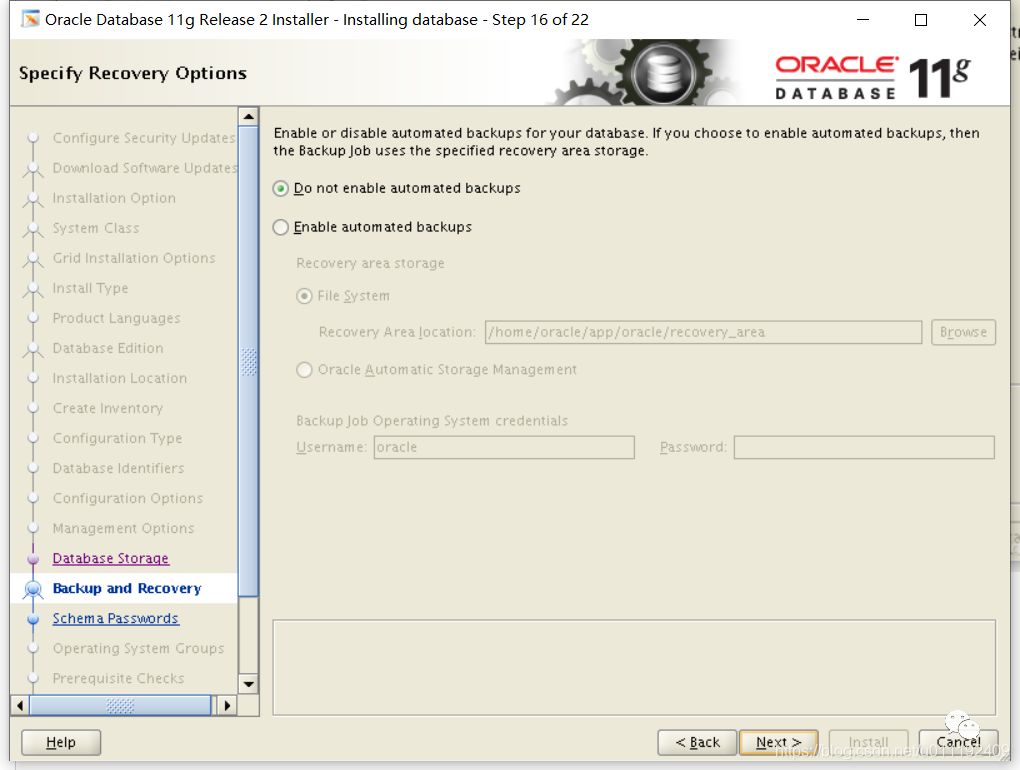
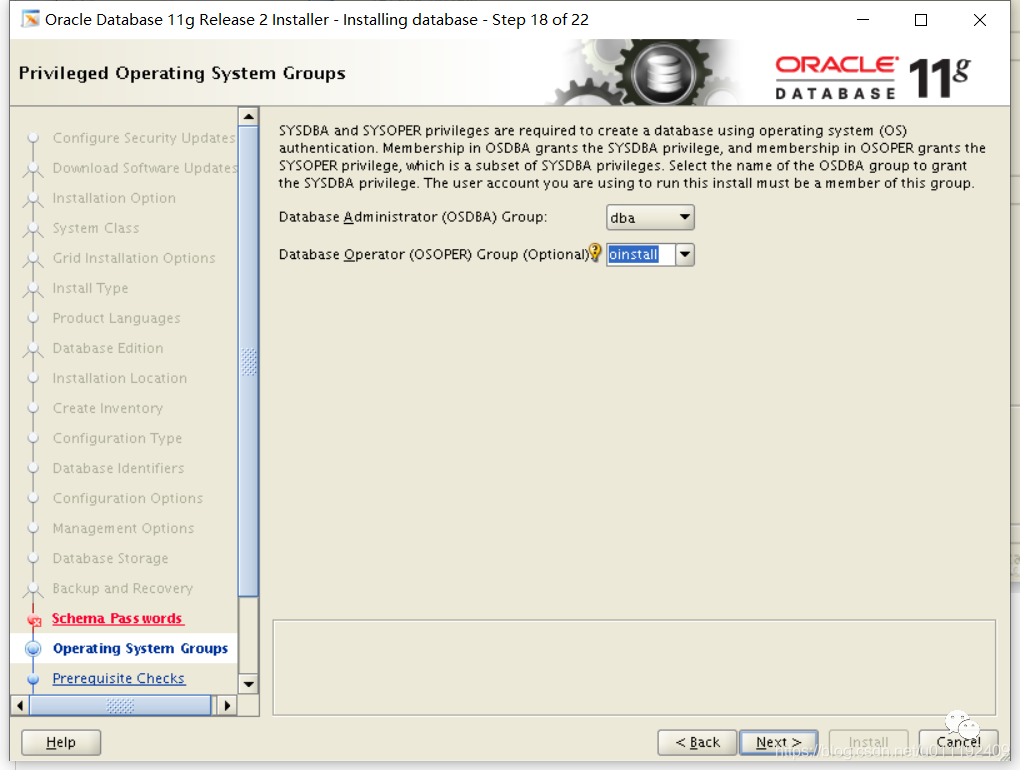
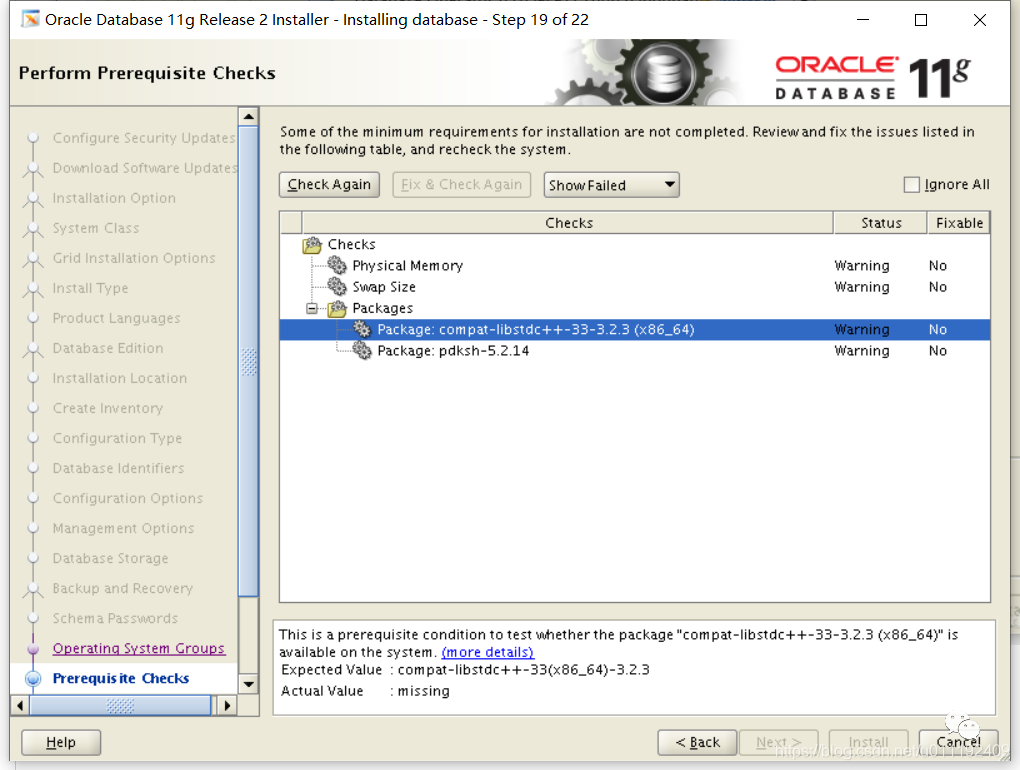
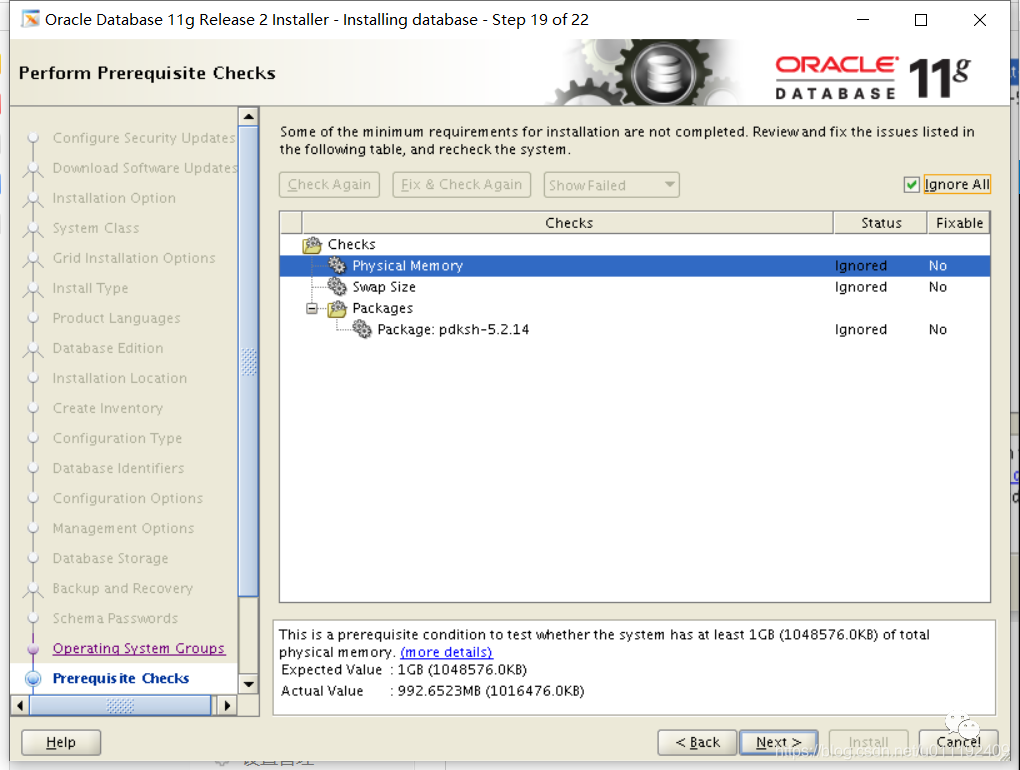
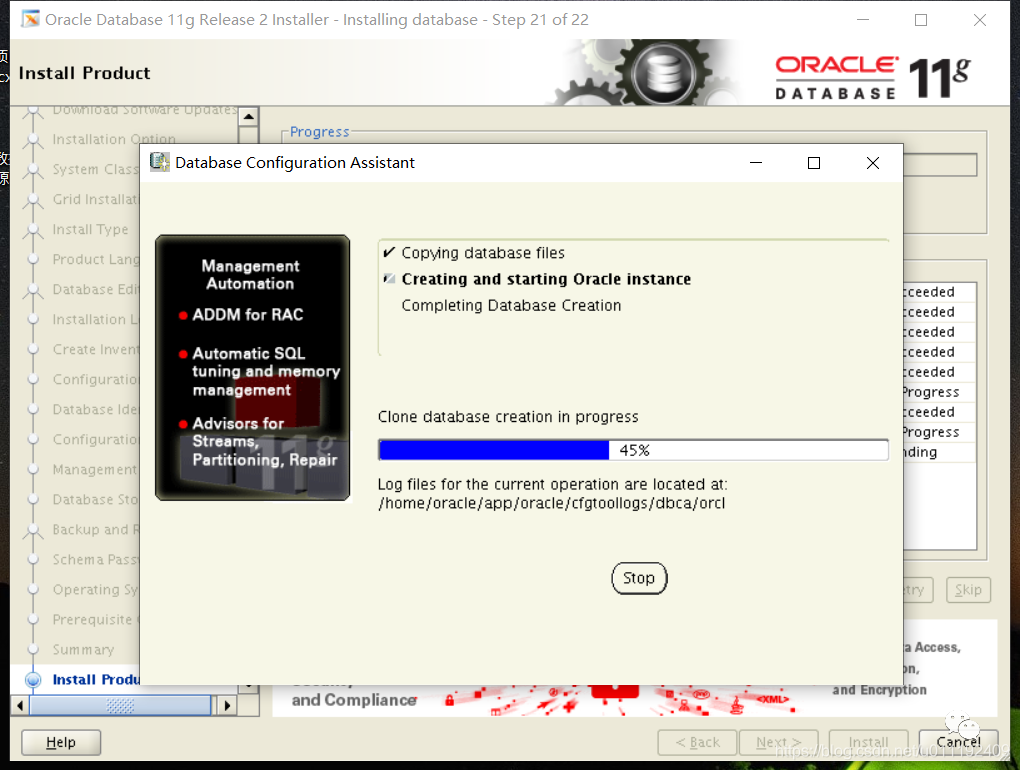
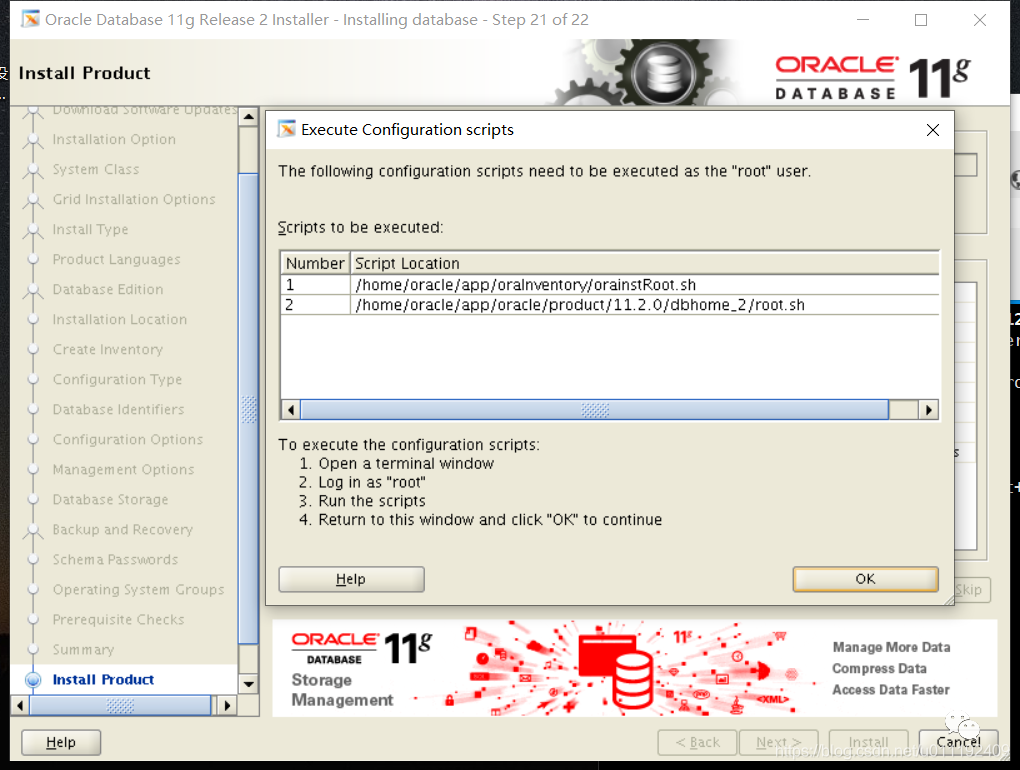
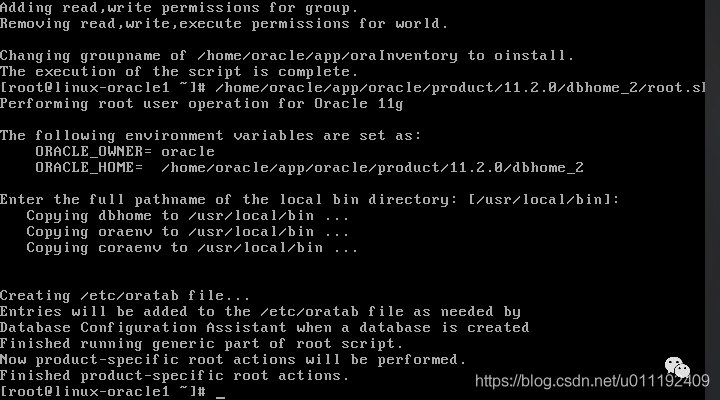
3、开始图形界面安装


文章转载自WorkLifeRecords,如果涉嫌侵权,请发送邮件至:contact@modb.pro进行举报,并提供相关证据,一经查实,墨天轮将立刻删除相关内容。
