


前言
这次梳理的篇幅主要是涉及图像仿射变换的图像旋转,利用python编程实现不同方式的图像旋转,对巩固自己的python知识也是很有帮助的,进一步的对图像处理的内容也是帮助很大的。
但更多的是抛砖引玉,希望对你们有所帮助。
感谢各位鼓励与支持🌹🌹🌹,往期文章都在最后梳理出来了(●'◡'●)
接下来就以问题的形式展开梳理👇
利用getRotationMatrix2D实现旋转
opencv中getRotationMatrix2D函数可以直接帮我们生成M, 而不需要我们在程序里计算三角函数:
getRotationMatrix2D(center, angle, scale)
参数解析
center 旋转中心点 (cx, cy) 你可以随意指定
angle 旋转的角度单位是角度 逆时针方向为正方向 ,角度为正值代表逆时针
scale 缩放倍数. 值等于1.0代表尺寸不变
该函数返回的就是仿射变换矩阵M
示例代码
import cv2import numpy as np# 获取旋转矩阵rotateMatrix = cv2.getRotationMatrix2D((100, 200), 90, 1.0)#设置numpy矩阵的打印格式np.set_printoptions(precision=2,suppress=True)print(rotateMatrix)
输出结果展示:
OUTPUT[[ 0. 1. -100.][ -1. 0. 300.]]
函数封装
为了使用方便,你也可以封装一下旋转过程
def rotate(image, angle, center = None, scale = 1.0):(h, w) = image.shape[:2]if center is None:center = (w 2, h 2)M = cv2.getRotationMatrix2D(center, angle, scale)rotated = cv2.warpAffine(image, M, (w, h))return rotated
封装函数后的代码演示
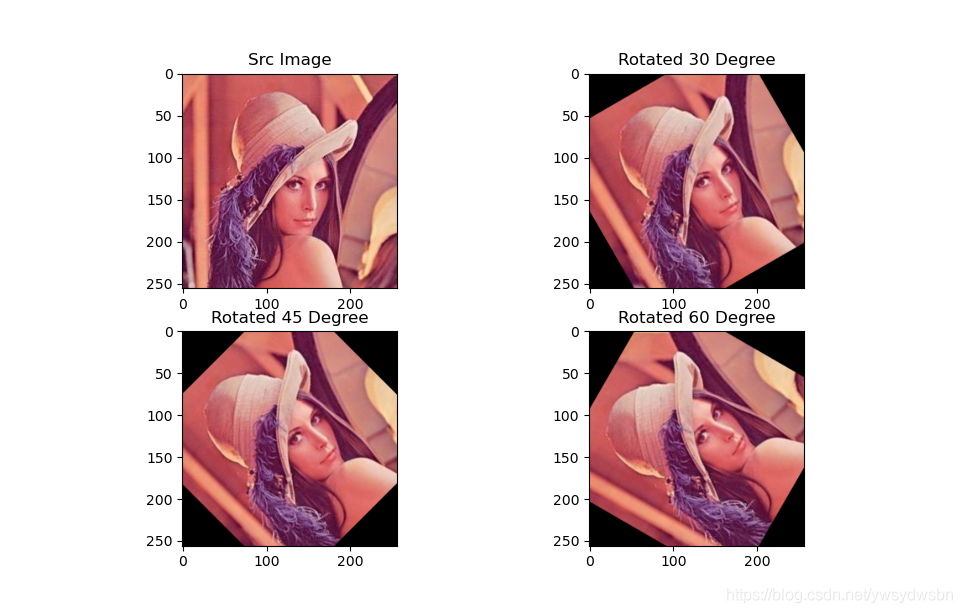
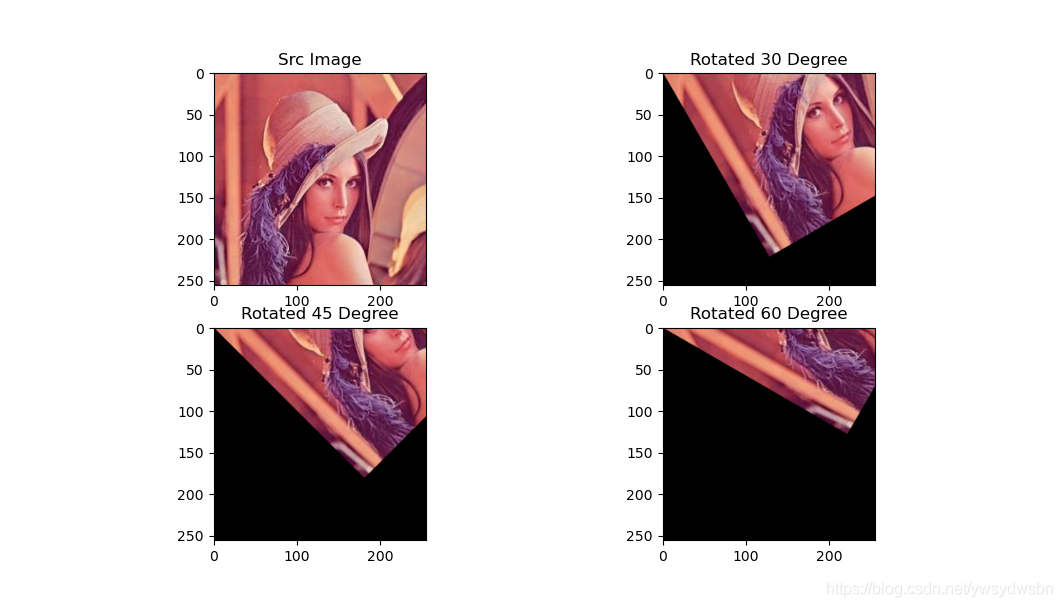
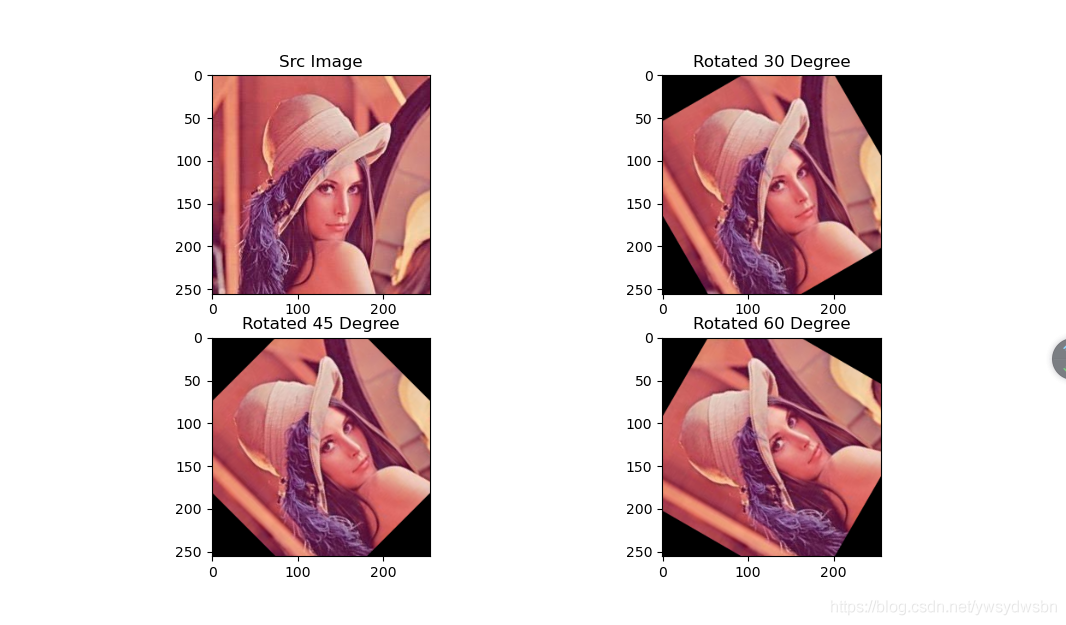
# -*- coding: utf-8 -*-'''围绕原点处旋转 (图片左上角) 正方向为逆时针利用getRotationMatrix2D函数生成仿射矩阵'''import numpy as npimport cv2from math import cos,sin,radiansfrom matplotlib import pyplot as pltimg = cv2.imread('lena1.jpg')height, width, channel = img.shape# 求得图片中心点, 作为旋转的轴心cx = int(width 2)cy = int(height 2)# 旋转的中心center = (cx, cy)new_dim = (width, height)# 进行2D 仿射变换# 围绕原点 逆时针旋转30度M = cv2.getRotationMatrix2D(center=center,angle=30, scale=1.0)rotated_30 = cv2.warpAffine(img, M, new_dim)# 围绕原点 逆时针旋转30度M = cv2.getRotationMatrix2D(center=center,angle=45, scale=1.0)rotated_45 = cv2.warpAffine(img, M, new_dim)# 围绕原点 逆时针旋转30度M = cv2.getRotationMatrix2D(center=center,angle=60, scale=1.0)rotated_60 = cv2.warpAffine(img, M, new_dim)plt.subplot(221)plt.title("Src Image")plt.imshow(img[:,:,::-1])plt.subplot(222)plt.title("Rotated 30 Degree")plt.imshow(rotated_30[:,:,::-1])plt.subplot(223)plt.title("Rotated 45 Degree")plt.imshow(rotated_45[:,:,::-1])plt.subplot(224)plt.title("Rotated 60 Degree")plt.imshow(rotated_60[:,:,::-1])plt.show()
运行代码后的效果演示:
原始图形:

图像旋转图像(逆时针30度、45度、60度):
利用wrapAffine实现缩放
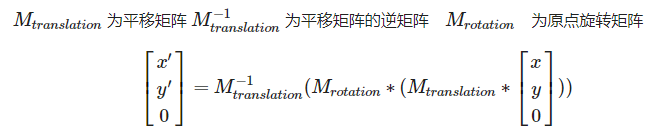
数学原理推导
旋转可以说是最简单的一种空间变换。围绕原点进行旋转,其图像为:👇
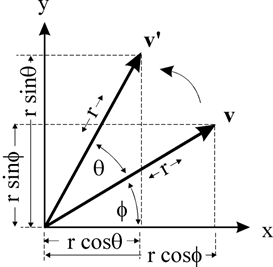

由此我们得出:
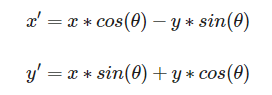
所以对应的变换矩阵为:
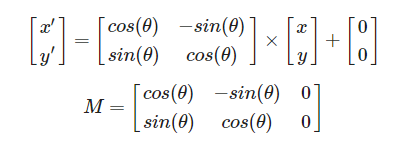
注意,这里我们进行公式推导的时候,参照的原点是在「左下角」, 而在OpenCV中图像的原点在图像的左上角, 所以我们在代码里面「对theta取反」。
我们可以利用math包中的三角函数。但是有一点需要注意 :三角函数输入的角度是弧度制而不是角度制。
我们需要使用radians(x) 函数, 将角度转变为弧度。
import mathmath.radians(180)
3.141592653589793
代码演示
具体代码演示如下:👇
# -*- coding: utf-8 -*-'''围绕原点处旋转 (图片左上角) 正方向为逆时针'''import numpy as npimport cv2import mathfrom matplotlib import pyplot as pltimg = cv2.imread('lena1.jpg')height, width, channel = img.shapedef getRotationMatrix2D(theta):# 角度值转换为弧度值# 因为图像的左上角是原点 需要×-1theta = math.radians(-1*theta)M = np.float32([[math.cos(theta), -math.sin(theta), 0],[math.sin(theta), math.cos(theta), 0]])return M# 进行2D 仿射变换# 围绕原点 顺时针旋转30度M = getRotationMatrix2D(30)rotated_30 = cv2.warpAffine(img, M, (width, height))# 围绕原点 顺时针旋转45度M = getRotationMatrix2D(45)rotated_45 = cv2.warpAffine(img, M, (width, height))# 围绕原点 顺时针旋转60度M = getRotationMatrix2D(60)rotated_60 = cv2.warpAffine(img, M, (width, height))plt.subplot(221)plt.title("Src Image")plt.imshow(img[:,:,::-1])plt.subplot(222)plt.title("Rotated 30 Degree")plt.imshow(rotated_30[:,:,::-1])plt.subplot(223)plt.title("Rotated 45 Degree")plt.imshow(rotated_45[:,:,::-1])plt.subplot(224)plt.title("Rotated 60 Degree")plt.imshow(rotated_60[:,:,::-1])plt.show()
原始图像:👇
旋转之后的演示图:👇
围绕任意点进行旋转
数学原理推导
那么如何围绕任意点进行旋转呢?
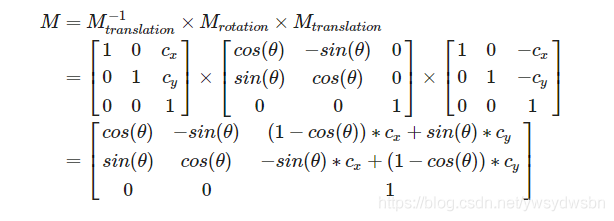
可以先把当前的旋转中心点平移到原点处,在原点处旋转后再平移回去。
假定旋转中心为 (cx,cy)
其中
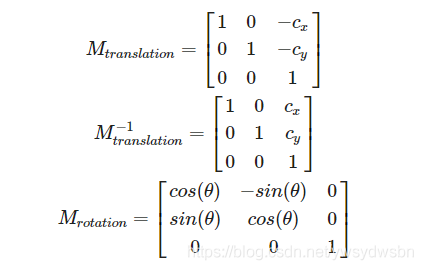
所以
完整演示代码
完整代码如下:👇
# -*- coding: utf-8 -*-'''围绕画面中的任意一点旋转'''import numpy as npimport cv2from math import cos,sin,radiansfrom matplotlib import pyplot as pltimg = cv2.imread('lena1.jpg')height, width, channel = img.shapetheta = 45def getRotationMatrix2D(theta, cx=0, cy=0):# 角度值转换为弧度值# 因为图像的左上角是原点 需要×-1theta = radians(-1 * theta)M = np.float32([[cos(theta), -sin(theta), (1-cos(theta))*cx + sin(theta)*cy],[sin(theta), cos(theta), -sin(theta)*cx + (1-cos(theta))*cy]])return M# 求得图片中心点, 作为旋转的轴心cx = int(width 2)cy = int(height 2)# 进行2D 仿射变换# 围绕原点 逆时针旋转30度M = getRotationMatrix2D(30, cx=cx, cy=cy)rotated_30 = cv2.warpAffine(img, M, (width, height))# 围绕原点 逆时针旋转45度M = getRotationMatrix2D(45, cx=cx, cy=cy)rotated_45 = cv2.warpAffine(img, M, (width, height))# 围绕原点 逆时针旋转60度M = getRotationMatrix2D(60, cx=cx, cy=cy)rotated_60 = cv2.warpAffine(img, M, (width, height))plt.subplot(221)plt.title("Src Image")plt.imshow(img[:,:,::-1])plt.subplot(222)plt.title("Rotated 30 Degree")plt.imshow(rotated_30[:,:,::-1])plt.subplot(223)plt.title("Rotated 45 Degree")plt.imshow(rotated_45[:,:,::-1])plt.subplot(224)plt.title("Rotated 60 Degree")plt.imshow(rotated_60[:,:,::-1])plt.show()
运行效果
运行代码,在后台显示结果如下(围绕图片中心点旋转30度至60度):
「❤️ 感谢大家」
如果你觉得这篇内容对你挺有有帮助的话:
点赞支持下吧,让更多的人也能看到这篇内容(收藏不点赞,都是耍流氓 -_-) 欢迎在留言区与我分享你的想法,也欢迎你在留言区记录你的思考过程。 觉得不错的话,也可以阅读近期梳理的文章(感谢各位的鼓励与支持🌹🌹🌹): python开发之HighGUI上位机开发(一)(100+👍) python开发之HighGUI上位机开发(二):键盘事件监听、窗口销毁、窗口显示图像、滑动条组件、按键组件以及鼠标事件监听(120+👍) python开发之HighGUI上位机开发(三)——项目实战:可变色画布和自制绘图板(120+👍) 基于混沌Logistic加密算法的图片加密与还原(160+👍) 一文带你彻底掌握数字化图像数据(210+👍) 先收藏!29个学术网站,比赛论文不再困难(230+👍) 【2020秋招面试】ML/DL/NLP/算法基础面试必看300问及答案(文末有下载方法)(220+👍) Python 简单操作 Excel(230+👍) Python 简单操作 Word(230+👍) Python 简单操作 CSV(230+👍)
「❤️ 资源传送门」
1. 扫码关注【做一个柔情的程序猿】公众号
2. 在【做一个柔情的程序猿】后台回复 【python资料】【2020秋招】 获取相应资料

👆长按上方二维码 2 秒 回复「python资料」即可获取python学习资料 回复「2020秋招」即可获取2020秋招面试题及答案
