


首先关闭防火墙和selinux
# systemctl stop firewalld
# cat etc/selinux/config
# This file controls the state of SELinux on the system.
# SELINUX= can take one of these three values:
# enforcing - SELinux security policy is enforced.
# permissive - SELinux prints warnings instead of enforcing.
# disabled - No SELinux policy is loaded.
SELINUX=disabled
# SELINUXTYPE= can take one of three values:
# targeted - Targeted processes are protected,
# minimum - Modification of targeted policy. Only selected processes are protected.
# mls - Multi Level Security protection.
SELINUXTYPE=targeted
开始部署:
zabbix部署服务器:192.168.0.1 szc-zabbix01 zabbix版本:5.0
MySQL部署服务器:192.168.0.1 szc-zabbix01 MySQL版本:5.7.34
1. 部署zabbix
a. Install Zabbix repository
# rpm -Uvh https://repo.zabbix.com/zabbix/5.0/rhel/7/x86_64/zabbix-release-5.0-1.el7.noarch.rpm
# yum clean all
b. Install Zabbix server and agent
# yum install zabbix-server-mysql zabbix-agent
c. Install Zabbix frontend
Enable Red Hat Software Collections
# yum install centos-release-scl
编辑配置文件 /etc/yum.repos.d/zabbix.repo and enable zabbix-frontend repository.
[zabbix-frontend]
...
enabled=1
...
Install Zabbix frontend packages.
# yum install zabbix-web-mysql-scl zabbix-apache-conf-scl
d. 启动Zabbix server和agent进程
# systemctl restart zabbix-server zabbix-agent httpd rh-php72-php-fpm
# systemctl enable zabbix-server zabbix-agent httpd rh-php72-php-fpm
2. 部署MySQL
使用的安装包是mysql57-community-release-el7-11.noarch.rpm
download package
# wget https://dev.mysql.com/get/mysql57-community-release-el7-11.noarch.rpm
a. 安装mysql
# yum -y localinstall mysql57-community-release-el7-11.noarch.rpm
# yum -y install mysql-community-server
# systemctl start mysqld
# systemctl enable mysqld
b.更改MySQL的root初始密码
查询初始密码:
# grep 'temporary password' /var/log/mysqld.log
2021-06-10T07:40:02.265657Z 1 [Note] A temporary password is generated for root@localhost: p7qX4=uwpshd
使用初始密码登录:
# mysql -u root -p
Enter password:
修改密码:
mysql> set password for 'root'@'localhost' = password('PASSWORD');
Query OK, 0 rows affected, 1 warning (0.00 sec)
注意:这里的PASSWORD是自己的密码,如下同
c. 创建zabbix数据库
mysql> create database zabbix character set utf8 collate utf8_bin;
Query OK, 1 row affected (0.00 sec)
创建用户
mysql> create user zabbix@localhost identified by 'PASSWORD';
Query OK, 0 rows affected (0.00 sec)
授权
mysql> grant all privileges on zabbix.* to zabbix@localhost;
Query OK, 0 rows affected (0.00 sec)
导入初始架构和数据,系统将提示您输入新创建的密码
# zcat /usr/share/doc/zabbix-server-mysql*/create.sql.gz | mysql -uzabbix -p zabbix
Enter password:
配置zabbix
a. 为Zabbix server配置数据库
编辑配置文件 /etc/zabbix/zabbix_server.conf
DBPassword=PASSWORD
b. 为Zabbix前端配置PHP
编辑配置文件 /etc/opt/rh/rh-php72/php-fpm.d/zabbix.conf, uncomment and set the right timezone for you.
; php_value[date.timezone] = Asia/Shanghai
d. 配置zabbix前端
连接到新安装的Zabbix前端:http://server_ip_or_name/zabbix
根据Zabbix文件里步骤操作: Installing frontend (https://www.zabbix.com/documentation/5.0/manual/installation/install#installing_frontend)
一些问题:
1.zabbix-server 自动down
查看zabbix server的log /var/log/zabbix/zabbix_server.log
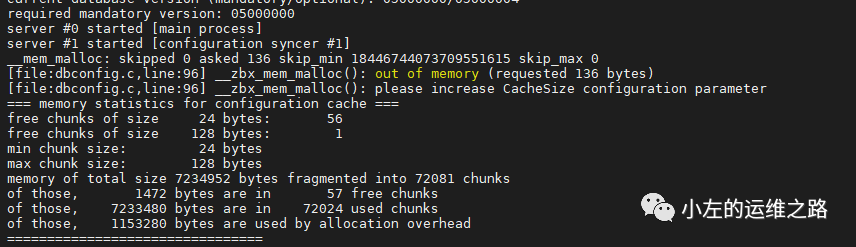
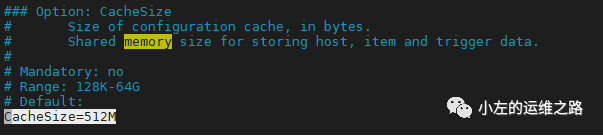
发现是zabbix的cache设置的不够大,需要修改/etc/zabbix/zabbix_server.conf里的CacheSize值,默认是CacheSize=8M,这里我修改为512M.
2.安装zabbix后安装MySQL异常或者按照MySQL后zabbix安装不上
这个因为zabbix的版本和MySQL版本不兼容导致的。建议使用文章开头的版本。
