


jmeter_proxy_step_by_step.pdf
10墨值下载
Apache JMeter HTTP(S) Test Script Recorder
This tutorial attempts to explain the exact steps for recording HTTP/HTTPS. For those new to
JMeter, one easy way to create a test plan is to use the Recorder.
Jmeter configuration
Since JMeter 2.10, recording has been improved to better handle embedded resources and
creation of certificates on the fly.
To enable these features, JMeter uses keytool utility (available in JRE/JDK) so you need to
ensure your configuration is correct, read this wiki page before starting:
• https://wiki.apache.org/jmeter/TestRecording210
Note that recording is more powerful with a Java 7.
Basic Instructions
1. Go to JMETER_HOME/bin and start JMeter with jmeterw.cmd on Windows and jmeter
on Linux/Unix
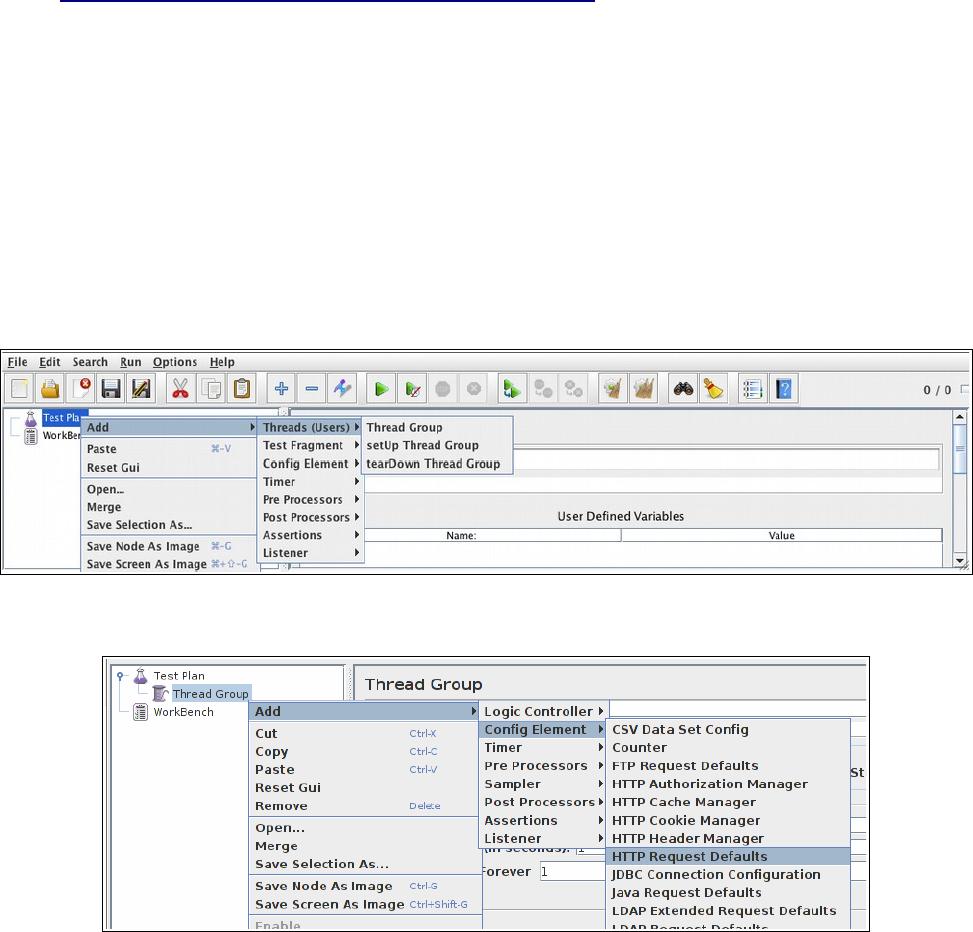
2. Select “Test Plan” on the tree
3. Right click on the “Test Plan” and add a new thread group: Add > Threads (Users) >
Thread Group
4. Select the Thread Group
5. Right click “Add -> Config Element -> HTTP Request Defaults”
1/8
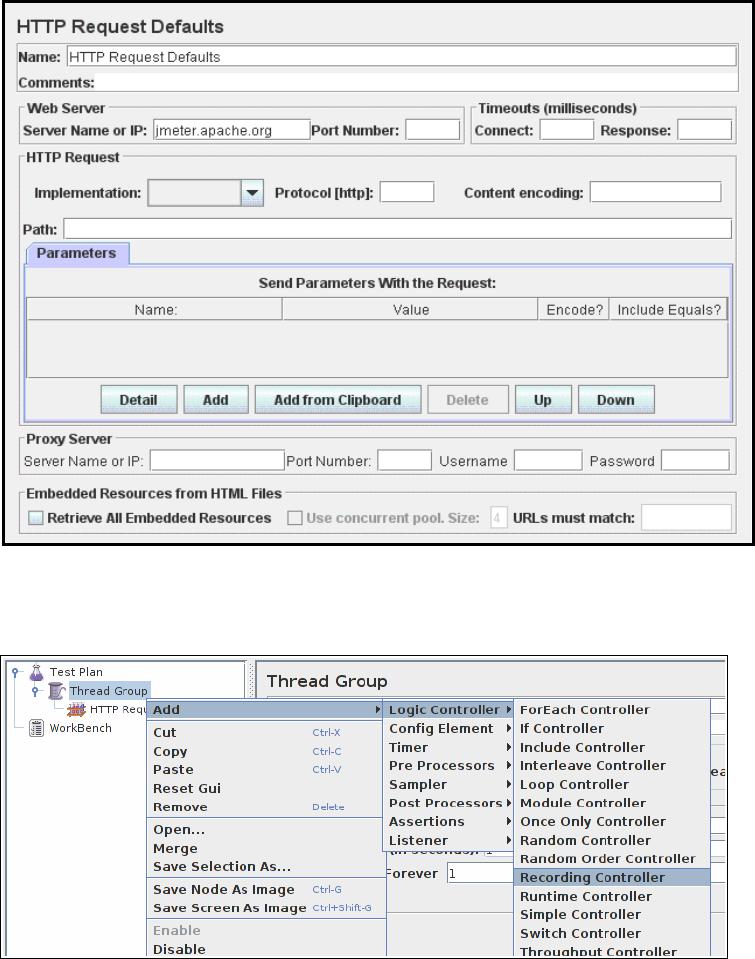
6. In new HTTP Request Defaults element: Server name – enter “jmeter.apache.org”
7. Path – leave blank
8. Right click on the “Thread Group” and add a recording controller: Add > Logic Controller >
Recording Controller
9. Next, select WorkBench
10. Right click on WorkBench and add the recorder: Add -> Non-Test Elements -> HTTP(S)
Test Script Recorder
2/8
of 8
10墨值下载
【版权声明】本文为墨天轮用户原创内容,转载时必须标注文档的来源(墨天轮),文档链接,文档作者等基本信息,否则作者和墨天轮有权追究责任。如果您发现墨天轮中有涉嫌抄袭或者侵权的内容,欢迎发送邮件至:contact@modb.pro进行举报,并提供相关证据,一经查实,墨天轮将立刻删除相关内容。
下载排行榜

评论