
作者
刘晓国
Elastic社区布道师
在本文中,我们来详细地描述如果使用Filebeat把MySQL的日志信息传输到Elasticsearch中。

01

环境准备
1、准备centos7.4版本 ECS 环境,关闭 selinux、firewall。
2、准备阿里云elasticsearch 6.7 版本环境,并使用创建的账号密码登录Kibana
3、安装 Filebeat 版本为 6.7.0
4、安装 MySQL 版本为 5.6.48
02
安装 MySQL
我们需要通过以下命令,来对 MySQL 进行安装。
# yum install mysql-server# systemctl start mysqld# systemctl status mysqld####通过mysqladmin设置root密码###### mysqladmin -u root password "123456"
下一步在my.cnf中配置error日志文件和慢速查询日志文件,默认情况下这些配置禁用状态,需要手动开启;也可通过mysql命令开启临时慢日志。
# vim /etc/my.cnf[mysqld]log_queries_not_using_indexes = 1slow_query_log=onslow_query_log_file=/var/log/mysql/slow-mysql-query.loglong_query_time=0[mysqld_safe]log-error=/var/log/mysql/mysqld.log
注:MySQL 不会主动创建日志文件,所以需要手动添加,添加完后赋予所有用户可读可写权限,如chmod 777 slow-mysql-query.log。
03
配置 Filebeat
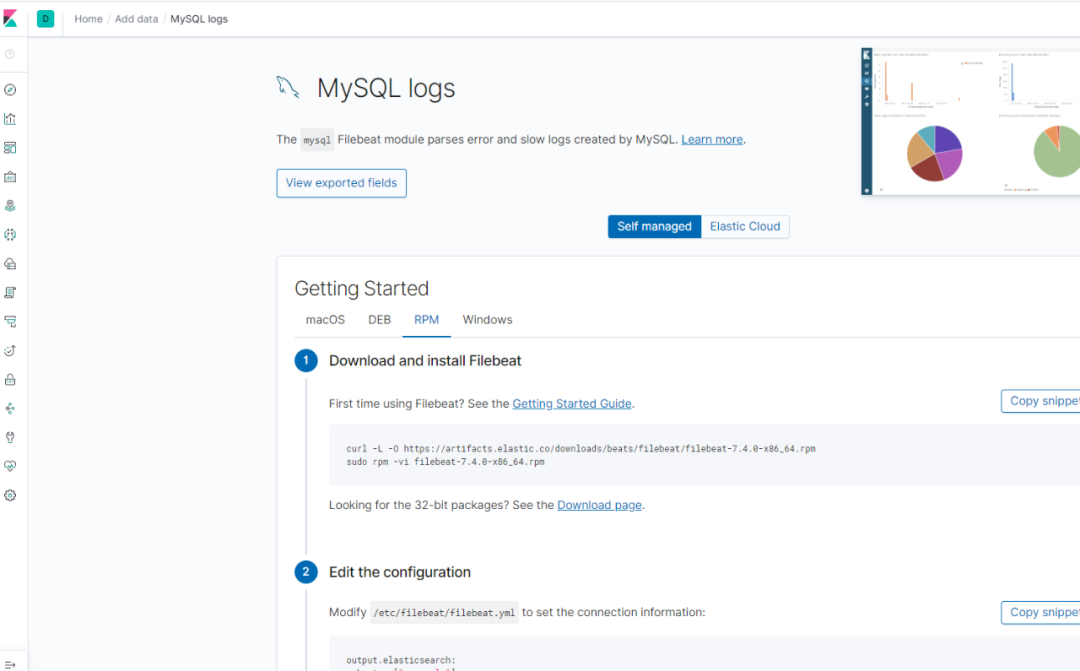
在 Centos 上安装 Filebeat 是非常直接的,可以打开 Elasticsearch - Kibana 控制台,进入概览页,选择“ add log data”

我们按照上面的要求一步一步地进行安装和修改。在修改filebeat.yml文件时,我们需要注意以下:
一、配置 Filebeat modules 动态加载
filebeat.config.modules:# Glob pattern for configuration loadingpath: /etc/filebeat/modules.d/mysql.yml# Set to true to enable config reloadingreload.enabled: true# Period on which files under path should be checked for changesreload.period: 1s
由于 MySQL 需要分别检测错误日志及慢日志,通过模块分别指定所在路径,动态加载模块,所以path指定模块所在路径。
二、 填入 Kibana 地址
setup.kibana:# Kibana Host# Scheme and port can be left out and will be set to the default (http and 5601)# In case you specify and additional path, the scheme is required: http://localhost:5601/path# IPv6 addresses should always be defined as: https://[2001:db8::1]:5601host: "https://es-cn-0p11111000zvqku.kibana.elasticsearch.aliyuncs.com:5601"
三、填入 Elasticsearch 地址及端口号
output.elasticsearch:# Array of hosts to connect to.hosts: ["es-cn-0p11111000zvqku.elasticsearch.aliyuncs.com:9200"]# Optional protocol and basic auth credentials.#protocol: "https"username: "elastic"password: "elastic@333"
四、启用 MySQL 模块,并进行配置
# sudo filebeat modules enable mysql# vim /etc/filebeat/modules.d/mysql.yml- module: mysql# Error logserror:enabled: truevar.paths: ["/var/log/mysql/mysqld.log"]# Set custom paths for the log files. If left empty,# Filebeat will choose the paths depending on your OS.#var.paths:# Slow logsslowlog:enabled: truevar.paths: ["/var/log/mysql/slow-mysql-query.log"]# Set custom paths for the log files. If left empty,# Filebeat will choose the paths depending on your OS.#var.paths:
我们需要运行如下的命令来把相应的 Dashboard,Pipeline 及 Template 信息上传到 Elasticsearch 和 Kibana 中。
# sudo filebeat setup# sudo service filebeat start
04
Kibana Dashboard
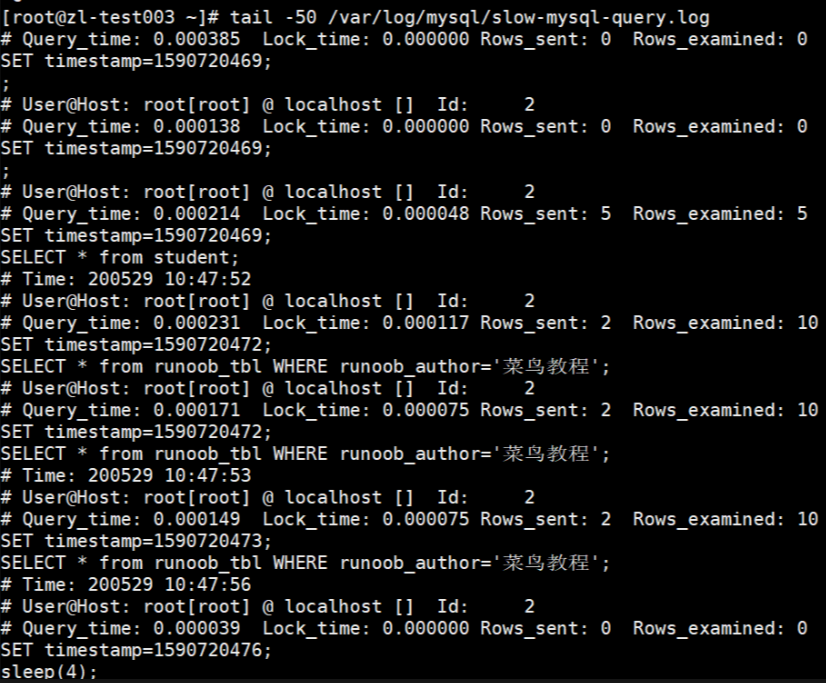
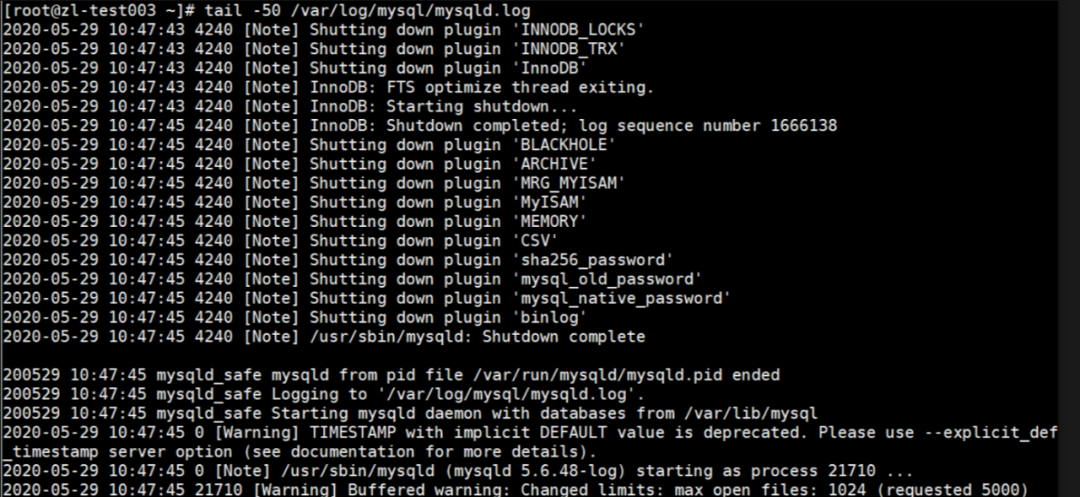
对 MySQL 数据库做重启及做查询,会生产对应的慢日志及错误日志。
部分慢查询日志
部分error日志
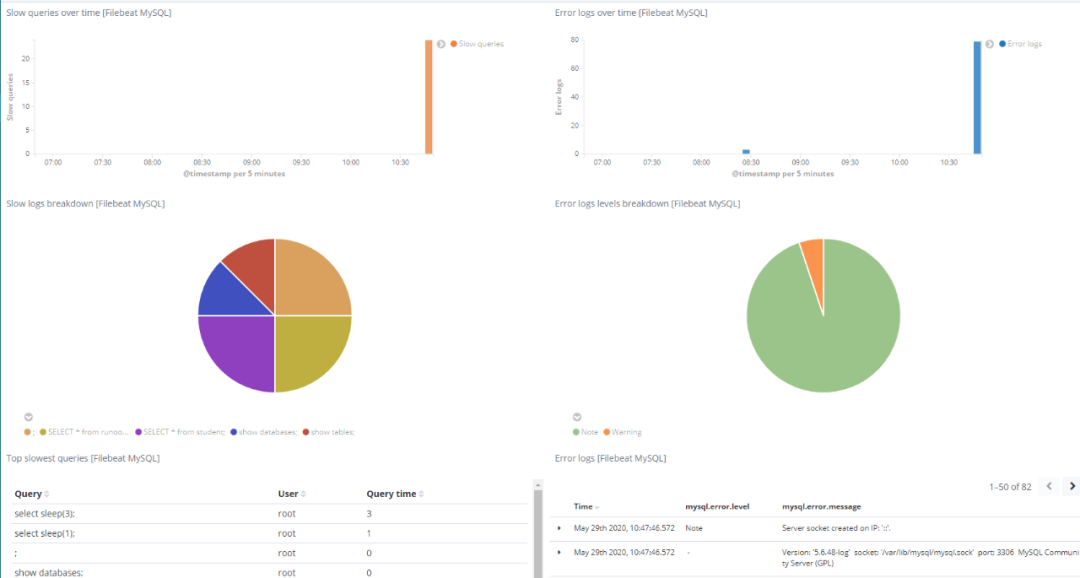
进入Kibana dashboard “[Filebeat MySQL] Overview ECS”,观察采集到的数据,至此,我们可以看到所有的关于MySQL的信息,这里包括以下queries及error logs等。
05
总结
如本教程所示,Filebeat 是用于 MySQL 数据库和 Elasticsearch 集群的出色日志传送解决方案。与以前的版本相比,它非常轻巧,可以有效地发送日志事件。Filebeat支持压缩,并且可以通过单个 yaml 文件轻松配置。使用Filebeat,您可以轻松地管理日志文件,跟踪日志注册表,创建自定义字 K 段以在日志中启用细化过滤和发现,以及使用 Kibana 可视化功能立即为日志数据供电。
本文由《Beats:如何使用Filebeat将MySQL日志发送到Elasticsearch》基于阿里云服务环境授权改编
经由 CSDN-Elastic 中国社区官方博客授权发布
合作编辑:Lettie/大禹
原文博客:https://elasticstack.blog.csdn.net/
END