


前言
近日Oceanbase官方发布了单机版的资源。大家也都开始风风火火的体验单机版了,我也跟着这股热潮参与进来。
除了测试安装使用,我也想试试能不能用OGG把数据从Oracle数据库同步到Oceanbase单机版上。毕竟Oceanbase支持MySQL租户,理论上就可以采用MySQL的方式同步数据。
环境规划
本次实验,规划了两个虚拟机。环境配置如下
服务器IP | 操作系统 | CPU | 内存 | 数据库版本 | OGG版本 |
172.16.1.37 | Oracle Linux 8.10 | 4 | 16 | Oracle 19.27 | OGG for Oracle 23.8 |
172.16.1.38 | Oracle Linux 8.10 | 8 | 32 | Oceanbase 4.2.5.3-103000152025033110 | OGG for MySQL 23.8 |
Oceanbase对资源使用要求比较高,因此就配置了两台虚拟机。
Oceanbase单机版部署
获取安装包
登录https://www.oceanbase.com/product/oceanbase-standalone,点击参与邀测,填入信息等着工作人员联系即可。
安装文件有两个,一个是obd安装,另外一个是用ocp安装。我用的是obd的,ocp太费资源,自己电脑cpu不够。
操作系统配置
关闭防火墙
systemctl stop firewalld
systemctl disable firewalld
禁用SELinux
sed -i 's/SELINUX=enforcing/SELINUX=disabled/' /etc/selinux/config重启服务器
配置内核参数
cat >>/etc/sysctl.conf<<EOF
# for oceanbase
## 修改内核异步 I/O 限制
fs.aio-max-nr = 1048576
## 网络优化
net.core.somaxconn = 2048
net.core.netdev_max_backlog = 10000
net.core.rmem_default = 16777216
net.core.wmem_default = 16777216
net.core.rmem_max = 16777216
net.core.wmem_max = 16777216

net.ipv4.ip_forward = 0
net.ipv4.conf.default.rp_filter = 1
net.ipv4.conf.default.accept_source_route = 0
net.ipv4.tcp_syncookies = 1
net.ipv4.tcp_rmem = 4096 87380 16777216
net.ipv4.tcp_wmem = 4096 65536 16777216
net.ipv4.tcp_max_syn_backlog = 16384
net.ipv4.tcp_fin_timeout = 15
net.ipv4.tcp_slow_start_after_idle=0

vm.swappiness = 0
vm.min_free_kbytes = 2097152
vm.overcommit_memory = 0

fs.file-max = 6573688
fs.pipe-user-pages-soft = 0

# 修改进程可以拥有的虚拟内存区域数量
vm.max_map_count = 655360
# 设置 core 文件的文件名格式以及目录
kernel.core_pattern = /data/core-%e-%p-%t
EOF
使用下面命令让参数生效
sysctl -p配置limit
cat >>/etc/security/limits.d/oceanbase.conf<<EOF
* soft nofile 655360
* hard nofile 655360
* soft nproc 655360
* hard nproc 655360
* soft core unlimited
* hard core unlimited
* soft stack unlimited
* hard stack unlimited
EOF
创建用户
groupadd admin
useradd  -g admin -m -d /home/admin -c "OceanBase Owner" admin
passwd admin
创建挂载点
mkdir /data /redo
chown admin: /data /redo
admin用户配置无密码登录
ssh-keygen -t rsa
ssh-copy-id ogg-ob01
配置sudo
echo >>/etc/sudoers<<EOF
admin ALL=(ALL) NOPASSWD: ALL
EOF
安装Oceanbase单机版
本章节默认使用admin用户操作
上传安装包
使用sftp工具将oceanbase-ocp-standalone-all-in-one-4.2.5.3-103000152025033110.el8.x86_64.tar上传到服务器上,文件放到/home/admin下面
chown admin: oceanbase-ocp-standalone-all-in-one-4.2.5.3-103000152025033110.el8.x86_64.tar解压缩安装文件
使用admin用户解压缩
tar xvf oceanbase-ocp-standalone-all-in-one-4.2.5.3-103000152025033110.el8.x86_64.tar安装obd
cd /home/admin/oceanbase-standalone-all-in-one/bin
./install_obd.sh
安装日志
[admin@ogg-ob01 bin]$ ./install_obd.sh
install obd as sudo
No previous obd installed, try install..., wait a moment
name: grafana
version: 7.5.17
release:1
arch: x86_64
md5: 1bf1f338d3a3445d8599dc6902e7aeed4de4e0d6
size: 177766248
add /home/admin/oceanbase-standalone-all-in-one/rpms/grafana-7.5.17-1.el8.x86_64.rpm to local mirror
name: obagent
version: 4.2.2
release:100000042024011120.el8
arch: x86_64
md5: bf152b880953c2043ddaf80d6180cf22bb8c8ac2
size: 72919140
add /home/admin/oceanbase-standalone-all-in-one/rpms/obagent-4.2.2-100000042024011120.el8.x86_64.rpm to local mirror
name: ob-deploy
version: 3.2.0
release:2.el8
arch: x86_64
md5: 529076c3e548f690ea6cb4e50cd77b2dfc4bfc6d
size: 178634999
add /home/admin/oceanbase-standalone-all-in-one/rpms/ob-deploy-3.2.0-2.el8.x86_64.rpm to local mirror
name: oceanbase-diagnostic-tool
version: 3.2.0
release:52025031411.el8
arch: x86_64
md5: e7aeaa17222aa079c8d9e0c74a73e1d7f9c5501b
size: 71147006
add /home/admin/oceanbase-standalone-all-in-one/rpms/oceanbase-diagnostic-tool-3.2.0-52025031411.el8.x86_64.rpm to local mirror
name: oceanbase-standalone
version: 4.2.5.3
release:103000152025033110.el8
arch: x86_64
md5: 305669b55281773f5c53ff4e44ff9f7bed9f7bc0
size: 1813828757
add /home/admin/oceanbase-standalone-all-in-one/rpms/oceanbase-standalone-4.2.5.3-103000152025033110.el8.x86_64.rpm to local mirror
name: oceanbase-standalone-libs
version: 4.2.5.3
release:103000152025033110.el8
arch: x86_64
md5: 84315910ce45d91ed361867215964369044185c0
size: 7848
add /home/admin/oceanbase-standalone-all-in-one/rpms/oceanbase-standalone-libs-4.2.5.3-103000152025033110.el8.x86_64.rpm to local mirror
name: prometheus
version: 2.37.1
release:10000102022110211.el8
arch: x86_64
md5: e4f8a3e784512fca75bf1b3464247d1f31542cb9
size: 211224073
add /home/admin/oceanbase-standalone-all-in-one/rpms/prometheus-2.37.1-10000102022110211.el8.x86_64.rpm to local mirror
Trace ID: f9c6367a-261c-11f0-a589-000c293ada1f
If you want to view detailed obd logs, please run: obd display-trace f9c6367a-261c-11f0-a589-000c293ada1f
Disable remote ok
Trace ID: fd39bb1a-261c-11f0-b69d-000c293ada1f
If you want to view detailed obd logs, please run: obd display-trace fd39bb1a-261c-11f0-b69d-000c293ada1f
add auto set env logic to profile: /home/admin/.bash_profile
Execute this command to apply the environment config:`source ~/.oceanbase-all-in-one/bin/env.sh `
导入ob的环境变量
source ~/.oceanbase-all-in-one/bin/env.sh以后再登录就不用执行这个步骤
编辑yaml文件
这里使用yaml来部署
ob.yaml
user:
  username: admin
  key_file: /home/admin/.ssh/id_rsa
oceanbase-standalone:
  servers:
    - ip: 172.16.1.38
  global:
    cluster_id: 1
    # please set memory limit to a suitable value which is matching resource.
    memory_limit: 16G # The maximum running memory for an observer
    system_memory: 8G # The reserved system memory. system_memory is reserved for general tenants.
    datafile_size: 10G # Size of the data file.
    datafile_next: 10G
    datafile_maxsize: 100G
    log_disk_size: 10G # The size of disk space used by the clog files.
    enable_syslog_wf: false # Print system logs whose levels are higher than WARNING to a separate log file. The default value is true.
    max_syslog_file_count: 4 # The maximum number of reserved log files before enabling auto recycling. The default value is 0.
    # observer cluster name, consistent with obproxy's cluster_name
    appname: ob
    mysql_port: 2881 # External port for OceanBase Database. The default value is 2881. DO NOT change this value after the cluster is started.
    rpc_port: 2882 # Internal port for OceanBase Database. The default value is 2882. DO NOT change this value after the cluster is started.
    obshell_port: 2886 # Operation and maintenance port for OceanBase Database.
    # The working directory for OceanBase Database. OceanBase Database is started under this directory. This is a required field.
    home_path: /home/admin/observer
    # The directory for data storage. The default value is $home_path/store.
    data_dir: /data
    # The directory for clog. The default value is the same as the data_dir value.
    redo_dir: /redo
    root_password: ****** # root user password, can be empty
    zone: zone1
obagent:
  depends:
    - oceanbase-standalone
  servers:
    - ip: 172.16.1.38
  global:
    home_path: /home/admin/obagent
    monagent_http_port: 8088
    mgragent_http_port: 8089
prometheus:
  depends:
    - obagent
  servers:
    - 172.16.1.38
  global:
    # The working directory for prometheus. prometheus is started under this directory. This is a required field.
    home_path: /home/admin/prometheus
    port: 9090
grafana:
  depends:
    - prometheus
  servers:
    - 172.16.1.38
  global:
    home_path: /home/admin/grafana
    login_password: '*****' # Grafana login password.
port: 3000
部署Oceanbase
obd cluster deploy ob -c ob.yaml安装日志
[admin@ogg-ob01 ~]$ obd cluster deploy ob -c ob.yaml
Package oceanbase-standalone-4.2.5.3-103000152025033110.el8 is available.
Package obagent-4.2.2-100000042024011120.el8 is available.
Package prometheus-2.37.1-10000102022110211.el8 is available.
Package grafana-7.5.17-1 is available.
install oceanbase-standalone-4.2.5.3 for local ok
install obagent-4.2.2 for local ok
install prometheus-2.37.1 for local ok
install grafana-7.5.17 for local ok
+----------------------------------------------------------------------------------------------------+
| Packages |
+----------------------+---------+------------------------+------------------------------------------+
| Repository | Version | Release | Md5 |
+----------------------+---------+------------------------+------------------------------------------+
| oceanbase-standalone | 4.2.5.3 | 103000152025033110.el8 | 305669b55281773f5c53ff4e44ff9f7bed9f7bc0 |
| obagent | 4.2.2 | 100000042024011120.el8 | bf152b880953c2043ddaf80d6180cf22bb8c8ac2 |
| prometheus | 2.37.1 | 10000102022110211.el8 | e4f8a3e784512fca75bf1b3464247d1f31542cb9 |
| grafana | 7.5.17 | 1 | 1bf1f338d3a3445d8599dc6902e7aeed4de4e0d6 |
+----------------------+---------+------------------------+------------------------------------------+
Repository integrity check ok
Load param plugin ok
Open ssh connection ok
Initializes obagent work home ok
Initializes observer work home ok
Initializes prometheus work home ok
Initializes grafana work home ok
Parameter check ok
Remote oceanbase-standalone-4.2.5.3-103000152025033110.el8-305669b55281773f5c53ff4e44ff9f7bed9f7bc0 repository install ok
Remote oceanbase-standalone-4.2.5.3-103000152025033110.el8-305669b55281773f5c53ff4e44ff9f7bed9f7bc0 repository lib check ok
Remote obagent-4.2.2-100000042024011120.el8-bf152b880953c2043ddaf80d6180cf22bb8c8ac2 repository install ok
Remote obagent-4.2.2-100000042024011120.el8-bf152b880953c2043ddaf80d6180cf22bb8c8ac2 repository lib check ok
Remote prometheus-2.37.1-10000102022110211.el8-e4f8a3e784512fca75bf1b3464247d1f31542cb9 repository install ok
Remote prometheus-2.37.1-10000102022110211.el8-e4f8a3e784512fca75bf1b3464247d1f31542cb9 repository lib check ok
Remote grafana-7.5.17-1-1bf1f338d3a3445d8599dc6902e7aeed4de4e0d6 repository install ok
Remote grafana-7.5.17-1-1bf1f338d3a3445d8599dc6902e7aeed4de4e0d6 repository lib check ok
ob deployed
Trace ID: 5dbe02cc-2625-11f0-8504-000c293ada1f
If you want to view detailed obd logs, please run: obd display-trace 5dbe02cc-2625-11f0-8504-000c293ada1f
启动Oceanbase
部署完成后启动Oceanbase
obd cluster start ob启动日志
[admin@ogg-ob01 ~]$ obd cluster start ob
Get local repositories ok
Load cluster param plugin ok
Open ssh connection ok
[WARN] OBD-1012: (172.16.1.38) clog and data use the same disk (/)
Check before start obagent ok
Check before start prometheus ok
Check before start grafana ok
cluster scenario: None
Start observer ok
observer program health check ok
Connect to observer 172.16.1.38:2881 ok
oceanbase bootstrap ok
obshell start ok
obshell program health check ok
obshell bootstrap ok
Start obagent ok
obagent program health check ok
Send /home/admin/.obd/repository/obagent/4.2.2/bf152b880953c2043ddaf80d6180cf22bb8c8ac2/conf/prometheus_config/rules to /home/admin/prometheus/rules ok
Start promethues ok
prometheus program health check ok
Start grafana ok
grafana program health check ok
Connect to grafana ok
Grafana modify password ok
Connect to observer 172.16.1.38:2881 ok
Wait for observer init ok
+-----------------------------------------------+
| oceanbase-standalone |
+-------------+---------+------+-------+--------+
| ip | version | port | zone | status |
+-------------+---------+------+-------+--------+
| 172.16.1.38 | 4.2.5.3 | 2881 | zone1 | ACTIVE |
+-------------+---------+------+-------+--------+
obclient -h172.16.1.38 -P2881 -uroot@sys -p'********' -Doceanbase -A
cluster unique id: 4b5a7fcd-2c38-57c1-9aa0-1c81a522c4de-196895bd745-03050204
Connect to Obagent ok
+----------------------------------------------------------------+
| obagent |
+-------------+--------------------+--------------------+--------+
| ip | mgragent_http_port | monagent_http_port | status |
+-------------+--------------------+--------------------+--------+
| 172.16.1.38 | 8089 | 8088 | active |
+-------------+--------------------+--------------------+--------+
Connect to Prometheus ok
+-------------------------------------------------------+
| prometheus |
+-------------------------+-------+------------+--------+
| url | user | password | status |
+-------------------------+-------+------------+--------+
| http://172.16.1.38:9090 | admin | ***** | active |
+-------------------------+-------+------------+--------+
Connect to grafana ok
+-----------------------------------------------------------------+
| grafana |
+-------------------------------------+-------+----------+--------+
| url | user | password | status |
+-------------------------------------+-------+----------+--------+
| http://172.16.1.38:3000/d/oceanbase | admin | ******* | active |
+-------------------------------------+-------+----------+--------+
ob running
Trace ID: 7b6fa9fe-2627-11f0-ae56-000c293ada1f
If you want to view detailed obd logs, please run: obd display-trace 7b6fa9fe-2627-11f0-ae56-000c293ada1f
连接Ocenabase
obclient -h172.16.1.38 -P2881 -uroot@sys -p -c -A配置Oceanbase支持OGG
用内置的test存数据,新建ogg数据库用于运行ogg
创建ogg数据库
create database ogg;创建ogg用户
create user 'ogg'@'%' identified by '123456';
grant all privileges on *.* to 'ogg'@'%' with grant option;
grant insert,update,delete,select on test.* to ogg;
grant drop on test.* to ogg;
grant insert,update,delete,select on *.* to ogg;
flush privileges;
创建测试表
CREATE TABLE `test`.`t1`  (
  `ID` int NOT NULL,
  `NAME` varchar(255) NULL,
  `ADDRESS` varchar(255) NULL,
  `BIRTHDAY` timestamp NULL,
  PRIMARY KEY (`ID`)
);
OGG配置
OGG for Oracle安装
ogg-ob00上面安装OGG for Oracle,配置的过程和参数跟之前稳定一样,这里不再赘述。
OGG for MySQL安装
ogg-ob01上面安装OGG for MySQL。OGG for MySQL安装到oracle用户下面。
创建oracle用户
useradd oracle
passwd oracle
配置OGG环境变量
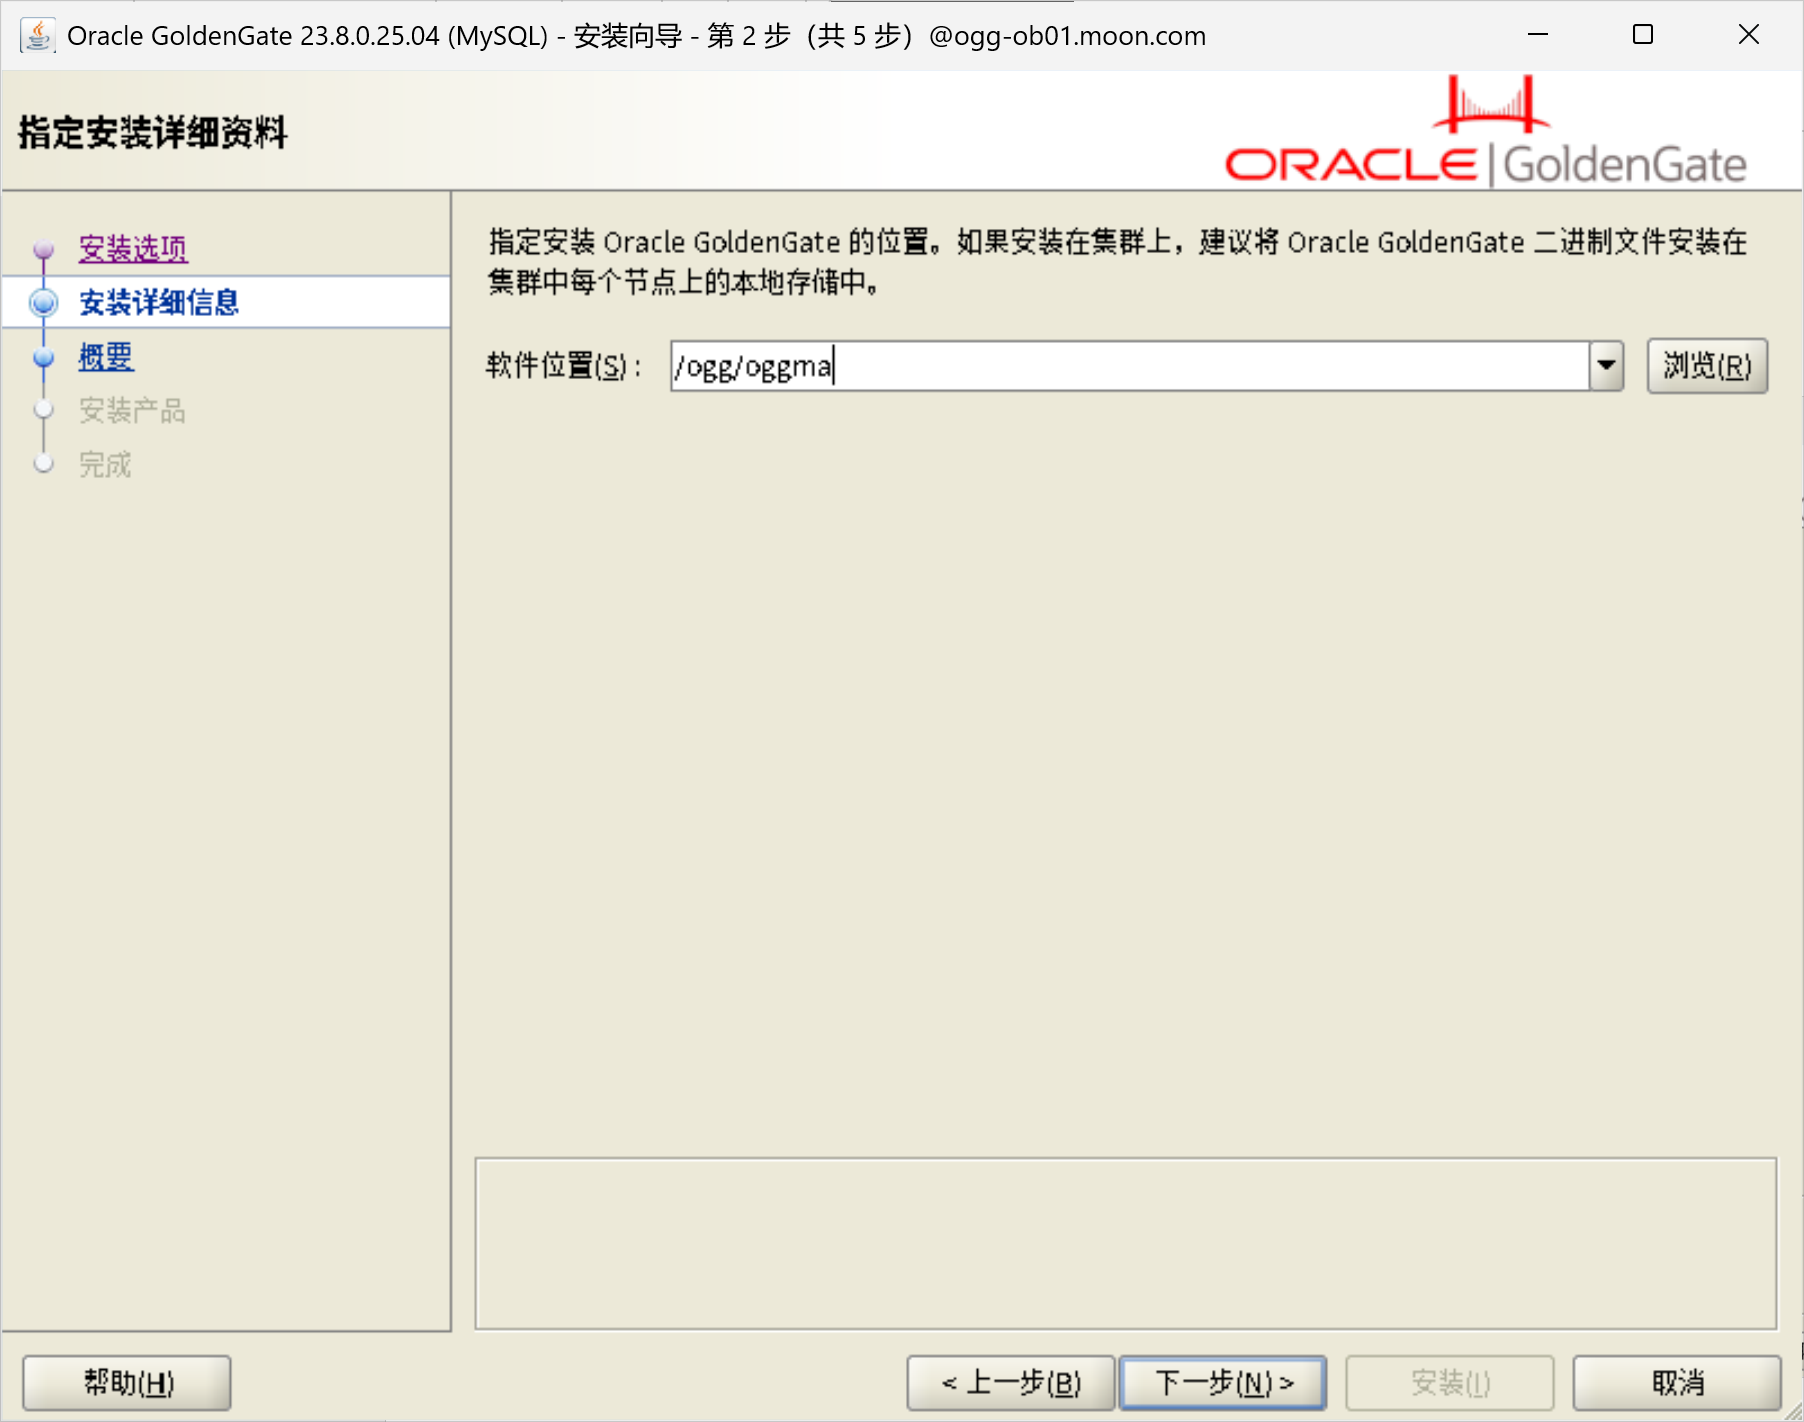
export OGG_HOME=/ogg/oggma
export OGG_ETC_HOME=/ogg/ogginst/sm/etc
export OGG_VAR_HOME=/ogg/ogginst/sm/var
创建OGG挂载点
mkdir /ogg
chown oracle: /ogg
将安装文件上传并解压缩
unzip 23802504_ggs_Linux_x64_MySQL_services_shiphome.zip
cd ggs_Linux_x64_MySQL_services_shiphome/Disk1
./runInstaller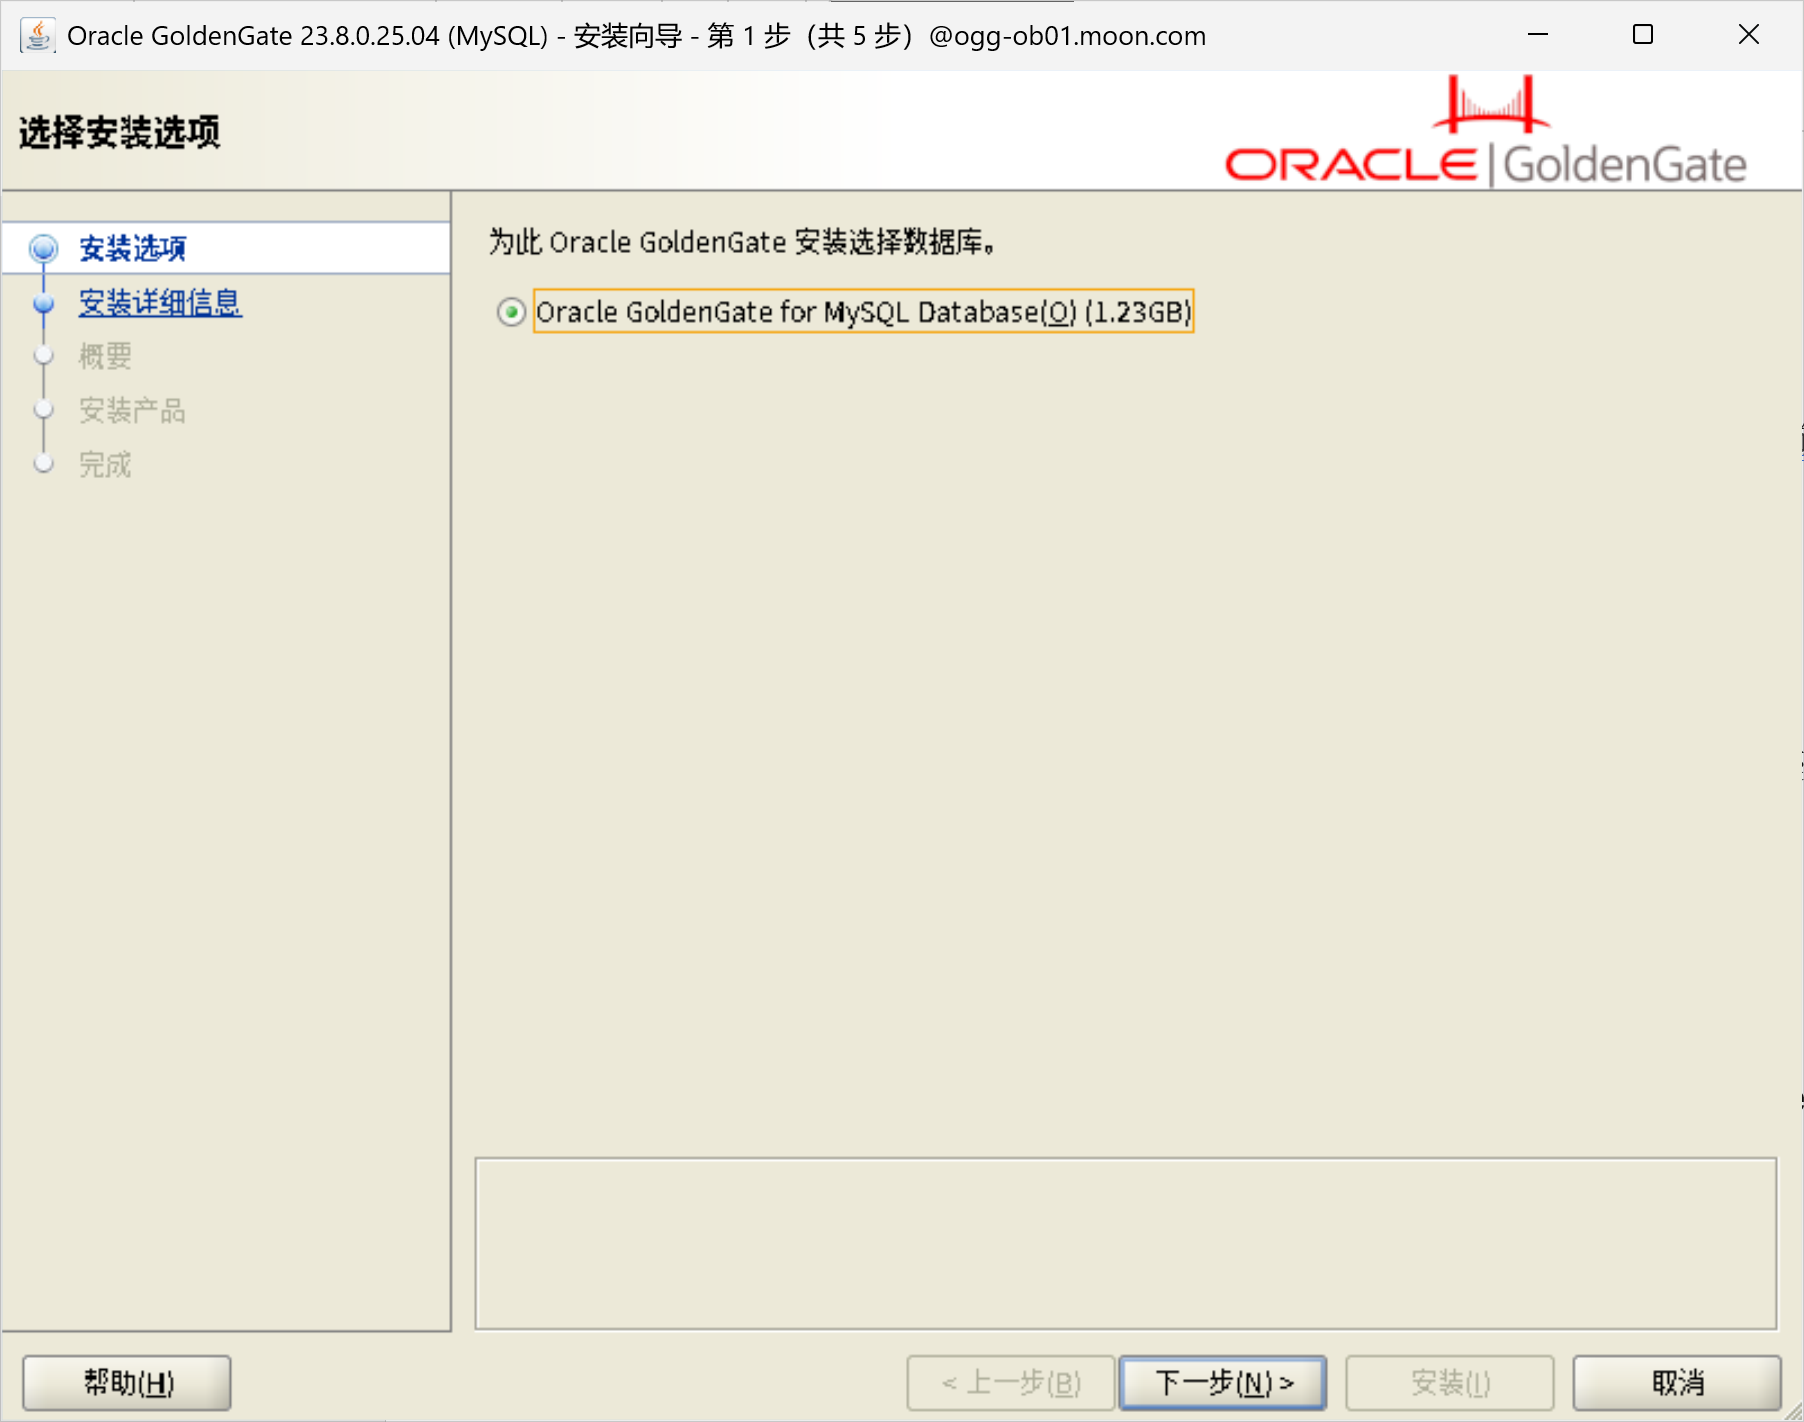
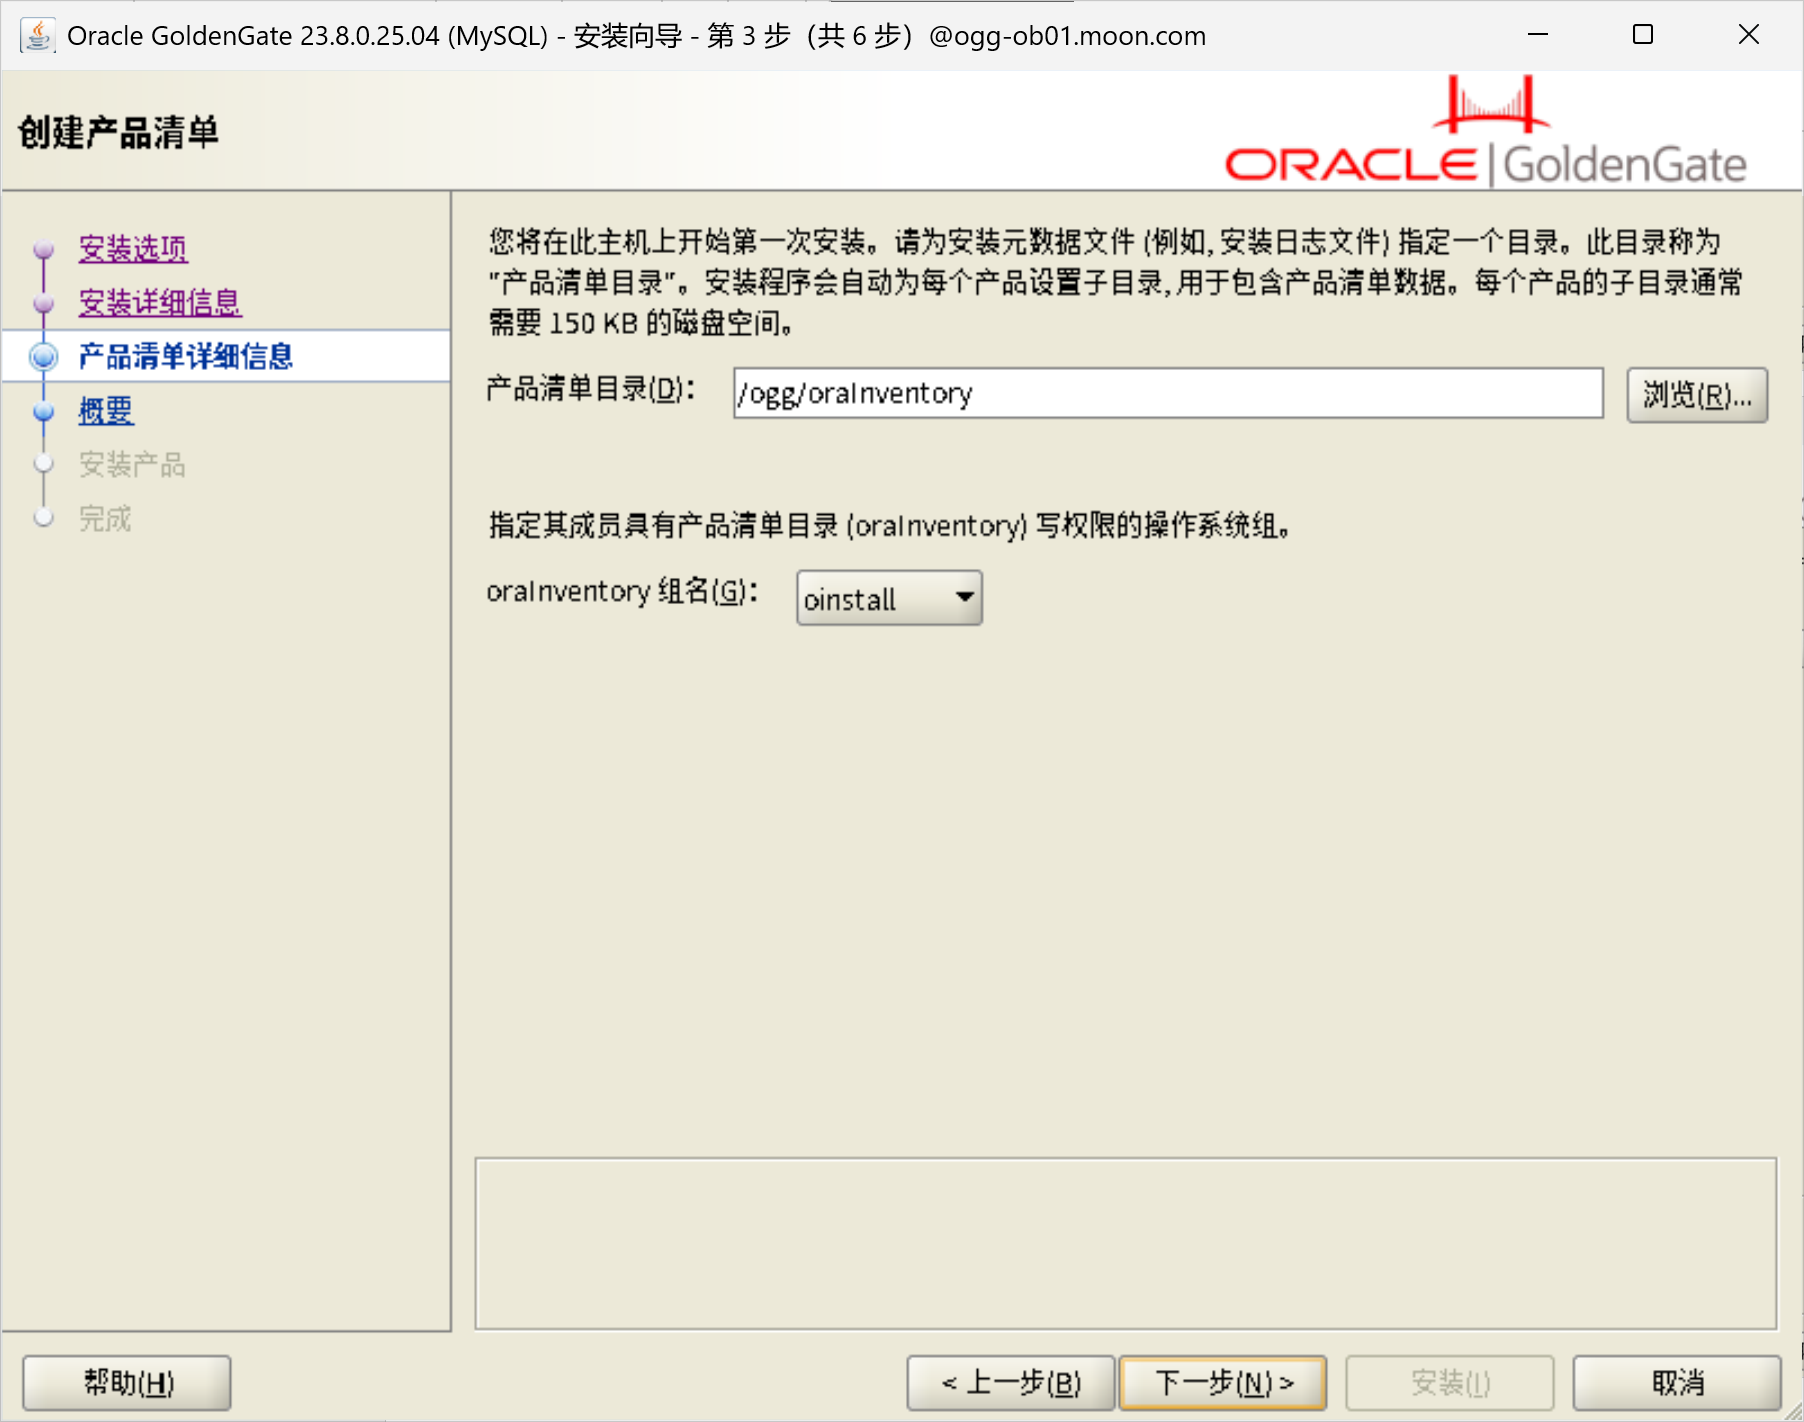
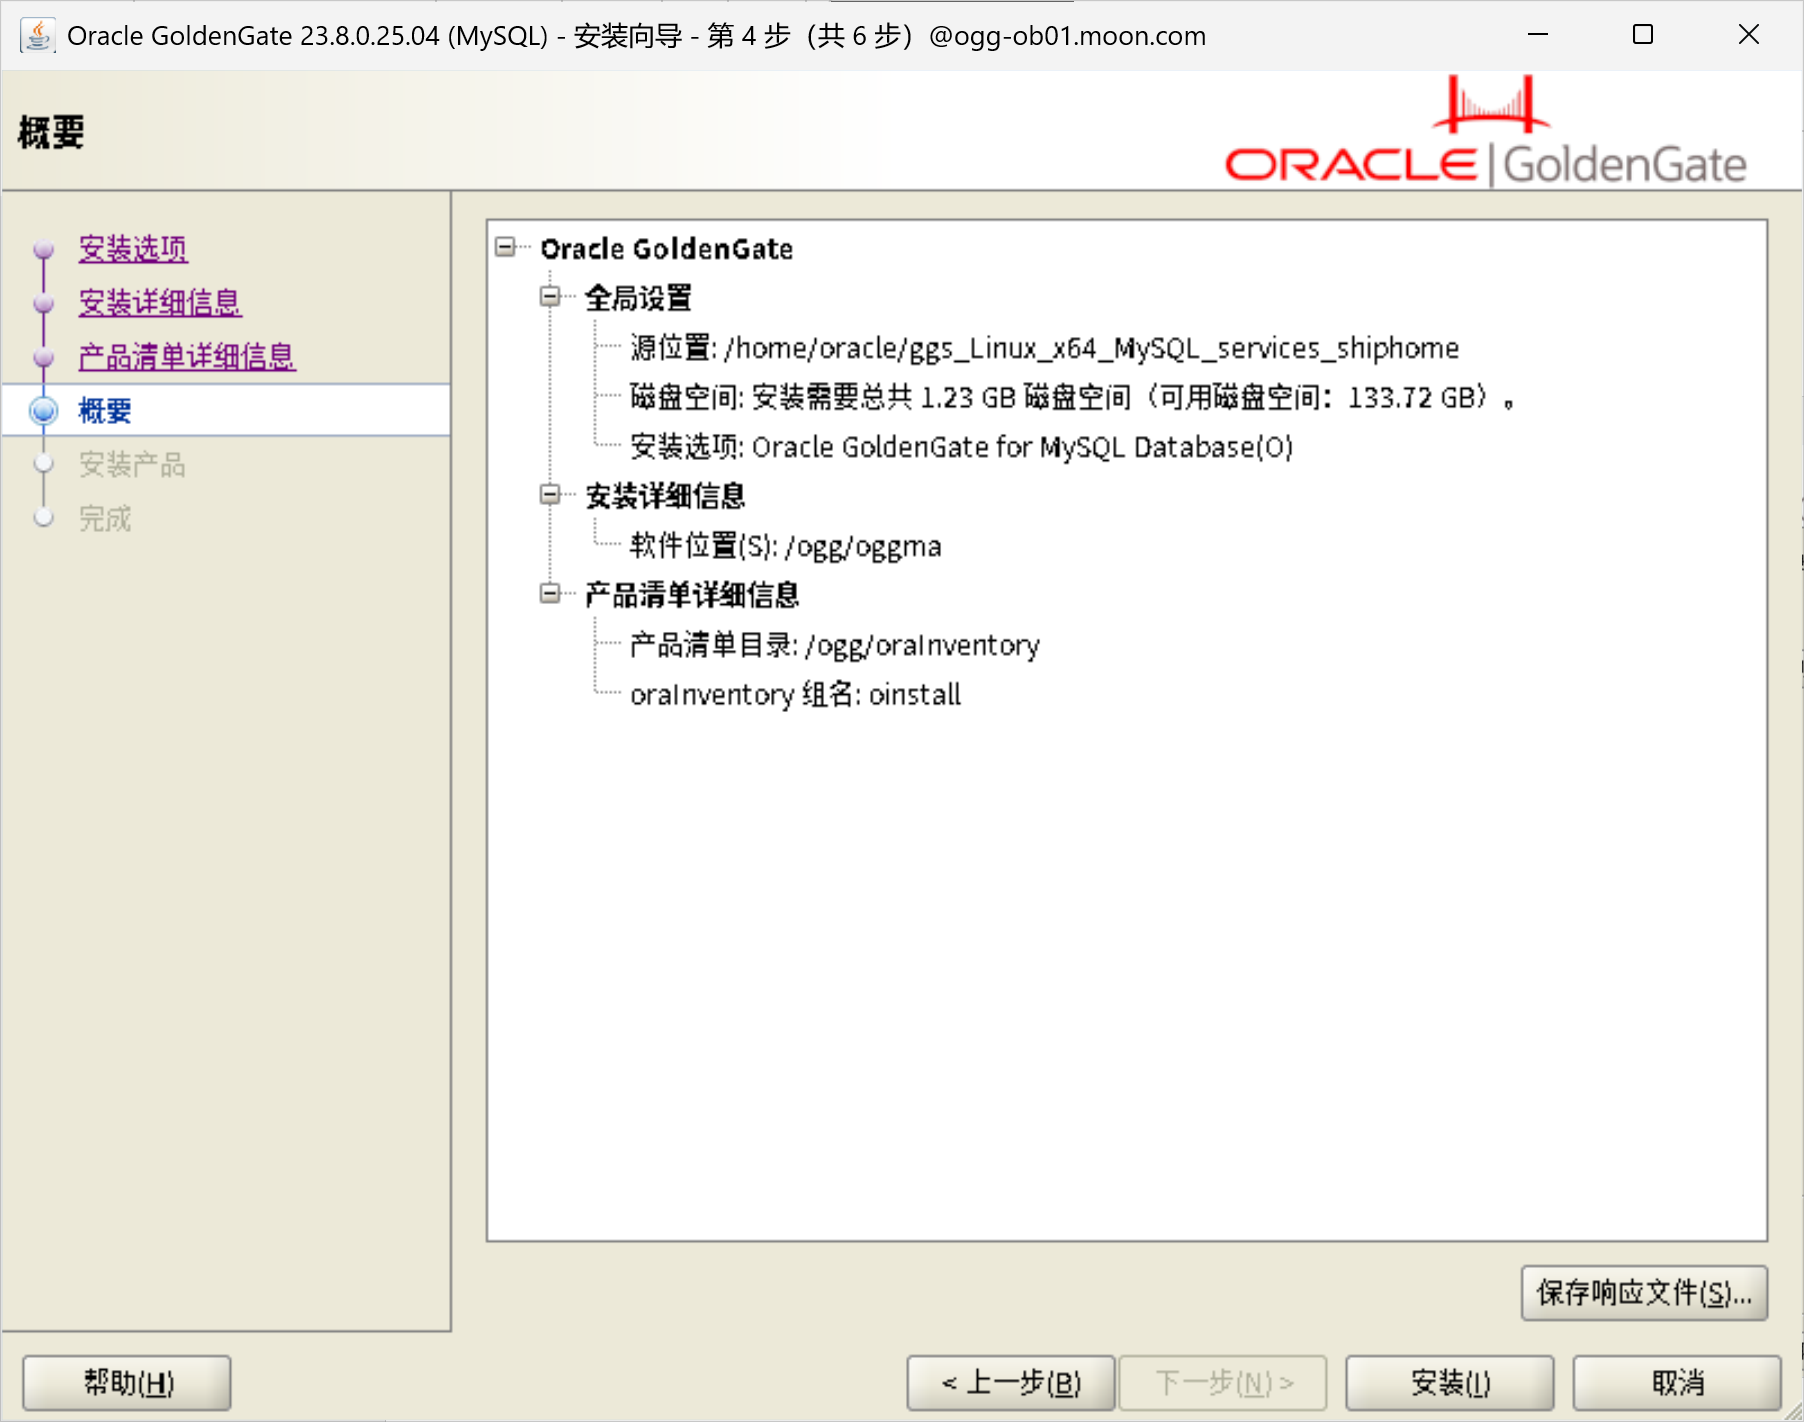

[root@ogg-ob01 ~]# /ogg/oraInventory/orainstRoot.sh
更改权限/ogg/oraInventory.
添加组的读取和写入权限。
删除全局的读取, 写入和执行权限。
更改组名/ogg/oraInventory 到 oinstall.
脚本的执行已完成。
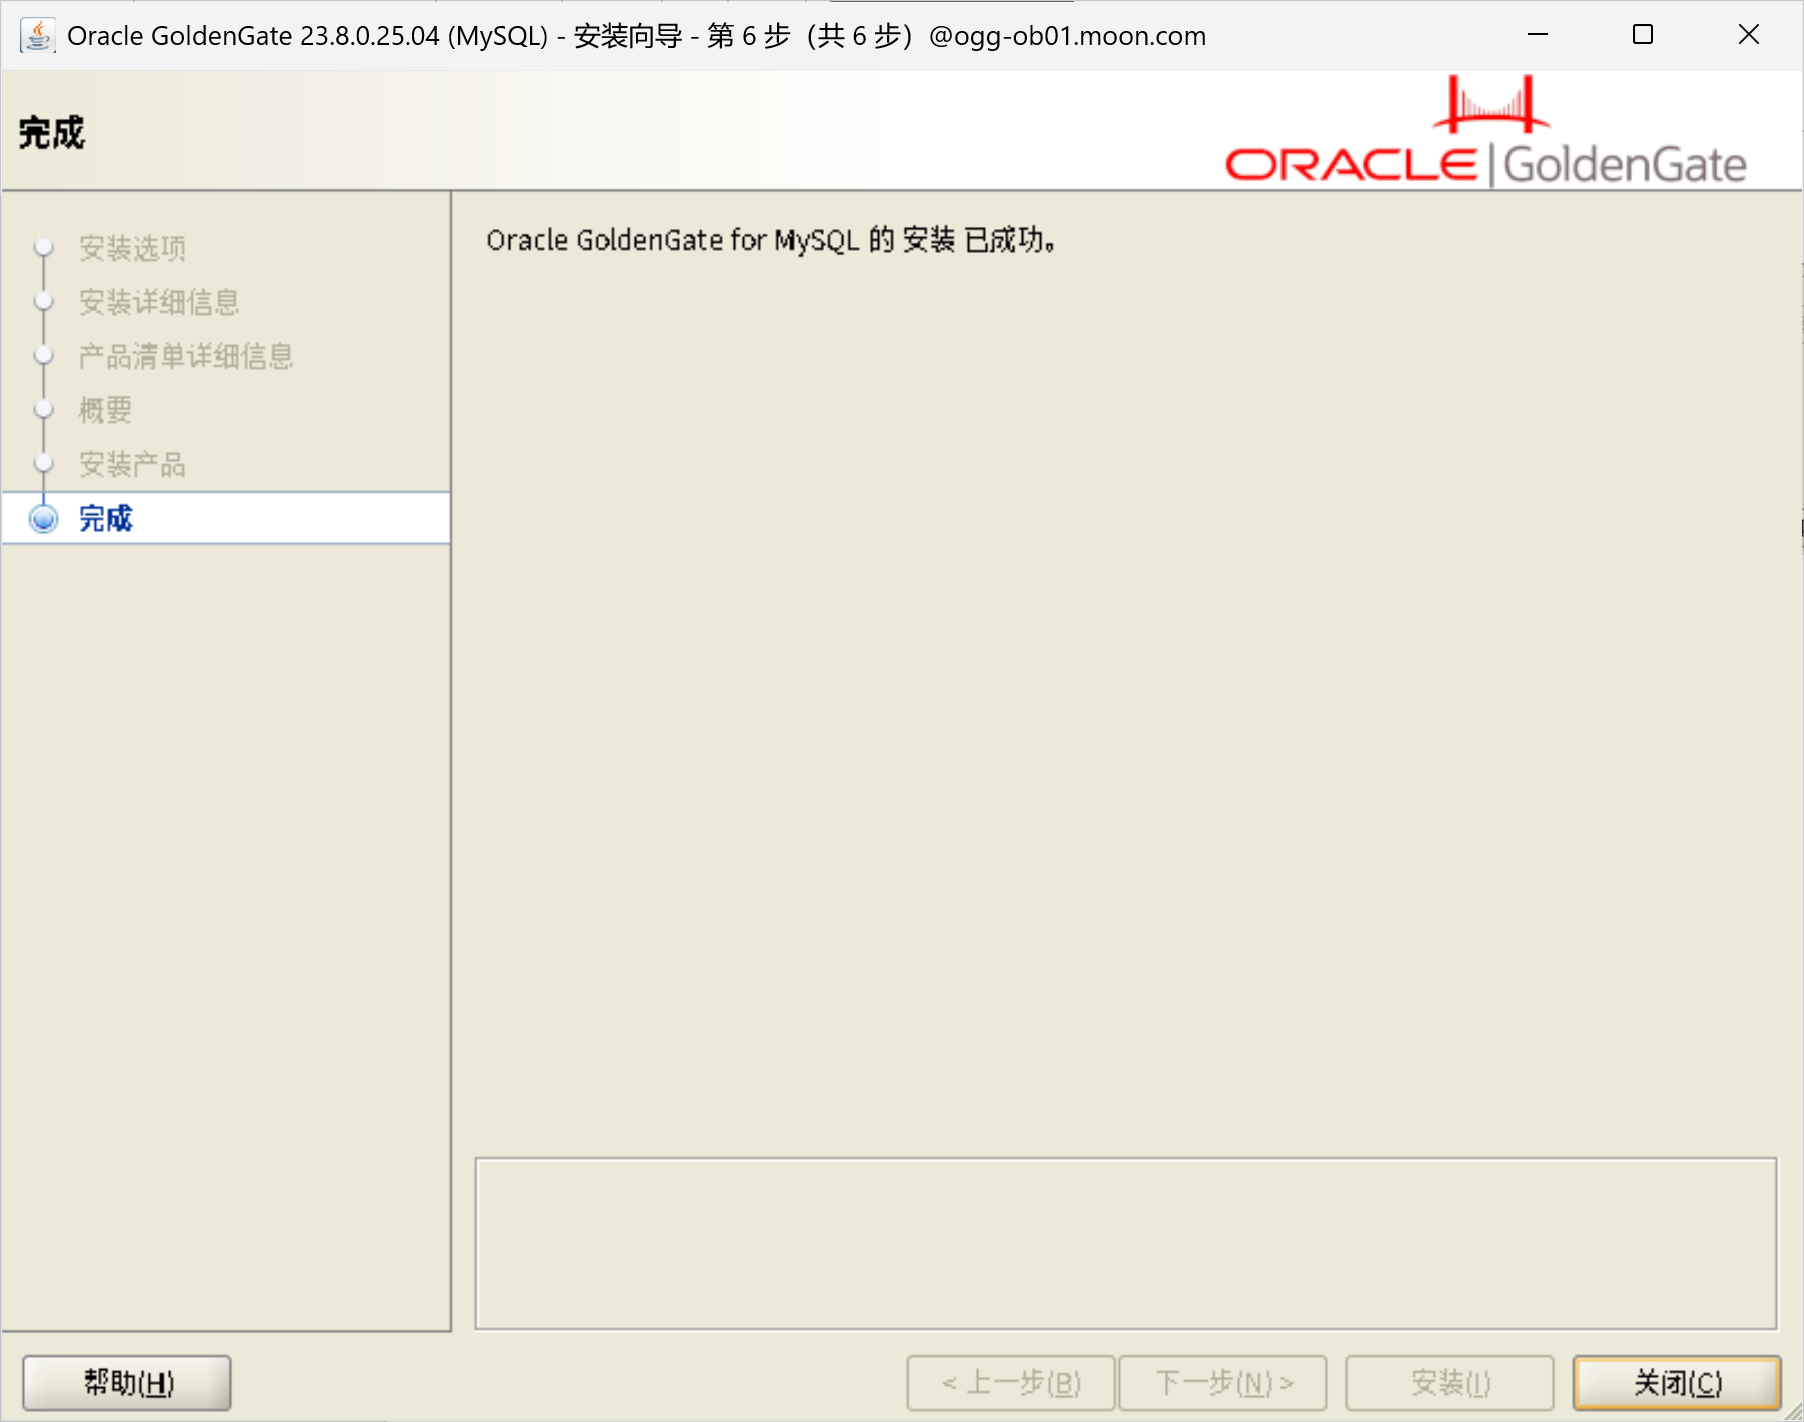
部署OGG for MySQL
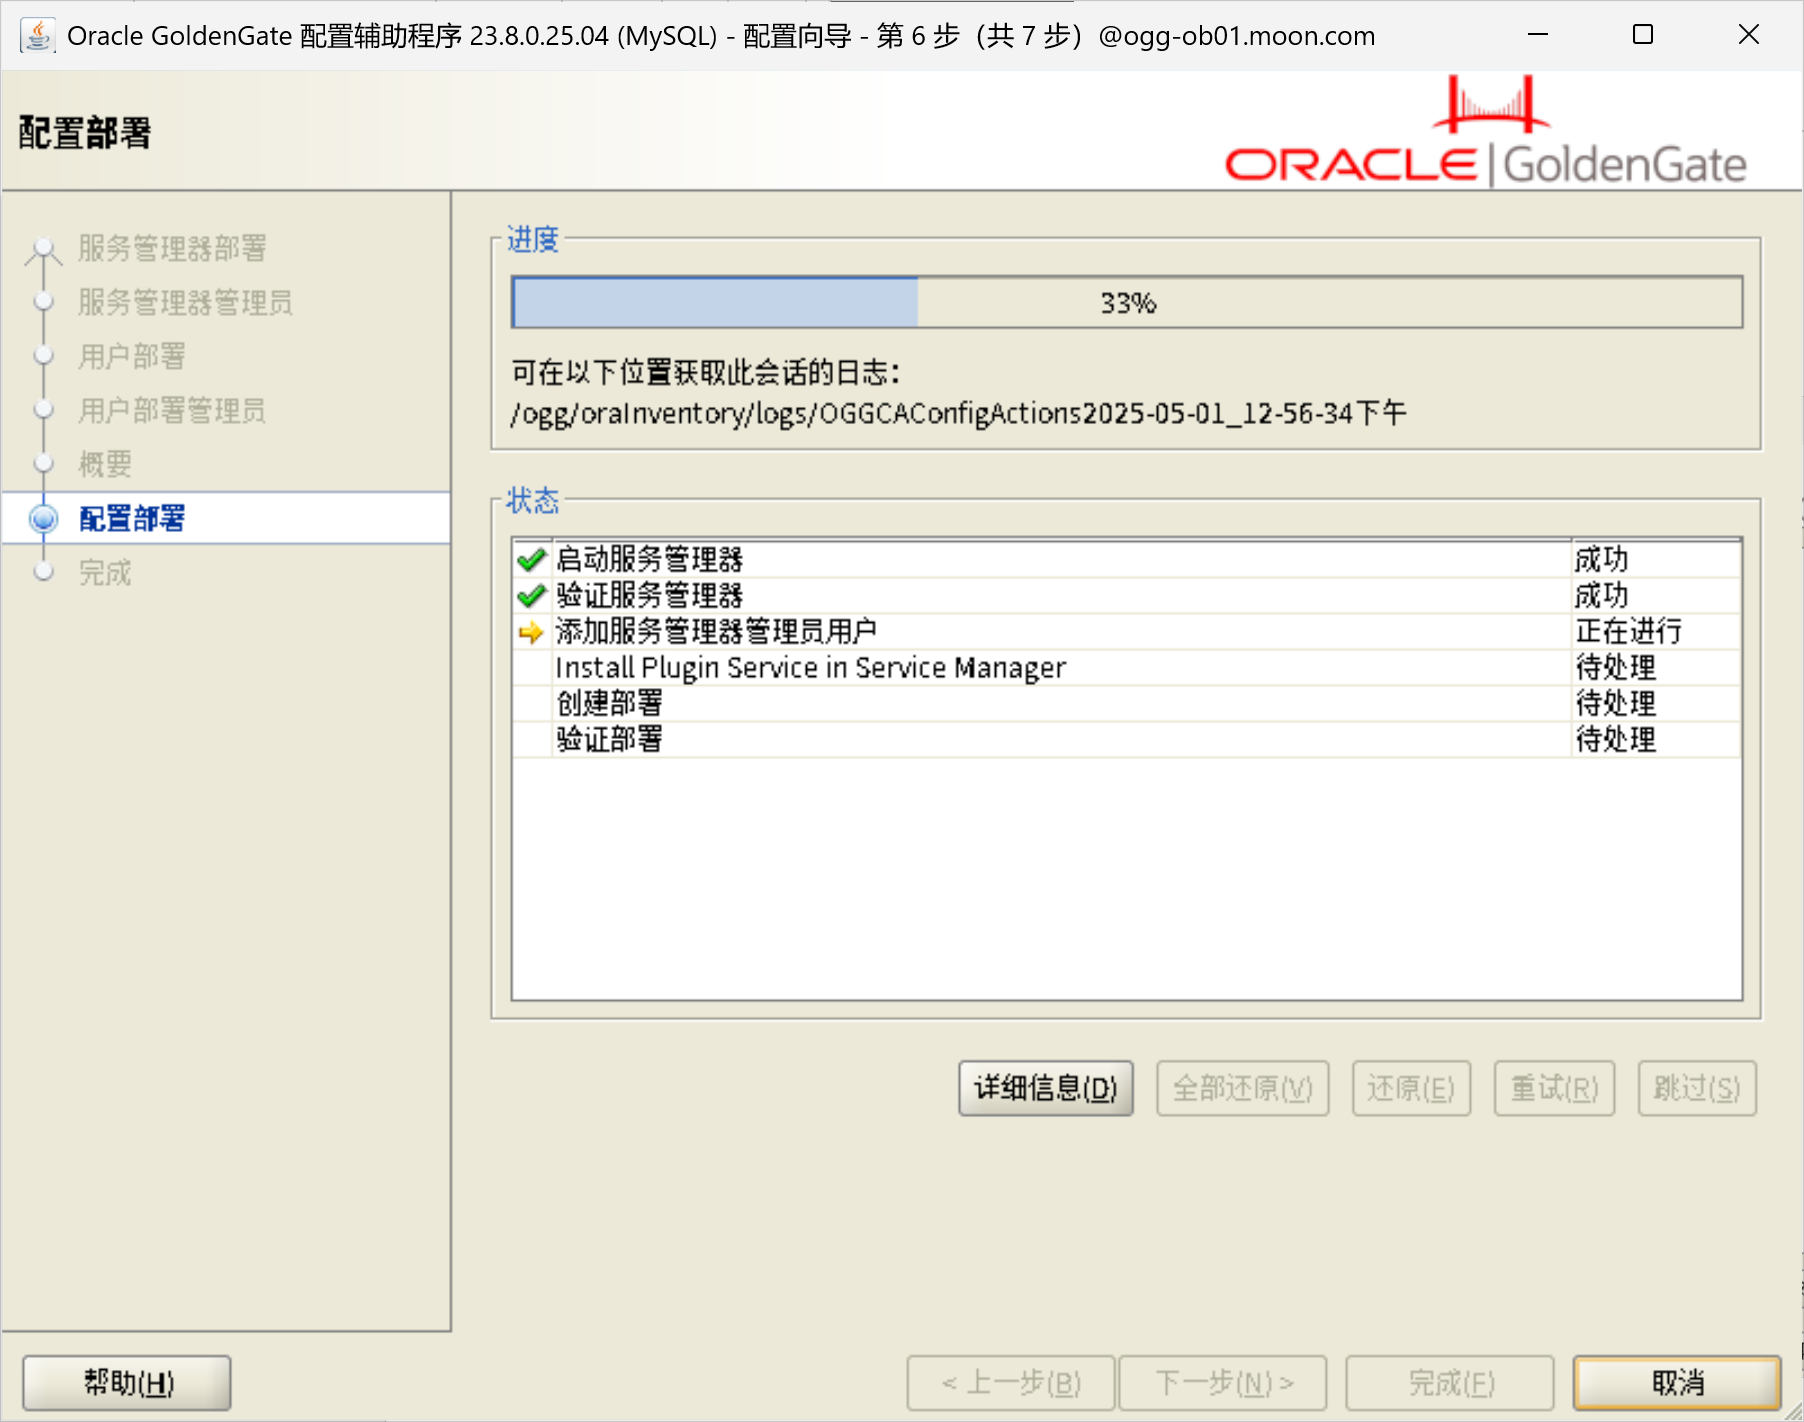
/ogg/oggma/bin/oggca.sh
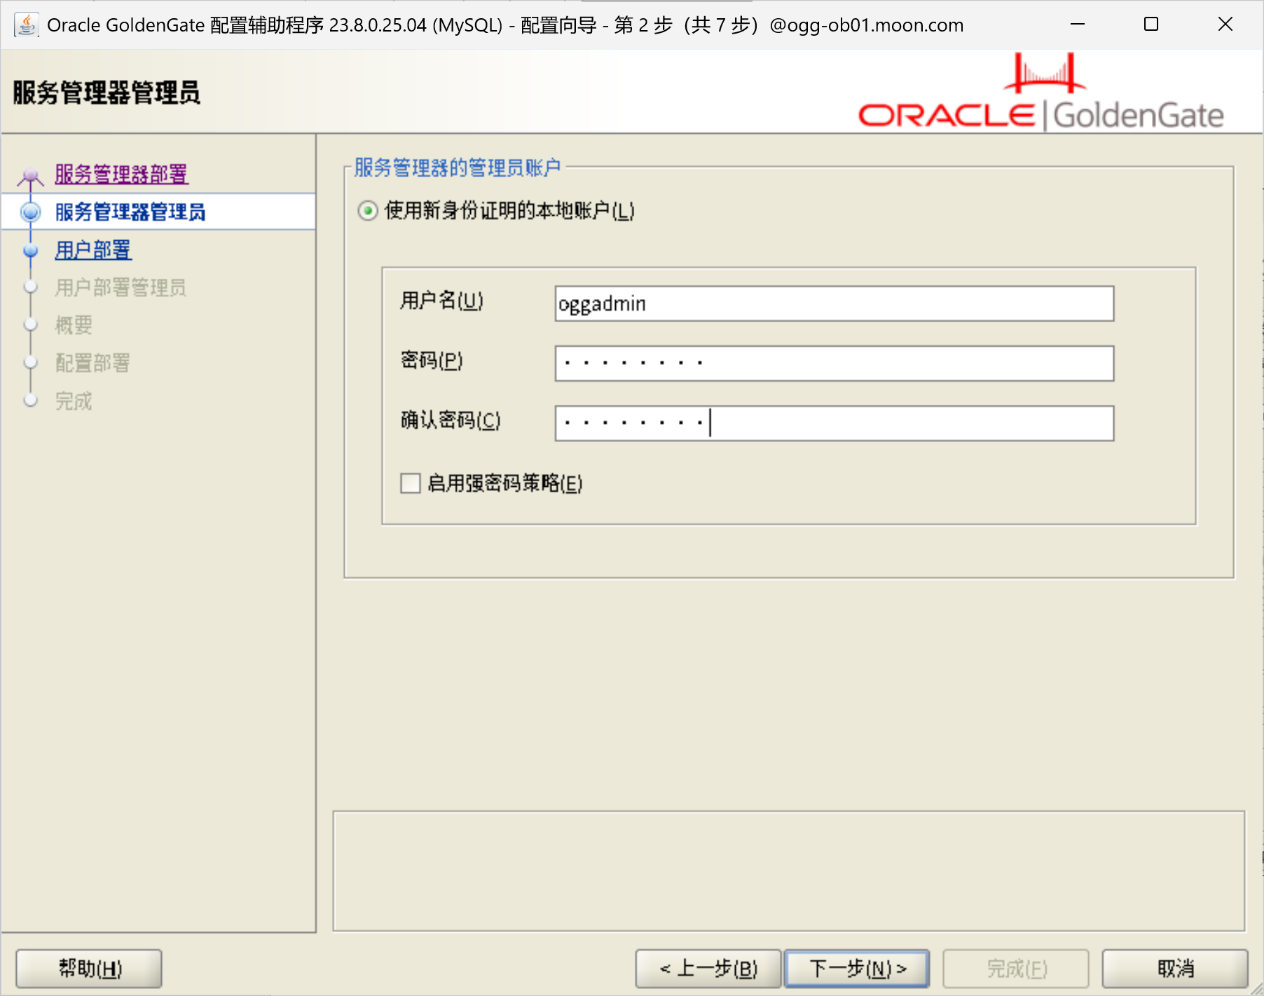
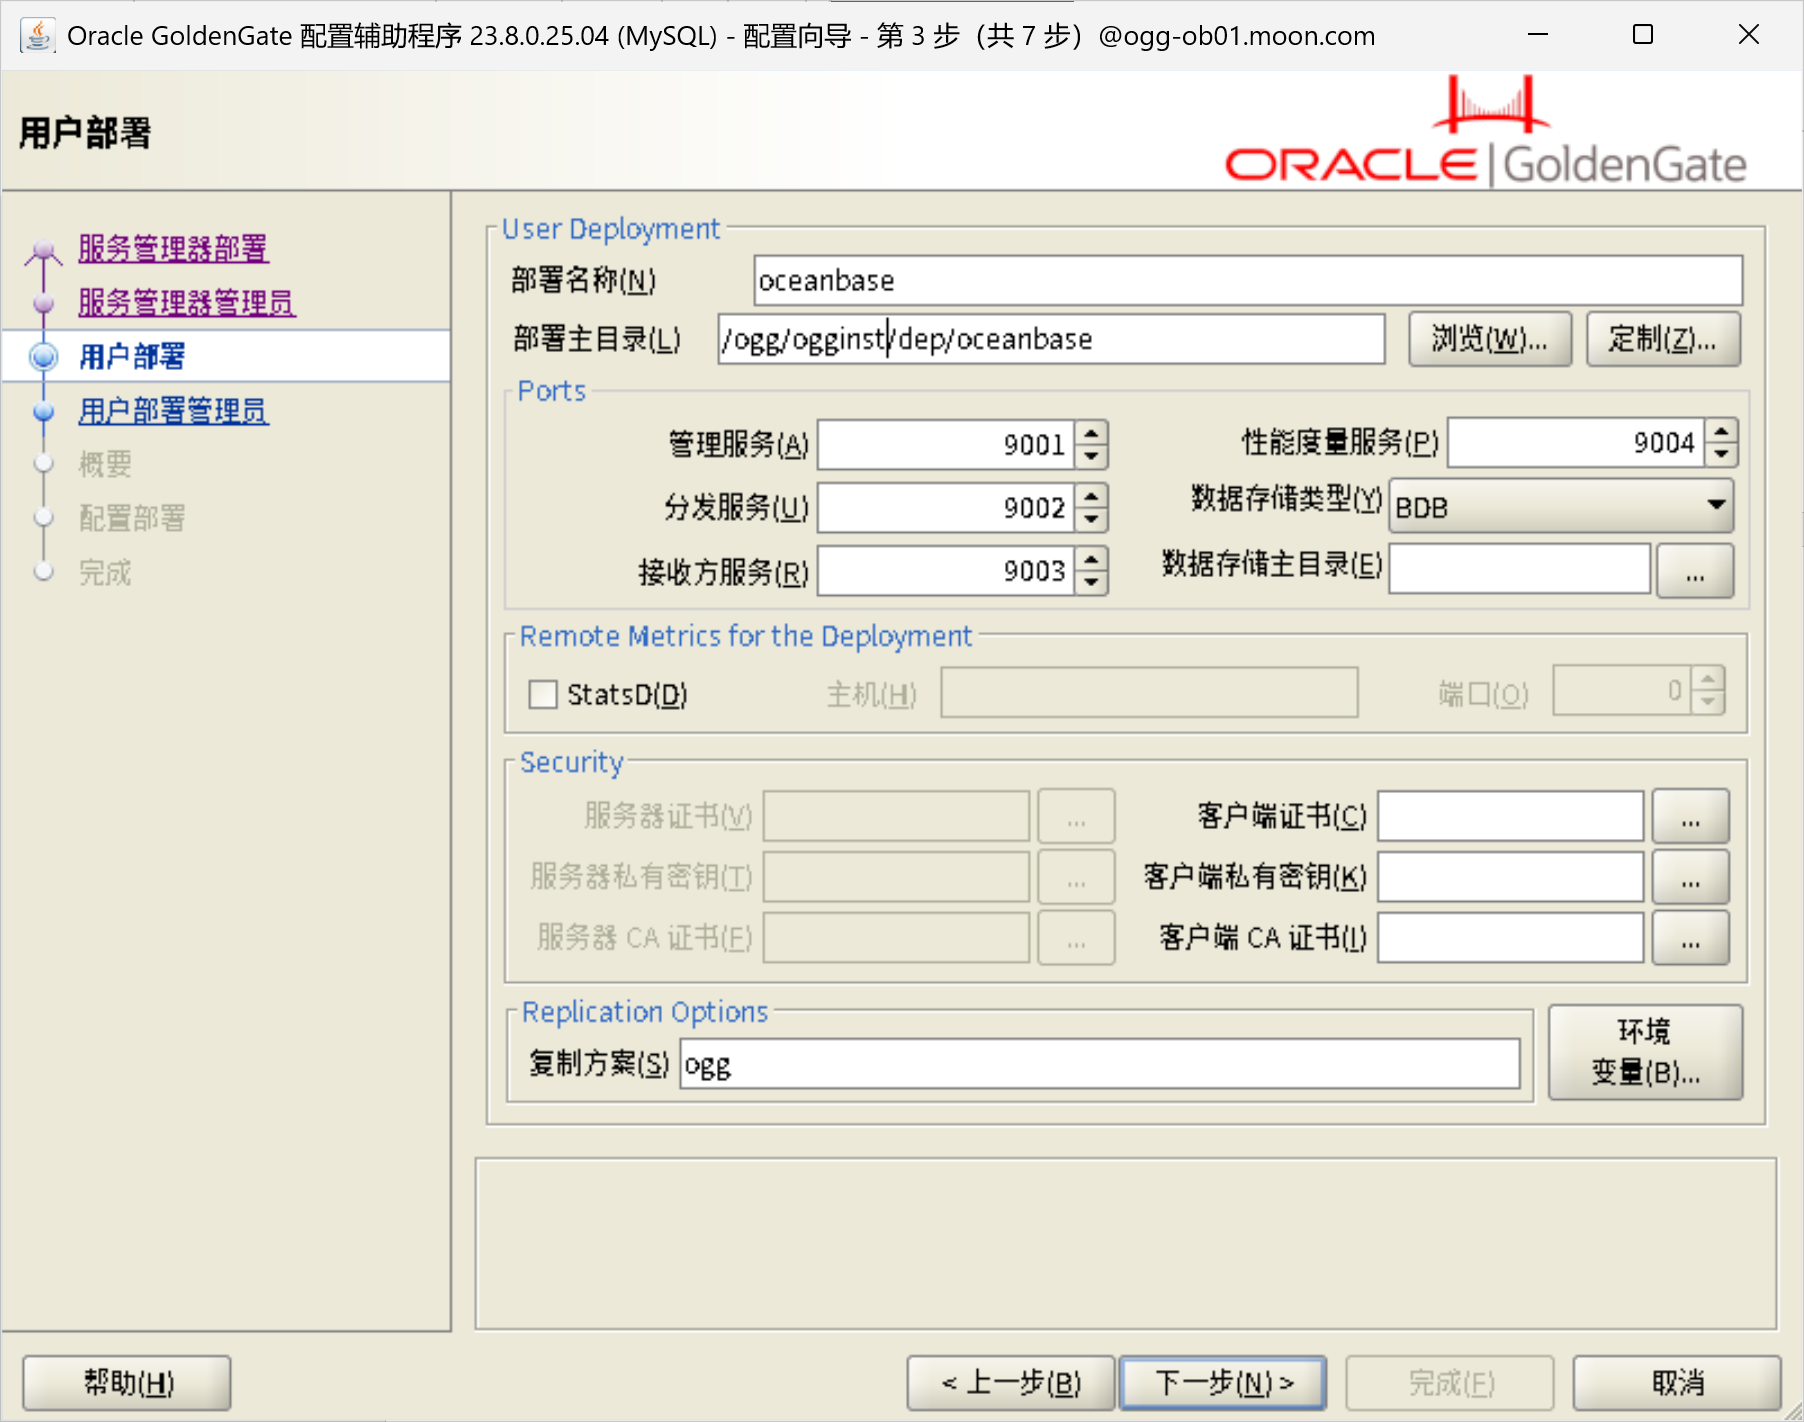
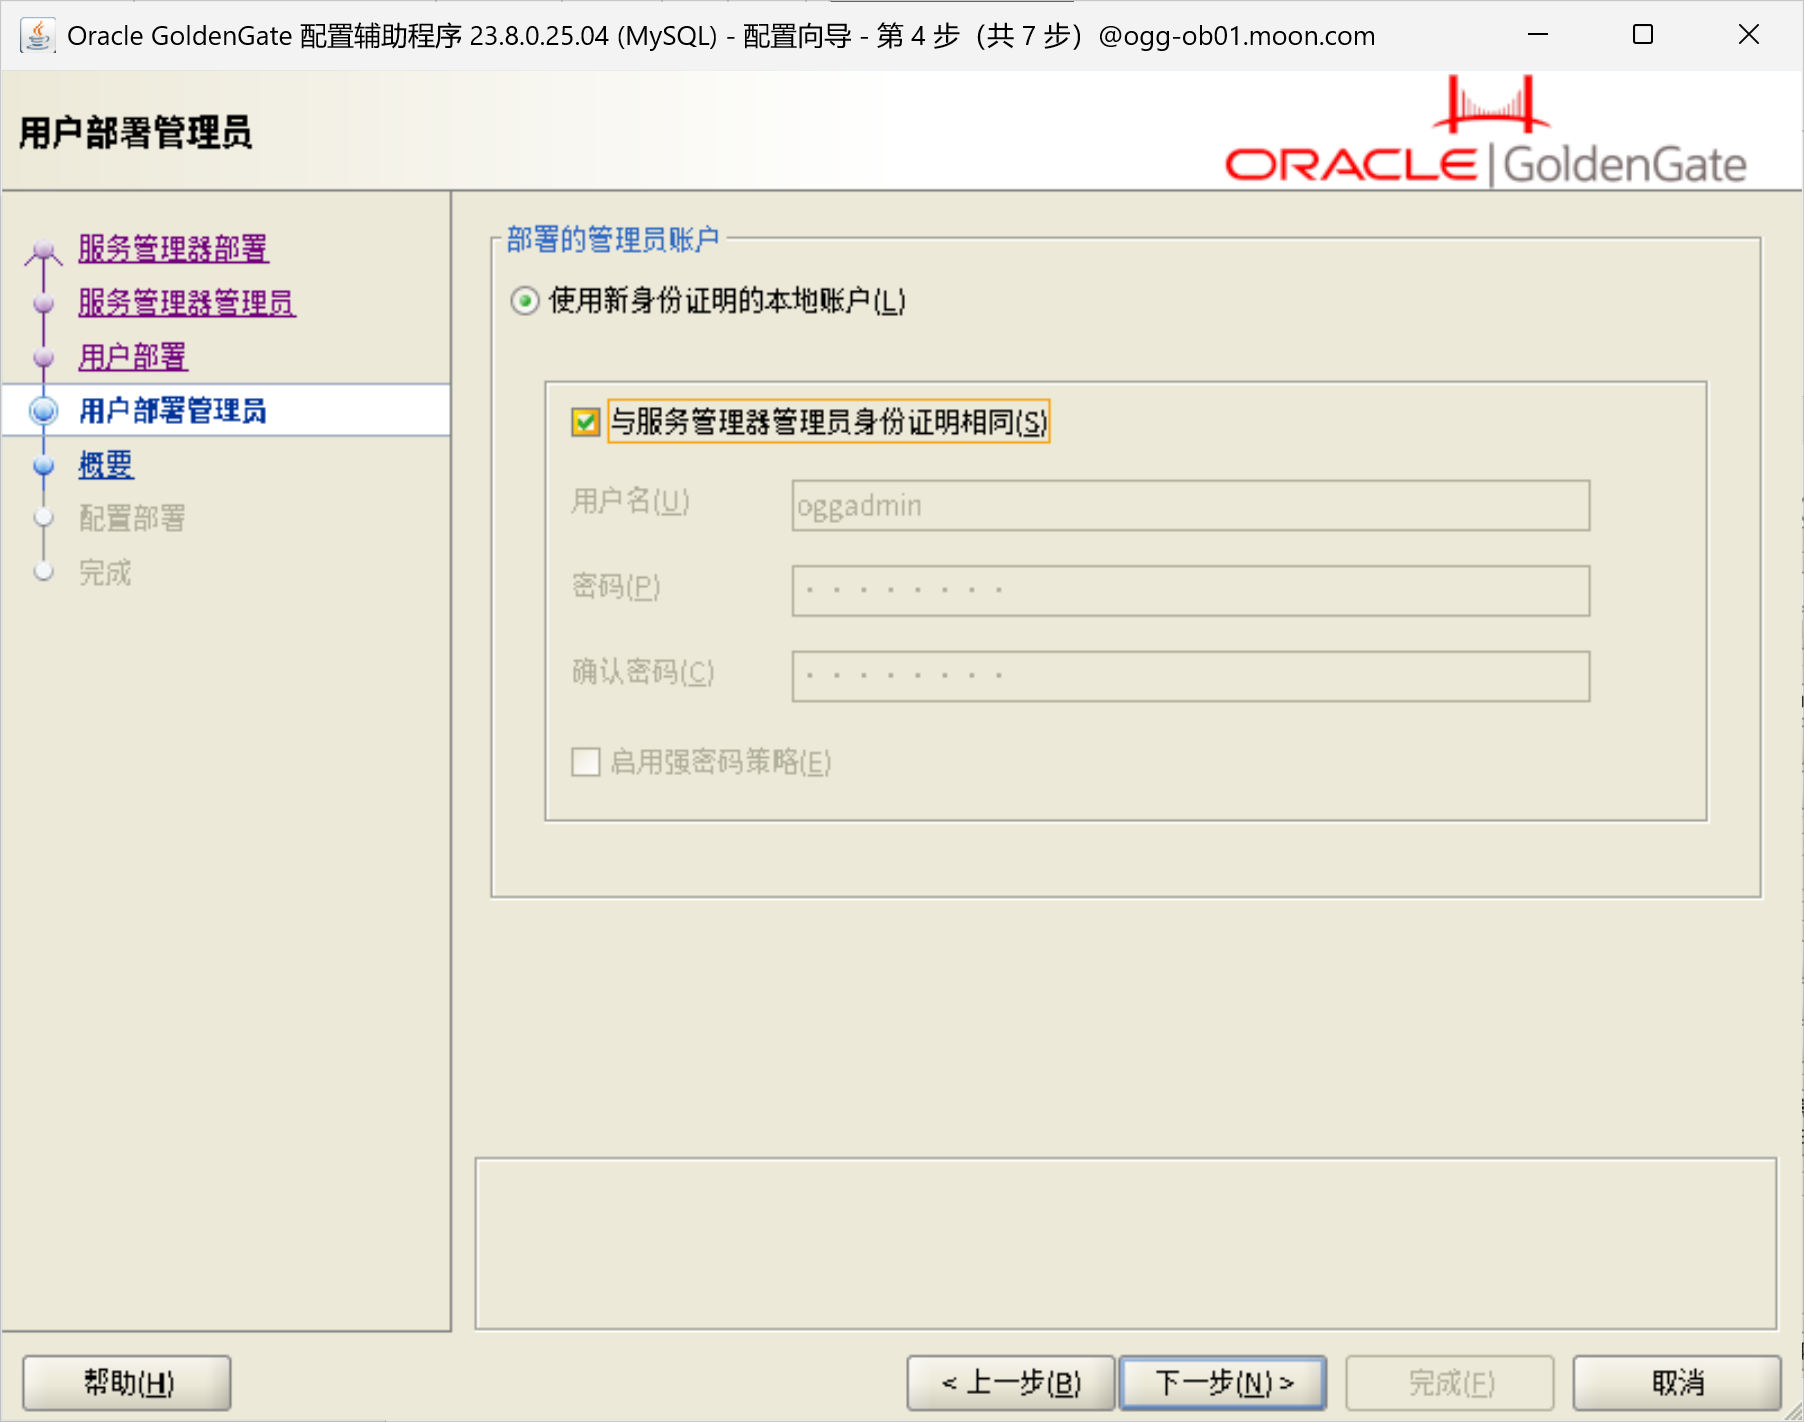
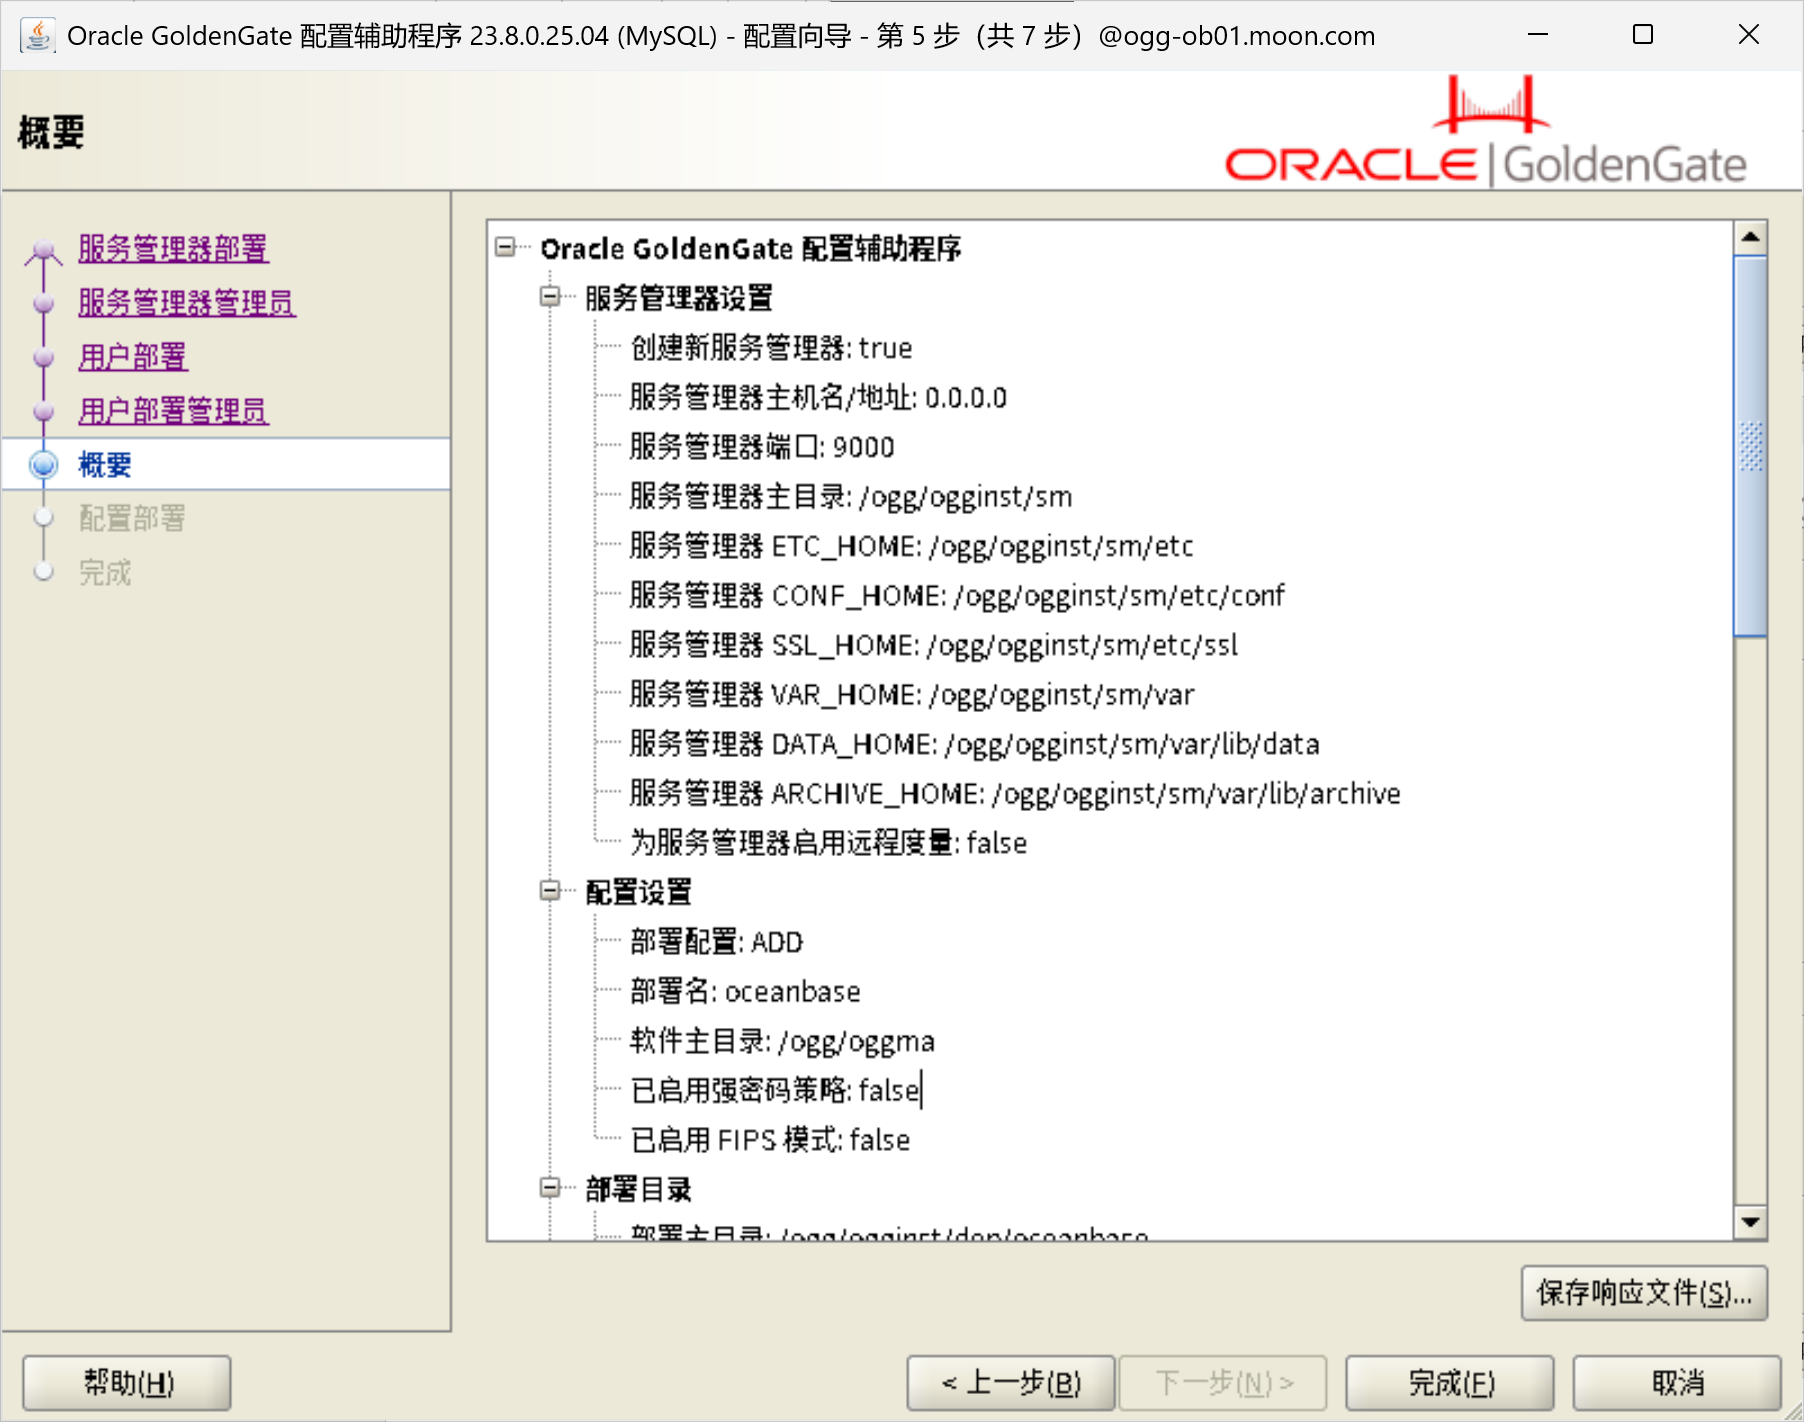
配置Oceanbase连接
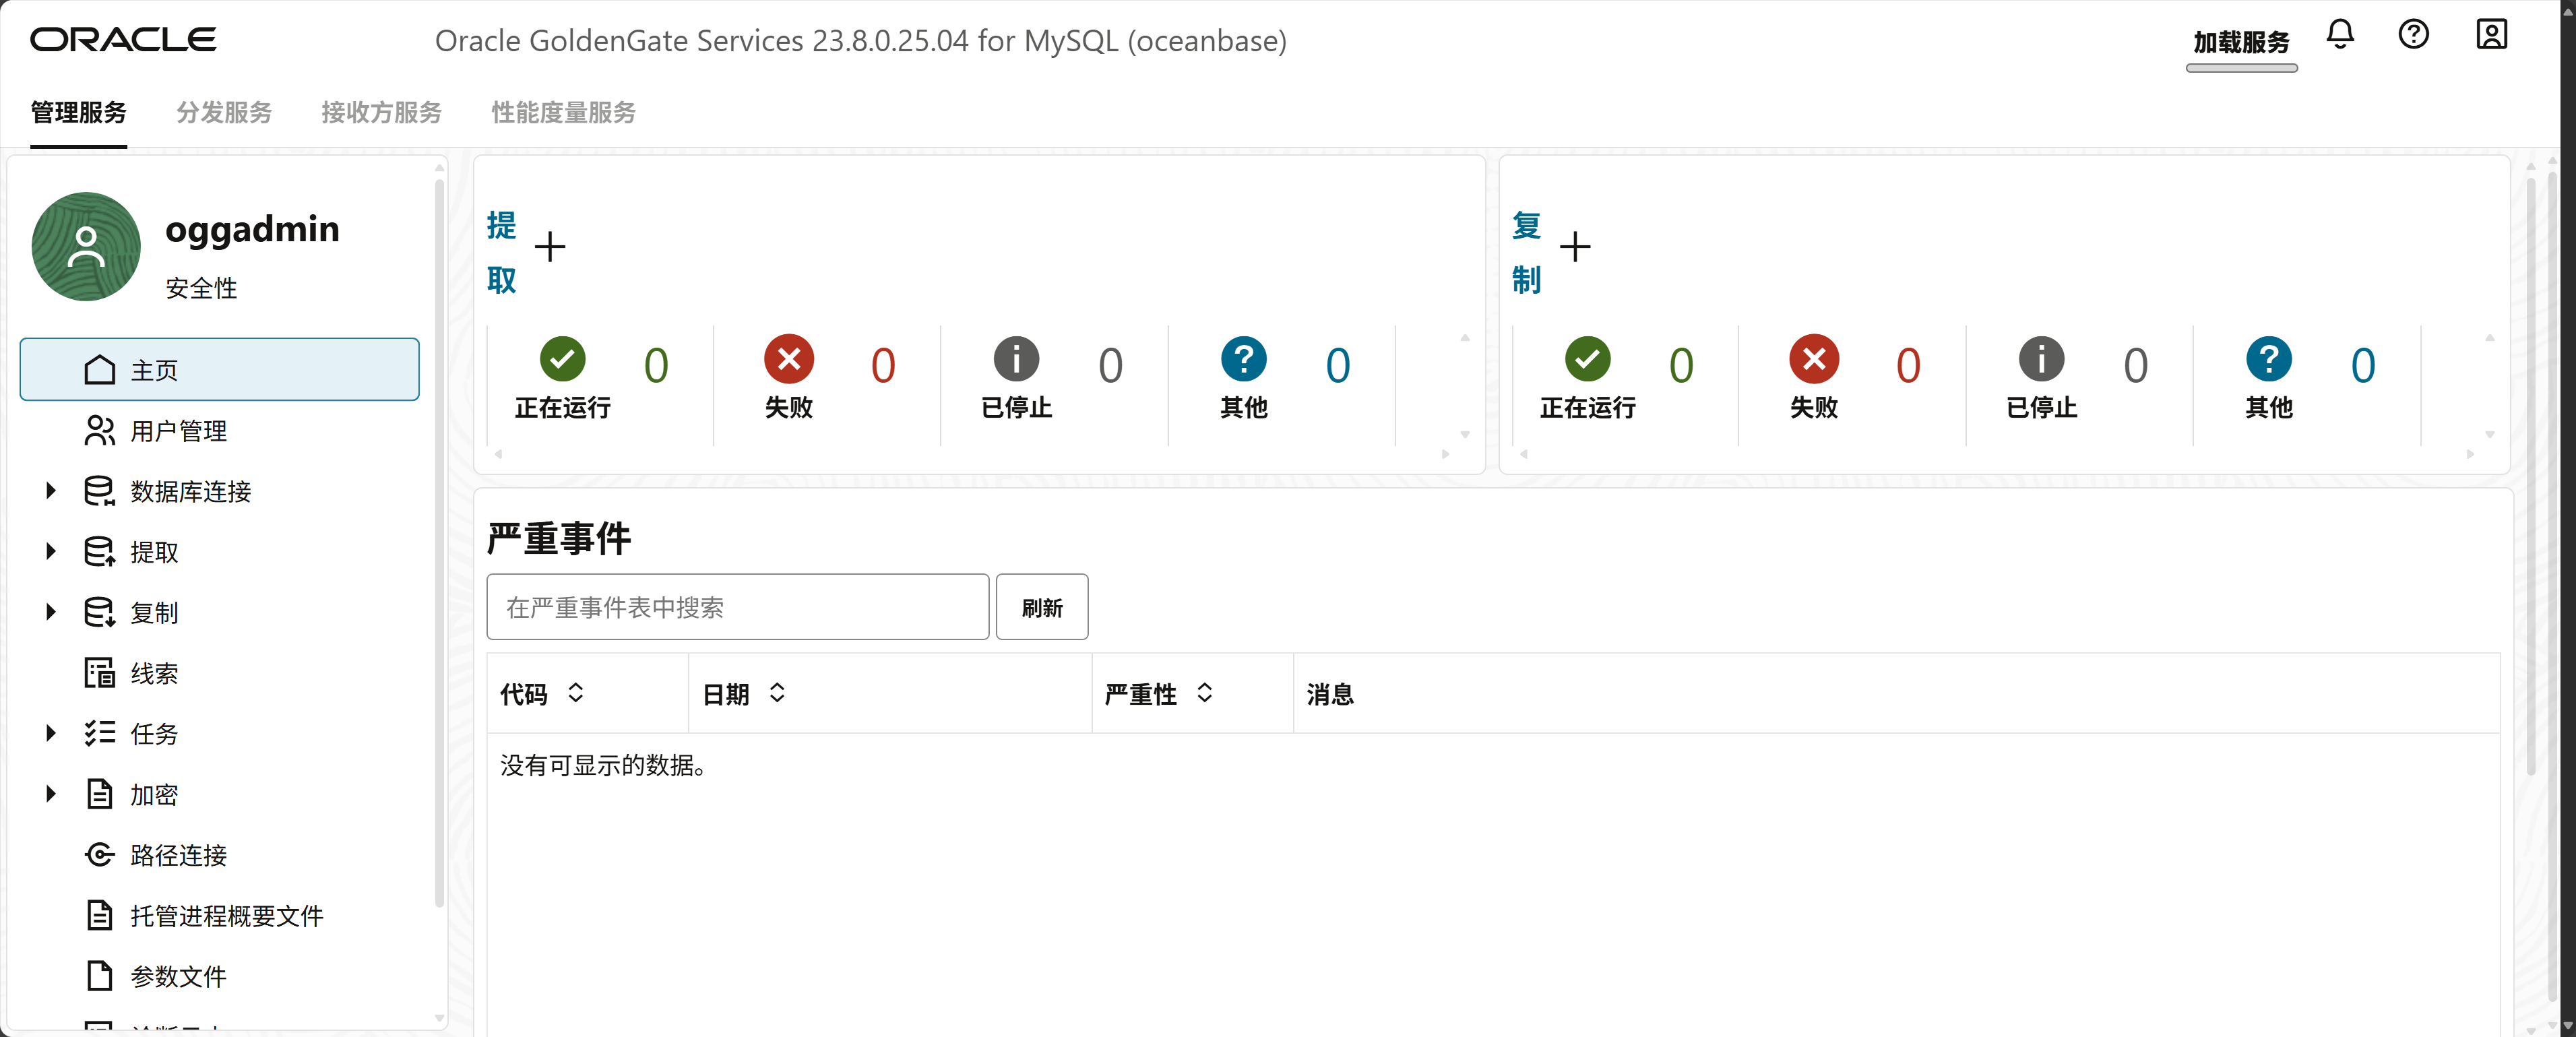
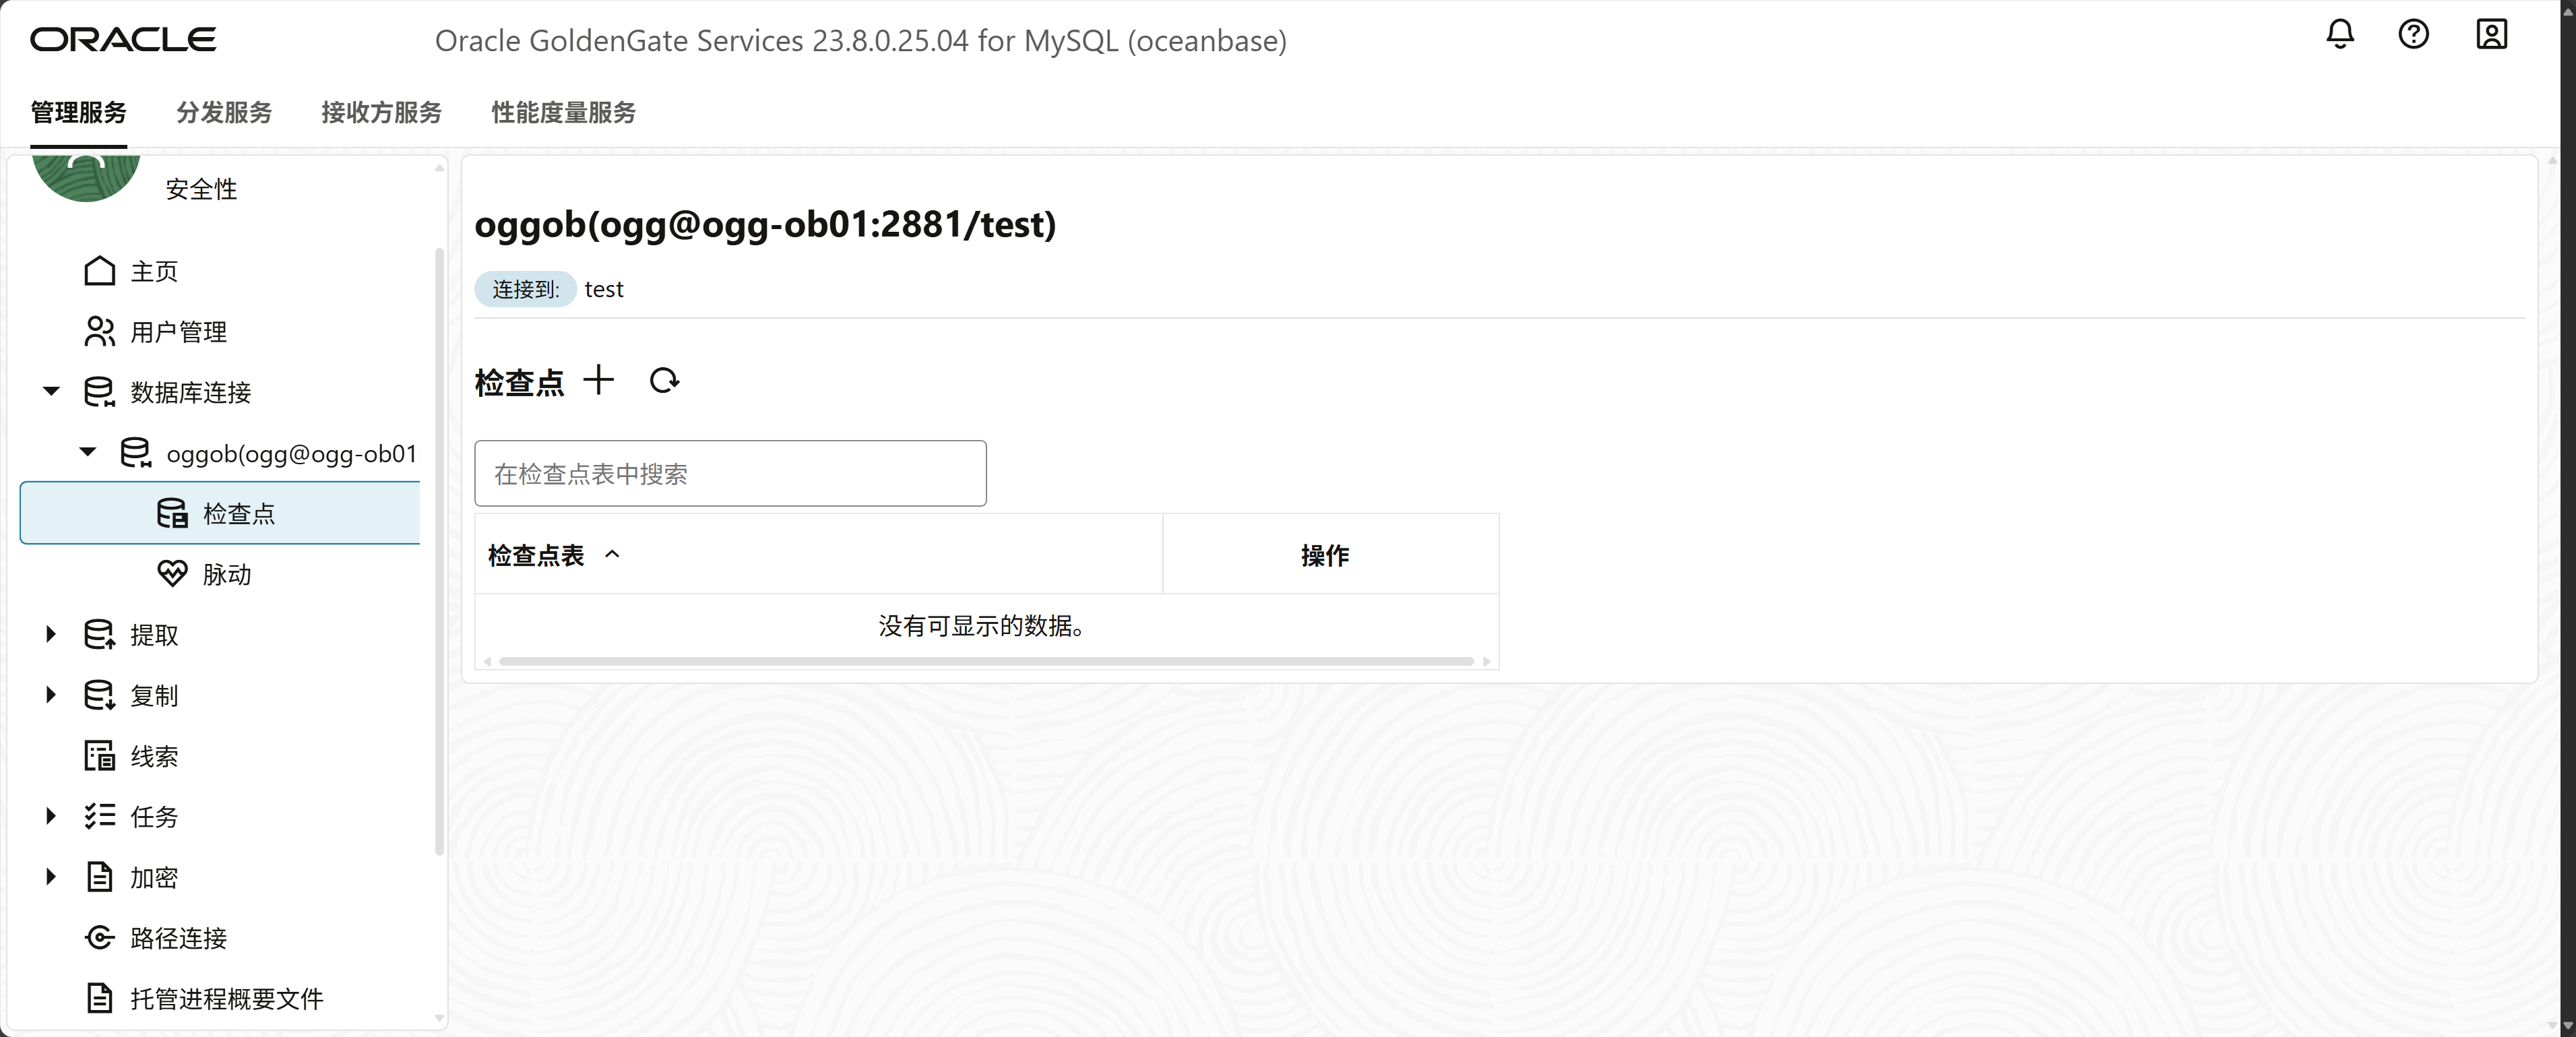
使用172.16.1.38:9001登录ogg控制台
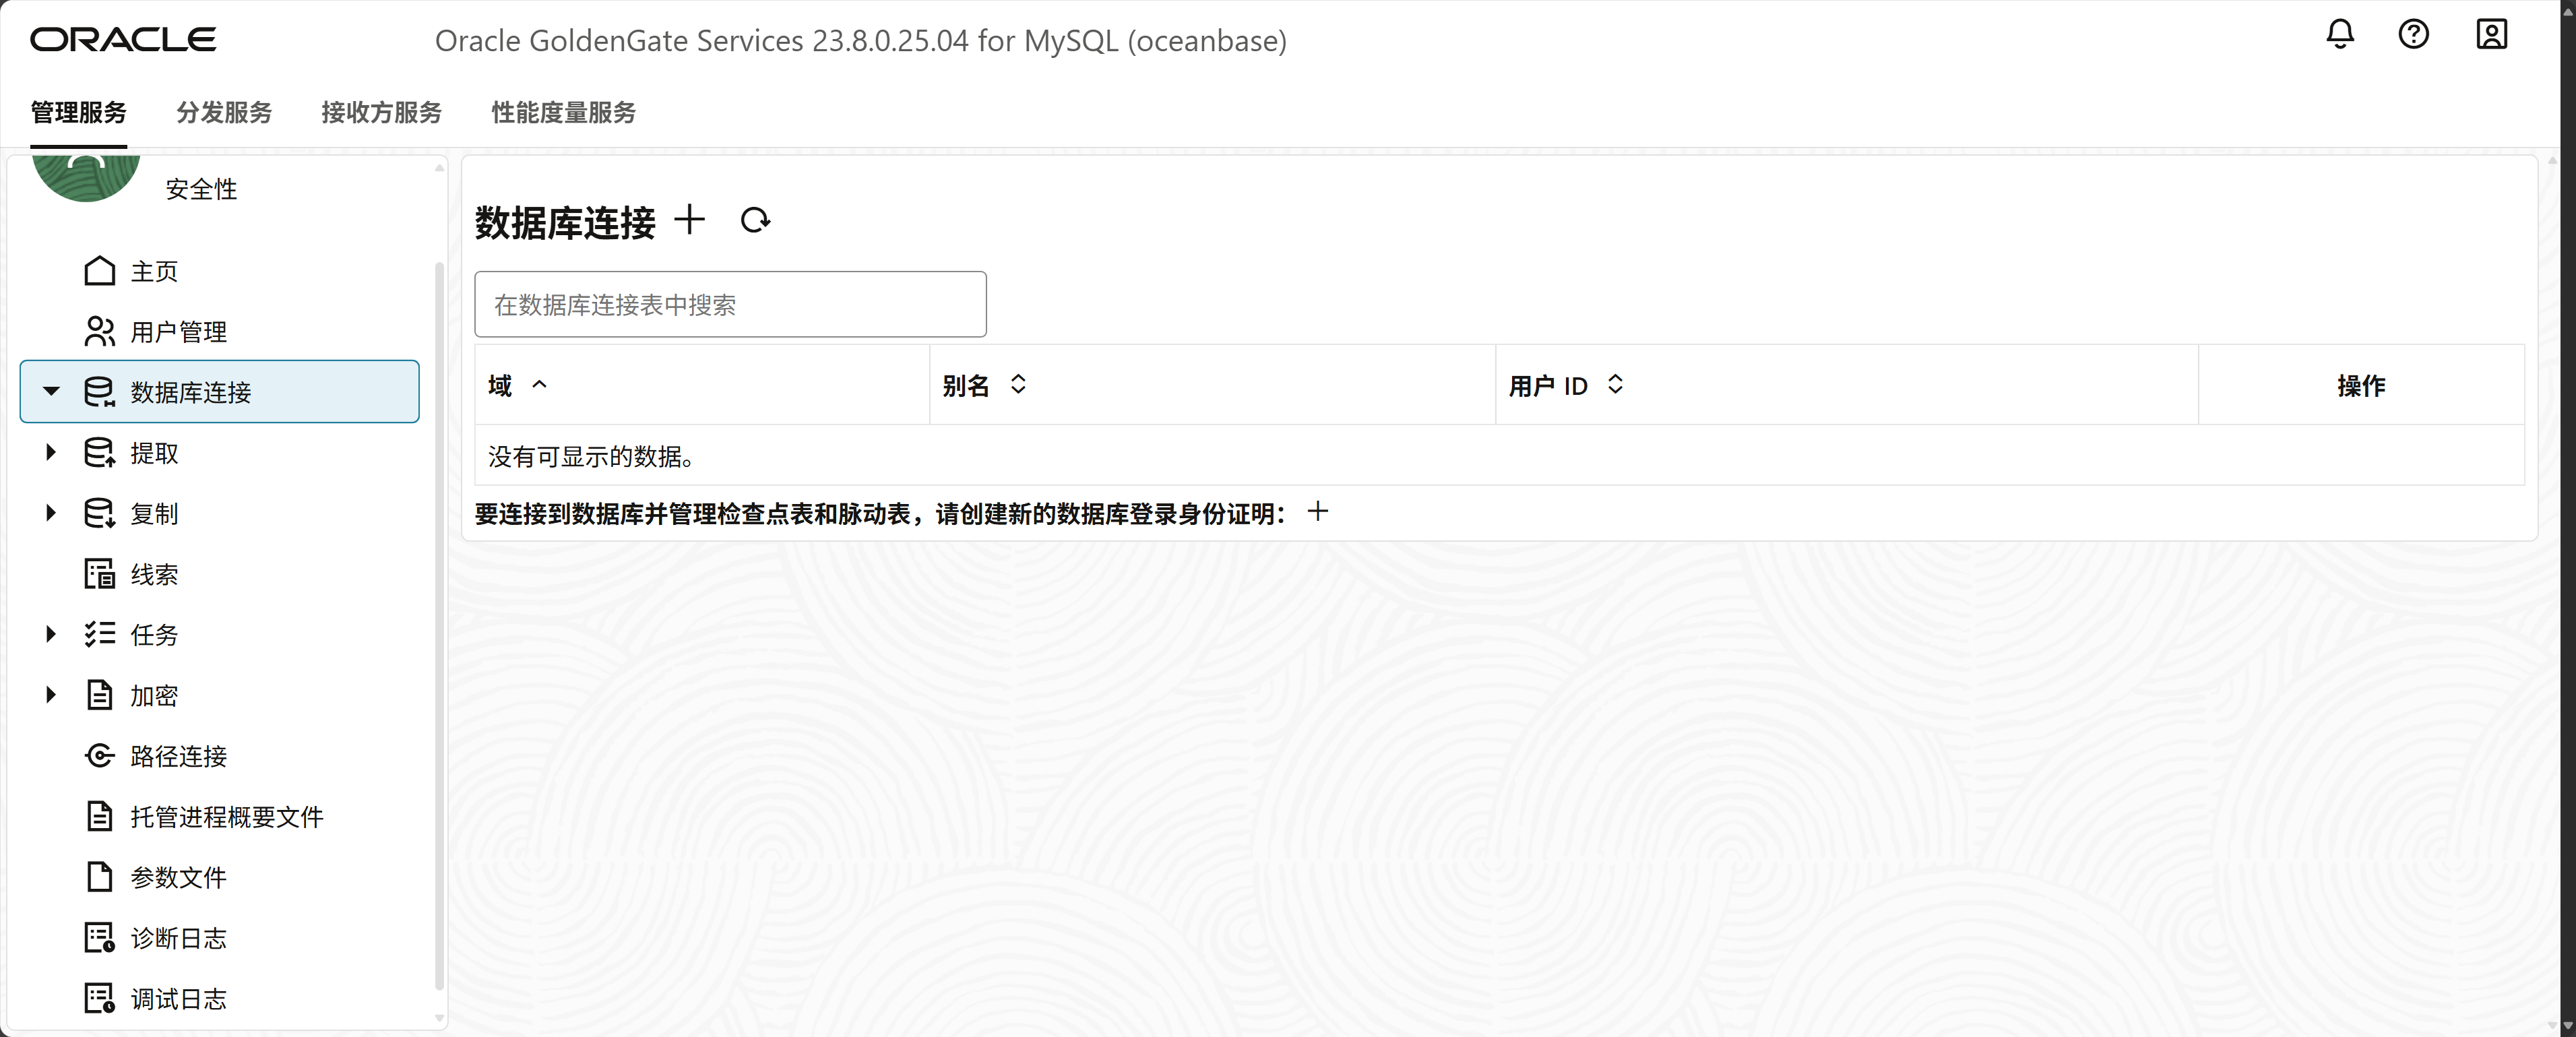
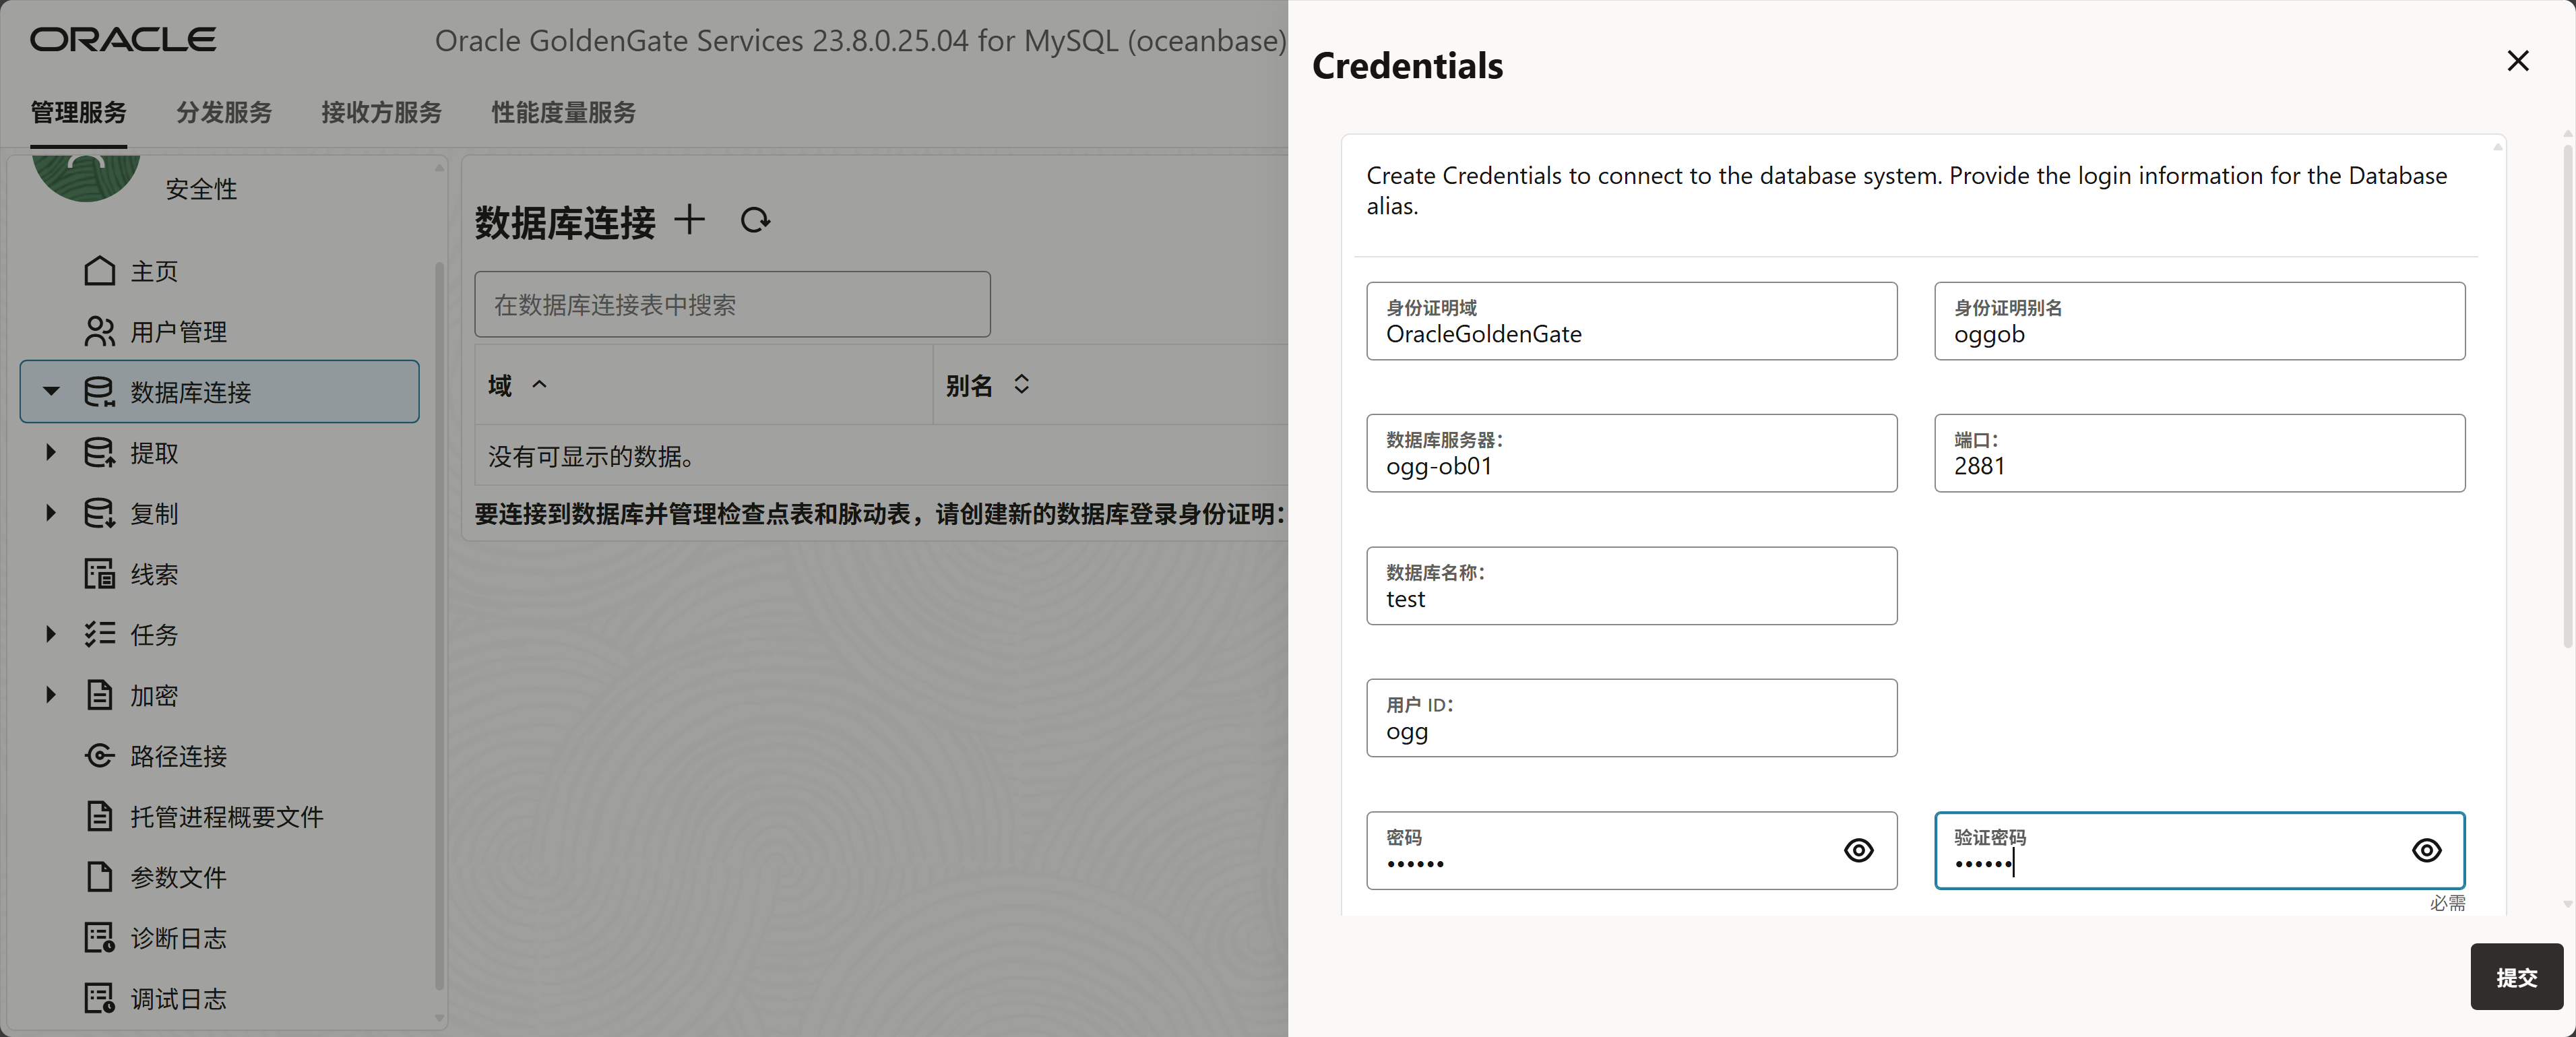
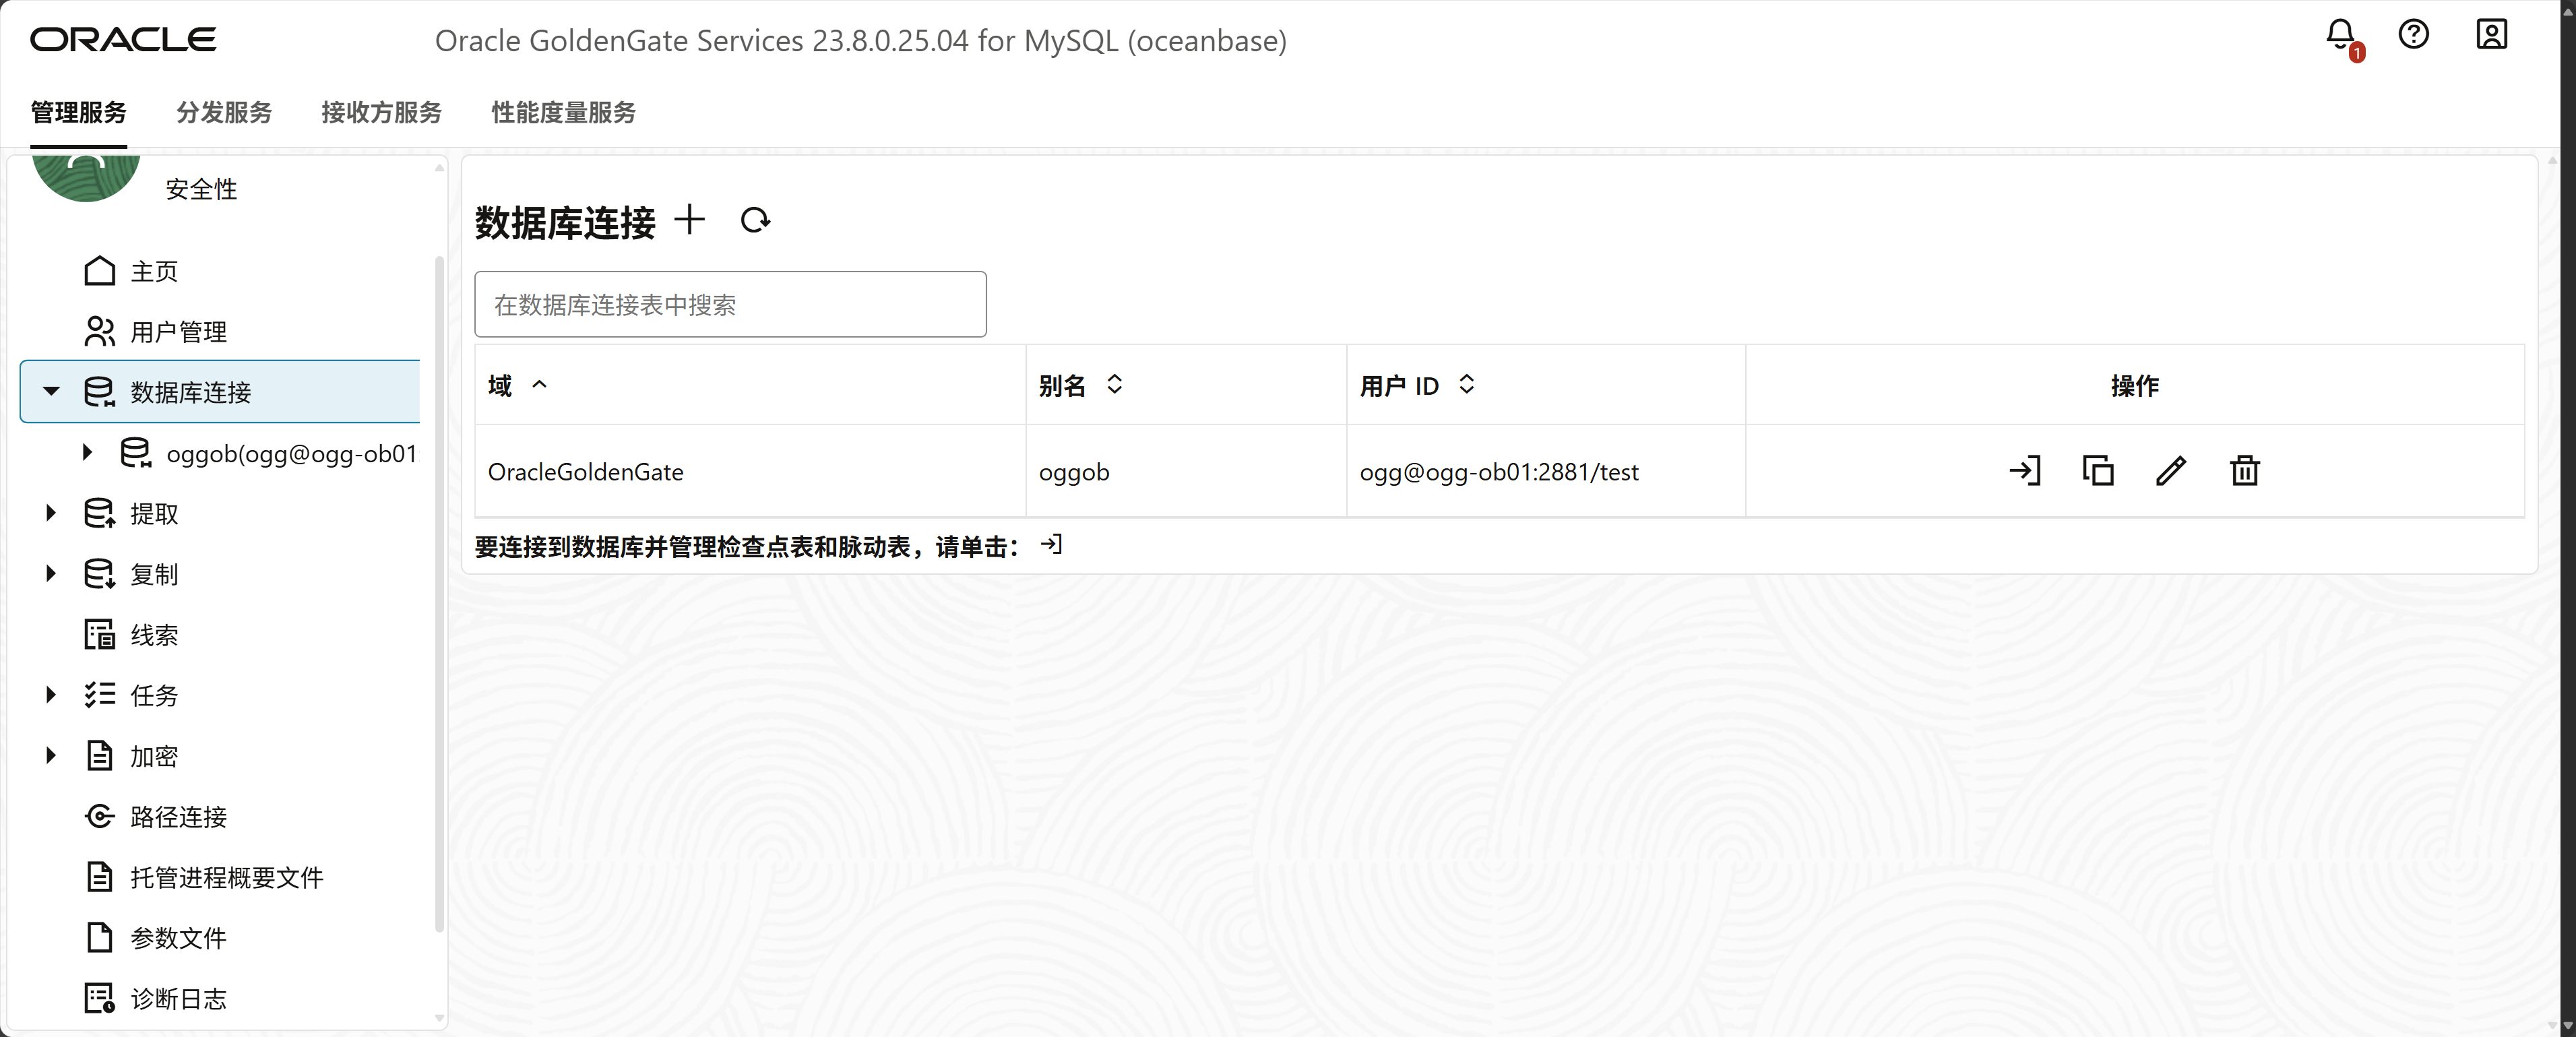
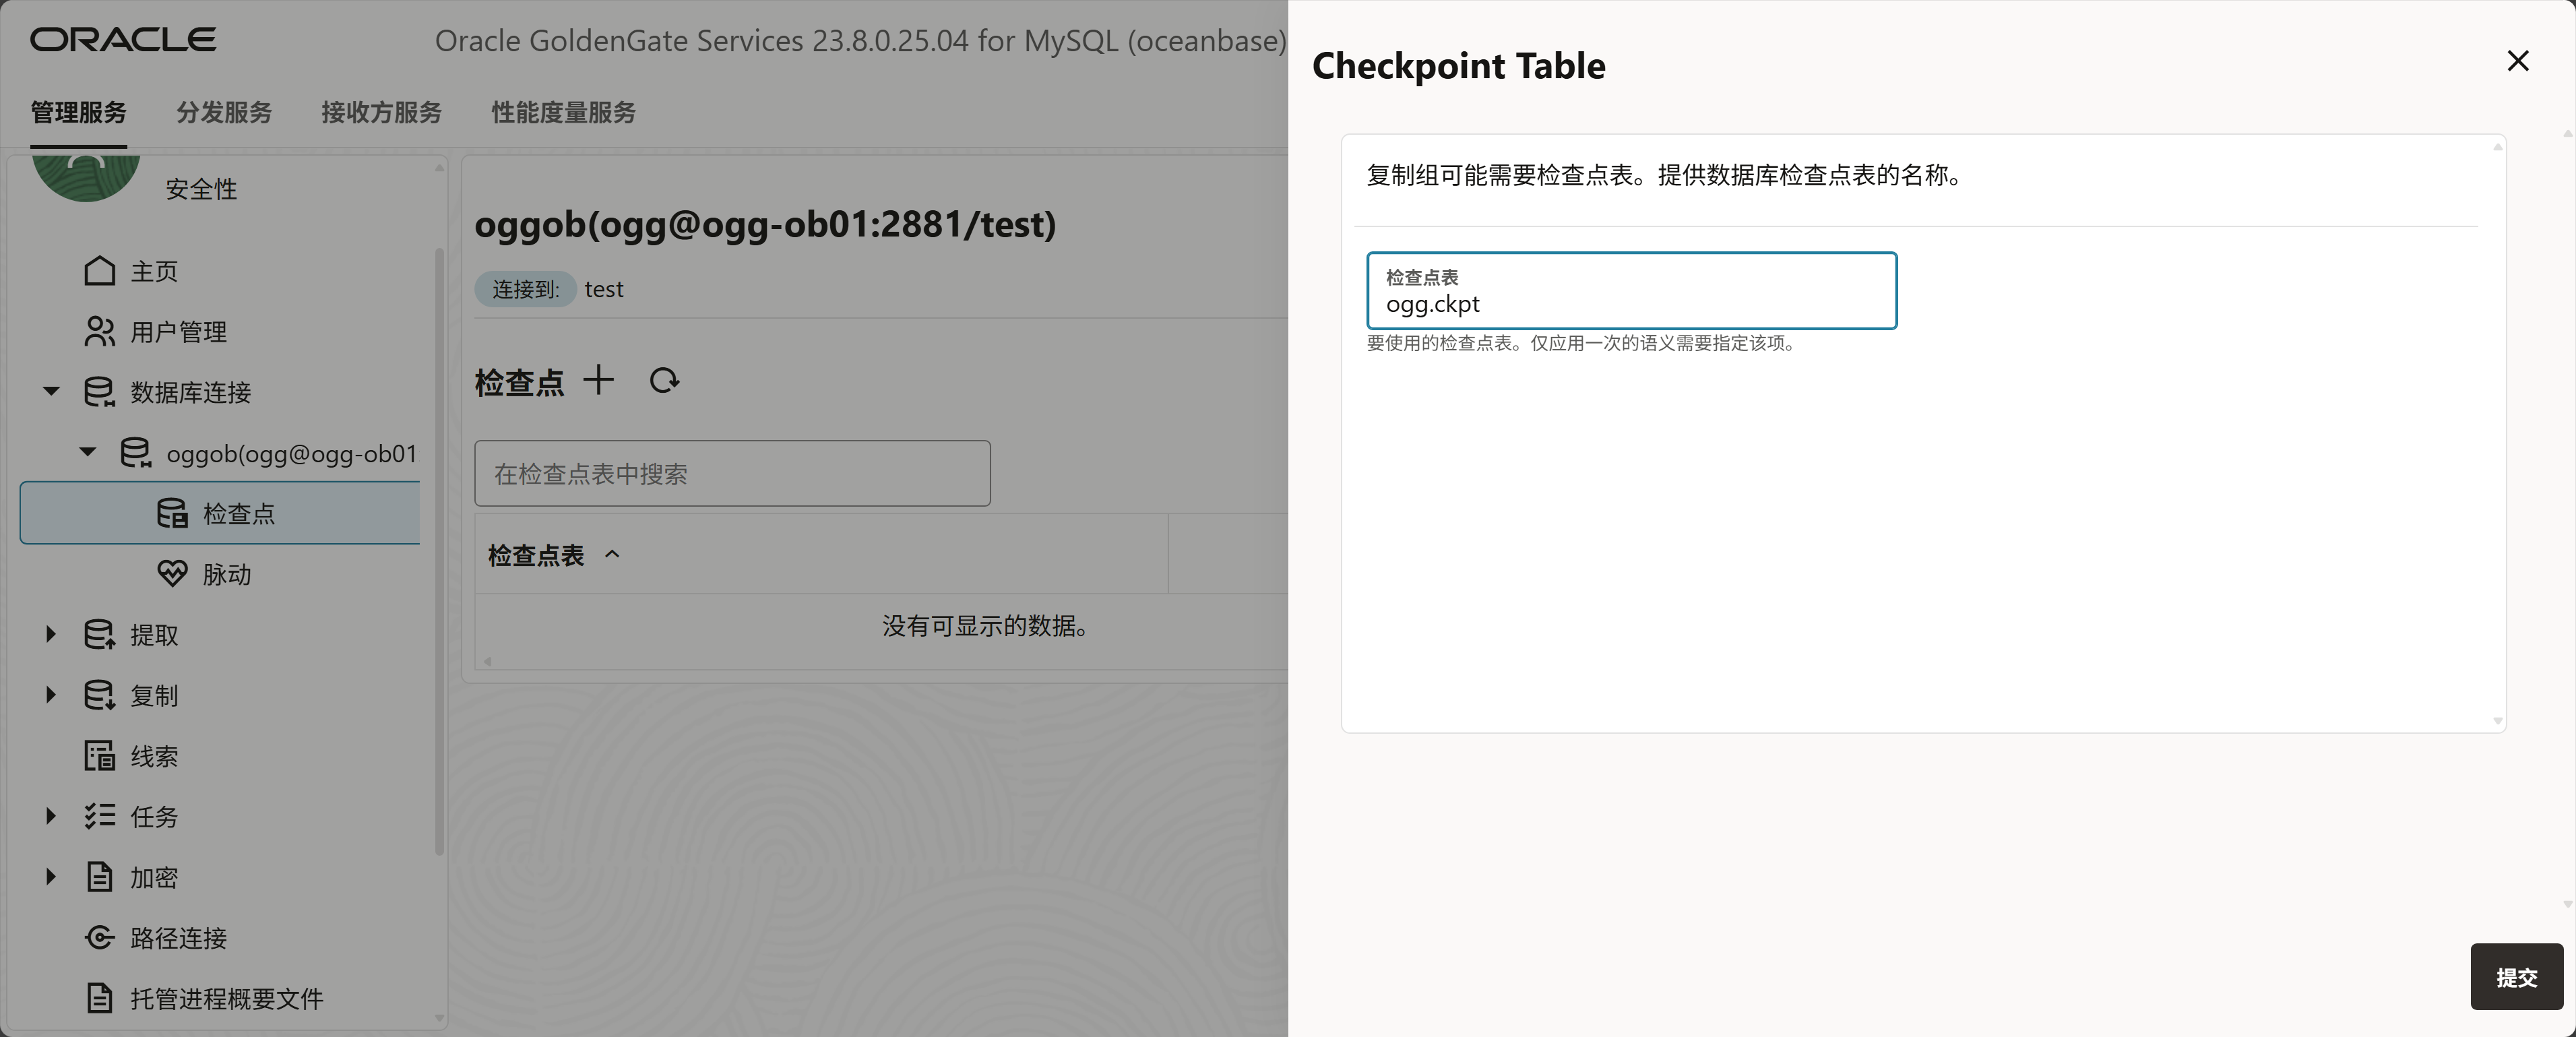
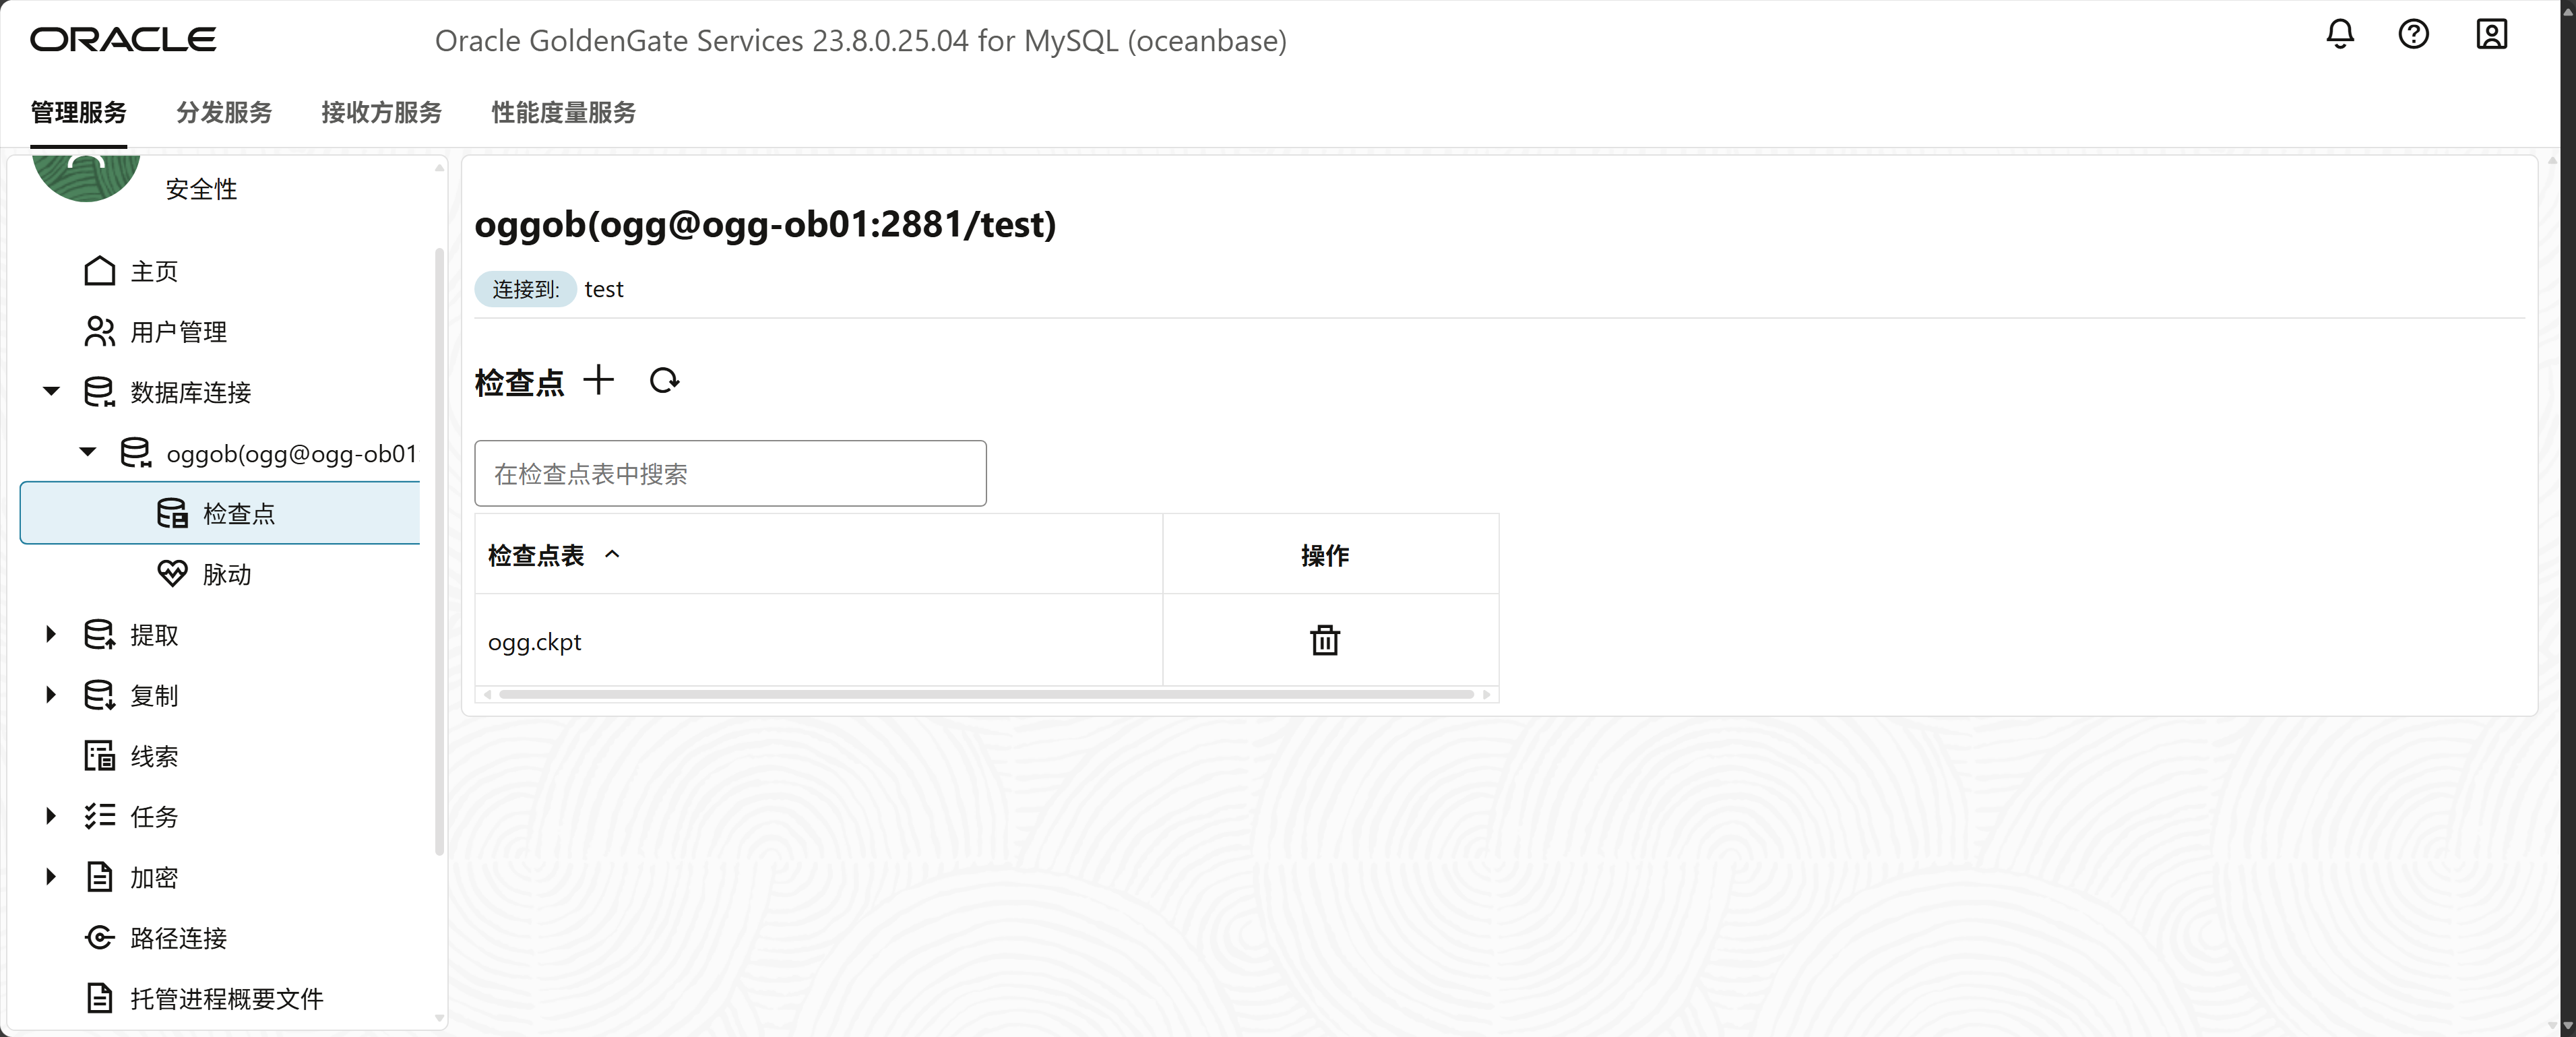
创建检查点
配置OGG同步
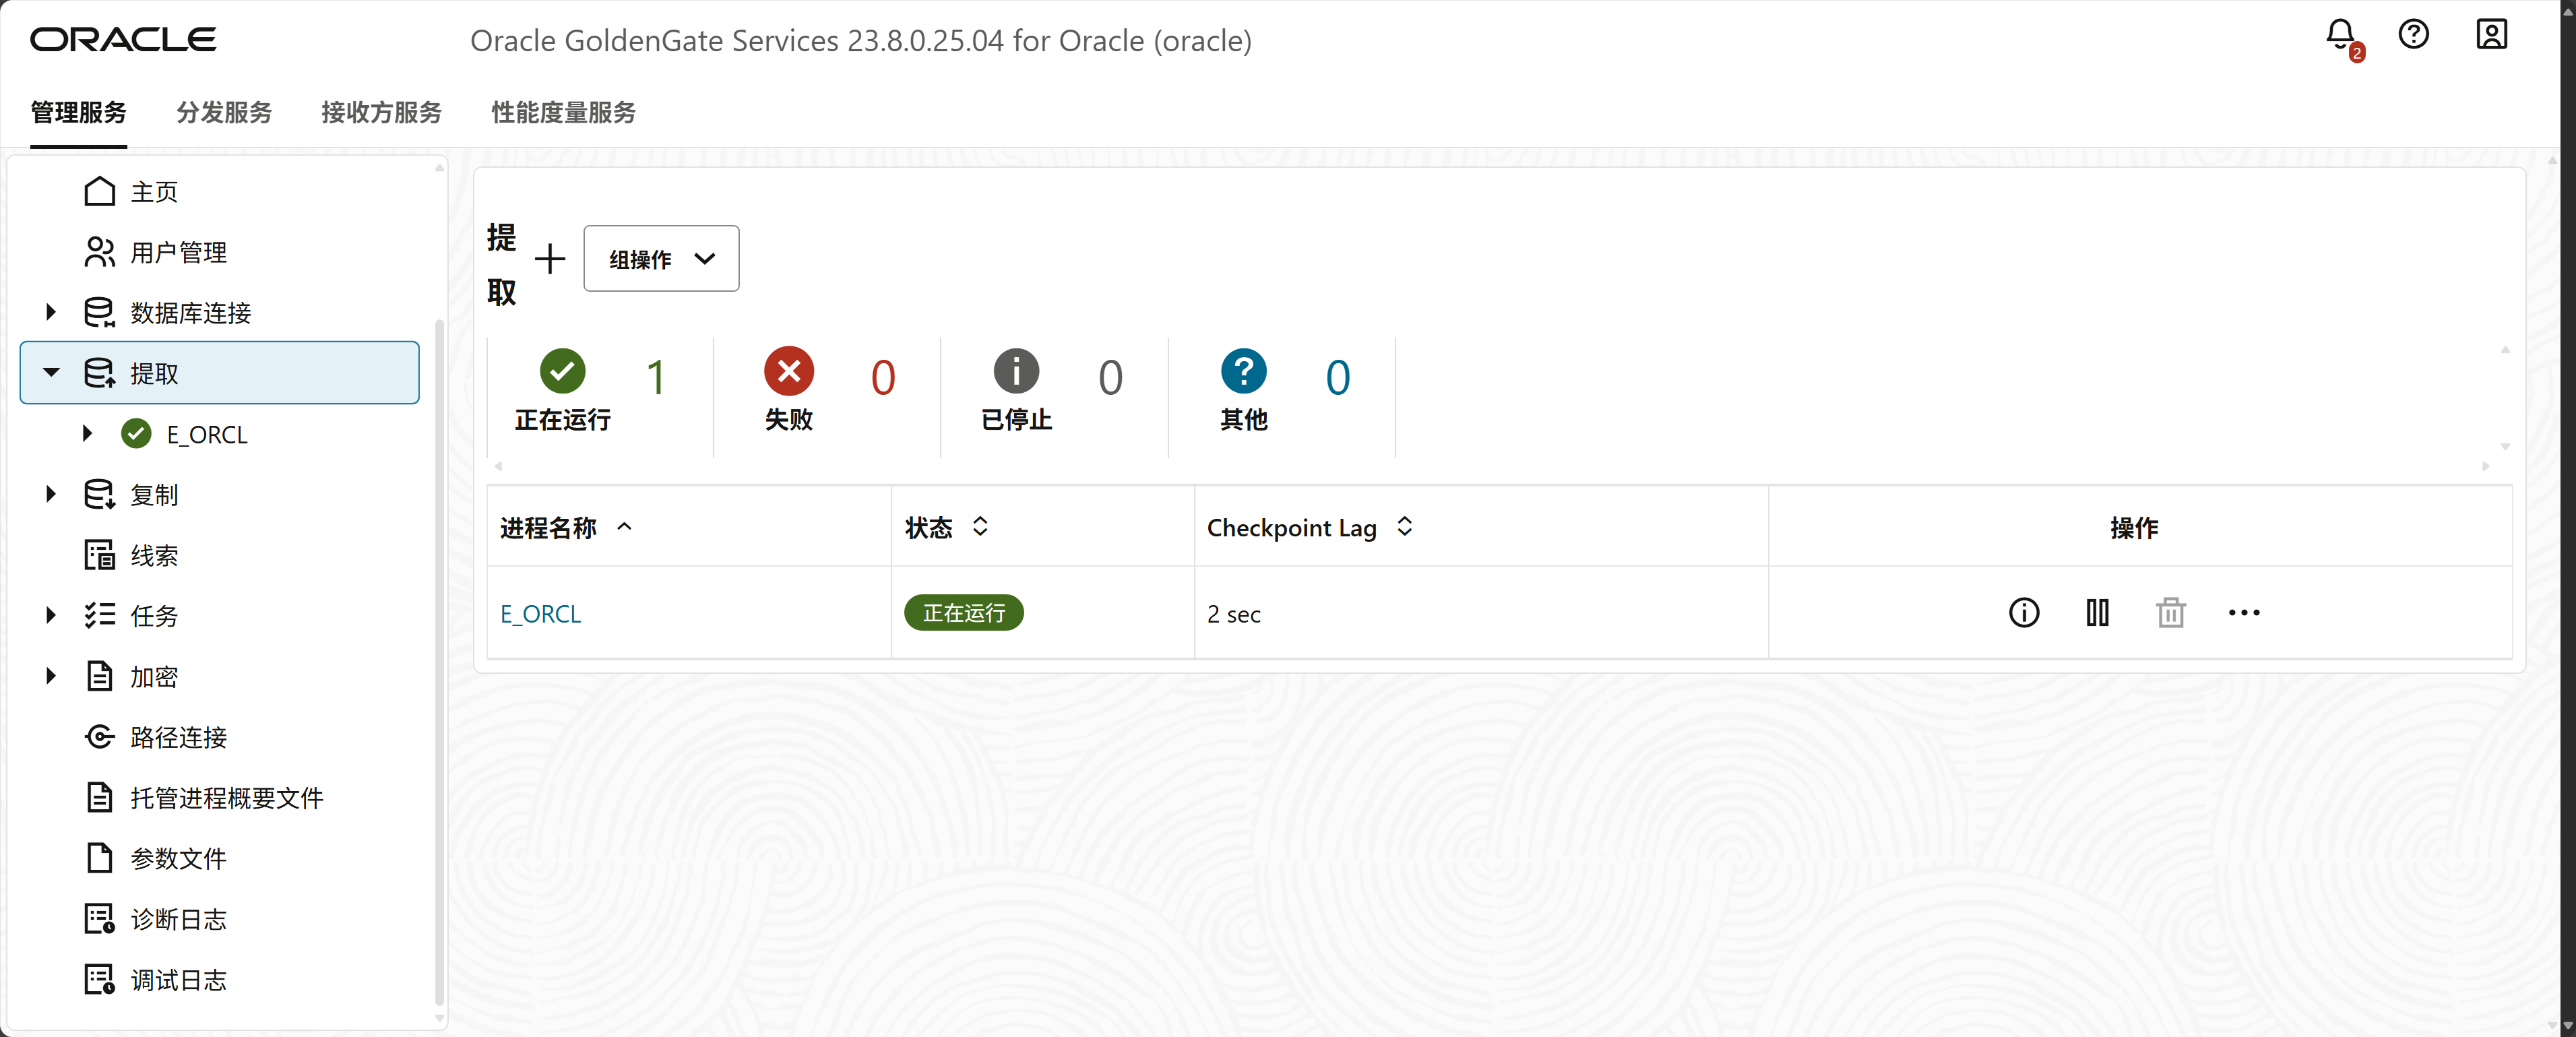
在Oracle上创建抽取
按照之前的步骤创建抽取进程
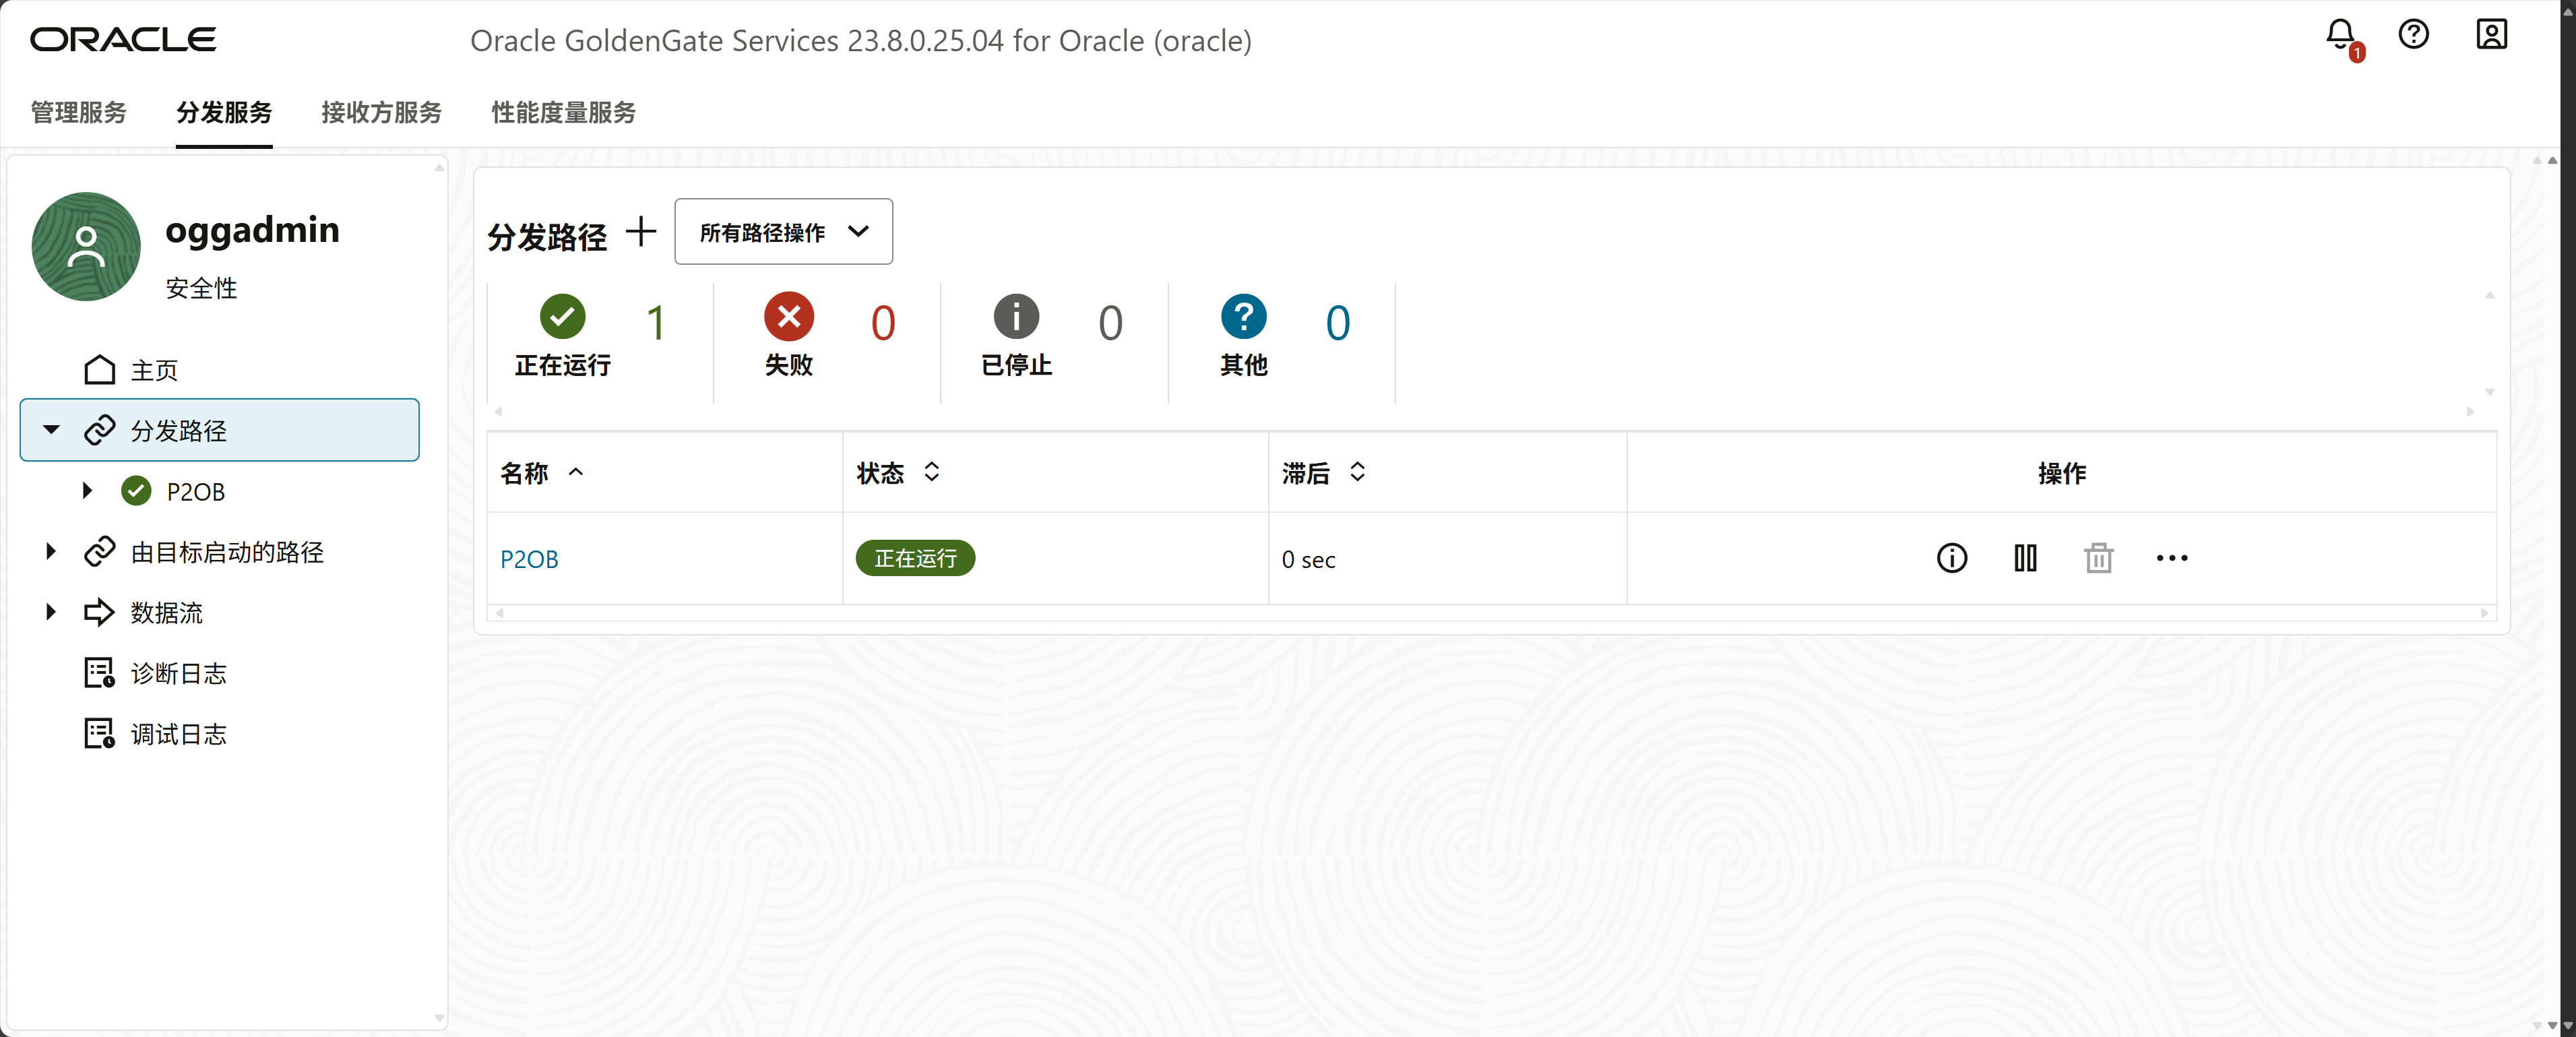
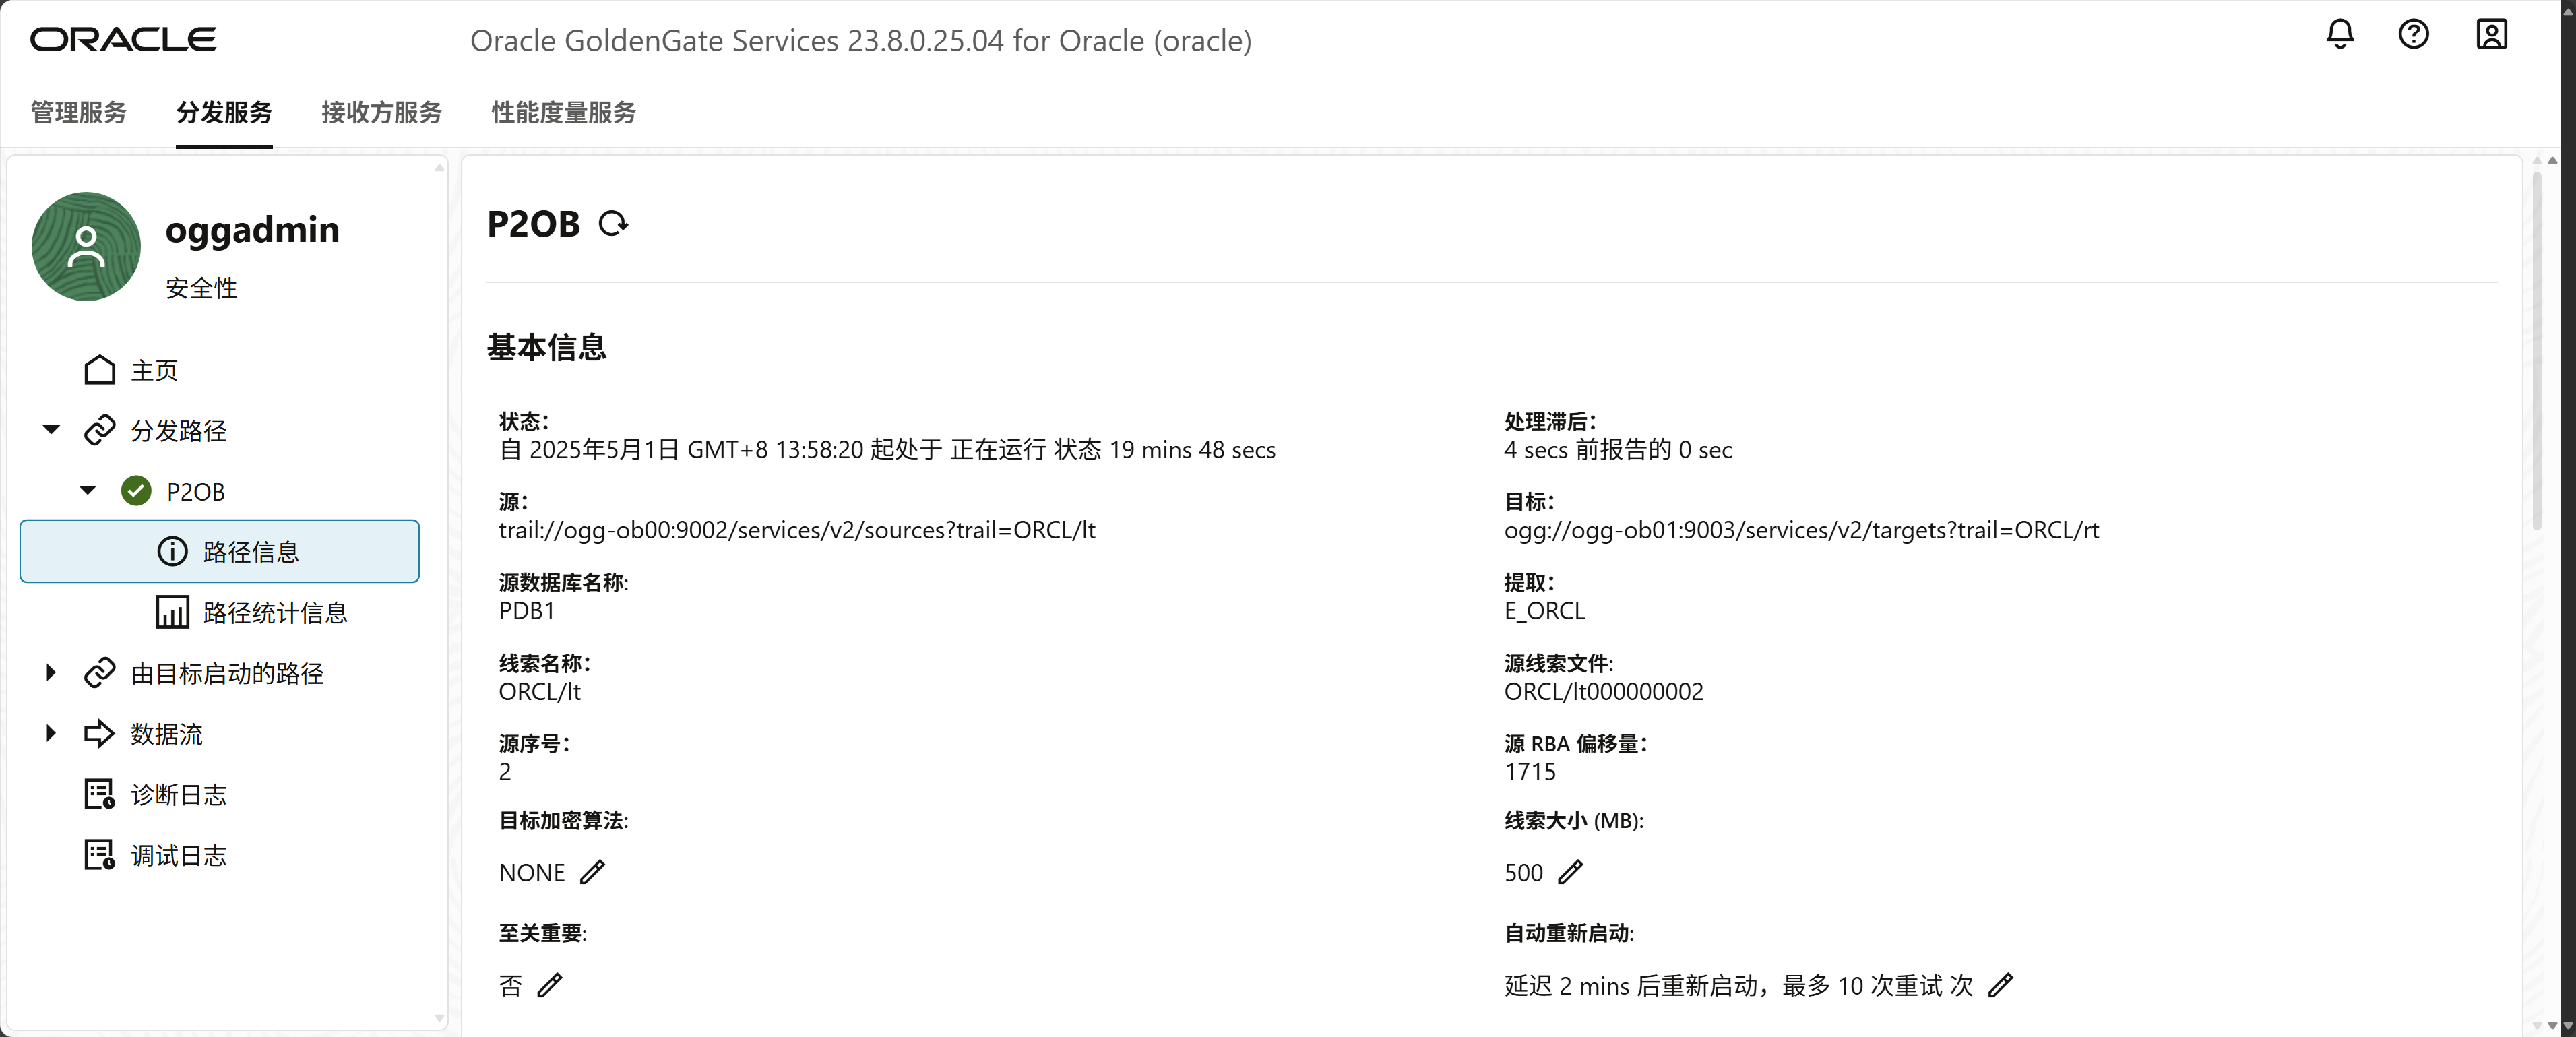
创建分发路径
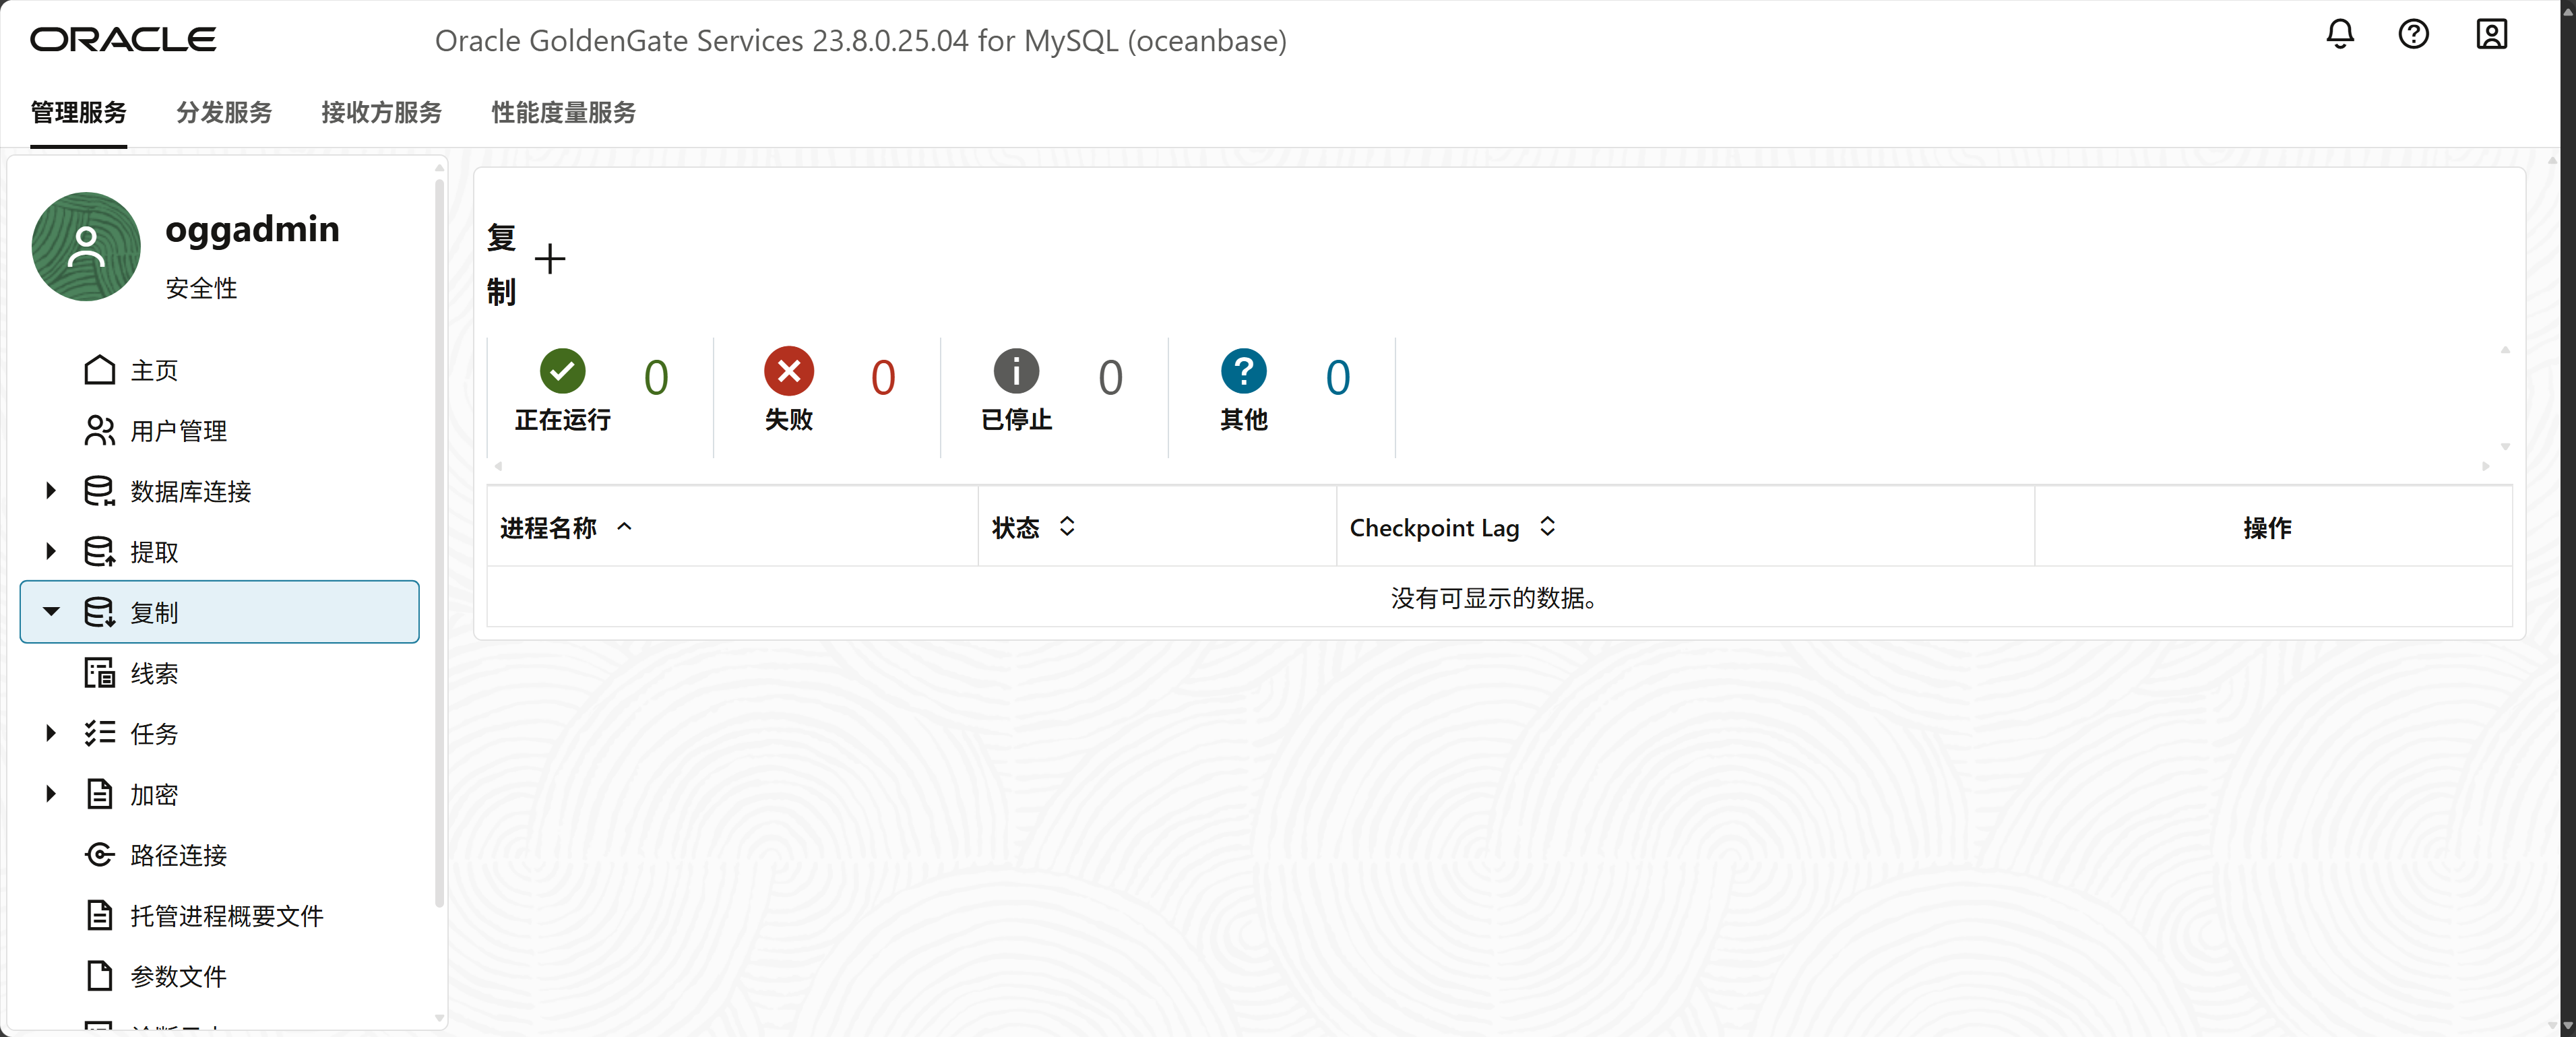
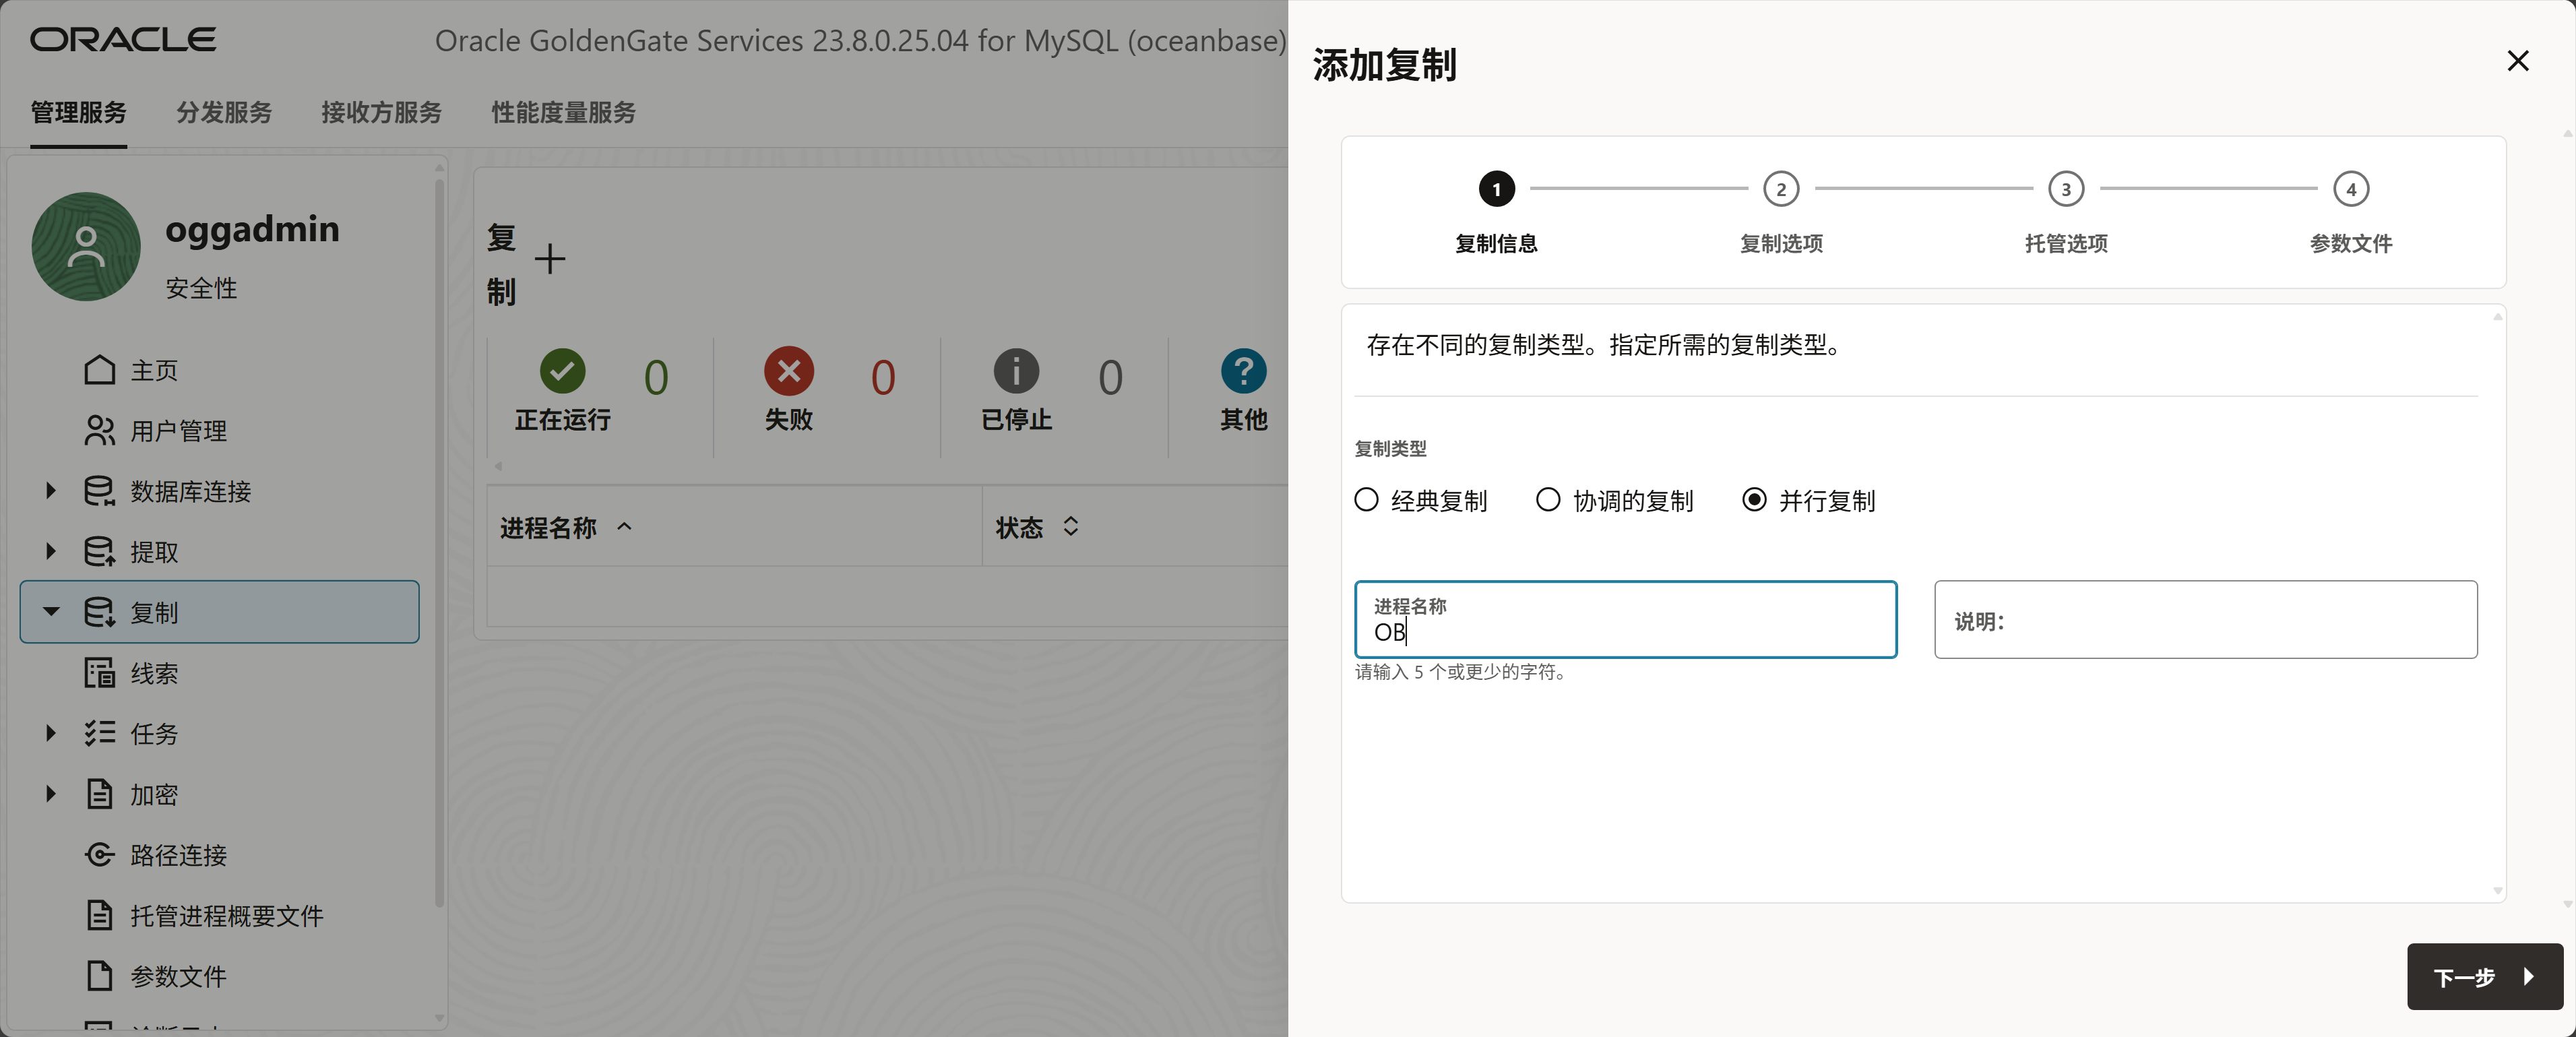
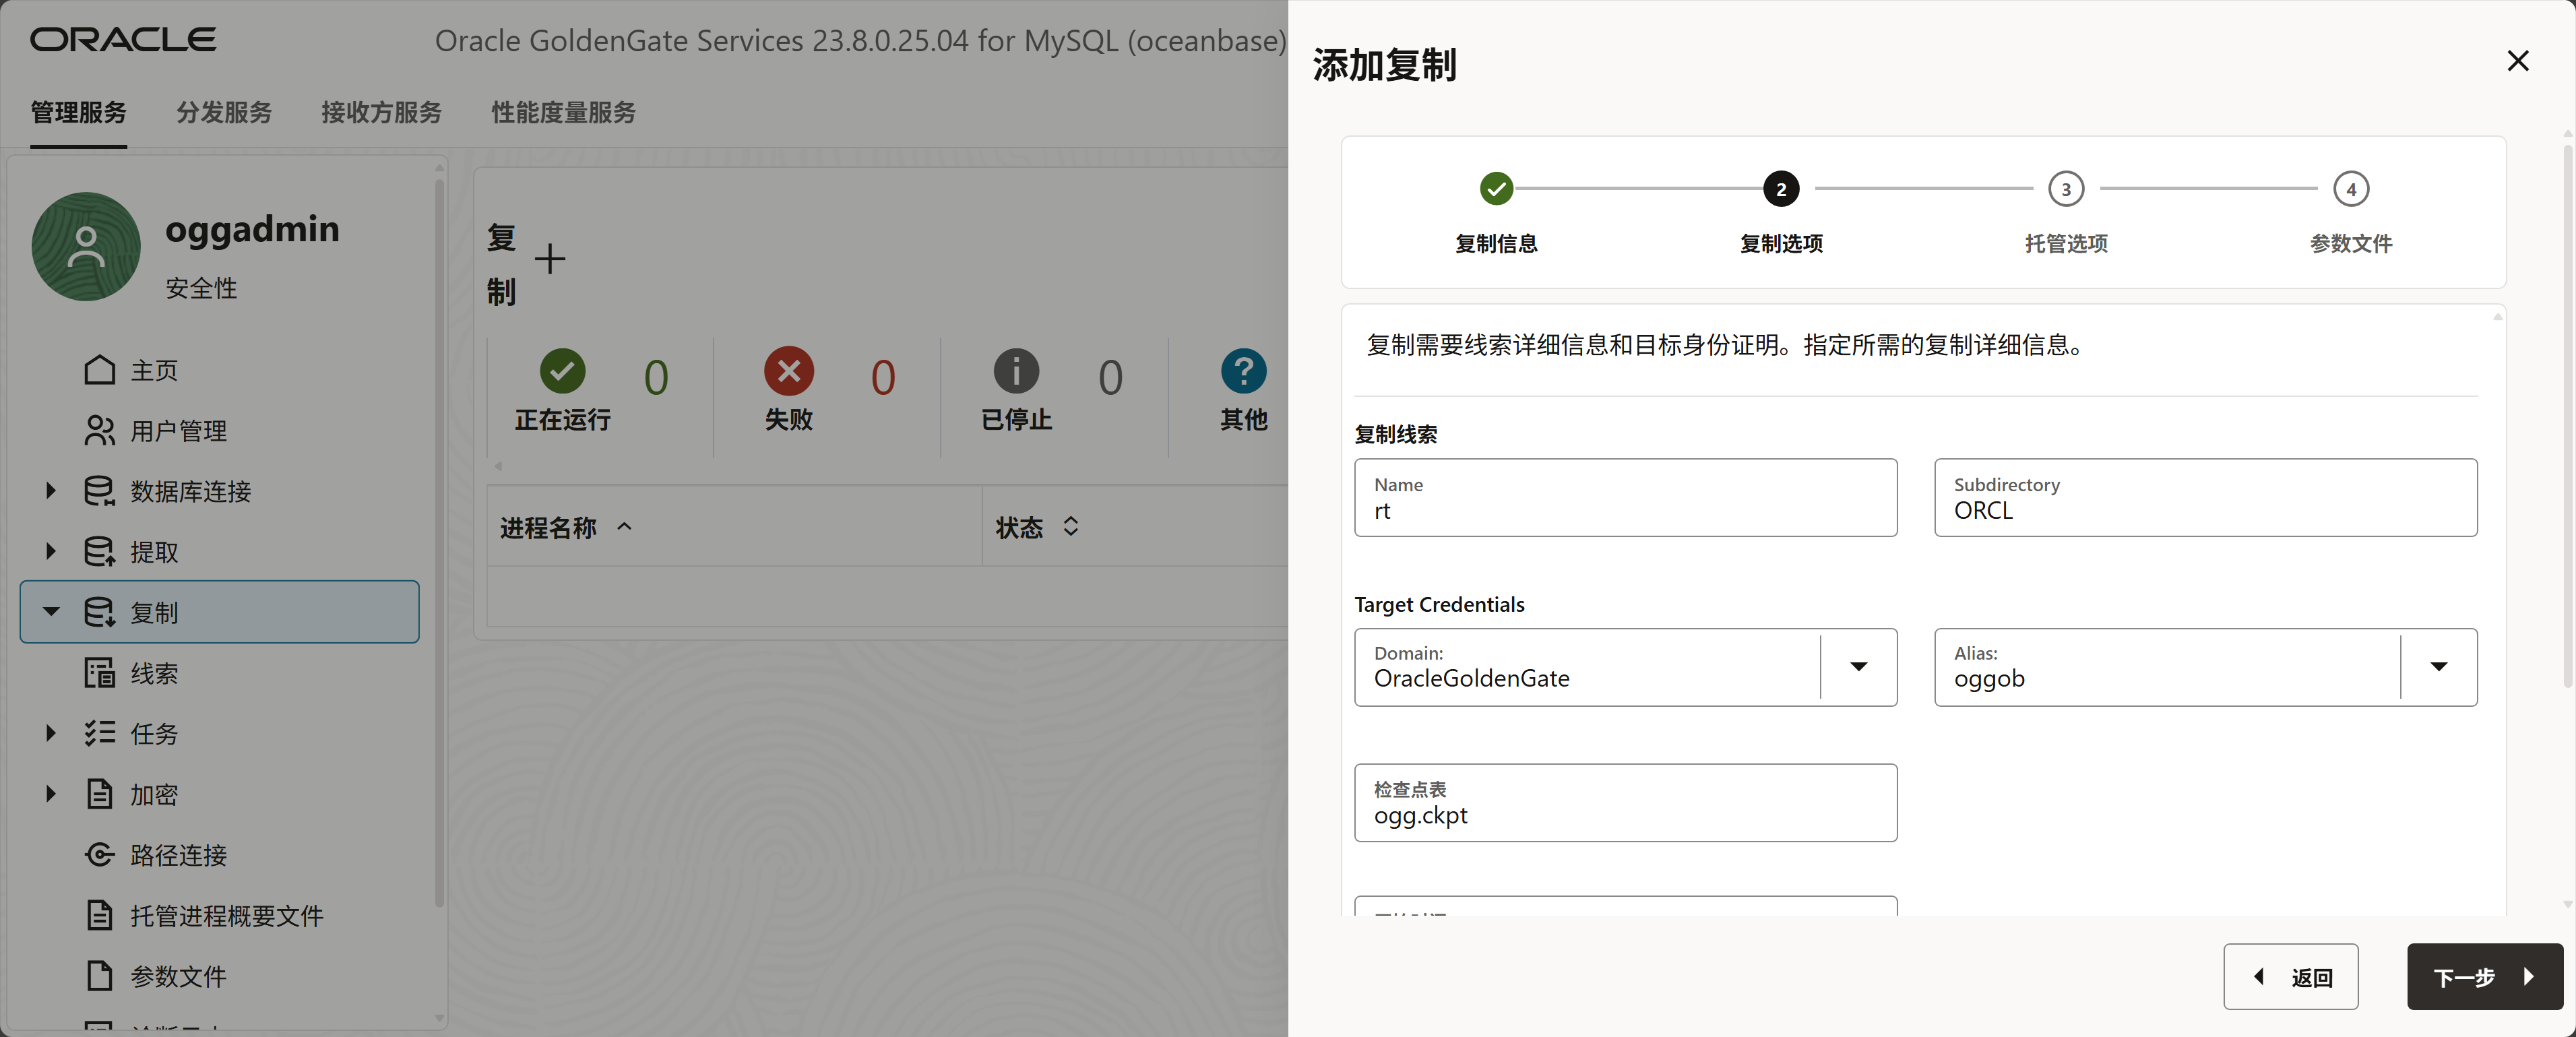
Oceanbase创建应用


使用工具生成一万条记录
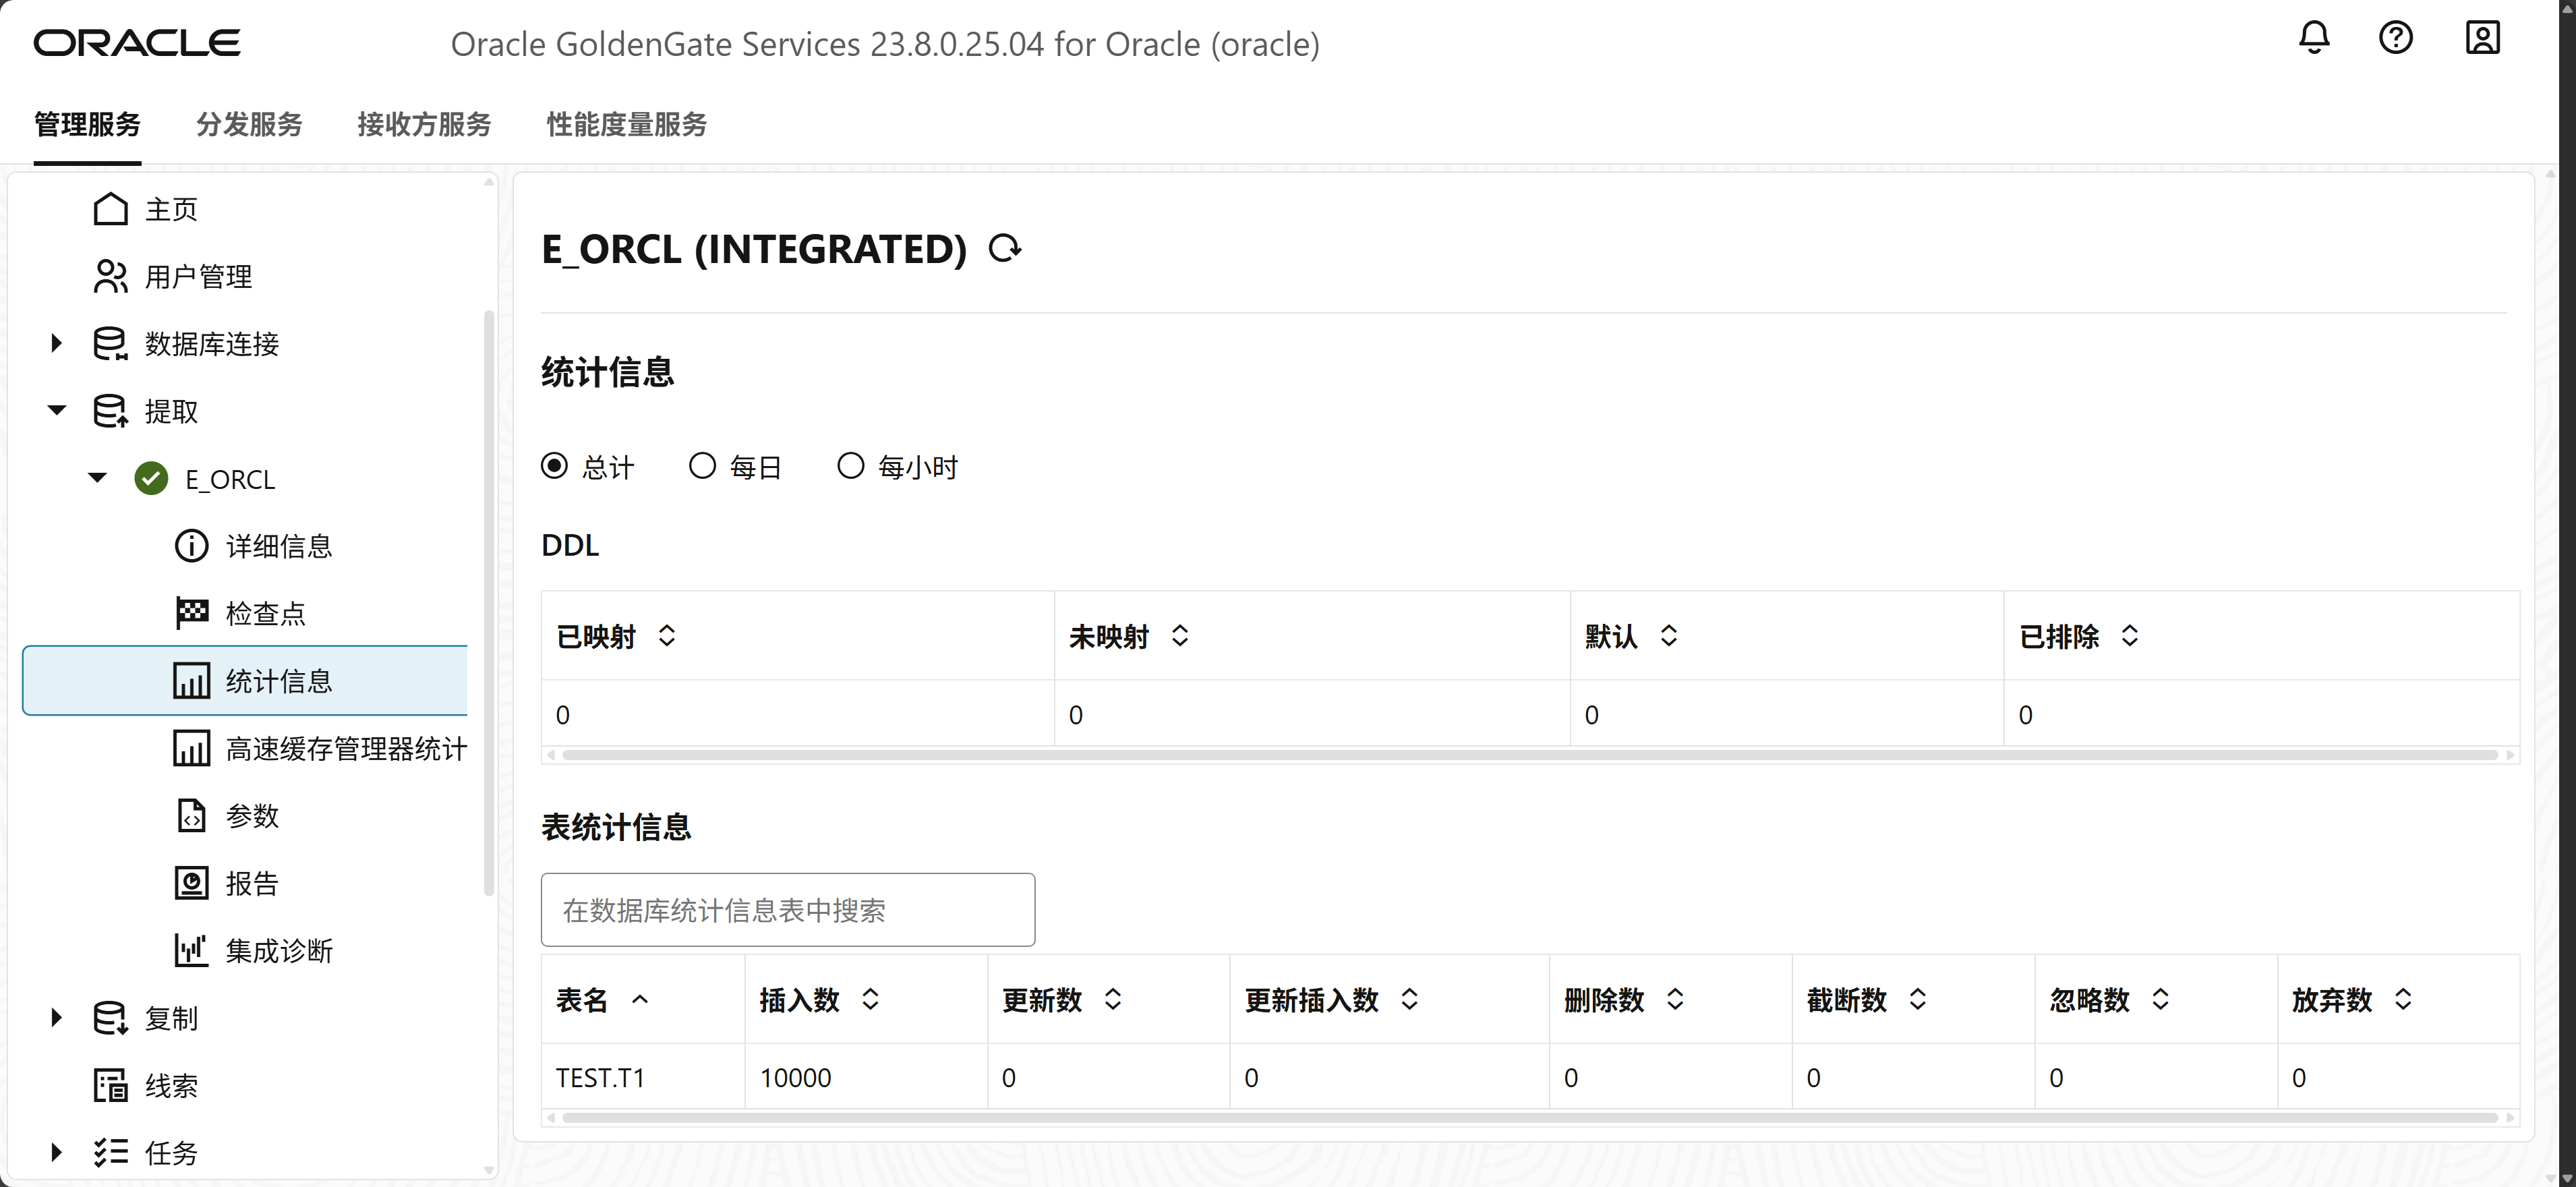
在源端捕获了一万条数据
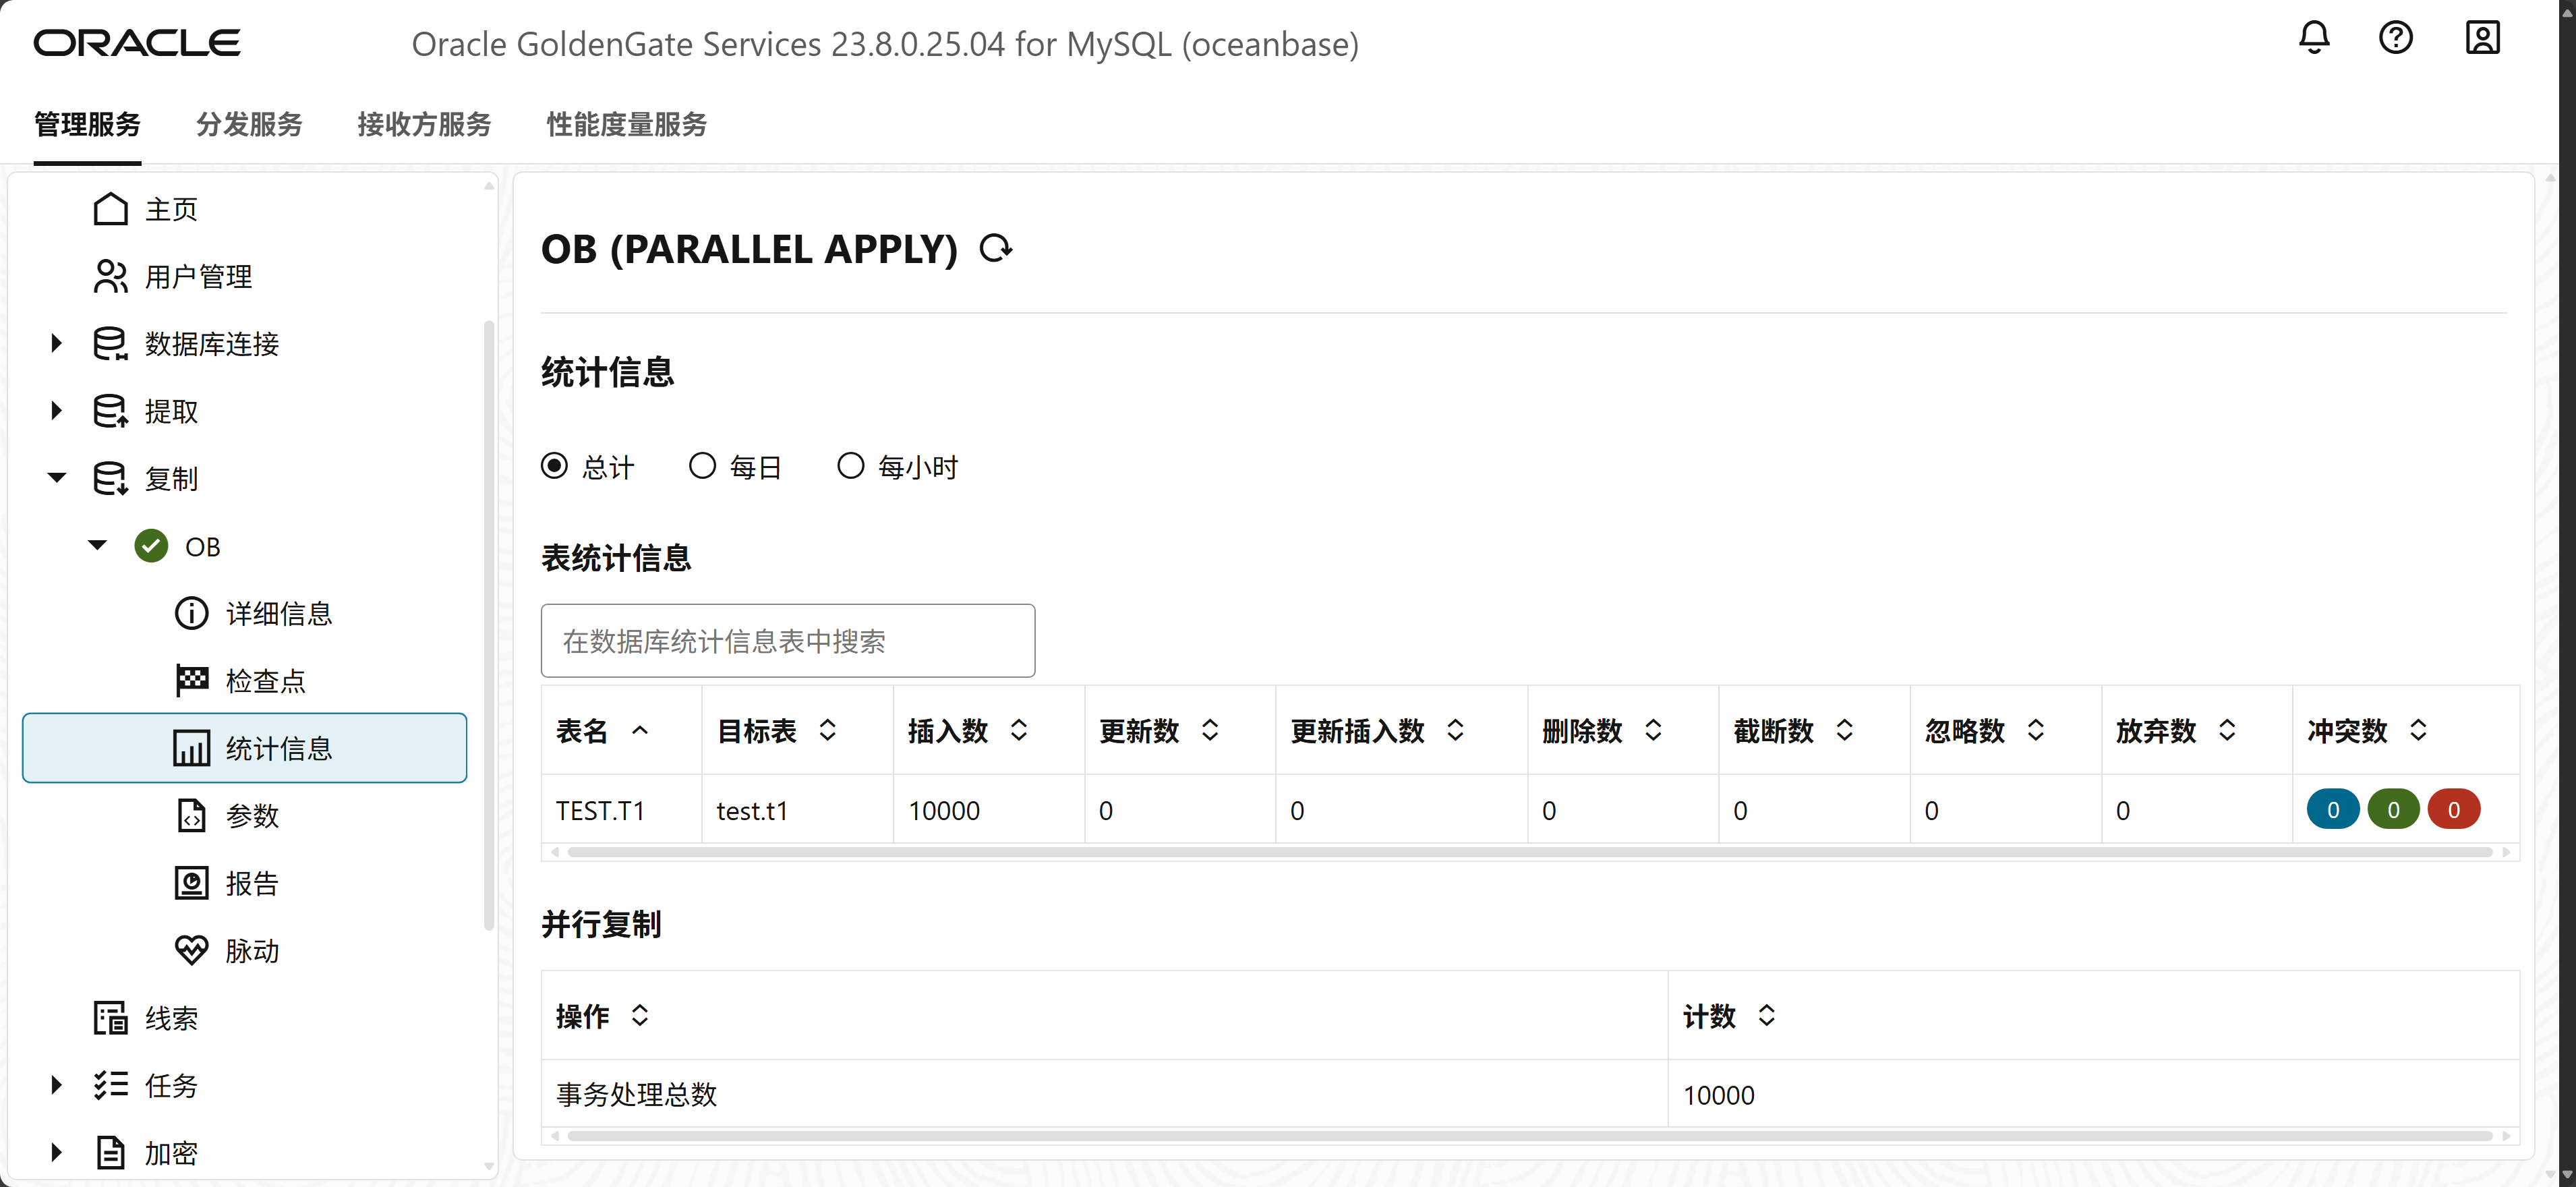
目标端也写入了一万条记录,配置成功。
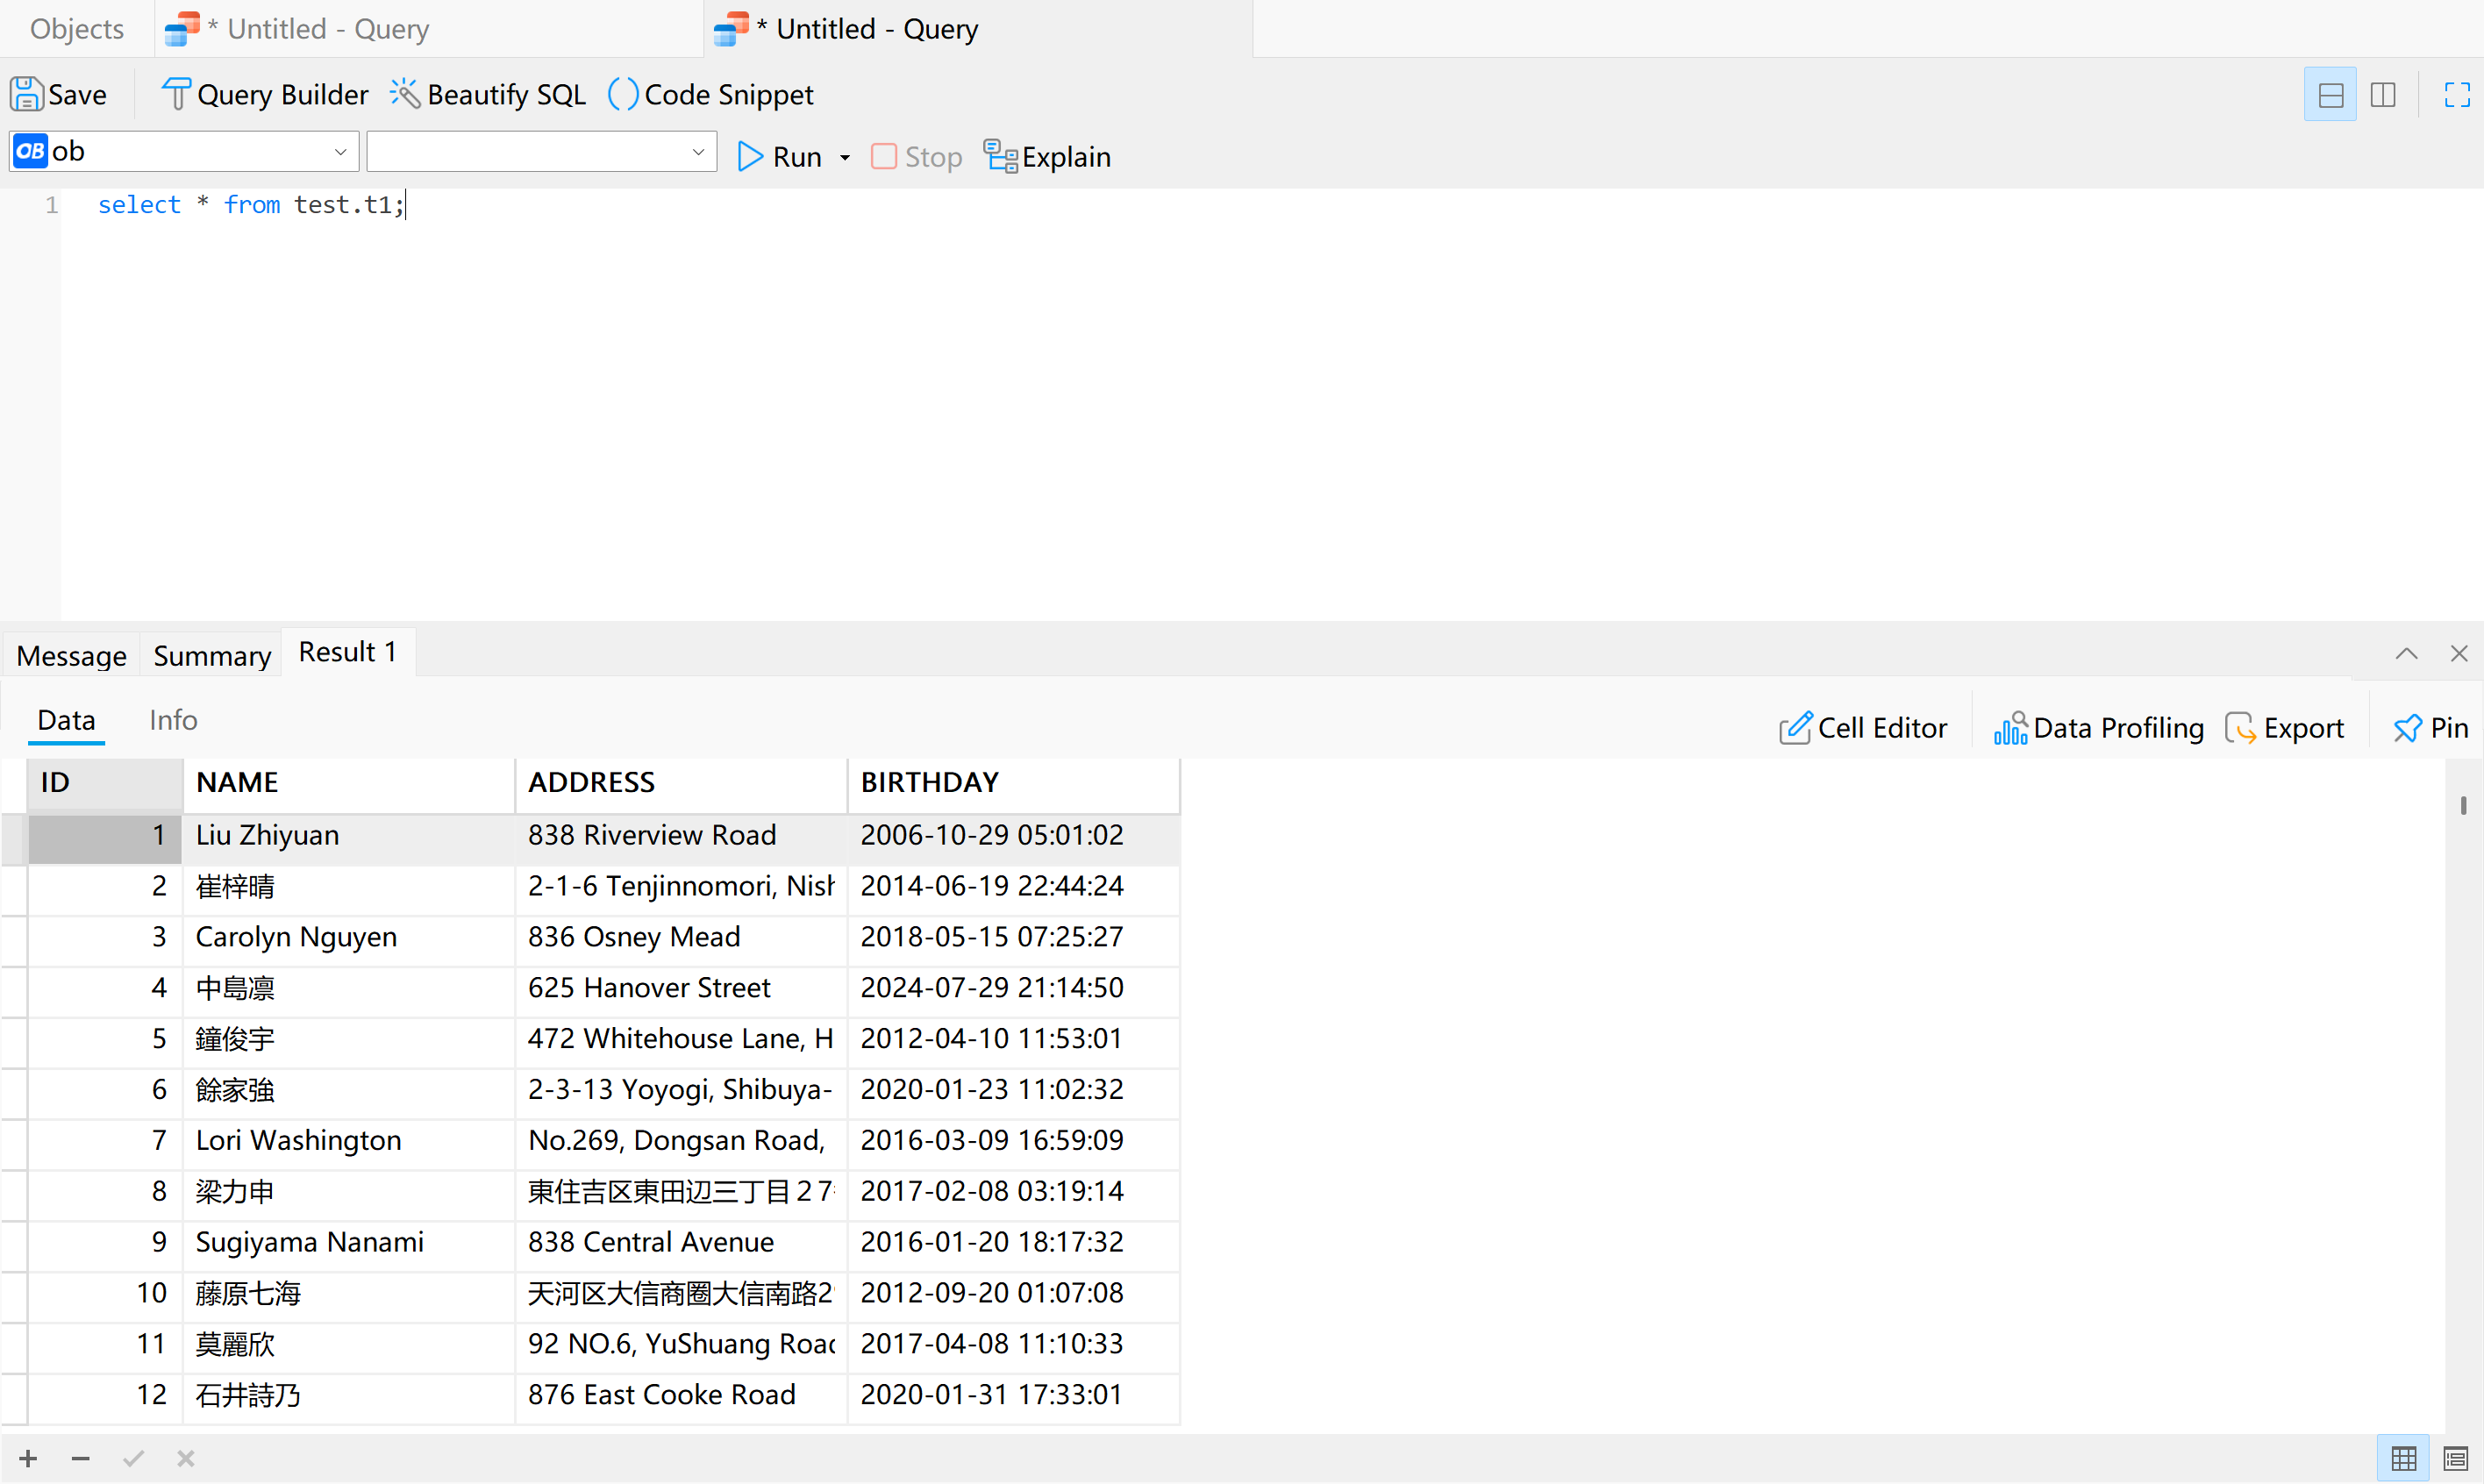
查一下数据也是正常。
往期文章供参考
OGG for MySQL
OGG for MySQL InnoDB cluster
https://www.modb.pro/db/1896921681046810624
OGG for PGSQL
https://www.modb.pro/db/1898559773482692608
OGG for Hadoop
