


一、大云海山数据库介绍及单机版安装
二、大云海山数据库主备版部署
(一)安装准备
1、环境说明
| 主机名 | ip地址 | OS版本 | 内存、CPU | 节点角色 | 数据库端口 |
|---|---|---|---|---|---|
| node1 | 192.*.*.101 | BigCloud Enterprise Linux 21.10U4 LTS | 4G 、 1个双核 | 主节点 | 5432 |
| node2 | 192.*.*.102 | BigCloud Enterprise Linux 21.10U4 LTS | 4G 、 1个双核 | 从节点 | 5432 |
2、目录规划
| 序号 | 文件系统 | 用途 |
|---|---|---|
| 1 | /database/he3db/app | 数据库软件存放目录 |
| 2 | /database/he3db/data | 数据存放目录 |
注意:以下操作需要在两个节点都执行。
3、安装所需依赖包
yum install -y protobuf-devel readline-devel bison flex perl zlib-devel check libtool libffi-devel openssl-devel wget tar gzip curl bzip2-devel brotli-devel
4、关闭SELINUX
sed -i 's/^SELINUX=enforcing/SELINUX=disabled/g' /etc/selinux/config
5、关闭防火墙
systemctl stop firewalld
systemctl disable firewalld
systemctl status firewalld
6、创建用户
groupadd -g 1000 he3db
useradd -u 1000 -g he3db he3db
passwd he3db
7、设置用户he3db免密sudo权限
visudo
添加下面内容:
he3db       ALL=(ALL)       NOPASSWD: ALL
8、创建软件安装目录和数据目录
mkdir -p /database/he3db/app
mkdir -p /database/he3db/data
chown -R he3db:he3db /database/
9、上传安装包并解压
假设软件安装包已经上传到/home/he3db目录。解压到/database/he3db/app目录:
su - he3db
tar -zxf he3db_v2.0.6_x86_64.tar.gz -C /database/he3db/app
10、配置he3db用户环境变量
vim ~/.bashrc
追加:
export PATH=/database/he3db/app/he3sql/bin:$PATH
export LD_LIBRARY_PATH=/database/he3db/app/he3sql/lib:$LD_LIBRARY_PATH
export PGDATA=/database/he3db/data
export PGUSER=he3db
export PGDATABASE=postgres

保存退出,并执行如下命令生效:
source ~/.bashrc
(二)主备部署安装
1、主节点执行部署
1.1、初始化数据库
initdb -D /database/he3db/data
执行回显如下:
[he3db@euler1 ~]$ initdb -D /database/he3db/data
The files belonging to this database system will be owned by user "he3db".
This user must also own the server process.

The database cluster will be initialized with locale "en_US.UTF-8".
The default database encoding has accordingly been set to "UTF8".
The default text search configuration will be set to "english".

Data page checksums are disabled.

fixing permissions on existing directory /database/he3db/data ... ok
creating subdirectories ... ok
selecting dynamic shared memory implementation ... posix
selecting default max_connections ... 100
selecting default shared_buffers ... 128MB
selecting default time zone ... Asia/Shanghai
creating configuration files ... ok
running bootstrap script ... ok
performing post-bootstrap initialization ... ok
syncing data to disk ... ok

initdb: warning: enabling "trust" authentication for local connections
initdb: hint: You can change this by editing pg_hba.conf or using the option -A, or --auth-local and --auth-host, the next time you run initdb.

Success. You can now start the database server using:

    pg_ctl -D /database/he3db/data -l logfile start

[he3db@euler1 ~]$
1.2、配置数据库参数
vi /database/he3db/data/postgresql.conf
调整以下参数:
listen_addresses = '*'
wal_level = logical
checkpoint_timeout = 60min
checkpoint_completion_target = 0.9
max_wal_size = 8GB
min_wal_size = 1GB
wal_keep_size = 1GB
max_connections = 1024
shared_buffers = 1GB  ##shared_buffers大小推荐设置为系统内存的25%
logging_collector = on
log_directory = 'pg_log'
log_filename = 'postgresql-%Y-%m-%d-%H-%M-%S.log'
log_rotation_age = 1d
log_connections = on
log_disconnections = on
#license_info = '/database/he3db/data/he3_license.lic'
enable_probation = true
注:
(1)正式模式:要将enable_probation设置为false,并且要配置参数license_info为许可文件的绝对路径
(2)试用模式:将enable_probation设置为true,license_info可不配置,免费试用时长为3个月
1.3、配置数据库白名单
vi /database/he3db/data/pg_hba.conf
host   all   all    192.*.*.0/24    md5    ##注意:这些要根据实际情况替换掉*.*
host replication repli 192.*.*.0/24 md5
1.4、配置数据库license(正式模式配置,试用模式请跳过此步骤)
拷贝he3_license.lic文件到license_info参数指定的位置:
cp he3_license.lic /database/he3db/data/he3_license.lic
1.5、启动数据库实例
pg_ctl -D /database/he3db/data start
执行回显如下:
[he3db@euler1 ~]$ pg_ctl start
waiting for server to start....2026-03-07 16:09:17.592 CST [2359] LOG:  试用期生效中
2026-03-07 16:09:17.665 CST [2359] LOG:  redirecting log output to logging collector process
2026-03-07 16:09:17.665 CST [2359] HINT:  Future log output will appear in directory "pg_log".
 done
server started
1.6.连接并创建repli用户
psql -U he3db -d postgres -p 5432
ALTER ROLE he3db PASSWORD '******';
CREATE ROLE repli LOGIN REPLICATION ENCRYPTED PASSWORD '******';
GRANT pg_read_all_stats TO repli;
执行回显如下:
[he3db@euler1 ~]$  psql -U he3db -d postgres  -p 5432
psql (15.5)
Type "help" for help.

postgres=# ALTER ROLE he3db PASSWORD '******';
ALTER ROLE
postgres=# CREATE ROLE repli LOGIN REPLICATION ENCRYPTED PASSWORD '******';
CREATE ROLE
postgres=# GRANT pg_read_all_stats TO repli;
GRANT ROLE
postgres=#
2、备节点执行部署
2.1、从远程主库拉取数据重做备节点
pg_basebackup -U repli -D /database/he3db/data -P -v -p 5432 -h 192.*.*.101 -R --wal-method=stream
执行回显如下:
[he3db@euler2 data]$ pg_basebackup -U repli -D /database/he3db/data -P -v -p 5432 -h 192.*.*.101 -R --wal-method=stream
Password:
pg_basebackup: initiating base backup, waiting for checkpoint to complete
pg_basebackup: checkpoint completed
pg_basebackup: write-ahead log start point: 0/3000028 on timeline 1
pg_basebackup: starting background WAL receiver
pg_basebackup: created temporary replication slot "pg_basebackup_2455"
40460/40460 kB (100%), 1/1 tablespace
pg_basebackup: write-ahead log end point: 0/3000100
pg_basebackup: waiting for background process to finish streaming ...
pg_basebackup: syncing data to disk ...
pg_basebackup: renaming backup_manifest.tmp to backup_manifest
pg_basebackup: base backup completed
[he3db@euler2 data]$
2.2、配置数据库参数
vi /database/he3db/data/postgresql.conf
调整以下参数:
listen_addresses = '*'
wal_level = logical
checkpoint_timeout = 60min
checkpoint_completion_target = 0.9
max_wal_size = 8GB
min_wal_size = 1GB
wal_keep_size = 1GB
max_connections = 1024
shared_buffers = 1GB  ##shared_buffers大小推荐设置为系统内存的25%
logging_collector = on
log_directory = 'pg_log'
log_filename = 'postgresql-%Y-%m-%d-%H-%M-%S.log'
log_rotation_age = 1d
log_connections = on
log_disconnections = on
synchronous_standby_names = ''
primary_conninfo = 'user=repli password=****** host=192.*.*.101 port=5432 sslmode=disable application_name=standby1 channel_binding=disable'
#license_info = '/database/he3db/data/he3_license.lic'
enable_probation = true
注:
(1)正式模式:要将enable_probation设置为false,并且要配置参数license_info为许可文件的绝对路径
(2)试用模式:将enable_probation设置为true,license_info可不配置,免费试用时长为3个月
创建 standby.signal 文件
touch /database/he3db/data/standby.signal
2.3、配置数据库白名单
vi /database/he3db/data/pg_hba.conf
host    all    all 192.*.*.0/24   md5    ##注意:这些要根据实际情况替换掉*.*
host    replication     repli           192.*.*.*/24            scram-sha-256 ##注意:这些要根据实际情况替换掉*.*
2.4、配置数据库license(正式模式配置,试用模式请跳过此步骤)
拷贝he3_license.lic文件到license_info参数指定的位置:
cp he3_license.lic /database/he3db/data/he3_license.lic
2.5、启动数据库实例
pg_ctl -D /database/he3db/data start
执行回显如下:
[he3db@euler2 data]$ pg_ctl -D /database/he3db/data start
waiting for server to start....2026-03-07 19:19:54.830 CST [2432] LOG:  试用期生效中
2026-03-07 19:19:55.148 CST [2432] LOG:  redirecting log output to logging collector process
2026-03-07 19:19:55.148 CST [2432] HINT:  Future log output will appear in directory "pg_log".
 done
server started
[he3db@euler2 data]$
2.6.启动同步复制
psql -h 192.*.*.101 -p 5432 -U he3db -d postgres
ALTER SYSTEM SET synchronous_standby_names = '*';
SELECT pg_reload_conf();
执行回显如下:
[he3db@euler2 data]$ psql -h 192.*.*.101 -p 5432 -U he3db -d postgres
Password for user he3db:
psql (15.5)
Type "help" for help.

postgres=# ALTER SYSTEM SET synchronous_standby_names = '*';
ALTER SYSTEM
postgres=# SELECT pg_reload_conf();
 pg_reload_conf
----------------
 t
(1 row)

postgres=#
2.7.连接主数据库检查
psql -h 192.*.*.101 -U he3db -d postgres -p 5432
select * from pg_stat_replication;
执行回显如下:
testdb=# SELECT pg_is_in_recovery();
 pg_is_in_recovery
-------------------
 f
(1 row)

testdb=# select * from pg_stat_replication;
 pid  | usesysid | usename | application_name |   client_addr   | client_hostname | client_port |         backend_start         | backend_xmin |   state   | sent_lsn  | write_lsn | flush_lsn | replay_l
sn | write_lag | flush_lag | replay_lag | sync_priority | sync_state |          reply_time
------+----------+---------+------------------+-----------------+-----------------+-------------+-------------------------------+--------------+-----------+-----------+-----------+-----------+---------
---+-----------+-----------+------------+---------------+------------+-------------------------------
 2521 |    24580 | repli   | walreceiver      | 192.*.*.102 |                 |       44368 | 2026-03-07 17:05:11.019089+08 |              | streaming | 0/401A660 | 0/401A660 | 0/401A660 | 0/401A66
0  |           |           |            |             1 | sync       | 2026-03-07 17:10:00.770489+08
(1 row)

testdb=#
主备同步情况正常。
三、部署keepalived
注意:生产环境中的异常情况会很复杂,除非是测试环境或极低负载的边缘应用,否则不应使用 Keepalived 脚本来做数据库的主备切换,以免造成脑裂、数据不一致等情况出现。生产环境中应使用Patroni、regmgr等工具做主备切换。
1、两节点都安装keepalived
[root@euler1 ~]# yum install -y keepalived
Last metadata expiration check: 1 day, 20:35:58 ago on Thu 05 Mar 2026 11:59:25 PM CST.
Dependencies resolved.
=========================================================================================================================================================================================================
 Package                                             Architecture                           Version                                                     Repository                                  Size
=========================================================================================================================================================================================================
Installing:
 keepalived                                          x86_64                                 2.2.4-3.bclinux.21.10U4                                     update                                     326 k
Installing dependencies:
 mariadb-connector-c                                 x86_64                                 3.1.13-4.bclinux.21.10U4                                    everything                                 178 k
 net-snmp                                            x86_64                                 1:5.9.1-7.bclinux.21.10U4                                   update                                     823 k
 net-snmp-libs                                       x86_64                                 1:5.9.1-7.bclinux.21.10U4                                   update                                     616 k

Transaction Summary
=========================================================================================================================================================================================================
Install  4 Packages

Total download size: 1.9 M
Installed size: 6.8 M
Downloading Packages:
(1/4): keepalived-2.2.4-3.bclinux.21.10U4.x86_64.rpm                                                                                                                     507 kB/s | 326 kB     00:00
(2/4): mariadb-connector-c-3.1.13-4.bclinux.21.10U4.x86_64.rpm                                                                                                           170 kB/s | 178 kB     00:01
(3/4): net-snmp-libs-5.9.1-7.bclinux.21.10U4.x86_64.rpm                                                                                                                  1.0 MB/s | 616 kB     00:00
(4/4): net-snmp-5.9.1-7.bclinux.21.10U4.x86_64.rpm                                                                                                                       411 kB/s | 823 kB     00:02
---------------------------------------------------------------------------------------------------------------------------------------------------------------------------------------------------------
Total                                                                                                                                                                    970 kB/s | 1.9 MB     00:02
Running transaction check
Transaction check succeeded.
Running transaction test
Transaction test succeeded.
Running transaction
  Running scriptlet: mariadb-connector-c-3.1.13-4.bclinux.21.10U4.x86_64                                                                                                                             1/1
  Preparing        :                                                                                                                                                                                 1/1
  Installing       : net-snmp-libs-1:5.9.1-7.bclinux.21.10U4.x86_64                                                                                                                                  1/4
  Installing       : mariadb-connector-c-3.1.13-4.bclinux.21.10U4.x86_64                                                                                                                             2/4
  Installing       : net-snmp-1:5.9.1-7.bclinux.21.10U4.x86_64                                                                                                                                       3/4
  Running scriptlet: net-snmp-1:5.9.1-7.bclinux.21.10U4.x86_64                                                                                                                                       3/4
  Installing       : keepalived-2.2.4-3.bclinux.21.10U4.x86_64                                                                                                                                       4/4
  Running scriptlet: keepalived-2.2.4-3.bclinux.21.10U4.x86_64                                                                                                                                       4/4
/usr/lib/tmpfiles.d/net-snmp.conf:1: Line references path below legacy directory /var/run/, updating /var/run/net-snmp → /run/net-snmp; please update the tmpfiles.d/ drop-in file accordingly.

  Verifying        : mariadb-connector-c-3.1.13-4.bclinux.21.10U4.x86_64                                                                                                                             1/4
  Verifying        : keepalived-2.2.4-3.bclinux.21.10U4.x86_64                                                                                                                                       2/4
  Verifying        : net-snmp-1:5.9.1-7.bclinux.21.10U4.x86_64                                                                                                                                       3/4
  Verifying        : net-snmp-libs-1:5.9.1-7.bclinux.21.10U4.x86_64                                                                                                                                  4/4

Installed:
  keepalived-2.2.4-3.bclinux.21.10U4.x86_64     mariadb-connector-c-3.1.13-4.bclinux.21.10U4.x86_64     net-snmp-1:5.9.1-7.bclinux.21.10U4.x86_64     net-snmp-libs-1:5.9.1-7.bclinux.21.10U4.x86_64

Complete!
2、修改主节点keepalived配置文件
vim /etc/keepalived/keepalived.conf
如下的 interface 和 virtual_ipaddress 需要手动替换成实际环境的内容;
vrrp_script check_pg_alived {
    script "/etc/keepalived/pg_check.sh"
    interval 20
    weight 2
}
vrrp_instance VI_1 {
    state MASTER
    interface ens33
    virtual_router_id 66
    priority 100
    advert_int 1
    authentication {
        auth_type PASS
        auth_pass 1234
    }
    track_script {
        check_pg_alived
    }
    virtual_ipaddress {
         192.*.*.168
    }
}
3、修改备节点keepalived配置文件
vrrp_script check_pg_alived {
    script "/etc/keepalived/pg_check.sh"
    interval 20
    fall 5
}

vrrp_instance VI_1 {
    state BACKUP
    nopreempt
    interface ens33
    virtual_router_id 66
    priority 90
    advert_int 1
    authentication {
        auth_type PASS
        auth_pass 1234
    }
      track_script {
        check_pg_alived
     }
    virtual_ipaddress {
        192.*.*.168
    }
}
4、编写pg_check.sh脚本
vi /etc/keepalived/pg_check.sh
加入:
#!/bin/bash
#PG is alive or not?
echo "`date "+%Y-%m-%d--%H:%M:%S"` Start this check! " >> /etc/keepalived/check_pg.log
A=`ps -ef | grep postgres | grep "/database/he3db/app/he3sql/bin/postgres*" |grep -v grep| wc -l`
# where the VIP floats to
B=`ip a | grep 192.*.*.168 | wc -l`

# the slave  is in a waiting state?
#C=`ps -ef | grep postgres | grep he3db | grep 'startup process' |grep -v grep| wc -l`
C=`ps -ef | grep postgres | grep he3db | grep 'startup' |grep -v grep| wc -l`

#the secondary  is positive for linking to the master ?
D=`ps -ef | grep postgres |grep he3db | grep 'receiver' |grep -v grep | wc -l`

#he connection between the master and the slave library is normal?
E=`ps -ef | grep postgres |grep he3db| grep 'sender'  |grep -v grep| wc -l`

#If pg dies, log the message and turn off keepalived
if [ $A -eq 0 ];then
echo "`date "+%Y-%m-%d--%H:%M:%S"` postgresql stop so vip stop " >> /etc/keepalived/check_pg.log
sudo systemctl stop keepalived
else
        #When the master is dead, the VIP floats to slave, elevating slave's status to make him read and write
        if [ $B -eq 1 -a $C -eq 1 -a $D -eq 0 ];then
                su - he3db -c "/database/he3db/app/he3sql/bin/pg_ctl promote -D /database/he3db/data"
                echo "`date "+%Y-%m-%d--%H:%M:%S"` standby promote " >> /etc/keepalived/check_pg.log
        fi

        #Judge yourself as Lord and lose contact with him
        if [ $B -eq 1 -a $C -eq 0 -a $D -eq 0 -a $E -eq 0 ];then
                                sleep 10
                echo "`date "+%Y-%m-%d--%H:%M:%S"` can't find standby " >> /etc/keepalived/check_pg.log
        fi
fi
:wq
存盘退出。

chmod +x /etc/keepalived/pg_check.sh
5、启动主备上的keepalived进程:
sudo systemctl restart keepalived
sudo systemctl enable keepalived
sudo systemctl status keepalived
6、查看vip挂载情况
[root@euler1 he3db]# ip -4 a|grep 192
    inet 192.*.*.101/24 brd 192.*.*.255 scope global noprefixroute ens33
    inet 192.*.*.168/32 scope global ens33
[root@euler1 he3db]#
vip挂载在主节点。
四、主从切换测试
1、关闭主库,模拟主库异常宕机
pg_ctl stop -D /database/he3db/data -m fast
2、检查备库是否自动切为主库
##查看vip是否挂载
[he3db@euler2 pg_log]$ ip -4 a|grep 192
    inet 192.*.*.102/24 brd 192.*.*.255 scope global noprefixroute ens33
    inet 192.*.*.168/24 scope global secondary ens33
##查看数据库进程
[he3db@euler2 pg_log]$ ps -ef|grep postgres|grep -v grep
he3db      37150       1  0 13:29 ?        00:00:00 /database/he3db/app/he3sql/bin/postgres
he3db      37151   37150  0 13:29 ?        00:00:00 postgres: logger
he3db      37152   37150  0 13:29 ?        00:00:00 postgres: checkpointer
he3db      37153   37150  0 13:29 ?        00:00:00 postgres: background writer
he3db      37356   37150  0 13:38 ?        00:00:00 postgres: walwriter
he3db      37357   37150  0 13:38 ?        00:00:00 postgres: autovacuum launcher
he3db      37358   37150  0 13:38 ?        00:00:00 postgres: logical replication launcher
##登录数据库检查
postgres=# select pg_is_in_recovery();
 pg_is_in_recovery
-------------------
 f
(1 row)
备库已经切成新主库。
3、老主库以新备库身份加入
1、拉起新备库
pg_basebackup -U repli -D /database/he3db/data -P -v -p 5432 -h 192.*.*.102 -R --wal-method=stream
2、编辑 postgresql.conf 添加主库连接信息
echo "primary_conninfo = 'host=192.*.*.102 port=5432 user=repli password=******'" >> postgresql.auto.conf
3、创建 standby 信号文件
touch /database/he3db/data/standby.signal
4、 启动新从库
pg_ctl -D /database/he3db/data start
5、登录数据库检查
postgres=# select pg_is_in_recovery();
 pg_is_in_recovery
-------------------
 t
(1 row)
4、新主库检查复制情况
postgres=# select * from pg_stat_replication;
  pid  | usesysid | usename | application_name |   client_addr   | client_hostname | client_port |         backend_start         | backend_xmin |   state   | sent_lsn  | write_lsn | flush_lsn | replay_
lsn | write_lag | flush_lag | replay_lag | sync_priority | sync_state |         reply_time
-------+----------+---------+------------------+-----------------+-----------------+-------------+-------------------------------+--------------+-----------+-----------+-----------+-----------+--------
----+-----------+-----------+------------+---------------+------------+-----------------------------
 38322 |    24580 | repli   | walreceiver      | 192.*.*.101 |                 |       48276 | 2026-03-07 17:59:55.753487+08 |              | streaming | 0/6000148 | 0/6000148 | 0/6000148 | 0/60001
48  |           |           |            |             1 | sync       | 2026-03-07 18:00:01.1343+08
(1 row)

postgres=#
主备同步情况正常。
五、连接数据库验证
1、新主库执行dml,在新备库检查
新主库:
[he3db@euler2 data]$ psql -U he3db -d postgres
psql (15.5)
Type "help" for help.

postgres=# create table testtab(id int);
CREATE TABLE
postgres=# insert into testtab (id) VALUES (6), (7), (8), (9), (10);
INSERT 0 5
postgres=# update testtab set id=11 where id=10;
UPDATE 1
postgres=# select * from testtab;
 id
----
  6
  7
  8
  9
 11
(5 rows)

postgres=#

新备库:
[he3db@euler1 data]$ psql -U he3db -p 5432
psql (15.5)
Type "help" for help.

postgres=# select * from testtab;
 id
----
  6
  7
  8
  9
 11
(5 rows)

postgres=#
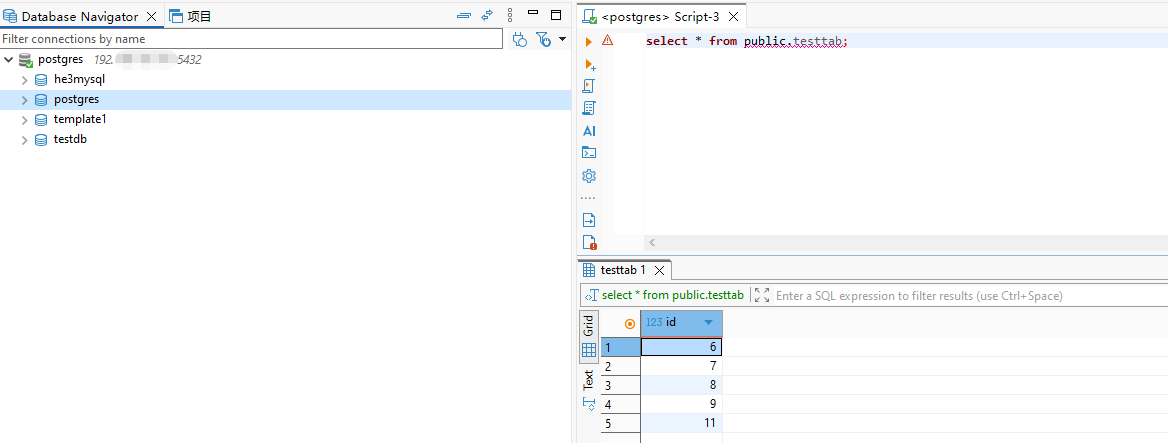
2、通过DBeaver查询表数据
驱动下载:https://jdbc.postgresql.org/download/
五、总结
部署海山数据库主备版的过程还是挺容易的,但是切记生产环境中最好使用三节点的高可用架构!
关于作者
网名:飞天,墨天轮2024年度优秀原创作者,拥有 Oracle 10g OCM 认证、PGCE认证、MySQL 8.0 OCP认证以及OBCA、KCP、KCSM、ACP、YCP、HCIP、磐维等众多国产数据库认证证书,目前从事Oracle、Mysql、PostgreSQL、磐维数据库管理运维工作,喜欢结交更多志同道合的朋友,热衷于研究、分享数据库技术。
微信公众号:飞天online
墨天轮:https://www.modb.pro/u/15197
如有任何疑问,欢迎大家留言,共同探讨~~~
最后修改时间:2026-03-08 14:14:54
「喜欢这篇文章,您的关注和赞赏是给作者最好的鼓励」
关注作者
【版权声明】本文为墨天轮用户原创内容,转载时必须标注文章的来源(墨天轮),文章链接,文章作者等基本信息,否则作者和墨天轮有权追究责任。如果您发现墨天轮中有涉嫌抄袭或者侵权的内容,欢迎发送邮件至:contact@modb.pro进行举报,并提供相关证据,一经查实,墨天轮将立刻删除相关内容。
